This article applies to all MetaDefender Core V4 and V5 releases deployed on Windows or Linux systems, and will cover deployments in both Standalone and Shared Database mode.
Please scroll down to find the instructions applicable to your OS and mode.
MetaDefender Core version upgrades are always Manual; only certain feature updates (such as engine updates) can be configured to Automatic.
Windows (Standalone DB mode)
To perform a MetaDefender Core Deployment Upgrade, please follow the steps below:
Browse Release Notes for details on the latest MetaDefender Core version release.

OPSWAT highly recommends that users upgrade to the latest version of MetaDefender Core. Current versions incorporate state-of-the-art features and necessary bug fixes, and are freely available for all license holders to download.
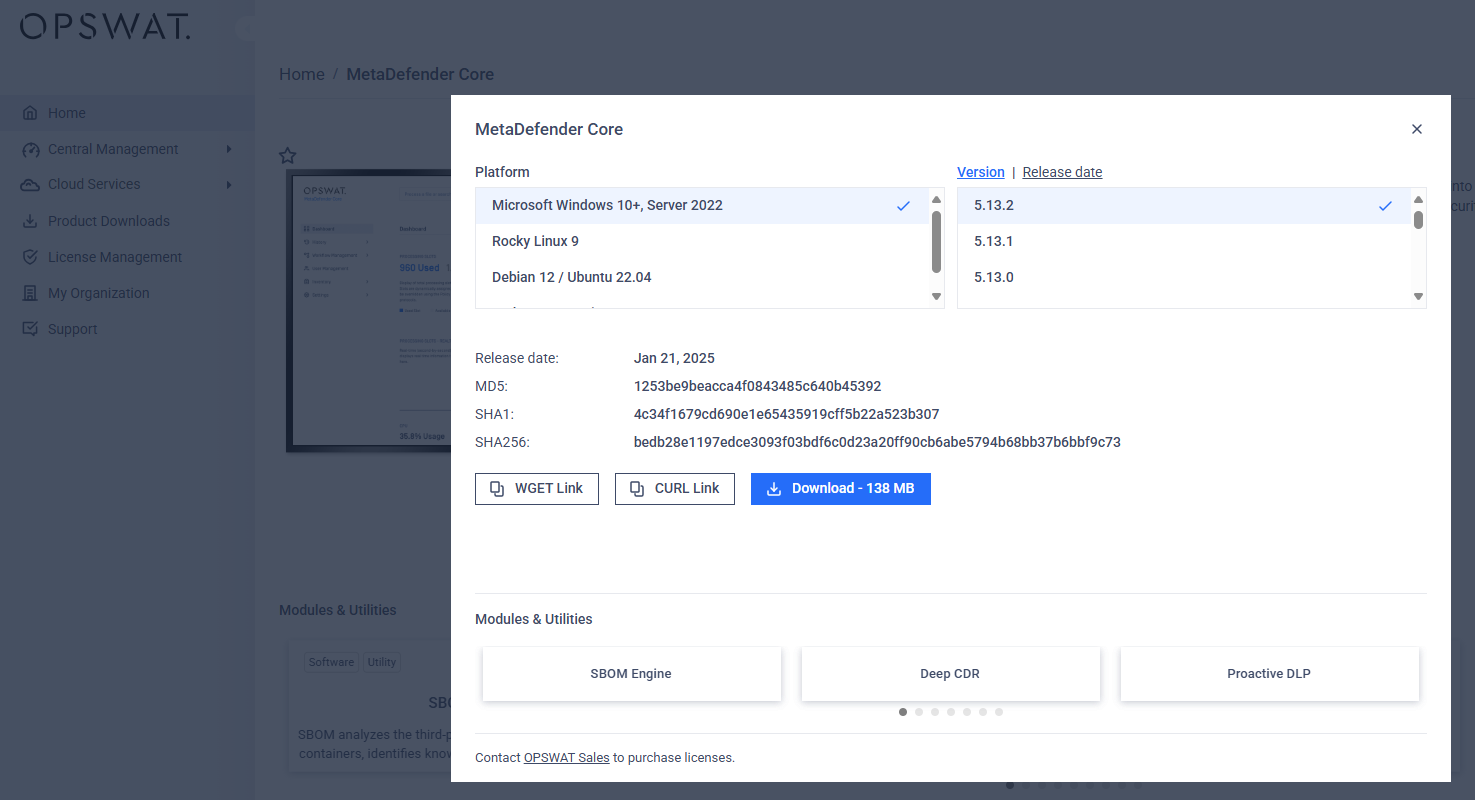
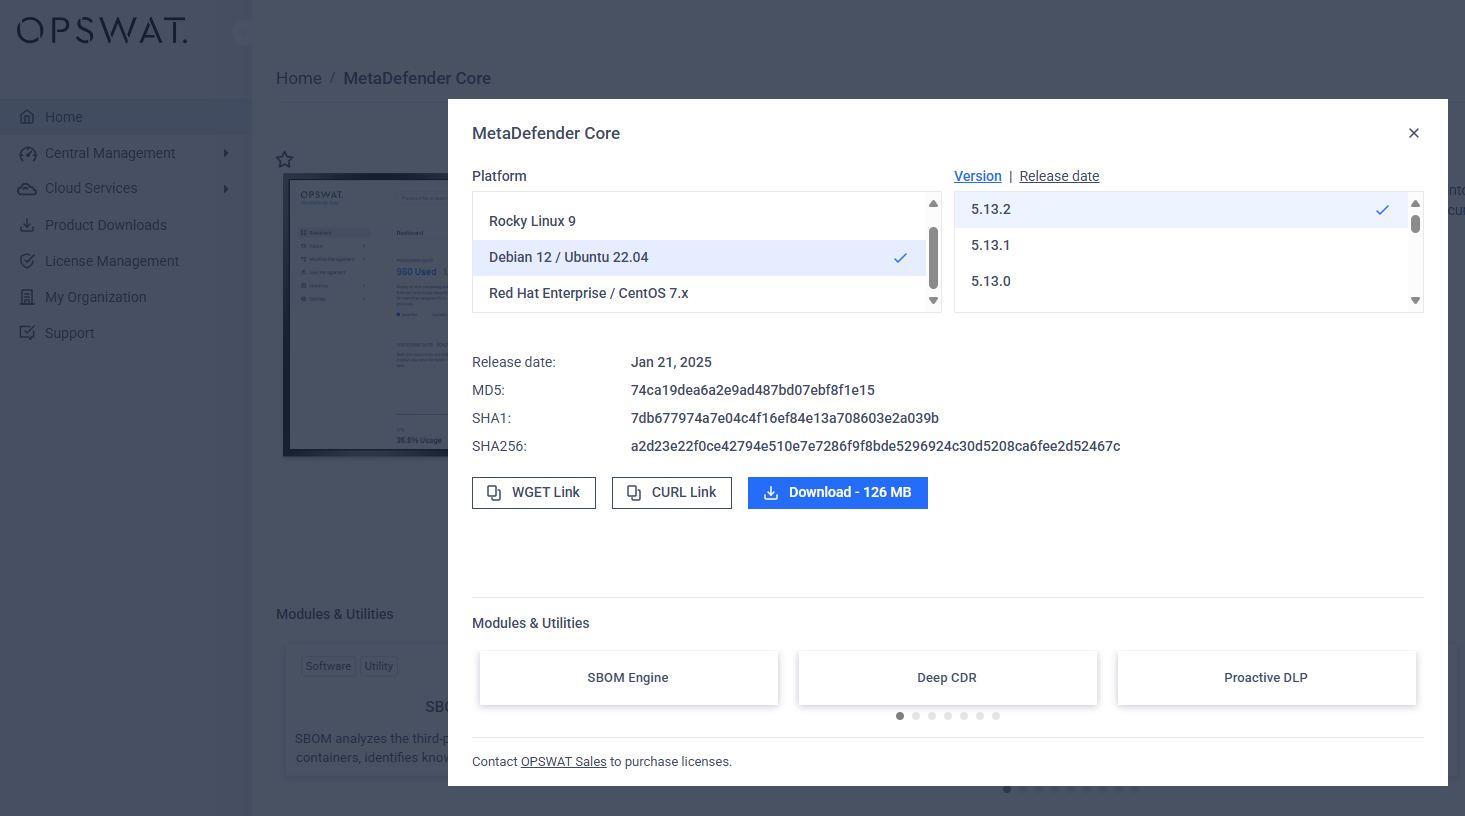
Visit My OPSWAT to download the latest MetaDefender Core version for Windows.

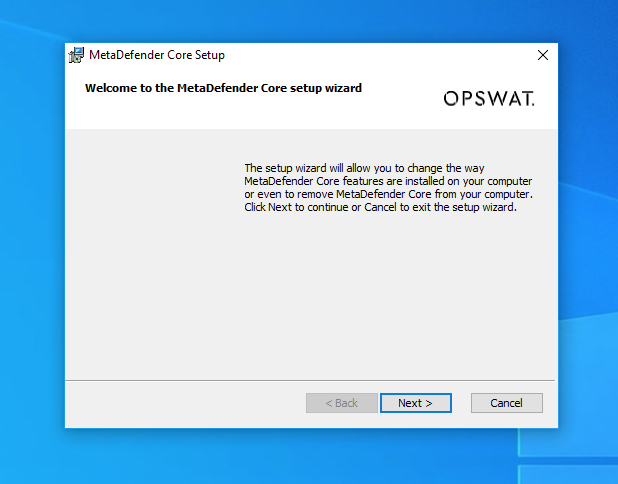
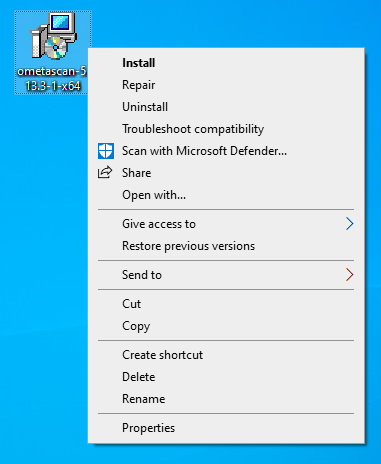
Log in as Admin user on the MetaDefender Core server, then Run the installer file.

Let the MetaDefender Core Setup Wizard guide you through the process.
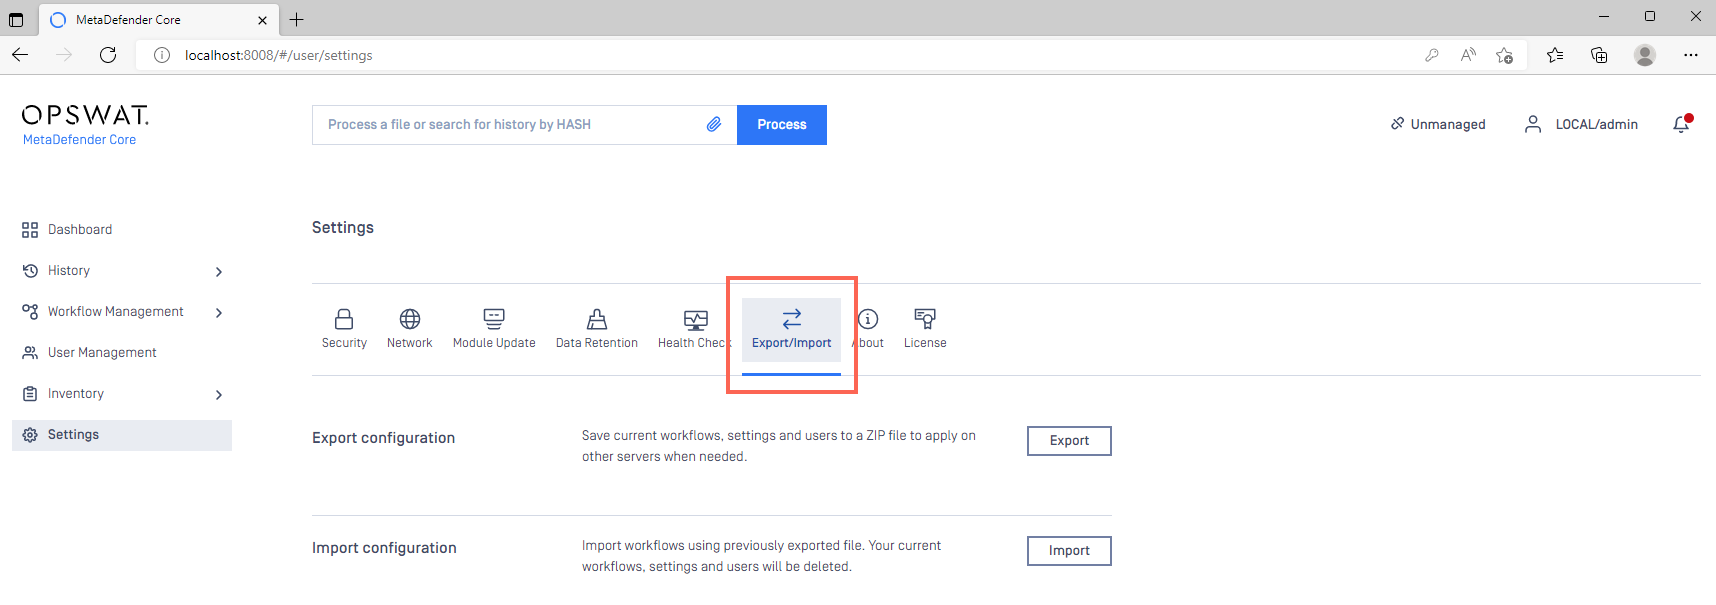
If you are upgrading from a prior release, ensure you use the Config Export/Import feature, as illustrated below Read This to learn more.
With the help of this feature, and provided no errors occur during the upgrade process, your configurations and licensing information will be fully preserved through the upgrade process.
Once the installer has finished, your system will be upgraded to the latest version.
Once installed, click the MetaDefender Core icon to log into the Management Console and verify that the system is functioning as expected.

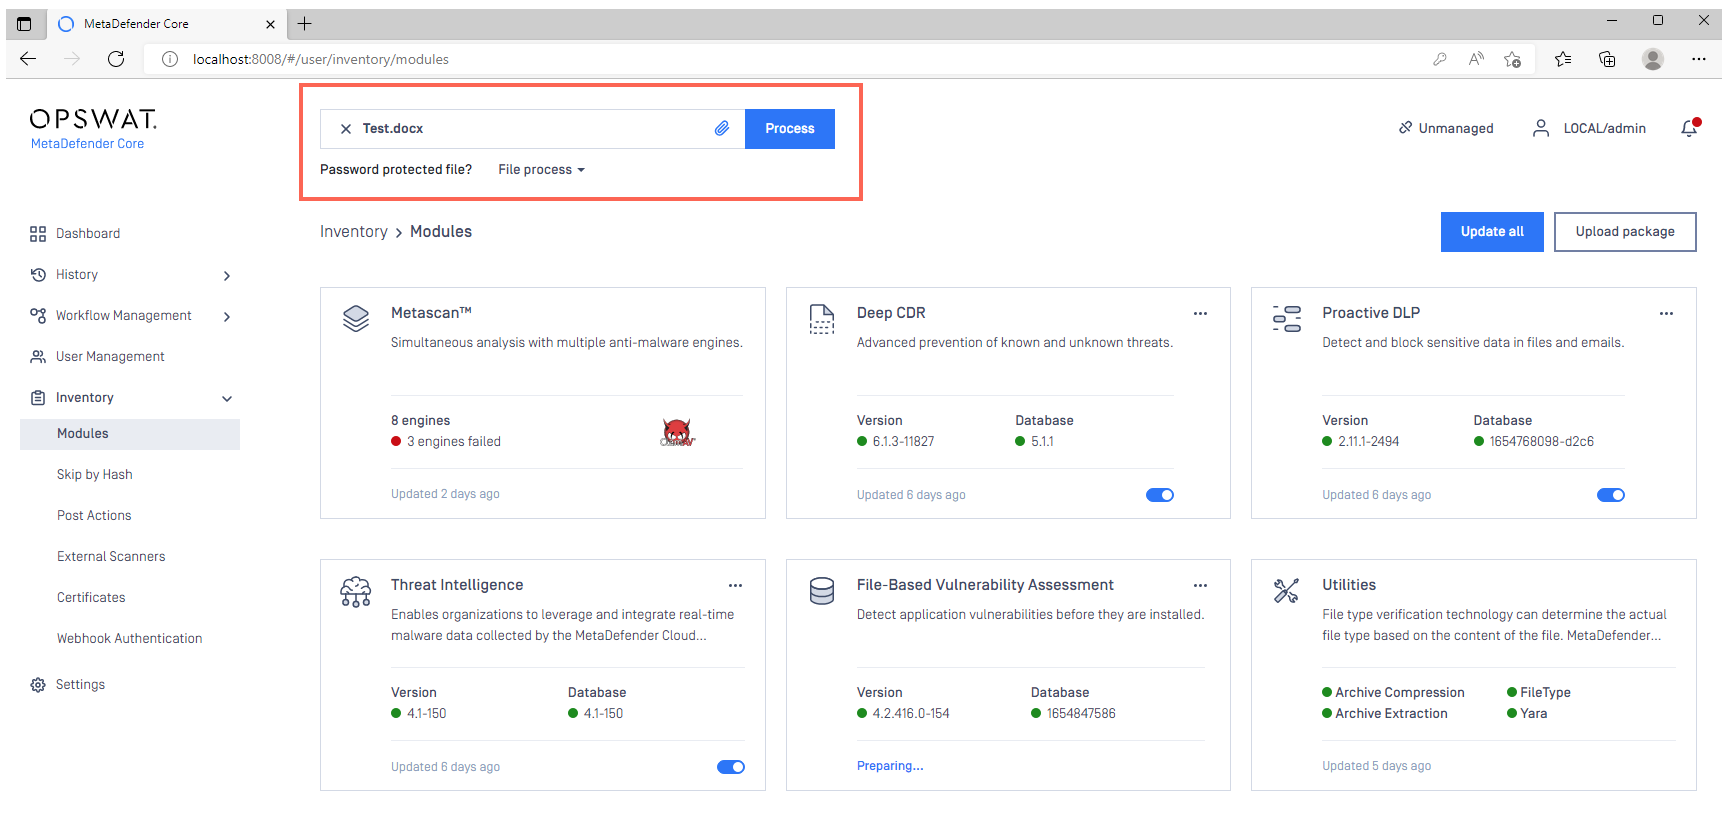
In the Console, open Inventory>Modules to view the status of your module and engine downloads.

Once all your required modules are up-to-date and enabled, and your Security Policies configured, drop a test file in the Process field to run your first scan.
Windows (Standalone DB mode) command line
For command line installation in Windows, it is mandatory to use a MetaDefender Core ignition file to add PostgreSQL server information before installing MetaDefender Core 4.19.0 or later releases.
MetaDefender Core supports two modes to setup PostgreSQL server:
Local PostgreSQL Server
Existing PostgreSQL Server
Local PostgreSQL Server
Here, MetaDefender Core will install a new PostgreSQL server locally, alongside the product.
A sample ignition file for PostgreSQL server’s information is shown below. Note that only non-Unicode characters are supported for both user and password.
On Windows systems, it is possible to install MetaDefender Core by running the corresponding .msi file. This can be done via command line by executing the following command.
Where the <option keys>, their default values and their descriptions are as follows:
Key | Default Value | Description |
|---|---|---|
INSTALLFOLDER | C:\Program Files\OPSWAT\MetaDefender Core | Customize installation folder for product. Example: INSTALLFOLDER="D:\Products" |
RESTADDRESS | REST interface binding IPv4 or IPv6 address ( '*' means that the service listens on all IPv4 and IPv6 interfaces). | |
RESTPORT | 8008 | REST interface binding port |
EXTERNALNODE | Whether to enable external processing nodes or not. To enable external processing nodes, set EXTERNALNODE=1 . ADDRESS and PORT values below are admitted only if EXTERNALNODE=1 is set. | |
ADDRESS | Address of the computer to accept external scan node connections. ADDRESS value is only admitted if EXTERNALNODE=1 is set. If EXTERNALNODE=1 is set but ADDRESS is not, then ADDRESS defaults to * (all IPv4 and IPv6 interfaces). | |
PORT | Designated port number to accept external scan node connections. PORT value is only admitted if EXTERNALNODE=1 is set. If EXTERNALNODE=1 is set but PORT is not, then PORT defaults to 8007. | |
REPORT_ENGINE_ISSUE | true | Enable reporting of engine issue count (possible values: ‘true’ or ‘false’). |
Existing PostgreSQL Server
Here, MetaDefender Core will connect to a pre-installed PostgreSQL server, running remotely, before setting up its database.
Be sure to follow the Open Connection steps on PostgreSQL server first, so that your existing remote PostgreSQL server is ready to accept the upcoming connection from MetaDefender Core.
A sample ignition file for PostgreSQL server’s information is shown below.
On Windows systems, it is possible to install MetaDefender Core by running the corresponding .msi file. This can be done via command line by executing the following command.
Where the <option keys>, their default values and their descriptions are as follows:
Key | Default Value | Description |
|---|---|---|
INSTALLFOLDER | C:\Program Files\OPSWAT\MetaDefender Core | Customize installation folder for product. Example: INSTALLFOLDER="D:\Products" |
RESTADDRESS | REST interface binding IPv4 or IPv6 address ( '*' means that the service listens on all IPv4 and IPv6 interfaces). | |
RESTPORT | 8008 | REST interface binding port |
EXTERNALNODE | Whether to enable external processing nodes or not. To enable external processing nodes, set EXTERNALNODE=1 . ADDRESS and PORT values below are admitted only if EXTERNALNODE=1 is set. | |
ADDRESS | Address of the computer to accept external scan node connections. ADDRESS value is only admitted if EXTERNALNODE=1 is set. If EXTERNALNODE=1 is set but ADDRESS is not, then ADDRESS defaults to * (all IPv4 and IPv6 interfaces). | |
PORT | Designated port number to accept external scan node connections. PORT value is only admitted if EXTERNALNODE=1 is set. If EXTERNALNODE=1 is set but PORT is not, then PORT defaults to 8007. | |
REPORT_ENGINE_ISSUE | true | Enable reporting of engine issue count (possible values: ‘true’ or ‘false’). |
Windows (Shared Database mode)
To perform a MetaDefender Core Deployment Upgrade, please follow the steps below:
Browse Release Notes for details on the latest MetaDefender Core version release.
OPSWAT highly recommends that users upgrade to the latest version of MetaDefender Core. Current versions incorporate state-of-the-art features and necessary bug fixes, and are freely available for all license holders to download.
Visit My OPSWAT to download the latest MetaDefender Core version for Windows.
Log in as Admin user on the MetaDefender Core server, then Run the installer file.
Let the MetaDefender Core Setup Wizard guide you through the process.
If you are upgrading from a prior release, ensure you use the Config Export/Import feature, as illustrated below Read This to learn more.
With the help of this feature, and provided no errors occur during the upgrade process, your configurations and licensing information will be fully preserved through the upgrade process.
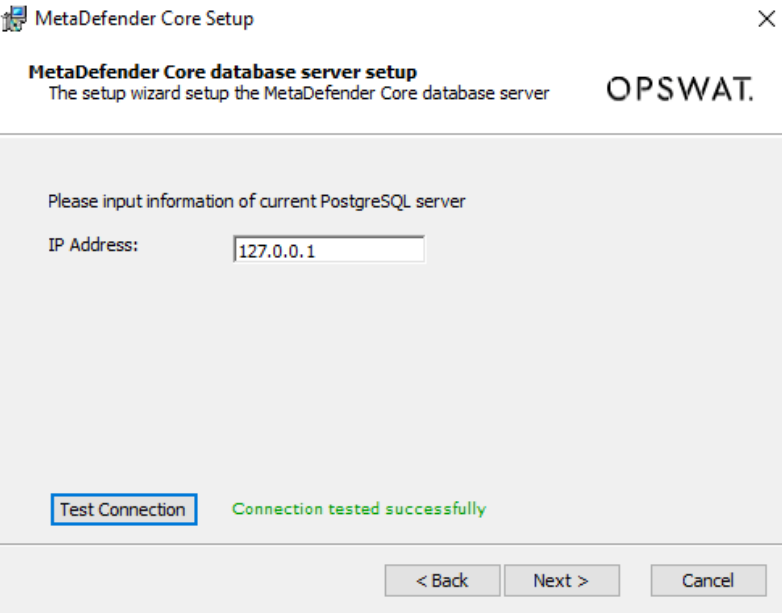
For Shared Database mode, the same upgrade instructions apply as described above for Standalone mode, with one exception: at the Setup stage illustrated in the screenshot below, you will need to specify your current PostgreSQL server IP address.
Once the installer has finished, your system will be upgraded to the latest version.
Once installed, click the MetaDefender Core icon to log into the Management Console and verify that the system is functioning as expected.
In the Console, open Inventory>Modules to view the status of your module and engine downloads.
Once all your required modules are up-to-date and enabled, and your Security Policies configured, drop a test file in the Process field to run your first scan.
Windows (Shared Database mode) command line
For command line installation in Windows, it is mandatory to use a MetaDefender Core ignition file to add PostgreSQL server information before installing MetaDefender Core 4.19.0 or later releases.
MetaDefender Core supports two modes to setup PostgreSQL server:
Local PostgreSQL Server
Existing PostgreSQL Server
Local PostgreSQL Server
Here, MetaDefender Core will install a new PostgreSQL server locally, alongside the product.
A sample ignition file for PostgreSQL server’s information is shown below. Note that only non-Unicode characters are supported for both user and password.
On Windows systems, it is possible to install MetaDefender Core by running the corresponding .msi file. This can be done via command line by executing the following command.
Where the <option keys>, their default values and their descriptions are as follows:
Key | Default Value | Description |
|---|---|---|
INSTALLFOLDER | C:\Program Files\OPSWAT\MetaDefender Core | Customize installation folder for product. Example: INSTALLFOLDER="D:\Products" |
RESTADDRESS | REST interface binding IPv4 or IPv6 address ( '*' means that the service listens on all IPv4 and IPv6 interfaces). | |
RESTPORT | 8008 | REST interface binding port |
EXTERNALNODE | Whether to enable external processing nodes or not. To enable external processing nodes, set EXTERNALNODE=1 . ADDRESS and PORT values below are admitted only if EXTERNALNODE=1 is set. | |
ADDRESS | Address of the computer to accept external scan node connections. ADDRESS value is only admitted if EXTERNALNODE=1 is set. If EXTERNALNODE=1 is set but ADDRESS is not, then ADDRESS defaults to * (all IPv4 and IPv6 interfaces). | |
PORT | Designated port number to accept external scan node connections. PORT value is only admitted if EXTERNALNODE=1 is set. If EXTERNALNODE=1 is set but PORT is not, then PORT defaults to 8007. | |
REPORT_ENGINE_ISSUE | true | Enable reporting of engine issue count (possible values: ‘true’ or ‘false’). |
Existing PostgreSQL Server
Here, MetaDefender Core will connect to a pre-installed PostgreSQL server, running remotely, before setting up its database.
Be sure to follow the Open Connection steps on PostgreSQL server first, so that your existing remote PostgreSQL server is ready to accept the upcoming connection from MetaDefender Core.
A sample ignition file for PostgreSQL server’s information is shown below.
On Windows systems, it is possible to install MetaDefender Core by running the corresponding .msi file. This can be done via command line by executing the following command.
Where the <option keys>, their default values and their descriptions are as follows:
Key | Default Value | Description |
|---|---|---|
INSTALLFOLDER | C:\Program Files\OPSWAT\MetaDefender Core | Customize installation folder for product. Example: INSTALLFOLDER="D:\Products" |
RESTADDRESS | REST interface binding IPv4 or IPv6 address ( '*' means that the service listens on all IPv4 and IPv6 interfaces). | |
RESTPORT | 8008 | REST interface binding port |
EXTERNALNODE | Whether to enable external processing nodes or not. To enable external processing nodes, set EXTERNALNODE=1 . ADDRESS and PORT values below are admitted only if EXTERNALNODE=1 is set. | |
ADDRESS | Address of the computer to accept external scan node connections. ADDRESS value is only admitted if EXTERNALNODE=1 is set. If EXTERNALNODE=1 is set but ADDRESS is not, then ADDRESS defaults to * (all IPv4 and IPv6 interfaces). | |
PORT | Designated port number to accept external scan node connections. PORT value is only admitted if EXTERNALNODE=1 is set. If EXTERNALNODE=1 is set but PORT is not, then PORT defaults to 8007. |
Linux (Standalone mode)
To perform a MetaDefender Core Deployment Upgrade, please follow the steps below:
Browse Release Notes for details on the latest MetaDefender Core version release.

OPSWAT highly recommends that users upgrade to the latest version of MetaDefender Core. Current versions incorporate state-of-the-art features and necessary bug fixes, and are freely available for all license holders to download.
Visit My OPSWAT to download the latest MetaDefender Core version for your Linux distro.
Log in as Root user on the MetaDefender Core server, then Run the installer file.
Depending on your distro, Software Install or a similar utility will guide you through the process.
If you are upgrading from a prior release, ensure you use the Config Export/Import feature, as illustrated below Read This to learn more. With the help of this feature, and provided no errors occur during the upgrade process, your configurations and licensing information will be fully preserved through the upgrade process.

Once the installer has finished, your system will be upgraded to the latest version.
Once installed, click the MetaDefender Core icon to log into the Management Console and verify that the system is functioning as expected.
In the Console, open Inventory>Modules to view the status of your module and engine downloads.

Once all your required modules are up-to-date and enabled, and your Security Policies configured, drop a test file in the Process field to run your first scan.

Linux (Standalone mode) command line
For command line installation in Linux, it is mandatory to use a MetaDefender Core ignition file to add PostgreSQL server information before installing MetaDefender Core 4.19.0 or later releases.
Log into the terminal as Root user.
Create an ignition file (if one does not already exist) via command line by running the following command: touch ometascan.conf
Now, run: nano ometascan.conf to edit the file with the necessary information.
An example of an ignition file is shown below.
Linux: /etc/opswat/ometascan.conf
MetaDefender Core supports two modes to setup PostgreSQL server:
Local PostgreSQL Server
Existing PostgreSQL Server
Local PostgreSQL Server
Here, MetaDefender Core will install a new PostgreSQL server locally, alongside the product.
A sample ignition file for PostgreSQL server’s information is shown below. Note that only non-Unicode characters are supported for both user and password.
Finally, enter the relevant command from the table below to install MetaDefender Core.
Debian package (.deb) | sudo dpkg -i <filename> || sudo apt-get install -f |
On Red Hat Enterprise 7.x Linux / CentOS package (.rpm) | sudo yum install <filename> |
For systems which enabled GPD check flag | sudo yum install --nogpgcheck <filename> |
Red Hat Enterprise Linux 8.x package (.rpm) | sudo dnf install -y <filename> |
Existing PostgreSQL server
Here, MetaDefender Core will connect to a pre-installed PostgreSQL server, running remotely, before setting up its database.
Be sure to follow the Open Connection steps on PostgreSQL server first, so that your existing remote PostgreSQL server is ready to accept the upcoming connection from MetaDefender Core.
A sample ignition file for PostgreSQL server’s information is shown below.
Finally, enter the relevant command from the table below to install MetaDefender Core.
Debian package (.deb) | sudo dpkg -i <filename> || sudo apt-get install -f |
On Red Hat Enterprise 7.x Linux / CentOS package (.rpm) | sudo yum install <filename> |
For systems which enabled GPD check flag | sudo yum install --nogpgcheck <filename> |
Red Hat Enterprise Linux 8.x package (.rpm) | sudo dnf install -y <filename> |
For security reasons, after installing MetaDefender Core successfully, you may want to remove all credentials information created for the [dbserver] section in the ignition file.
Linux (Shared Database mode)
To perform a MetaDefender Core Deployment Upgrade, please follow the steps below:
Browse Release Notes for details on the latest MetaDefender Core version release.
OPSWAT highly recommends that users upgrade to the latest version of MetaDefender Core. Current versions incorporate state-of-the-art features and necessary bug fixes, and are freely available for all license holders to download.
Visit My OPSWAT to download the latest MetaDefender Core version for your Linux distro.
Log in as Root user on the MetaDefender Core server, then Run the installer file.
Depending on your distro, Software Install or a similar utility will guide you through the process.
For Shared Database mode, the same upgrade instructions apply as described above for Standalone mode, with one exception: during setup, you will need to specify your current PostgreSQL server IP address.
If you are upgrading from a prior release, ensure you use the Config Export/Import feature, as illustrated below Read This to learn more. With the help of this feature, and provided no errors occur during the upgrade process, your configurations and licensing information will be fully preserved through the upgrade process.

Once the installer has finished, your system will be upgraded to the latest version.
Once installed, click the MetaDefender Core icon to log into the Management Console and verify that the system is functioning as expected.
In the Console, open Inventory>Modules to view the status of your module and engine downloads.
Once all your required modules are up-to-date and enabled, and your Security Policies configured, drop a test file in the Process field to run your first scan.

Linux (Shared Database mode) command line
For command line installation in Linux, it is mandatory to use a MetaDefender Core ignition file to add PostgreSQL server information before installing MetaDefender Core 4.19.0 or later releases, as follows.
Log into the terminal as Root user.
Create an ignition file (if one does not already exist) via command line by running the following command: touch ometascan.conf
Now, run: nano ometascan.conf to edit the file with the necessary information.
An example of an ignition file is shown below.
Linux:/etc/opswat/ometascan.conf
MetaDefender Core supports two modes to setup PostgreSQL server:
Local PostgreSQL Server
Existing PostgreSQL Server
Local PostgreSQL Server
Here, MetaDefender Core will install a new PostgreSQL server locally, alongside the product.
A sample ignition file for PostgreSQL server’s information is shown below. Note that only non-Unicode characters are supported for both user and password.
Finally, enter the relevant command from the table below to install MetaDefender Core.
Debian package (.deb) | sudo dpkg -i <filename> || sudo apt-get install -f |
On Red Hat Enterprise 7.x Linux / CentOS package (.rpm) | sudo yum install <filename> |
For systems which enabled GPD check flag | sudo yum install --nogpgcheck <filename> |
Red Hat Enterprise Linux 8.x package (.rpm) | sudo dnf install -y <filename> |
Existing PostgreSQL Server
Here, MetaDefender Core will connect to a pre-installed PostgreSQL server, running remotely, before setting up its database.
Be sure to follow the Open Connection steps on PostgreSQL server first, so that your existing remote PostgreSQL server is ready to accept the upcoming connection from MetaDefender Core.
A sample ignition file for PostgreSQL server’s information is shown below.
Finally, enter the relevant command from the table below to install MetaDefender Core.
Debian package (.deb) | sudo dpkg -i <filename> || sudo apt-get install -f |
On Red Hat Enterprise 7.x Linux / CentOS package (.rpm) | sudo yum install <filename> |
For systems which enabled GPD check flag | sudo yum install --nogpgcheck <filename> |
Red Hat Enterprise Linux 8.x package (.rpm) | sudo dnf install -y <filename> |
For security reasons, after installing MetaDefender Core successfully, you may want to remove all credentials information created for the [dbserver] section in the ignition file.
For further guidance through the upgrade process, please follow these instructions on How to Create Support Package With Bundle Tools?, before creating a support case or chatting with our support engineer.