Apart from using the MetaDefender NDR signatures, you can create user-defined (customized) signatures by defining your own strings and conditions and then include them in your policies. MetaDefender NDR Managers are also preinstalled with several signature templates to assist analysts in creating their own signatures. These signature templates cover a range of signatures that analysts are likely to encounter within their own workflow.
Strings
Strings are the variables that can you can define to match the signature pattern in files. The syntax of signature strings is very important. The string name must be preceded by the $ symbol and its variable must be enclosed in double quotation marks. Specify your desired string patterns with the following syntax:
($<stringname>= "<custom text>") Examples: $STRING1= ”THIS IS A TEST.” $STRING2= ”THIS IS ALSO A TEST.” $STRING3= ”THIS IS THE LAST TEST.”
Note: Strings do not necessarily need to have more than one variable.
Conditions
Conditions are the rules to specify any desired combinations of your strings to detect the file and send alerts. You can specify combinations using the "AND" or "OR" operators such as $string1, $string2, OR $string3, or $string1, $string2, AND $string3. For the first combination, the rule fires if at least one of the strings match the signature pattern of the file. For the second combination, the rule fires only if all the three strings match the signature pattern of the file.
There are also MetaDefender NDR specific conditions that can be used for MetaDefender NDR Threat Discovery and MetaDefender NDR RetroHunt Threat Hunting:
- artifact_mime_type
- artifact_size
- artifact_type
- cert_algorithm
- cert_issuer
- cert_not_valid_after
- cert_not_valid_before
- cert_serial
- cert_subject
- cert_version
- file_declared_type
- file_extension
- file_filename
- file_path
- headers_count
- session_analyst
- session_collector_mode
- session_collector_name
- session_current_time
- session_dest_country
- session_dest_ip
- session_dest_port
- session_protocol
- session_src_country
- session_src_ip
- session_src_port
- session_start_time
- session_vlan1
- session_vlan2
- uri_entropy
- uri_extension
- uri_filename
- uri_fragment
- uri_location
- uri_params
- uri_password
- uri_path
- uri_port
- uri_query
- uri_scheme
- uri_username
Note: Strings and Conditions are compatible with YARA. Refer to the Yara documentation at http://yara.readthedocs.org/en/v3.4.0/ for more information.
Header Analysis Signatures
Headers are normalized into the format “name: value”
- Headers are lower cased
- Followed by a single colon
- Followed by a single space
- Followed by the value
Header-value pairs are newline separated from each other and may be randomly ordered.
Adding a User-Defined Signature
- Click Policy > Add Policy or select an existing Policy. Then click User-Defined Signatures.
- Click Add Signature. The following page appears.
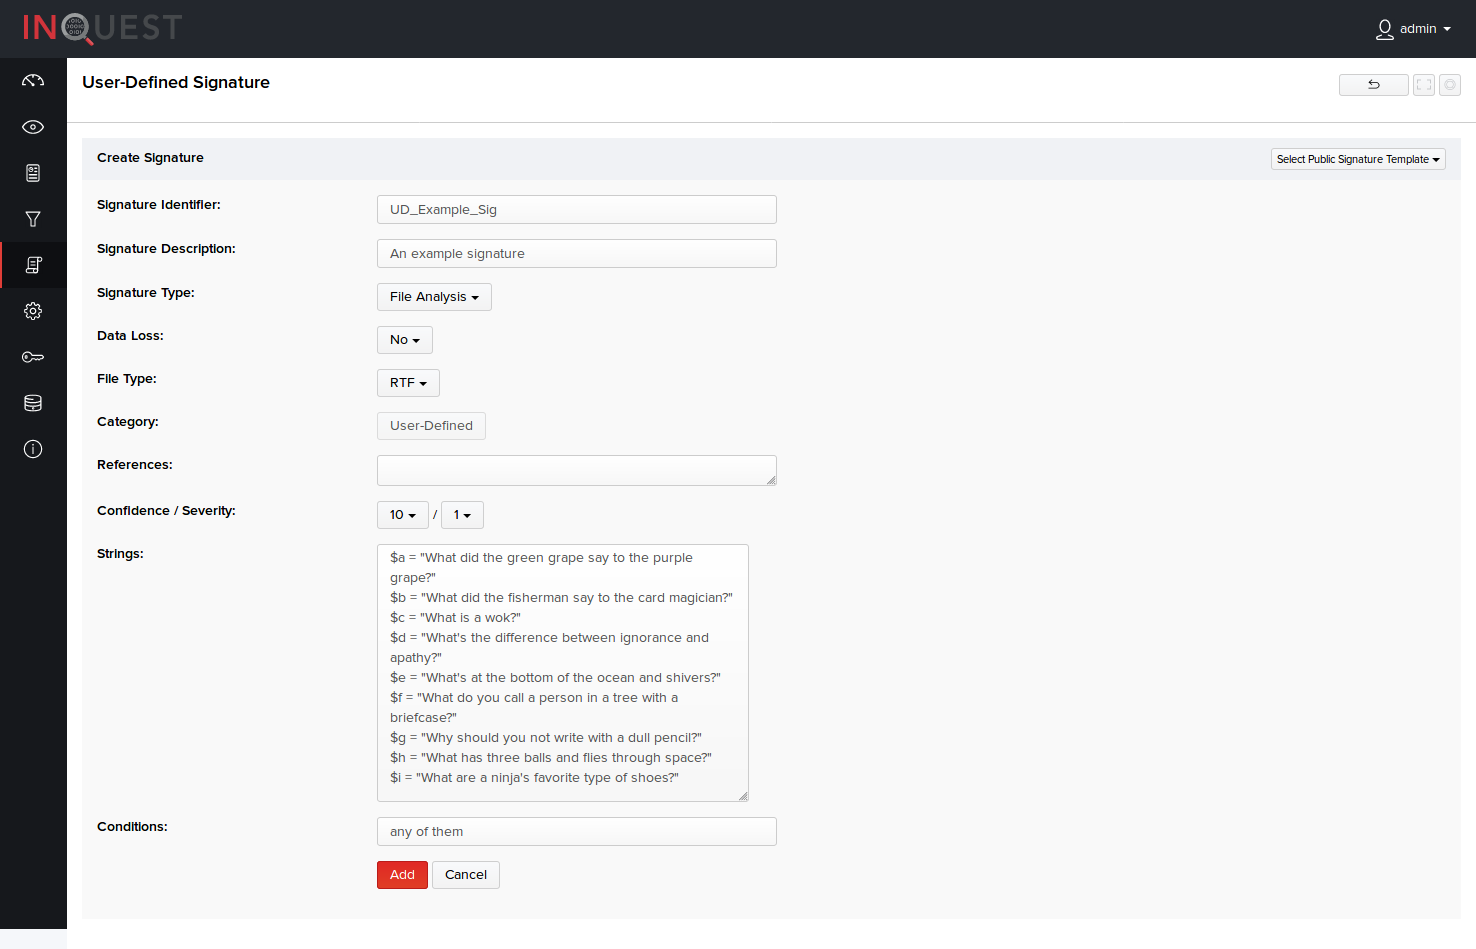
- Type the signature name, description, and select a Signature Type to which the signature is to be applied. Specify the file type, reference URL, confidence, severity, strings, and conditions.
| Field | Description |
|---|---|
*Both confidence and severity of your signatures determine the Threat Score given to traffic associated with alerts generated by the signature.
- Click Add. Your newly activated signature appears in the list of user-defined signatures in Policy > User-Defined Signatures.
User-Defined Signature Templates
The following signature templates are available to assist analysts in creating their own signatures:
rule UD_Template_JavaScript_from_PDFs{}rule UD_Template_PDF_Files{}rule UD_Template_Office_Macros{}rule UD_Template_Document_Semantics{}rule UD_Template_Decompiled_Java{} rule HA_JA3_Example{}rule HA_Containing_URL{}Import Signatures
Click Policy > Add Policy or select an existing Policy. Then click User-Defined Signatures.
Click Import Signatures.
Click Upload File and select a Yara signature file, or copy and paste the new signatures.
Select if you want it to be Active, if you want it to be Public, and what values of Confidence and Severity it should have with the options at the bottom.
Click Import. Each signature will be evaluated and imported if possible. Your newly activated signature appears in the list of user-defined signatures in Policy > User-Defined Signatures.
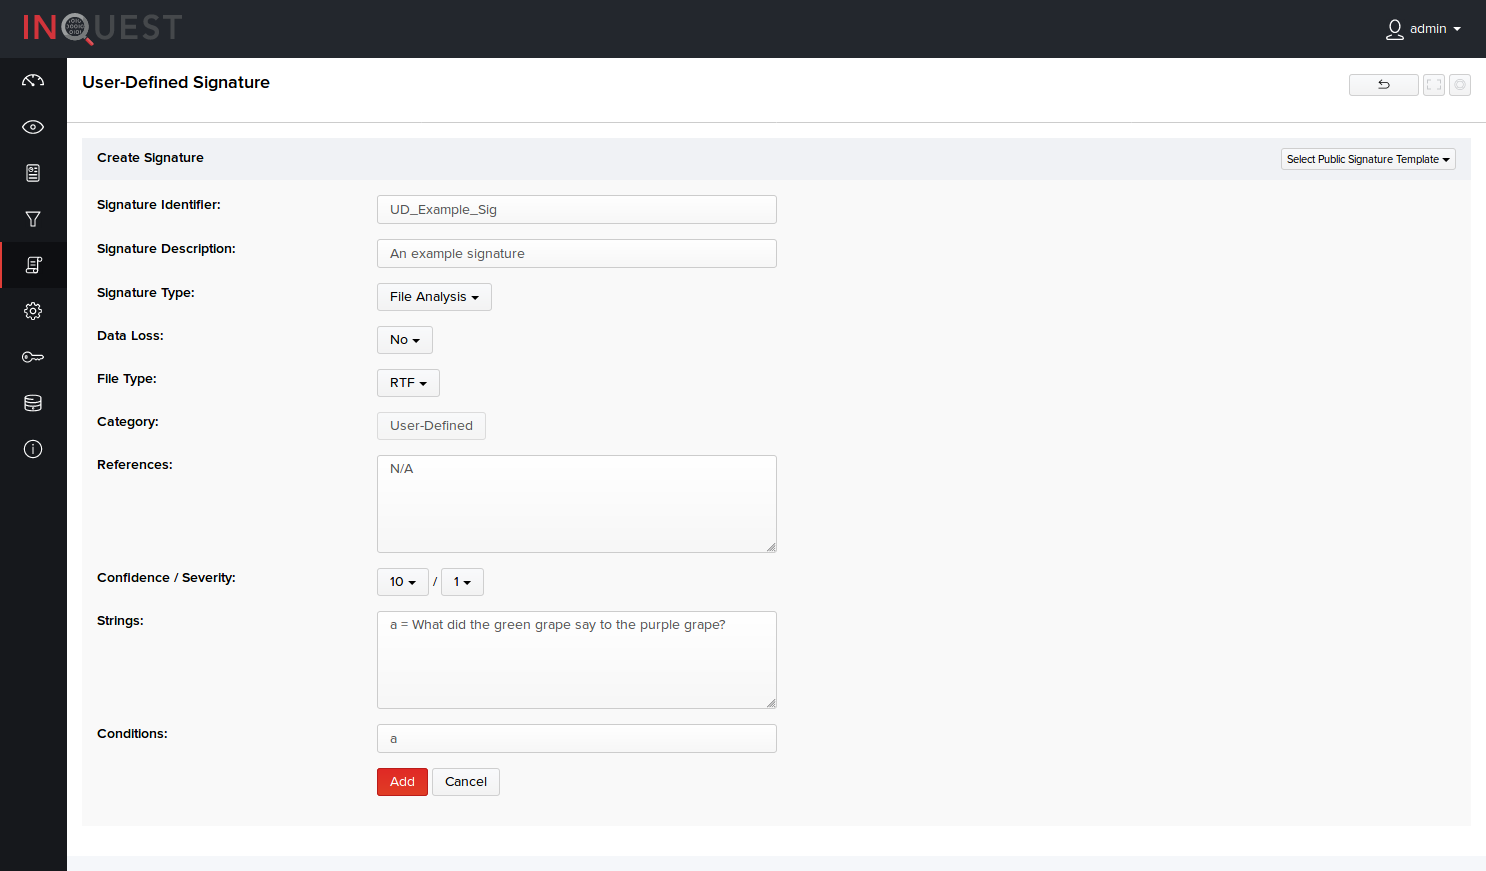
Syntax Errors
If the strings or conditions do not contain the correct syntax, an error message is generated and the rule is not activated. The syntax error is displayed after specifying incorrect strings or conditions syntax and clicking the Add button, as illustrated below. The following syntax error shown below was generated because the string was not preceded by the $ symbol or enclosed in double quotation marks.
###

Viewing User-Defined Signature Details
In Policy > User-Defined Signatures, click View in the Actions column to view the details of the user-defined signatures.
The resulting page displays the following:
- Severity and confidence you set while creating the signature, user-defined signature name, author or the username that created the signature, version and revision information of the signature based on the number of times it was updated.
- Signature name followed by its brief description, signature type, and the raw data of the entire signature (such as the signature configuration information, rules set for specifying strings and conditions, reference URLs of the file type and so on).
- Sessions triggered by the signature with their basic details.
- A brief overview of the signature and an option to edit the signature on the right pane.
- Note*: User-defined signature name cannot be edited.

Editing User-Defined Signatures
- In Policy > User-Defined Signatures, click View corresponding to the signature you want to edit.
- On the signature details page, click Edit Signature on the right pane.
- Edit the signature information as required and click Save.
Note: User-defined signature name cannot be edited.
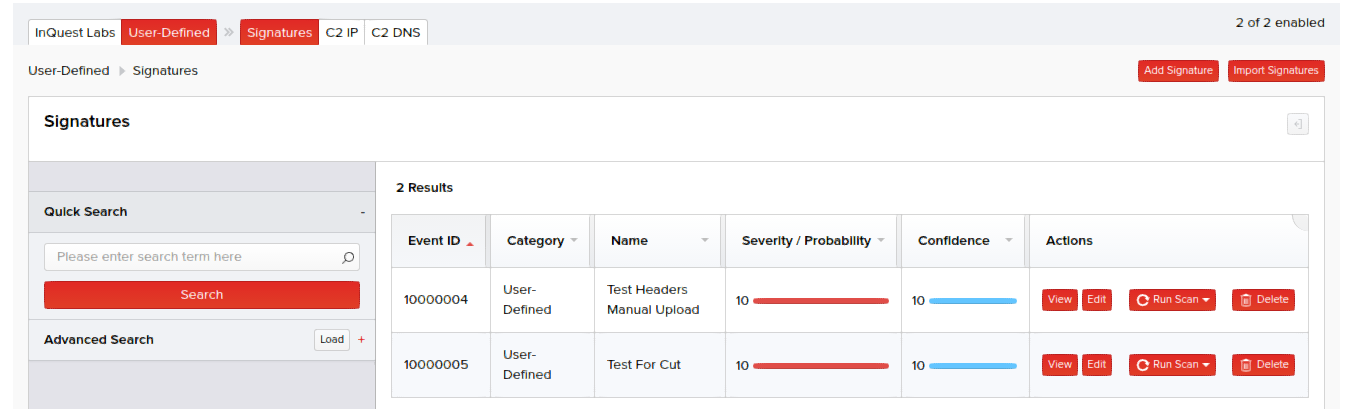
Searching User-Defined Signatures
You can find specific user-defined signatures by using the Quick Search function on the left pane in Policy > User-Defined Signatures. The results in the right pane displays signatures and their basic details along with the ability to view, delete, and page through the available signatures.
You can enable or disable the existing user-defined signatures directly on this page. Select or deselect the checkbox(es) of the desired signature(s) in the Active column.