
Overview
MetaDefender Managed File Transfer™ supports several types of users:
Local Users
External Users
Active Directory Users
Guest Users
Global Supervisors
Local users can be created and managed through the graphical user interface by navigating to "Users" → "Local Users." Administrators can create, enable, disable, or delete users at any time.
External Users are accounts intended for clients outside the organization. These users have minimal permissions, such as uploading and downloading files.
Active Directory Users are users imported from your Active Directory server. To enable Active Directory synchronization in MetaDefender Managed File Transfer™, please refer to Active Directories.
Guest Users are temporary accounts that any user can create. By default, these accounts expire after one hour, but the expiration time can be adjusted. Note that guest users do not have a username or password—they use only a Guest ID to log in.
On the different user pages, you can sort the data by clicking on the respective column headers. All columns can be sorted.
All user pages (except Guests) have an "Update Notification Emails" button visible only to Administrators and Helpdesk Administrators. Clicking the button opens a modal where the user can upload a .csv file containing usernames and notification e-mails, which will update the related users with the notification e-mails.
Additional topics:
Deleting Users
When deleting any type of user, all their owned files are moved to Recycle Bin. User deletion can be performed through the user interface, API, or Active Director Sync.
When attempting to delete a Supervisor, MetaDefender® MFT checks to ensure the user is not a mandatory Supervisor whose deletion would disrupt the Approval Process. In such cases, MetaDefender® MFT will not allow the deletion.
Deleting a user also removes any API keys they created.
The last local administrator cannot be deleted but can be disabled if other administrators are present (e.g., administrators set by an Active Directory configuration).
Local Users
Administrators can create local users from the user interface without needing to integrate with an Active Directory server. When creating a local user, it is also possible to assign a role to that user.
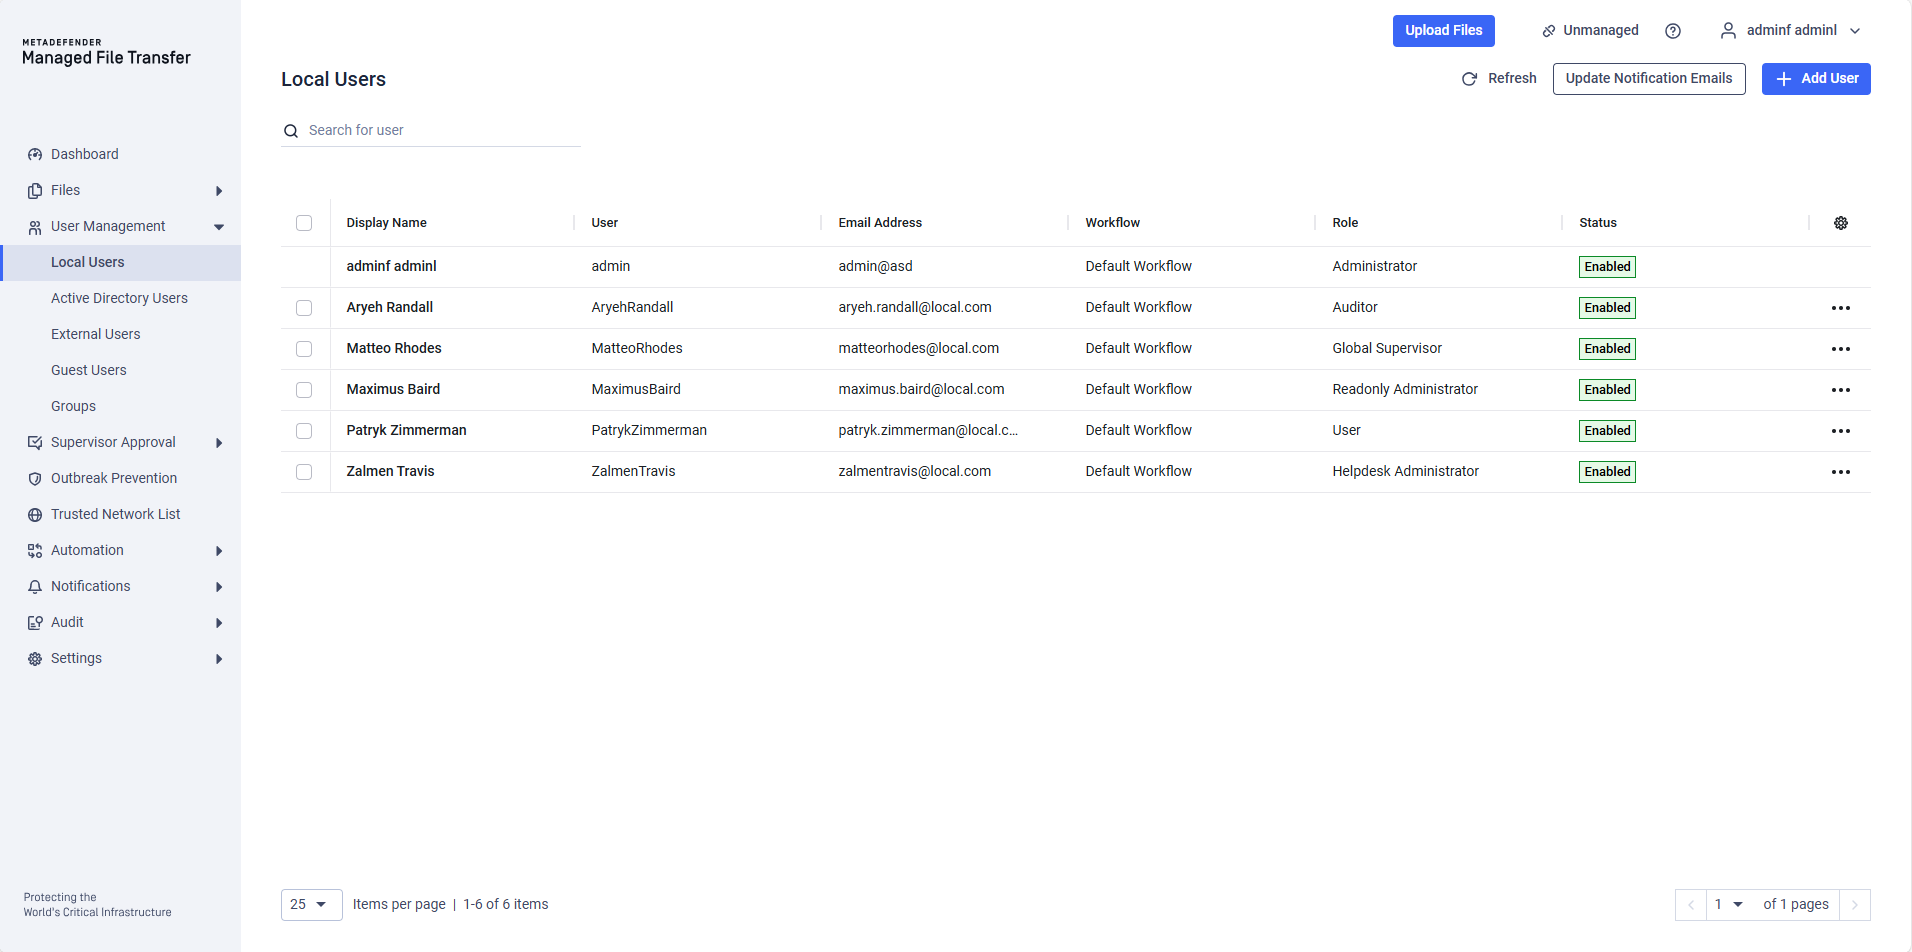
Administrators can create new accounts by clicking the "+" button. Passwords must be in line with the system's policy.
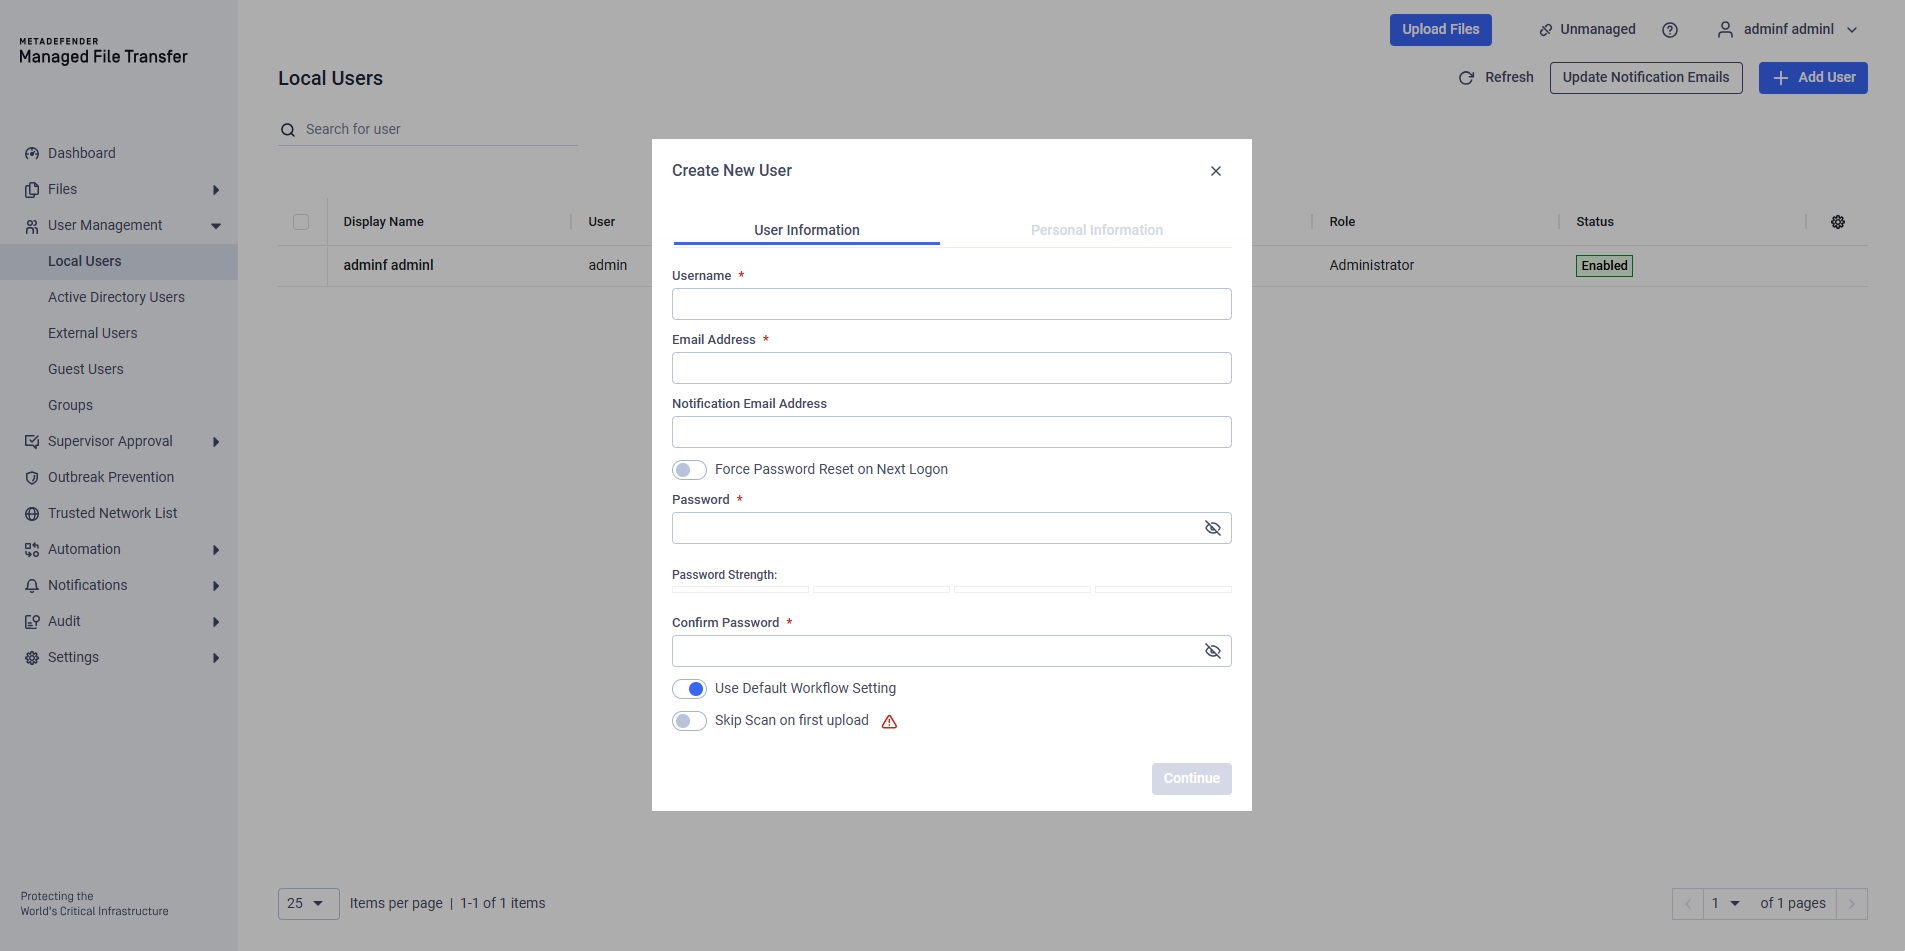
Administrators can require new users to change their password upon first login. This feature can also be applied to existing local users during their next login, though active sessions will not be terminated.
When creating a new user, administrators can choose from the following user types:
User - regular account with minimal permissions, such as uploading, downloading and sharing files.
Administrator - account with elevated permissions to change configuration settings.
Readonly Administrator - account with view-only access to all the configured settings.
Restricted Administrator - account with administrator-level access that cannot preview or download other users' files, manage API keys, or import and export settings.
Helpdesk Administrator - account with access to change global configuration.
Auditor - account with access to audit logs with file activity.
Global Supervisor - account with the ability to see and instantly approve all pending requests, eliminating the need for further steps.
Verdict Supervisor - Global Supervisor account that can also access the Processing History and override or restore the blocked status of user files.
Automation Coordinator - account that can create and manage Automated Jobs and the related integrations, with access only to its own files.
User Manager - account with read-only access to user administration: it can view all user types and the Groups page, and has access to General Audit, but cannot create, edit, delete, enable or disable any account.
The roles available in the dropdown depend on the role of the administrator creating the account. A Helpdesk Administrator or a Restricted Administrator can assign fewer roles than a full Administrator.
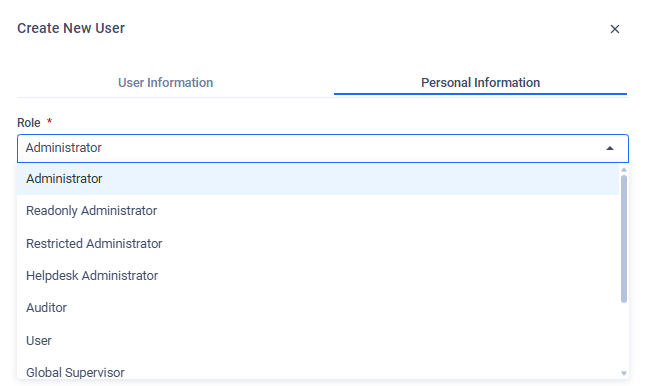
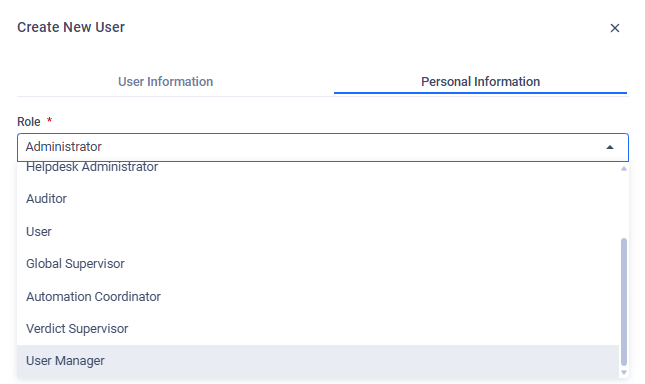
Administrators can edit existing local users, including their username, password, email, and role.
External Users
External user accounts are designed for long-term file sharing with partner clients or organizations. This role cannot see internal users and can only share files with their owner and groups that they are a part of.
An external user account can only log into the system if:
It has not expired
The external account is enabled
The parent/creator account is active and enabled
Trusted network rules are met
Administrators and users can create external user accounts by navigating to "Users" → "External Users" and clicking the "Create external user" button.
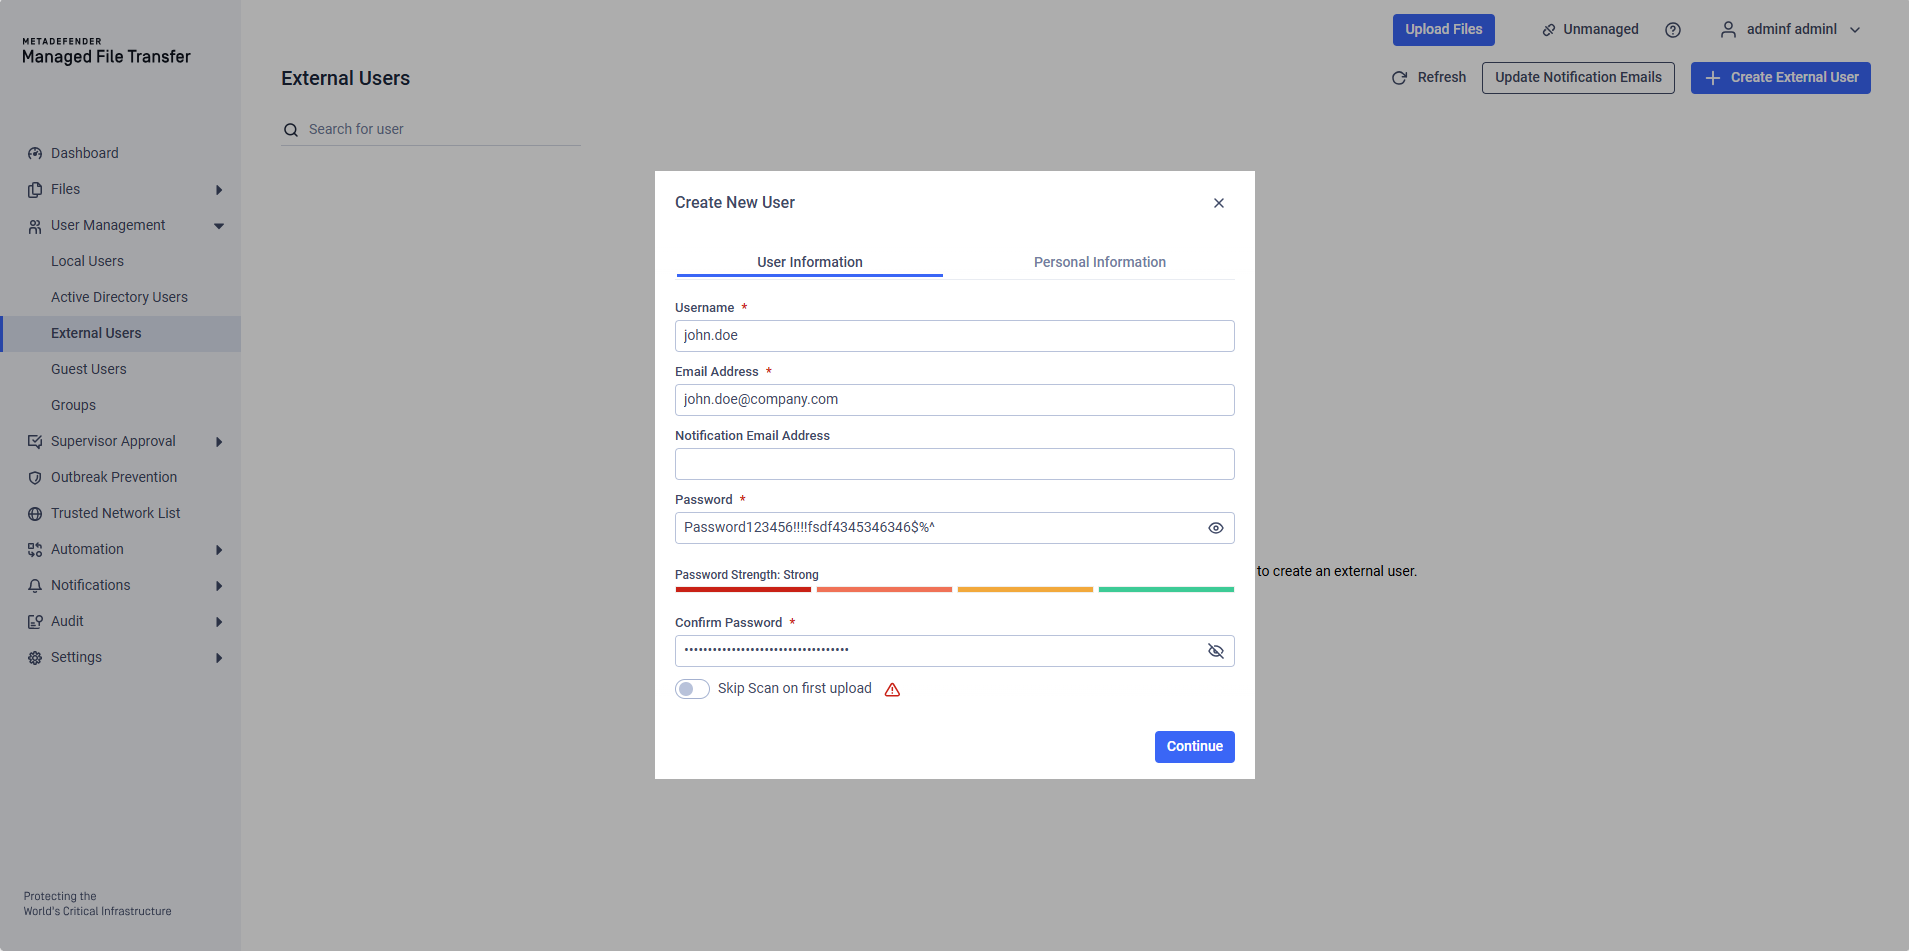
Ensure the password meets the system policy requirements, then click "Continue."
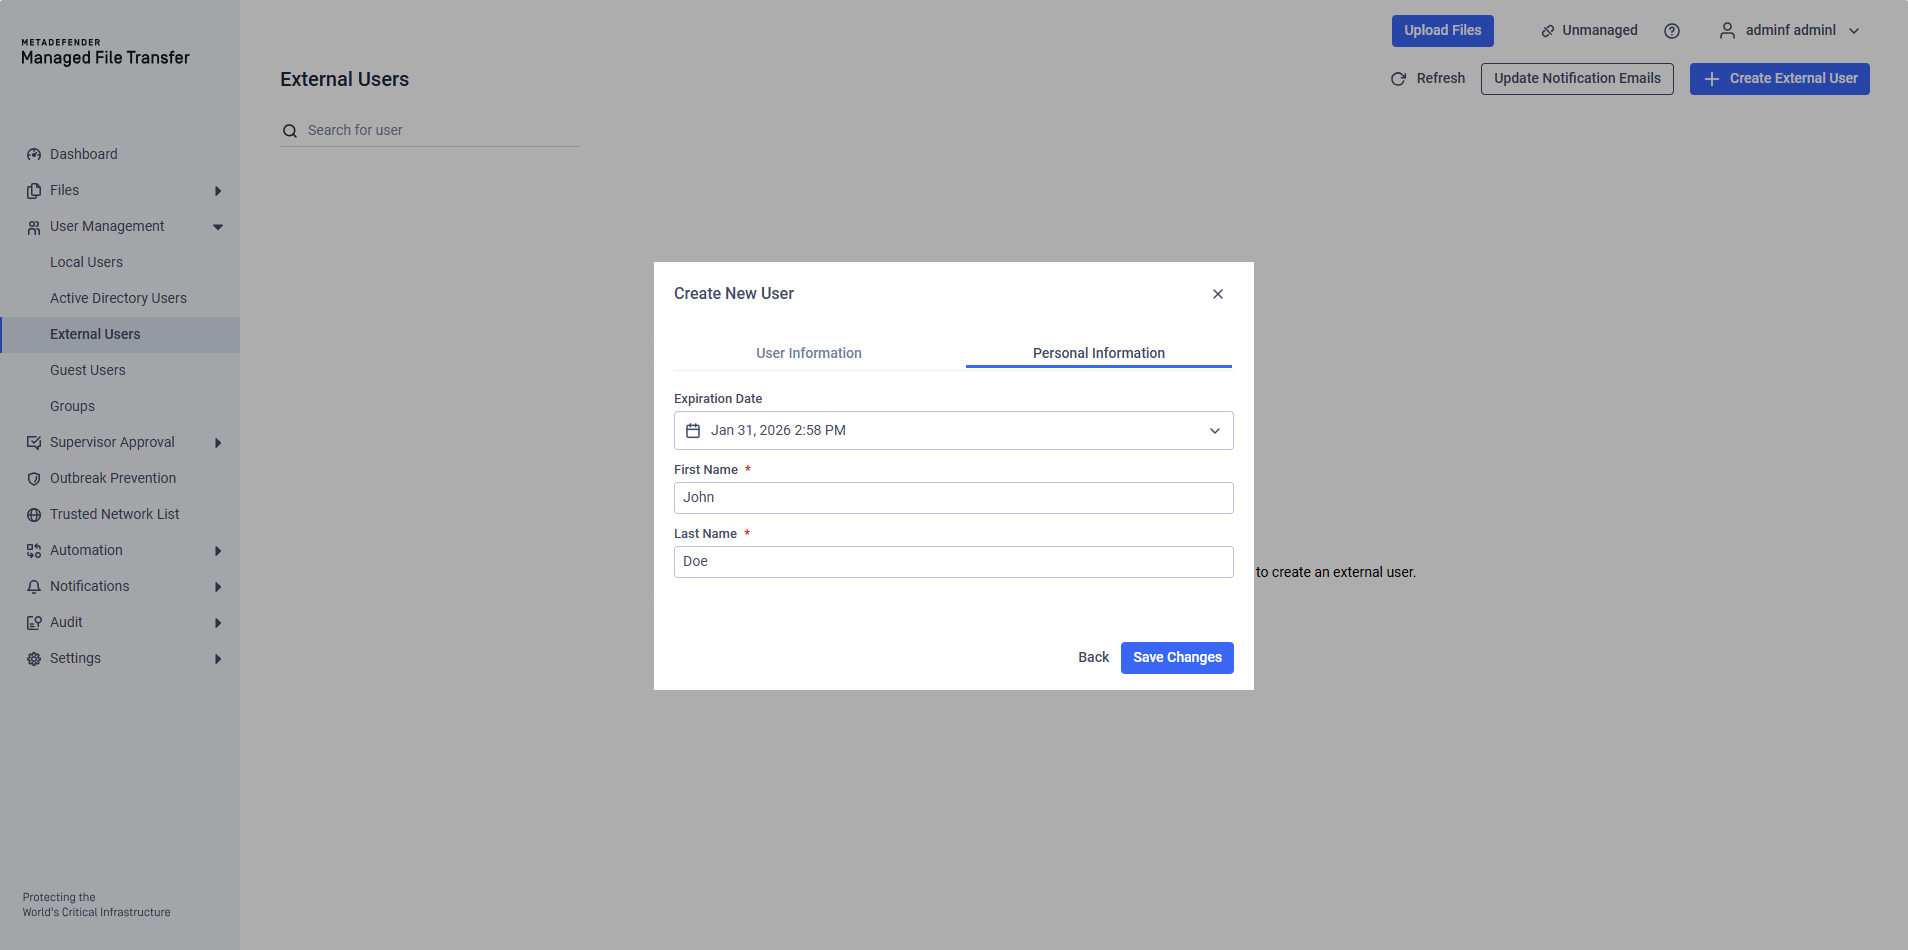
External user accounts may require an expiration date, depending on the configured settings. Click "Create" to finalize the new account.
Once created, external user accounts can be edited, enabled/disabled, and deleted.
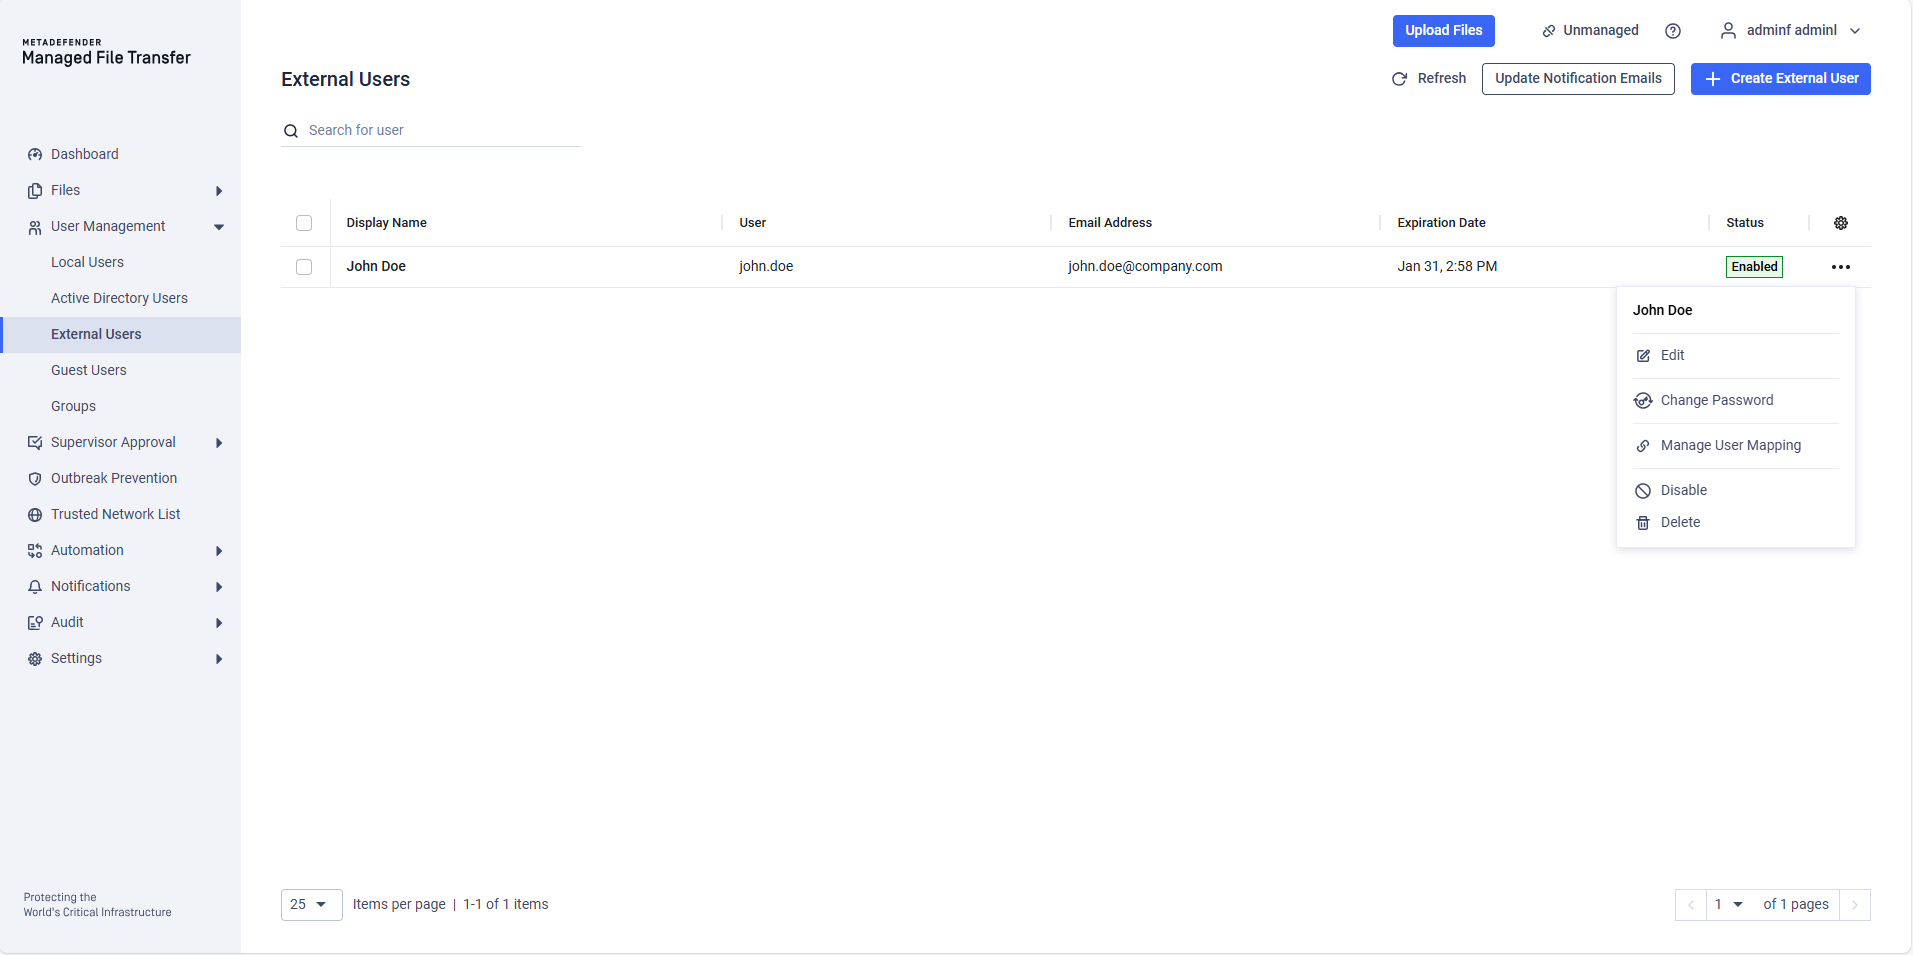
By clicking the "Edit" button, you can update the account's credentials using the same dialog that was used during account creation.
Active Directory Users
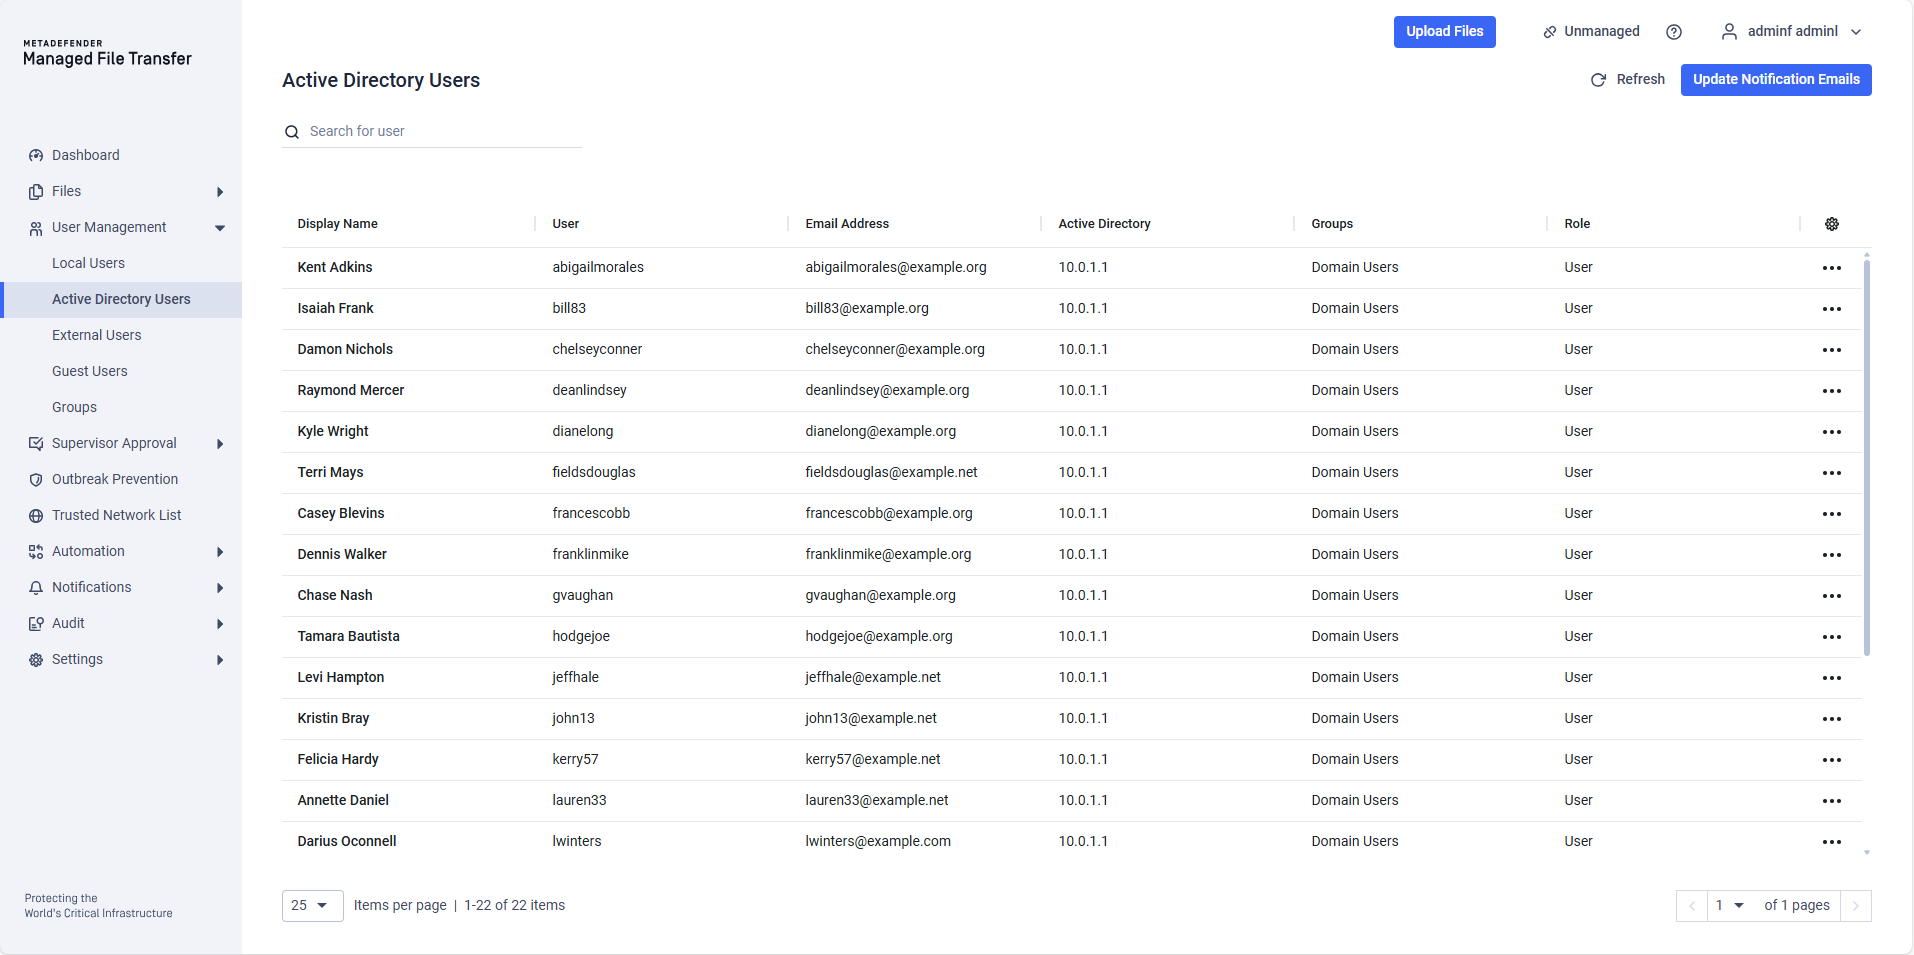
Active Directory users are synchronized from your "Active Directory" server into MetaDefender Managed File Transfer™ . They can login using the same username and password as their Active Directory credentials. Note that you cannot edit or change information for these users in any way.
Guest Users
A guest account is a temporary account with limited access and lifetime. Any user can create a guest account and share files with it. A guest user can only upload files to themselves or to the account owner who created their guest account.
A guest user account can only log into the system if:
It has not expired
The guest user account is enabled
The parent/creator account is active and enabled
Trusted network rules are met
To create a guest account, log in and go to "Users" → "Guest."
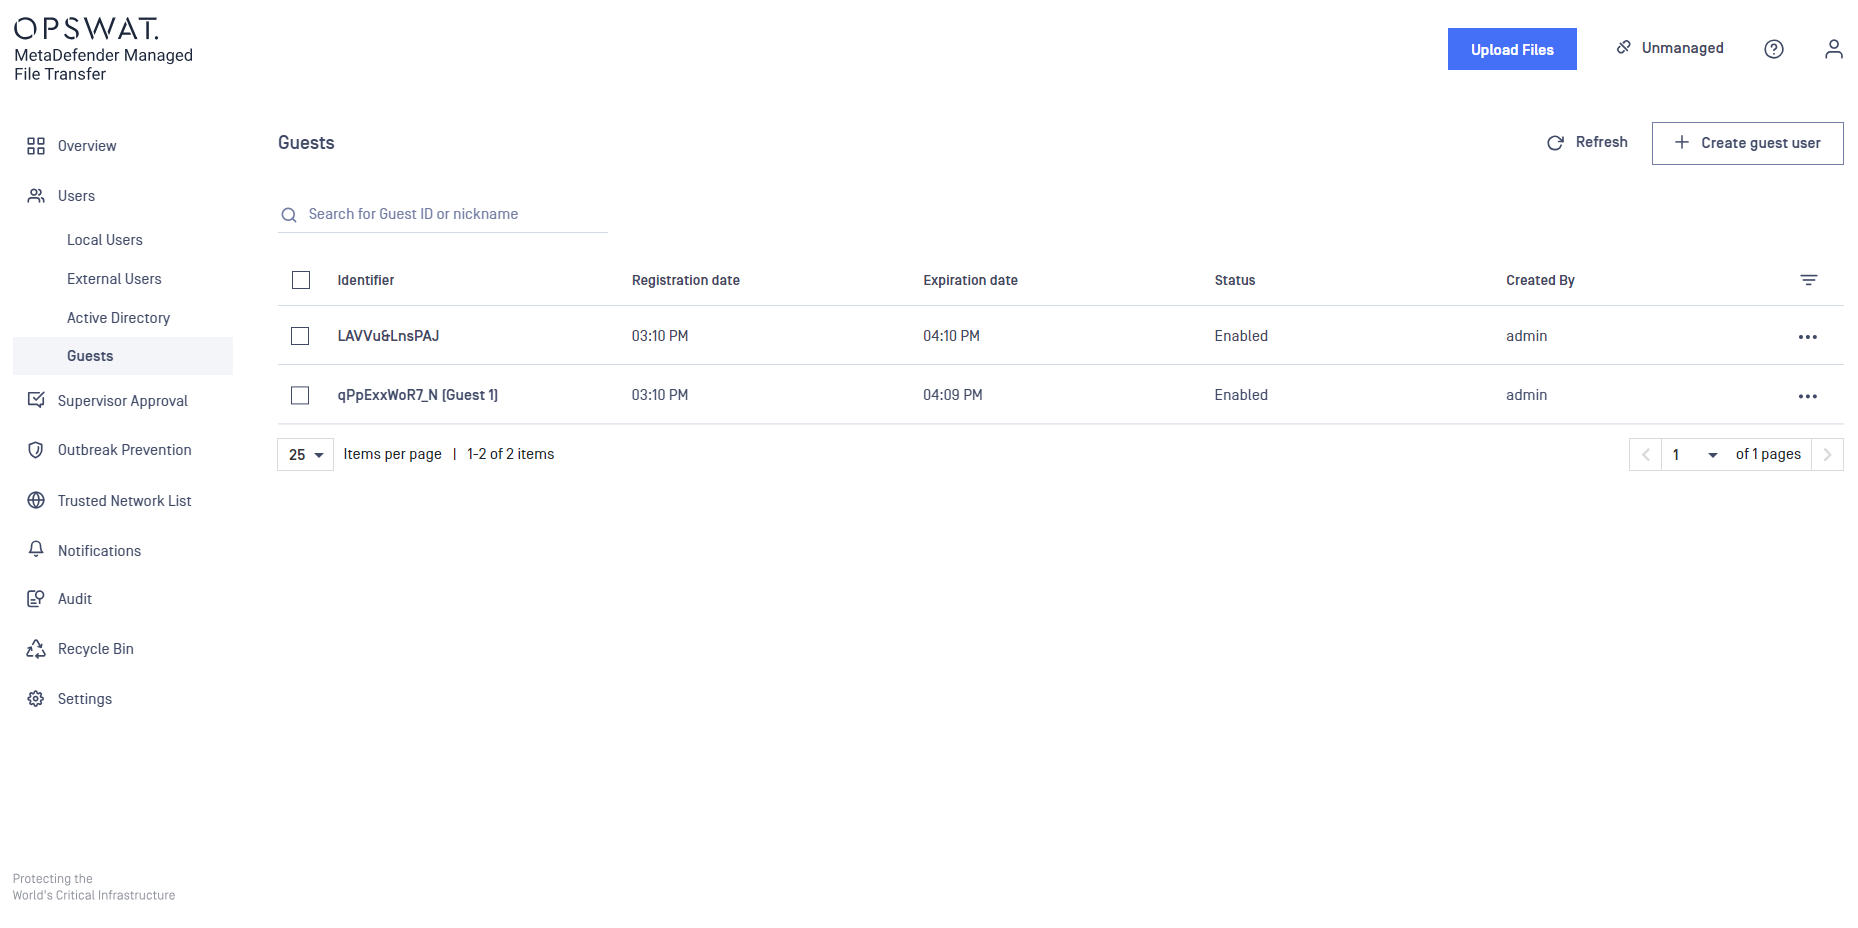
Click the "Add Guest User" button in order to generate a new guest user.
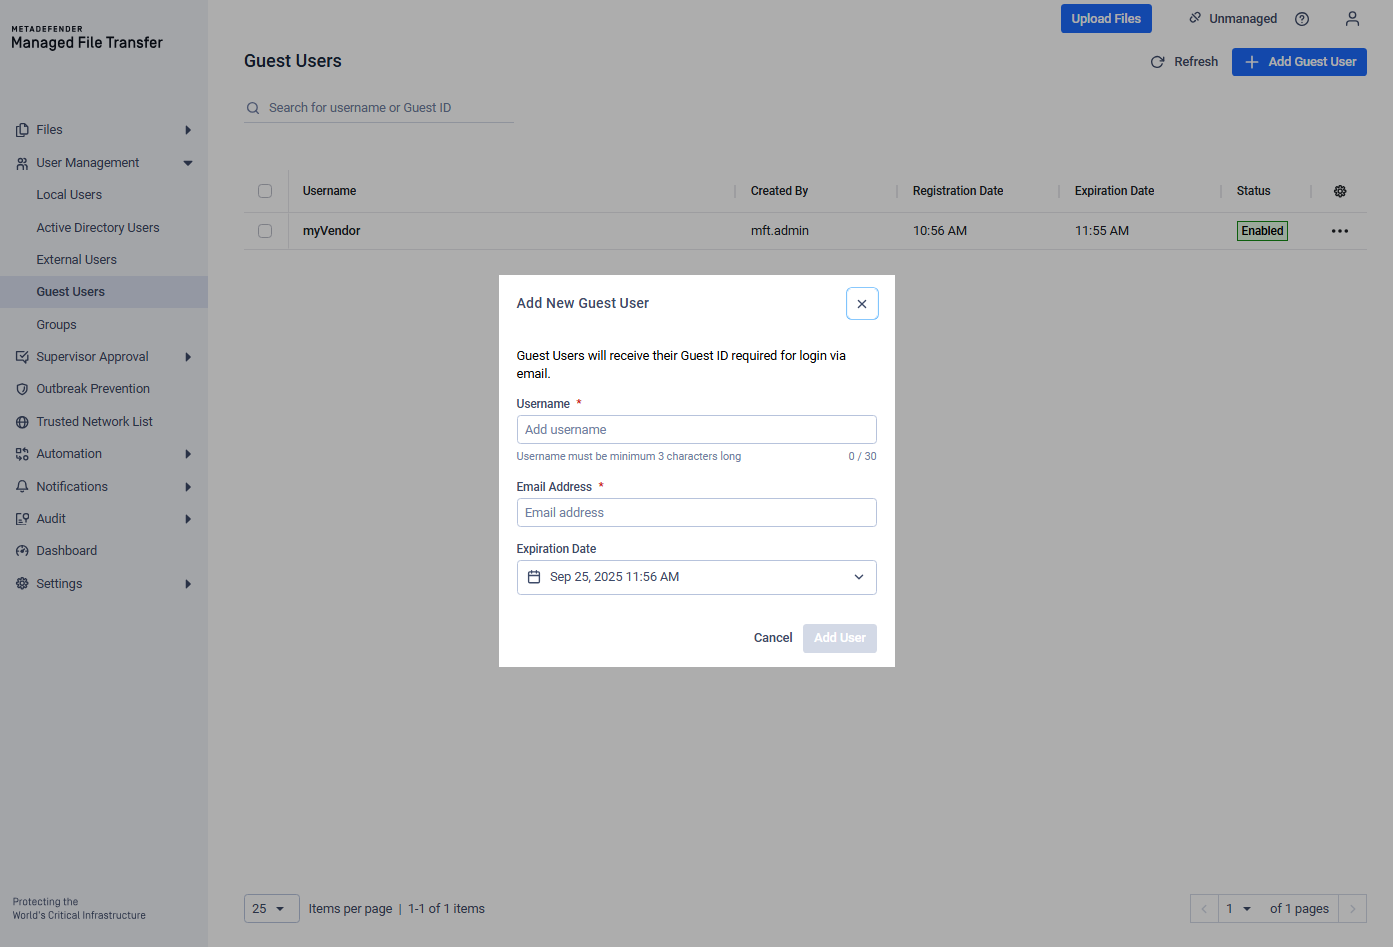
Add a proper username and email address for the guest user to receive notifications.
An email address can be shared among multiple guest user accounts but not with any other user types.
Choose the desired expiration date and click "Add User" to finalize the operation. Use this page to perform actions like suspending, editing or deleting a guest account.
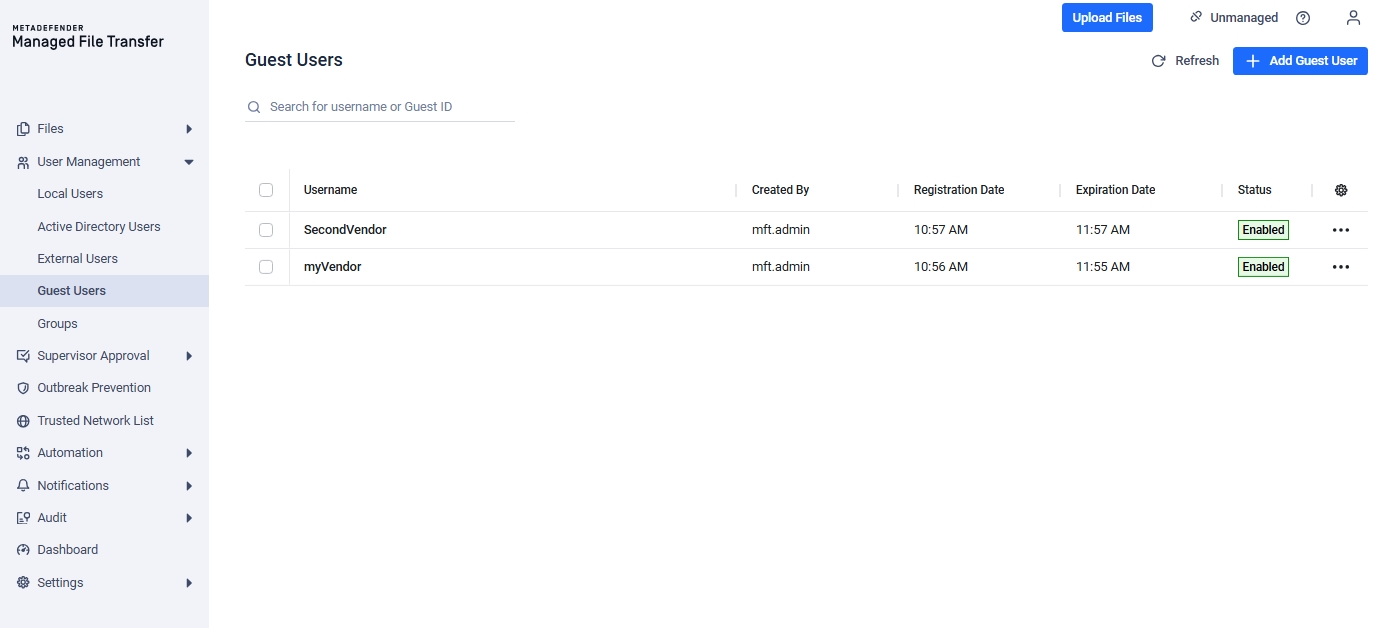
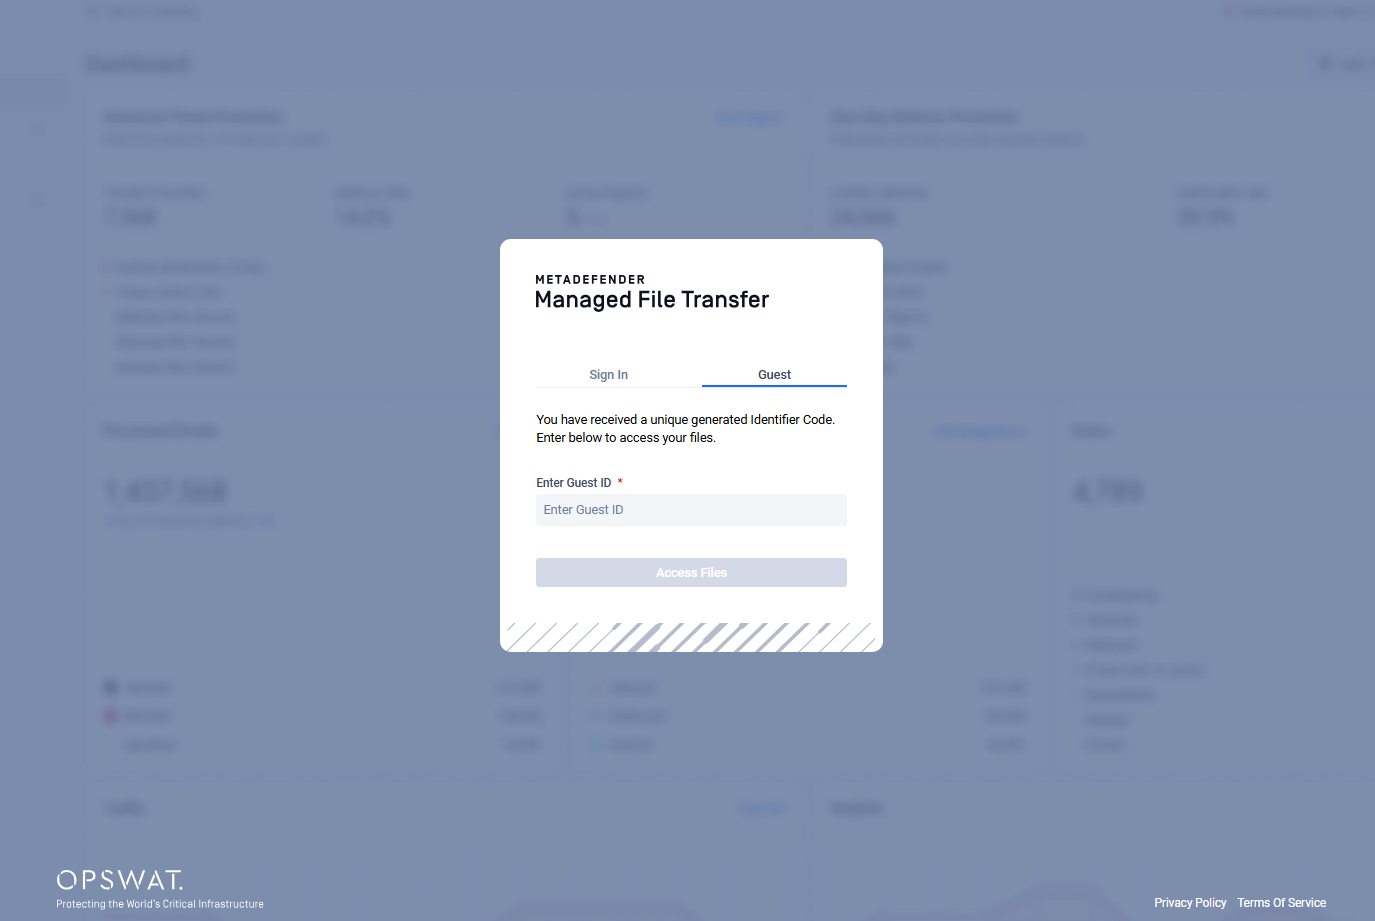
Logging in with a Guest Account
To log in with a guest account, instruct your guest user to access the login page and use the generated PIN code (can be found in the e-mail, which was automatically sent to the guest user).
Groups
The "Groups" page lists both "Active Directory" and "Custom groups."
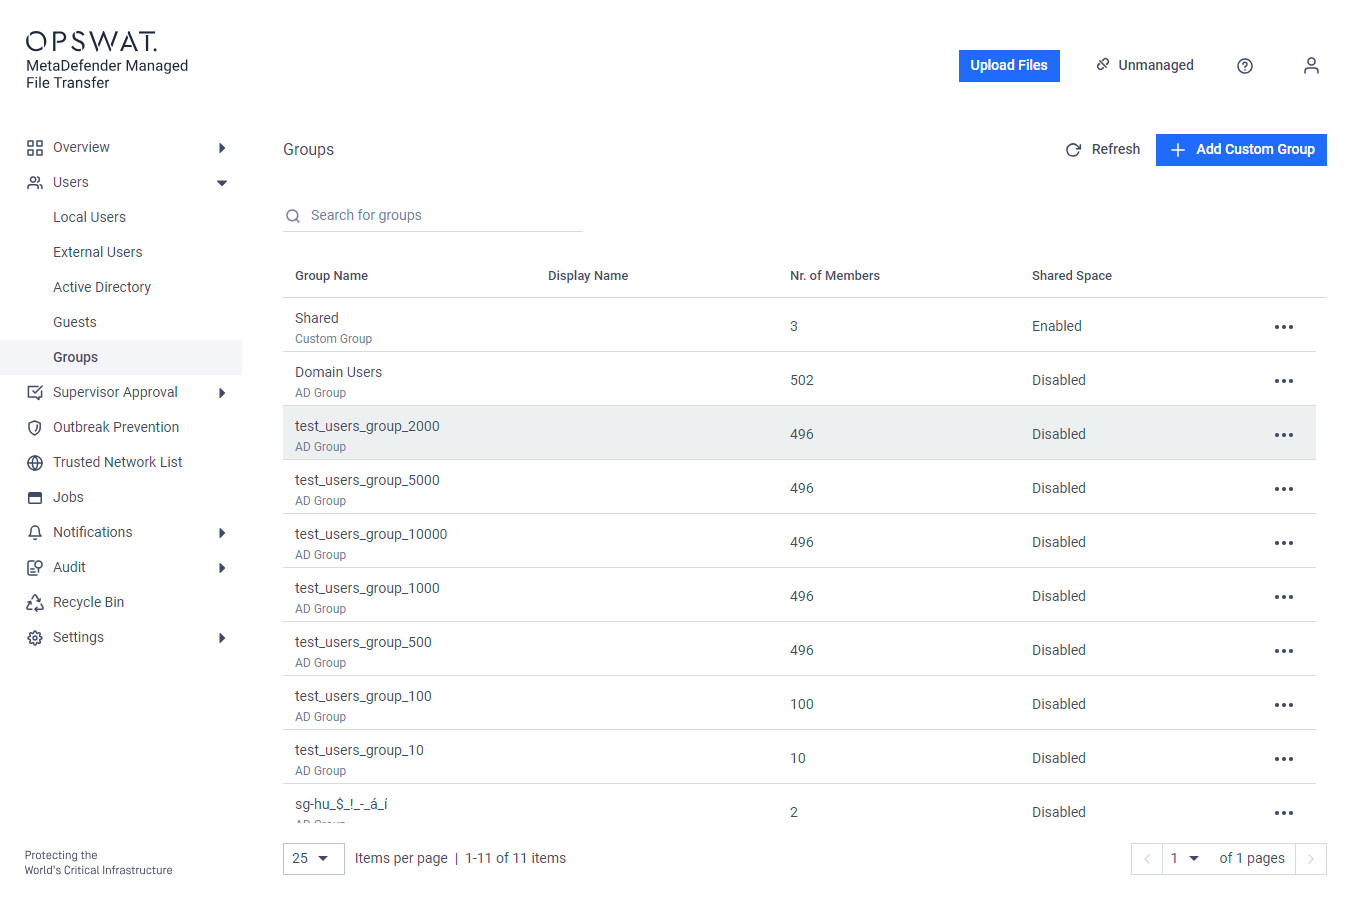
Custom Groups
Custom Groups are user-defined collections created by an administrator, where Local, External and Active Directory users can be included as members. Each Custom Group must have a unique identifier (name) and can optionally have a separate display name. Administrators can modify group MetaDefender Core™ Workflow (Custom MetaDefender Core Workflow Rule for Groups) and enable Shared Spaces for collaboration within the group.
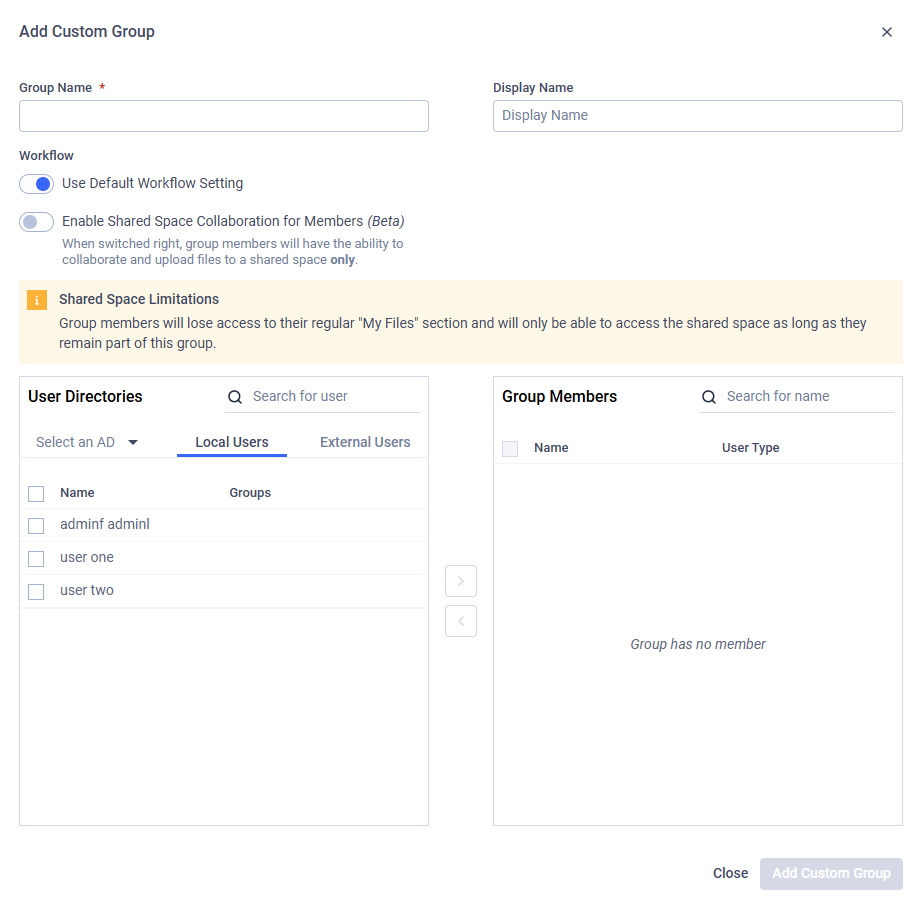
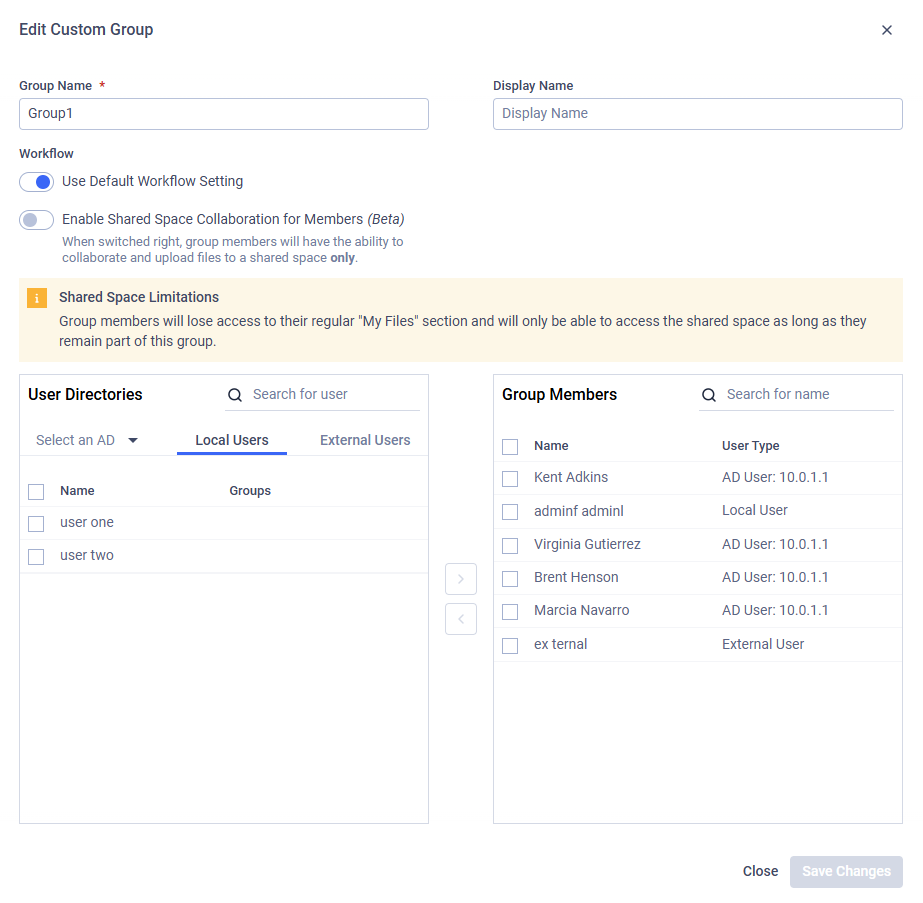
Active Directory Groups
Active Directory groups are created after an Active Directory Authentication Source is configured. You cannot add new groups, but you can edit attributes such as Display Name or Custom MetaDefender Core Workflow Rule for Groups.
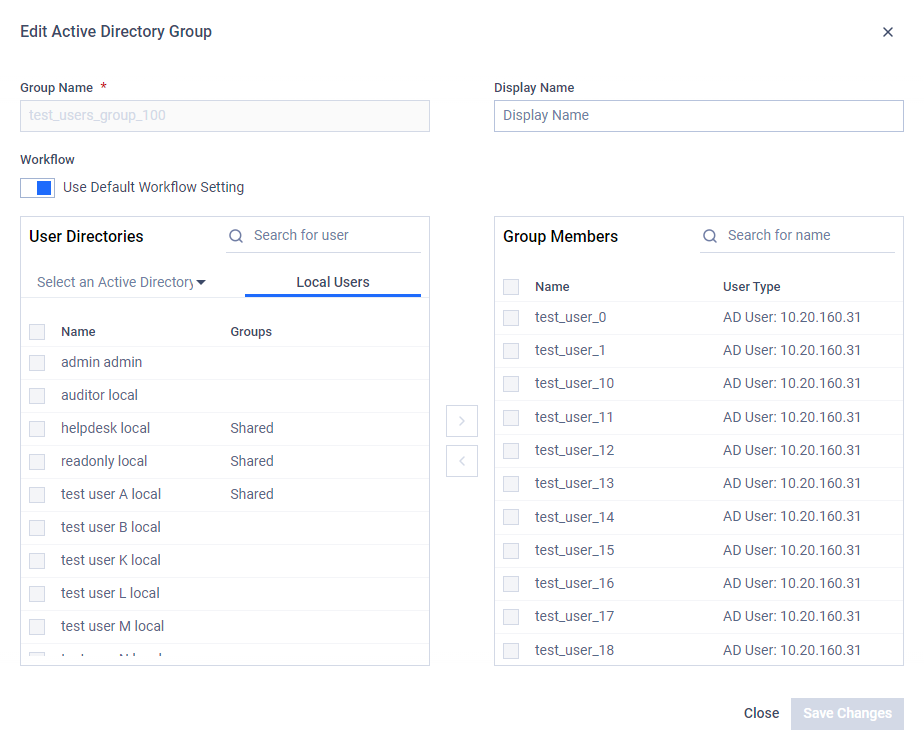
Single Sign-On Groups
Single Sign-On (SSO) groups are automatically created after an SSO Authentication Source is configured with group claims and a user signs in via SSO. These groups cannot be created manually. However, certain attributes, such as the display name or the custom MetaDefender Core workflow rule assigned to the group, can be modified after creation.
File Policies for Groups
Administrators can configure file-handling policies for Active Directory Groups, Custom Groups, and Single Sign-On Groups, including:
Upload quotas and upload options
Sharing and user management options
File management options, including Managed Folders
To open the settings:
Navigate to the Groups page.
Locate the group you want to configure.
Click the three-dot menu in the group’s row.
Select “File Policies” to open the settings modal.
Use the tabs — “Upload Quotas & Options”, “Sharing & User Management Options”, and “File Management Options” — to reach the setting you want to change.
Adjust the desired values and click “Save Changes”.
Upload Quotas and Options
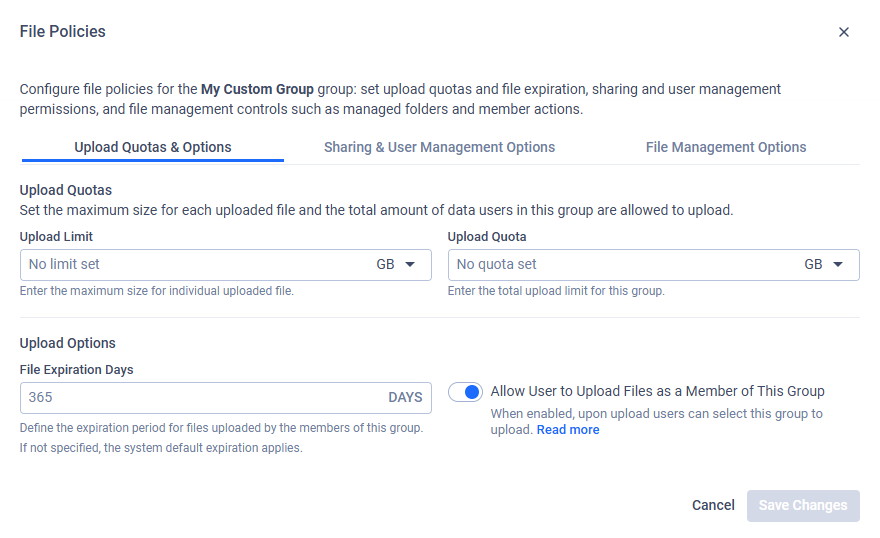
Upload Limit / Quota
Administrators can define upload restrictions at the group level. For each Custom or Active Directory group, you may configure:
Upload Limit – the largest size allowed for a single file.
Upload Quota – the maximum combined size of all files uploaded by the group.
These limits help ensure efficient storage management and prevent groups from exceeding allocated resources.
Upload Options
File Expiration Days — Administrators can configure custom File Expiration Days for groups. You can find more information about file expiration here.
Allow User to Upload Files as a Member of This Group — Controls whether users can upload files or folders on behalf of a specific group.
Enabled: Users can select this group in the Upload modal and perform uploads as a member of the selected group.
Disabled: The group is not available as a selectable option in the Upload modal.
If the “Allow Users to Upload Files Without Specifying Group Membership” setting is disabled and the user does not belong to any group, the Upload Files action is unavailable, preventing the user from uploading files or folders.
Sharing and User Management Options
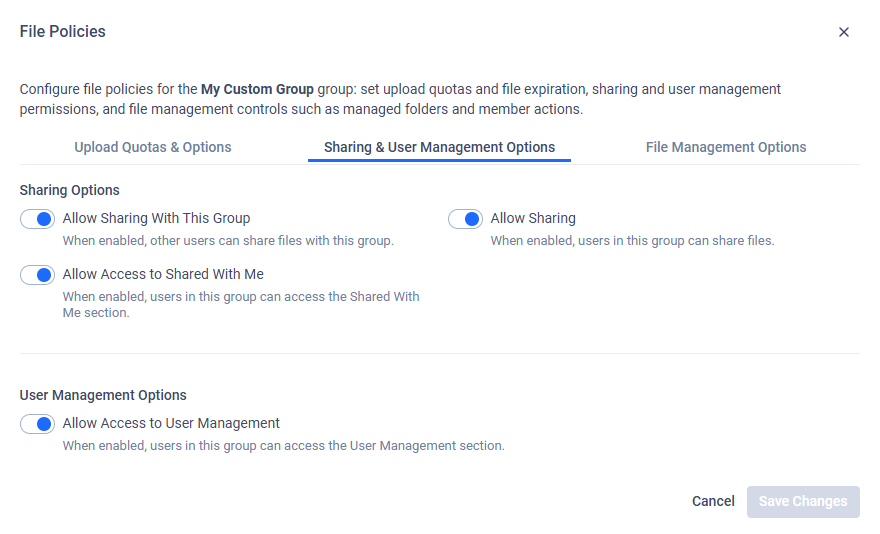
Sharing Options
Allow sharing with this group — When enabled, administrators allow users to select this group in the Share modal to share a file with the group as a whole (the file is shared with all current group members). When disabled, the group does not appear as a share target, but users can still share files with individual members of the group.
Allow Sharing — When enabled, users in this group can share files. When disabled, members of this group are not permitted to share any files, regardless of other sharing settings.
Allow Access to Shared With Me — when enabled, users in this group can access the Shared With Me section.
All three options are only available when file sharing is globally enabled. If file sharing is turned off system-wide, these controls are disabled. You can enable it under Settings / File Settings.
User Management Options
Allow Access to User Management — when enabled, users in this group can access the User Management section.
File Management Options
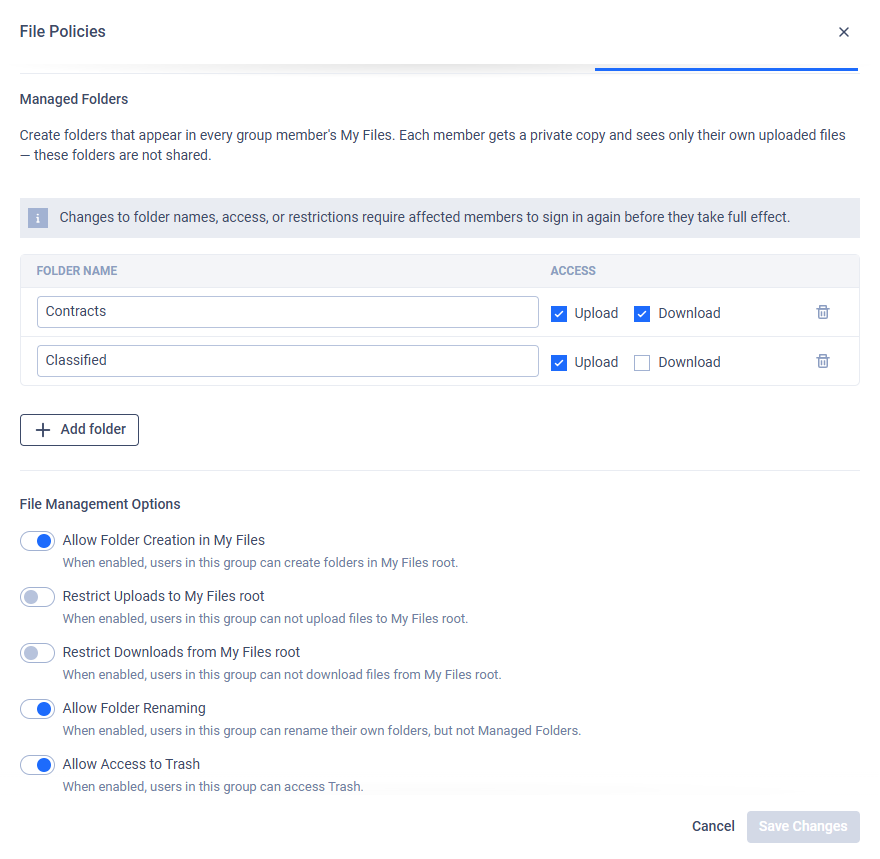
Managed Folders
Managed Folders let you create folders that appear in every group member’s My Files. Each member gets a private copy and sees only their own uploaded files in it — Managed Folders are not shared between members.
For each Managed Folder, you can set:
Column | Description |
|---|---|
Folder name | Required, and must be unique within the group (matching is case-insensitive). |
Access | Upload and Download checkboxes controlling what members can do in the folder. At least one of the two must stay checked — unchecking the last remaining option is reverted automatically. |
Click “Add folder” to add a Managed Folder, or the delete icon next to a row to remove one. Removing a folder that has already been saved to the group asks for confirmation, since all of its contents are permanently deleted from every member’s My Files; removing a folder you just added (and haven’t saved yet) does not.
Changes to folder names, access, or restrictions require affected members to sign in again before they take full effect.
“Add folder” is disabled, while shared space collaboration is enabled for the selected group — Managed Folders and shared space collaboration cannot be used together on the same group.
Below the folder list, you can also configure:
Allow Folder Creation in My Files — when enabled, users in this group can create folders in their My Files root. This control is automatically disabled while “Restrict Uploads to My Files root” is on, so members can’t work around the restriction by creating their own upload folders; turning the restriction back off restores the previous value.
Restrict Uploads to My Files root — when enabled, users in this group cannot upload files to their My Files root (only into Managed Folders). This option only appears once the group has at least one Managed Folder.
Restrict Downloads from My Files root — when enabled, users in this group cannot download files from their My Files root (only from Managed Folders). This option only appears once the group has at least one Managed Folder.
Allow Folder Renaming — when enabled, users in this group can rename their own folders, but not Managed Folders.
Allow Access to Trash — when enabled, users in this group can access Trash.