
Skip By Hash lets you centrally manage file-hash rules across your entire MetaDefender Core fleet from My OPSWAT Central Management.
You create hash lists, assign them to Core policies, and every Core instance governed by those policies automatically receives and applies the rules. As you update entries, changes sync incrementally, no manual push required.
Before You Begin
Requirement | Detail |
|---|---|
Supported products | MetaDefender Core only |
Permissions | Your role must have the Skip By Hash permission to use this feature |
Assignment required | A hash list has no effect until it is assigned to at least one Core policy. See Assign Hash List to Policy |
Core-side setting | Whether a Core instance accepts skip-hash settings from My OPSWAT Central Management is controlled on the Core instance itself. This setting cannot be viewed or changed from My OPSWAT Central Management |
Upgrading from earlier versions | Group-based assignments are not migrated. After upgrading, re-assign each list to the appropriate policy |
Deployment models | Supported on Cloud, Windows (MSI), Linux (RPM), OVA, and High Availability, including air-gapped environments |
Hash actions available |
|
Step-by-Step Workflow
Create a Hash List
Step 1: Navigate to File Security → Skip By Hash
Click Create New List on the Skip By Hash page
Enter a Name and Description
The new list starts empty and unassigned.
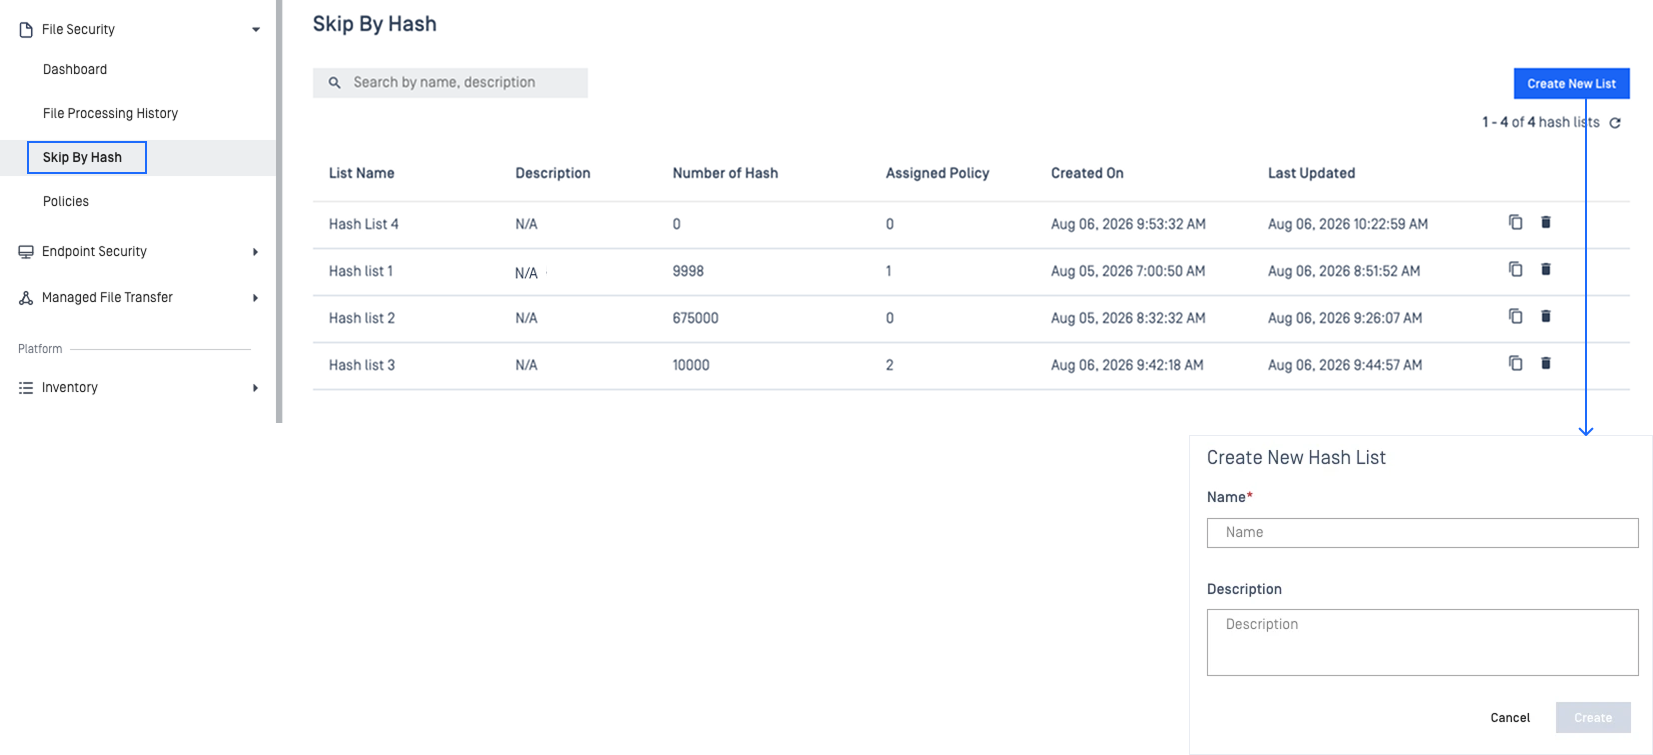
Step 2: Under Hashes tab, choose Add Hash or Import Hash
Actions | Details |
|---|---|
Add Hash |
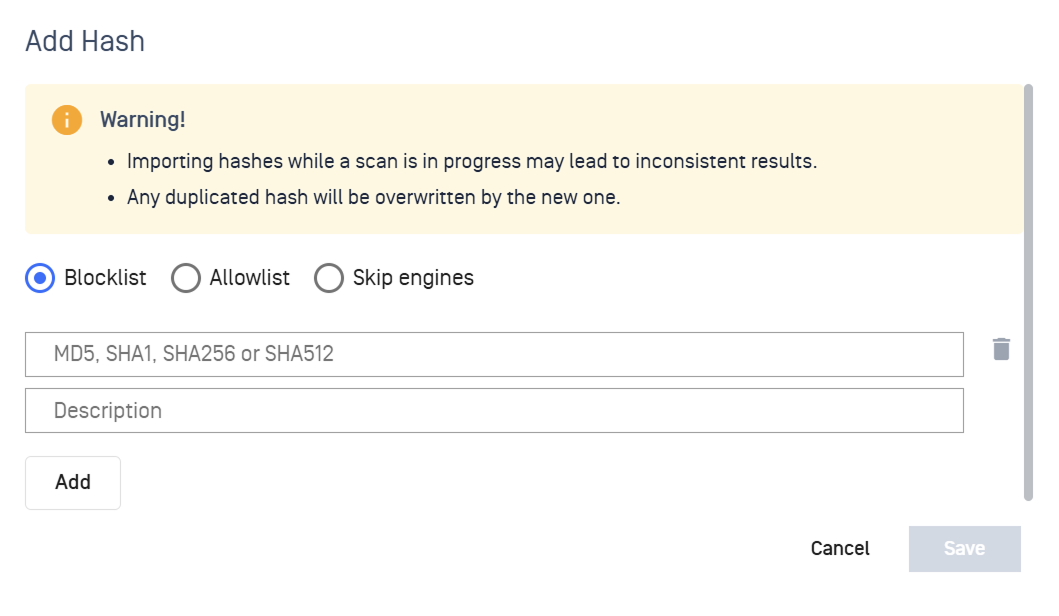 |
Import Hash |
Note Any rows with errors are skipped, you'll see which ones failed so you can fix and re-import. 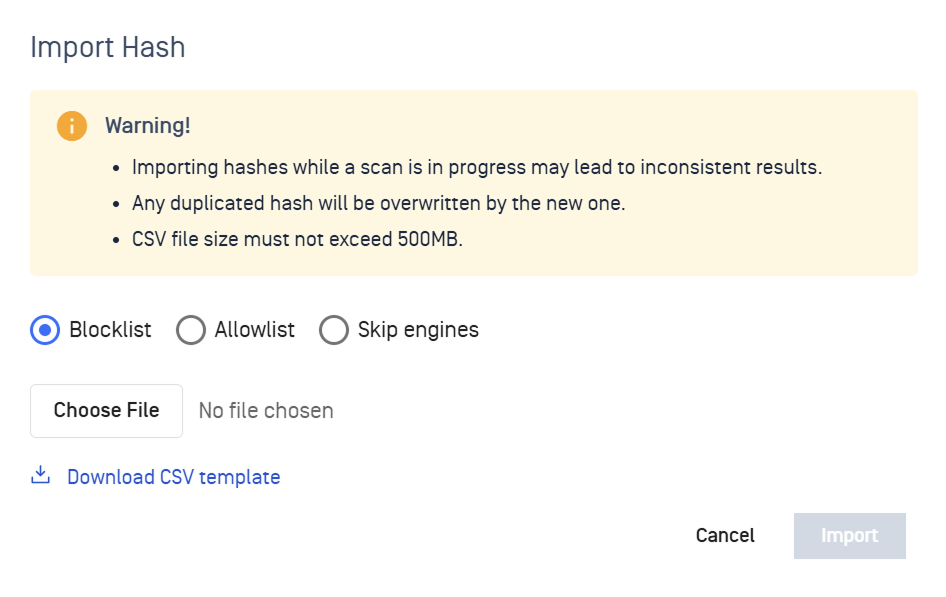 |
Note If the hash already exists in the list, you'll be asked to confirm overwriting the existing entry.
Assign Hash List to Policy
A hash list only takes effect once assigned to a policy.
Step 1: Navigate to Inventory → Skip By Hash. Open the Assignments tab.
Actions | How |
|---|---|
Assign hash list to a policy | Click Assign Policy → select one or more Core policies Note A policy can only carry one list. Assigning a list to a policy that already has a different one replaces it silently, without warning. 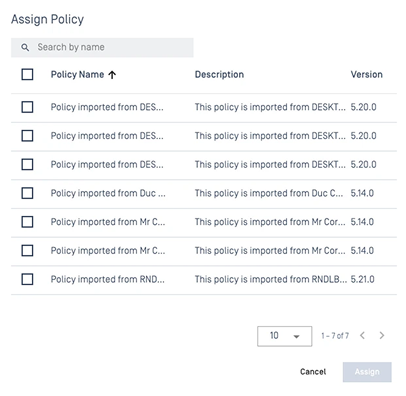 |
Remove an assignment | Click the remove action on the assignment row |
Step 2: Verify hash list has been assigned to policy
Navigate to File Security > Policies
Select the policy that you've assign hash list to
Go to Skip By Hash tab
Verify the hash list appears under this tab
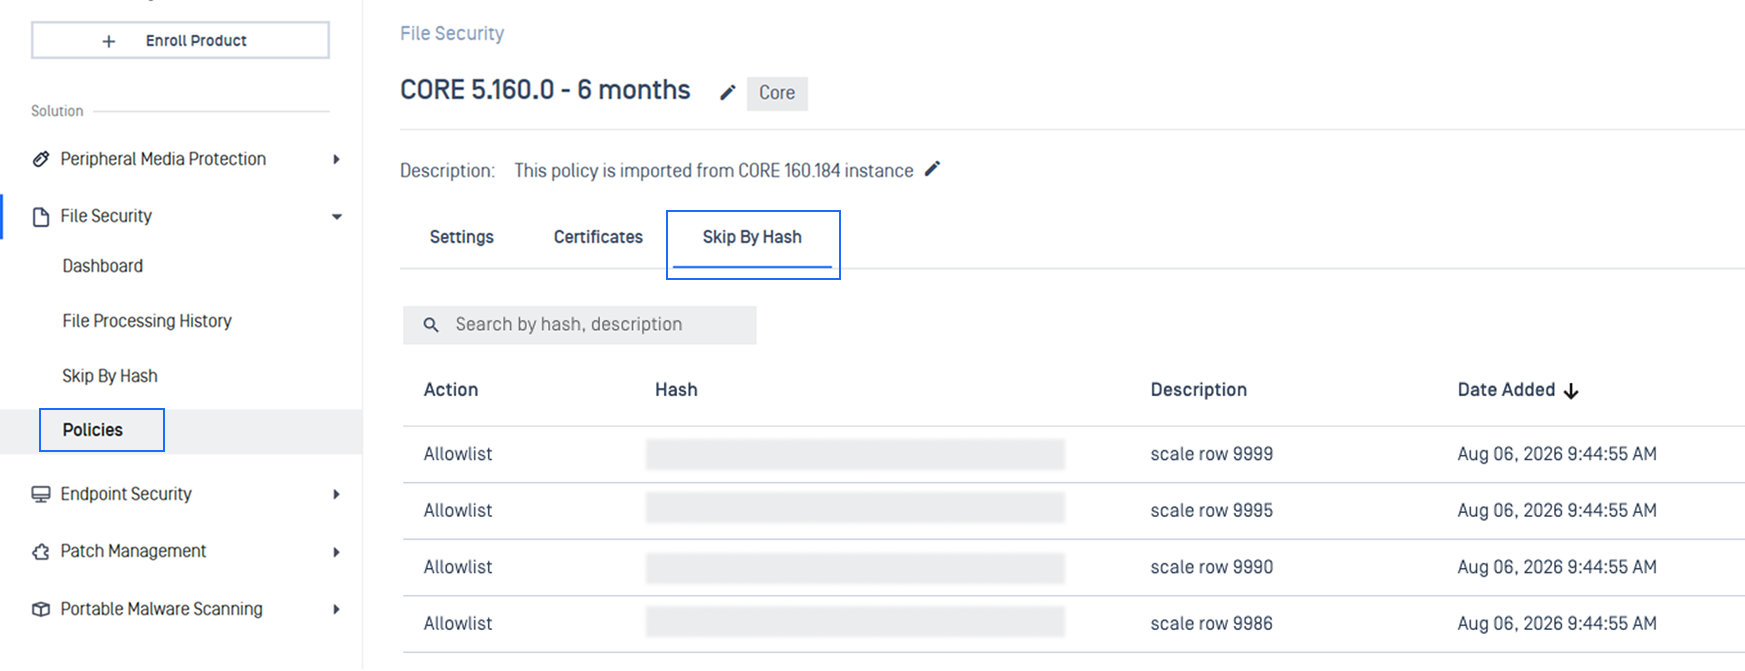
Once a hash list is assigned to a policy, all changes sync automatically to every connected Core instance, no manual push needed. Instances that are offline will pick up the latest updates as soon as they reconnect.
Manage Hash List Entries
Open any hash list to view, edit, or delete entries.
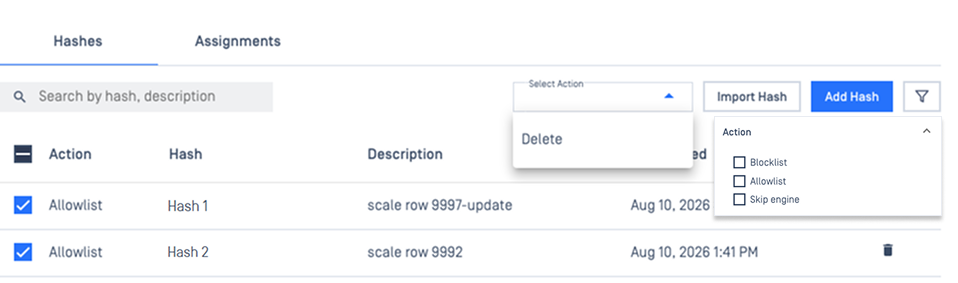
Actions | Details |
|---|---|
Edit | You can change the action, description, and engines, but the hash value itself is read-only. To change a hash, delete and re-add. |
Delete | Removes the entry from the list and propagates the removal to all affected Core instances. |
Search and filter |
|