
Scheduled Remote Execution lets My OPSWAT Central Management administrators run scripts on their managed product instances, automatically or on a schedule.
Instead of logging into each server one by one, an admin uploads a script once, picks the instances to target, sets a schedule, and My OPSWAT Central Management takes care of the rest.
Supported Products & Versions
Scheduled Remote Execution requires the target product instance to run a version that supports remote script execution.
MetaDefender Kiosk: version 4.8.3 and later
Note MetaDefender Kiosk supports Scheduled Remote Execution starting from version [X.Y.Z]. Instances on earlier versions will not appear as eligible targets.
Why It Matters
Without the feature | With Scheduled Remote Execution |
|---|---|
SSH / RDP into every machine individually | Target hundreds of instances from one screen |
Remember to run maintenance manually | Set it once, My OPSWAT Central Management runs it on schedule |
No central record of what ran where | Full execution history, per instance, with output logs |
Hard to scale across a fleet | One job can target up to 500 instances |
Typical Use Cases
Routine maintenance: log cleanup, cache clearing, disk housekeeping
Fleet-wide health checks: collect diagnostics across all instances on a schedule
On-demand operational task: push a one-time corrective script to selected instances
Compliance / reporting: run a report-generation script on the 1st and 15th of every month
Where to Find It
Scheduled Remote Execution lives in the My OPSWAT Central Management left navigation menu.
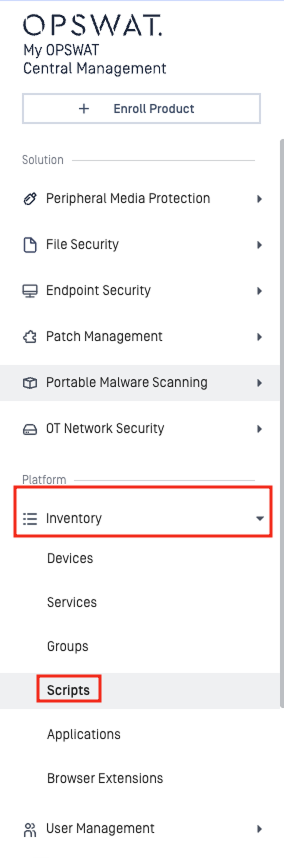
The feature is organized into two areas:
Scripts: your reusable library of scripts.
Jobs: the execution history: every scheduled run, with its results.
Script List
Each row is one script, opening a script shows all the jobs that ran for it.
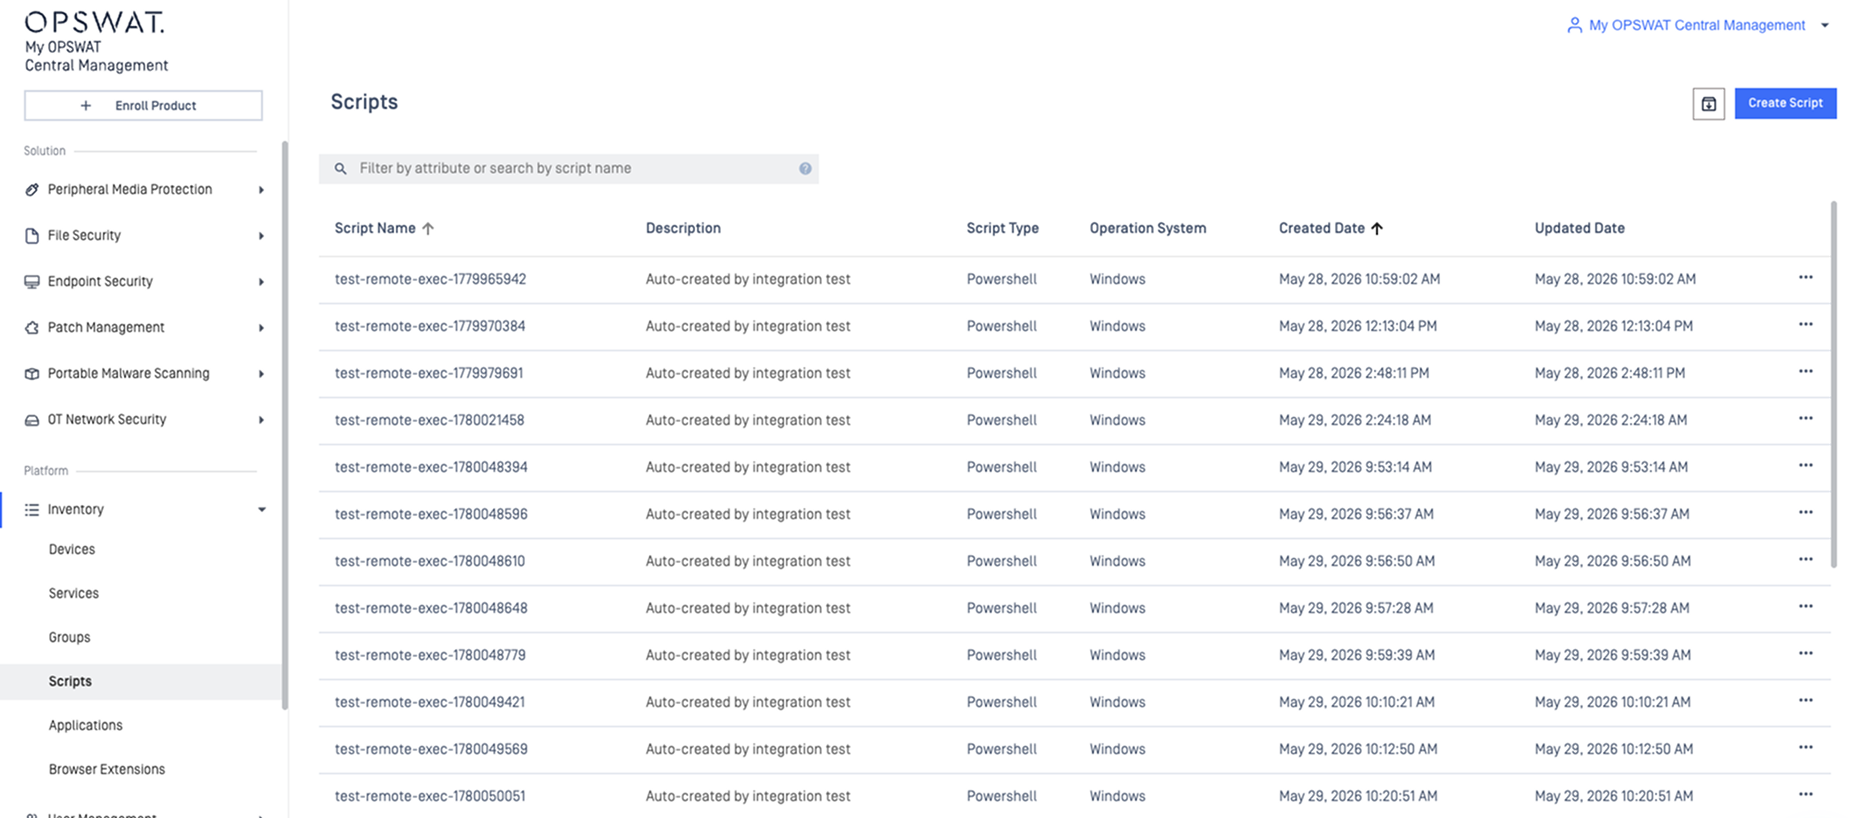
Column | What it shows |
|---|---|
Name | The script's name (e.g. "Daily Log Cleanup") |
Description | Optional notes |
Script Type | PowerShell, cmd, bash, or sh |
OS | Windows or Linux |
Created Date | When the script was created |
Updated Date | When the script was last changed |
Search & filter by name, type, or OS.
Add a script from this page (see Creating a Script).
Open a script to view its jobs and to schedule a new one.
Archive scripts that are no longer needed.
Creating a Script
Scripts are managed independently of any schedule, so the same script can be reused across many jobs. Every time a script is uploaded it becomes a new version, and the content is stored securely, it is never shown inline in the UI (always downloaded as a file).
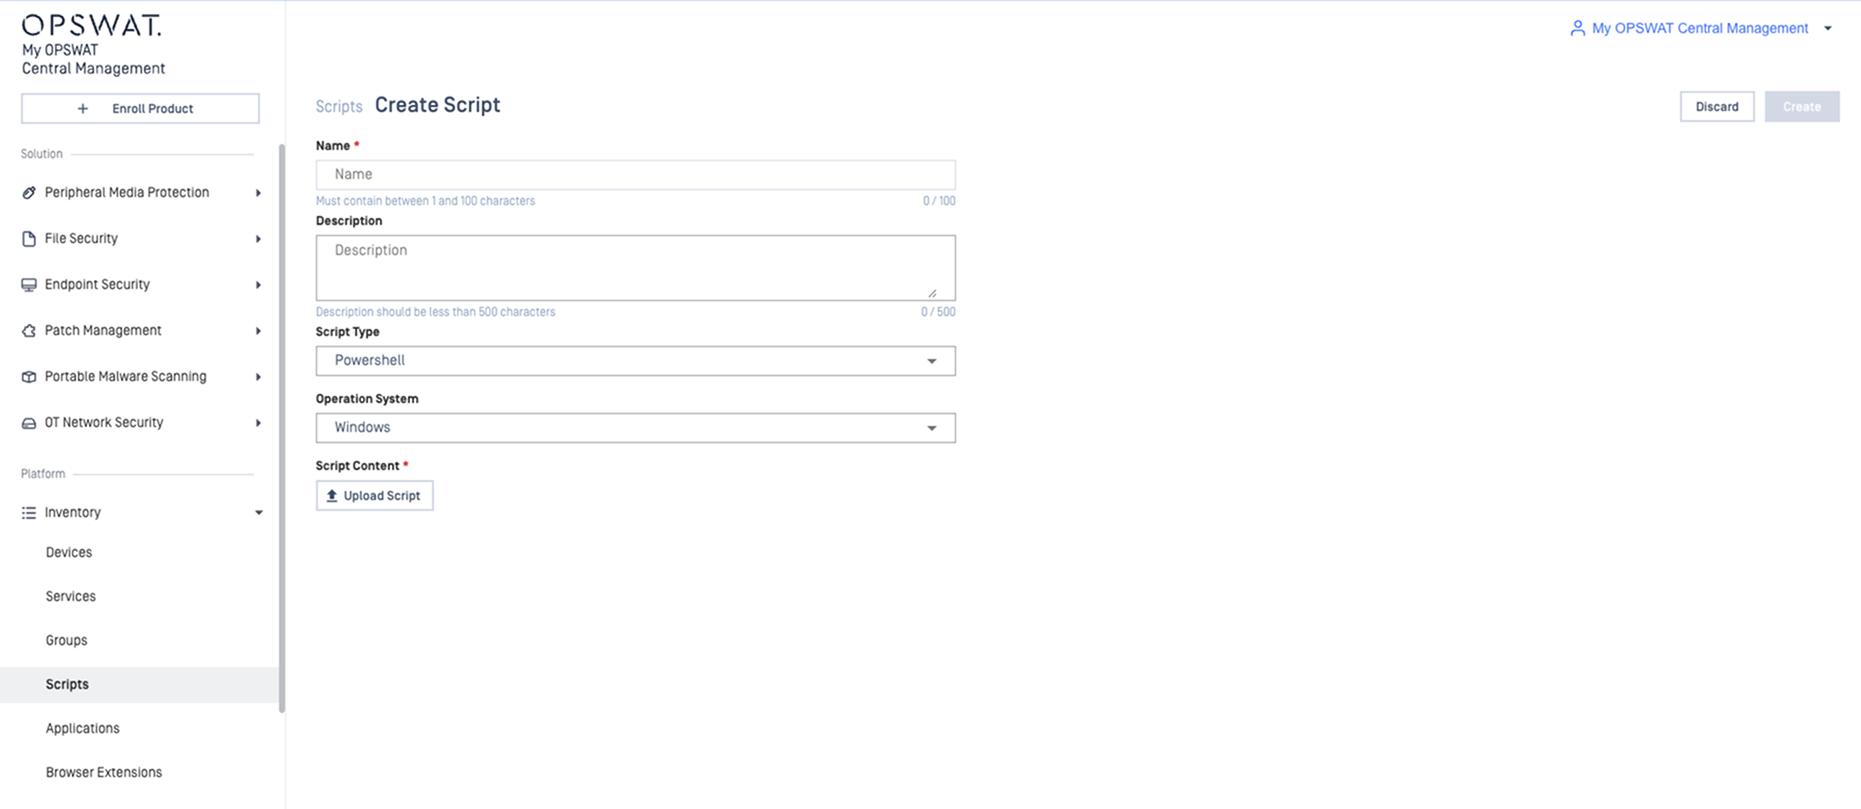
What the user provides:
Script file — the file to upload
Name — a descriptive name, e.g. "Daily Log Cleanup" (max 100 characters)
Description (optional) — extra notes (max 500 characters)
Script type —
PowerShell,cmd,bashOS — target platform:
WindowsorLinux
Script's Jobs
Open a script to see its jobs and the execution history for that script. Each row is one execution cycle: a single time the schedule ran against the selected instances.
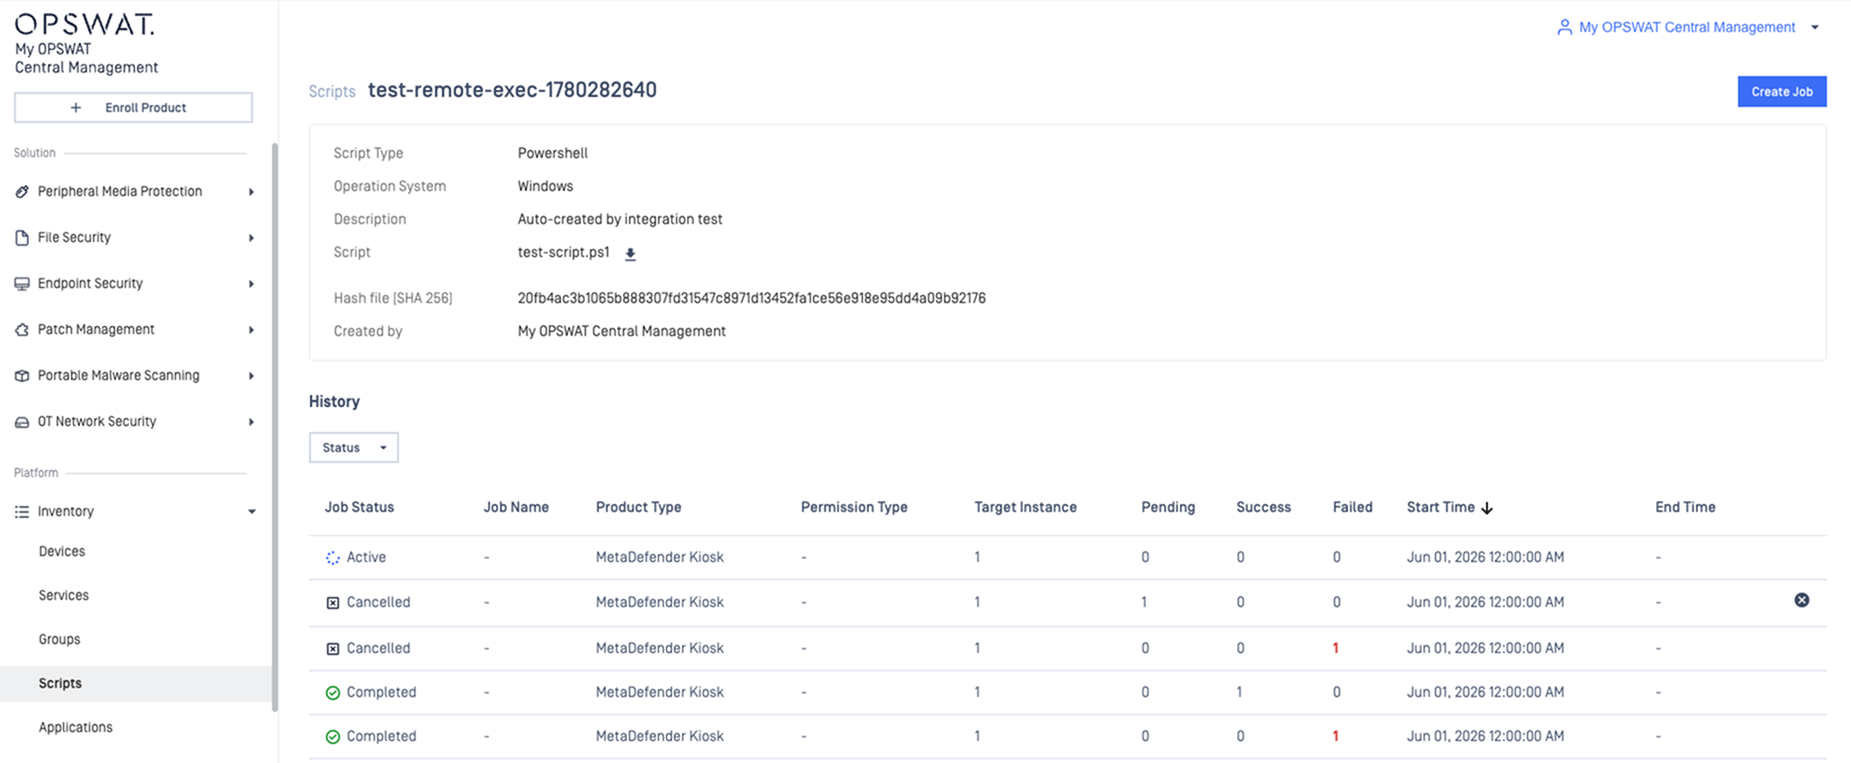
Column | What it shows |
|---|---|
Job Name | Which schedule of this script produced the job |
Status |
|
Total Instances | How many instances this job targeted |
Succeeded | Instances that finished successfully |
Failed | Instances that errored or timed out |
Pending | Instances waiting to execute |
Start Time | When this job was triggered |
End Time | When the last instance finished |
Filter the jobs by status.
Schedule a new job for this script (see Scheduling a Job ).
Cancel an active job directly from this view.
Scheduling a Job
A job is created from a script's page, so the script is already chosen. The user just defines where and when it should run.
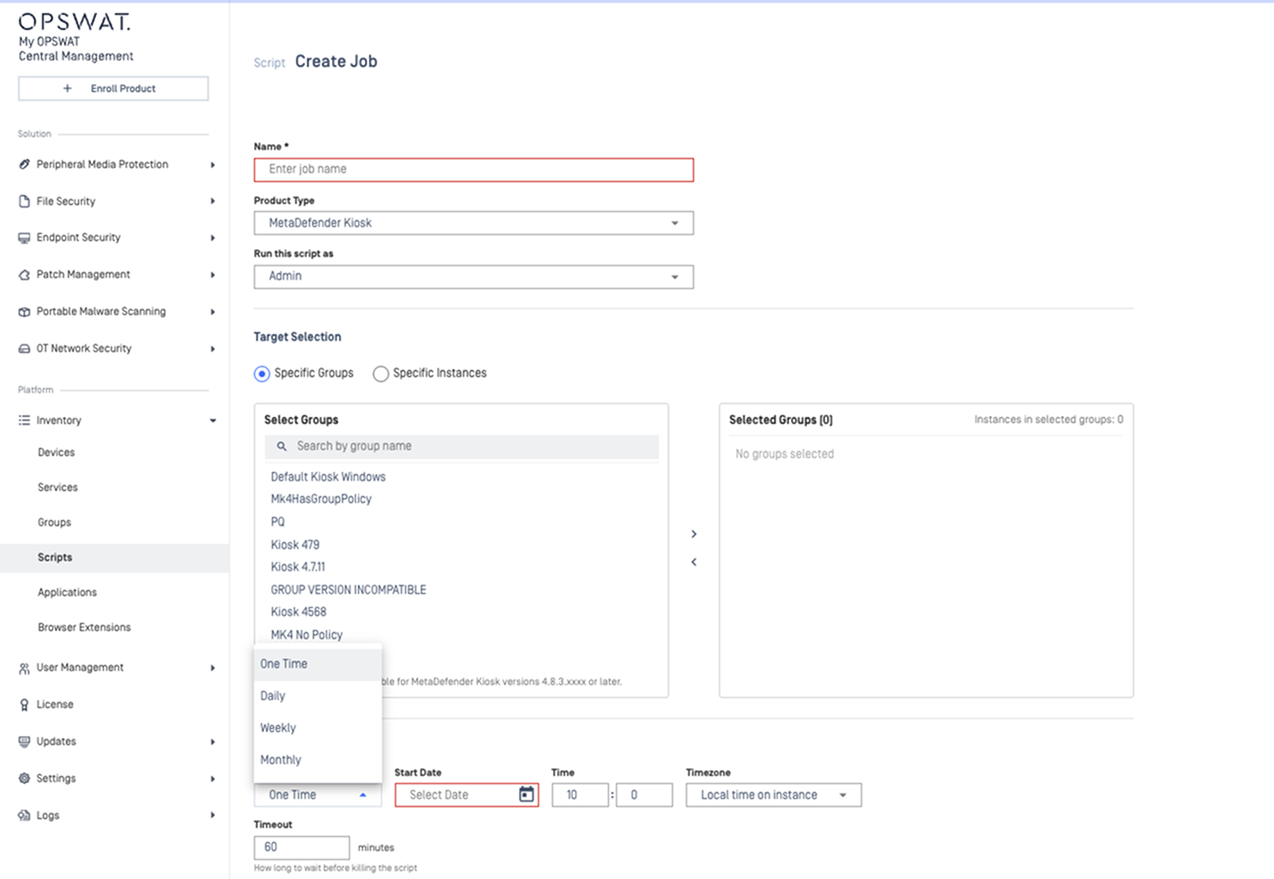
What the user fills in:
Product type: which product to target (e.g. MetaDefender Kiosk). One job targets a single product type, you can't mix products in one job.
Instances: one or more instances of that product type (up to 500).
Schedule type:
Once,Daily,Weekly, orMonthly, plus the time window.Start date: when the schedule becomes active.
End date: when it stops (required for recurring types).
Timezone: how the time window is interpreted (e.g.
+07:00,UTC).Timeout: how long to allow each run before it's automatically stopped.
Note The schedule goes live immediately. As soon as it's created, My OPSWAT Central Management starts producing jobs according to the schedule, no extra "activate" step.
How recurring jobs work
The schedule type controls how often a job is created:
Type | Behavior |
|---|---|
Once | Runs a single time, then auto-completes — 1 job. |
Daily | One new job per day within the time window. |
Weekly | One new job on each selected weekday. |
Monthly | One new job on each selected day of the month. |
Each job uses the latest script version at trigger time; past jobs keep theirs.
Times follow the schedule's timezone.
Overlap: if an instance is still running when the next cycle fires, it's marked Skipped (not re-run, and the running job is never force-killed).
Instances Within a Job
Open any job to see its instance executions, one row per targeted instance. This is where users monitor progress and read results.
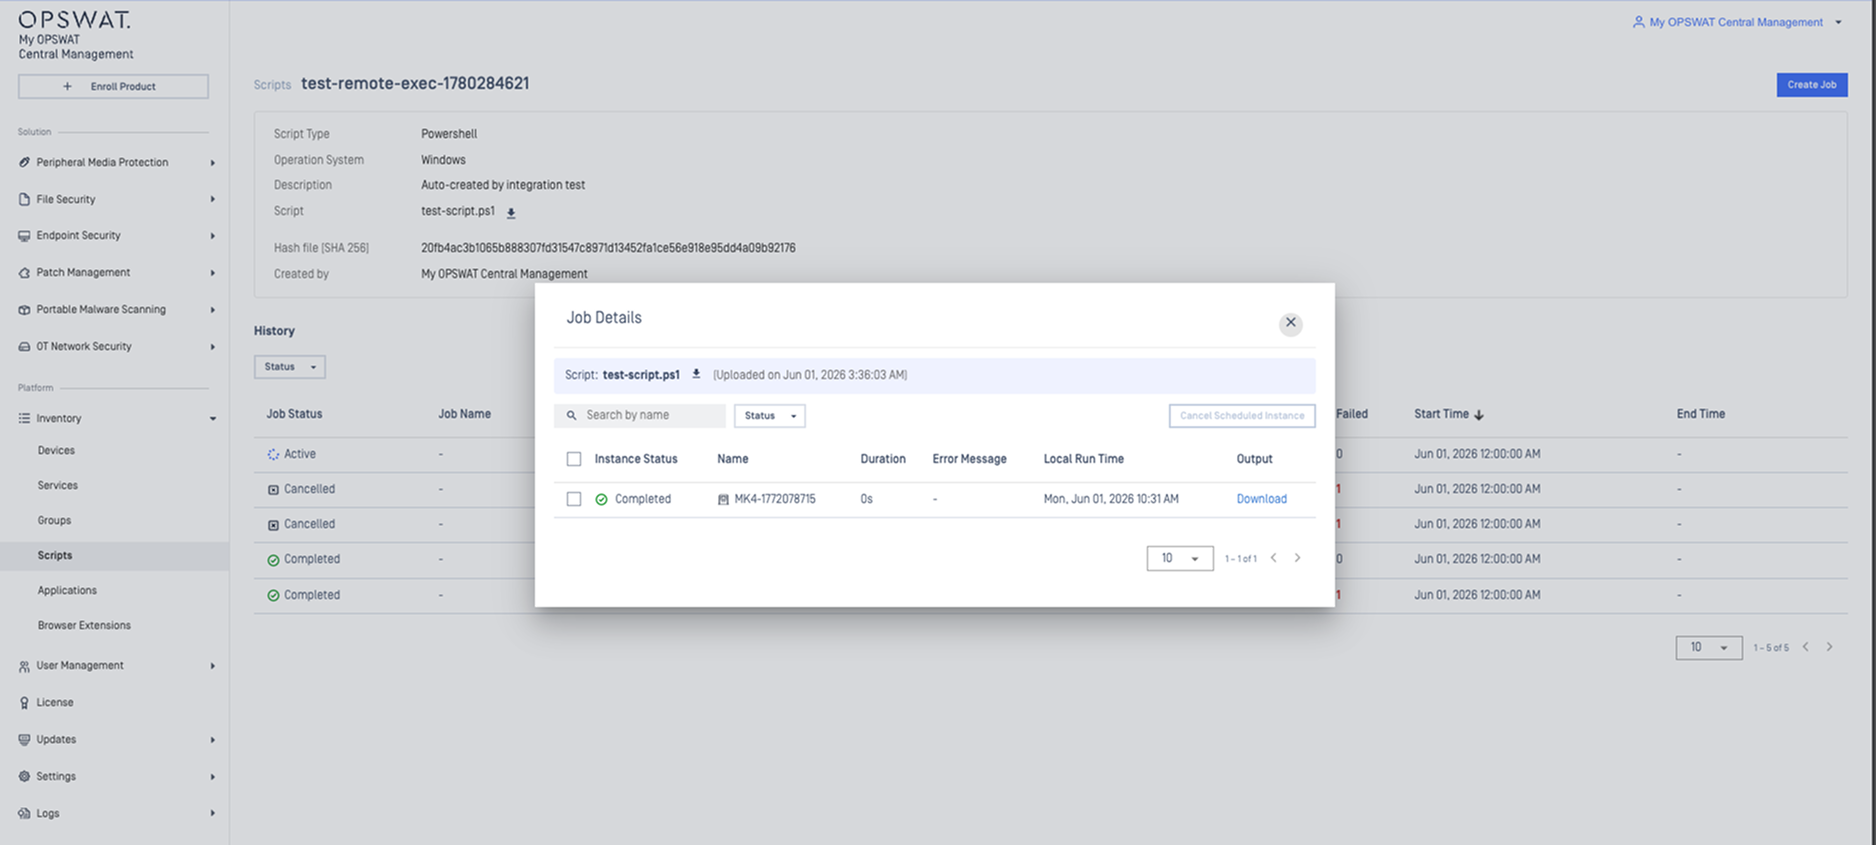
Each instance row shows:
Status: see the table below
Instance name
Exit code: the script's return code (
0= success)Output: the script's logs (stdout/stderr), available as a downloadable file
Timing: delivered, started, and completed times
Instance Status Reference
Pending: Queued, waiting for the instance to pick it up
Delivered: The instance received the command
Running: The script is actively executing
Succeeded: Finished successfully (exit code 0)
Failed: Finished with an error (non-zero exit code)
Timeout: Ran longer than the configured timeout — auto-stopped
Cancelled: Stopped successfully by user action
Cancel Failed: Couldn't be stopped (e.g. a stuck process)
Skipped: Was still busy from the previous cycle and skipped this time
Viewing Output
Clicking an instance opens its script output. Output arrives slightly after completion. The instance uploads its log after reporting that it finished, so the UI shows:
Uploading: finished, log on its way
Download: log is ready
Output unavailable: upload didn't complete
Cancelling
Cancel a Job
A user can cancel an active job. My OPSWAT Central Management sends a stop signal to every running/pending instance in that job. Users can also cancel specific instances rather than the whole job
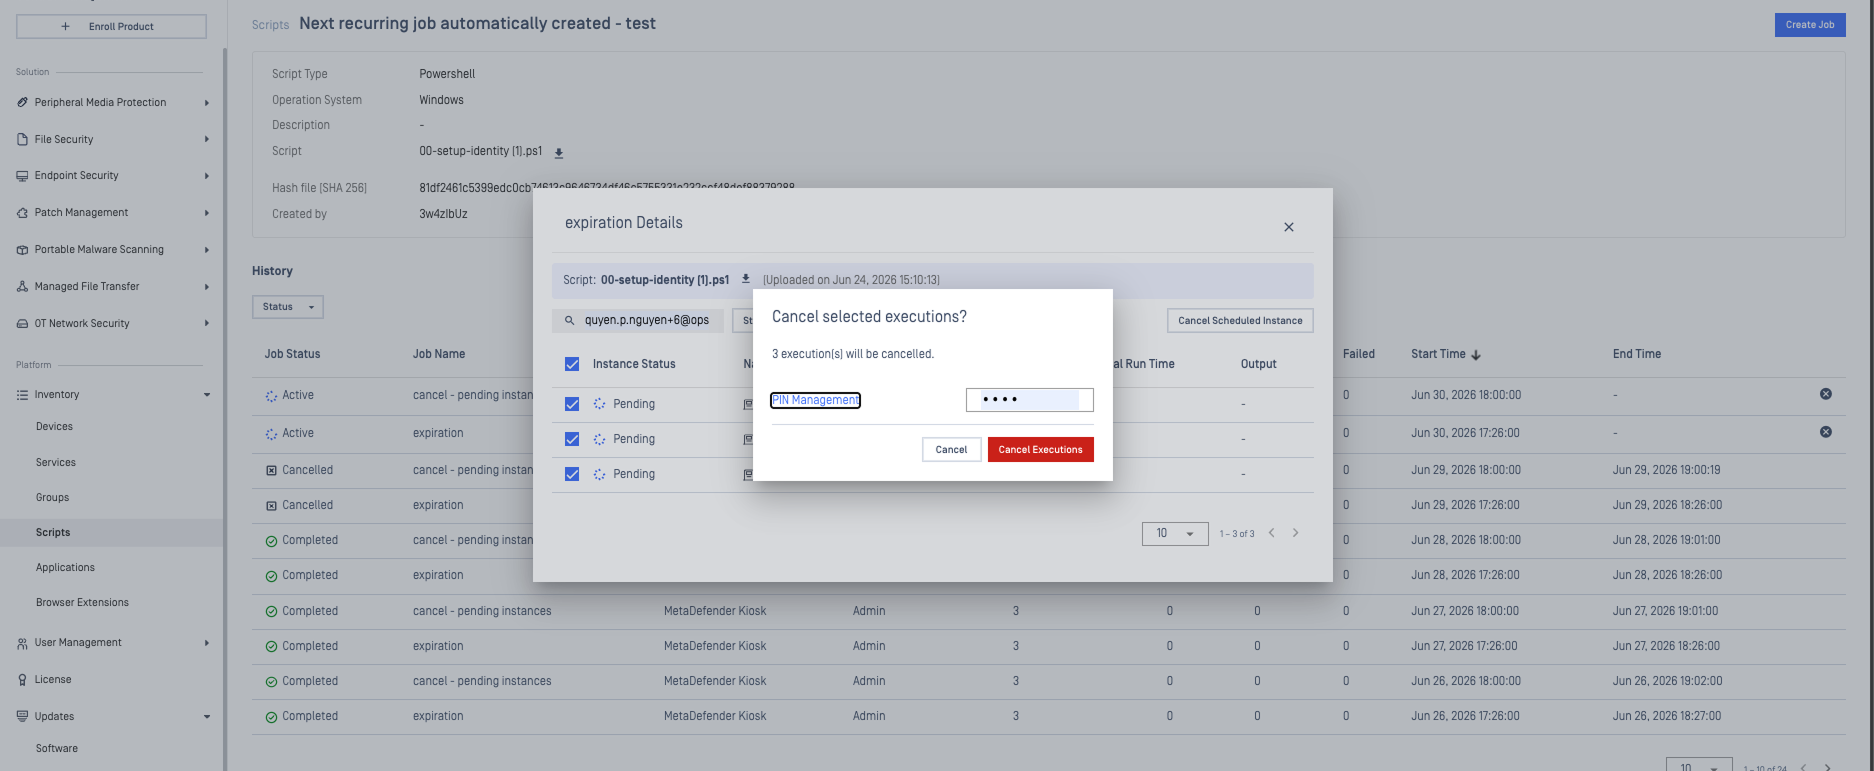
Cancel can fail and that's expected. If a script spawned child processes or is in a state that can't be stopped, the instance reports Cancel Failed. The UI shows this clearly so the operator knows which instances need attention.
Cancel a Schedule
Cancelling a schedule stops My OPSWAT Central Management from creating any future jobs. Instances already running in the current job continue to completion, they are not force-killed.
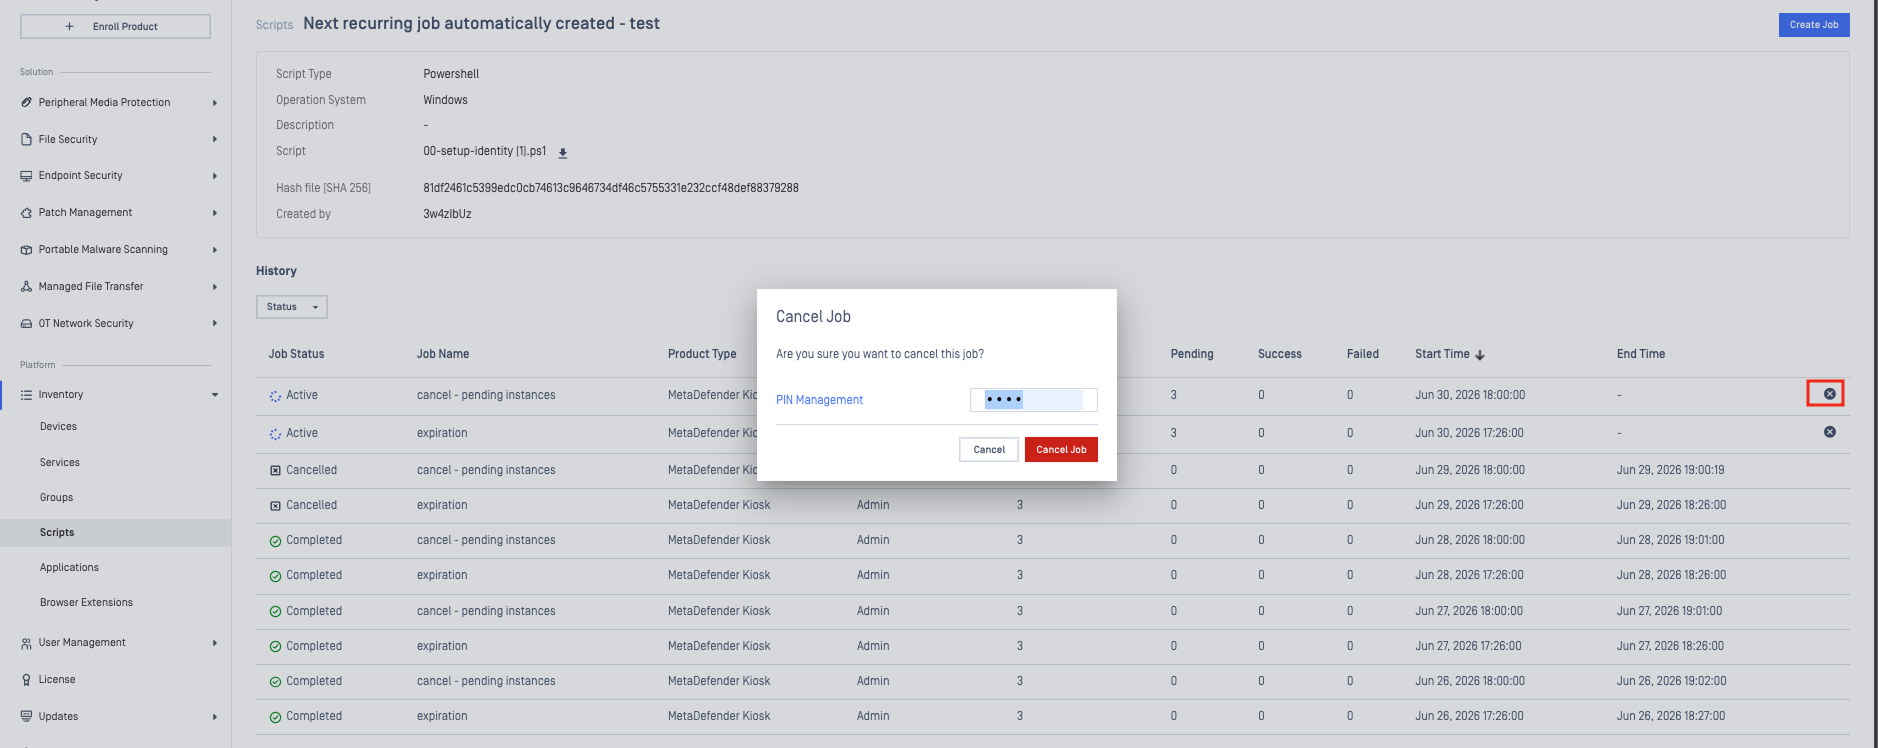
Schedules can't be edited or resumed once cancelled. To change a schedule, cancel it and create a new one. To re-run a script, create a new schedule.