
Quarantined Files in My OPSWAT Central Management gives you one list of every file your MetaDefender Core instances have quarantined, across your whole Core fleet. From that list, you can:
Retrieve a quarantined file as a password-protected ZIP archive, without signing in to the Core instance or opening a network path to it.
Protect a file so automatic cleanup doesn't remove it.
Delete files you no longer need.
Note This feature requires MetaDefender Core version 5.23 or later.
On This Page
Prerequisites
Requirements | Details |
|---|---|
Supported Products | Supported for MetaDefender Core instances only. Other products (ICAP, MFT, Storage Security, Email Gateway Security, Sandbox) are not covered. |
Supported Deployment |
|
User Role Permission |
Note A dedicated Quarantined Files permission is planned for a later release. |
Connected Core Instance | The Core instance must be connected to My OPSWAT Central Management to retrieve, protect, unprotect, or delete a file. |
Archive Password for Retrieval | A retrieved file is always delivered inside a ZIP archive locked with a password you choose when you retrieve it. The password must:
Accented letters and other non-ASCII characters aren't accepted, because they can make the archive fail to open in Windows Explorer. |
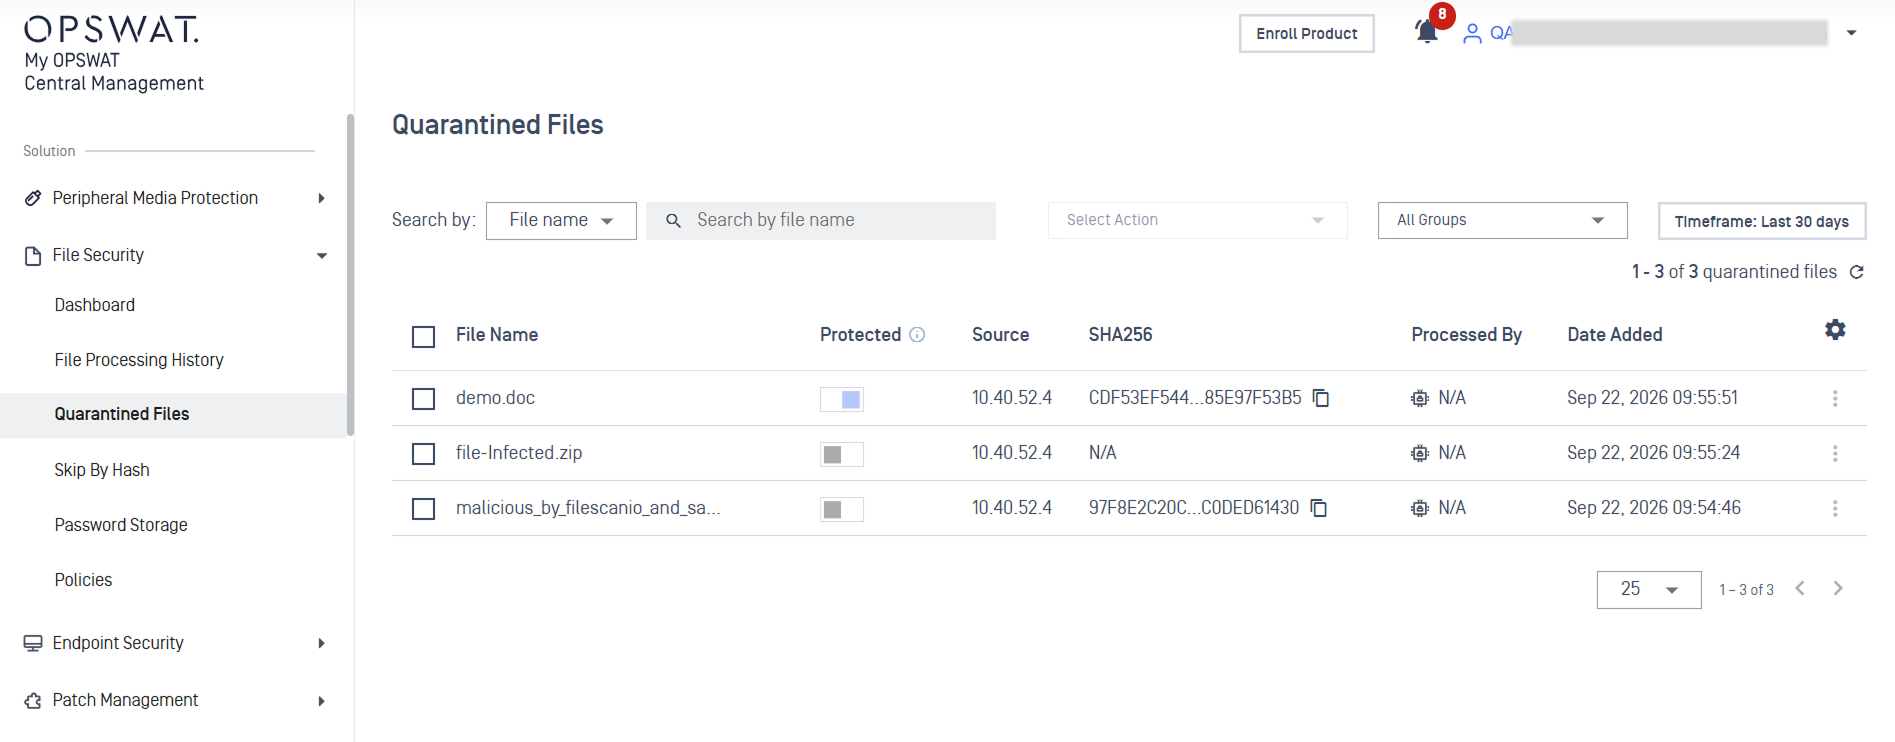
Open Quarantined Files Page
In the left navigation, select File Security > Quarantined Files
Use Search by function or scroll the list to find the files. You can narrow the list using Filter or Timeframe.
Tip Can't find a file you expected? Check the timeframe first. For other common reasons, see Troubleshooting.
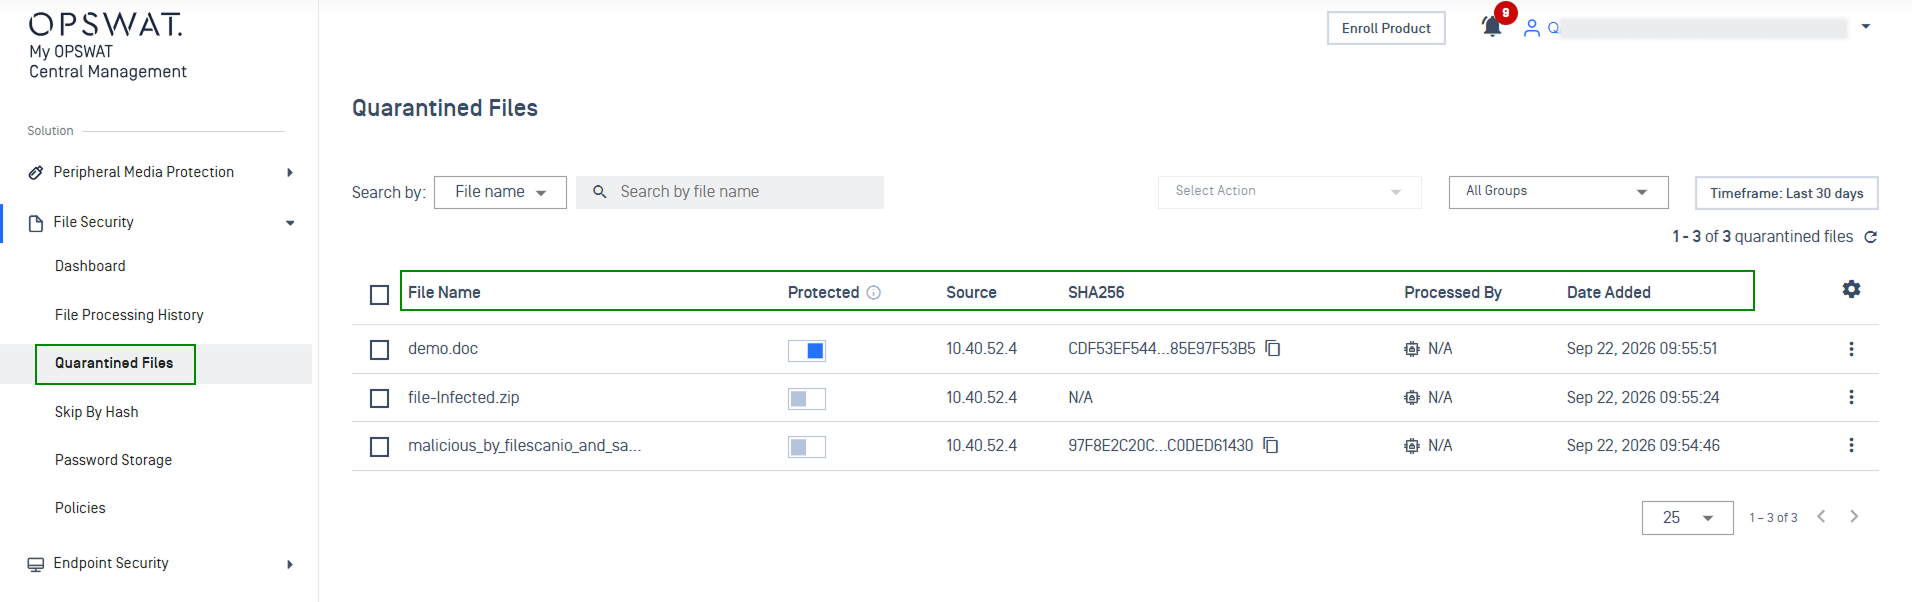
Columns | Details |
|---|---|
File Name | The name of the quarantined file. Always shown. |
Protected | Whether the file is protected from automatic cleanup. You can switch it on or off here. |
Source | The IP address of the client that submitted the file for scanning. |
SHA256 | The file's hash, shortened. Hover to see the full value, or select the copy icon. |
Processed By | The Core instance that holds the file, by its current name. Always shown. |
Date Added | When the file was first quarantined on that instance. Select the column header to switch between newest and oldest first. |
Please Note N/A means no value. For example, Source shows N/A when the Core instance didn't report it.
View Quarantined File's Details
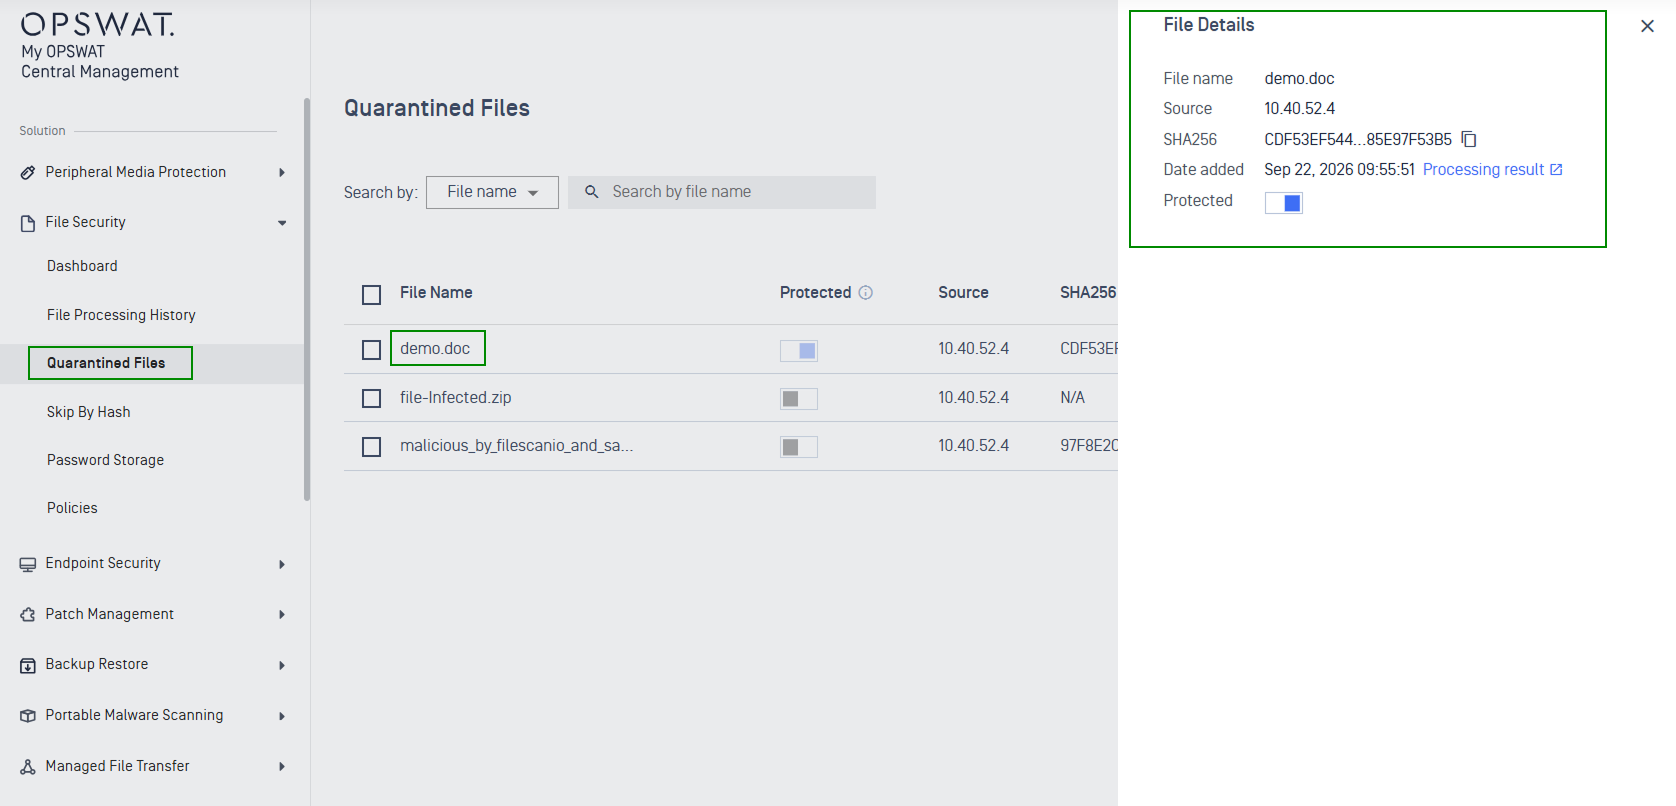
Select a row. The File Details panel opens on the right.
The panel shows: File name, Source, SHA256, Date added, and Processing result link (shown only when the original scan record is still available)
Retrieve a Quarantined File
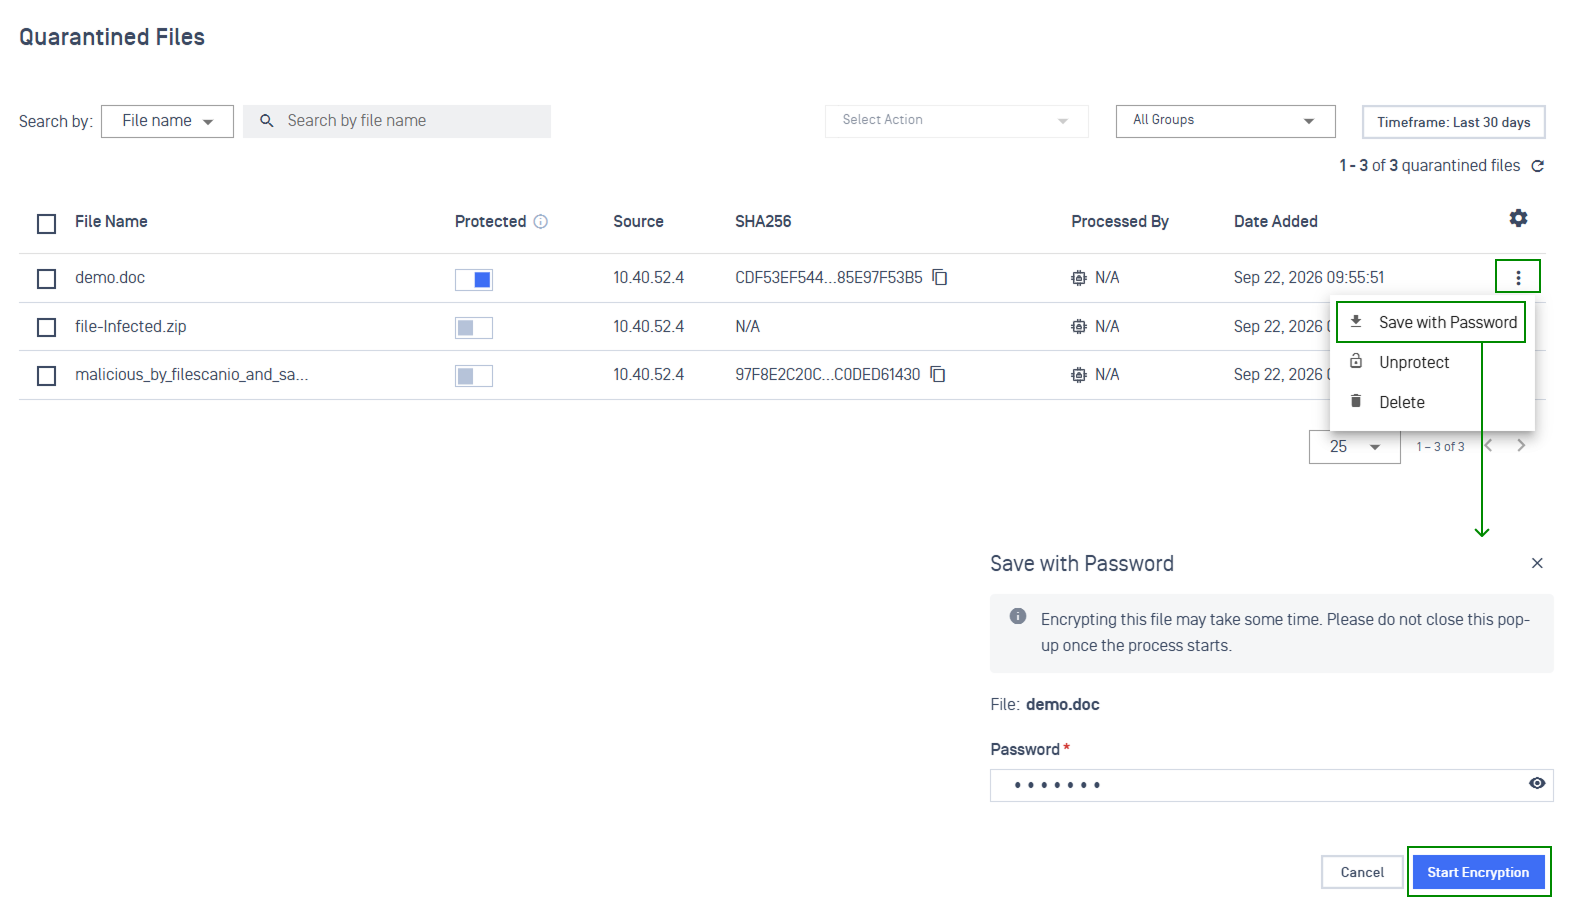
From the left menu, navigate to File Security > Quarantined Files
In the file's row, select ⋮ > Save with Password
In Password, enter a password for the archive
Select Start Encryption
Choose a folder to save the archive
Wait for the transfer to finish. Don't reload or close the browser tab until it finishes.
When the dialog shows Saved, select Close.
Verify success, open the archive with any ZIP tool, including Windows Explorer, using the password you set.
Warning The retrieved file is still potentially malicious. Open the archive only in an environment set up for handling malware.
Protect a Quarantined File
Protecting a file keeps it from being removed by automatic cleanup. The file is also marked as protected on the Core instance that holds it.
From the left menu, navigate to File Security > Quarantined Files
You can protect or unprotect a file in any of these ways:
Navigation | Details |
|---|---|
Switch Protected toggle on or off, then confirm | 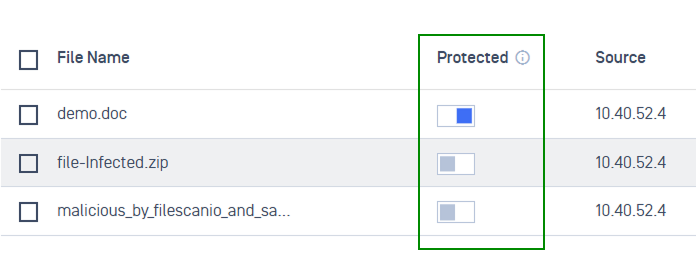 |
Select ⋮, choose Protect or Unprotect, then confirm. | 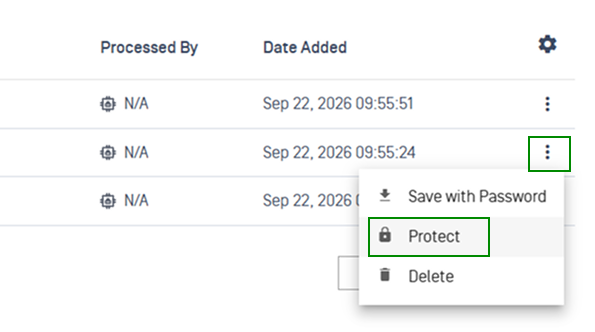 |
From File Details: switch Protected, then select Save | 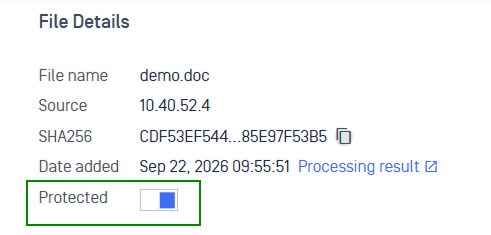 |
Delete a Quarantined File
Warning Deleting removes the file from the Core instance's quarantine and from My OPSWAT Central Management. It can't be undone.
From the left menu, navigate to File Security > Quarantined Files
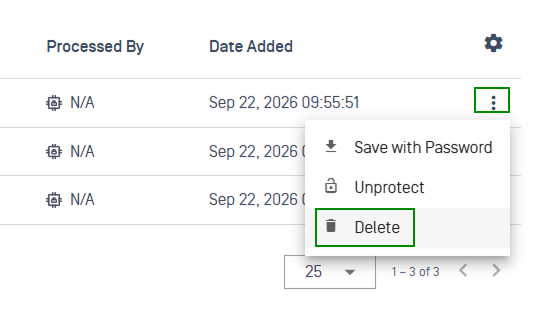
In the file's row, select ⋮ > Delete.
The confirmation names the file. Check that it's the one you mean, then confirm.
Act on Multiple Files At Once
Select the checkbox next to each file you want. To select the whole page, select the header checkbox
In Select Action, choose Protect, Unprotect, or Delete
Confirm
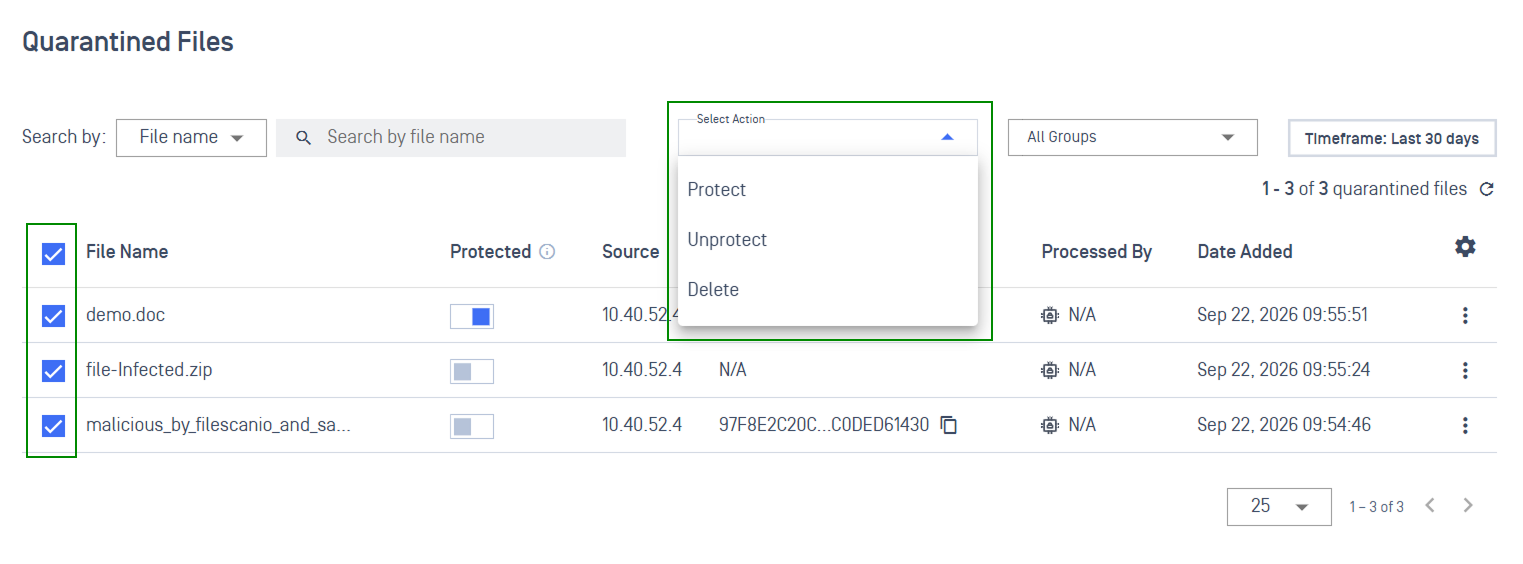
What to expect:
You can act on up to 50 files at a time.
Each file is handled on its own.
If some succeed and others fail, a summary shows how many succeeded and lists each file that failed, with the reason.
Retrieval isn't available for several files at once. Retrieve files one at a time.
Event Logs
Every retrieval, protect, unprotect, and delete is recorded under Logs > Admin Events, with who did it, when, and the Core instance involved.
A forced change is recorded as forced. Use these records to review activity for compliance or troubleshooting.
How Changes Reach the Core Instance
Protect, unprotect, and delete are carried out on the Core instance first. My OPSWAT Central Management saves the change only after the instance confirms it. Here's what happens in each case:
What the Core instance does | What happens | What you can do |
|---|---|---|
Confirms the change | The change is made on both the Core instance and My OPSWAT Central Management | Nothing further |
Refuses the change | Nothing changes in My OPSWAT Central Management | Select Refresh to see the file's current state |
Refuses a protect or unprotect because it no longer holds the file | Nothing changes yet | Force the change, so an entry whose file is already gone from the instance can still be unprotected and cleaned up. (A delete in this situation succeeds on its own) |
Doesn't answer, not connected, timed out, unreachable, or running a version that doesn't support the action | It's not known whether the change took effect. A dialog lists the affected files with the reason for each. Its Enforce column shows which files can be forced | Select Force Protect, Force Unprotect, or Force Delete, or select OK to leave the files unchanged |
Note A forced change updates My OPSWAT Central Management only. It doesn't contact the Core instance, so the two may disagree afterward. For example, a force-deleted file may still exist on the instance.
How Long Quarantined Files Are Kept
In My OPSWAT Central Management
The quarantine list is kept separately from scan records, so a file stays listed after its scan record has been cleaned up.
The list is cleaned up on a schedule that follows your account's data retention setting. See Data Storage for more details.
Protected files are never removed by this cleanup.
This cleanup removes only the entry in My OPSWAT Central Management. It never deletes the file on the Core instance.
On the Core instance
The Core instance applies its own quarantine retention, which My OPSWAT Central Management doesn't change.
As a result, a listed file can occasionally be gone from the instance. Retrieving it then reports that the file is no longer stored. You can delete the out-of-date entry.
Security
Your archive password stays private. Central Management never generates, stores, or logs the archive password. The password is encrypted specifically for the target Core instance the moment you submit it, so only that instance can read it.
Files never arrive unprotected. A retrieved file always arrives inside a password-protected archive, never as a bare file. It's still potentially malicious: open it only in an environment meant for handling malware.
Access follows your inventory groups. In this release, your role's permissions don't restrict Quarantined Files; only the inventory groups the role permits do. Files on instances outside your groups aren't shown and can't be reached through a link.
Troubleshooting
Issues | Resolution |
|---|---|
A file I expect isn't listed | A missing file is usually expected. Check these in order:
|
Save with Password is greyed out | Read the reason shown under the action. For example, the Core instance may not have finished quarantining the file. Actions are also unavailable while that file is transferring. |
A retrieval request is refused or has to wait | The Core instance may have reached its limit of 2 simultaneous retrievals or about 20 requests per minute. Wait, then try again. |
The transfer stopped before finishing | The browser tab was probably closed or reloaded. There's no resume; start the retrieval again from the beginning. |
I forgot the archive password | The password can't be recovered. Retrieve the file again with a new password. |
Retrieval says the file is no longer stored | The Core instance's own retention removed the file. Delete the out-of-date entry. |
A protect, unprotect, or delete didn't take effect | The Core instance refused or didn't answer. See How Changes Reach the Core Instance |