This article applies to MFT version 3.8.0 to 3.11.0+ releases deployed on Windows.
Before proceeding with the database migration, please ensure that you back up the system or the VM where MD MFT is running.
For detailed backup instructions, refer to the official documentation: MD MFT Backup Guide
Prepare tools
SQL Server Management Studio
- Purpose: Required for easier execution of SQL operations.
- Link: Install SQL Server Management Studio
- Where to install: Any machine with access to both source and destination SQL Server
Limitations
· SQL Authentication method must be unchanged. E.g. If using SQL authentication it must remain this way.
· Avoid special characters in the SQL login password if possible. It could be changed later as described in
· Destination SQL Server version and edition should be equal or higher than source.
1. Uninstall and Export Config
Uninstalling 3.11.0+:
- Uninstall MFT on the old server.
- When prompted, keep the existing databases.
- Export configuration files to a safe location outside the install directory (e.g., include secret.bin if present).
Uninstalling 3.8.0+ < 3.11.0
Manually copy config files for backup purposes
Encryption secret
- secret.bin: InstallDir\Services\secret.bin (may not exist if the first version installed was <3.3.1, and the encryption key never rotated)
Windows Service config files
- Next service config: InstallDir\Services\appsettings.json
- Caching service config: InstallDir\Services\cache.appsettings.json (3.9.2+)
- Node manager service config: InstallDir\Services\node-manager.appsettings.json (3.10.2+)
- Rest service config: InstallDir\Services\opswat.vault.rest.service.exe.config
- Processor service config: InstallDir\Services\opswat.vault.processor.service.exe.config
- Helper service config: InstallDir\Services\opswat.vault.helper.service.exe.config
- Caching service config: InstallDir\Services\opswat.vault.caching.service.
Nginx configs
- InstallDir\WebServer\nginx.conf
- InstallDir\WebServer\conf\dynamic.conf
Localization files
- InstallDir\WebClient\assets\i18n*.json
Config metadata
- InstallDir\Services\config_meta_data.json
Uninstall selecting “No” for Complete uninstallation: Uninstalling MetaDefender Managed File Transfer - MetaDefender Managed File Transfer
2. Backup Databases
- Connect to the SQL Server instance using the SQL Server Management Studio (SSMS):
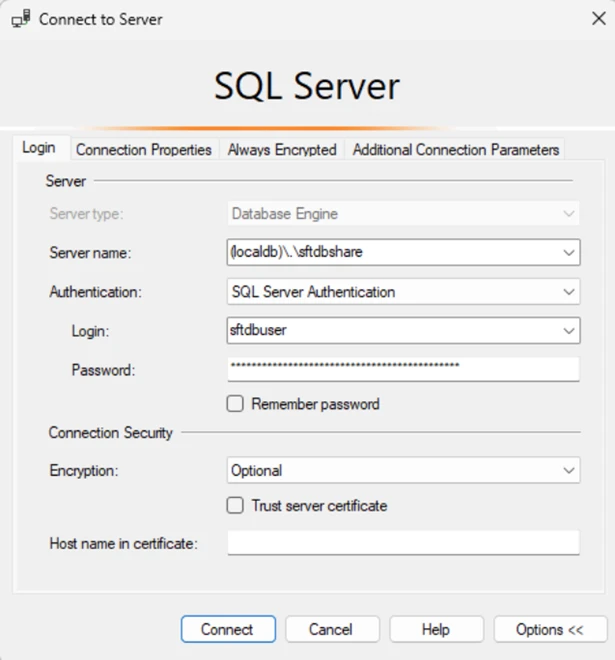
- Stop all the MD MFT services.
- Backup both sft_conn and sft_data databases one by one
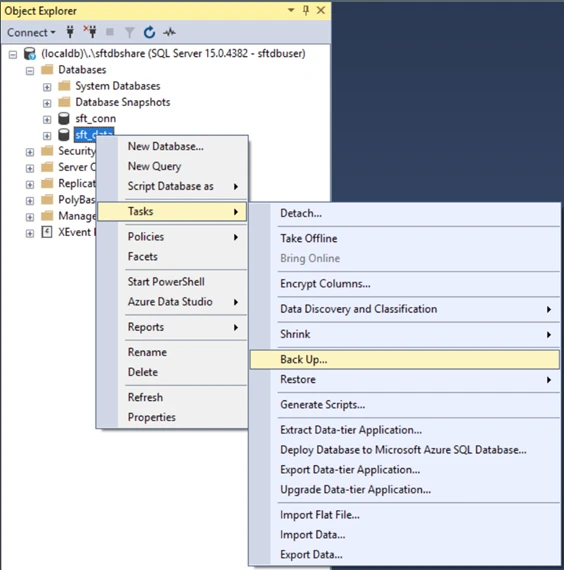
Right-click the database name and navigate to Tasks > Back Up…
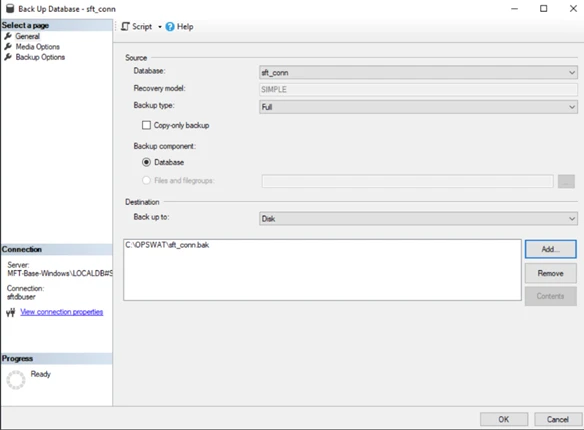
Choose the destination directory and filename for the backup. Remove any other file from the list. Click OK to complete the process.
3. Restore on New Environment
It's recommended to avoid special characters in the password during migration, as some characters may cause compatibility issues.
- Copy both the
sft_connandsft_databackup files to the machine or VM where the remote MS SQL server is running. - Using the SQL Server Management Studio (SSMS),restore both databases from the backup files one by one:
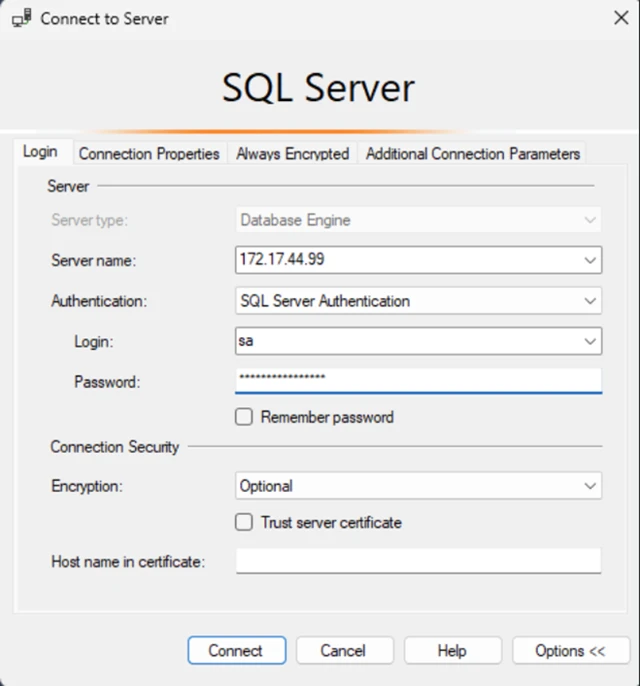
Connect to the remote SQL Server instance
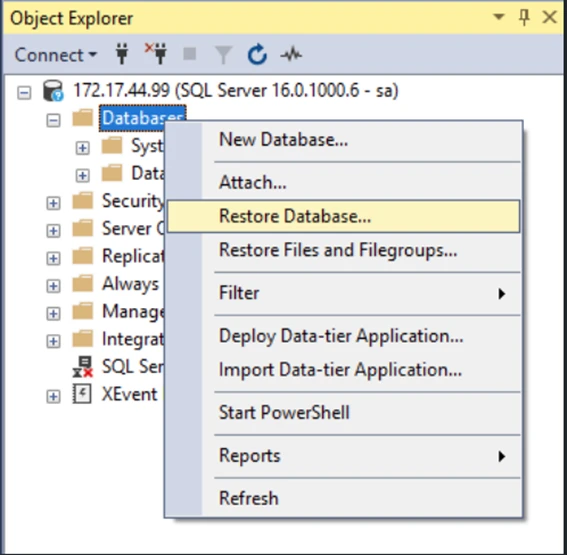
Right-click Databases and select Restore Database…
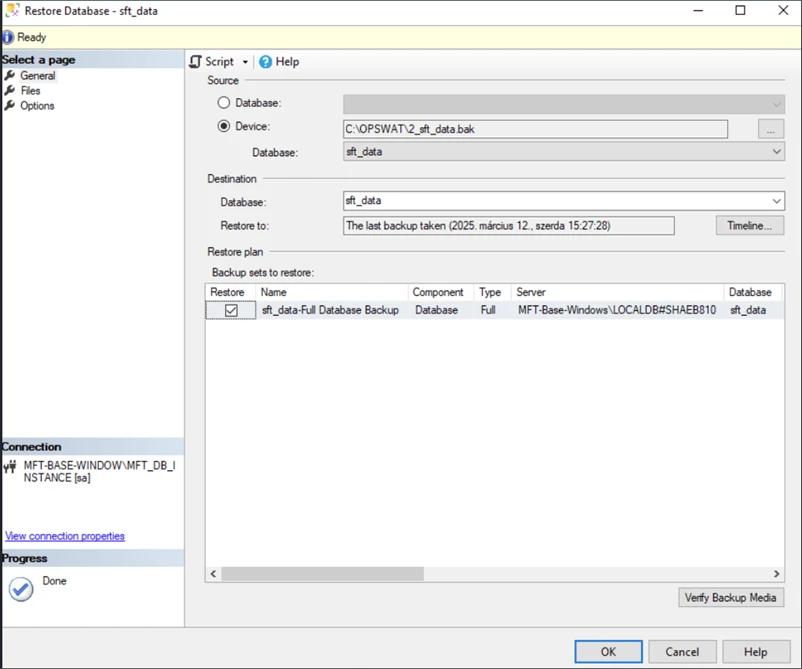
Choose Device, then locate and select the backup file.
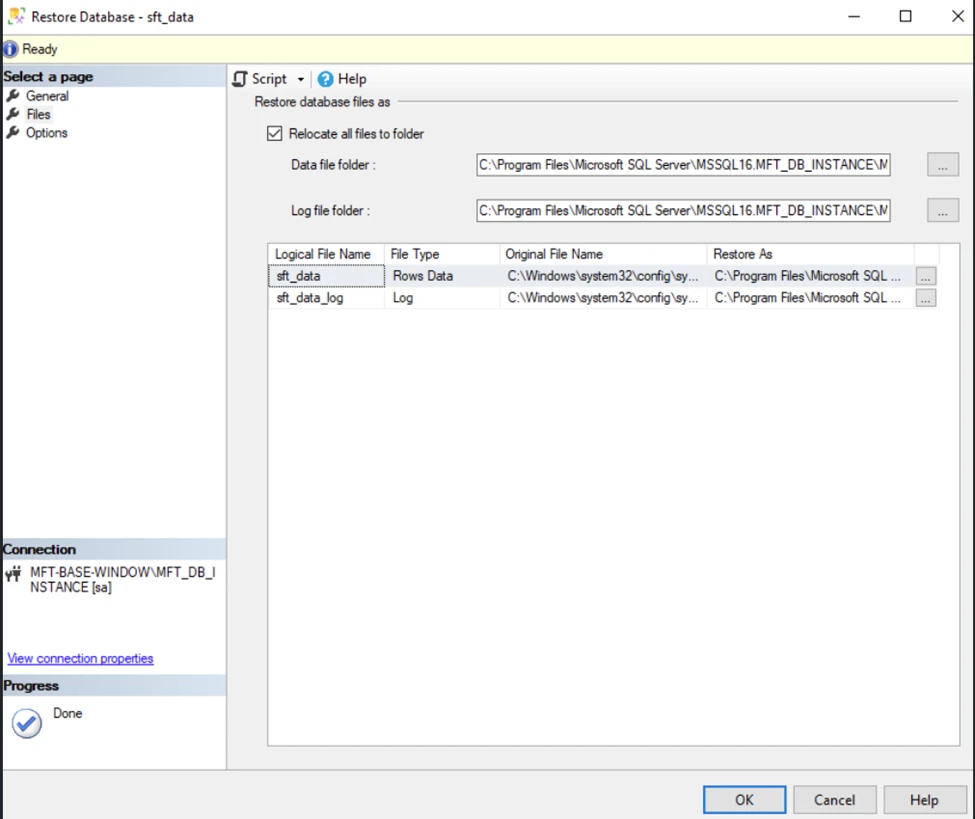
Check Relocate all files to folder. Click on OK button
In such a case where the database user who restored the database is not the same one, additional steps needed:
- MFT database user should already exist in database instance
- After the restore, this user should be the owner for both
sft_connandsft_datadatabases - Complete the mapping between the databases and the database user
4. Set Database Owner
- Assign the SQL login that MFT will use as the database owner (dbo) for both databases.
5. Install MFT on New Server
- Choose Existing database during setup (all MFT database versions supported that were last updated by a currently supported MFT version)
- Select SQL Server authentication.
- Provide the new SQL Server address and credentials.
6. Configure Encryption
- If available, provide secret.bin from the exported files during uninstallation to preserve encryption keys.
- The installer will verify if the provided secret.bin is correct or required at all
7. Accept Connection String Change
If the installer fail unexpectedly after the change. The change will not be rolled back in the database. Make sure to have a database backup before accepting this fix.
Suggested follow-up
For security reasons, it is strongly recommended to update database credentials and encryption keys after migration. This ensures that any sensitive information accessed during the process becomes invalid.
- Update Database Credentials: If you need to update the database username and password, use the SftDatabaseConfigurationTool.exe file. Refer to the Database Configuration Tool documentation for detailed instructions.
- Change the Encryption Key: To generate a new encryption key, navigate to:
- Settings → Security → Encryption* and create a new key. For more details, visit: Encryption
If Further Assistance is required, please proceed to log a support case or chatting with our support engineer.