This article is applied to MetaDefender MFT releases deployed in a Windows environment using a full SQL database.
Description
There are situations in which the drive where the SQL database is installed may be full and there is a need to move the database files to a different partition.
Prerequisites
For this activity, you will require the SQL Server Management Studio installed on the MFT server or the SQL database server.
Configuration
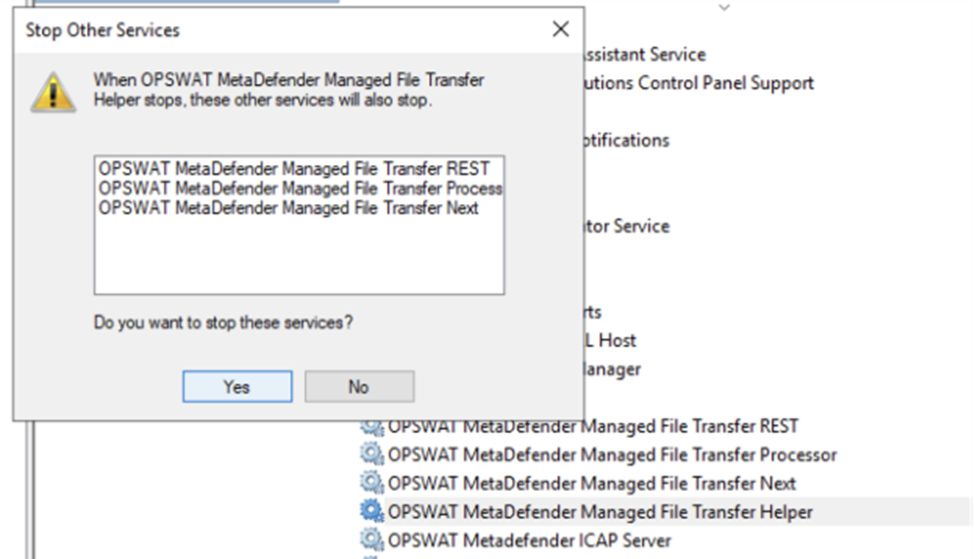
First step is to stop the MFT services
To do so please go to the services.msc, locate the OPSWAT MetaDefender Managed File Transfer Helper and stop it. This will trigger the stop of the other MFT services as shown below.
Please confirm that all the MFT services are stopped.

The next step is to Open the SSMS application and connect to the SQL database
First task is to backup the database.
In Object Explorer, expand Databases.
Right click the sft_conn -> tasks -> Backup -> Select back-up type as full and select the path where to save it.
Do the same steps to the sft_data
Detach the database
In Object Explorer, expand Databases.
Right-click sft_conn → Tasks → Detach…
In the Detach dialog: Tick Drop Connections (to force off any users). Click OK.
Apply the same steps to sft_data
Move the files in Windows Explorer
Open File Explorer as an administrator.
Navigate to the folder on C: where your .mdf and .ldf live (e.g. C:\Program Files\Microsoft SQLServer\MSSQL15.MSSQLSERVER\MSSQL\DATA).
Cut (or drag) sft_conn, sft_data.mdf, sft_conn_log.ldf and sft_data_log.ldf to your new location (e.g. E:\SQLData and E:\SQLLogs).
Ensure the SQL Server service account has Full Control on those folders.
Attach the database from the new location
In SSMS Object Explorer, right-click Databases → Attach…
In the Attach Databases dialog, click Add… and browse to E:\SQLData\sft_conn.mdf, select it, andclick OK.
Apply the same steps for sft_data.
Under Database details, if the log file path still points to C:, select the log row, click Remove, then
click Add… and browse to the moved .ldf on E:.
Click OK to finish attaching.
You can verify in SSMS by right-clicking sft_data and sft_conn→ Properties → Files tab to see the new paths.
The MFT services can be started.
Please go to the services.msc, locate the OPSWAT MetaDefender Managed File Transfer services.
Start them in the following order:
OPSWAT MetaDefender Managed File Transfer Helper
OPSWAT MetaDefender Managed File Transfer Next
OPSWAT MetaDefender Managed File Transfer Processor
OPSWAT MetaDefender Managed File Transfer Rest
Once all the services are started, the MFT application is ready to be used.
If Further Assistance is required, please proceed to log a support case or chatting with our support engineer.