Integrating Server Message Block (SMB) file shares with MetaDefender Managed File Transfer (MFT) enables automated and secure file transfers between systems. This integration supports various use cases, including file transfer automation and enhanced security through data sanitization.
To ensure smooth SMB integration, user initially needs to configure the Network and Sharing Center settings properly so that a shared file is available on a Windows network, follow these steps to configure the Network and Sharing Center settings properly on the destination machine
Destination machine:
Opening Network and Sharing Center
Press
Win + R, typecontrol, and press Enter.Click on Network and Sharing Center.
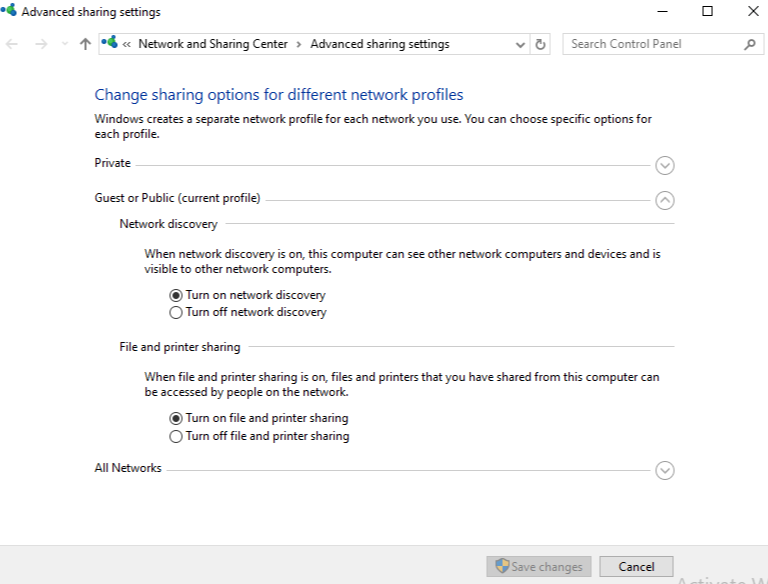
Enabling Network Discovery and File Sharing on Guest or Public
Click on Change advanced sharing settings (on the left panel).
Under "Guest or Public (current profile", ensure:
Turn on network discovery is enabled.
Turn on file and printer sharing is enabled.
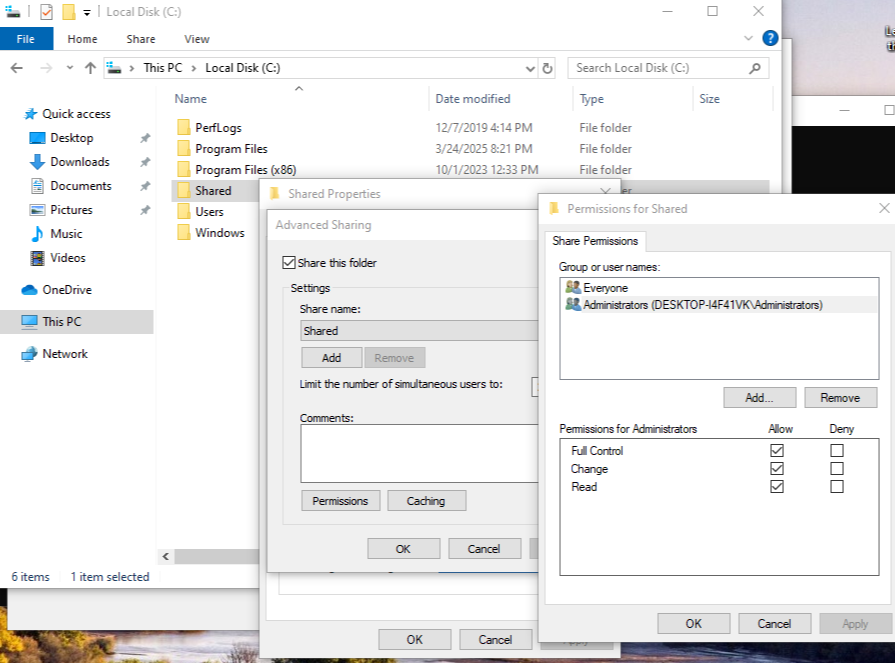
Shared Folder Permissions
Navigate to the folder you want to share.
Right-click the folder and choose Properties.
Go to the Sharing tab → Click Advanced Sharing.
Check Share this folder.
Click Permissions → Make sure that the user that you modify in MFT Jobs is assigned with all permissions (Read, Change, Full Control). For e.g: Administrators
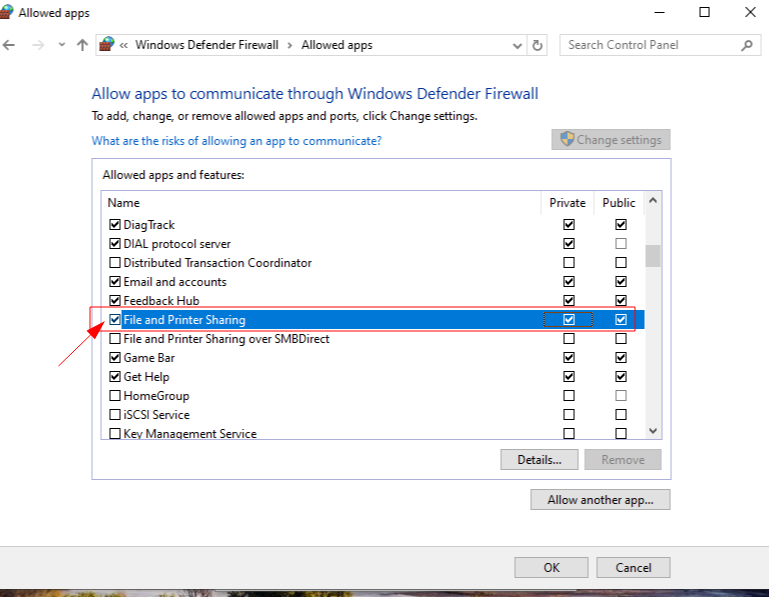
Firewall and Security Considerations
Ensure File and Printer Sharing is allowed in Windows Defender Firewall:
Go to Control Panel > Windows Defender Firewall > Allow an app or feature through Windows Defender Firewall.
Enable File and Printer Sharing for Private and Public networks.
MFT machine
Configuration Guide
For detailed instructions on setting up SMB integration with MetaDefender MFT, refer to the official OPSWAT documentation: SMB Integration Guide
By implementing this integration, organizations can enhance file transfer automation while ensuring robust security and compliance.
Note: Ensure that you input the correct name of shared folder on the destination machine in the field SMB Share Name, in this use case is Shared

After successfully tested the connection, navigate to Jobs tab to configure jobs to automatically push or pull files between SMB file shares and other systems, streamlining workflows and reducing manual intervention.
For detailed configuration:
Refer to the attached link: SMB Push Files
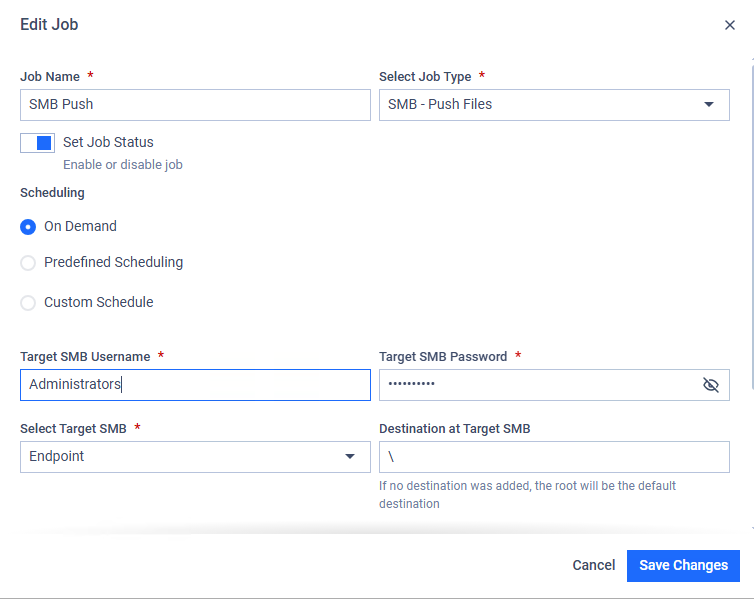
Note: Ensure these following fields are filled appropriately
Target SMB Username and password: The username and password are used to authenticate via the SMB protocol on the selected destination. e.g in this case: Administrators.
Destination at Target SMB: Provide paths to recursively collect and push files from MetaDefender Managed File Transfer. Any number of paths can be configured. If no path is defined, the root ('') will be the default source path.
- Expected results:
- Successful status:
- Files are copied to destination shared folder:
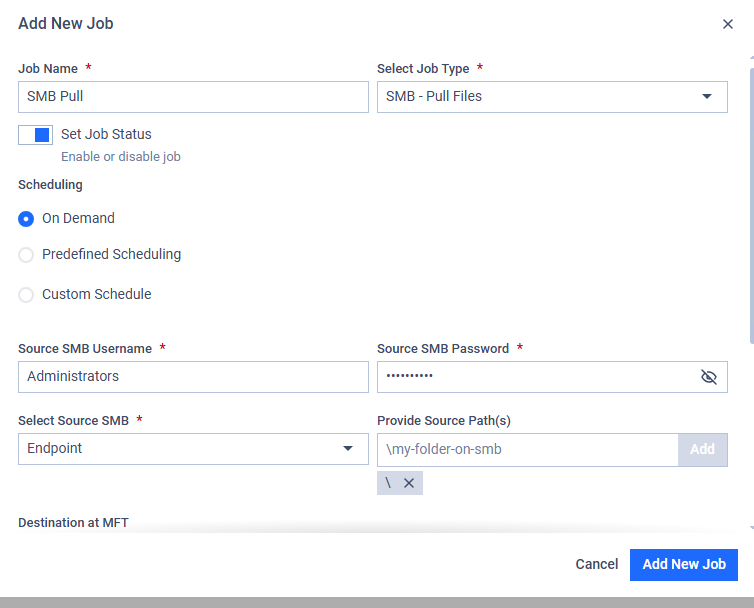
Refer to the attached link: SMB Pull Files
Note: Ensure these following fields are filled appropriately
Source SMB Username and password: the username and password are used to authenticate via SMB protocol on the selected machine, e.g in this case: Administrators
Provide Source Path(s): Provide paths to recursively collect and pull files from the selected host using SMB. Any number of paths can be configured, if no path was added, the root '' will be the default source path
- Expected results:
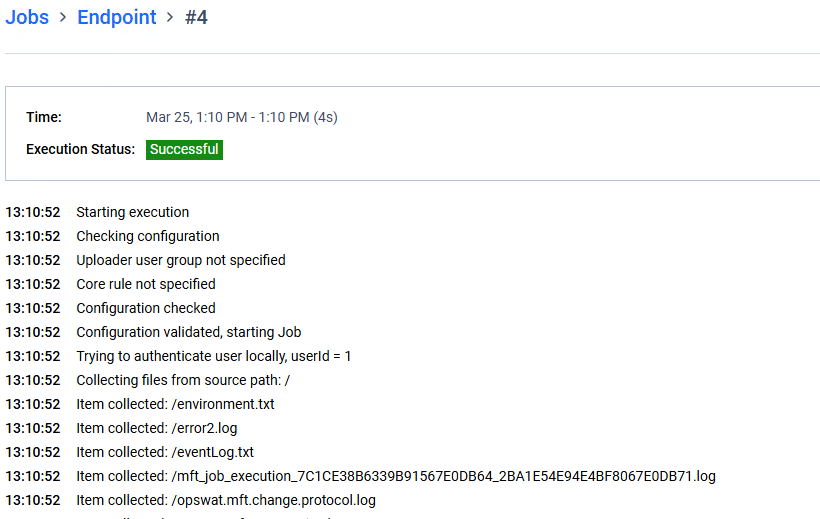
- Successful status:

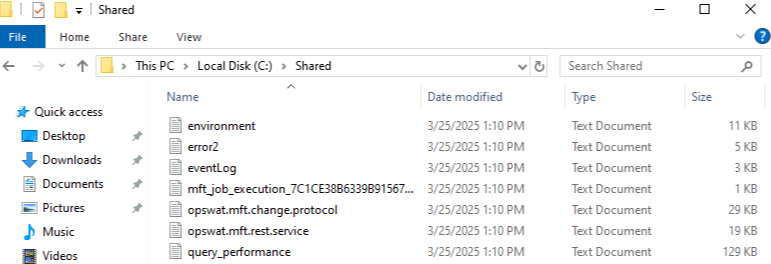
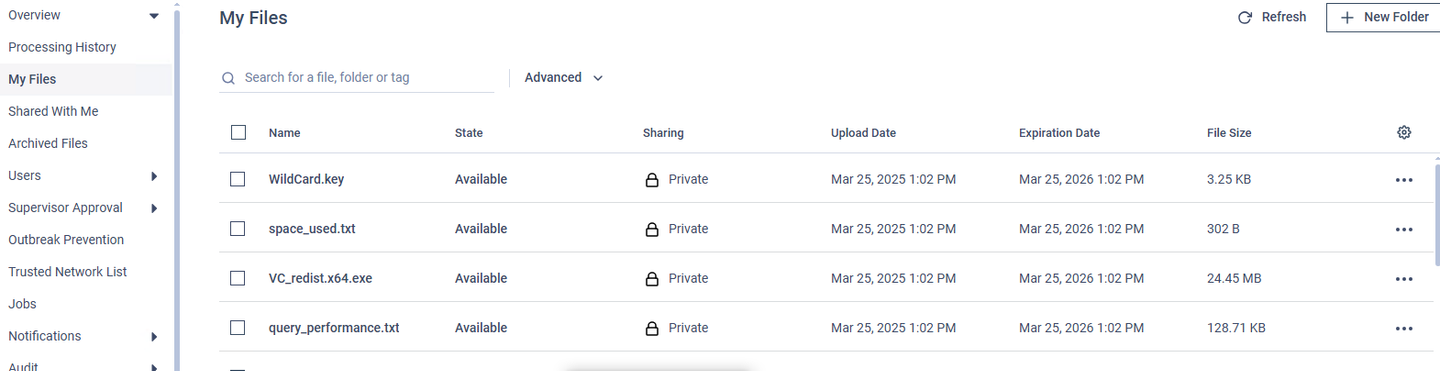
- Files are copied to MFT:
In addition, user can schedule the task in stead of push or pull files immediately using On-demand option.
If Further Assistance is required, please proceed to log a support case or chatting with our support engineer.