Register a new application in Azure
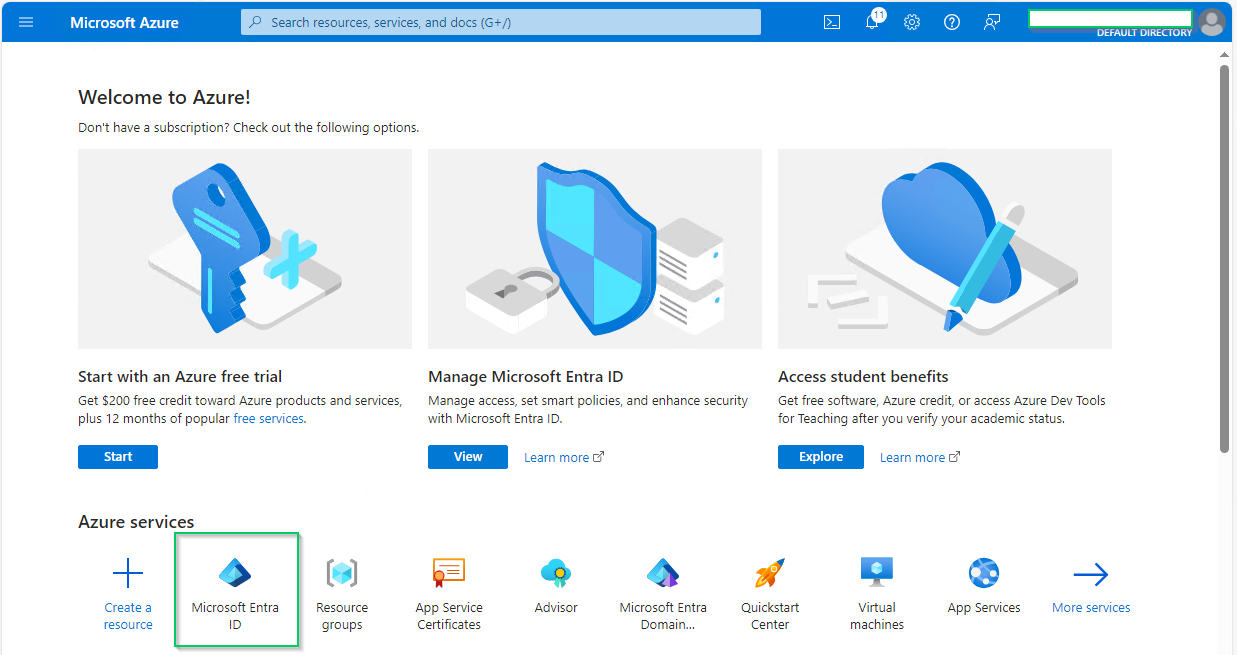
Access Azure portal and sign in.
On the home page, select
Microsoft Entra IDunderAzure services.
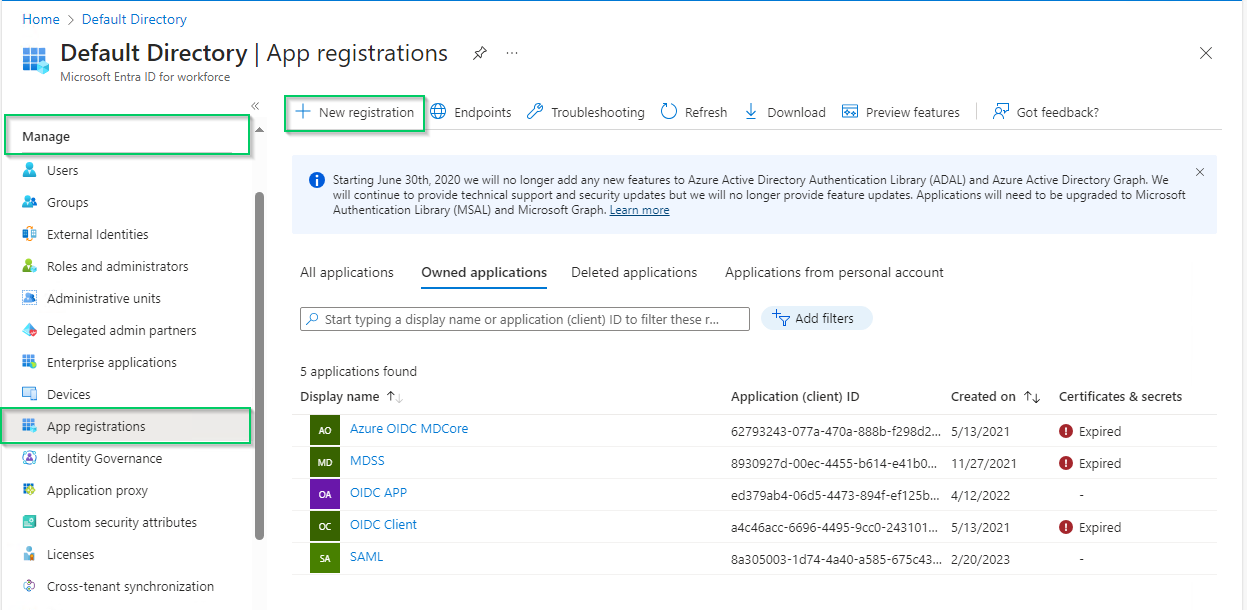
Select
App registrationsunderManagesection on the left sidebar, then click onNew registrationon the top menu bar.
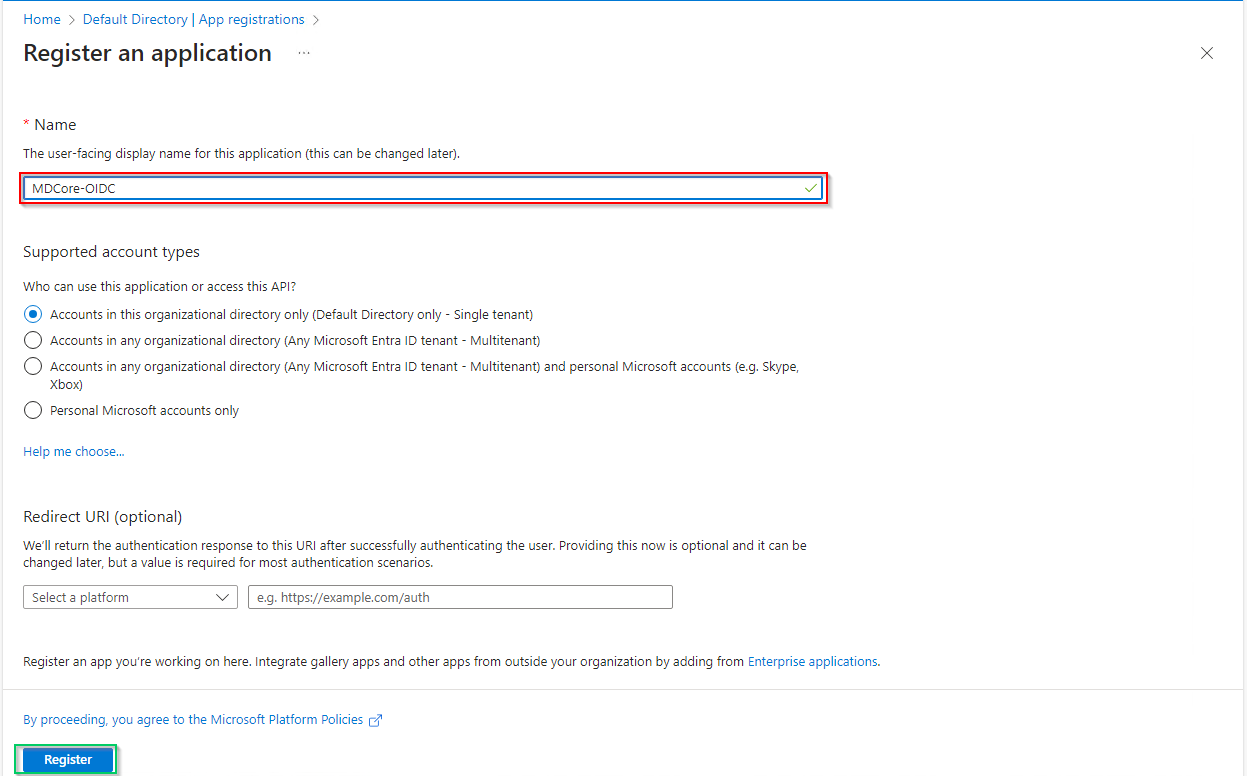
In
Register an applicationpage, fill in the name for the new application, using MDCore-OIDC as an example, and clickRegisterto complete.
Select
Token configurationin the left sidebar, hitAdd optional claim, chooseIDon the right sidebar, enable essential claims (given_name in this example) and clickAddat the bottom.
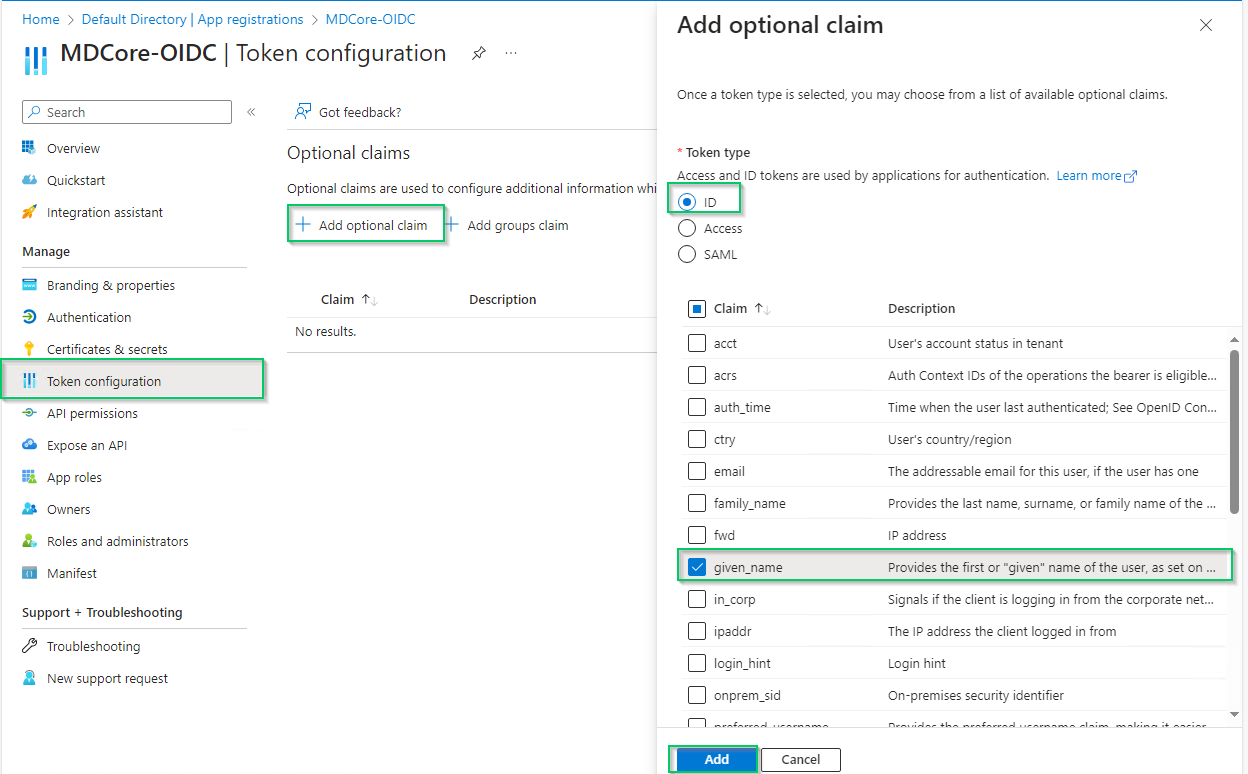
Click
Addon the popup to finish.
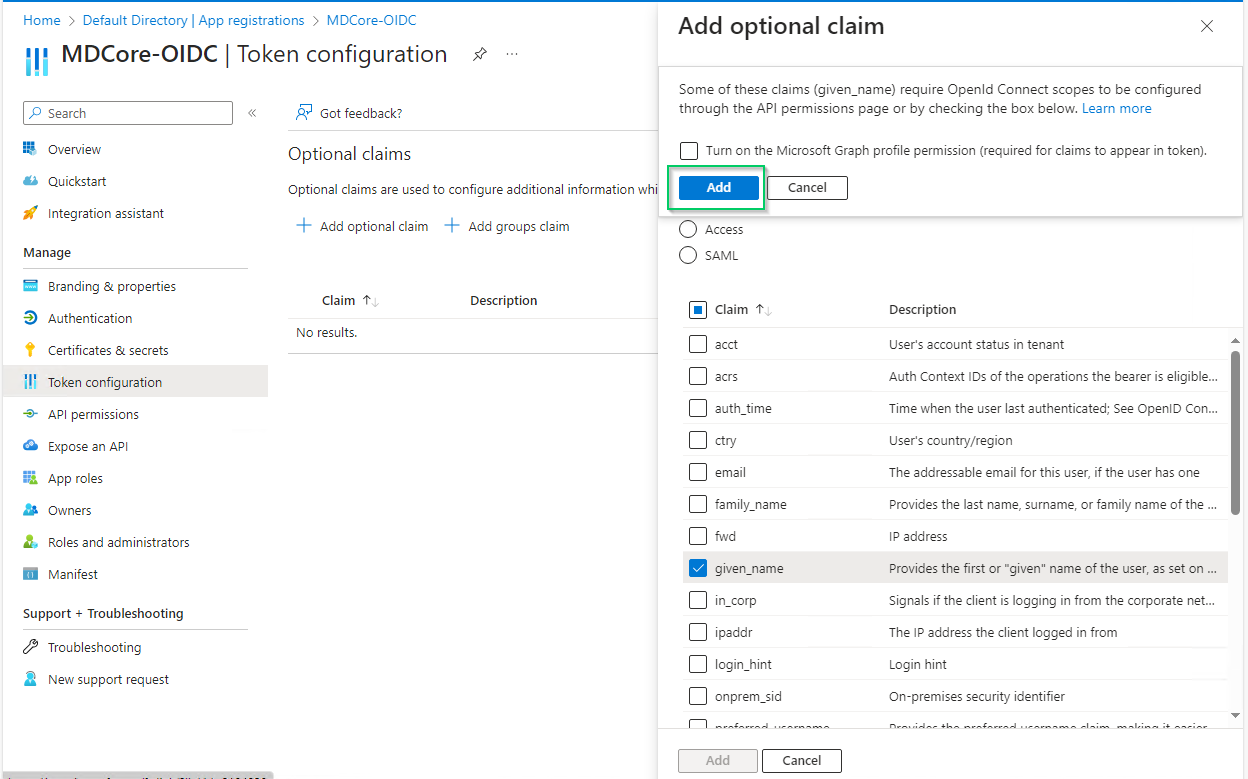
Enabled claims will be used later by MetaDefender Core to identify logged-in user.
Create OIDC directory in MetaDefender Core
Sign in to MetaDefender Core.
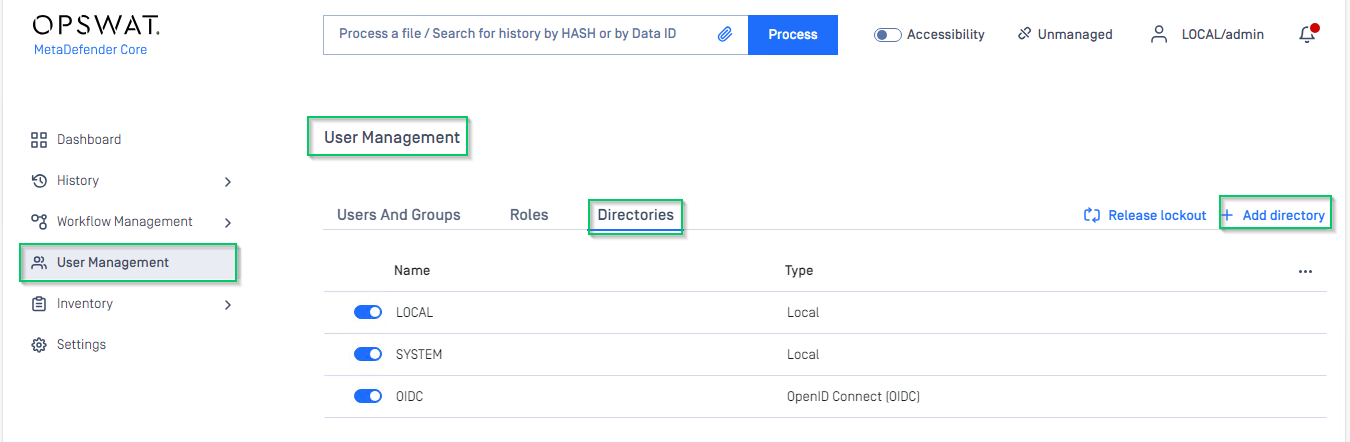
At the dashboard, click
User Managementin the left sidebar.In
User Managementpage, chooseDirectoriestab and clickAdd directoryon the top right corner.
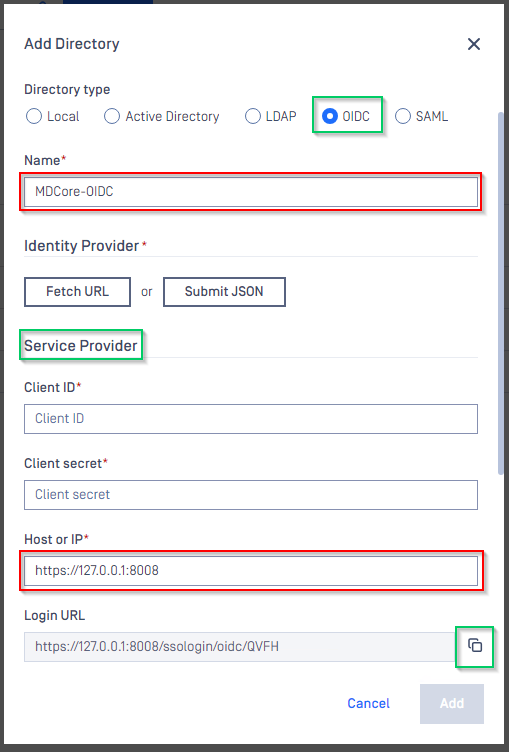
In
Add Directorypage, choose OIDC inDirectory type.Fill in the name the new directory, such as MDCore-OIDC.
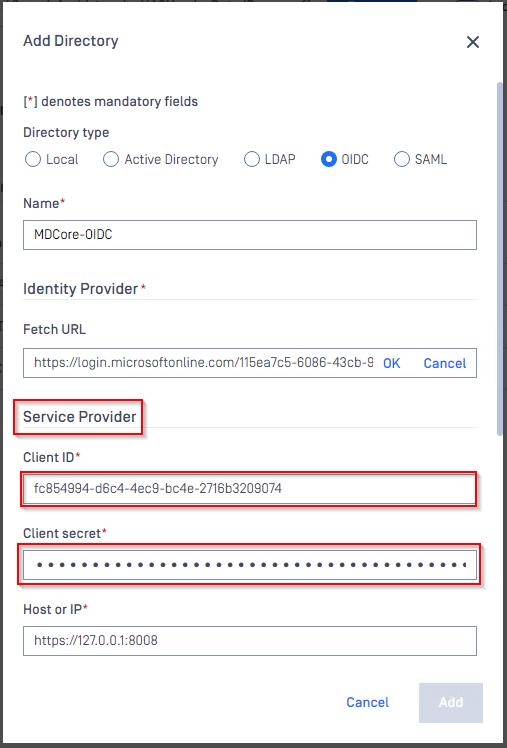
In
Service Providersection, fill inHost or IPwith the host or IP address where MetaDefender Core is hosted; for this example, it is https://localhost:8008.Copy the
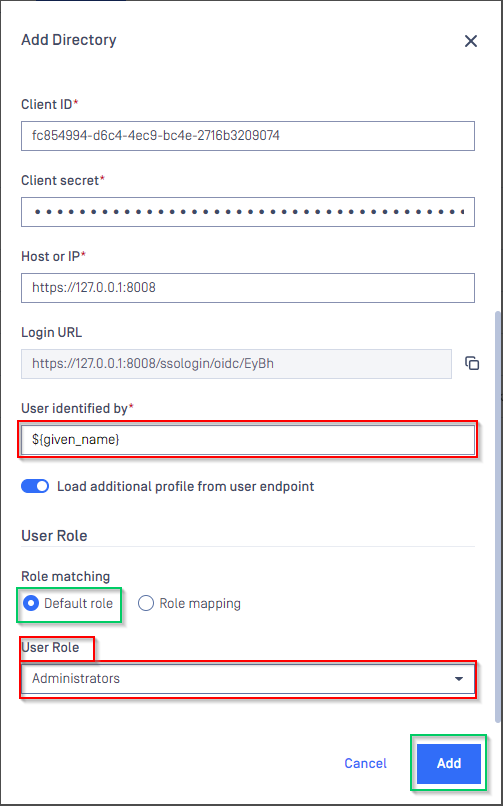
Login URLand store it somewhere for later use.
Complete configuration in Entra ID
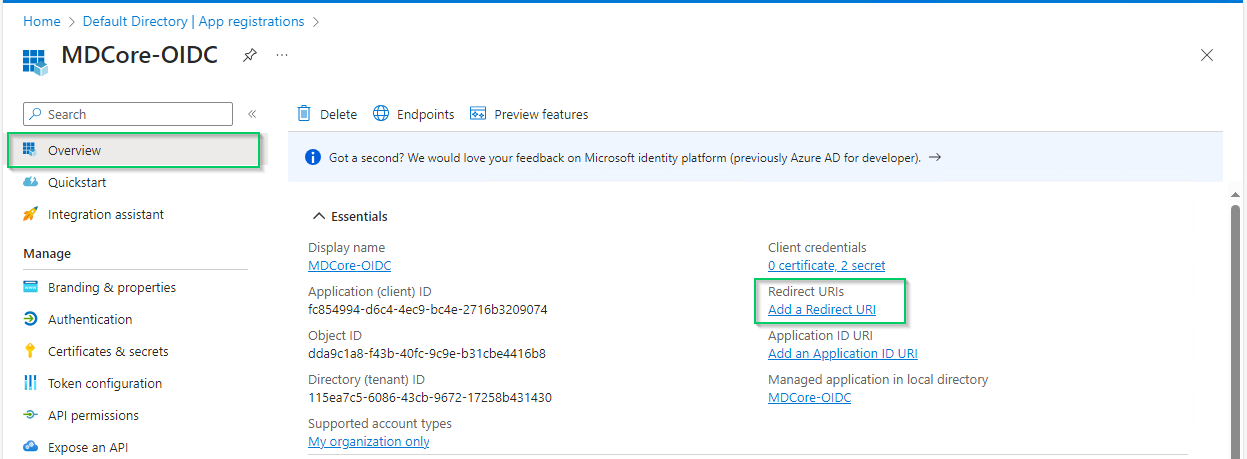
Back to Microsoft Entra ID, on
MDCore-OIDCpage, selectOverviewsection in the left sidebar and click onAdd a Redirect URIlink to switch toAuthenticationpage.
In
Authenticationpage, clickAdd a platformand chooseWeboption in the right sidebar.
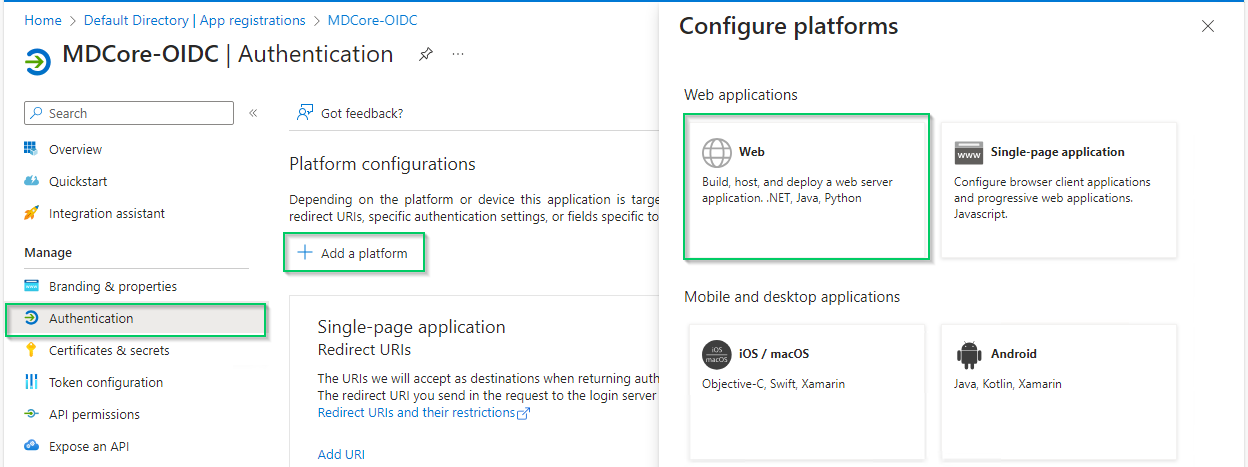
Fill in
Redirect URIsfield with theLogin URLcopied from MDCore, enableAccess tokensoption and clickConfigure.

Select
Overviewin the left sidebar again, copy the string next toApplication (client) IDand store as client_id.
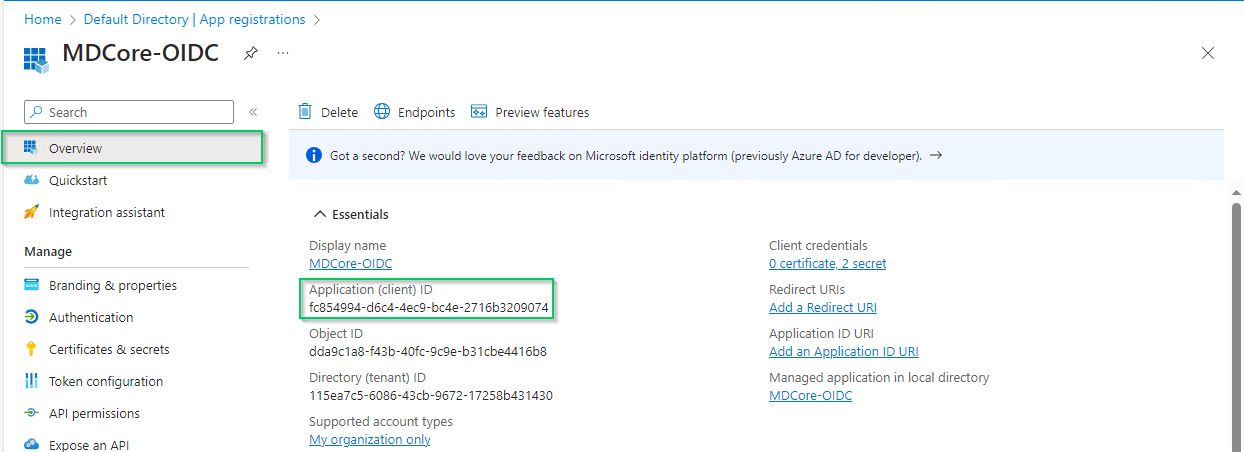
Click
Endpointsin the top bar, copy the URI underOpenID Connect metadata documentin the right sidebar and store it as metadata_uri.

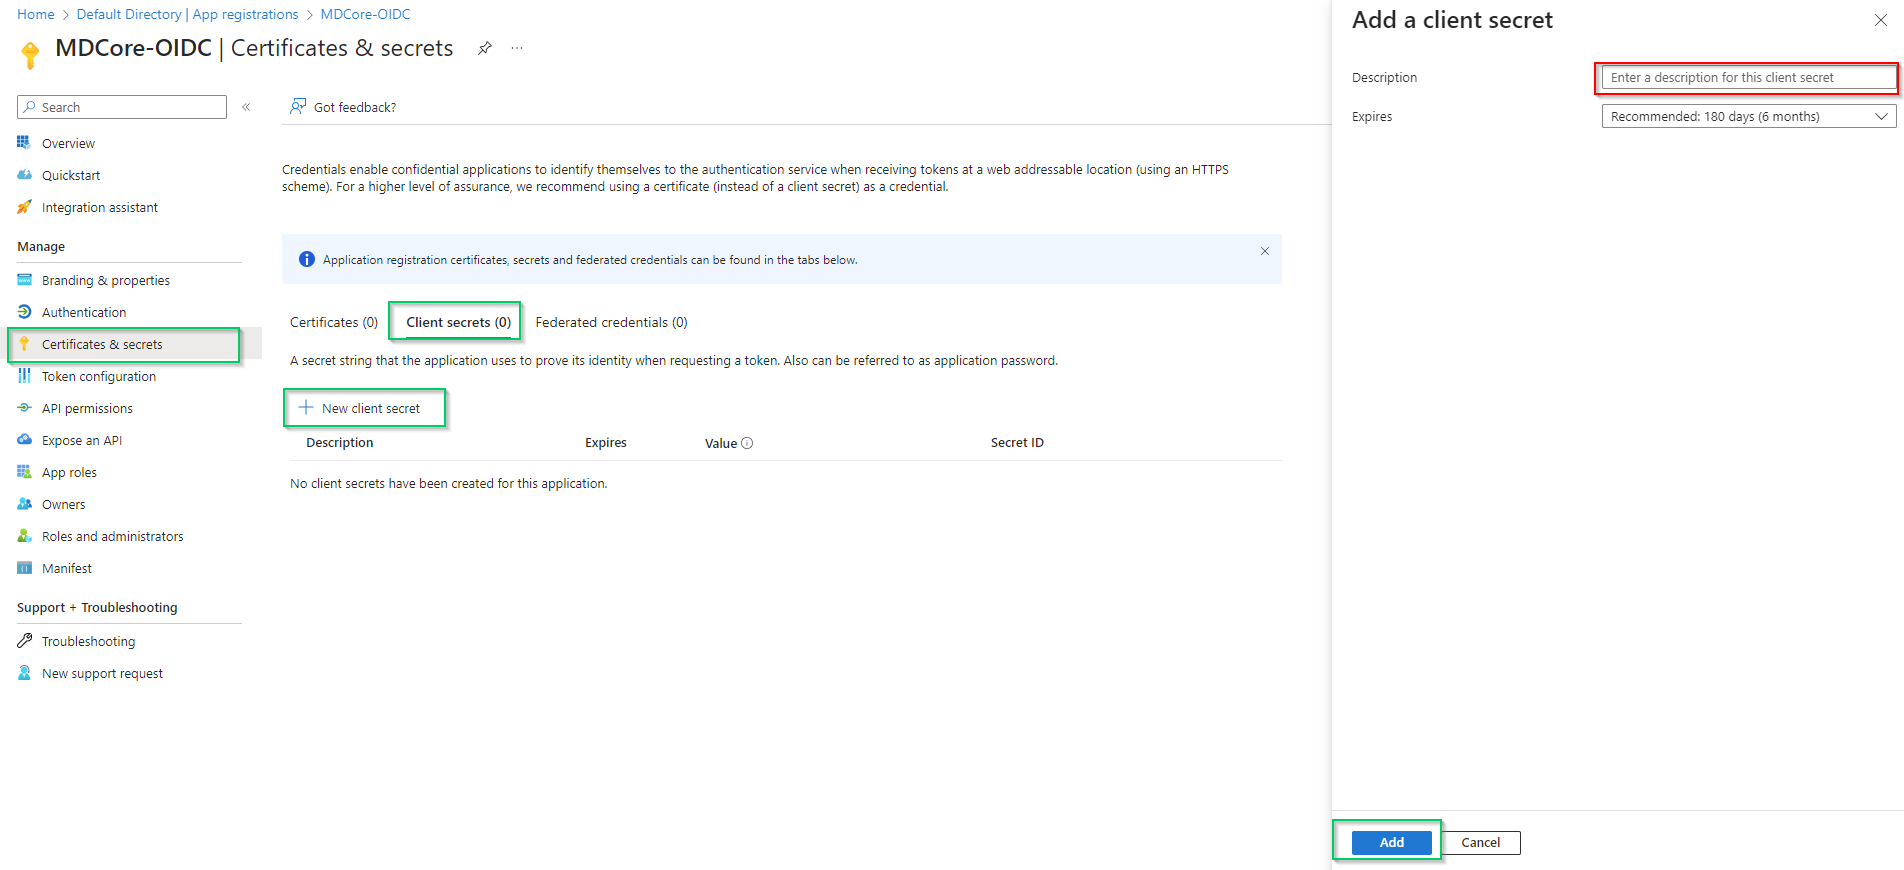
Select
Certificates & secretsin the left sidebar, go toClient secrets (0)tab, clickNew client secret, fill in the secret description and set expiration and, then clickAddto complete.
A new client secret is created under
Client secret (1)tab; copy the string underValuecolumn and store it as client_secret.
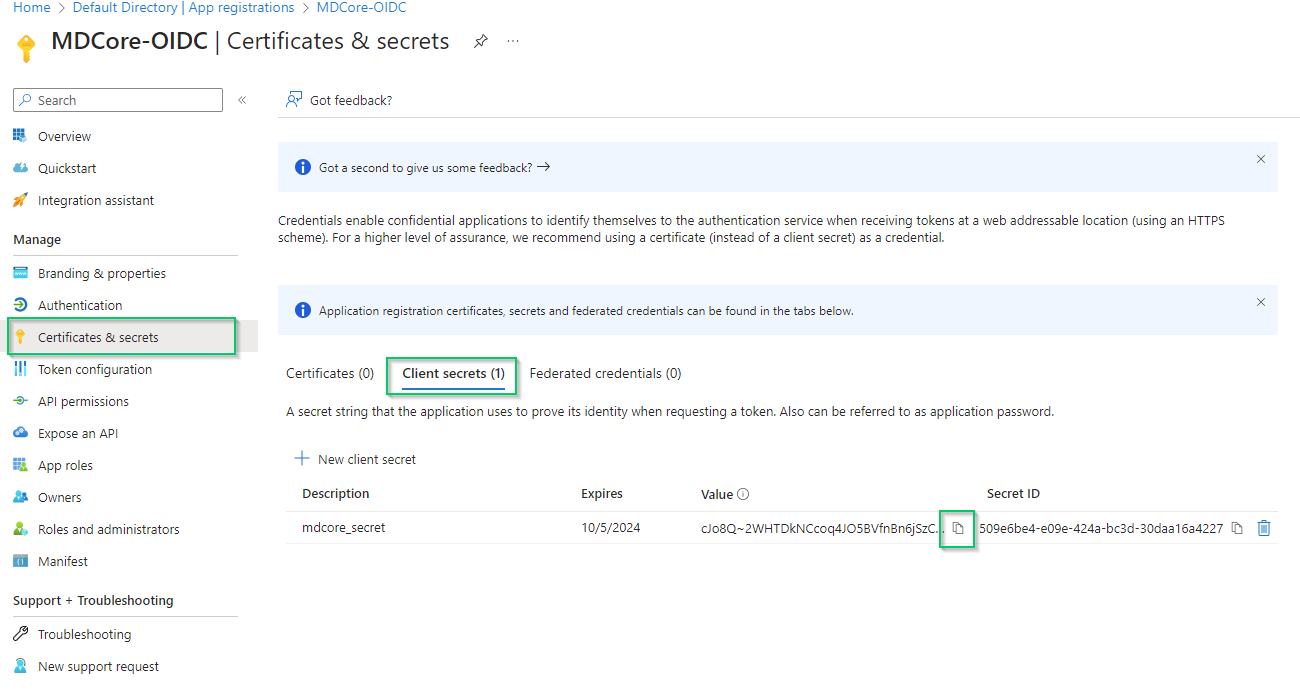
Entra ID will hide the client secret completely when page Certificate & secrets is left. Administrator is recommended to store the client secret in a safe place, otherwise they have to create a new one.
Complete configuration in MetaDefender Core
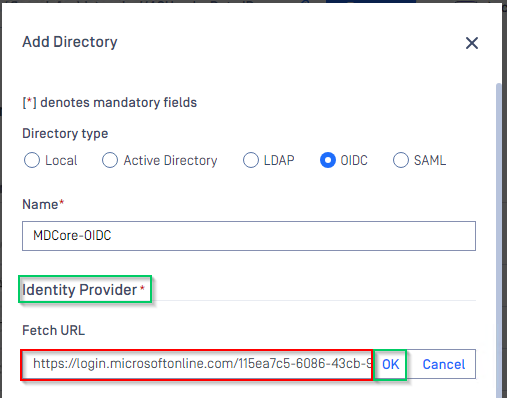
Switch back to MetaDefender Core. Under
Identity Providersection, clickFetch URLand paste metadata_uri gathered in Configure Azure stage into the box underFetch URL. ClickOKand wait a moment for MetaDefender Core to set Microsoft Entra ID as its IDP.
Under
Service Providersection, paste client_id and client_secret gathered in Configure Azure stage toClient IDandClient secretrespectively.
Fill user identity under
User identified by, ${given_name} is used in this example.Select
Default roleoption and select correct role for the user underUser RoleClick
Addto complete the settings.
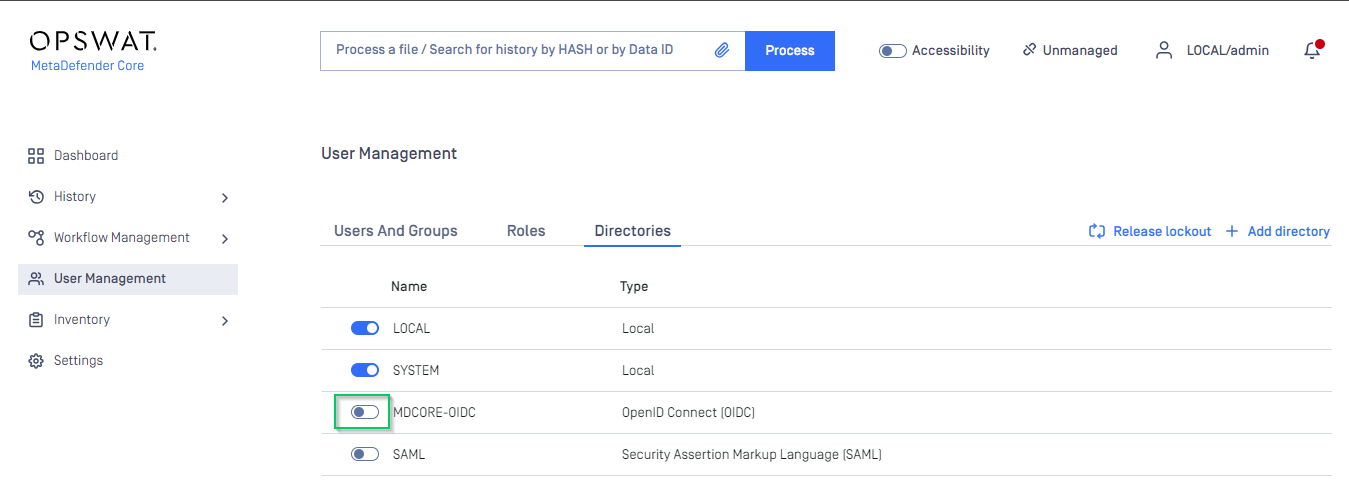
In
User Managementscreen of MetaDefender Core, toggle MDCORE-OIDC directory. A dialog box appears to confirm the action. OnceEnableis clicked , all sessions expire immediately.
Test the integration
At the home screen of MetaDefender Core, click
Login; the user is redirected to Microsoft Entra ID sign-in page.
Sign in using the account registered with Microsoft Entra ID.
If everything goes correctly, MetaDefender Core dashboard is displayed with user's identity shown in the top right corner.
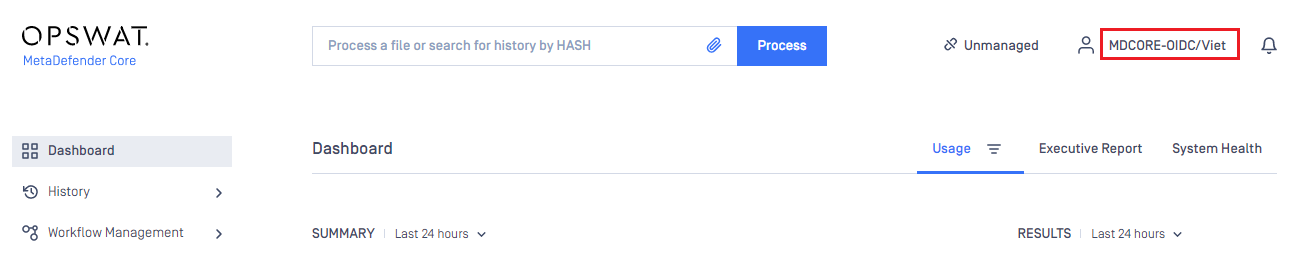
Otherwise, access backup login page at
<mdcore-host>#/public/backuploginfor trouble shooting.