Enabling HTTPS

MetaDefender Core supports accessing Web UI and REST interface via HTTPS. This feature is not enabled by default.

There are two ways to enable the feature:

  • via Management Console or
  • modifying MetaDefender Core server configuration via configuration files.

TLS v1.2 and v1.3 are supported HTTPS connection.

If HTTPS is configured via both ways, only the settings made on Management Console will take effect. It is highly recommended not to use both configuration files and user interface for HTTPS settings at the same time.

Enabling HTTPS via Management Console

  1. Go to Settings→Security page
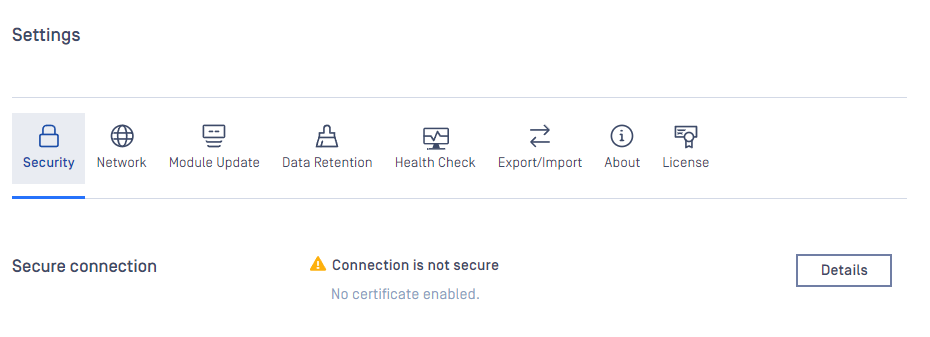
  1. If there's no certificate-key pair added to the inventory, please go to Inventory→Certificates add one that is desired to use for securing HTTP connections.
  1. Check Enable certificate connection button and choose a certificate-key pair.
  2. Users can define advanced SSL settings in the "Advanced SSL Settings" section. These settings follow Nginx syntax.
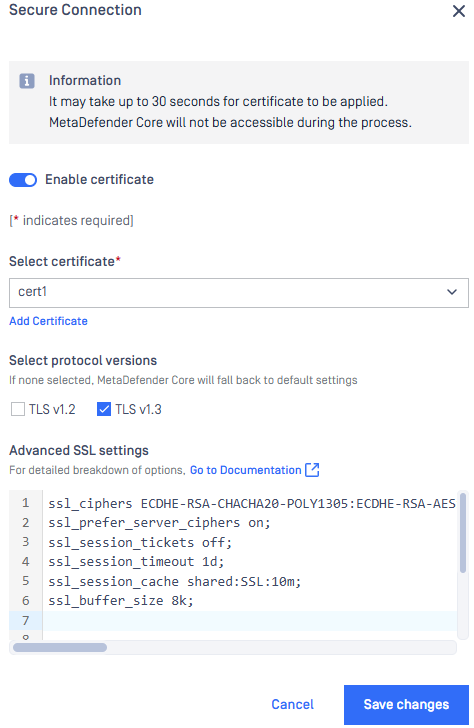
  1. As clicking on Save changes, you will be warned that Management Console is going to be restarted and this will take some time.
  2. Approximately 30 seconds after confirming saving of configuration the Management Console will be reloaded via HTTPS.

Enabling HTTPS via configuration files

Starting from version 5.14.0, advanced SSL settings can be configured directly through the UI. We highly recommend using the UI for SSL configuration to ensure better management and ease of use.

Starting from version 5.13.0, the ssl on directive is deprecated and can no longer be used for configuring SSL. Please utilize the Web UI console to configure HTTPS connections.

When upgrading from an older version to 5.13.0, MetaDefender Core will automatically migrate the SSL configuration to a new file named ssl.conf.mdcore to manage SSL settings. To configure SSL, please use this file but we recommend to use the Web UI console instead manually modify this file.

If the customer is already using ssl.conf for SSL configuration, there is no need to worry as it will be updated automatically during the upgrade.

Before upgrading, ensure that the file ssl.conf has permission set to 777. After the upgrade, remember to adjust the file permissions accordingly.

First create your certificate and key files in convenient directory. Let us take paths as an example /etc/ometascan/nginx.d/your.crt and /etc/ometascan/nginx.d/your.key for Linux and C:/Program Files/OPSWAT/Metadefender Core/nginx/your.crt and C:/Program Files/OPSWAT/Metadefender Core/nginx/your.key for Windows accordingly.

On Linux

  1. Create folder /etc/ometascan/nginx.d if not existed, and make sure to grant read and write access for metascan user on this folder and all files inside.
  2. Create file ssl.conf.mdcore (MetaDefender Core only accept this name) in the directory /etc/ometascan/nginx.d
  3. Enter SSL-configuration according to Nginx. To allow simple SSL one needs to add the following lines only:
ssl.conf.mdcore
Copy
  1. Service restart is required to take these changes into effect.

On Windows

  1. Create file ssl.conf.mdcore (MetaDefender Core only accept this name) in the directory <Installation Directory>\nginx.
  2. Enter SSL-configuration according to Nginx. To allow simple SSL one needs to add the following lines only (note the forward "/" slashes)
ssl.conf.mdcore
Copy
  1. A restart of the “OPSWAT Metadefender Core” service is required.

Advanced web server configurations (applicable to both Linux and Windows platform)

1.) Explicitly allow specific TLS versions, optionally with preferred ciphers. For example:

ssl on;

ssl_certificate "C:/Program Files/OPSWAT/Metadefender Core/nginx/your.crt";

ssl_certificate_key "C:/Program Files/OPSWAT/Metadefender Core/nginx/your.key";

ssl_protocols tlsv1.2;

ssl_ciphers ECDHE-RSA-AES128-GCM-SHA256;

2.) Use SSL private key and(or) certificate which is encrypted with a passphrase. Strongly recommended to put the passphrase file(s) into a secured vault where only MetaDefender Core can access.

A reference for typical practice: https://www.nginx.com/blog/protecting-ssl-private-keys-nginx-hashicorp-vault/

ssl on;

ssl_certificate "C:/Program Files/OPSWAT/Metadefender Core/nginx/cert.pem";

ssl_certificate_key "/etc/keys/secretkey.pass";

ssl_certificate_key "C:/Program Files/OPSWAT/Metadefender Core/nginx/your_encrypted.key";

ssl_password_file "/etc/keys/private.pass";

ssl_protocols tlsv1.2;

ssl_ciphers ECDHE-RSA-AES128-GCM-SHA256;

For more SSL-options please consult Nginx documentation.

'\n' sequences in paths

Using the standard Windows path separator backslash '' may give unexpected results if directory or file names start with 'n'. The reason is that the sequence '\n' is interpreted as a new line by nginx.

For example the following directive

ssl_certificate "C:\Program Files\OPSWAT\Metadefender Core\nginx\your.crt";

will appear at nginx as

ssl_certificate "C:\Program Files\OPSWAT\Metadefender Core

ginx\your.crt";

As a workaround instead of backslash '' use

  1. Forward slash '/' or
  2. Double backslash ''.

Note that certificate and key files are to provided by the user who can store them whenever it is convenient. Please adjust the paths accordingly.

Note: When choosing location for cert and key files, make sure the files are in a location which is readable to the service user.

Type to search, ESC to discard