The SFTP Server Connector allows the user to configure a built-in SFTP Server on both the BLUE and RED sides. It provides users with the flexibility to determine how SFTP transfers work, transferring files from the BLUE side (using a flanker or the built-in SFTP server) to the RED side (using a flanker or the built in SFTP server).
To use the STFP Server, a SFTP File Transfer Connector must be also configured on both BLUE and RED sides.
A total of 20 simultaneous SFTP sessions can be configured, one for each Virtual User created on the SFTP Server
Security Gateway BLUE
SFTP Server Configuration
A security dongle must be inserted in the BLUE and RED servers to change configuration.
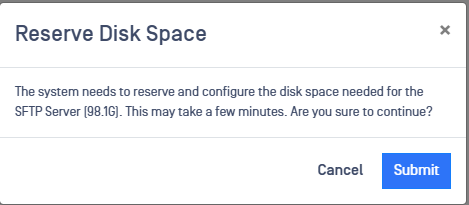
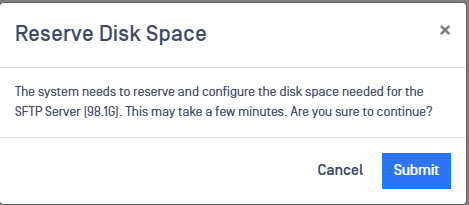
Login into MetaDefender Security Gateway BLUE. If the SFTP Server has not been previously configured the user will see an Edit button to include a new SFTP Server. This requires the user to reserve disk space to allow it to act as a SFTP Server. Once the Edit button is selected, the user will be prompted by the message bellow.
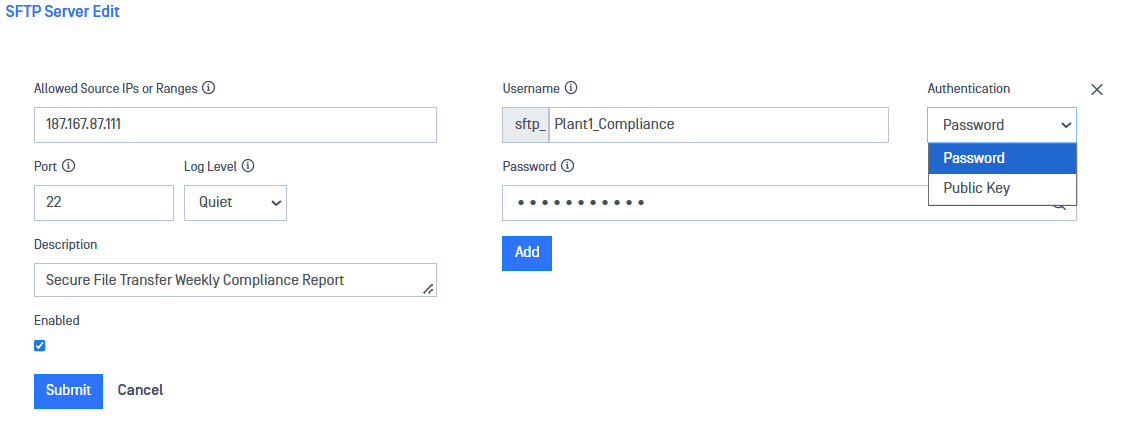
Once the needed space has been reserved, type or select values in the following boxes:
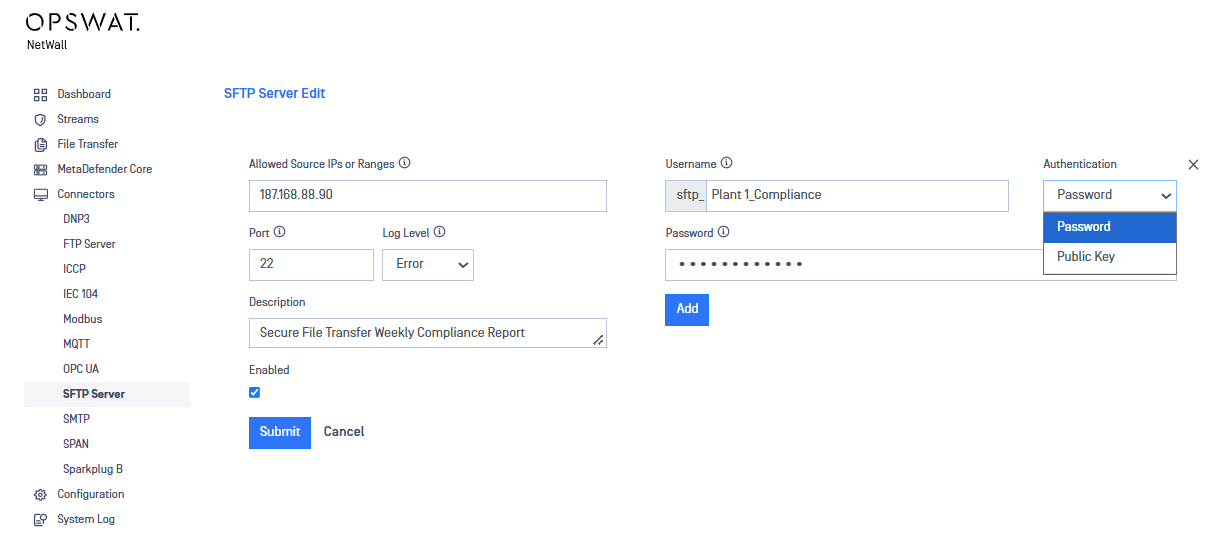
Allowed Source IPs or Ranges: List of IP addresses allowed to connect to the SFTP Server. User can enter several addresses or ranges separated by semicolon. Empty field means ANY IP will be allowed to connect.
Port: Port on which the server will listen to clients.
Log Level: Select the Log Level using the drop down list. Options are Quiet, Error, Info and Verbose.
Description: Free text field to include a description.
Username: Username to connect to the SFTP server. A mandatory "sftp-" prefix will be automatically added. The remainder can be formed by any combination of lowercase alphanumeric characters and underscore (_). They must be unique. Min length: 1 character, max length: 25.
Authentication: Select Password or Public Key authentication.
Password/ Public Key: Input Password or Public Key depending on selected authentication method.
Enabled: This checkbox should be marked to enable SFTP Server connector.
Click on Submit button to save the changes.
SFTP Connector Configuration BLUE
As mentioned before, to provide the system with more flexibility the user needs to configure a SFTP File Transfer in both sides.
Important
For more information about configuring Secure File Transfer, please refer to File Transfer
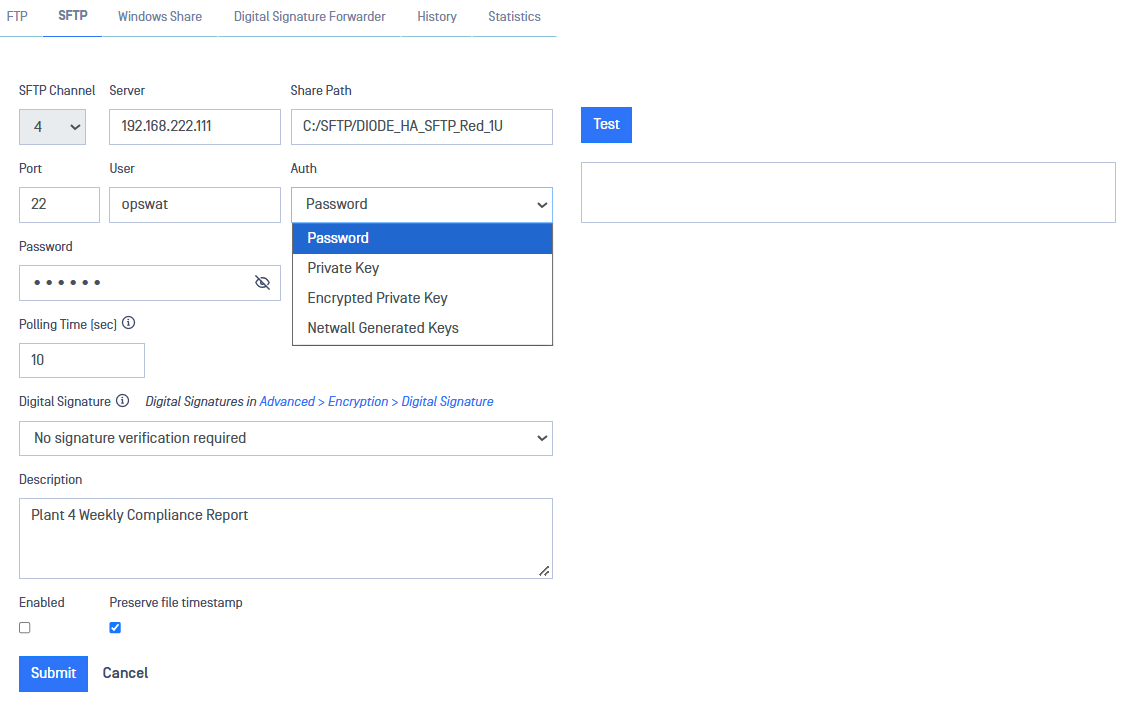
To configure the SFTP Connector, go to File Transfer-> **SFTP **and click on **Add SFTP Share **and complete the following fields.
SFTP Channel: Assign a channel number. The SFTP Channel Number must be the same on both BLUE and RED sides.
Server: IP of the SFTP Server in BLUE side.
Share Path: Folder on SFTP server. The value can be a folder name or a ‘/’, depending on how you set up file sharing on the SFTP server.
**Port: **Default port for SFTP file transfer is 22 but it can be changed by the user.
User: Indicate the user configured in the SFTP Server as Virtual User.
Auth: Select the authorization method: Password, Private Key, Encrypted Private Key or NetWall Generated Key.
Password or Key: Input Password and/or or Key depending on authentication method selected.
Polling Time (sec): Polling interval of the file share for new files (default: 10 secs, allowed values from 10 to 3600).
Digital Signature: Choose a Digital Signature to sign to sign the file transfer on the current channel. You can generate or import key pairs on the link next to the icon.
Enabled: File transfer will be enabled if this checkbox is ticked.
Delete Files on Share after Transfer: If this checkbox in ticked, files will be erased from the Share folder once the file transfer have been completed. This option is present only on the sending side.
**Preserve Timestamp: **Preserves timestamp of the original file.
Security Gateway RED
SFTP Server Configuration
Important
A security dongle must be inserted in the BLUE and RED servers to change configuration.
If the SFTP Server hasn't been previously configured the user will see a Edit button to include a new SFTP Server. Selecting Edit will automatically reserve disk space for SFTP Server. Once the Edit button is selected a popup will appear and track progress of the disk space allocation.
Once disk space has been reserved, type or select values in the following boxes:
Allowed Source IPs or Ranges: List of IP addresses allowed to connect to the SFTP Server. User can enter several addresses or ranges separated by semicolon. Empty field means ANY IP will be allowed to connect.
Port: Port on which the server will listen to clients.
Log Level: Select the Log Level using the drop down list. Options are Quiet, Error, Info and Verbose.
Description: Free text field to include a description.
Username: Username to connect to the SFTP server. A mandatory "sftp-" prefix will be automatically added. The remainder can be formed by any combination of lowercase alphanumeric characters and underscore (_). They must be unique. Min length: 1 character, max length: 25.
Authentication: Select Password or Public Key authentication.
Password/ Public Key: Input Password or Public Key depending on selected authentication method.
Enabled: This checkbox should be marked to enable SFTP Server connector.
Click on Submit button to save the changes.
SFTP Connector Configuration RED
As mentioned before, to provide the system with more flexibility user needs to configure a FTP File Transfer in both sides.
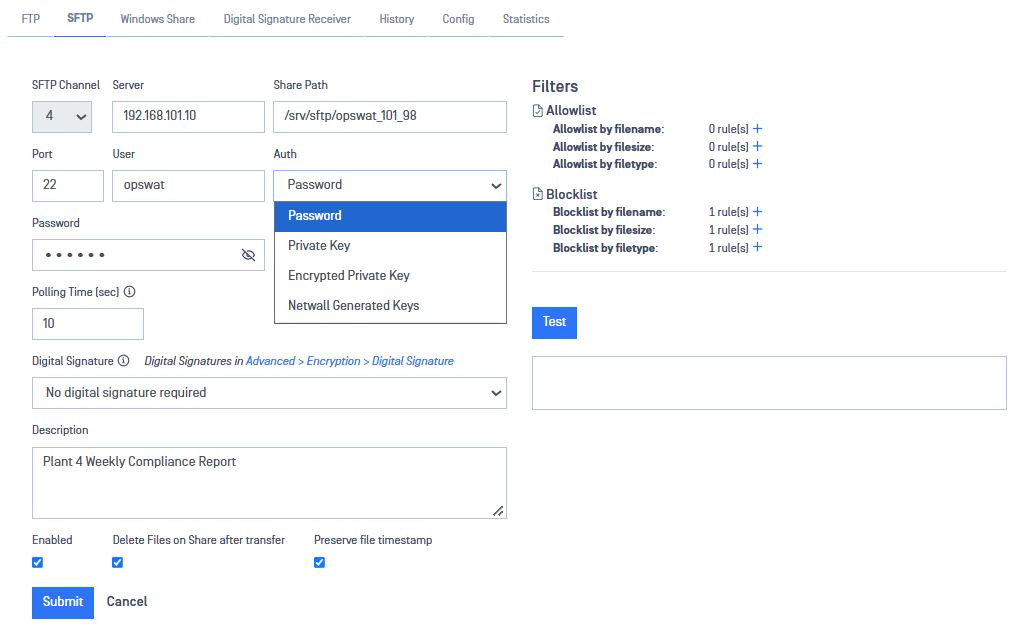
To configure the SFTP Connector, go to File Transfer-> **SFTP **and click on **Add SFTP Share **and complete the following fields.
SFTP Channel: Assign a channel number. The SFTP Channel Number must be the same on both BLUE and RED sides.
Server: IP of the SFTP Server in BLUE side.
Share Path: Folder on SFTP server. The value can be a folder name or a ‘/’, depending on how you set up file sharing on the SFTP server.
**Port: **Default port for SFTP file transfer is 22 but it can be changed by the user.
User: Indicate the user configured in the SFTP Server as Virtual User.
Auth: Select the authorization method: Password, Private Key, Encrypted Private Key or NetWall Generated Key.
Password or Key: Input Password and/or or Key depending on authentication method selected.
Polling Time (sec): Polling interval of the file share for new files (default: 10 secs, allowed values from 10 to 3600).
Digital Signature: Choose a Digital Signature to sign to sign the file transfer on the current channel. You can generate or import key pairs on the link next to the icon.
Enabled: File transfer will be enabled if this checkbox is ticked.
**Preserve Timestamp: **Preserves timestamp of the original file.