Configuration
Create OneLogin application
- Access OneLogin and sign in.
- On the navigation bar, click
Administrationto access administrator mode, then click onApplicationsto add a new application for integration.

- Click
Add Appto add a new application.

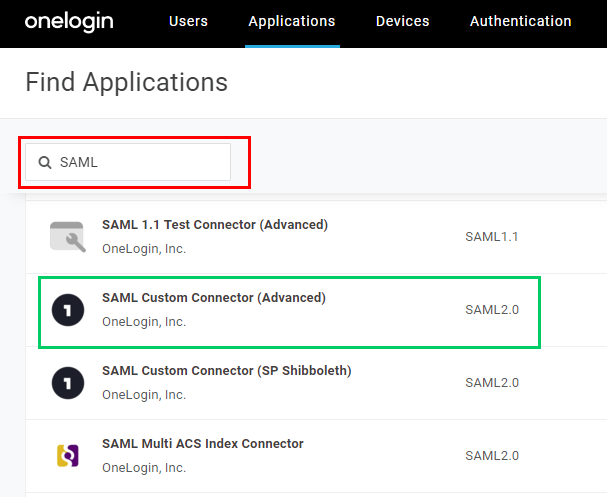
- Enter "SAML" in the search box and select
SAML Custom Connector (Advanced)version SAML2.0 in the results panel.
- In the new page, fill in
Display Namewith MDCore-SAML, for example, and clickSave.

Create SAML directory in MetaDefender Core
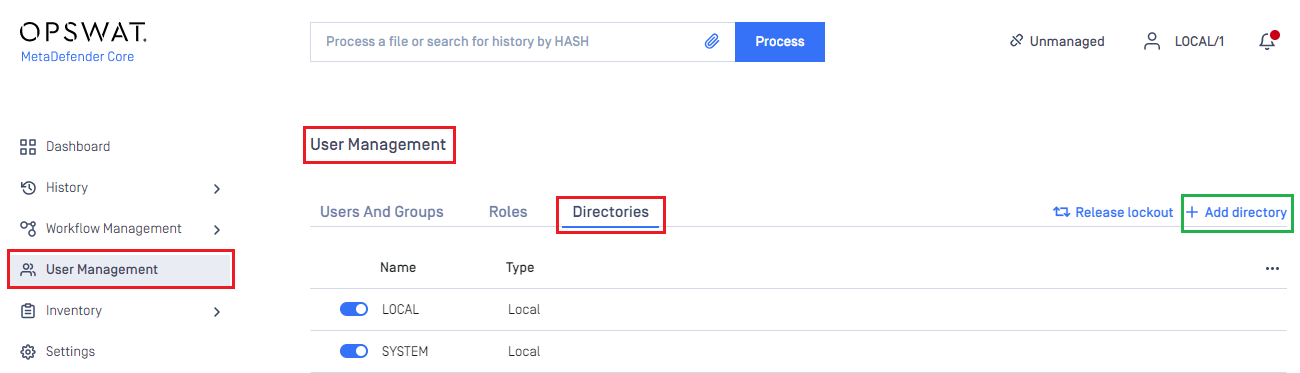
- Sign in to MetaDefender Core.
- In the dashboard, click on
User Managementin the left sidebar. - On
User Managementpage, selectDirectoriestab and clickAdd Directoryin the top right corner.
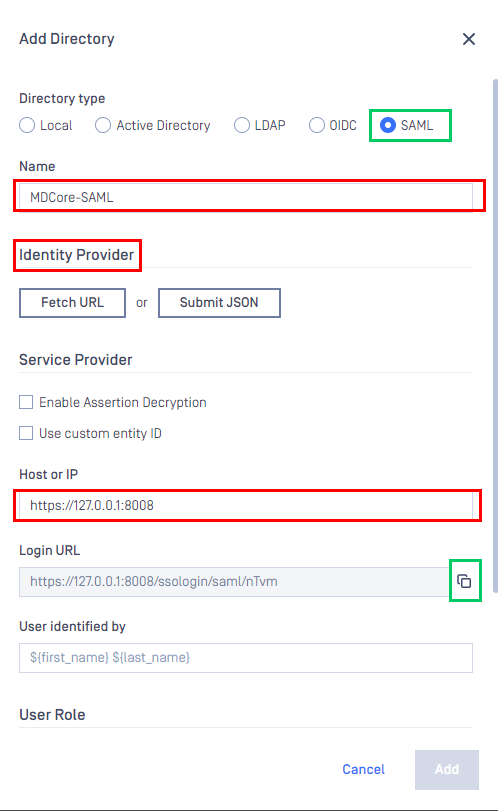
- In
Add Directorypage, select SAML asDirectory type, and enter a name for the new directory, such as MDCore-SAML. - In
Service Providersection, enterHost or IPwhere MetaDefender Core is hosted, for this example use https://127.0.0.1:8008. - Copy the string generated under
Login URLand store it as reply_uri.
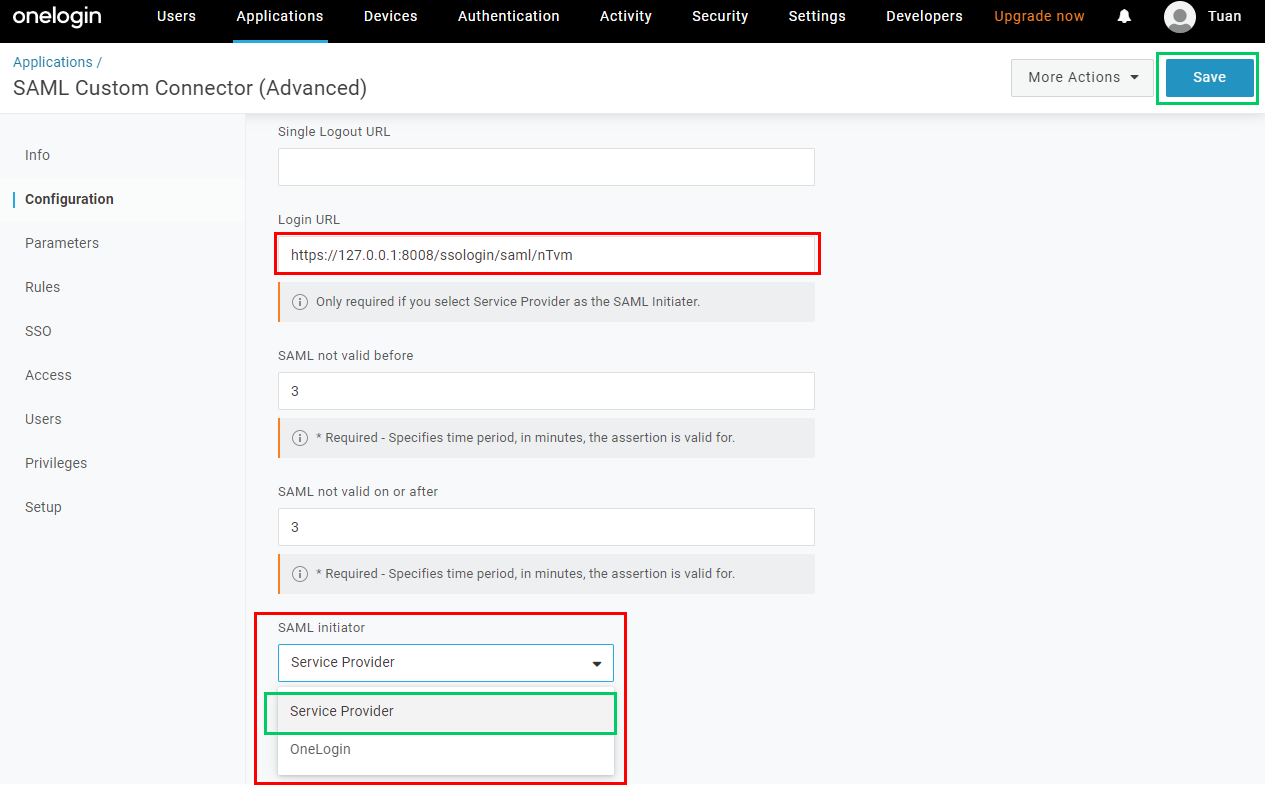
Complete configuration in OneLogin
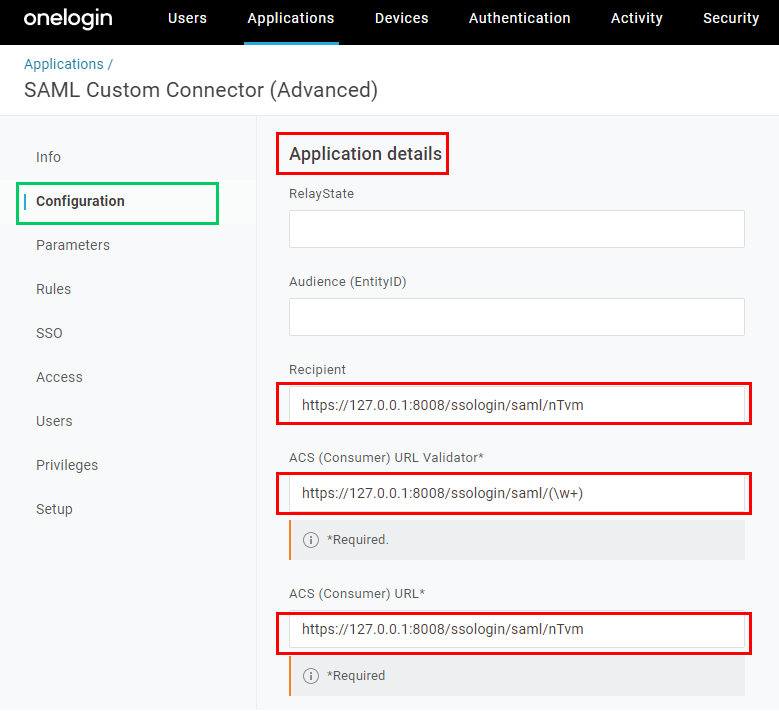
- In
Applicationsscreen on OneLogin, selectConfigurationtab. - In
Application Detailssection, fill inRecipientandACS (Consumer) URL*with theLogin URLcopied from MetaDefender Core. Fill inACS (Consumer) URL Validator*with a regular expression version ofLogin URL.
- Expand
SAML Initiatorsection, selectService Provider, enter theLogin URLcopied from MetaDefender Core and clickSave.
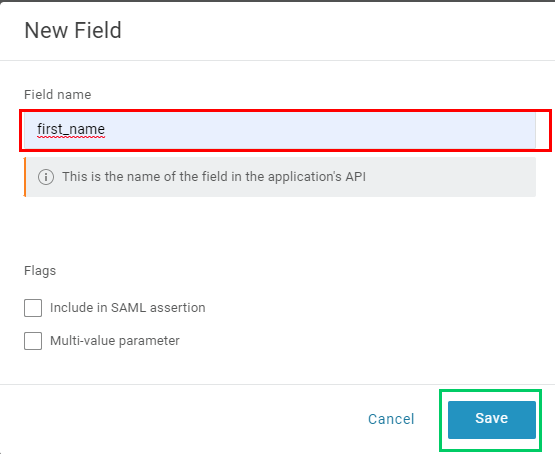
- Select
Parameterstab and click the plus button to add more fields that will be used to identify the signed-in users in MetaDefender Core.

- Fill in
Field namewith first_name and clickSave.
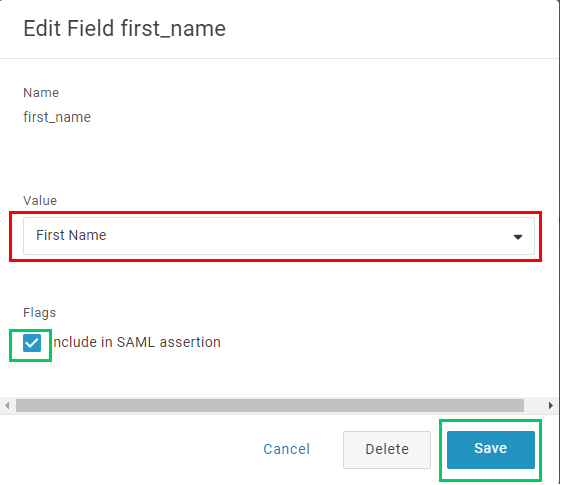
- Expand
Valuesection, choose an appropriate attribute, First Name is an example. Then toggleInclude in SAML assertionand clickSave.
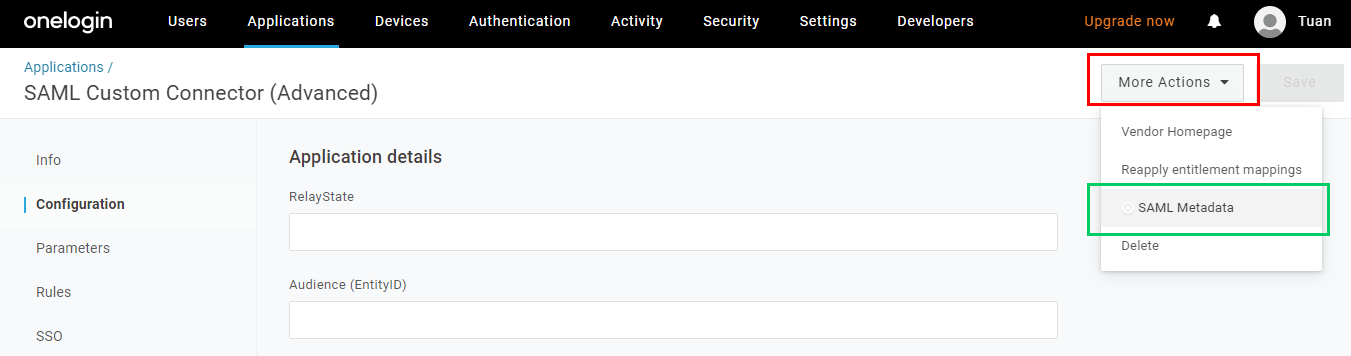
- Click
Savein the top right corner. - Drop
More Actionsdown and click onSAML Metadatato copy metadata_url.
Complete configuration in MetaDefender Core
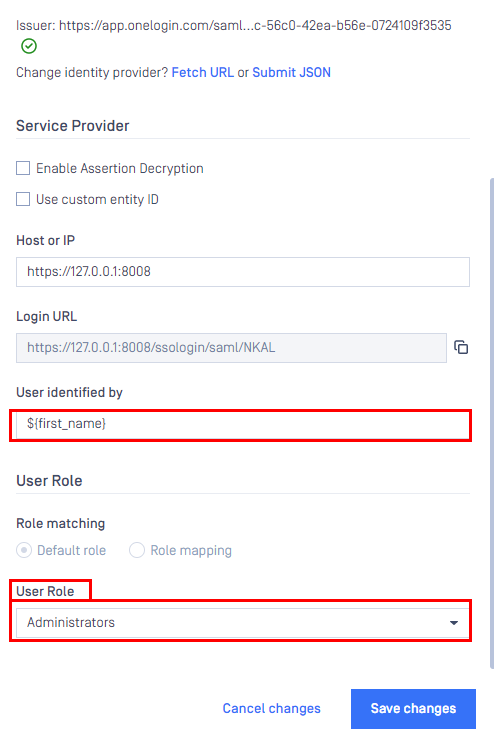
- Switch back to MetaDefender Core. Under
Identity Provider, clickFetch URL, paste the value of metadata_url into the box below, clickOK, and wait a moment for MetaDefender Core to check and set OneLogin as its IdP.

- Under
Service Provider, fill in ${first_name} in the box labeledUser identified by. - Select
Default roleoption, choose the appropriate role to assign to users underUser Role, and clickAddto complete the settings in MetaDefender Core.
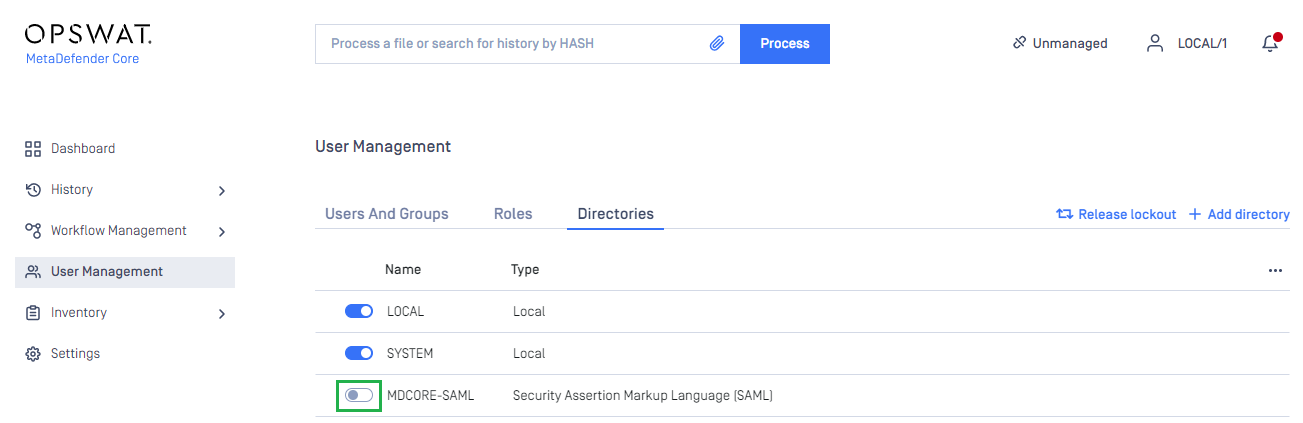
- On
User Managementpage, toggle the new directory, MDCORE-SAML in this example. A dialog box will appear to confirm the action. OnceEnableis clicked , all sessions will expire immediately.
Test the integration
- On the home screen of MetaDefender Core, click
Login; the user is redirected to OneLogin page.
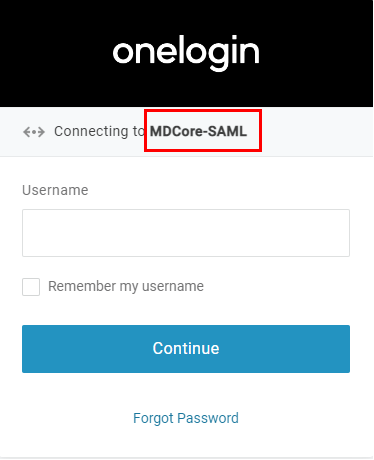
- Sign in using the account registered with OneLogin.
- If everything goes well, MetaDefender Core dashboard is displayed with the user identity in the top right corner.

- Otherwise, access backup login page at
<mdcore-host>#/public/backuploginfor trouble shooting.
Test IdP-initiated login
- Sign in to OneLogin management page.
- From the portal menu, navigate to MDCore-SAML and click on the icon.
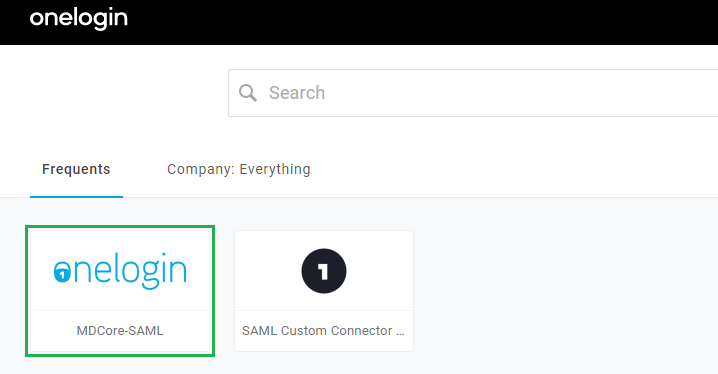
- If everything goes well, the user is redirected to MetaDefender Core dashboard with the user identity in the top right corner.

- Otherwise, access backup login page at <mdcore-host>#/public/backuplogin for trouble shooting.
Was this page helpful?