Configuration
After the integration is successfully set up, any modifications on Okta application could lead to the regeneration of the client secret, causing Okta to reject requests from MetaDefender Core due to a mismatch in the client secret. In this instance, the customer should copy the new secret from Okta and update Client secret field within Service Provider of MetaDefender Core with the new one.
Create Okta application
- Access https://www.okta.com/login/ and sign in.
- In the sidebar of dashboard, hit
Applicationsto drop sub items down, then selectApplications. - Click
Create App Integration.

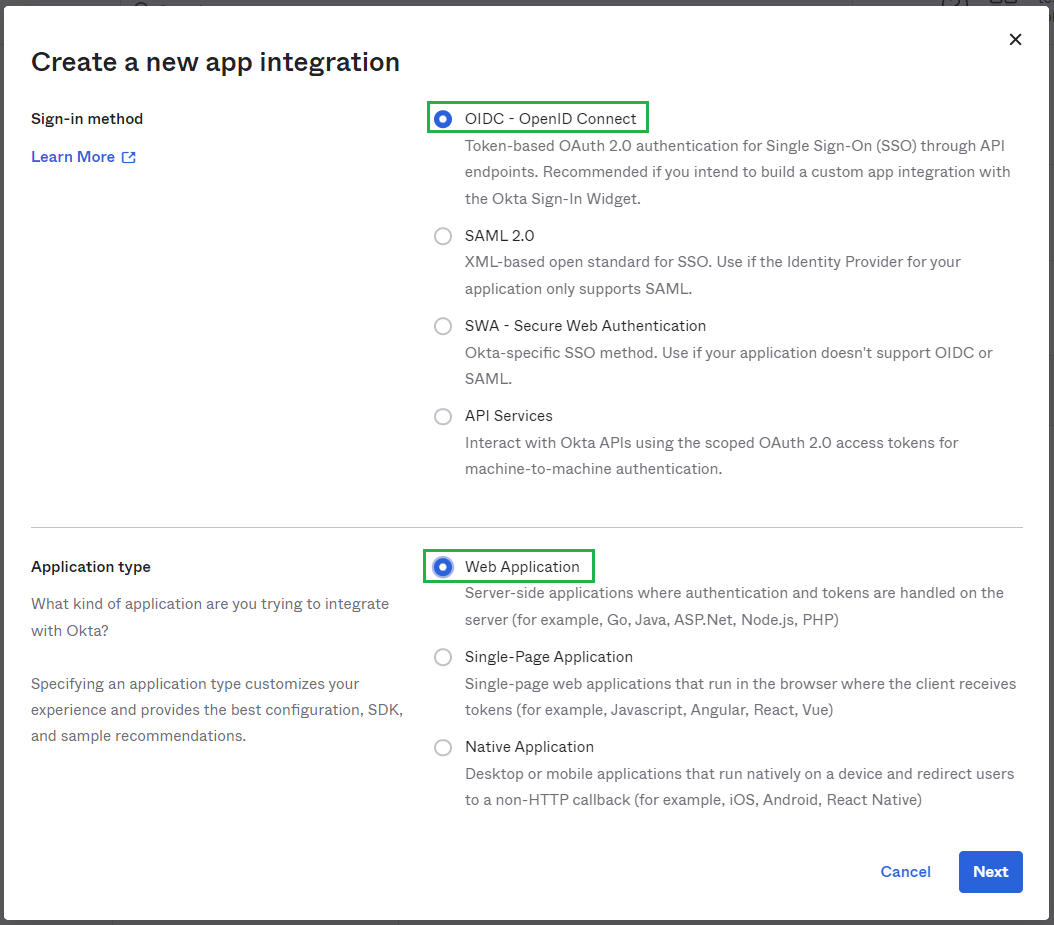
- In
Sign-in method, selectOIDC - OpenID Connect. InApplication typechooseWeb Applicationand clickNext.
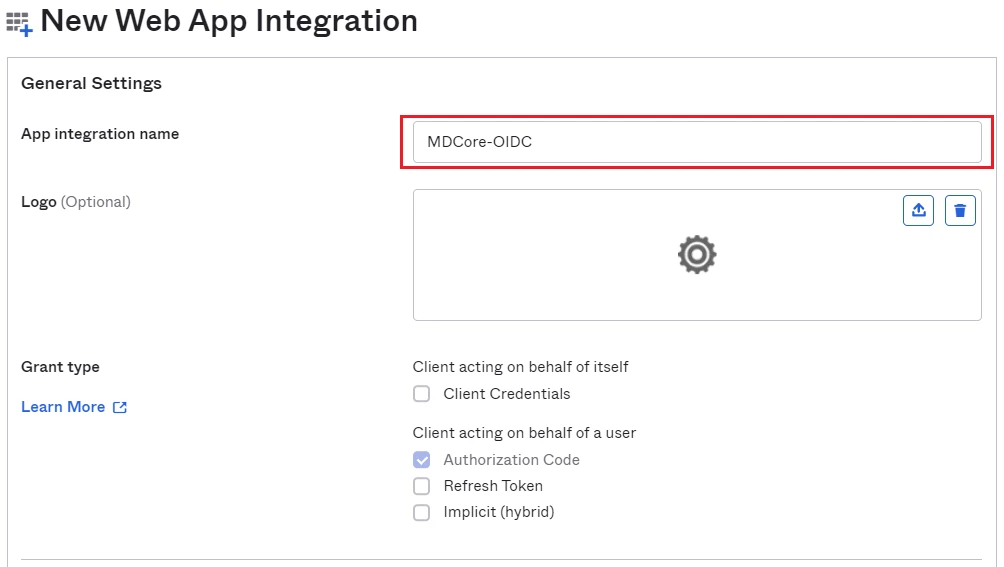
- Fill
App name, MDCore-OIDC for example and clickNext.
Create OIDC directory in MetaDefender Core
- Sign in to MetaDefender Core management console.
- Under
Dashboard, hitUser Managementin the sidebar. - Under
User Management, selectDirectoriestab and clickAdd directoryin the top right.

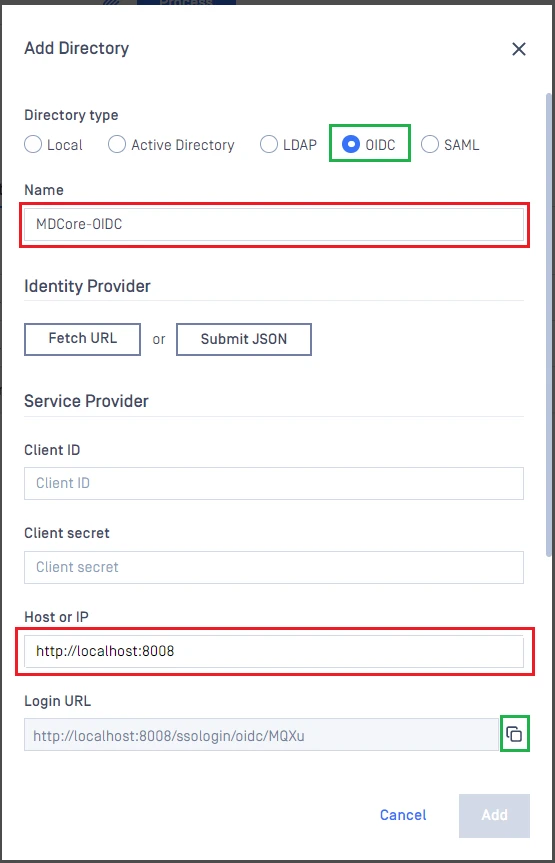
- In
Add Directorypage, choose OIDC forDirectory Type. - Fill
Nameof the new directory, MDCore-OIDC for example. - Under
Service Provider, fill inHost or IPwhere MetaDefender Core is being hosted, https://localhost:8008 for this example.
Complete configuration in Okta
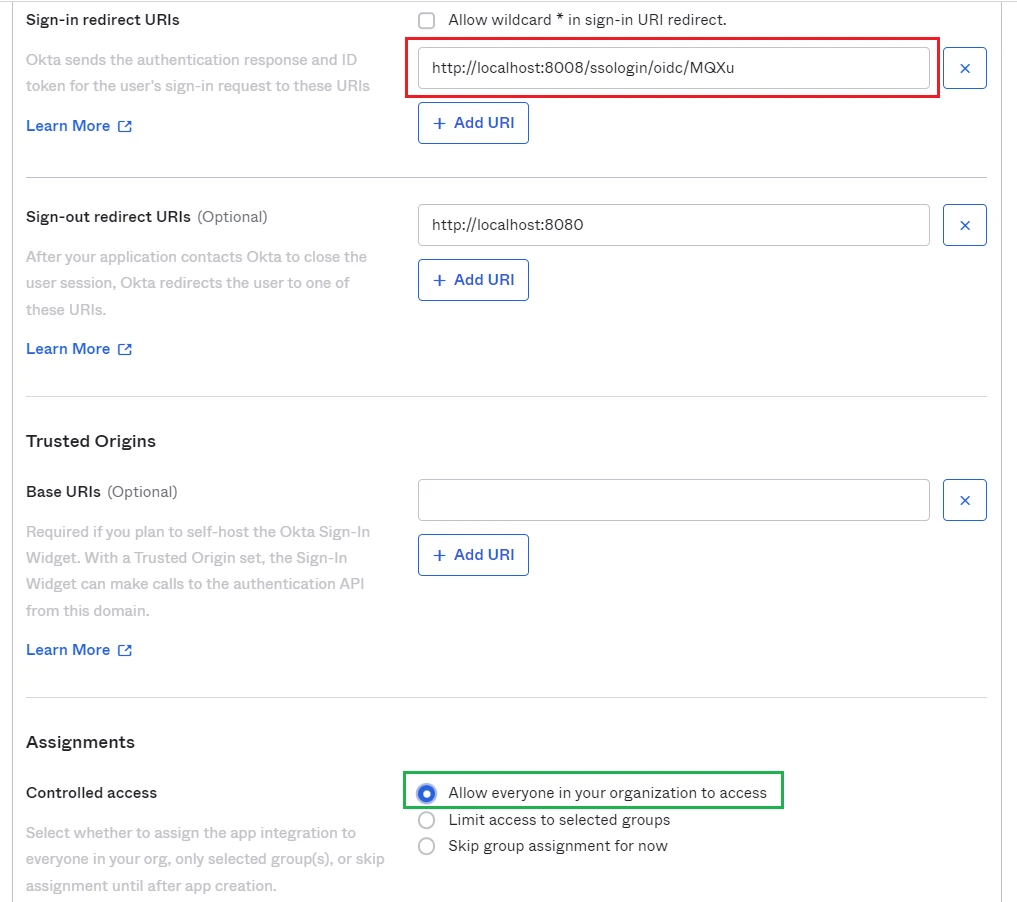
- Switch to
Applicationsscreen in Okta home page. - Paste the
Login URLfrom MetaDefender Core intoSign-in redirect URIsand grant permission for everyone to access our application inAssignmentsthen clickSave.
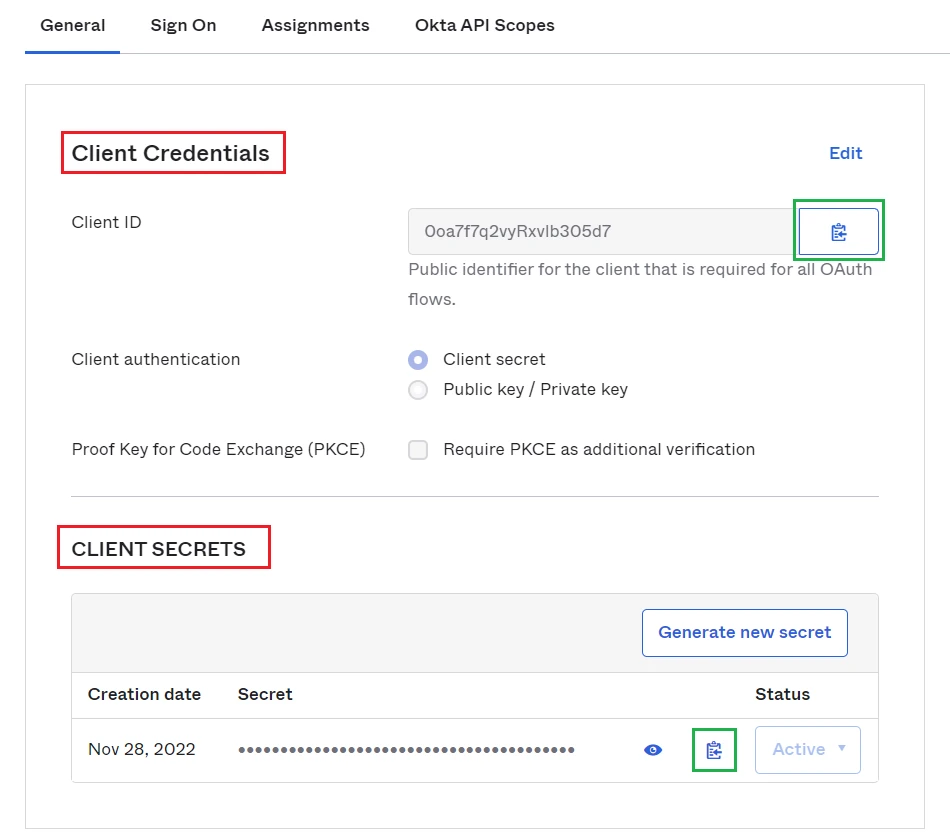
- In
Generaltab, copyClient IDandClient Secret.
Complete configuration in MetaDefender Core
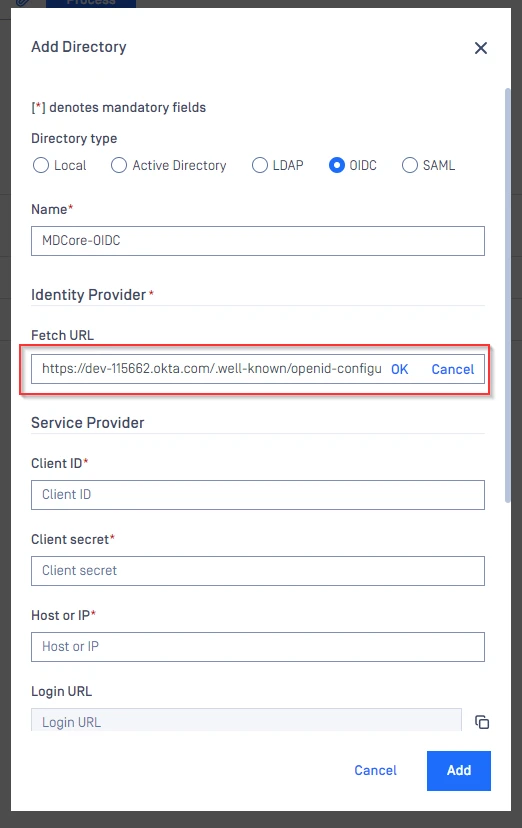
- Switch to MetaDefender Core screen, under
Identity Provider, click onFetch URL. - OIDC link will be built by appending /.well-known/openid-configuration to your Okta domain url (Referred Okta document). For example
dev-115662.okta.com/.well-known/openid-configuration. - Paste OIDC configuration link above to the box under
Fetch URLand hitOKto ensure MetaDefender Core can set Okta as its IdP.
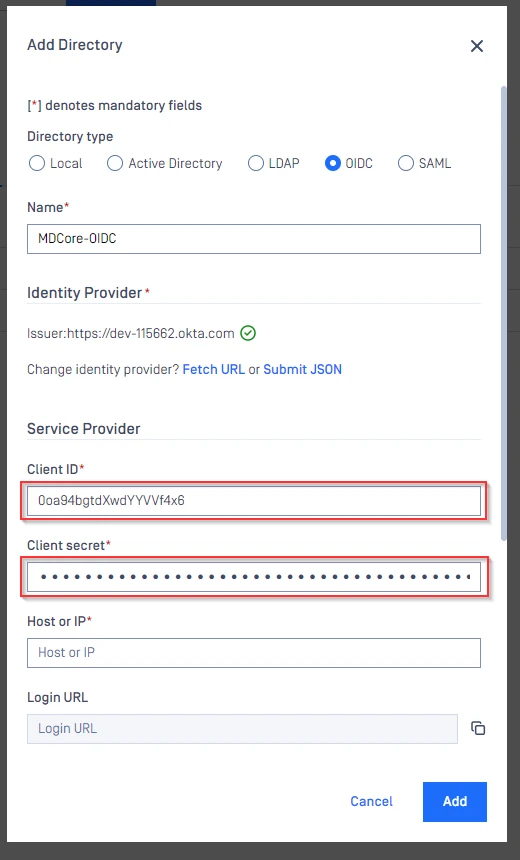
- Under
Service Provider, paste the value ofClient IDandClient secretthat you copied from Okta respectively.
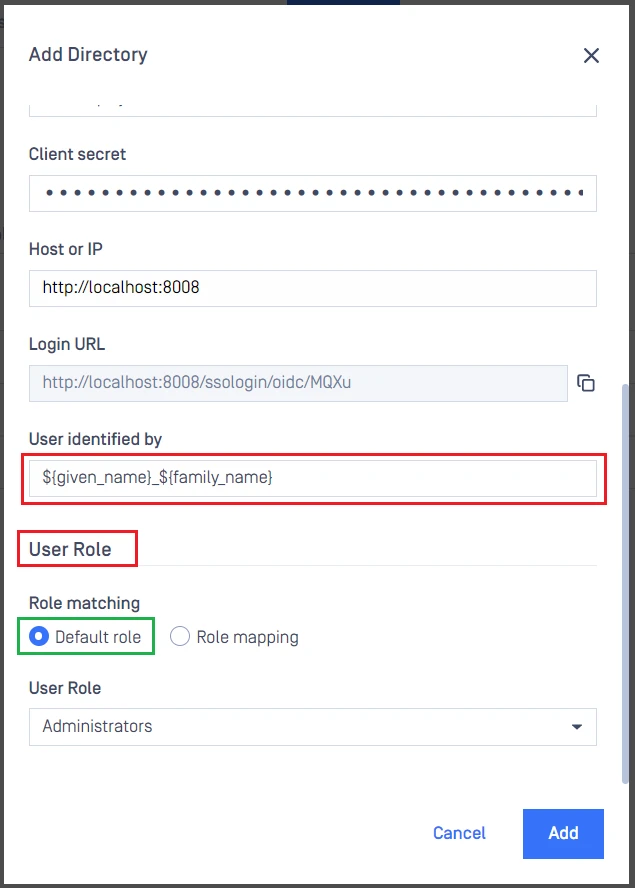
- Under
Service Provider, fill inUser identified bywith ${given_name}_${family_name} for example. - Select appropriate role for the user under
User Role. - Click
Addto complete the settings.
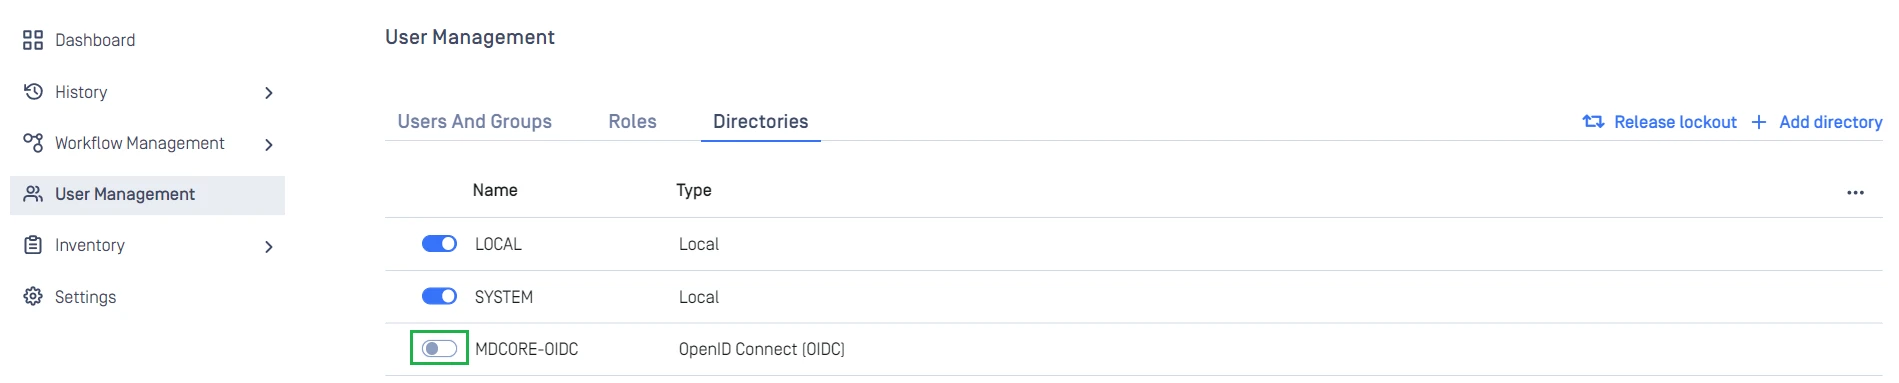
- On
User Managementscreen, toggle the new directory, MDCORE-OIDC in this example. A dialog box is shown to confirm the action. OnceEnableis hit, all existing sessions will be expired immediately and Okta will be used to authenticate users going forward.
Test the integration
- Browse MetaDefender Core, hit
Login, user is redirected to Okta's sign-in page.
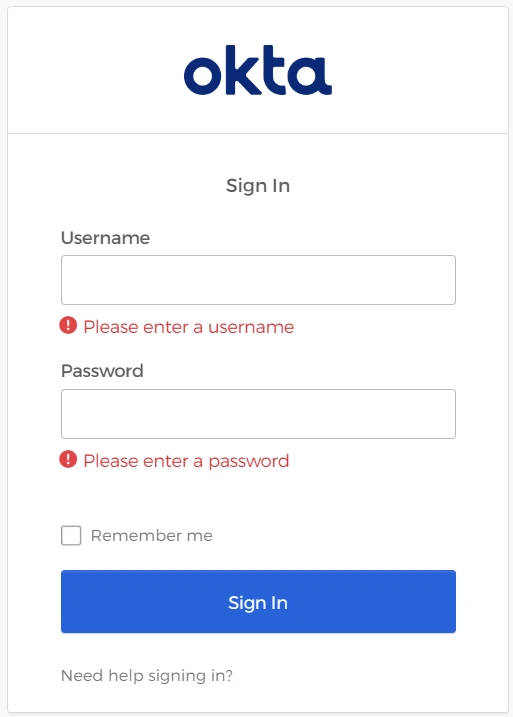
- Sign in by the account registered in Okta.
- If everything goes right, MetaDefender Core dashboard is shown with user identity set at the top right corner.

- For troubleshooting, browse
<mdcore-host>#/public/backuplogin.
Was this page helpful?