Configuration
Create OIDC directory in MetaDefender Core
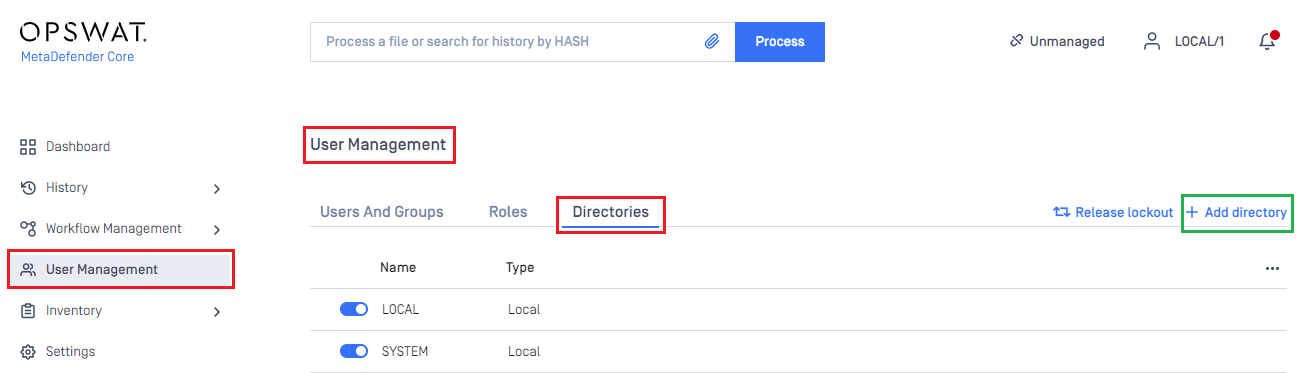
- Sign in to MetaDefender Core.
- In the dashboard, click on
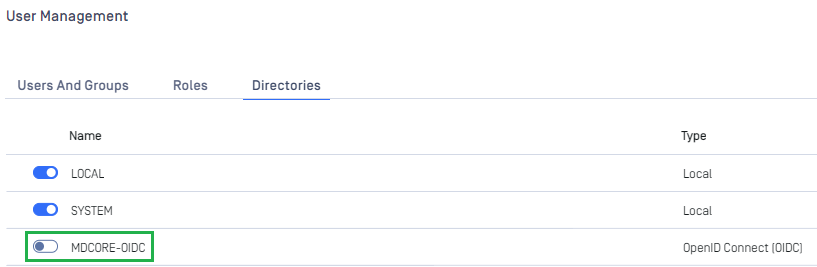
User Managementin the left sidebar. - In
User Managementpage, selectDirectoriestab and clickAdd Directoryin the top right corner.
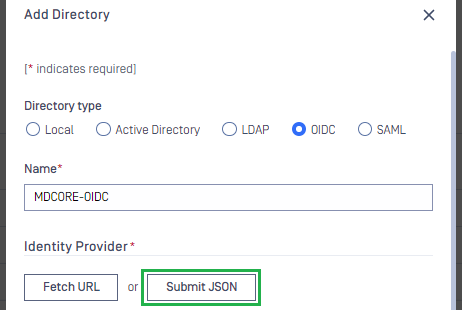
- In
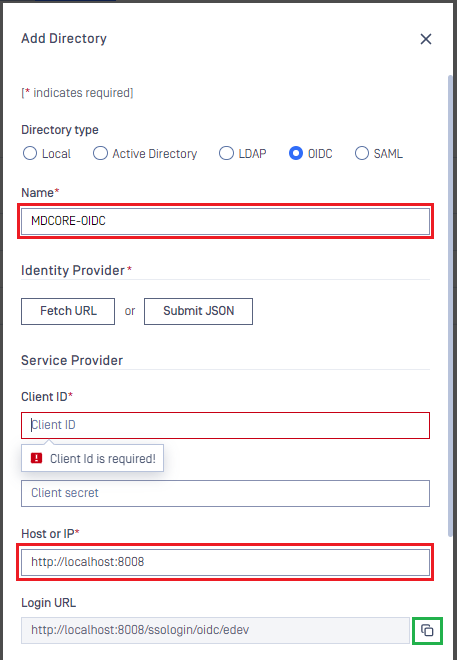
Add Directorypage, select OIDC asDirectory type, and enter a name for the new directory, such as MDCore-OIDC. - Enter
Host or IPwhere MetaDefender Core is hosted, for this example use https://127.0.0.1:8008. - Copy the string generated under
Login URLand store it as reply_uri.
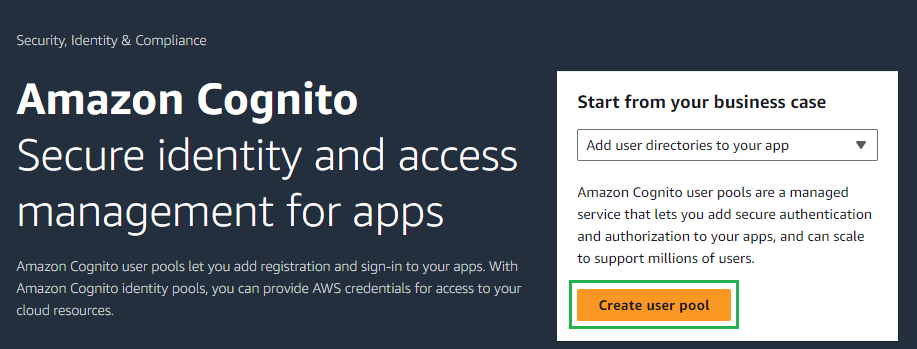
Create Amazon Cognito user pool
- Access https://aws.amazon.com/cognito/v2/home and sign in with your account.
- On the main page, click
Create user pool.
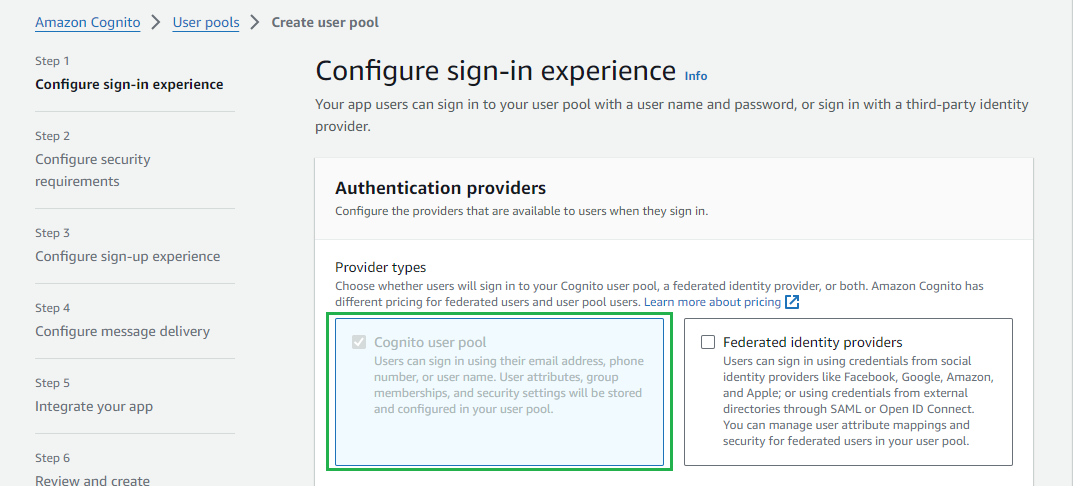
- In
Step 1 - Configure sign-in experience, selectCognito user poolforProvider types.
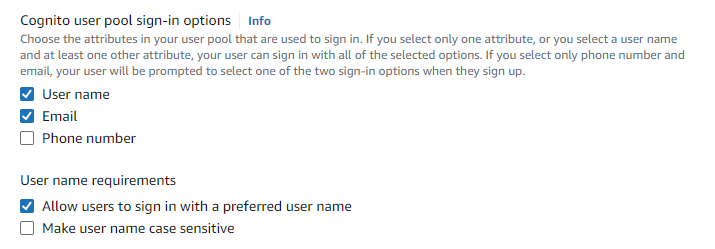
- Tick
User name,Email, andAllow users to sign in with a preferred user name, then clickNext.
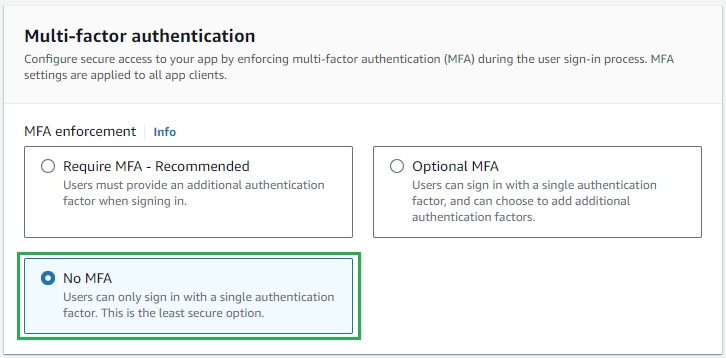
- In
Step 2 - Configure security requirements, selectNo MFAforMFA enforcement, leave all others as default , and clickNext.
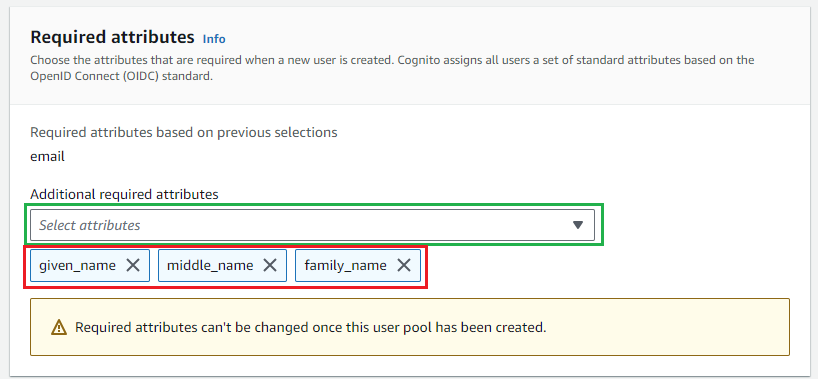
- In
Step 3 - Configure sign-up experience, navigate toRequired attributesand add additional attributes: given_name, middle_name , and family_name. ClickNext.
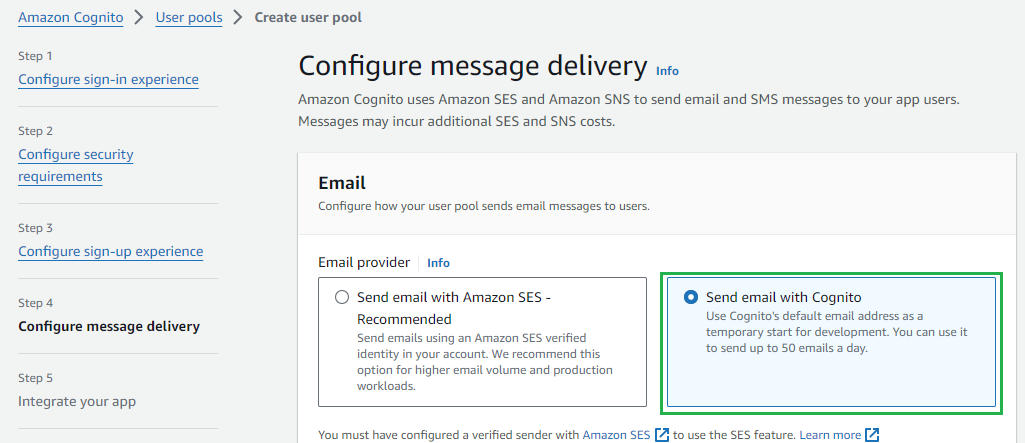
- In
Step 4 - Configure message delivery, chooseSend email with Cognitoand clickNext.
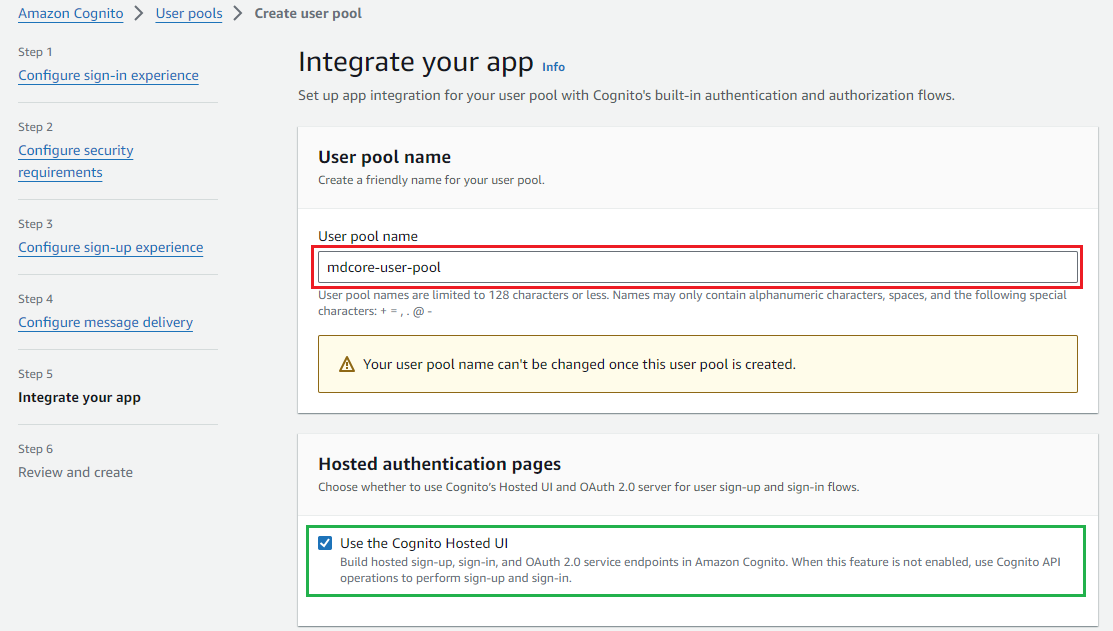
- In
Step 5 - Integrate your app, enter the user pool name and tickUse the Cognito Hosted UI.
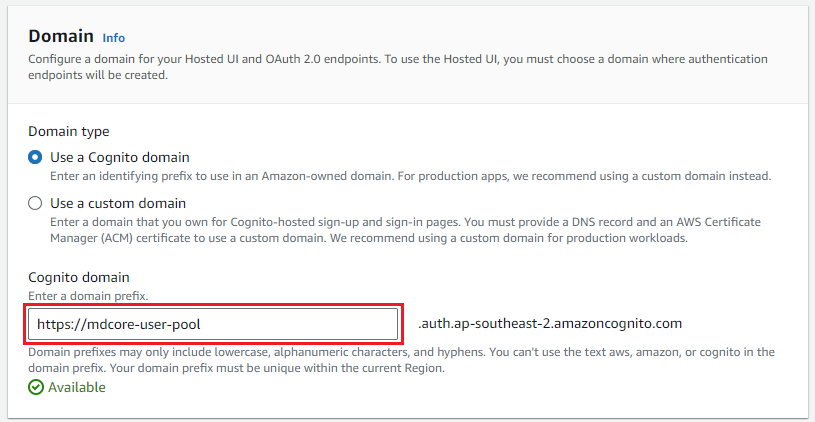
- Enter your domain to
Cognito domain.
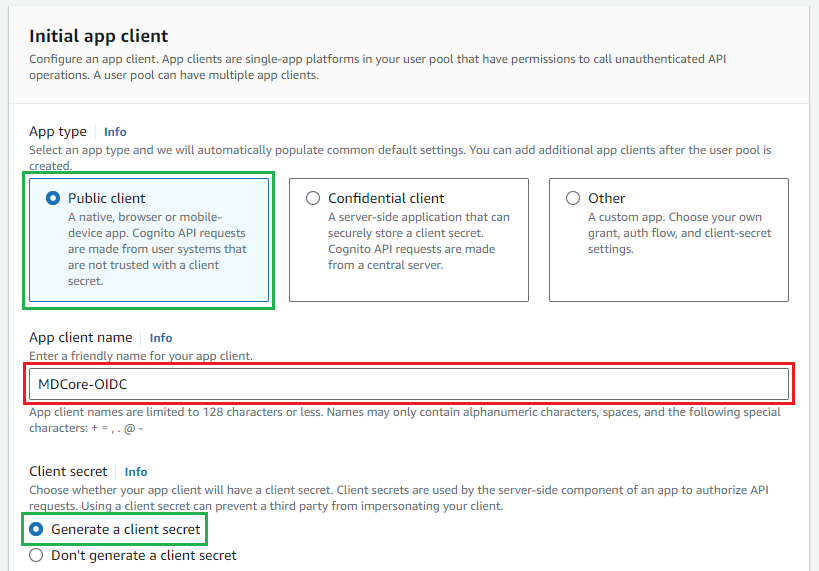
- Under
Initial app clientsection, selectPublic clientforApp type, enterApp client name, and selectGenerate a client secretforClient secret.
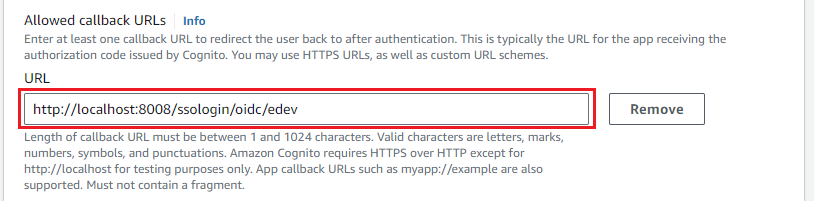
- Under
Allowed callback URLssection, fill inURLbox with the value of reply_uri.
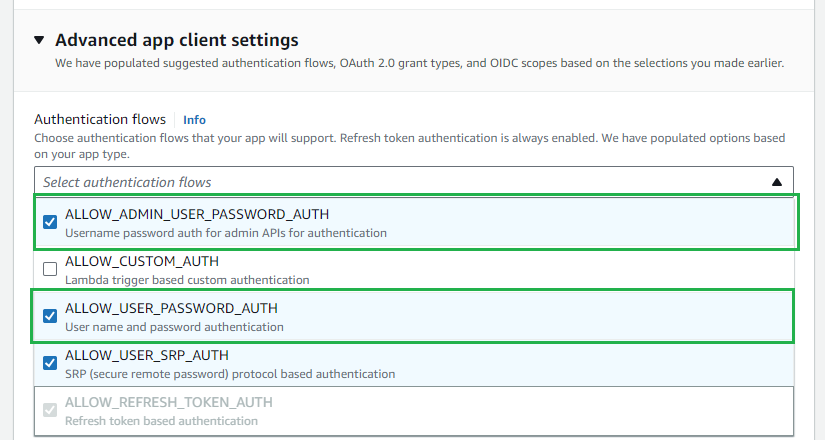
- Expand
Advanced app client settings, then stick to ALLOW_ADMIN_USER_PASSWORD_AUTH and ALLOW_USER_PASSWORD_AUTH forAuthentication flows.
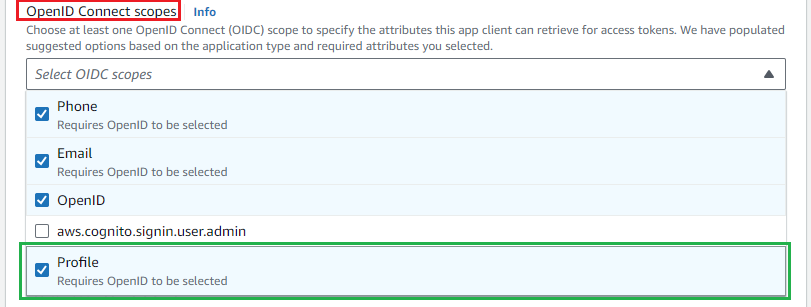
- Navigate to
OpenID Connect scopesand addProfilescope.
- Click
Nextin the final review page and clickCreate user pool.
Create Amazon Cognito user
- In Amazon Cognito, click
User Poolsin the left sidebar and select the user pool that has been created. - In
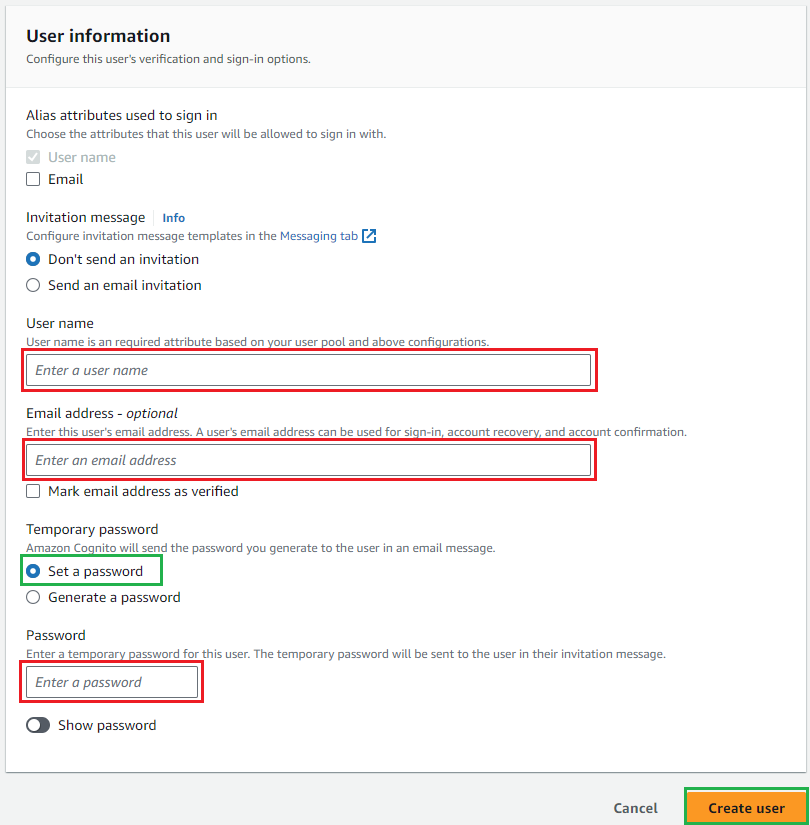
Userstab, clickCreate User.

- Enter the user name, and optional email address; stick to
Set a password, and enter your temporary password. ClickCreate Userto complete.
Download and modify ODIC metadata
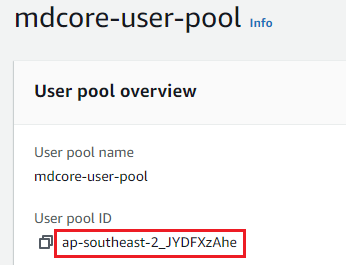
- Start your favorite web browser and enter a URL in the following format:
https://cognito-idp.{region_where user_pool_is_created}.amazonaws.com/{user_pool_id}/.well-known/openid-configuration, whereuser_pool_idcan be found inUser pool overview.
- Save the responded content to a file on disk.
- Open the file in your favorite editor.
- Add the following content to the beginning of the file, right after the first open brace.
xxxxxxxxxx"claims_supported": ["middle_name", "given_name", "family_name"],- Save the file.
claims_supported includes items that are selected for Required Attributes at step 6 of Create Amazon Cognito user pool stage.
Complete the configurations
- In Amazon Cognito, click on
User Poolsin the left sidebar and select the user pool that has been created. - In
App Integrationtab, navigate toApp Client listand select the app client that has been created.

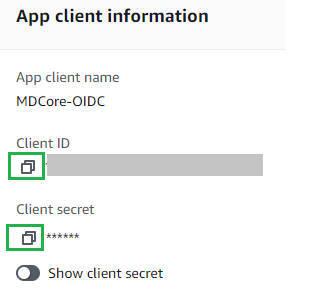
- Copy
Client IDandClient Secret.
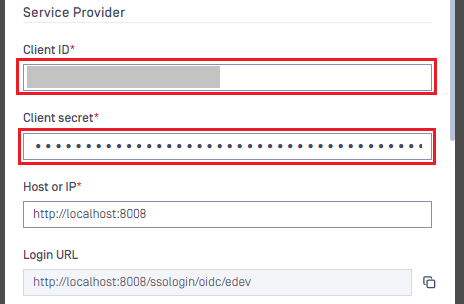
- Switch to MetaDefender Core, under
Service Provider, pasteClient IDandClient Secretfrom the previous step into their respective fields.
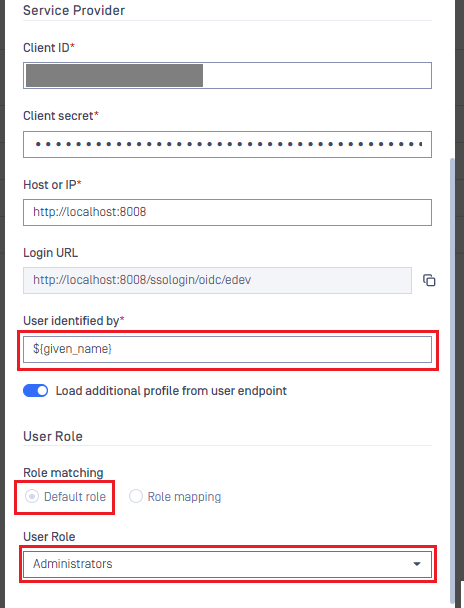
- In
Identity Provider, clickSubmit JSONbutton and upload the file that was modified in the previous stage. Wait a moment for MetaDefender Core to set Amazon Cognito as its IdP.
- Enter
User identified bywith ${given_name} and select the appropriate role.
- Click
Addto complete. - In
User Management, toggle the new directory. A dialog box will appear to confirm the action. OnceEnableis clicked, all sessions will be expired immediately.
Test the integration
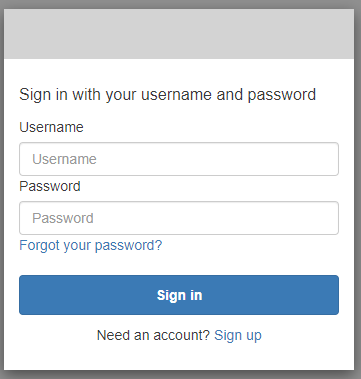
- On the home screen of MetaDefender Core, click
Login; the user is redirected to Amazon Cognito page.
- Change the password, enter other required fields, and click
Send.
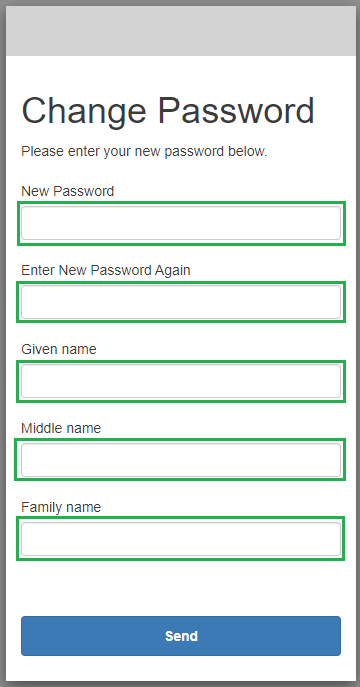
- If everything goes well, MetaDefender Core dashboard is displayed with the user identity in the top right corner.

- Otherwise, access backup login page at
<mdcore-host>#/public/backuploginfor trouble shooting.
Was this page helpful?