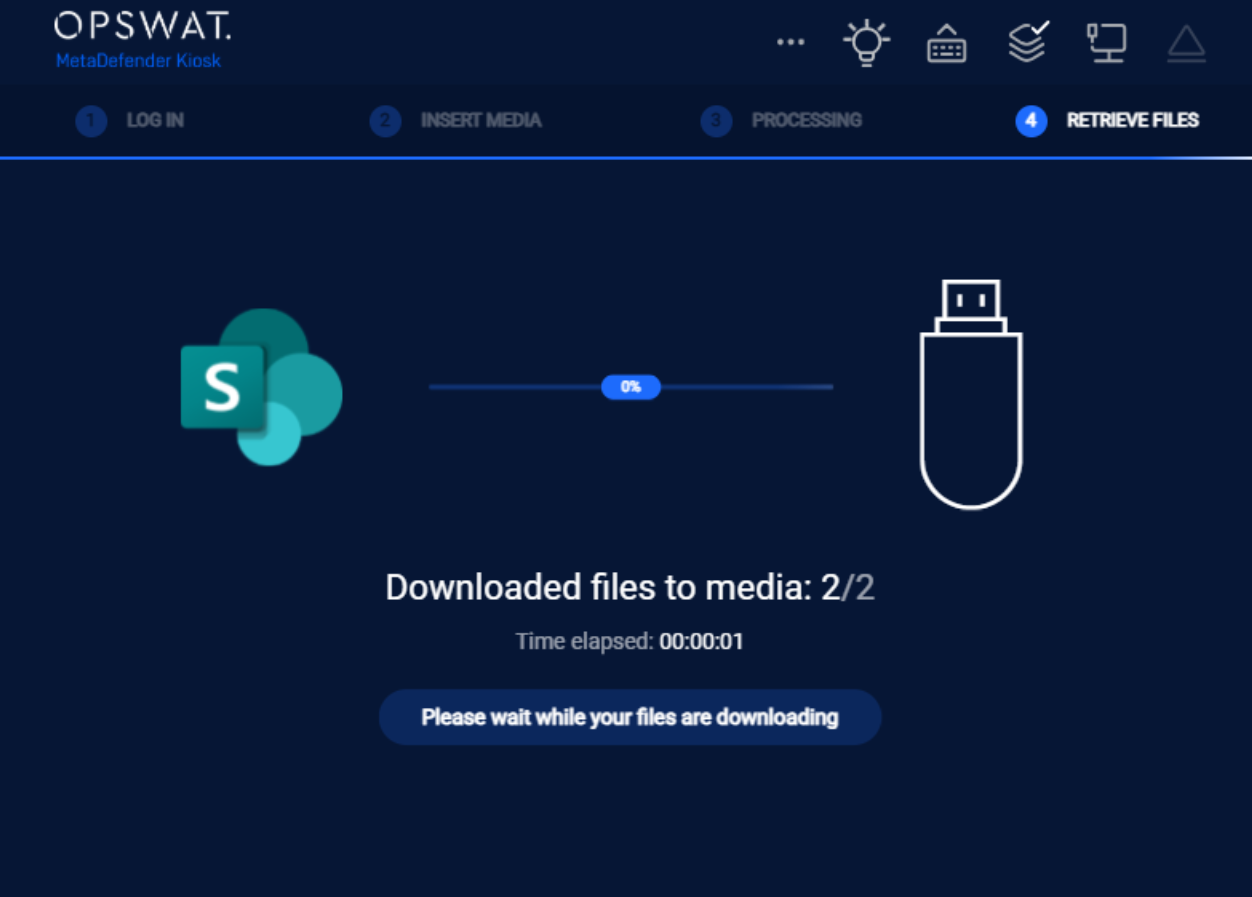
MetaDefender Kiosk supports file retrieval from multiple source types, giving organizations flexibility in how content enters the secure scanning workflow. Administrators can configure Kiosk to pull files directly from a Managed File Transfer (MFT) server, a local or network directory, SharePoint, or OneDrive — ensuring that files from across the organization's infrastructure are subject to the same rigorous scanning policy before being transferred to media.
Users from a Remote Active Directory (view Enabling user authentication in 8.3. Configuring Global Kiosk Settings) can retrieve files from all supported sources . Users logged in from Windows user login are not supported for file retrieval.
Guests are otherwise restricted to retrieving files from MFT only, and are required to enter a MFT Owner ID to access files — see 9.9. Retrieving Files from an External Source — with one exception, described below, for sessions that automatically receive files right after a Copy & Go upload.
Only AD accounts are allowed to retrieve files from networked folder
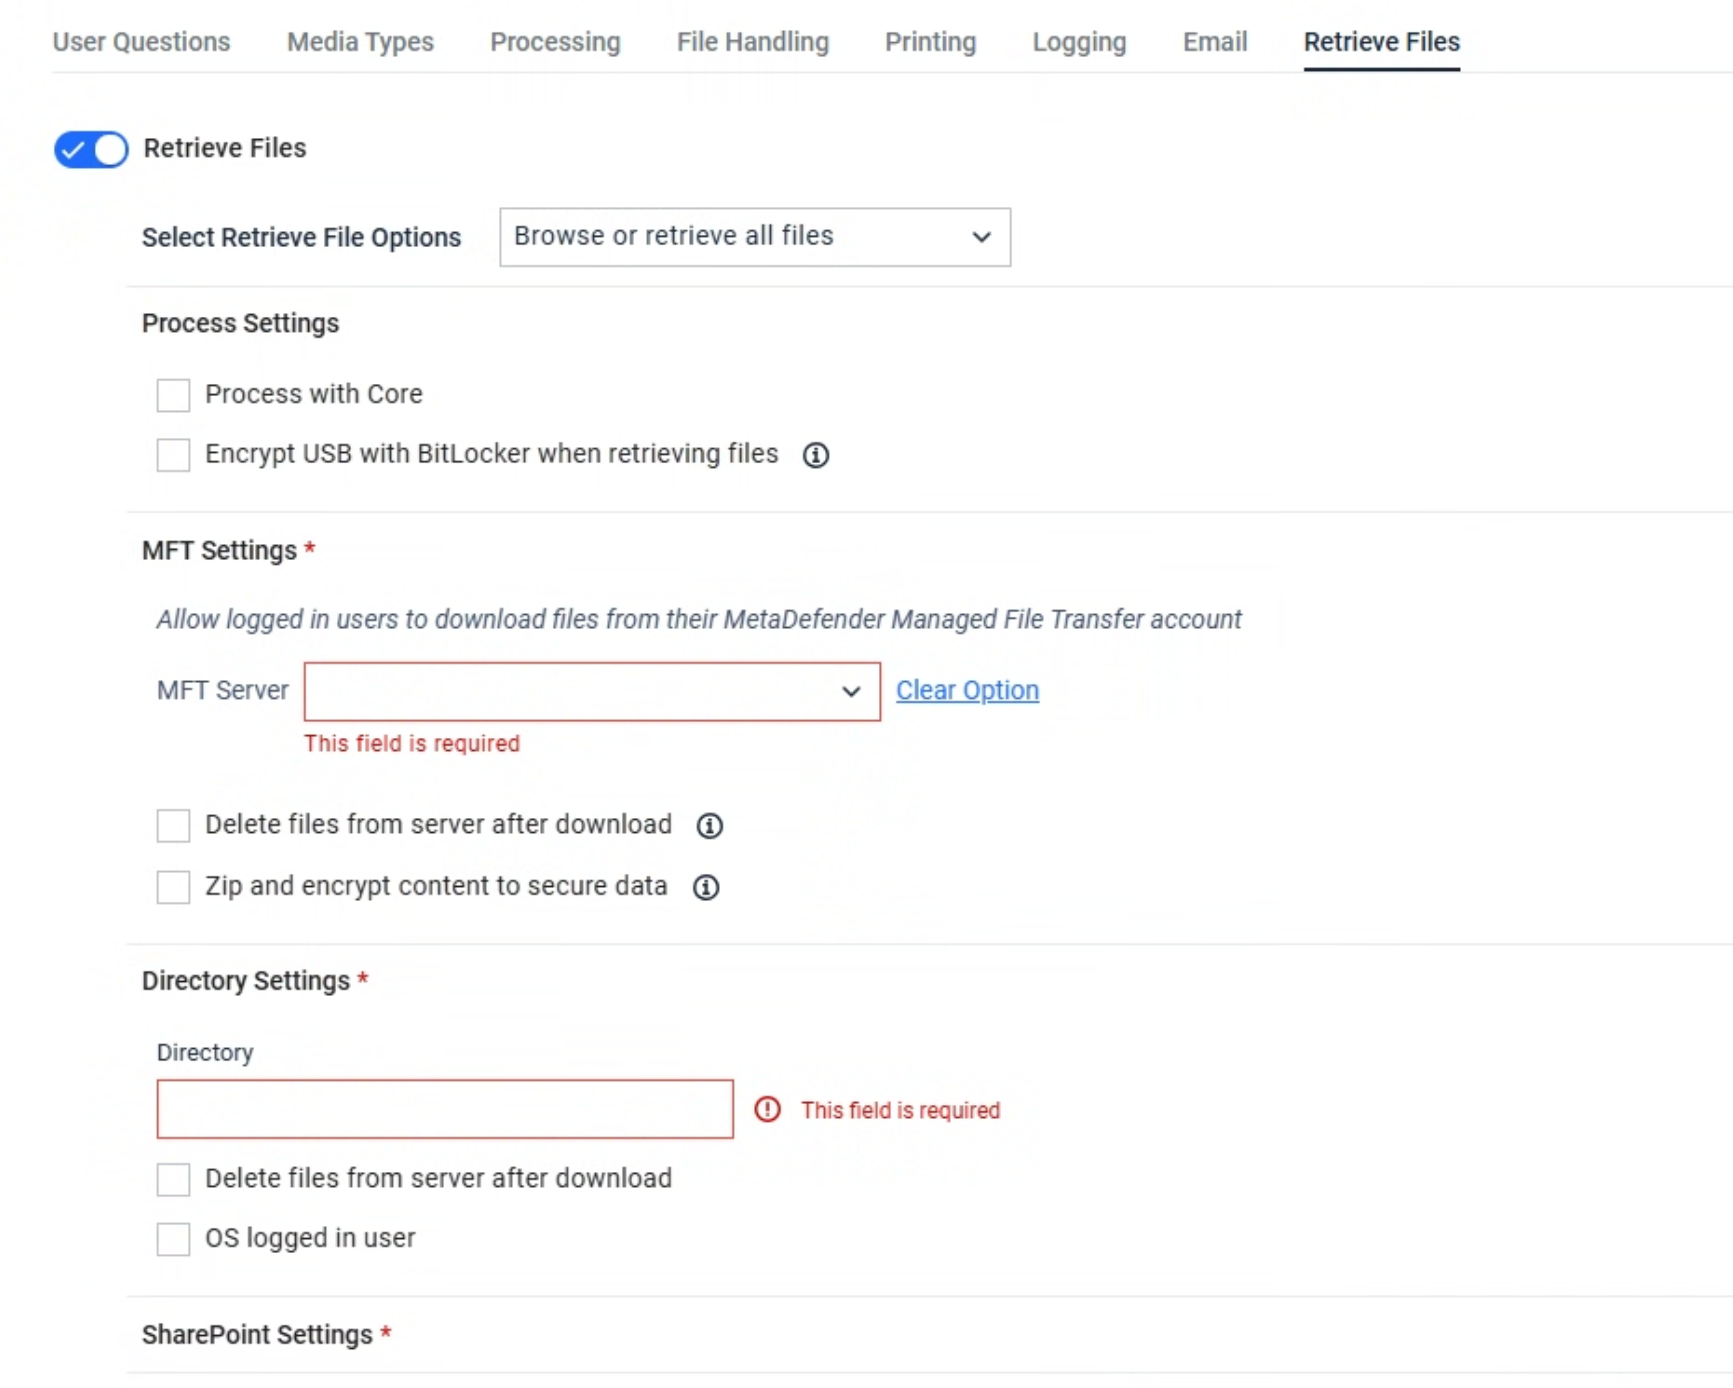
Retrieve File Options
Defines how files are selected and collected from the user folder during the retrieval process.
Browse File: Allows the end user to manually browse and select specific file(s) to retrieve.
Retrieve All Files: Automatically retrieves all files from the user folder without user selection.
Browse or Retrieve All Files: Gives the user the choice to either browse and select files or retrieve all files automatically.
Processing Settings
Process with Core
When retrieving files from supported sources, administrator can configure to process files with MetaDefender Core using a specific rule before downloading those files to the end user media.
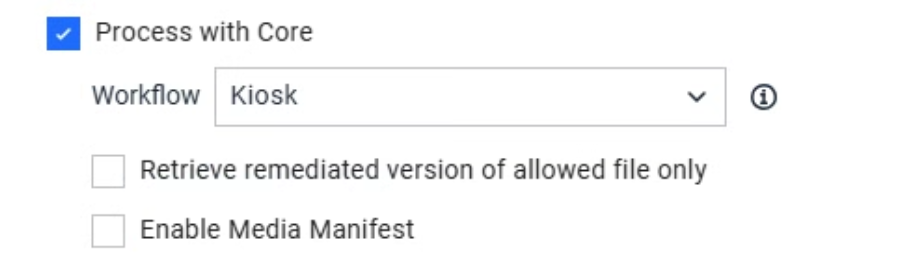
Administrators can optionally enable the following settings for file retrieval
Remediated version of allowed files only: When enabled, only files that passed the scan are retrieved — as their remediated version if MetaDefender Core produced one, or their original version if not. Files that did not pass the scan are not retrieved at all, even if a remediated version of them exists. See Limiting Remediated File Retrieval to Allowed Files below for details.
Enable Media Manifest: When enabled, Kiosk generates a digitally signed record of the retrieval session upon completion. Refer to this KB to understand more about media manifest
Wipe user media before retrieving: When enabled, Kiosk erases the inserted media before any retrieved files are written to it. See Wiping Media Before Retrieving Files below for details.
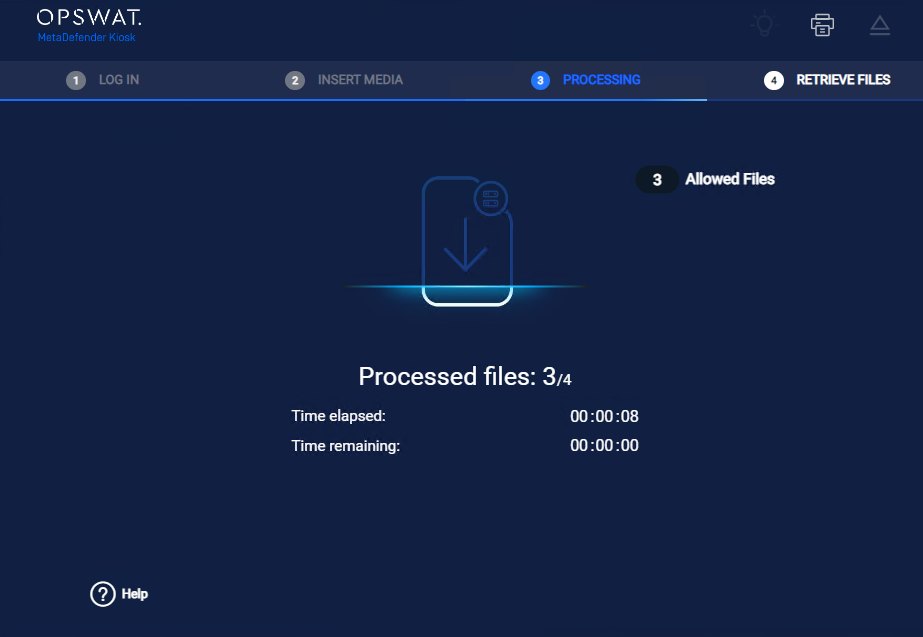
Users can monitor file scanning progress in real time through the Core interface. allowed files are copied to the inserted media. If a file was modified by CDR or DLP during processing, the remediated version is transferred instead of the original.
Starting with Kiosk version 4.7.11, administrators can enable the generation of a manifest file. Once the file retrieval process is successfully completed, a manifest file will be created on the media. For more details, please refer to the documentation How do I set up and use the Media Manifest feature in MetaDefender Kiosk? - MetaDefender Kiosk Windows for more details
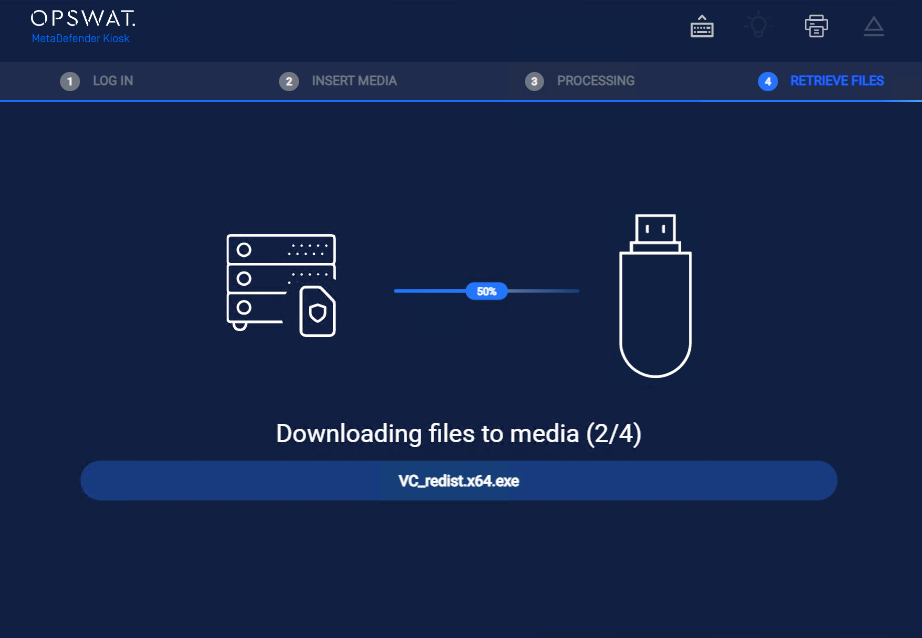
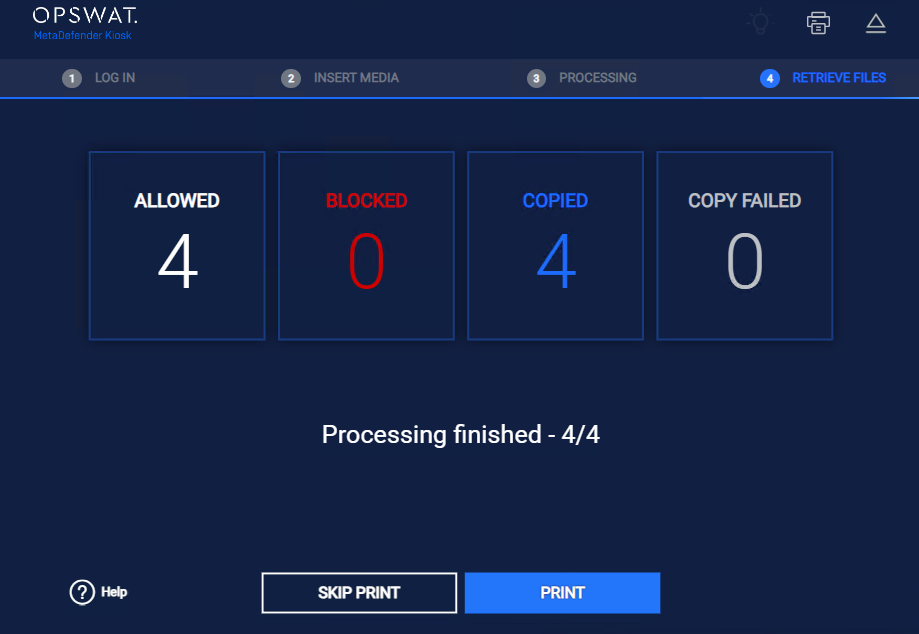
Limiting Remediated File Retrieval to Allowed Files
By default, if MetaDefender Core produces a remediated (cleaned) version of a file while it's being retrieved, that remediated version can be retrieved regardless of the file's overall scan result. Turn on Remediated version of allowed files only to change this: with the option on, only files that passed the scan are retrieved — as their remediated version if one was produced, or their original version if not. Files that did not pass the scan are not retrieved at all, even if a remediated version of them exists.
This setting is available for all Retrieve Files sources — MFT, Directory, SharePoint, and OneDrive — and only has an effect while files are being processed through MetaDefender Core during retrieval.
Note: This setting only affects files being retrieved into the Kiosk session from an external source. It's separate from settings that control where scanned files are copied out to after a session.
Example: An administrator sets up a workflow to retrieve files from an MFT server with MetaDefender Core scanning enabled, using a policy that redacts sensitive data. Two files are retrieved: File A fails the scan but still has a redacted version; File B passes the scan and also has a redacted version. With Remediated version of allowed files only turned on, only File B's redacted version is copied to the destination — File A isn't retrieved in any form.
Encrypt USB with BitLocker when retrieving files
This option allows administrators to force BitLocker encryption on a USB drive before retrieving files from the supported source, such as MFT or Directory. It was designed for high-security environments where sensitive data must be protected even after leaving the Kiosk's secure environment.
The option of encrypting USB with BitLocker when retrieving files support only USB. Other media types, such as SD card or Floppy disc are not supported
Administrators can configure where the BitLocker recovery keys are stored.
On the USB Drive: The recovery key is saved as a file on the USB.
On the Kiosk Device: The recovery key is securely stored in the Kiosk's local database.
Both: Keys are stored in both locations for redundancy.

Step | Description |
|---|---|
Initiate retrieve file process | Insert a non-encrypted USB drive into the Kiosk. Choose the "Retrieve Files" option and proceed as usual. |
Provide password for encryption | Kiosk prompts the user to enter a password for BitLocker encryption.
|
Encryption process | Kiosk applies BitLocker encryption to the USB. Depending on the amount of data on the USB, encryption time could be varied.
|
Encryption complete | Once the encryption complete, Kiosk informs the end user the status and where the recovery key is stored.
|
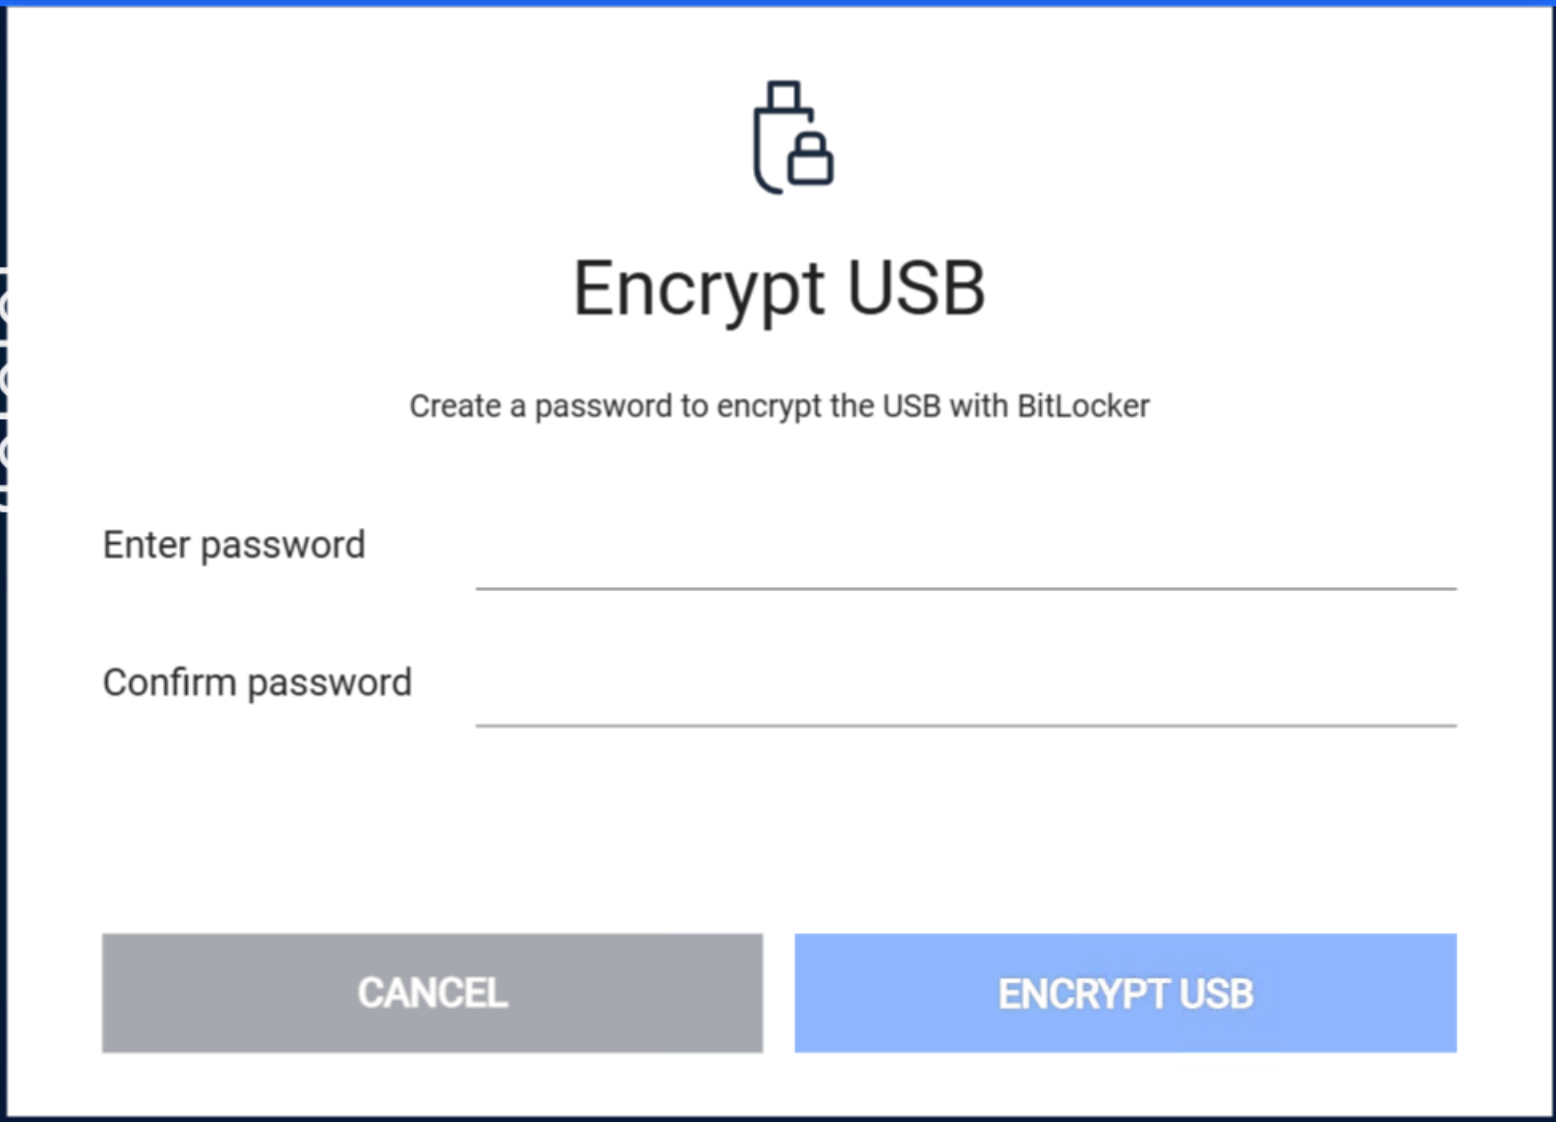
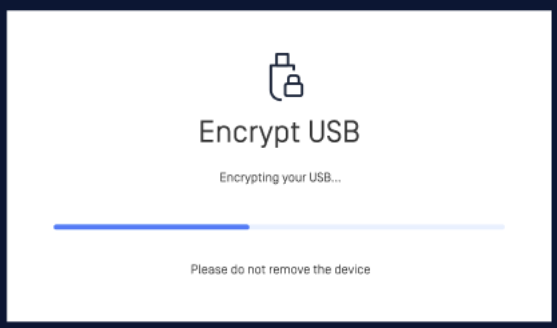
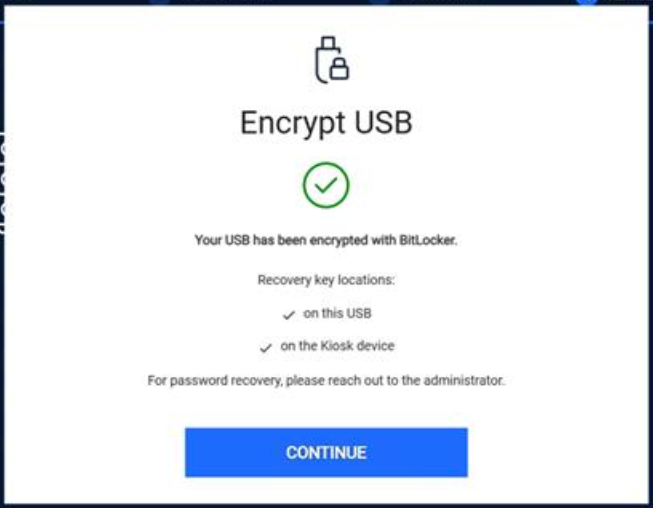
If BitLocker Recovery Key is configured to be stored in Kiosk, administrators can be managed the generated key from the Kiosk Console > Settings > Security > BitLocker Recovery Keys.
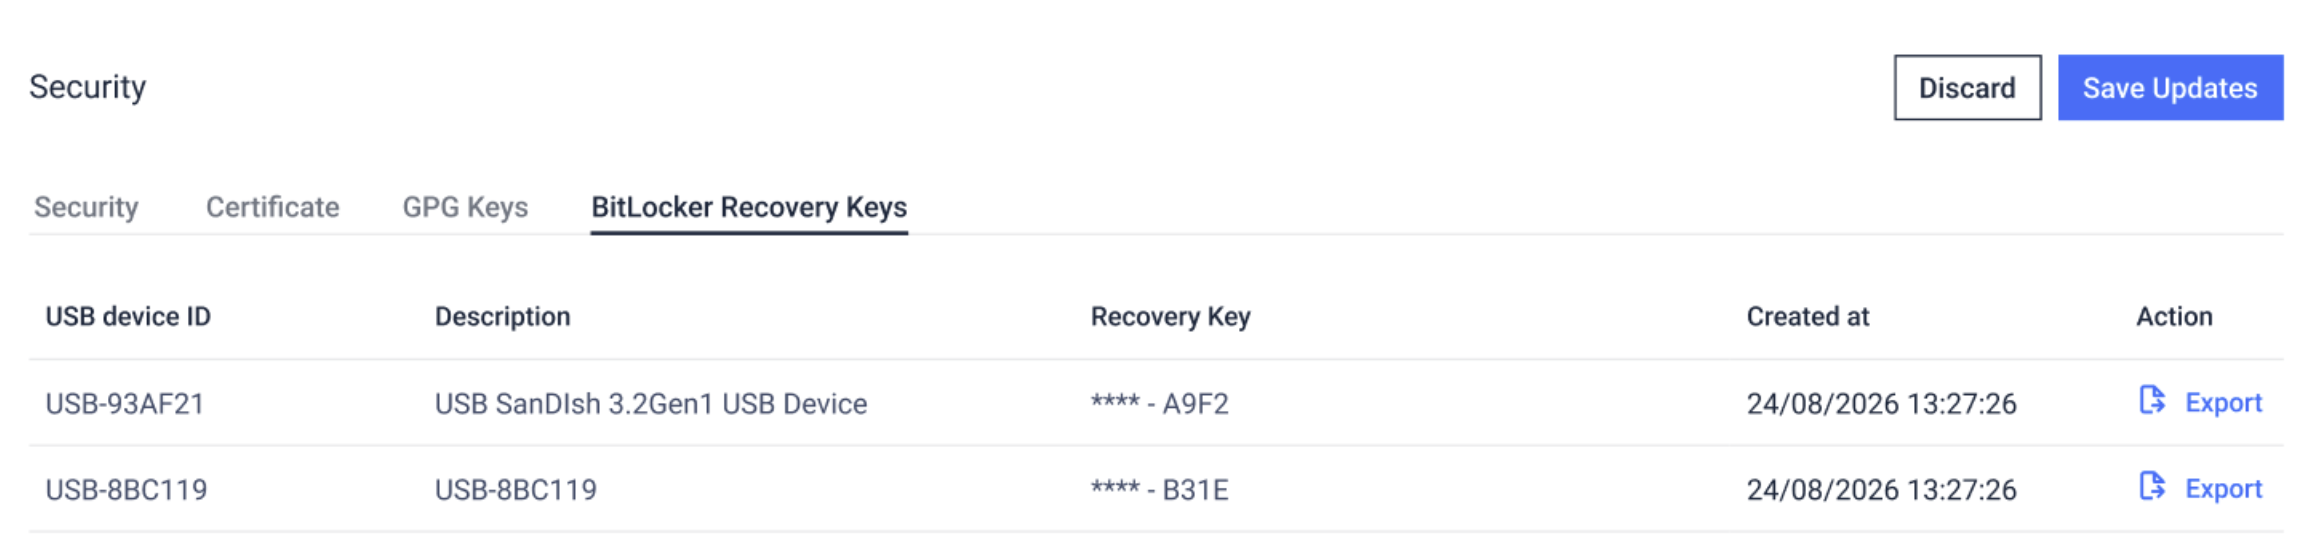
When the BitLocker password is forgotten, the recovery key is used to unlock the encrypted drive and regain access. Ensure the recovery key is stored in a safe and accessible place
Wiping Media Before Retrieving Files
You can configure a workflow so that the media you insert is erased before any retrieved files are written to it. This is useful when the same USB drive is reused across sessions and you want to be sure it doesn't carry over anything from a previous use.
This option is off by default and applies to every retrieval source — MFT, Directory, SharePoint, and OneDrive.
Turning it on
An administrator enables this per workflow:
In the Kiosk Web Management Console, open Workflows and select the workflow to update.
Open the Retrieve Files tab and make sure Retrieve Files is turned on.
Open the Process Settings section.
Check Wipe user media before retrieving.
Click Save Updates.
What you'll see
Insert your media at the Kiosk and choose your retrieval source, then tap Retrieve All (or the equivalent retrieval action for your workflow).
A confirmation prompt appears, warning that all content on the inserted media will be permanently erased before proceeding.
Tap Confirm to continue: your media is erased first, and then the retrieval finishes normally — only the newly retrieved files remain on it afterward.
Tap Cancel instead if you want to back out: nothing is erased or written, your session stays active, and you can remove the media and insert a different one before trying again.
If the erase itself can't complete (for example, because the media is write-protected), the Kiosk reports the erase as failed and ends the session without retrieving any files — nothing already on the media is written over in this case.
If your workflow also scans retrieved files with MetaDefender Core, the media is always erased before any files — including files that end up allowed through scanning — are written to it.
If your workflow also has USB encryption enabled for retrieved files, the media is erased first and then encrypted as part of writing the retrieved files, so you'll be prompted to unlock it the next time you plug it into a computer.
If this option is turned off, retrieval works as before: files are added to the media alongside whatever is already there, and a file with the same name as an existing one is saved with a number added to its name (for example, file_1.txt).
Retrieval Sources
MFT
When an AD user logs in to a Kiosk session, the same login credentials will be used for accessing the user's account on MFT. When a Guest user has uploaded files to MFT server, a MFT owner ID for that session is generated at MFT and is used as an input for guest to retrieve files later. Refer to 6. Configuring with MFT to enable MFT server selection.
It is recommended for both Kiosk and MFT to be connected to the same user directory in order for the integration to work seamlessly.
Retrieving files from MFT or directory via SSO is not yet supported.
Delete files from server after download
With this enabled, files that are successfully downloaded will be marked for deletion on MFT. MFT's background worker will later proceed to delete the file.
Zip and encrypt content to secure data
With this enabled, files that are successfully downloaded from MFT will be compressed into a zip archive with password protection before copying to the media.
User will be required to enter the encryption password.
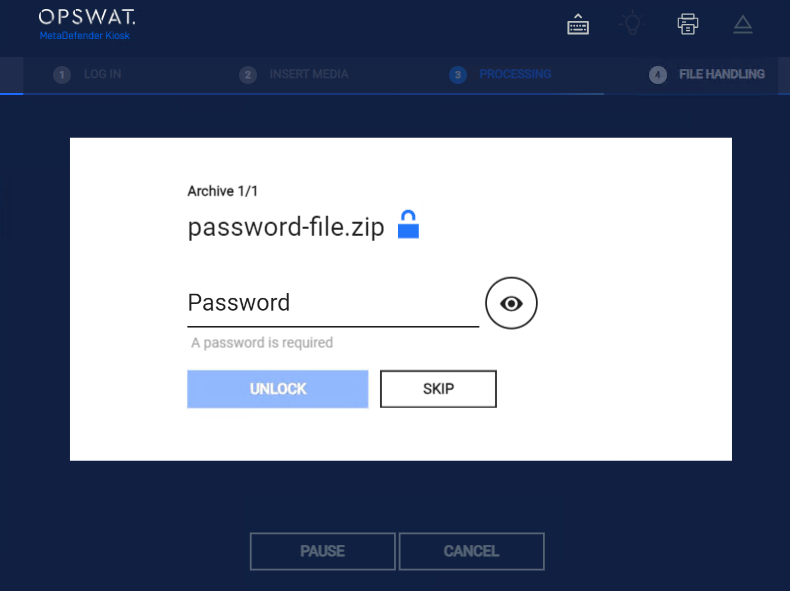
Max length of the password is 100
Special characters are not supported: " !"#$%&'()*+,-./:;<=>?@[]^_`{|}~"
Directory
Local directory or network share is supported. Guests cannot manually browse and retrieve from a directory on their own — an unauthenticated session can, however, receive files from a directory automatically right after copying files out, as described in Automatic retrieval after copy in a Guest Workflow below.
Variables can be used to create folder name or to map the home folder of the end users
The %%%% variable is supported to map the user that is logged in to the Kiosk session to their own personal directory.
Responses to user questions can also be utilized via the predefined '%%%userresponse#%%%' variable, where '#' is the number of the response to the corresponding user question.
For example, to utilize the answer to the question 2, the variable to use would be '%%%%'. If no response to the question was given or no such question exists for the user response to exist (e.g. %%%%), then the variable will exist in the path created. The user's credentials are used to access the directories contents, ensure security permissions are set accordingly.
Delete files from server after download
With this enabled, files that are successfully downloaded will be deleted on the directory
OS logged in User:
An Admin can enable utilizing the OS logged in user's credentials if the copy initially fails with the AD user credentials
When retrieving files from a network share, the OS logged in user option can only access the path if it uses the server's IP address instead of its hostname."
Automatic retrieval after copy in a Guest Workflow
A Guest Workflow lets a visitor scan removable media without logging in. Normally, an unauthenticated session like this can only send files out (for example, copying scanned files to a network folder) — it can't also retrieve files, since retrieval on other workflows depends on the identity of whoever is logged in.
To close that gap, a Guest Workflow can be configured so that once it finishes copying files to a network location, it automatically turns around and retrieves a second set of files from a different directory, writing them back onto the same USB drive the visitor is using — all without the visitor doing anything beyond inserting their media. Since there's no logged-in identity to rely on, this automatic retrieval always uses an account you configure specifically for the workflow, not the visitor's own credentials.
Setting it up
Open the Guest Workflow you want to configure, and confirm its File Handling settings already copy allowed files to a secondary network location (this is the existing Copy & Go behavior this feature builds on).
Go to the workflow's Retrieve Files tab and turn on Retrieve Files.
Open Directory Settings and enter the Directory path to retrieve from.
Make sure OS logged in user is turned off, and provide the account Kiosk should use to access both the copy destination and the retrieve directory (username and password, plus a domain if your environment requires one). Guest sessions have no logged-in user of their own, so this account is required.
Save your changes.
Only one directory path is supported for the retrieval step, and files can only be retrieved from a directory this way — not from MetaDefender Managed File Transfer, SharePoint, or OneDrive. Those sources remain available for authenticated (non-guest) sessions only.
What the visitor sees
The visitor inserts their USB drive at the Insert Media screen.
Kiosk scans the media and, once done, automatically copies the allowed files to the configured network location.
Immediately after that copy finishes, Kiosk automatically retrieves the files waiting in the second configured directory and writes them onto the same USB, inside a folder unique to that session.
The visitor is prompted to remove their USB once both steps are done.
If either step runs into a problem — for example, a share is unreachable — Kiosk shows an on-screen message and the session keeps going rather than stopping outright, unless the USB drive itself has been removed, in which case the session ends.
SharePoint and OneDrive
MetaDefender Kiosk (4.8.0 or later) allows users to browse and retrieve existing files directly from Microsoft OneDrive and SharePoint.
To use this option, Microsoft Entra ID must be configured and selected as a Default Login Method for Kiosk authentication. Refer to Setup Microsoft SharePoint or OneDrive as storage - MetaDefender Kiosk Windows for details about the setup.
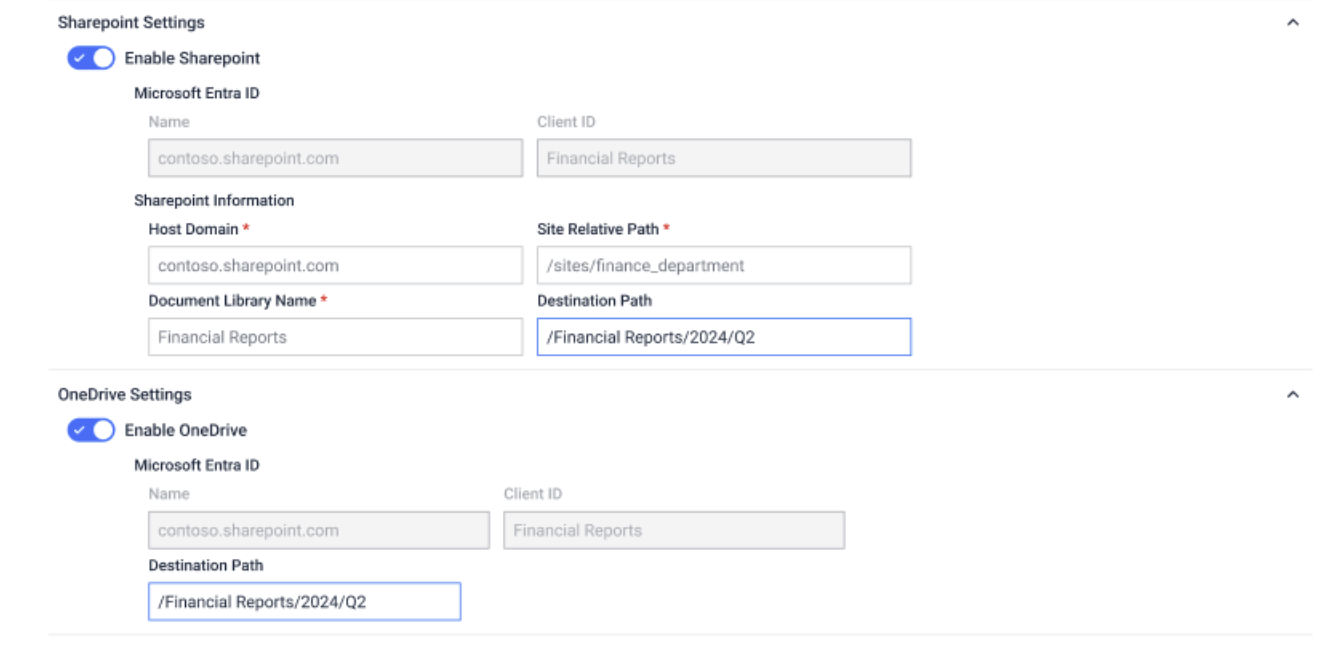
Settings for SharePoint
Microsoft Entra ID: Auto-populated from the configured Default Login Method > Entra ID settings.
Host Domain: Provide SharePoint Domain name
viethunghoang1999gmail.sharepoint.com as example from the screenshot above
Site Relative Path: Relative path to the site
/sites/hoangviethung-team as example from the screenshot above
Document Library Name
Documents as example from the screenshot above
Destination Path: The relative path from the root of the document library where the uploading folder will be stored
/Factory-3/Room1 as example from the screenshot above
Destination Path supports %%%% and %%%userresponse#%%% variables, please refer to Directory Naming for more information.
If you want to upload files into the root of the document library. Please enter Root, or leave this field empty
Settings for OneDrive
Microsoft Entra ID: Auto-populated from the configured Default Login Method > Entra ID settings.
Destination Path: The relative path where the uploading folder will be stored.
/Financial Reports/2024/Q2 as example from the screenshot above
Destination Path supports %%%% and %%%userresponse#%%% variables, please refer to Directory Naming for more information.
If you want to upload files into the user's personal folder. Please enter Root, or leave this field empty