
My OPSWAT Central Management can be easily integrated with an existing Okta Expensify integration to ensure that a device is compliant with the organization's security policy before it is granted access to Expensify. This ensures that the device is not only authenticated by the IdP, but also tested for risks and vulnerabilities such as infections or unpatched versions of operating systems, BEFORE it access an organization's cloud services.
To get started with implementing My OPSWAT Central Management integration to enforce device posture check before granting a device to access Expensify with Okta Single Sign On (SSO) service, you set up SSO between Okta and Expensify manually as below steps even you already have SSO set up for Expensify on Okta. The built-in Expensify application doesn't allow you to modify a single sign on URL of Expensify.
Log into the Okta console as an Administrator
Switch to Admin view, navigate to Application

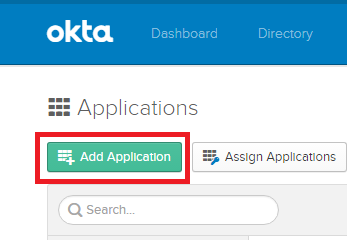
Click Add Application
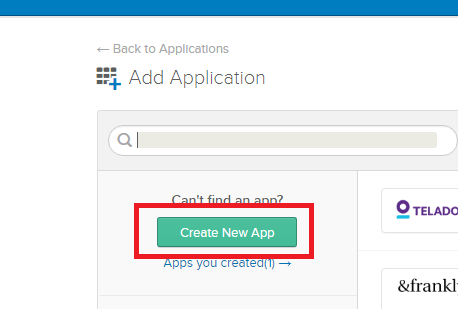
Click "Create New App" button to create an application manually
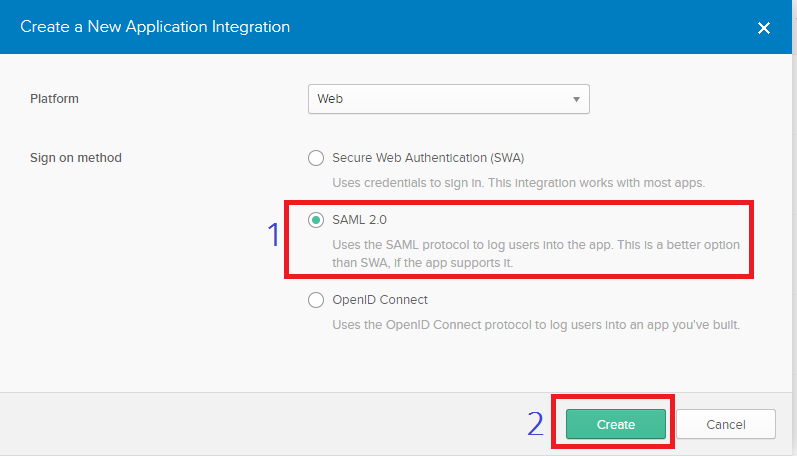
Select SAML 2.0 option and click Create
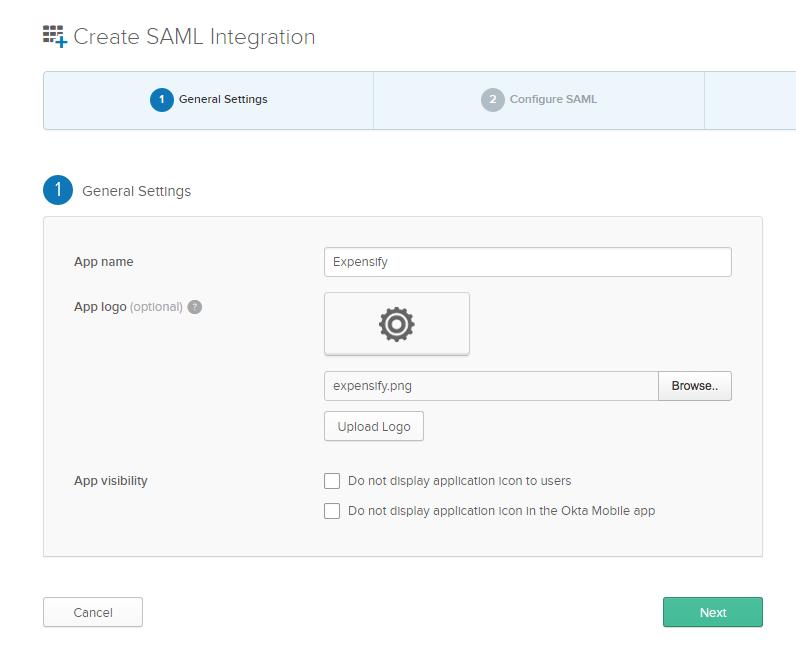
On the step 1 General Settings, fill in the app name and upload a new logo for the app if needed, then click Next
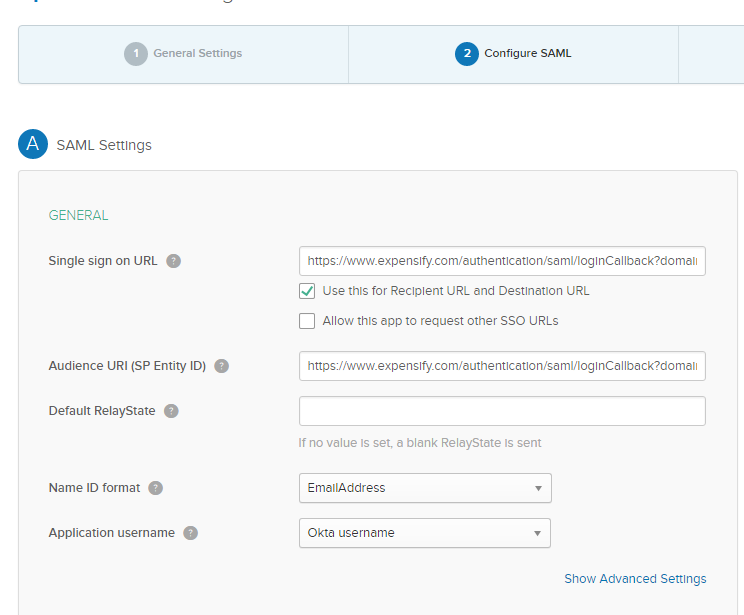
On the step 2 Configure SAML, fill in the below information and then click Next
Single sign-on URL is a Expensify single sign-on post back URL: https://www.expensify.com/authentication/saml/loginCallback?domain=your_domain.com
Audience URL (SP Entity ID): https://www.expensify.com/authentication/saml/loginCallback?domain=your_domain.com
Name ID format: EmailAddress
Application username: Okta username
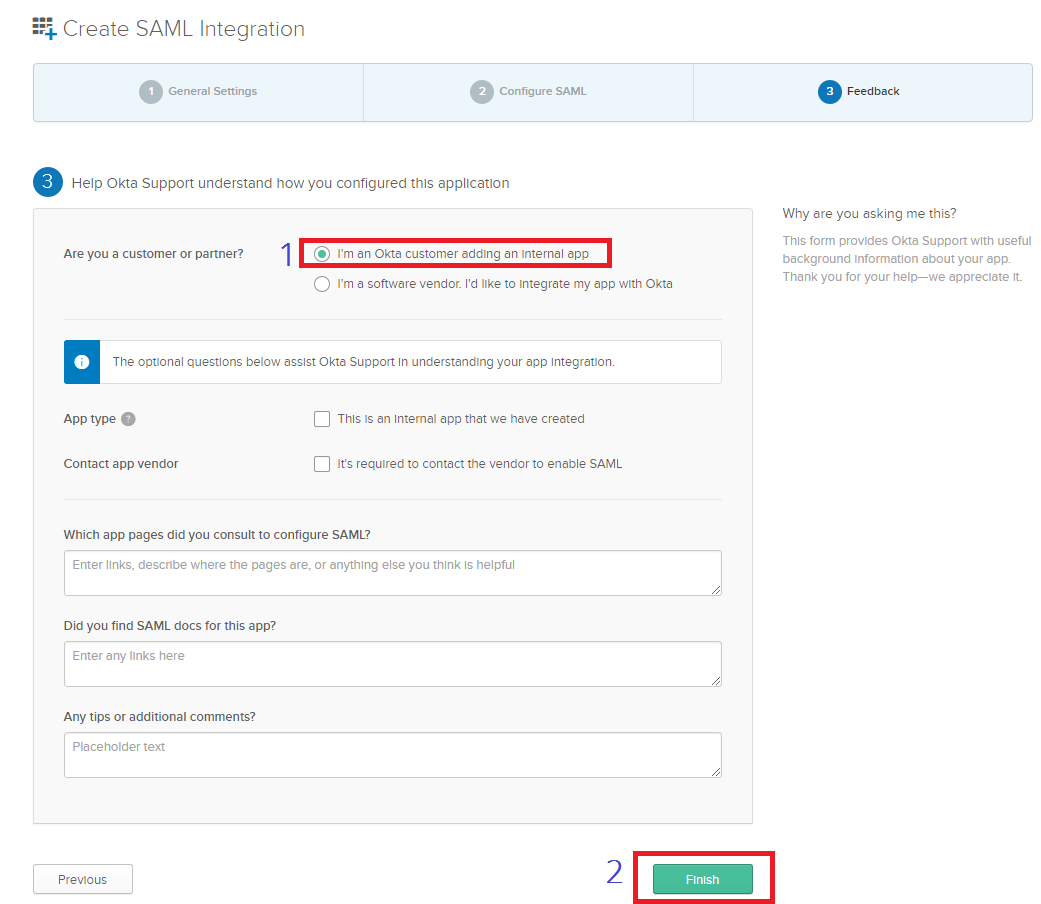
On the step 3 Feedback, select the option "I'm an Okta customer adding an internal app" and click Finish
On Sign On tab, you can view Setup instructions to get IdP metadata and follow guideline here to set up single sign-on settings on Expensify.
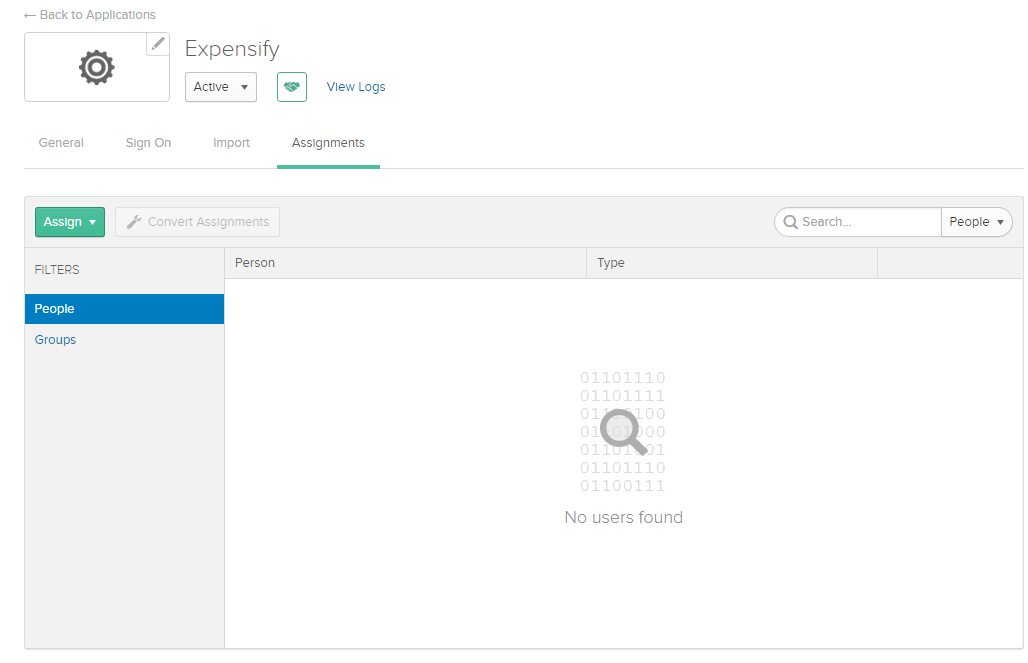
On Assignments tab, click on Assign to assign person you want to allow to access this application
After configuring SSO, you should test it out to make sure that SSO works as expected.
Now it's the time you can implement integration My OPSWAT Central Management with your Okta Expensify by following the below steps. You can learn more details for each step here at 3.1.1. How to set it up?
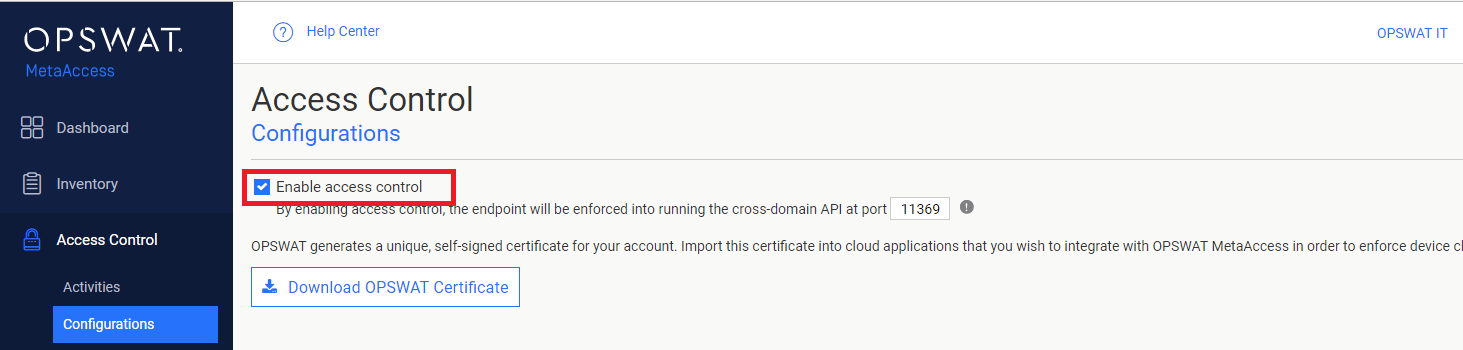
Step 1. Enable Access Control on your My OPSWAT Central Management account
Login to the My OPSWAT Central Management console.
Navigate to Access Control and then Configurations.
Check on the box "Enable access control".
Click SAVE.
Step 2. Add protected applications with IdP Method
Download Okta IdP: the next step is importing an Okta X.509 certificate to My OPSWAT Central Management. This allows My OPSWAT Central Management to verify users signing though a trusted IdP, Okta. Each identity provider has a unique X.509 certificate. Download the Okta X509 certificate by following these steps:
Login to Okta as Administrator
Switch to Admin mode

3. Go to Applications dashboard

4. Select the Expensify application which you just added above
5. Go to Sign On tab and click View Setup Instruction **
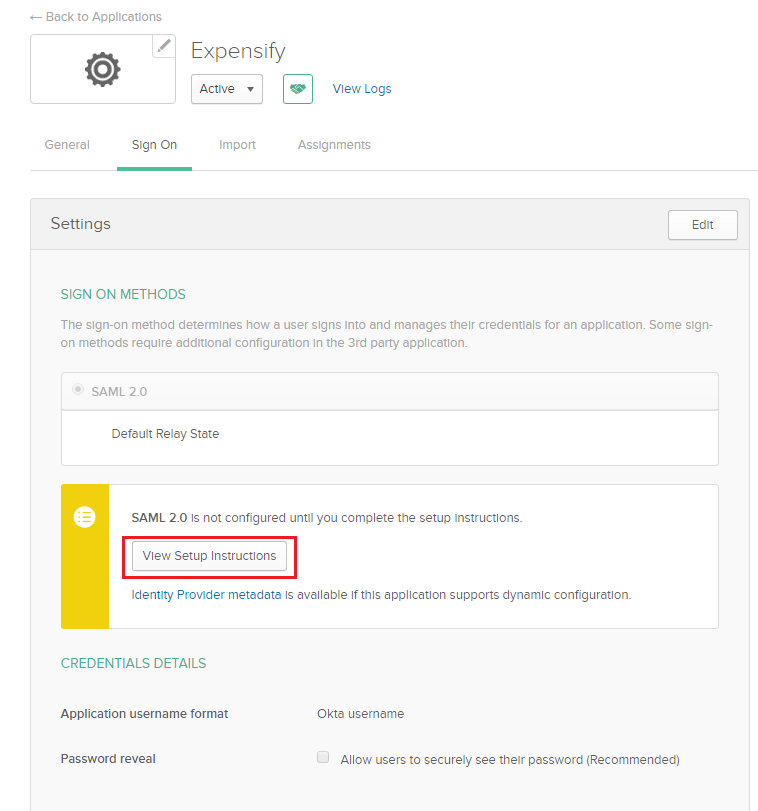
**
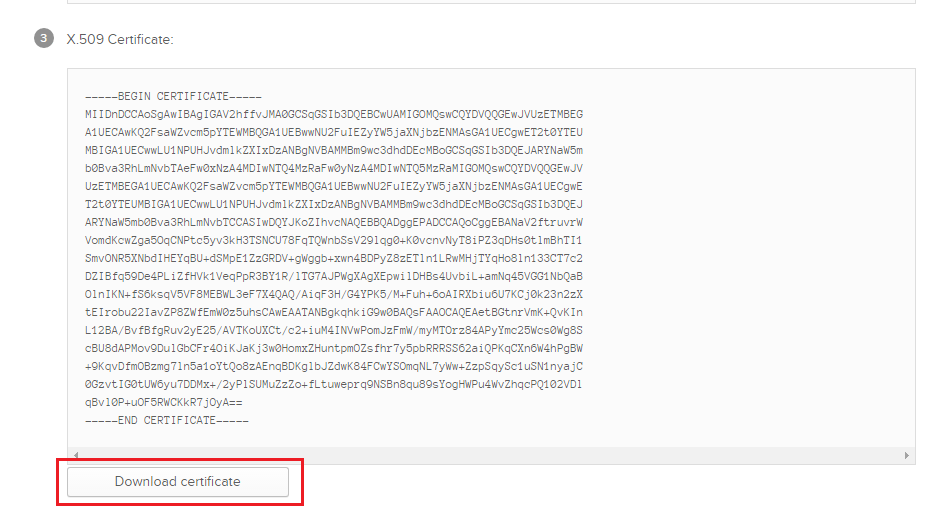
6. Search for X.509 Certificate and c lick Download certificate to download Okta certificate
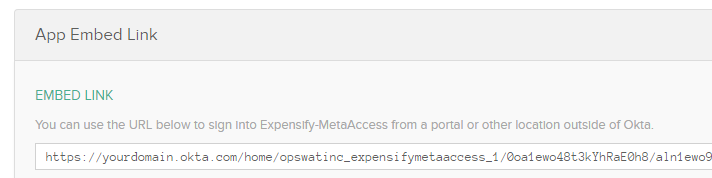
IdP Login URL: this is an embed link which Okta generated for the app to embed outside Okta. You can find this URL on General tab, scroll down to the App Embed Link section
Expensify LoginURL: is a Expensify single sign-on post back URL of your organization's Expensify which you configured when you set up SAML SSO in the Okta, for example https://www.expensify.com/authentication/saml/loginCallback?domain=your_domain.com
Collect Expensify Logout URL: you can find this URL inside of Expensify, for example https://www.expensify.com/authentication/saml/logoutCallback?domain=your_domain.com
Log into your organization's Expensify account
Click on your avatar, right click on Sign out and choose Copy link address to get log out URL
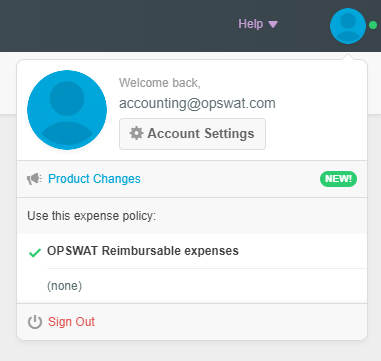
3. Store the log out URL in somewhere for a later use
Add the Okta Identity Provider. If you already have Okta IdP settings on your My OPSWAT Central Management account, go to 5 to add Expensify application.
Login to the My OPSWAT Central Management console.
Navigate to Access Control and then Configurations
On the Identity Providers tab, click "Add New Identity Provider" to add your IdP
Fill in required fields for the Identity Provider
IdP Name: an IdP name, for example: Okta
IdP Certificate: upload Okta certificate you downloaded in Step 2.1
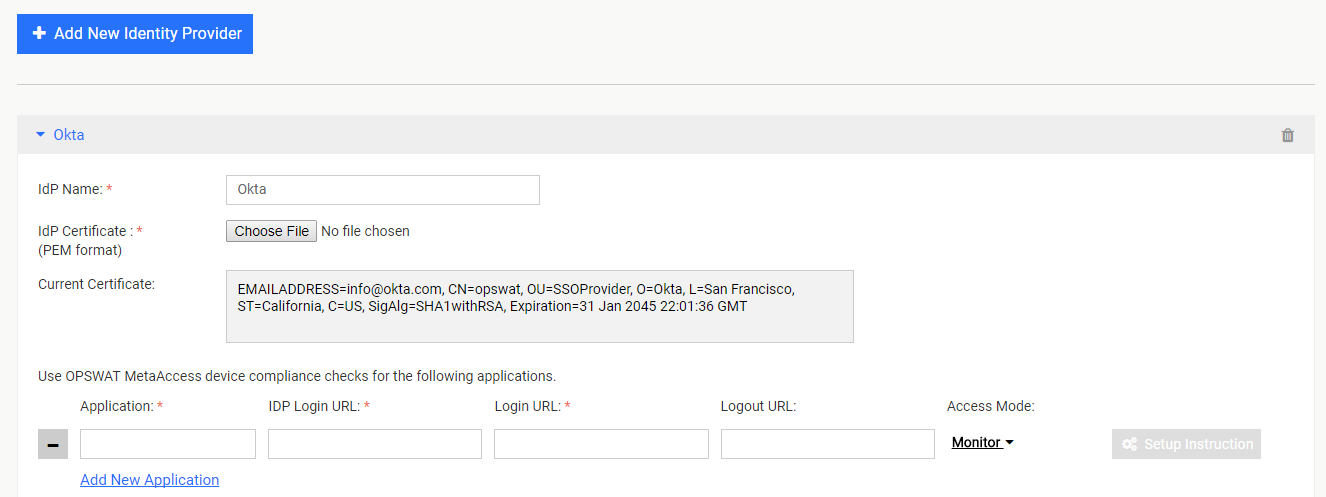
5. Click Add IDP
6. Click SAVE
Add Expensify application:
Expand the Okta IdP settings you have just added in Step 2.4 above.
Click Add New Application
Enter required field
Application: application name, for example: Expensify
IdP Login URL:
Login URL: application login URL which you have from Step 2.2
Logout URL: application logout URL which you have from Step 2.3
Access Mode: pick an access mode you prefer. See details on the access modes at Step 2. Add protected applications with IdP Method

4. Click SAVE
After saving your changes sucessfully, click the Setup Instructions button of the Expensify application you have just added and then copy the URL My OPSWAT Central Management generated there. This URL is used to replace Expensify login URL on Okta in Step 4.
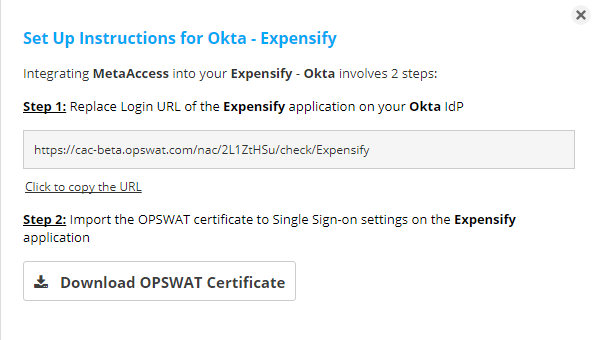
Note: you can add Expensify application (step 2.6) when you add Okta IdP settings in step 2.5.
Step 3. Configure Access Rules
On My OPSWAT Central Management console, navigate to Access Control and then Configurations
On Access Rules tab, click "ADD NEW RULE" to add a new rule for this application OR you can update existing access rules to add this application
With a new access rule, you need to specify how you would like to block/allow access a device from the application
Rule name: a rule name, for example Block non-compliant devices
Action: Block or Allow
Configure conditions to do the action. Details at Step 3. Configure Access Rules
Click ADD RULE
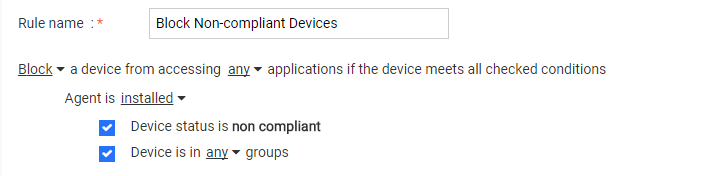
Step 4. Update Applications settings on Identity Provider
Login to Okta as administrator
Go to Applications dashboard
Select Expensify application
On General tab, click Edit on the SAML Settings box
Click Next at the first step
Replace Single sign on URL with the My OPSWAT Central Management URL which you got from Step 2.6
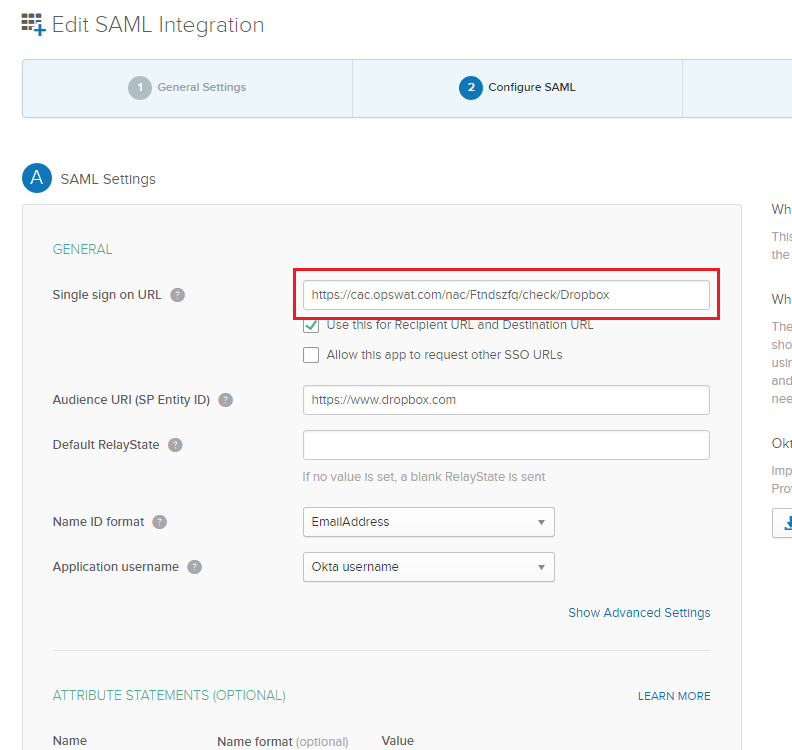
Click Next and Finish
Step 5. Configure SSO settings on applications
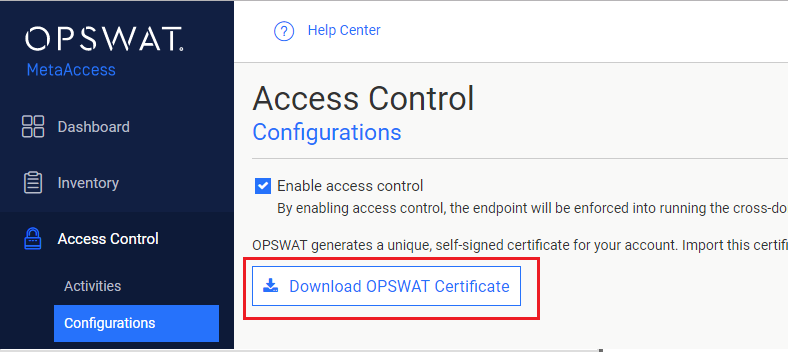
On My OPSWAT Central Management console, navigate to Access Control > Configurations
Download OPSWAT certificate
Login to Expensify as an administrator
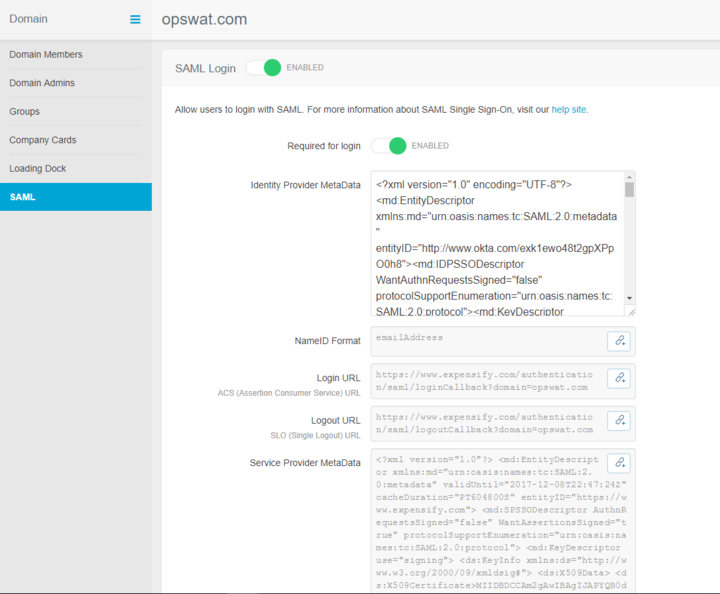
Navigate to Admin > Domain Control > [yourDomainName] > SAML
Replace a certificate in the IdP MetaData with OPSWAT certificate OPSWAT generated for your account (you downloaded in step 5.1). The certificate in the IdP metadata is placed in a tag "<ds:X509Certificate>"
Step 6: Test your integration
Follow guideline at Step 6: Test your integration to test your integration to verify if it works as your expectation.
DONE! CONGRATULATIONS.