
Perform the steps in order. The Windows Failover Cluster must exist before Always On can be enabled, and the databases must exist before they can be added to an Availability Group. Confirm the Requirements are met first.
1. Prepare the domain and nodes
Both SQL nodes must be domain-joined with static IP addresses. Create one domain service account for SQL Server, then confirm each node's domain health before clustering.
If you renamed the machines after joining the domain, the secure channel or DNS records may be stale. Repair before clustering with Test-ComputerSecureChannel -Repair, then ipconfig /registerdns.
2. Build the Windows Server Failover Cluster
A two-node cluster needs a witness to keep an odd vote count. Create a file-share witness on the domain controller and assign it.
A healthy witness is mandatory. If the witness is offline, a two-node cluster has an even vote count and cannot elect a new primary when a node fails — the Availability Group will remain in a RESOLVING state and MetaDefender Managed File Transfer™ will be unable to reach the database.
3. Install SQL Server and enable Always On
On both nodes, install the Database Engine, run the SQL Server service as the shared domain account, and enable TCP/IP. Then enable Always On (the cluster must already exist).
Service account: set the Database Engine to run as
DOMAIN\svc-sql(the same account on both nodes), startup type Automatic.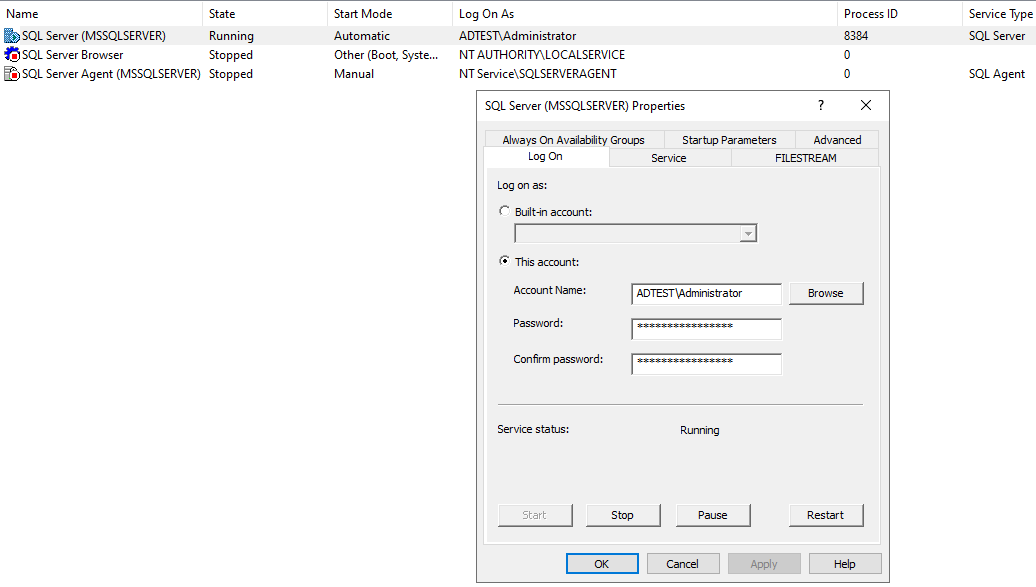
Authentication: Mixed Mode, with a strong
sapassword.TCP/IP: SQL Server Configuration Manager → SQL Server Network Configuration → Protocols → TCP/IP = Enabled → restart the service.
Always On: SQL Server Configuration Manager → SQL Server Services → SQL Server → Properties → AlwaysOn High Availability tab → tick Enable AlwaysOn Availability Groups → restart the service.
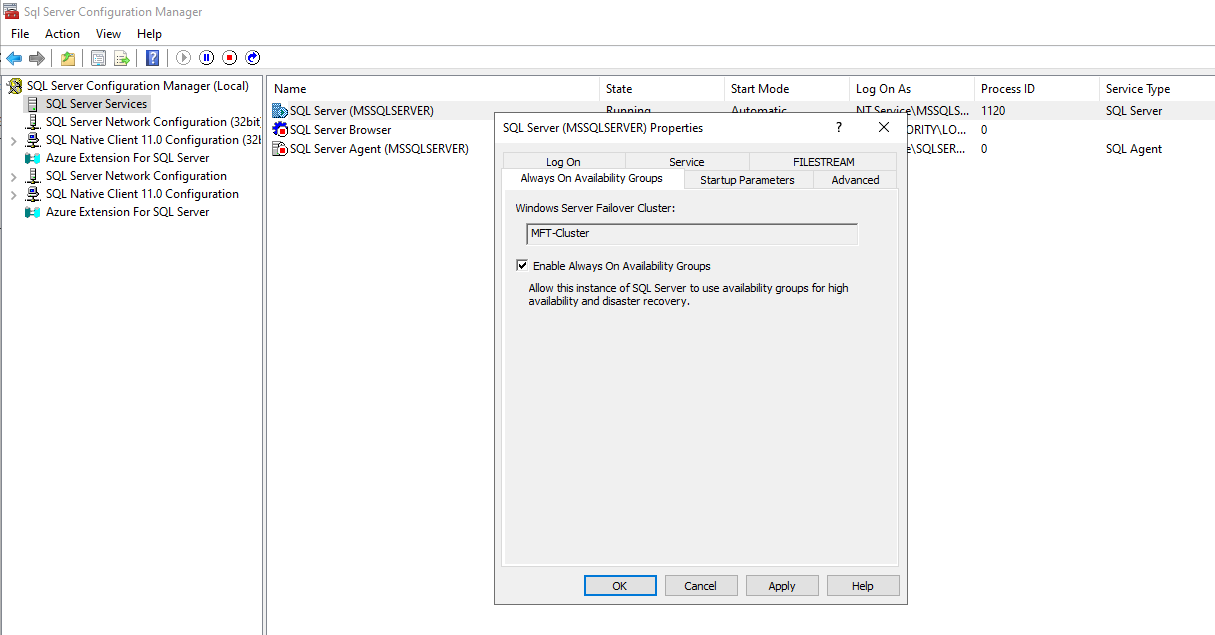
Verify Always On is enabled on both nodes:
4. Install MetaDefender Managed File Transfer™ to create the databases
Install MetaDefender Managed File Transfer™ on its own machine (the MetaDefender Managed File Transfer™ host), pointed at SQL node 1, using the Create new database option. This creates sft_data and sft_conn on SQL node 1, which must exist before they can be added to an Availability Group. Follow the standard installation in Install MFT Nodes.
MetaDefender Managed File Transfer™ runs on its own host, separate from both SQL nodes, and is installed only once. Do not install it on the SQL nodes. SQL node 2 receives copies of the databases automatically as read-only secondary replicas when the Availability Group is created in the next step.
On the database credential form, enter SQL node 1's address and credentials.
If the connection is encrypted with a self-signed certificate, select the installer's Trust server certificate option.
Complete the Setup Wizard and confirm MetaDefender Managed File Transfer™ is reachable.
5. Create the Availability Group
Use SQL Server Management Studio on SQL node 1. Prepare both databases first, then run the wizard.
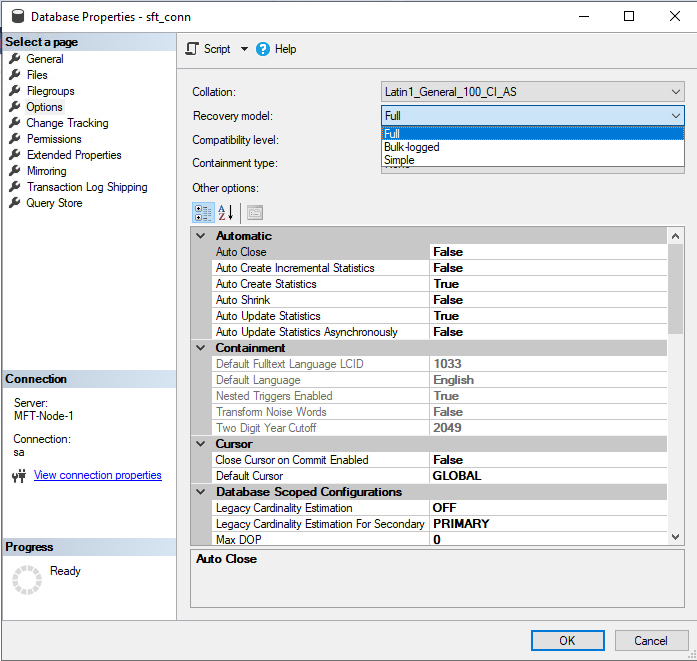
Set
sft_dataandsft_connto the Full recovery model (right-click the database → Properties → Options → Recovery model).Take a full backup of each database to establish the log chain.
Open Always On High Availability → Availability Groups → New Availability Group Wizard and configure:
Availability group name (for example
ag-mft); enable Database Level Health Detection.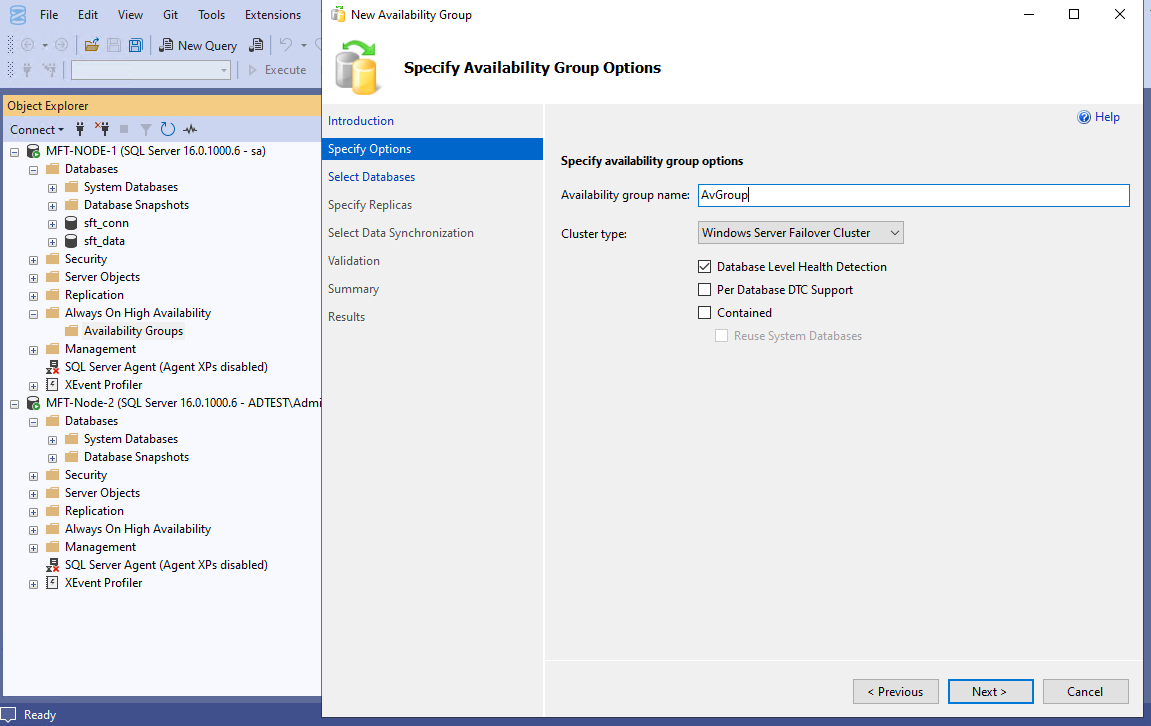
Select
sft_dataandsft_conn(both must report that they meet the prerequisites).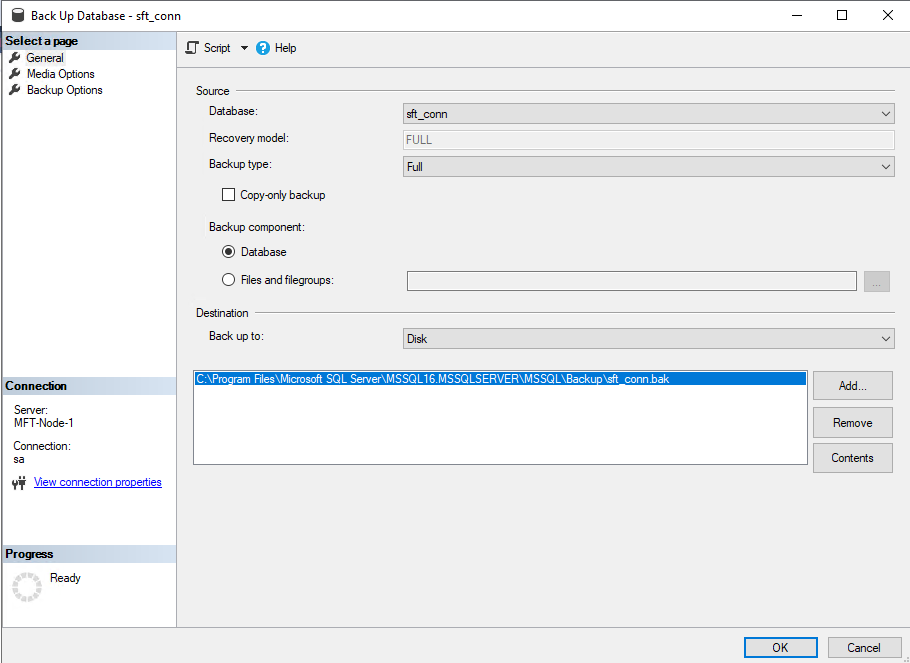
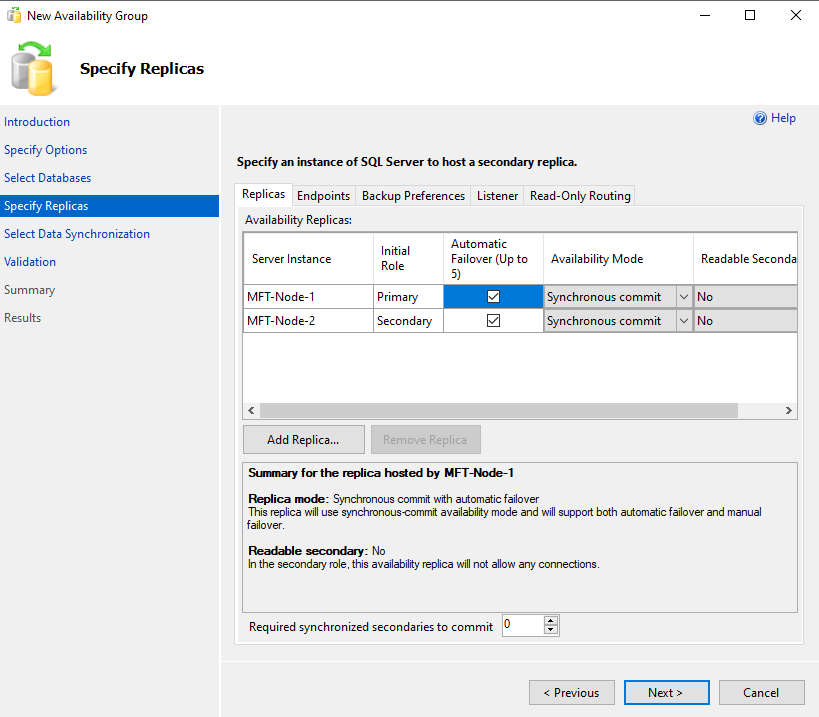
Add SQL node 2 as a replica. Set both replicas to Synchronous commit and Automatic failover.
Create a listener with a DNS name (for example
agl-mft), port1433, and a static IP address.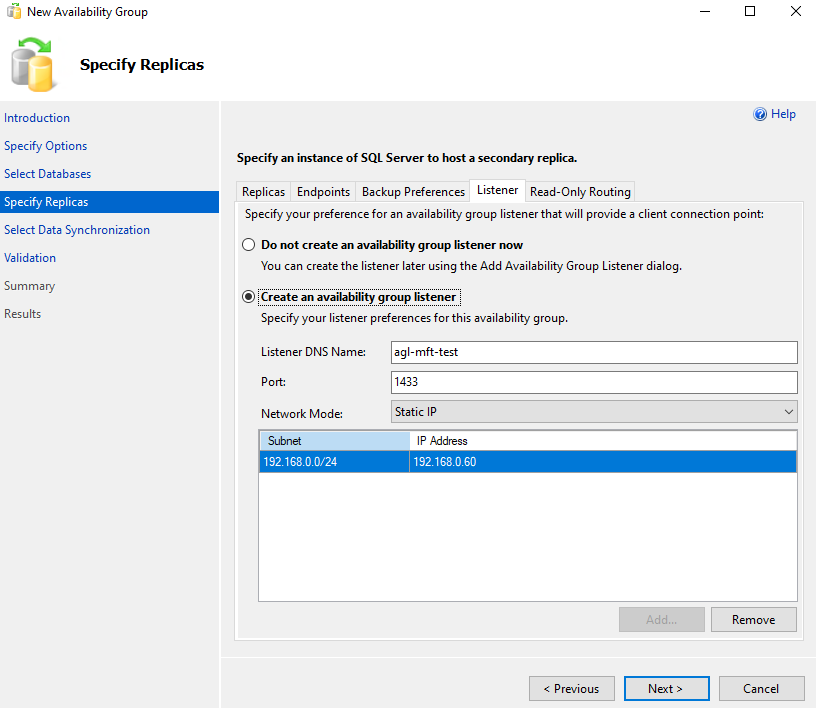
Data synchronization: Automatic seeding (when both nodes use identical installation paths).
If adding the listener fails with Error 19457 ("IP address is not valid in the cluster-allowed range"), the cluster network is marked Cluster Only. In Failover Cluster Manager → Networks → the network → Properties, tick Allow clients to connect through this network, then retry.
6. Point MetaDefender Managed File Transfer™ at the listener
Repoint MetaDefender Managed File Transfer™ from the individual SQL node to the Availability Group listener using the Database Configuration Tool shipped with the product (SftDatabaseConfigurationTool.exe, under <install-dir>\tools\SftDatabaseConfigurationTool\).
The tool validates the target, stops the MetaDefender Managed File Transfer™ services, rewrites the connection strings and the corresponding database record, then restarts the services, rolling back automatically if validation or startup fails.
For more information about the tool, see Database Configuration Tool.
If the connection is encrypted, make sure the SQL Server certificate is trusted by the MetaDefender Managed File Transfer™ host and valid for the listener name; otherwise repoint with --encrypt false.
7. Test failover
Automatic failover has three preconditions. If any one is not met, failover will not occur.
Quorum is healthy — the file-share witness is Online and the vote count is odd.
The secondary replica is synchronized at the moment the primary drops.
The Availability Group role's failover threshold has not been exhausted (repeated test failovers consume it).
Because MetaDefender Managed File Transfer™ runs on its own host, a failure of either SQL node leaves MetaDefender Managed File Transfer™ running, so the primary can be taken offline safely. To simulate a failure, stop the SQL Server service on the current primary (or take the whole node offline), then confirm the role moved and MetaDefender Managed File Transfer™ still serves requests.
Recover the stopped node with Start-Service MSSQLSERVER; it rejoins as a resynchronizing secondary. See Verification Queries to confirm health, and Troubleshooting if failover does not occur.