Below is a step-by-step guide on integrating Microsoft Azure Active Directory (now Microsoft Entra ID) with MetaDefender Managed File Transfer™ using the OpenID Connect protocol.
Prerequisites: An Entra Tenant (quick guide: https://learn.microsoft.com/en-us/entra/identity-platform/quickstart-create-new-tenant )
Microsoft Azure with Active Directory name changed to Microsoft Entra ID.
Credentials and other sensitive information are blurred in the below examples for security purposes.
Register Application in Microsoft Entra ID
Sign in to Microsoft Entra ID and navigate to the admin dashboard.
Go to "App registrations" and select "New registration."
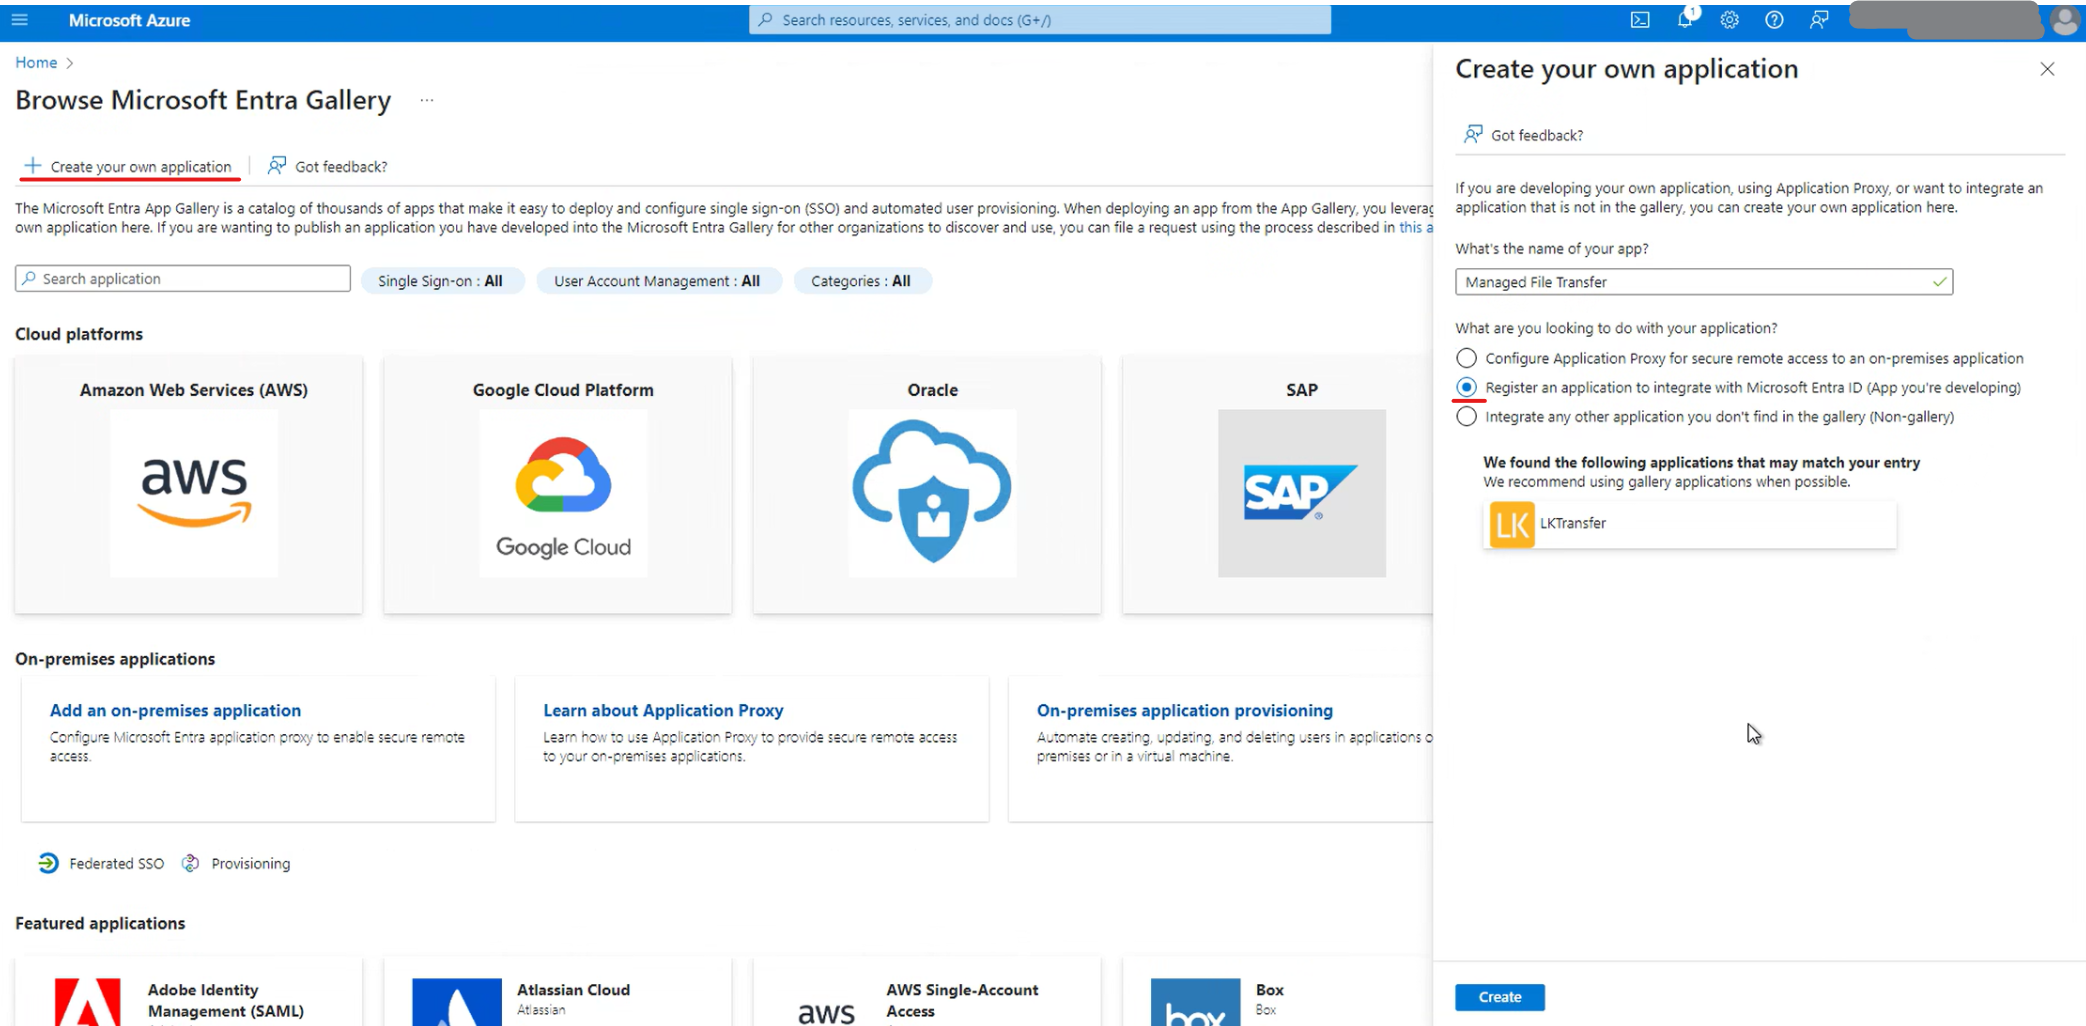
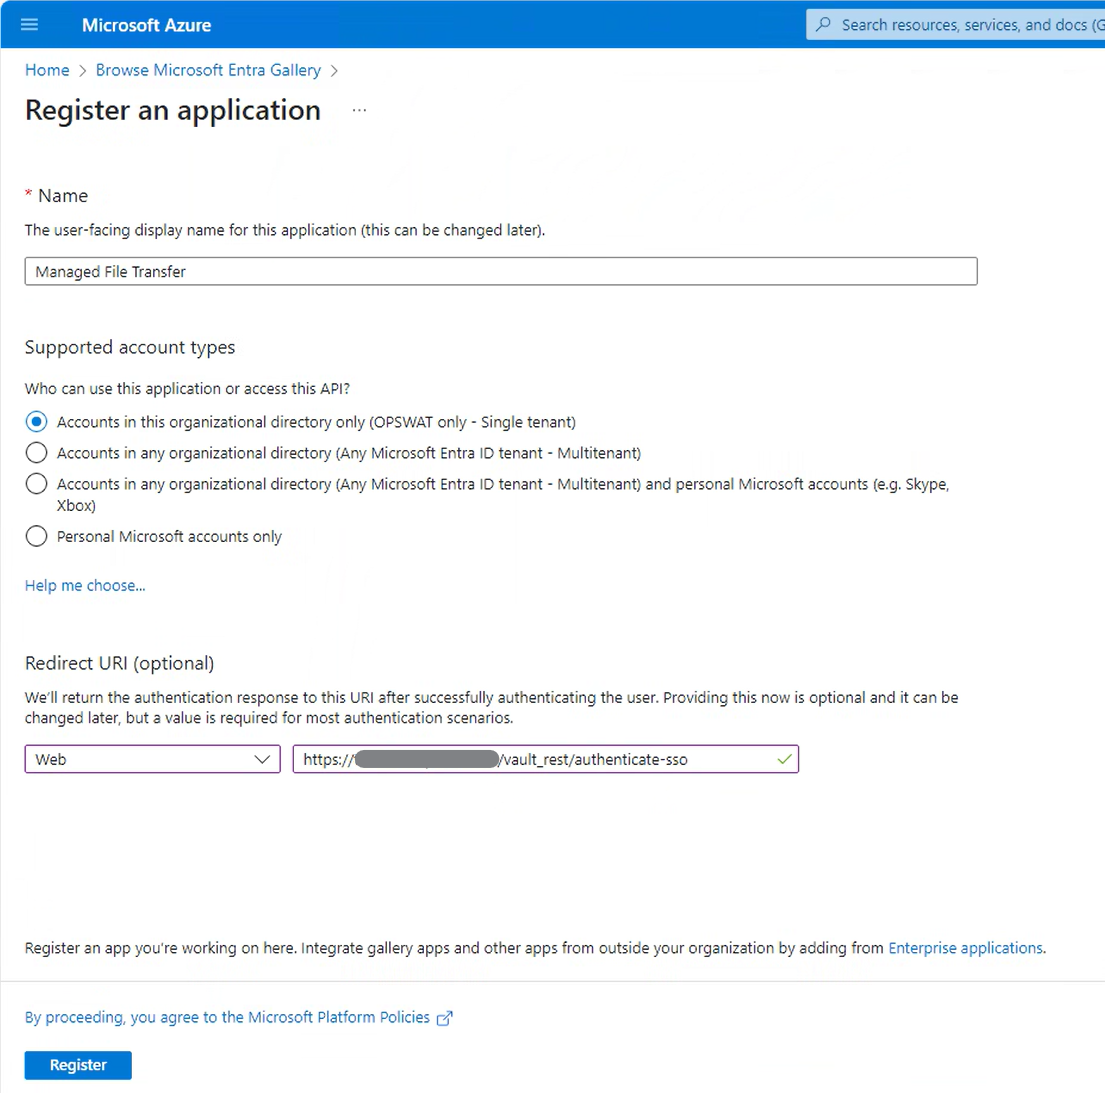
Configure the application settings:
Provide a name for the application, e.g., “OPSWAT Managed File Transfer.”
Configure the Redirect URL (
https://host:port/vault_rest/authenticate-sso), which can also be found in MetaDefender Managed File Transfer™ → "Settings" → "Authentication" → "Single Sign-On" after filling in "IP Address or Domain."
Microsoft Entra ID only supports HTTPS protocol for redirect URI.
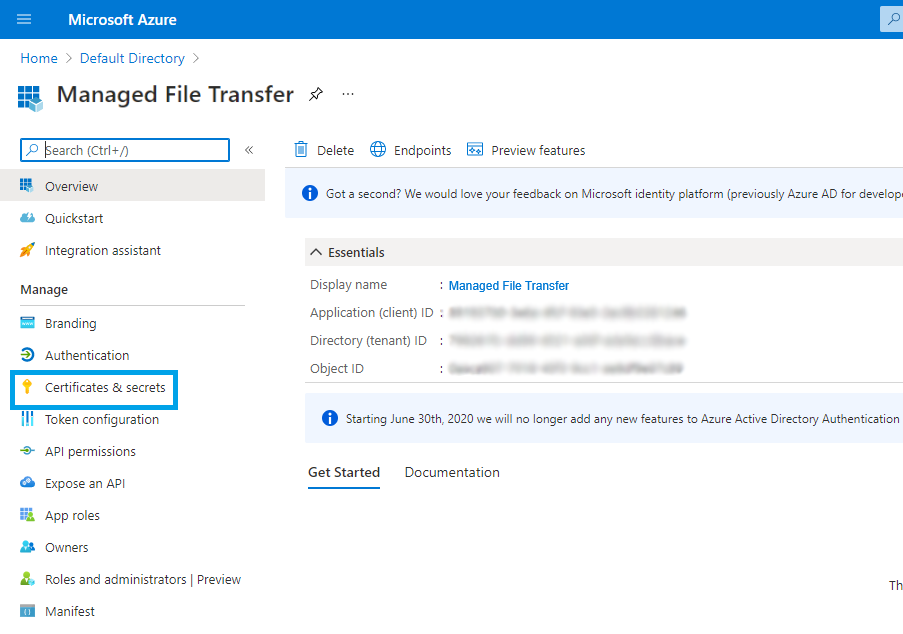
Record the "Application (client) ID" and "Directory (tenant) ID."
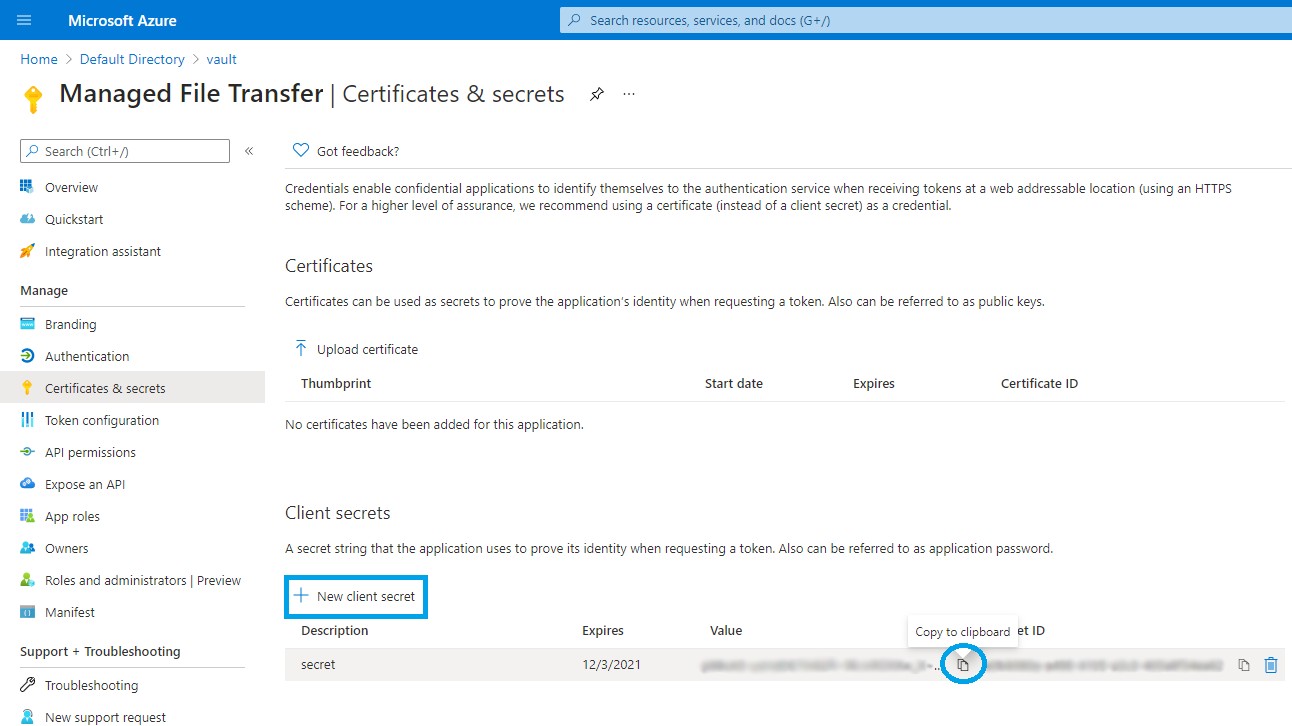
Generate Secret Key for Entra ID SSO
Go to "Certificates & Secrets" and generate a new "client secret" string (also referred to as an "application password"). Record the client secret. Repeat if necessary.
Client secrets will be hidden and invisible after generation. A new secret will need to be generated.
Configure Managed File Transfer for Entra ID SSO
Configure MetaDefender Managed File Transfer SSO using the above information.
Go to MetaDefender Managed File Transfer web console and navigate to "Settings" **→ "**Authentication" → "Single Sign-On."
Turn on "Enable Single Sign-On."
Disable "Ignore Certificate Issues," as Entra ID will provide a trusted certificate.
Turn on "Load User Profile" to allow MetaDefender Managed File Transfer™ to acquire the following claims:
name
email
preferred_username
given_name
family_name
phone_number
Set the "Authority" to the Microsoft Azure AD URL. This URL can be found in the Azure AD dashboard under application endpoints. The format is:
https://login.microsoftonline.com/{directory (tenant) ID}/v2.0Set the "IP Address or Domain" to the location of the Managed File Transfer instance. Once this information is provided, Managed File Transfer will automatically generate the Redirect URI.
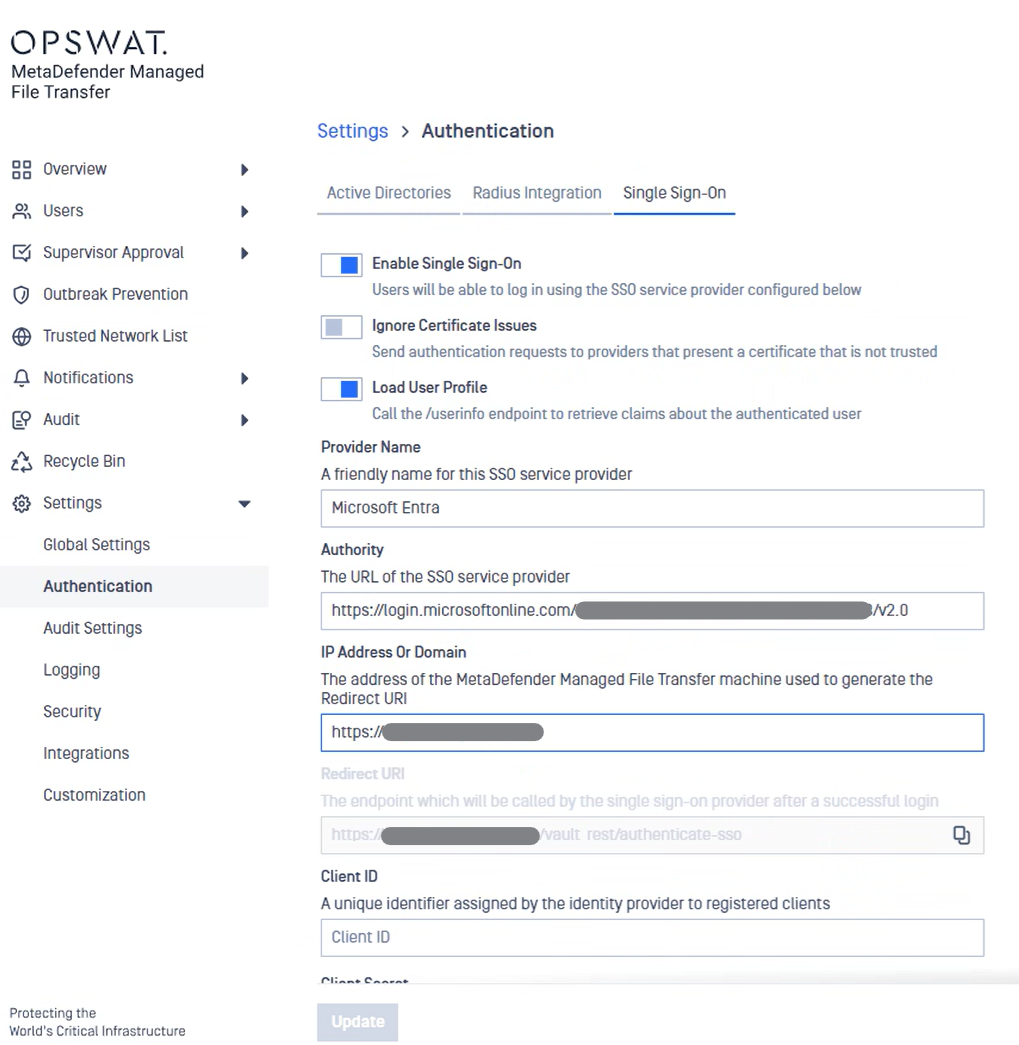
Use the "Redirect URI" in Azure AD Application Settings (step 3) - This field is auto-generated.
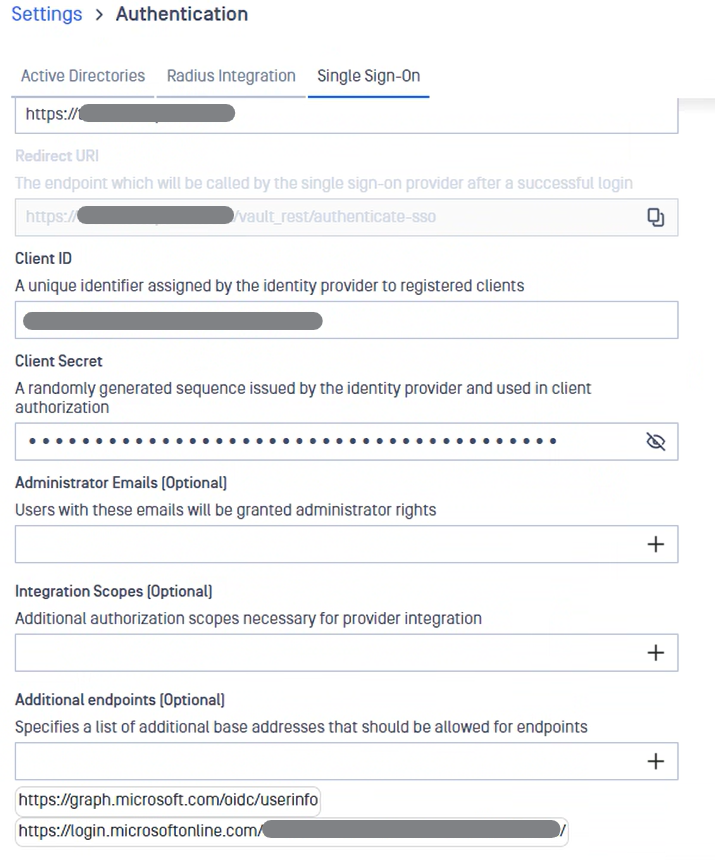
Copy the "Entra ID Application (client) ID" (step 4) into the "Client ID" field.
Copy the "Entra ID Client secret -> Value" (step 5) into the "Client Secret" field.
For "Administrator Emails," enter a list of emails for Microsoft Entra ID users who should have administrative rights in MetaDefender Managed File Transfer™. MetaDefender Managed File Transfer™ will compare the email of users logging in from Microsoft Entra ID against the provided list to determine administrative rights.
Additional integration scopes are not required.
Microsoft Entra ID requires adding two additional endpoints:
https://login.microsoftonline.com/{Directory (tenant) ID}/https://graph.microsoft.com/oidc/userinfo
Review the final configuration.
Once all configurations are complete, click "Update."
Log in as an Entra Organization Admin
Depending on the Entra ID configuration, an organization admin should approve/allow a new application beforehand.
Log in to Managed File Transfer SSO with the Entra ID administrative account, and accept the newly created application.

Testing the Integration
Log out of MetaDefender Managed File Transfer.
A new "Sign In with SSO" button will appear on the login page.
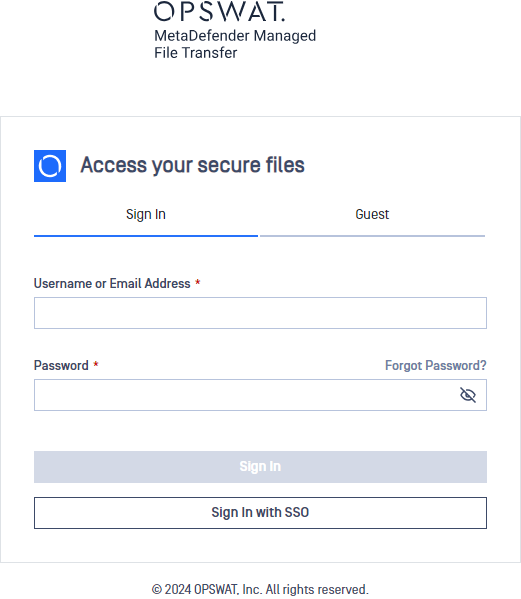
Click "Sign In with SSO" to be redirected to Microsoft Entra ID for login. Once logged in, you will be redirected back to MetaDefender Managed File Transfer.