About this task
Use this procedure to deploy the MetaDefender OT Security image file
Before you begin
Please complete the Notes for deployment of MD OT Security | Firewall Allow-listed Configurations
- Obtain the latest Enterprise Manager Linux image file from https://my.opswat.com/home/metaDefender-ot-security
Setup and Tools
- 1x USB stick with 32GBs storage space: for building the OT Security Image flash drive
- Keyboard, mouse, and monitor
Procedure
1. Prepare a bootable USB
The installation of MetaDefender OT Security requires using a USB boot created from a downloadable image file:
1.1. Download the latest MD OT Security Image:
- File name: mdots-[version].img.gz
- Size: ~8Gb
- You must extract the zip file using an extraction tool from Windows.
1.2. Download the Rufus tool for USB burning.
1.3. Plug in a flash USB with at least 32GB of storage.
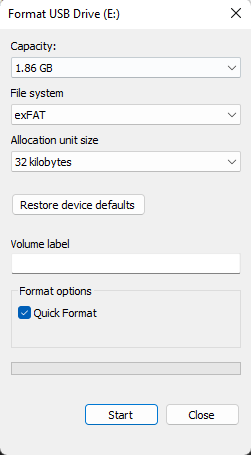
1.4. Format the USB using the exFAT file system type with Windows' format tool. Only use quick format if the USB file system is already exFAT.
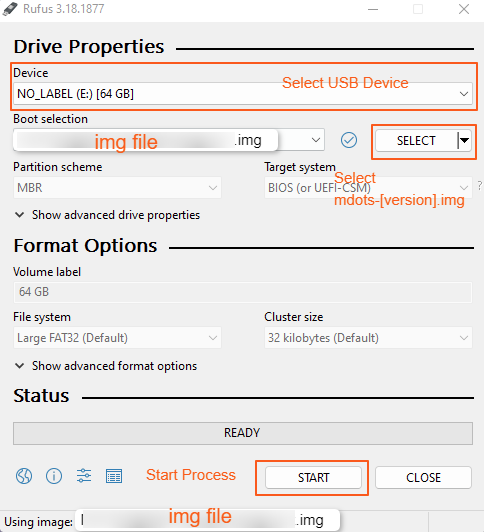
1.5. Open Rufus and insert the USB drive.
1.6. Select your USB drive under "Devices."
1.7. Click SELECT and select the downloaded mdots-[version].img.
1.8. Give your Volume label a name (optional).
1.9. Click START.
2.0. Once the burning is completed, reconnect the USB to the computer
2. MetaDefender OT Security Enterprise Manager flashing and installation
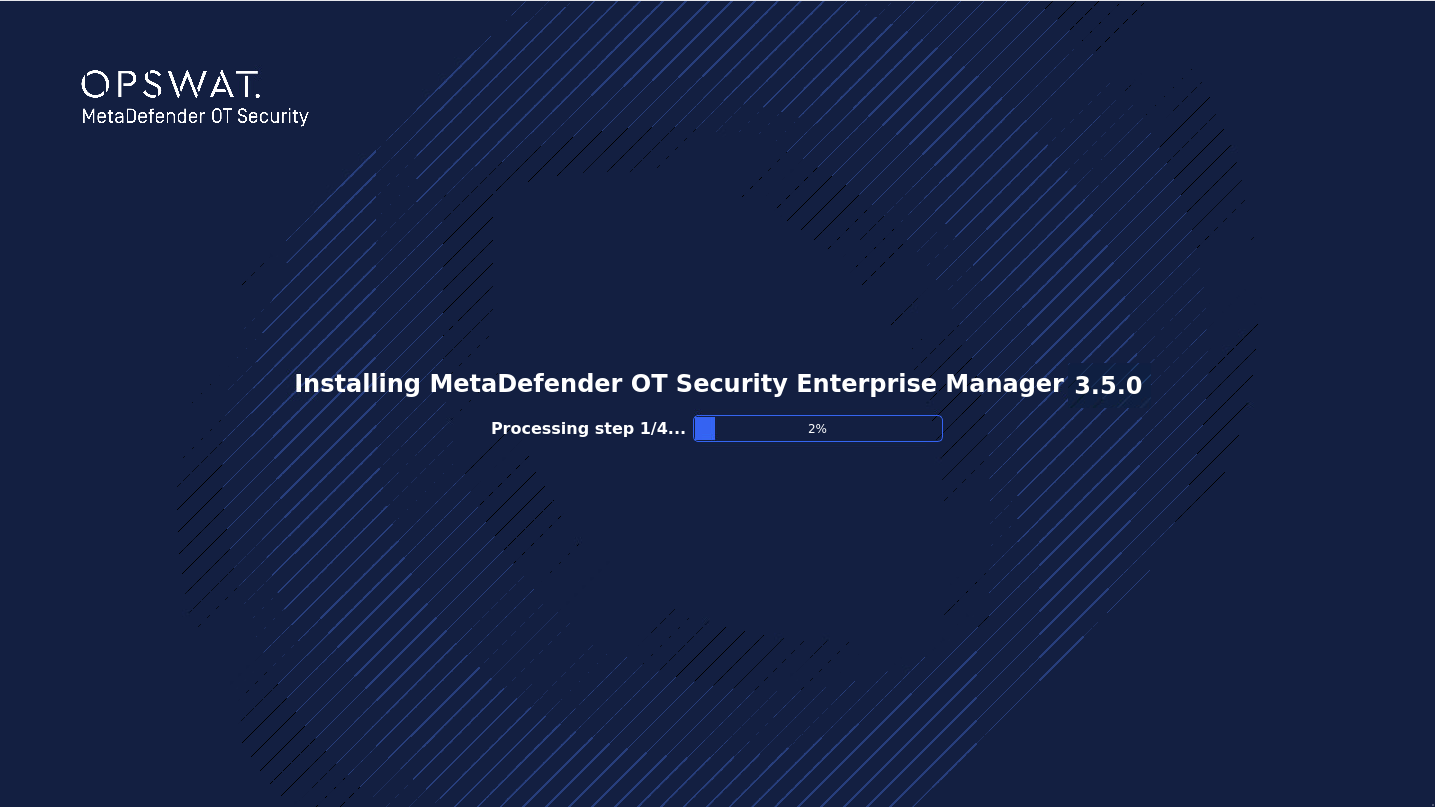
In the last section, the only thing left is to install MetaDefender OT Security onto the machine, which is accomplished almost automatically by the system.
- Plug in the MetaDefender OT Security USB that the user created in the first step.
- Boot to the USB from the BIOS. Pay attention to the USB brand name to avoid choosing the wrong one.
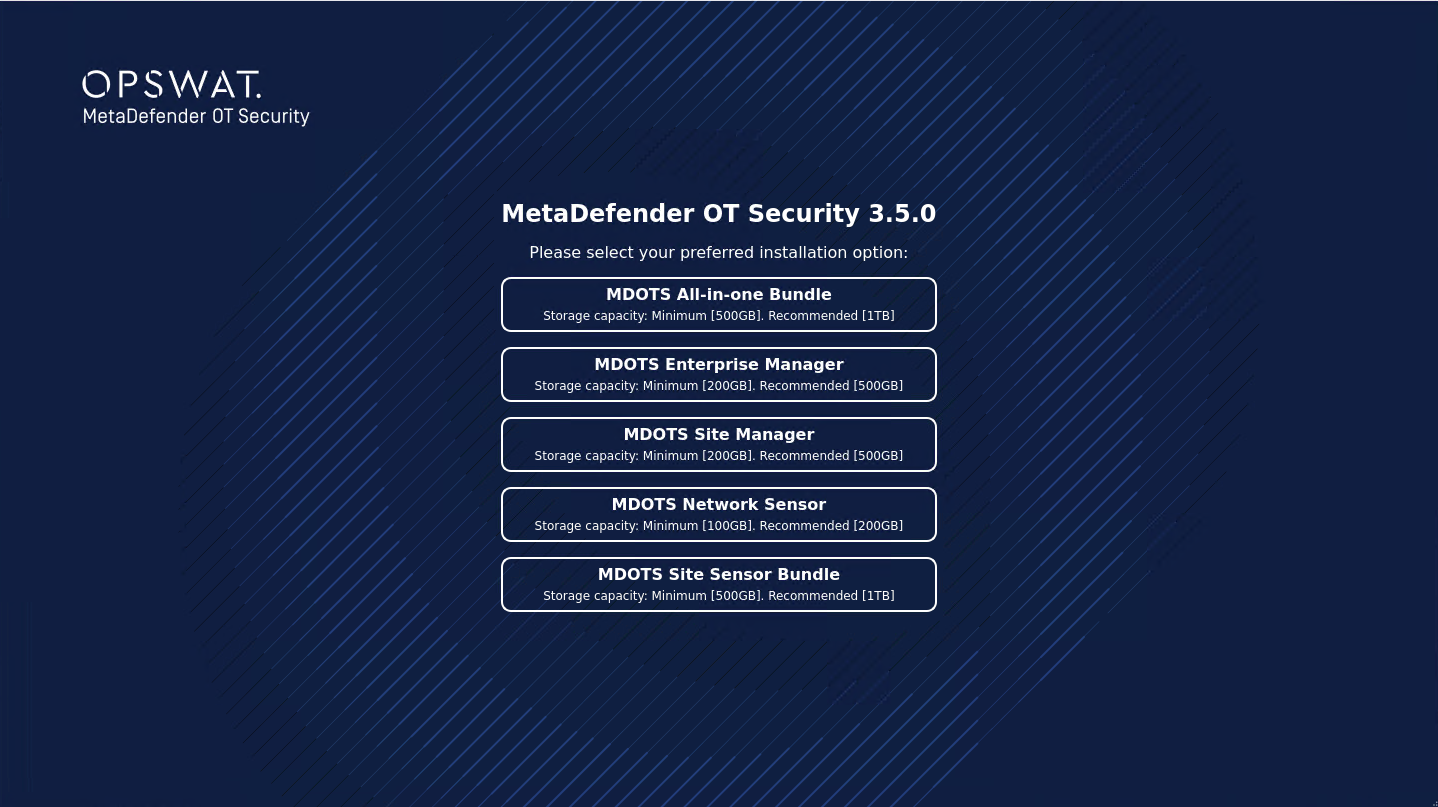
- Wait for the first stage installation until the pop-up asking to select a component.
- Select the component, click Next
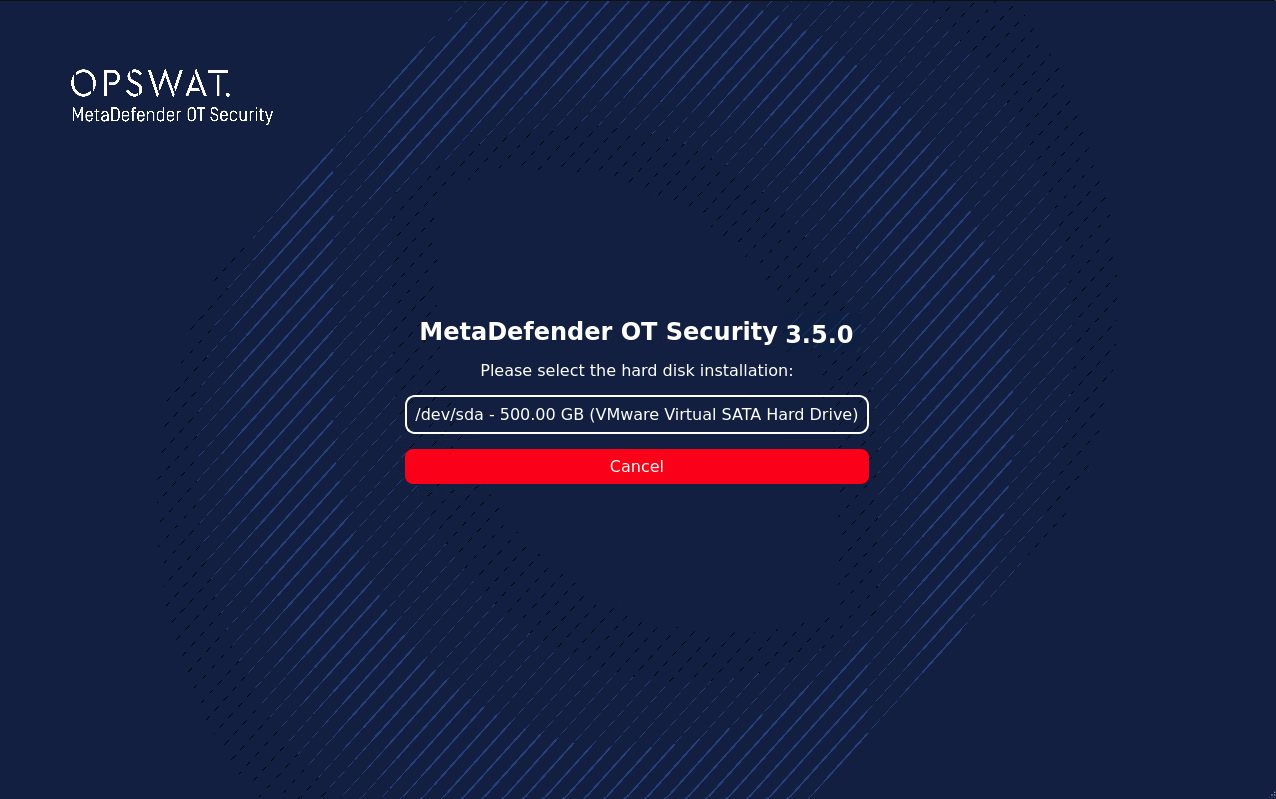
- Select the Hard disk
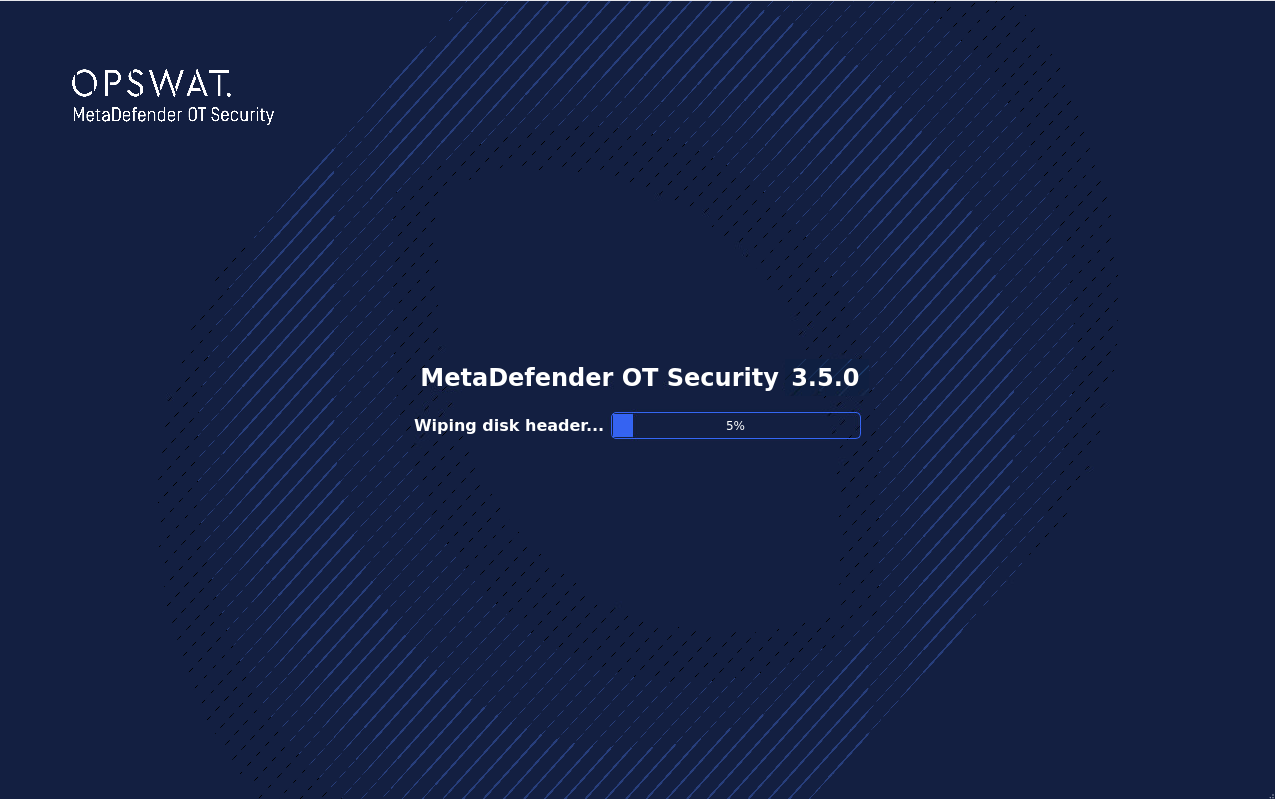
- The application is flashing
- After flashing is completed, click OK to shut down
- Unplug USB (Important!!!)
- Turn on the machine again to start installing