Account provisioning allows you to manage user access to My OPSWAT Central Management (OCM) directly from Okta. When a user is assigned to the OCM application in Okta, a corresponding account is automatically created in My OPSWAT Central Management. Any profile changes made in Okta are automatically synchronized, ensuring user information stays up to date. This lets you manage user access from a single location while keeping My OPSWAT Central Management in sync.
This is powered by SCIM 2.0 (System for Cross-domain Identity Management), the industry standard that Okta uses to push user accounts to connected applications.
How it works
Okta is the source of truth for your users. OCM exposes a secure SCIM endpoint, and Okta sends user changes to it over HTTPS:
OKTA → SCIM 2.0 (HTTPS) → MY OPSWAT CENTRAL MANAGEMENT
Assign a user in Okta → the user is created in OCM.
Update a user's name in Okta → the profile is updated in OCM.
Before you begin
Make sure you have the following ready:
An administrator account in My OPSWAT Central Management.
An administrator account in the Okta Admin Console.
SSO is already configured and enabled between Okta and OCM. Provisioning is built on top of SSO and uses the same Okta application. If SSO is not set up yet, complete the OCM SSO setup guide first.
Note Why SSO first? OCM only lets you turn on SCIM provisioning after Single Sign-On is enabled for your account. If SSO is off, the Enable provisioning action will be blocked.
Step 1: Enable SCIM provisioning in OCM
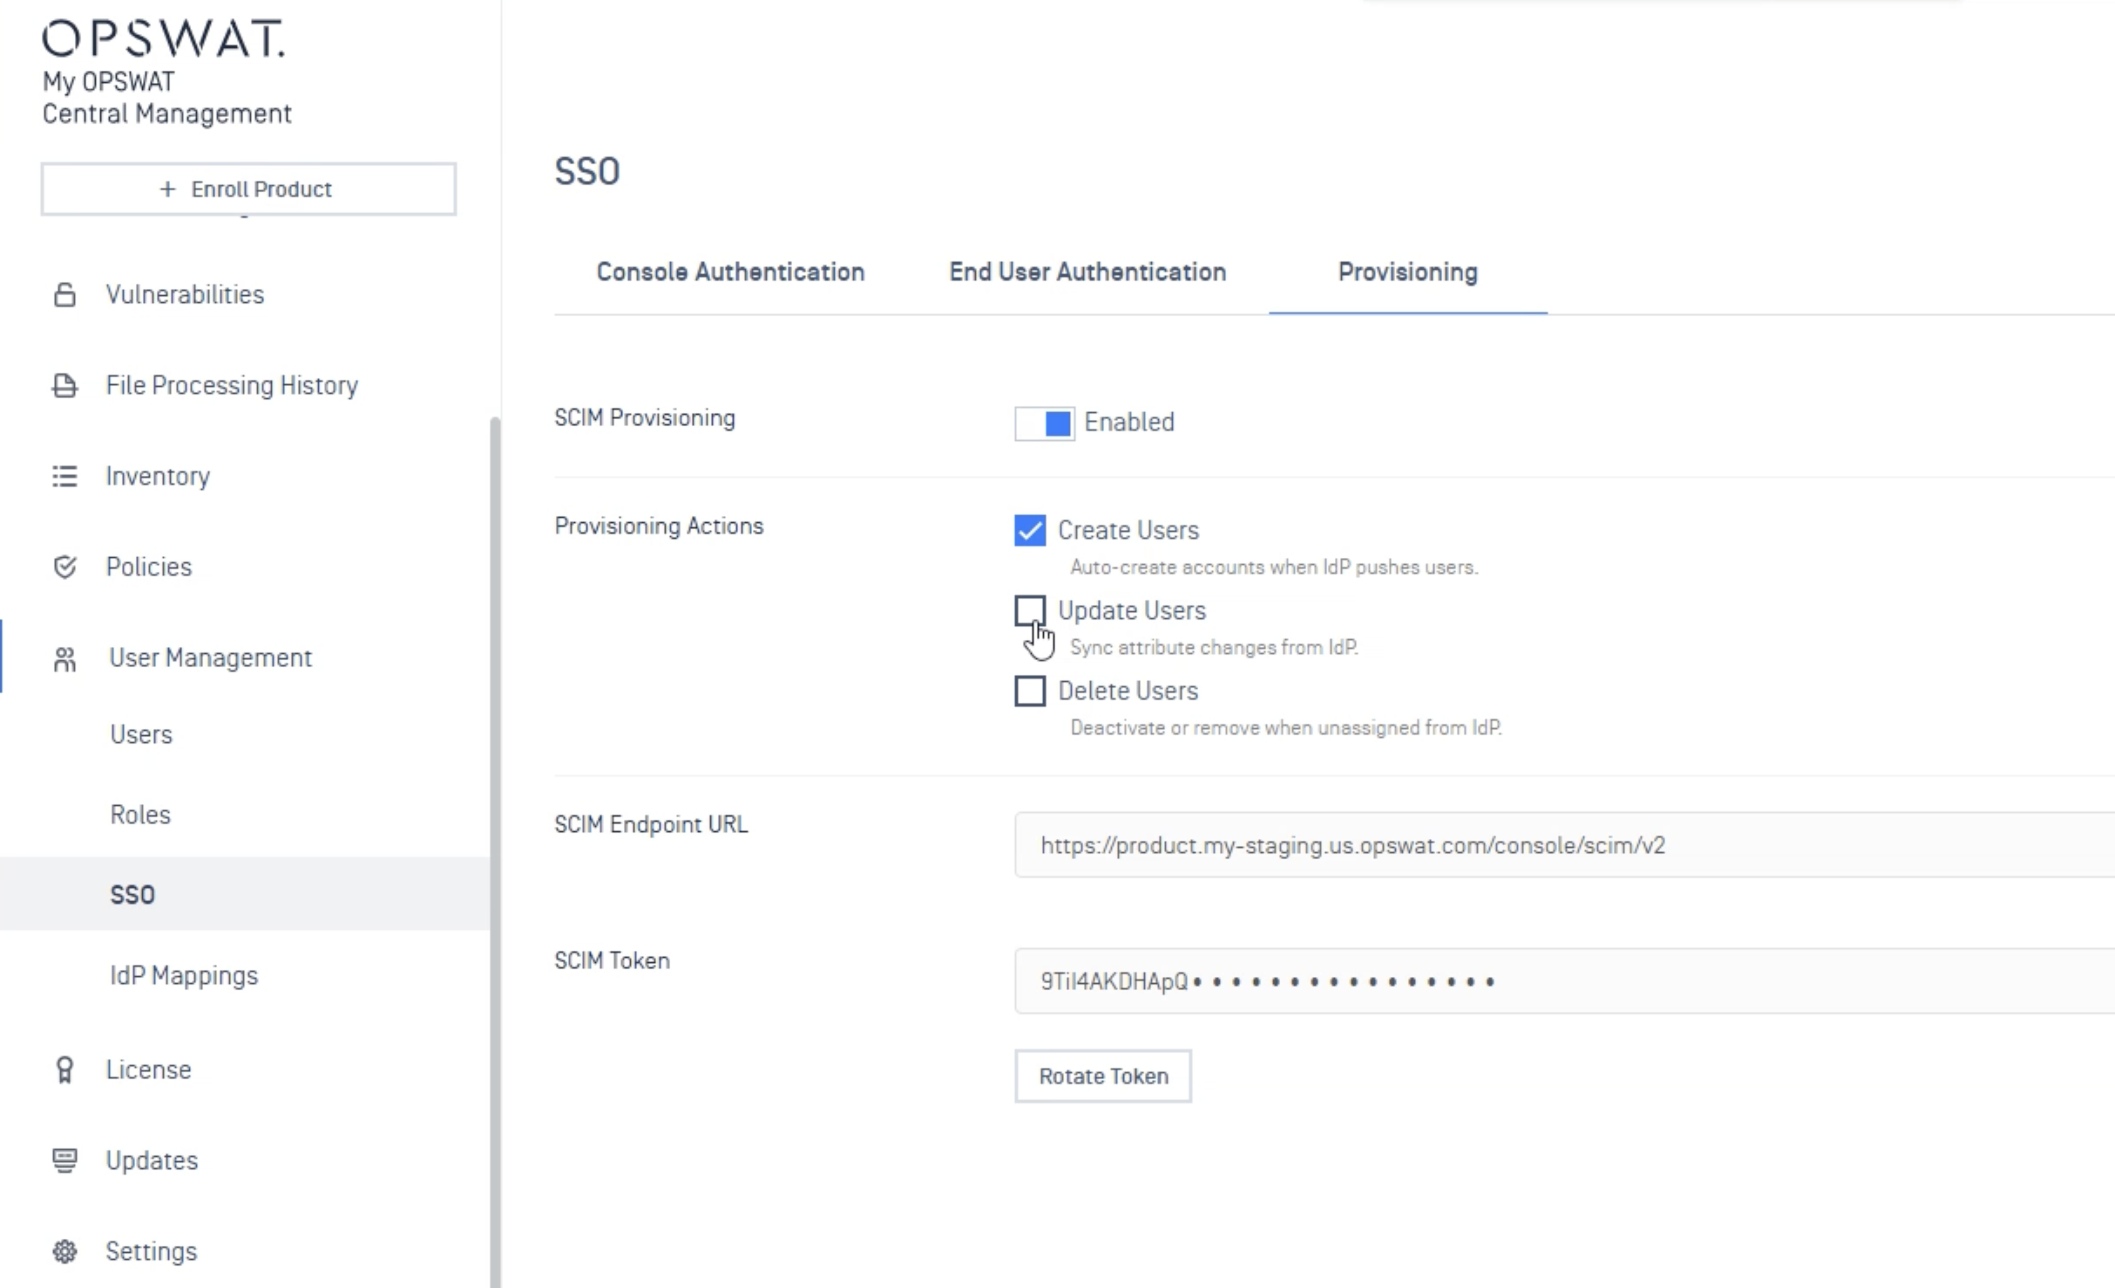
Sign in to My OPSWAT Central Management (OCM) as an administrator.
Open User Management → SSO settings — the same area where your Okta SSO connection is configured.
In the Provisioning section, switch SCIM provisioning to Enabled.
Under Provisioning Actions, enable Cre_a_te users and Update users.
Click Save. OCM generates the two values you will paste into Okta:
Value | What it is |
|---|---|
SCIM endpoint URL (Base URL) | The address Okta sends users to, e.g. |
API token (Bearer token) | A secret key Okta uses to authenticate to OCM. |
Note Copy the API token now. For security, OCM displays the token only once, right after you enable provisioning. Copy it and store it somewhere safe before leaving this screen, you will paste it into Okta in Step 2.
Step 2: Connect Okta to OCM
In the Okta Admin Console, go to Applications → Applications and open the application you already use for OCM Single Sign-On.
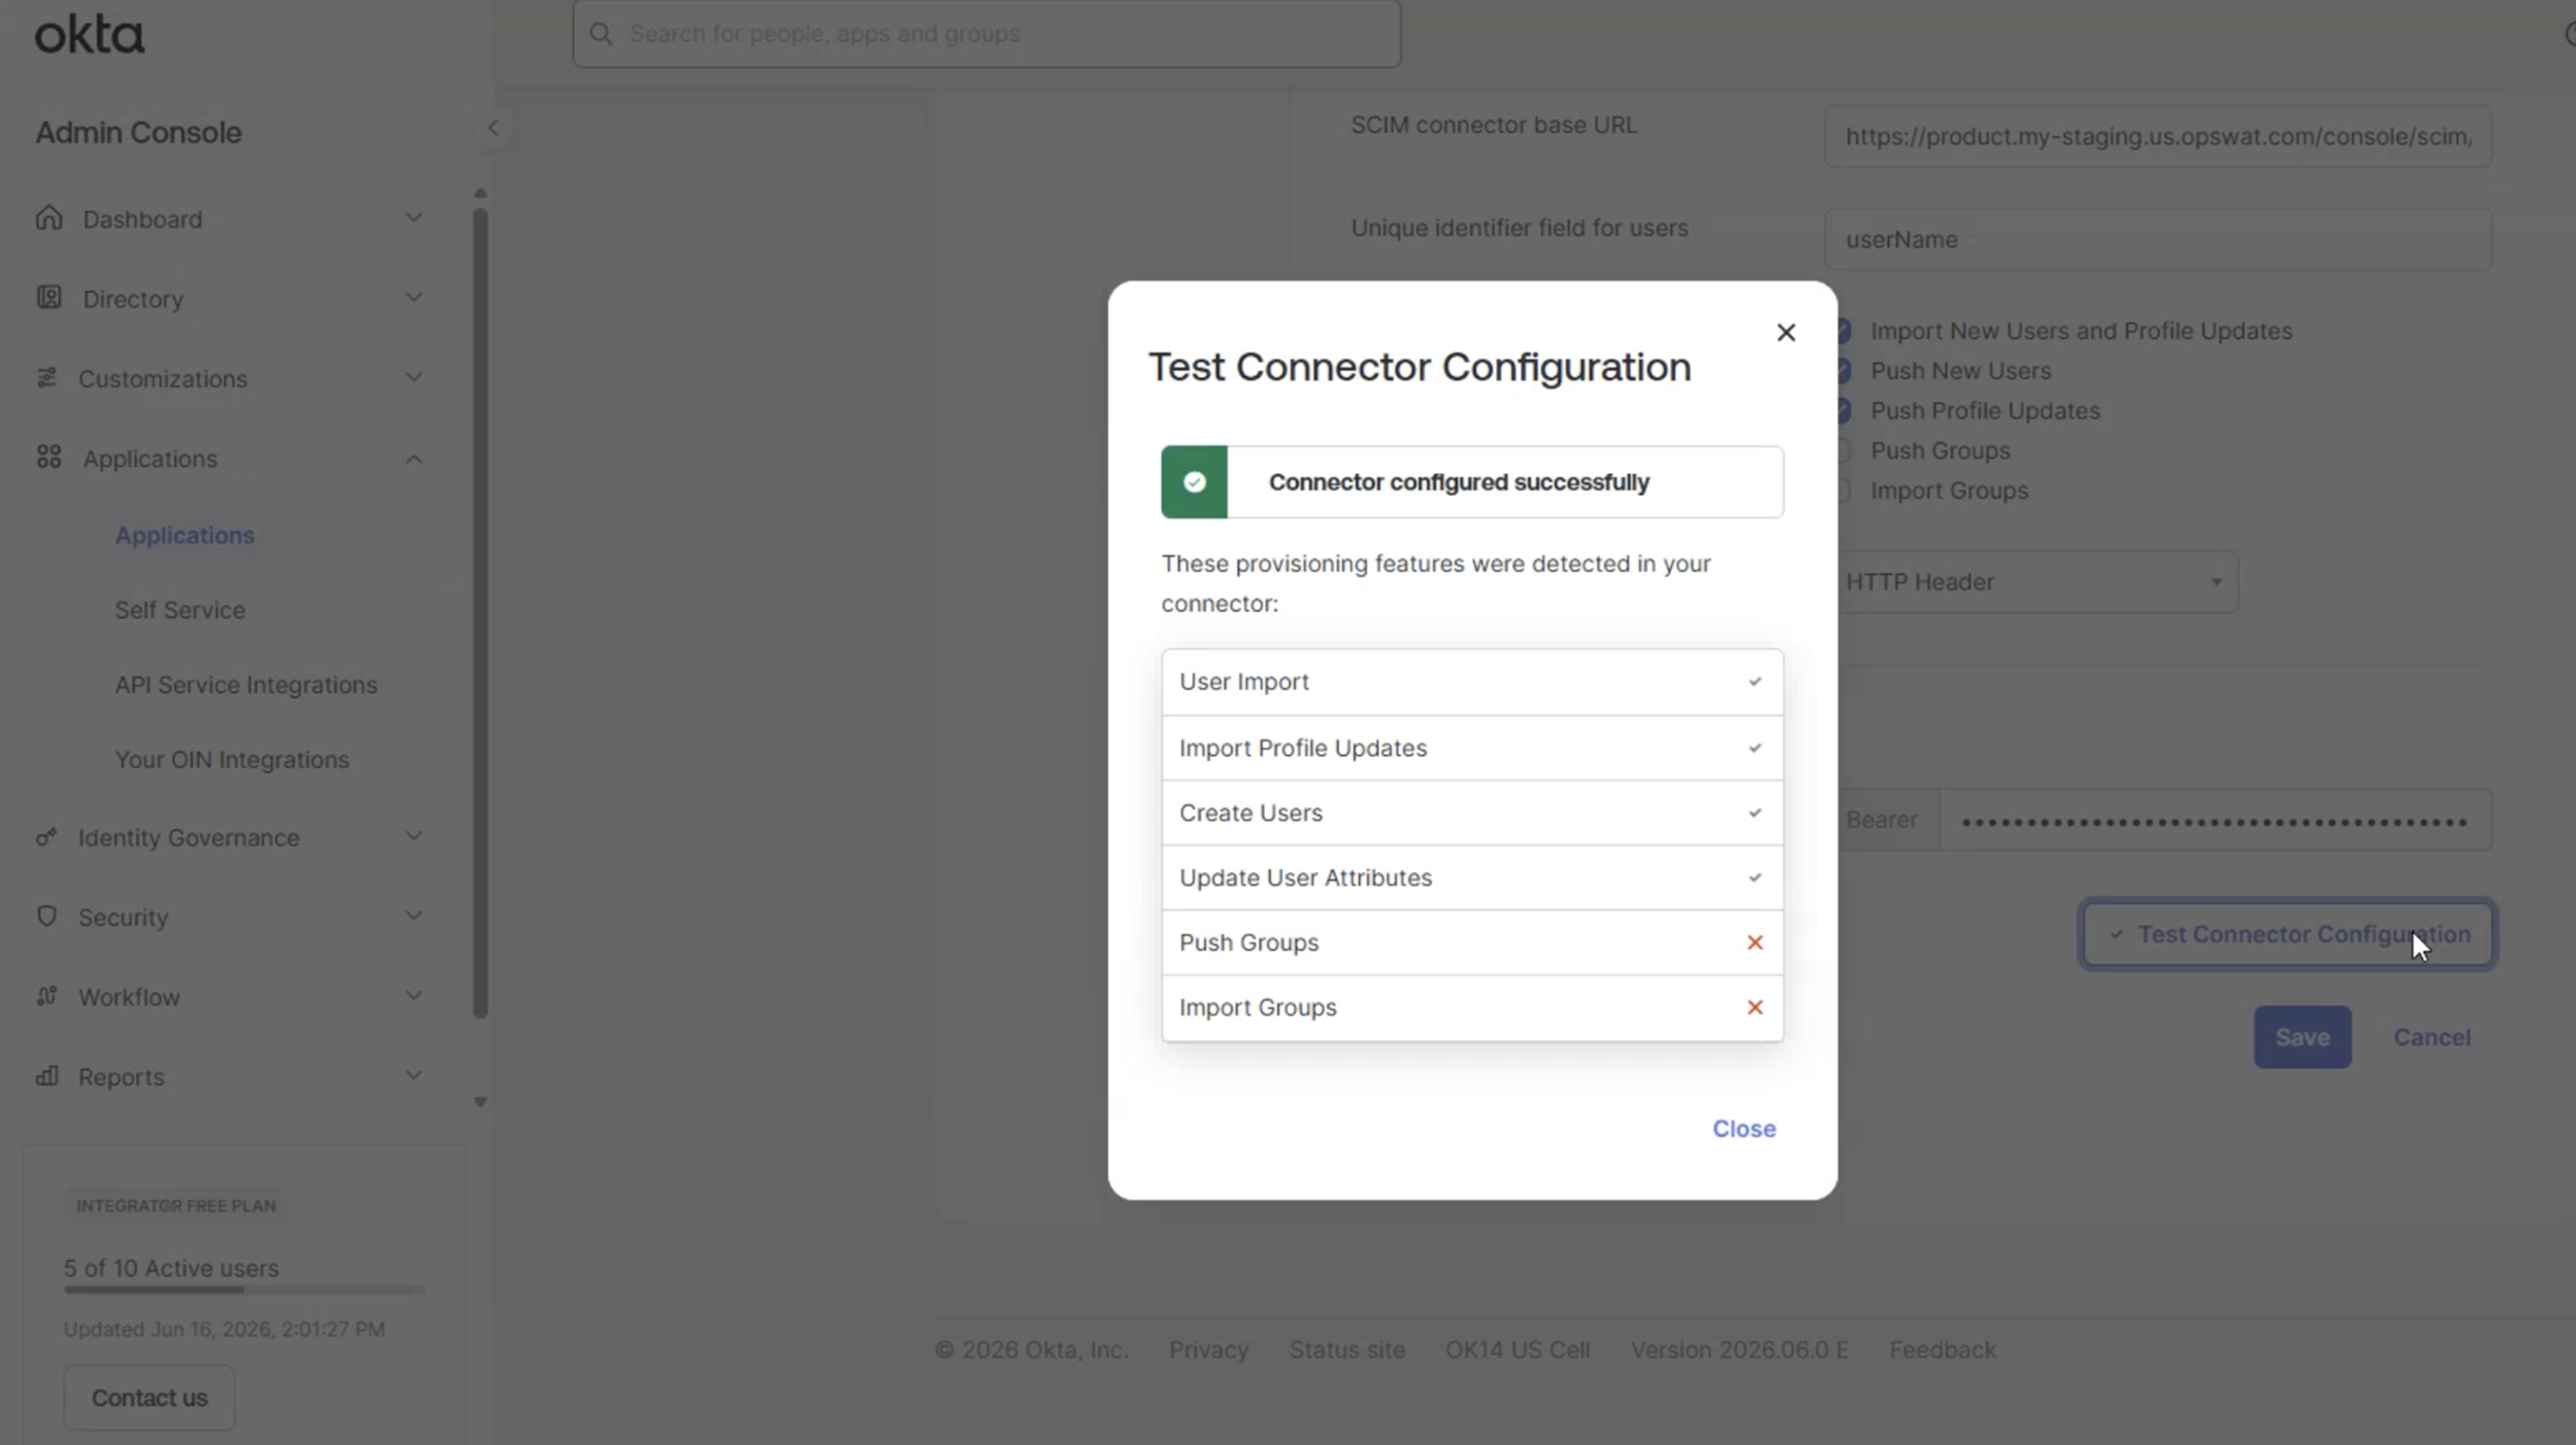
Open the Provisioning tab and click Configure API Integration.
Select Enable API integration.
Enter the values you copied from OCM in Step 1:
Okta field | Value to enter |
|---|---|
Base URL | The SCIM endpoint URL from OCM |
API Token | The API token from OCM |
Click Test API Credentials. Okta confirms it can reach OCM successfully.
Click Save.
Step 3: Turn on provisioning in Okta
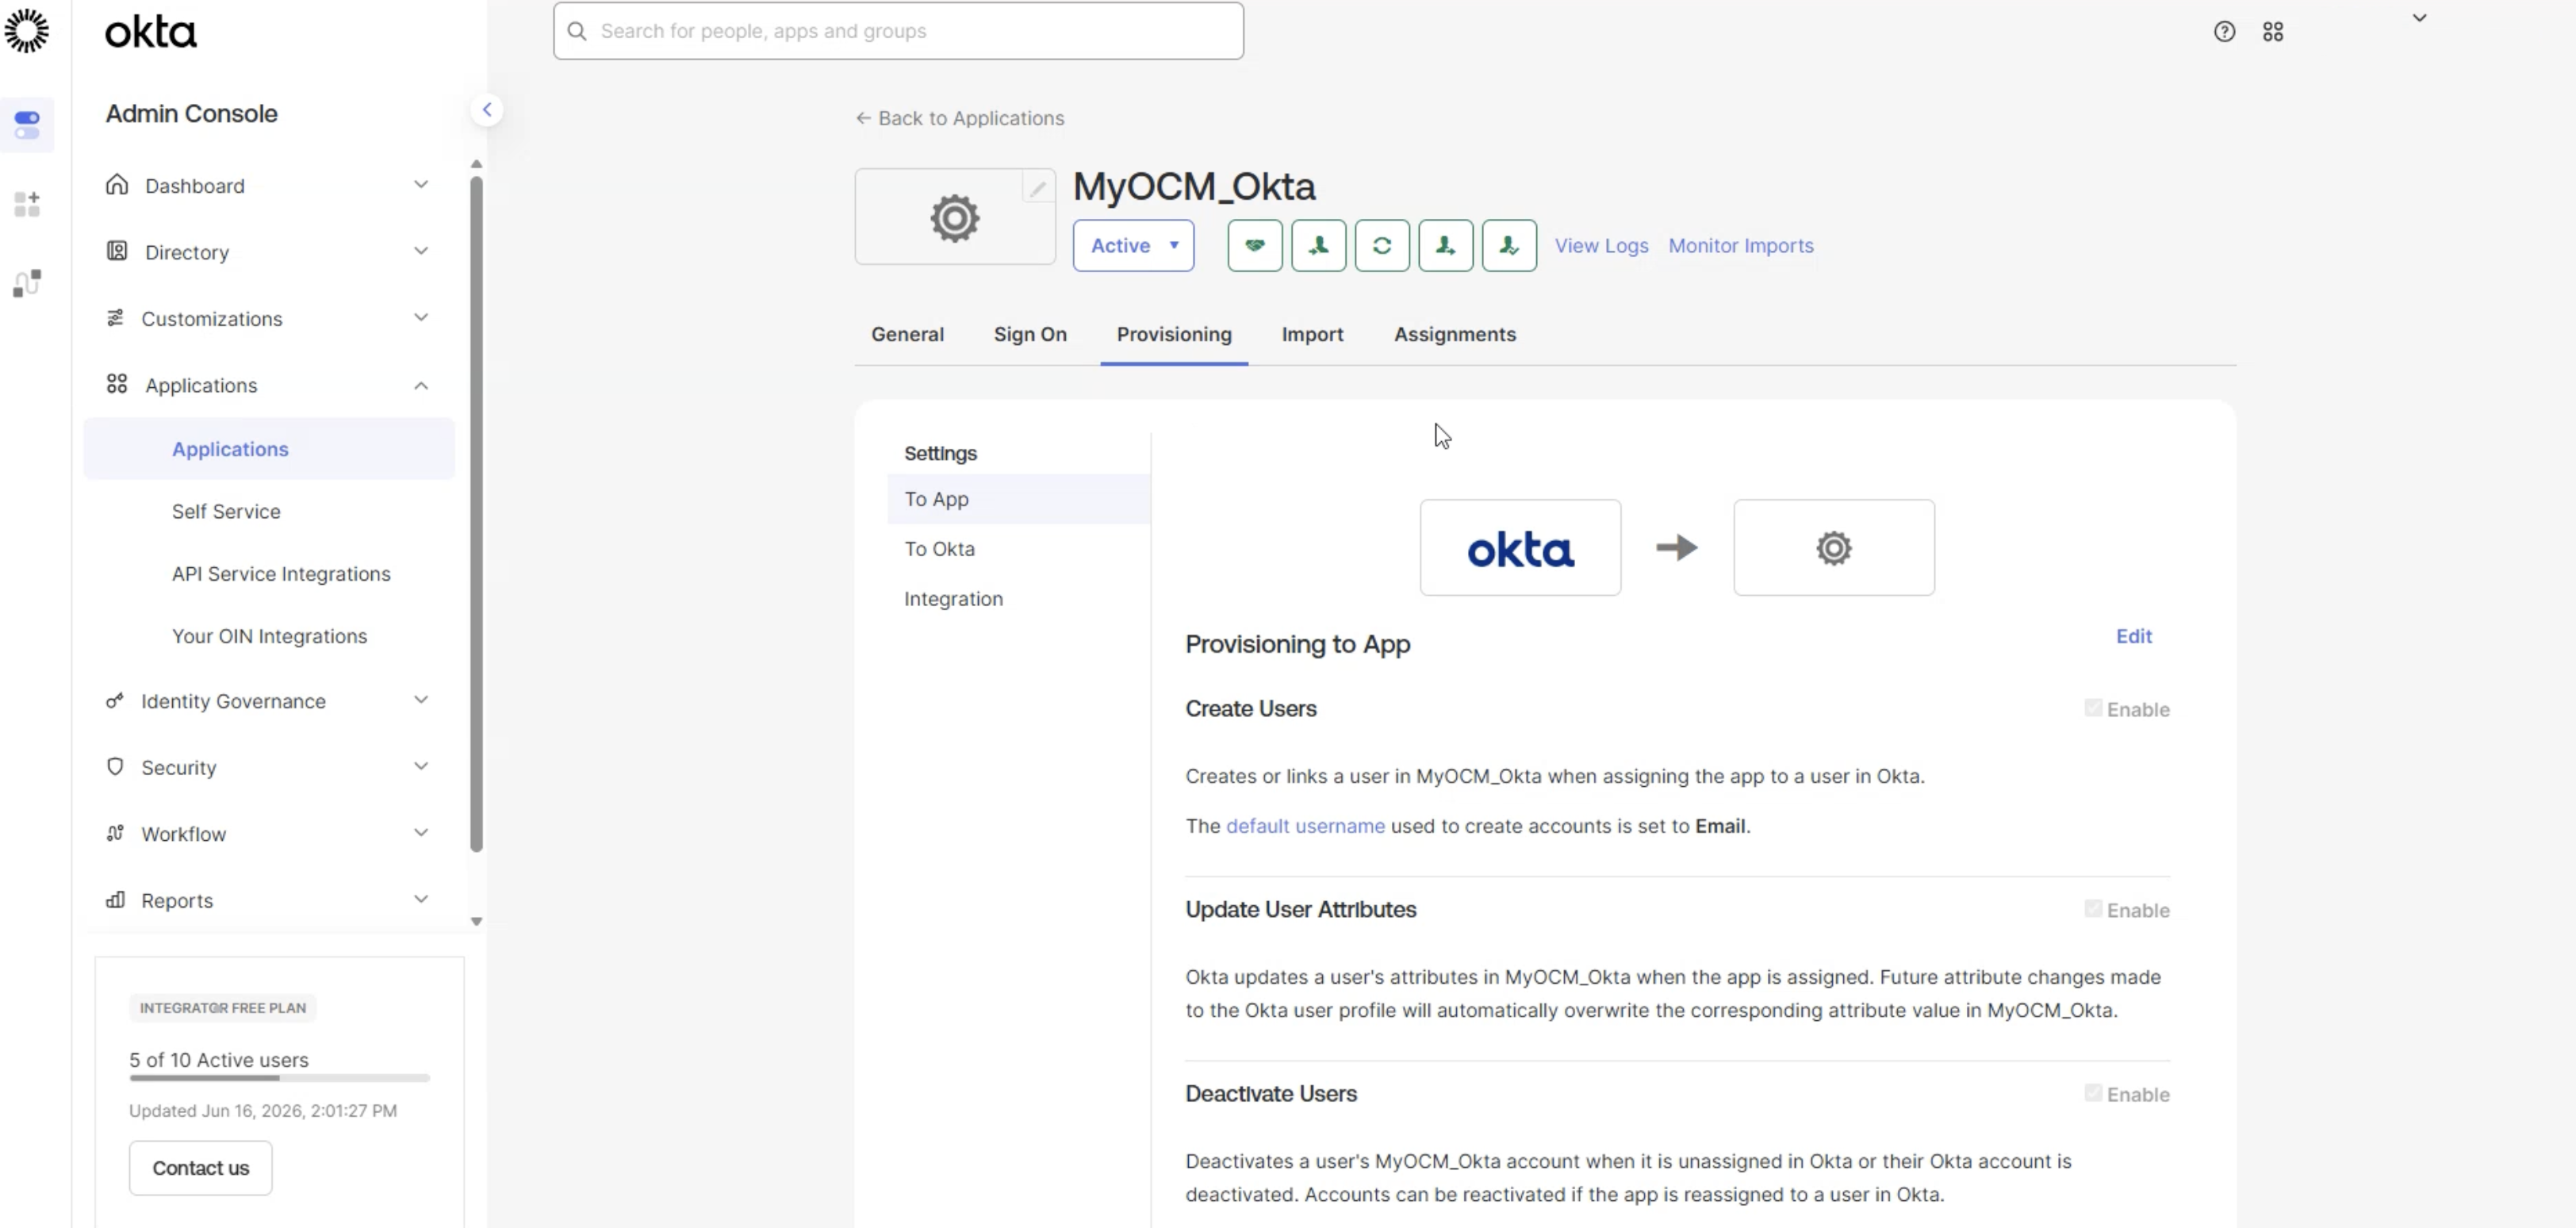
Still on the Provisioning tab, select To App in the left menu, then click Edit.
Enable the following actions:
Create Users
Update User Attributes
Click Save.
Scroll down to Attribute Mappings and confirm the defaults below. These tell Okta which user fields to send to OCM:
OCM field | Okta value |
|---|---|
Username / email |
|
First name |
|
Last name |
|
Step 4: Assign users and groups
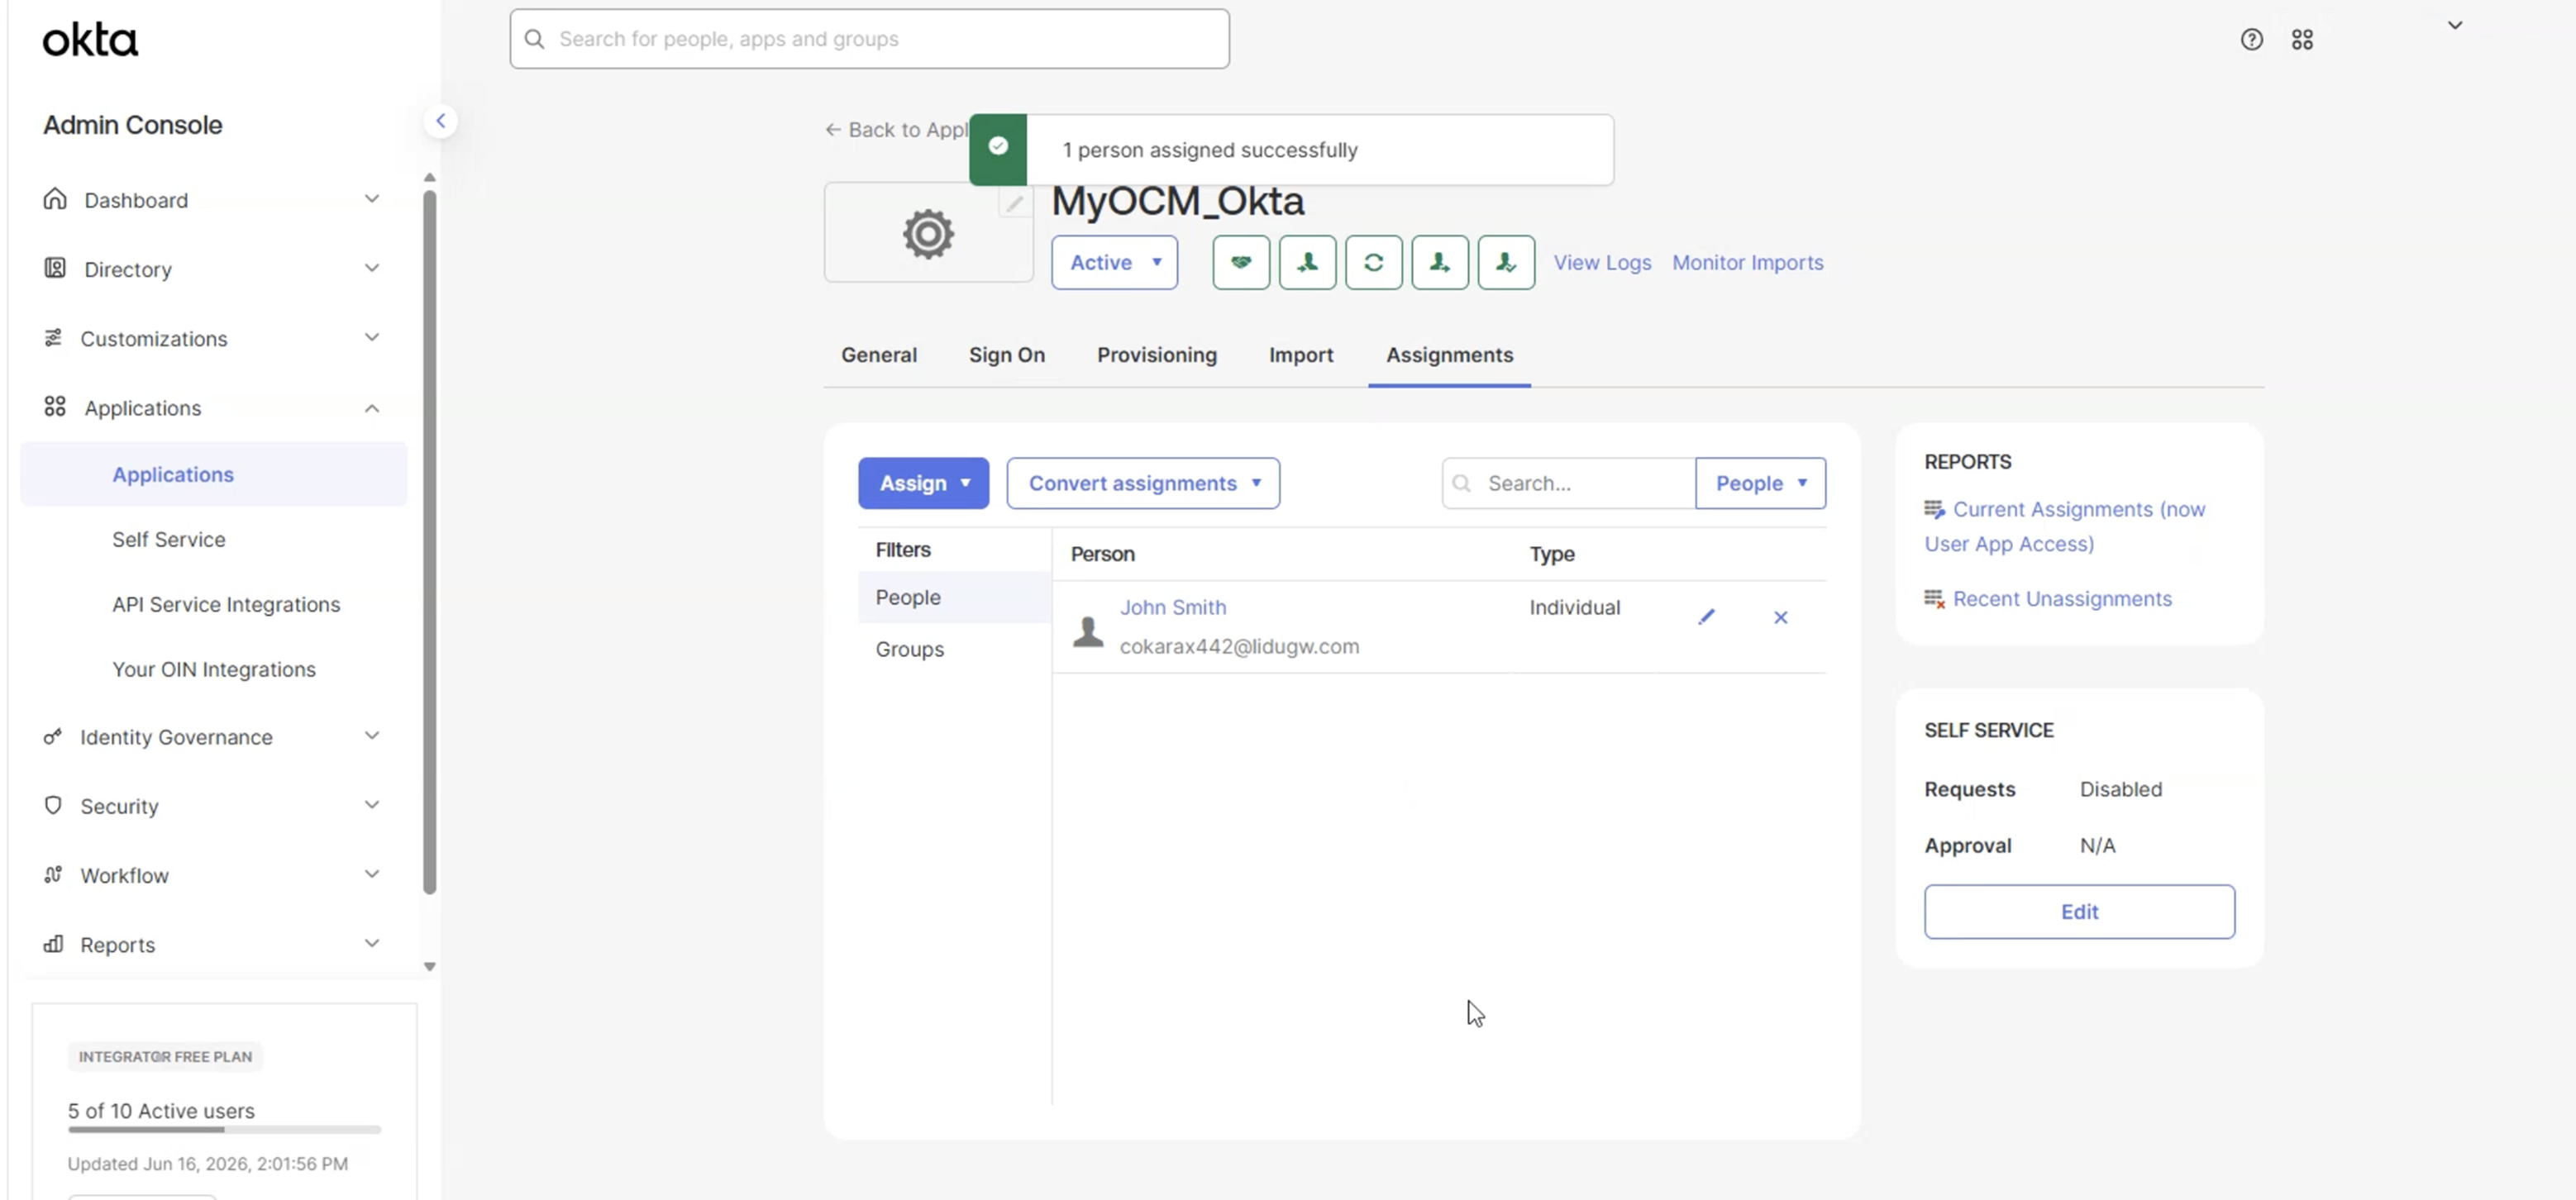
Open the Assignments tab of the application.
Click Assign, then choose Assign to People or Assign to Groups.
Select the users or groups who should have access to OCM, then confirm with Assign → Save and Go Back → Done.
As soon as a user is assigned, Okta pushes them to OCM and the account is created automatically.
Step 5: Verify in OCM
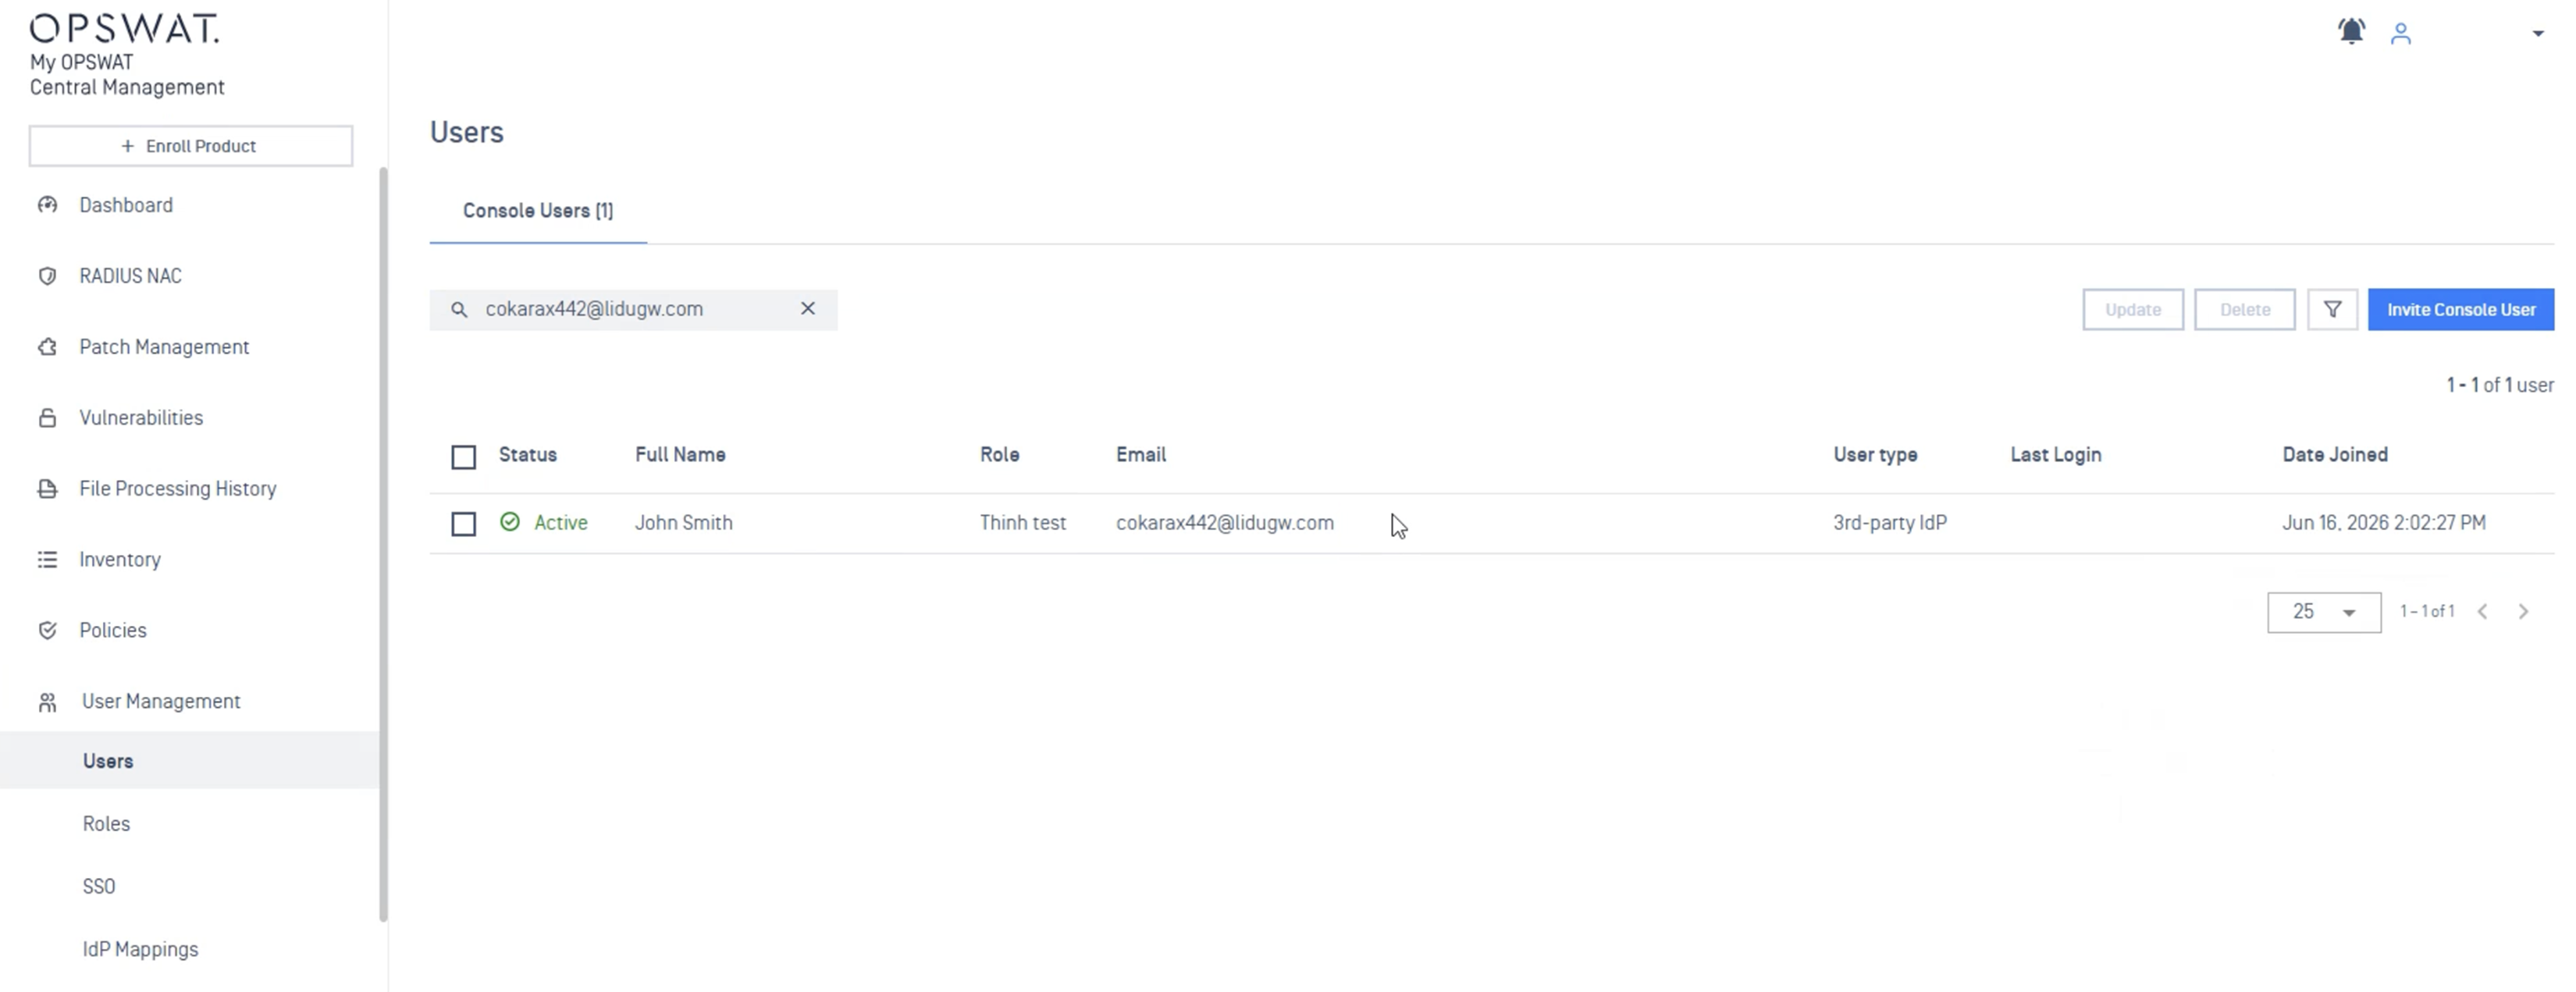
Return to My OPSWAT Central Management (OCM) and open the Users list (User Management).
Confirm that the users you assigned in Okta now appear in OCM, provisioned from Okta.
Done. Okta now provisions users into OCM automatically. From now on: assign a user in Okta and they appear in OCM; update a user's name in Okta and it updates in OCM — no manual user management needed in OCM.