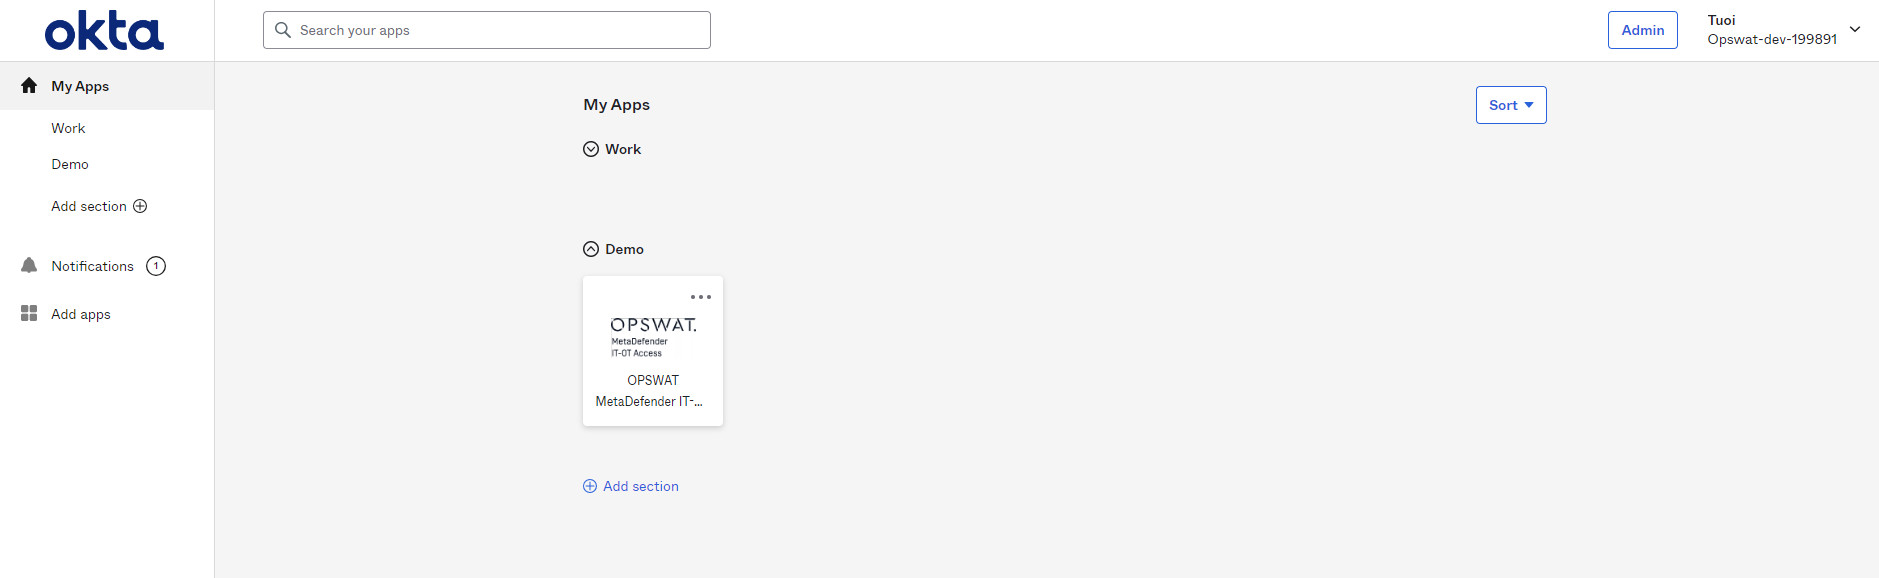
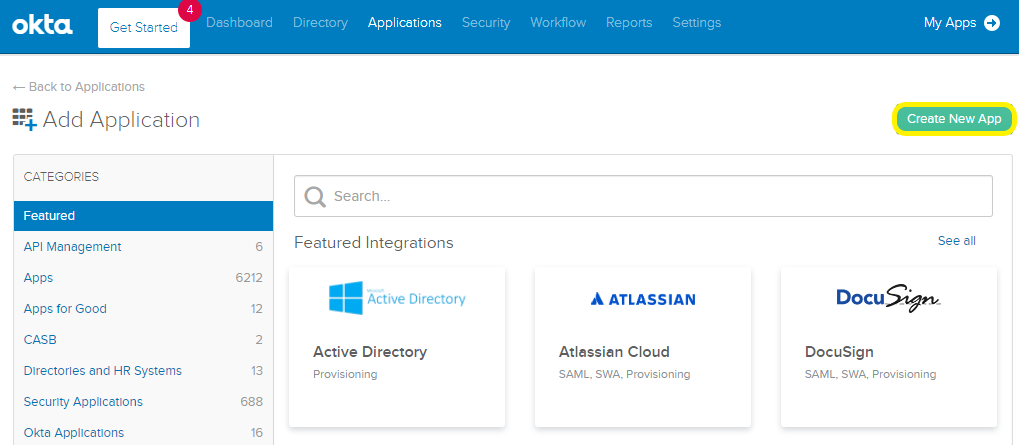
On the Okta Admin login splash page choose “Create a new app”.
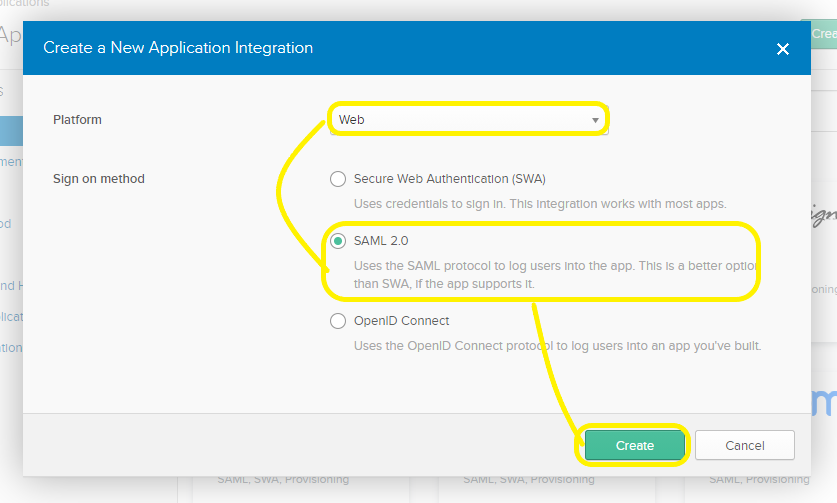
Choose Web and SAML 2.0.
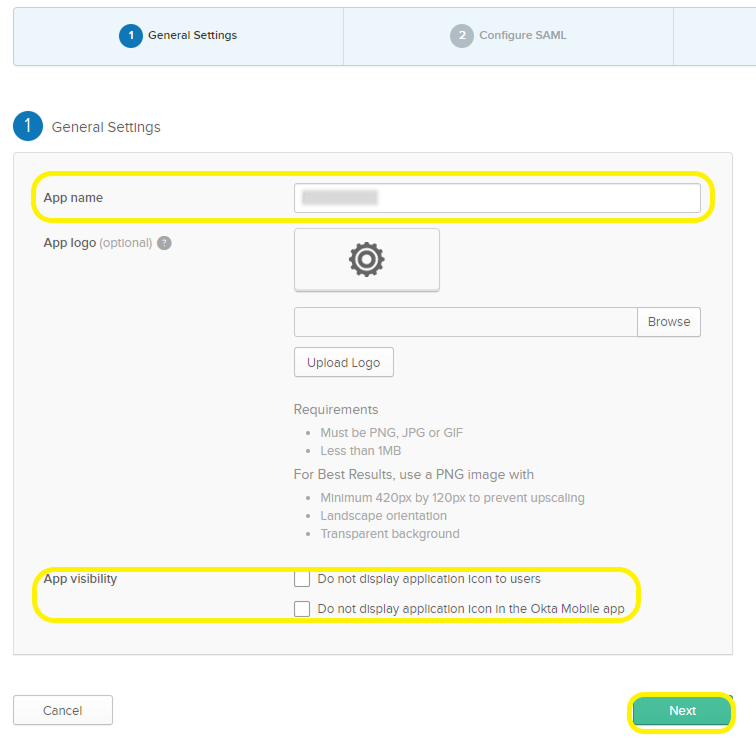
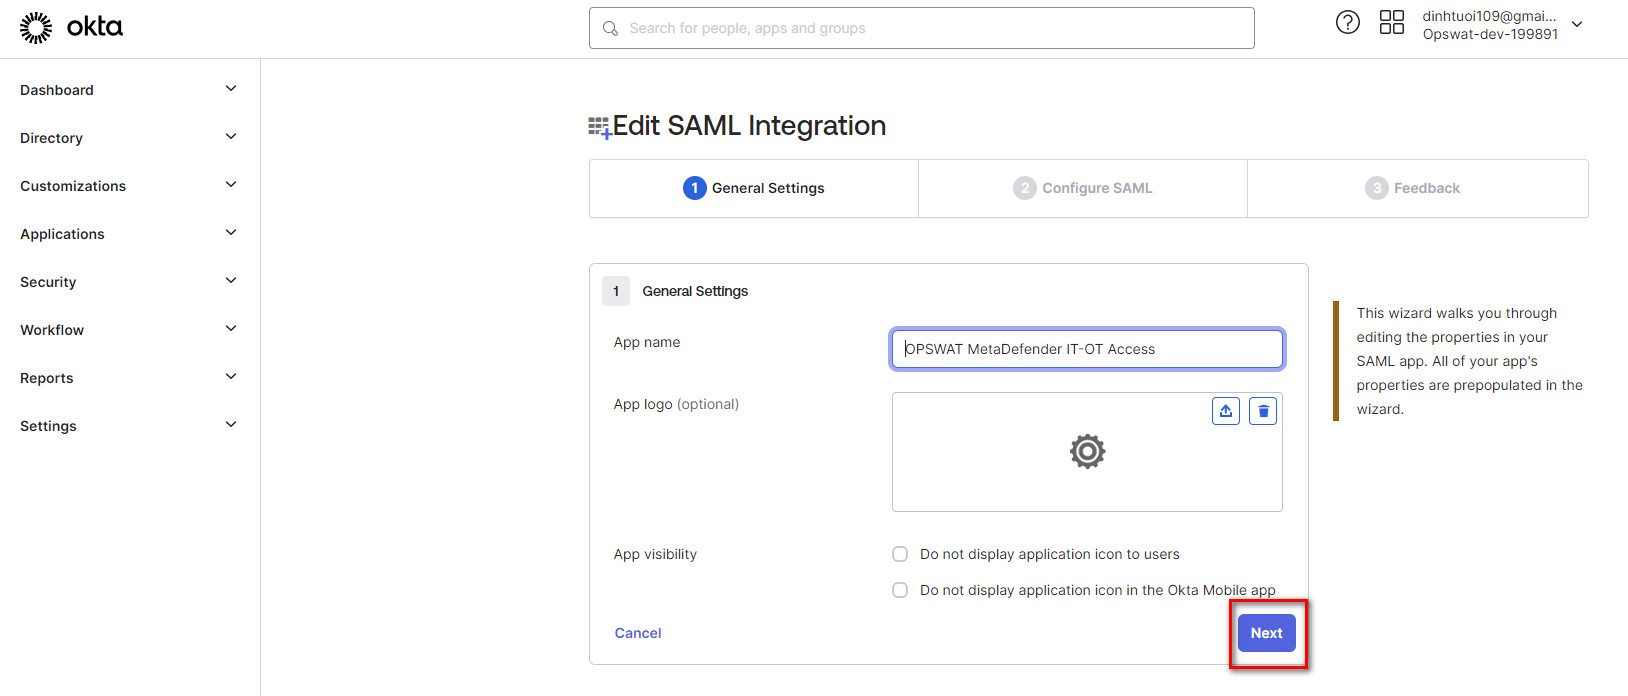
In the “App name” field, fill in “My OPSWAT Central Management” or something similar. You can also upload a logo if you like. Do not check the “App visibility” checkboxes. Click Next to continue.
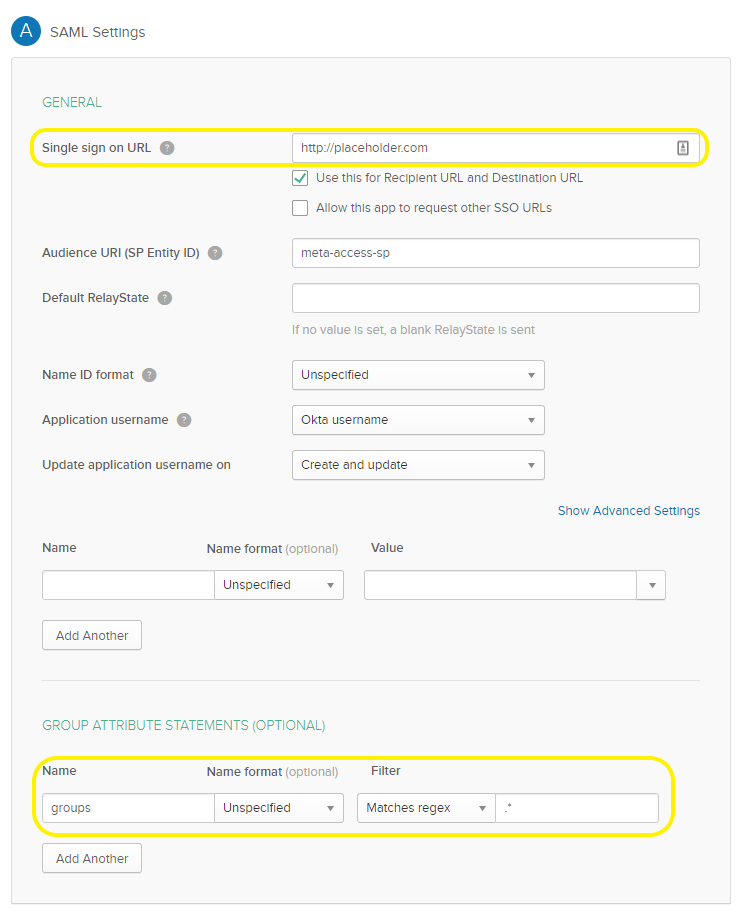
Under the “SAML Settings” , fill in the “Single Sign on URL” field with a properly formatted URL as a placeholder. Note You will change this later after retrieving the applicable value from My OPSWAT Central Management.
Leave the box checked next to “Use this for Recipient URL and Destination URL”. Leave the box unchecked, next to “Allow this app to request other SSO URLs“.
Fill in the Audience URL
Default setting are fine for “Default Relay State”, “Name ID format”, “Application username”, and “Update application username on”.
Skip the first “Name” and “Value” fields.
Under “GROUP ATTRIBUTE STATEMENTS (OPTIONAL)”, fill in the “Name” and “Filter” fields.
For “Name” enter whatever you want but save the value to use later in the MA UI”, eg: “groups”.
Under Filter , choose “Matches regex” and “.*”
Advanced users may choose other options but it’s recommended to use these setting unless you’re very familiar with Okta.
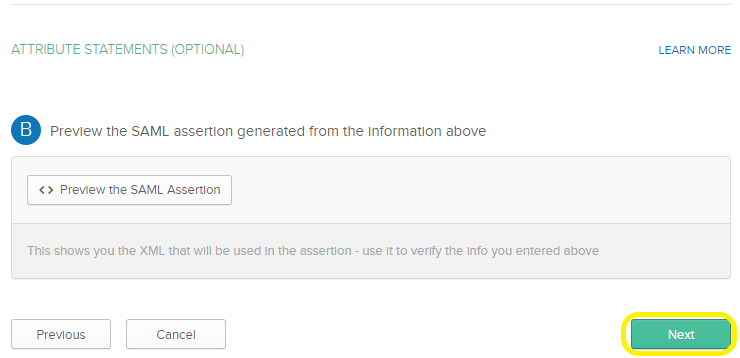
Click “Next” to continue.
The next page is just feedback for Okta, and has no functional impact. You can choose “I'm an Okta customer adding an internal app”, then leave all the other fields blank and click “Finish”.
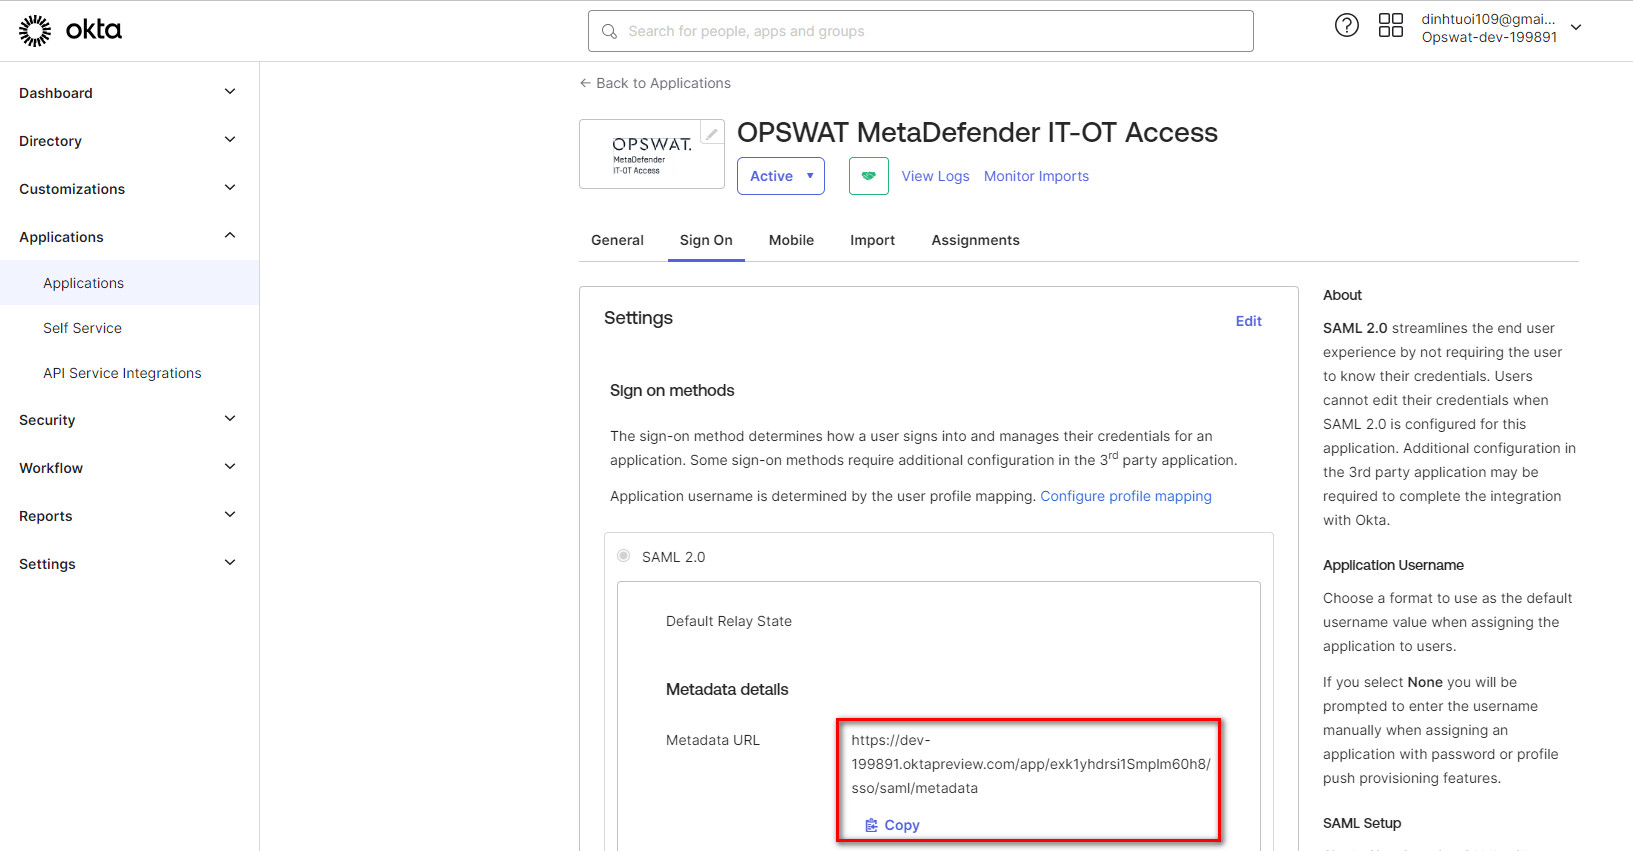
On the next page (under the “Sign On” tab), in the Info Box labeled “SAML 2.0” there is a link called “Metadata URL”. Click Copy, open new tab and paste that url, press Enter. Save as metadata.xml file you will import into My OPSWAT Central Management.
Log into your My OPSWAT Central Management Console at https://my.us.opswat.com/
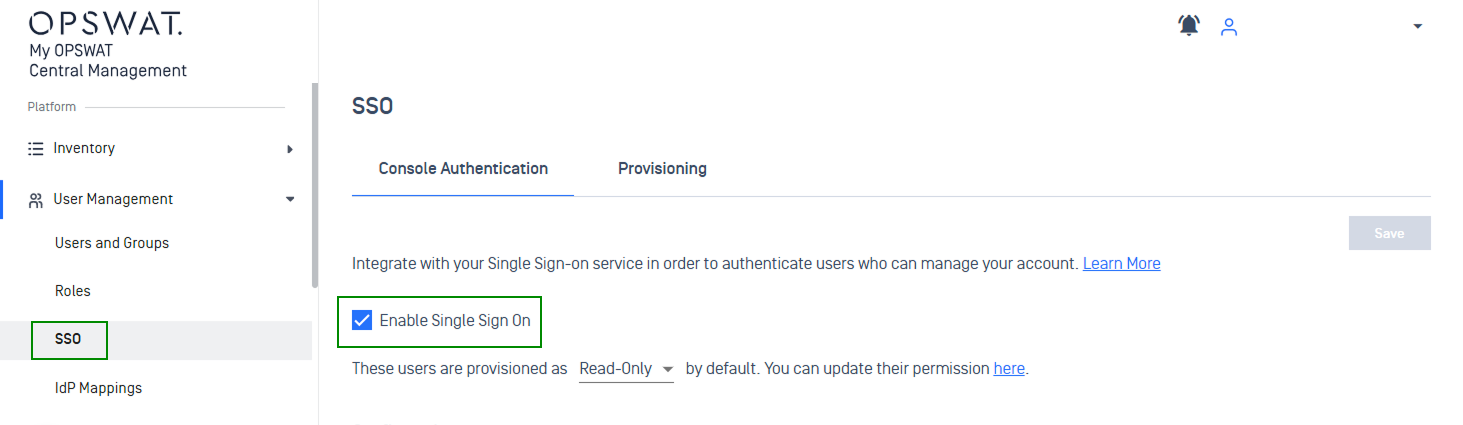
Navigate to User Management > SSO > SDP and check “Enable Single Sign On”.
Next to “Import configuration from XML Metadata file”, click “Choose File” and upload the “metadata” file you just downloaded from Okta. This should automatically fill in the “Current Certificate”, “Issuer”, and “IdP SSO URL” fields.
In the “IdP Name” field, enter “Okta” or some other string. This is only for reference in the My OPSWAT Central Management UI.
Leave the Logout URL and Error URL fields blank.
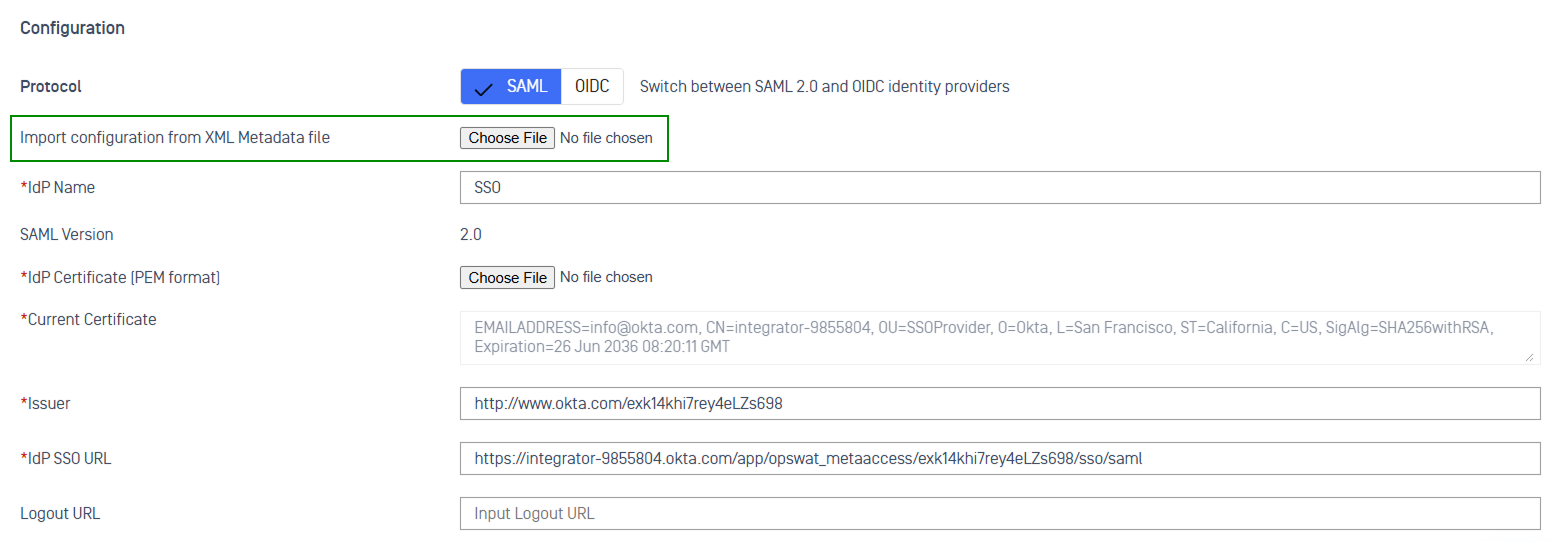
At the bottom, click “Add Group Attribute” and enter the value the value from the “Name” field in Okta. Presumably something like “group”.
At the bottom of the page you will see a new value called “My OPSWAT Central Management Login URL”. Click “Copy to clipboard”.
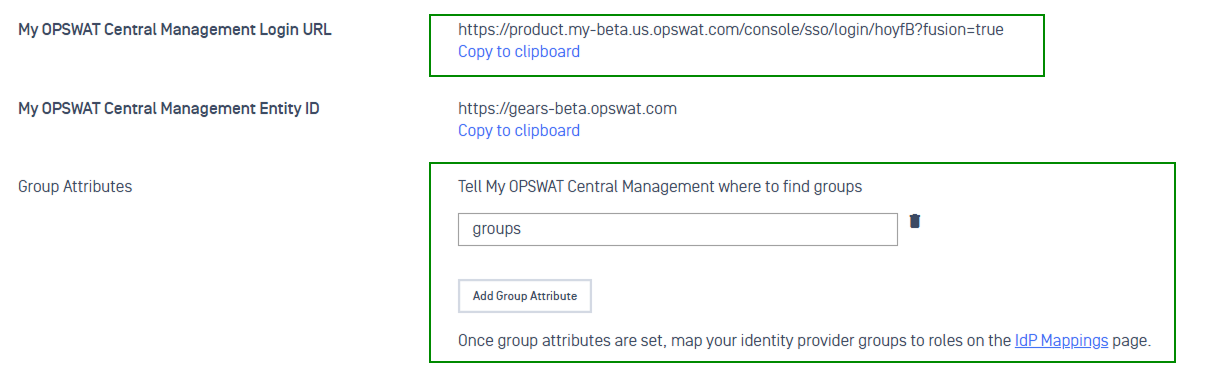
Scroll to the top of the page, click “Save” and enter your My OPSWAT Central Management admin PIN.
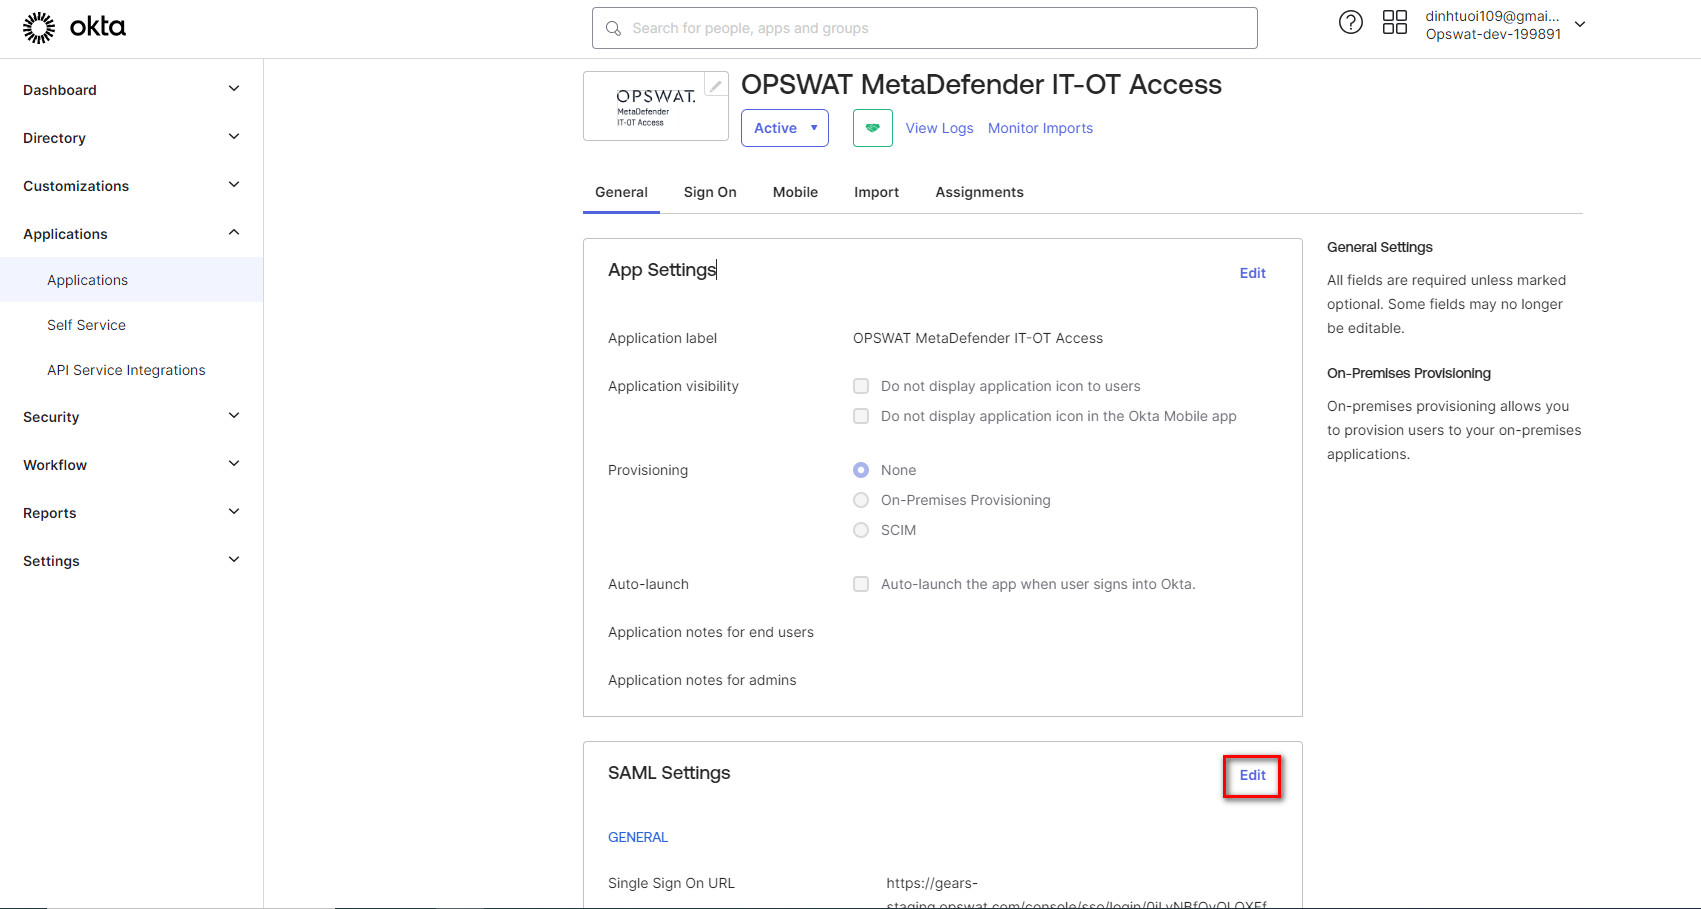
Switch back to Okta, click the “General” tab, scroll down to “SAML Settings” and click “Edit”.
Click “Next” on the first panel.
There will be a placeholder URL under “Single sign on URL”. Replace this with the URL you just copied from My OPSWAT Central Management.
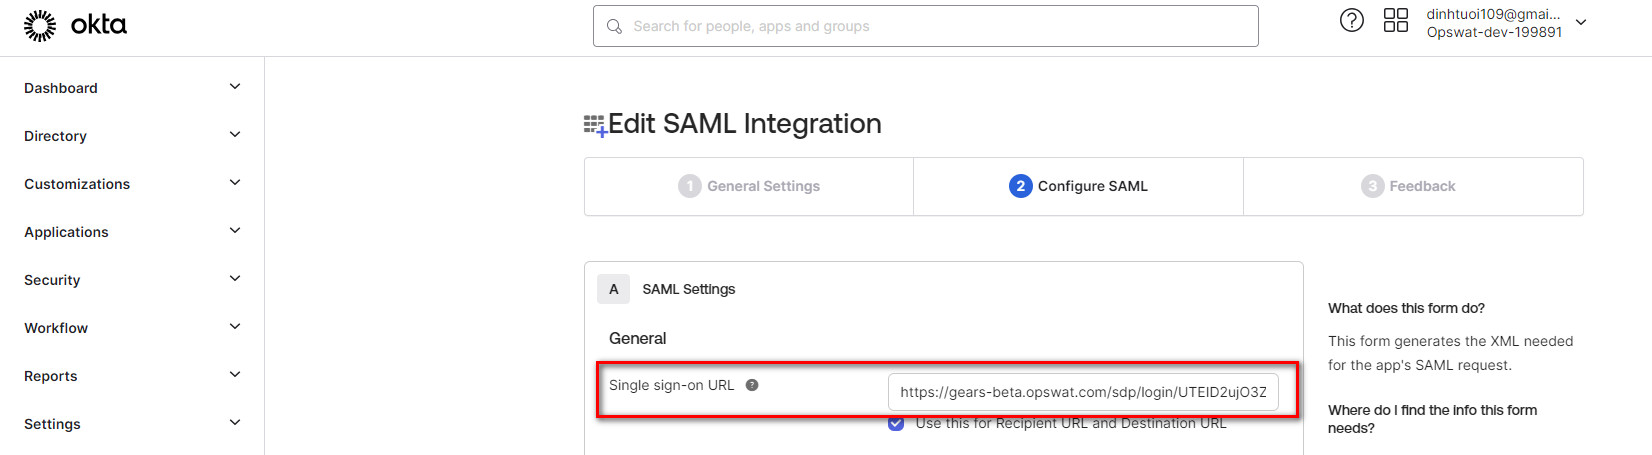
Scroll to the bottom and click “Next” and then “Finish”.
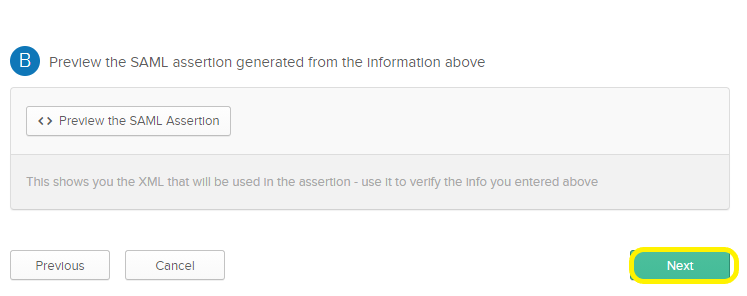
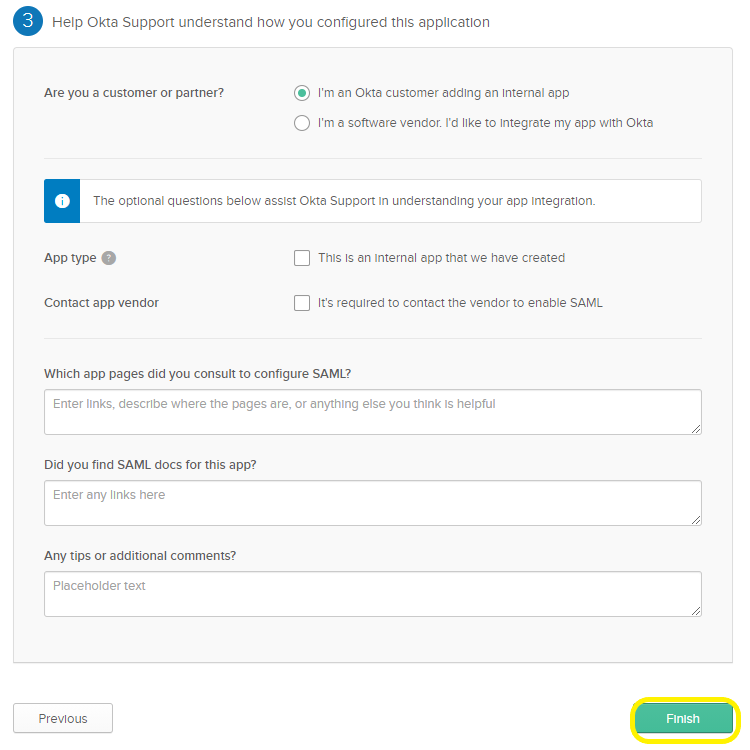
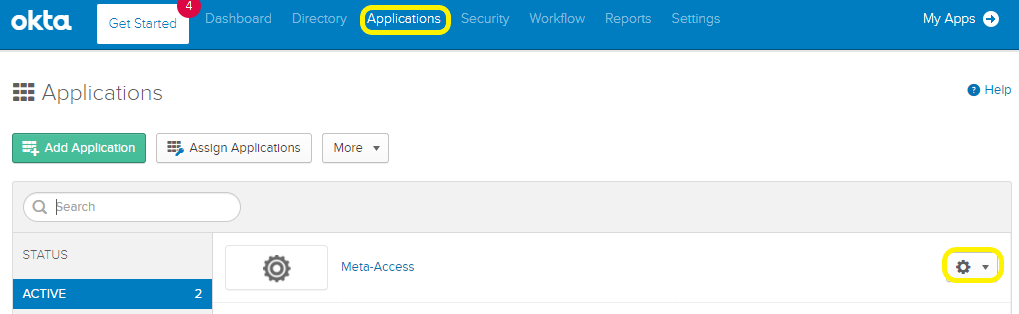
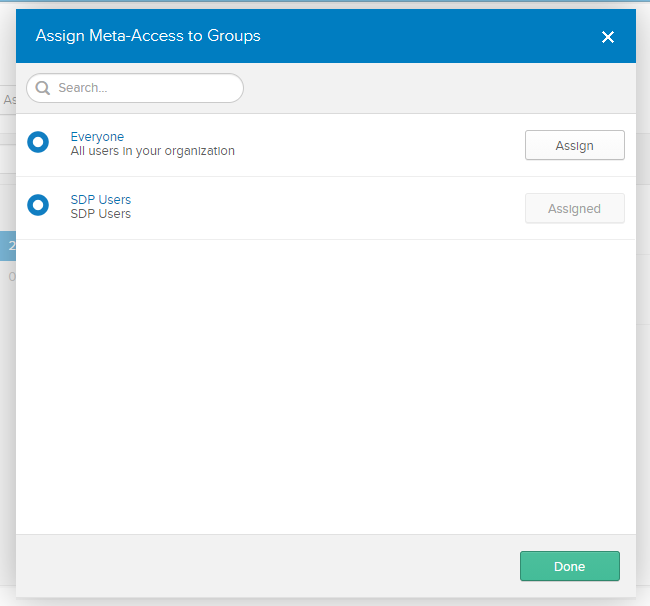
In the navigation bar on the top, mouse over Applications and click the Applications link. Then click the Gear icon next to the My OPSWAT Central Management app, and choose “Assign to Groups”.
On the groups panel, you can decide which groups you want to use for assigning SDP access in the My OPSWAT Central Management console. Click “Assign” next to each SDP user group. Note You will need to record the selected group names for use in My OPSWAT Central Management. Please copy and paste the group names to minimize human error!
Click “Done.”
Navigate to the My OPSWAT Central Management console, then go to User Management > IdP Groups, and click “Add”.
Fill in a group name you copied from Okta, enter your PIN and choose Add. Your new group will show up in the “IdP Groups” section.
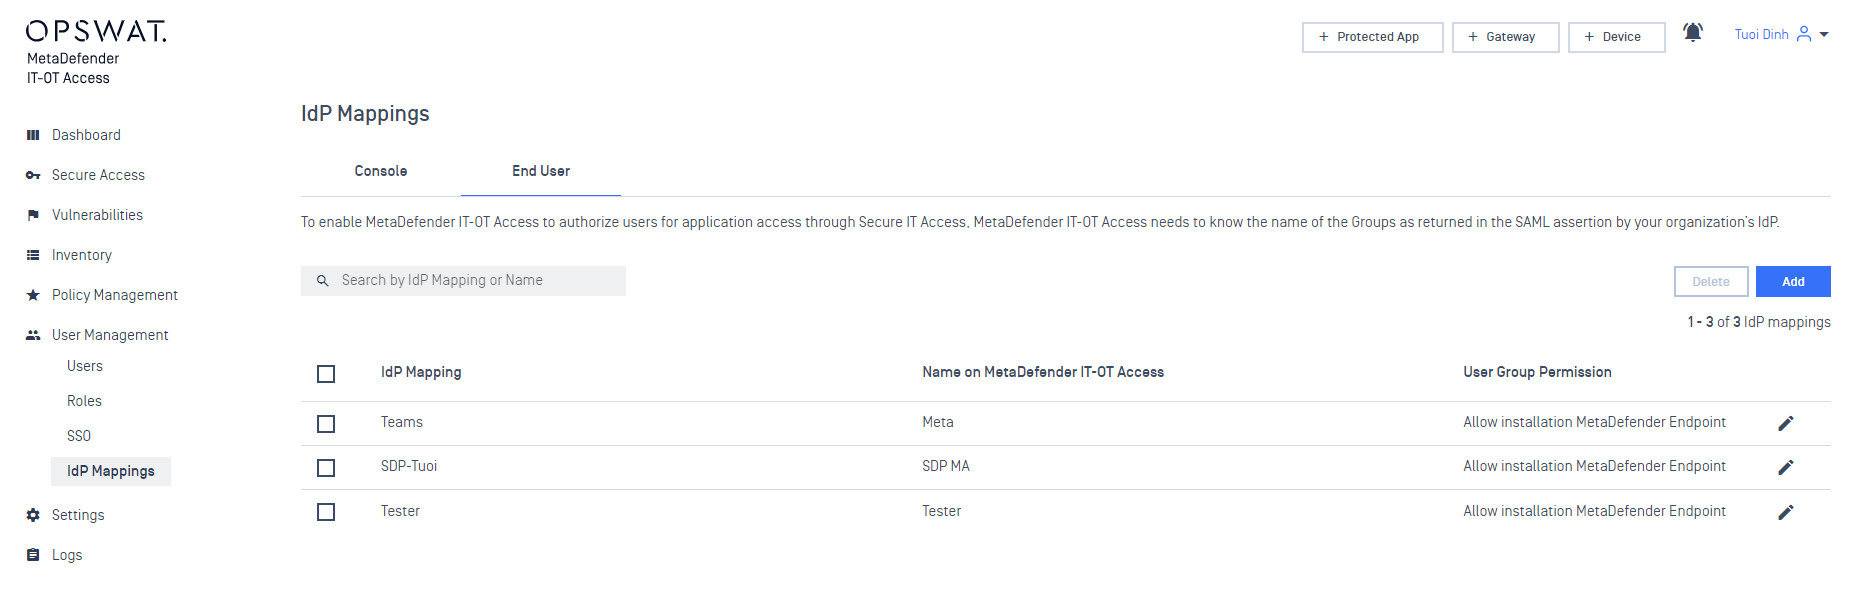
Repeat for each SDP user group in Okta.
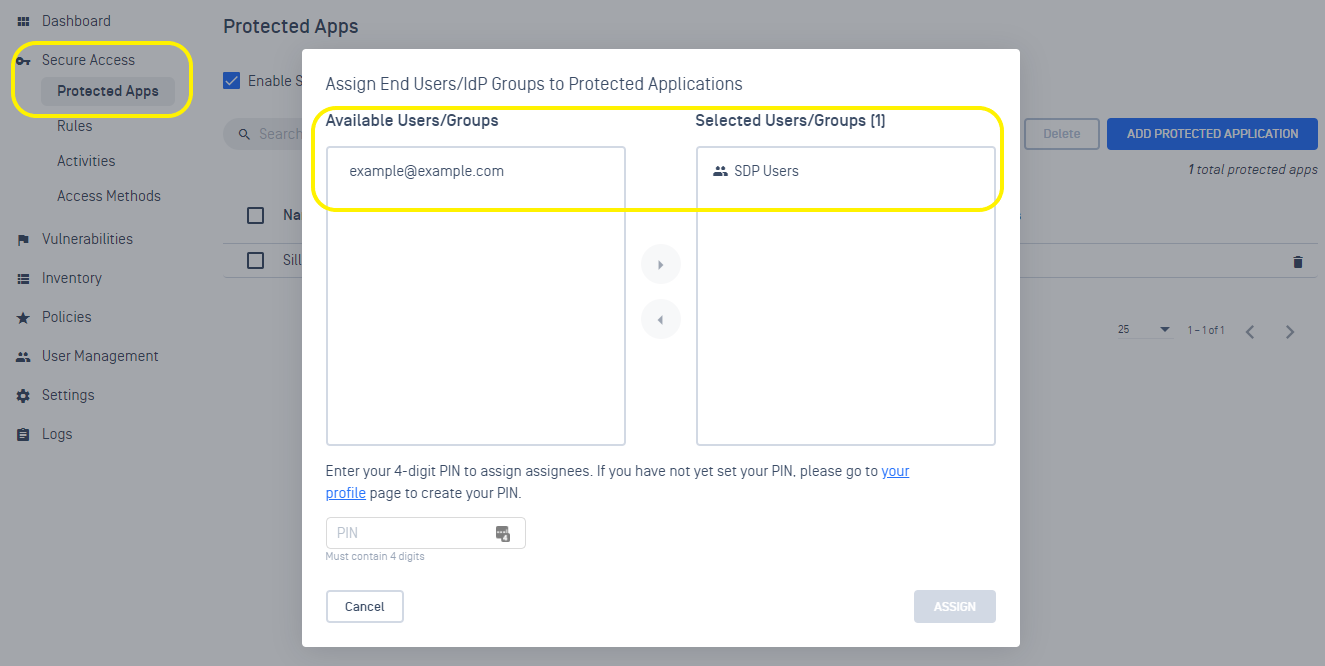
When you are ready to assign your new groups to protected applications, go to Secure Access > Protected Apps, click the “Assign” link next to your desired application(s).
On the “Assign End Users/IdP Groups to Protected Applications” Move groups “Available Users/Groups” to “Selected Users/Groups” to assign access, then enter your PIN again and choose Enter.
Log back in to the Okta console as an end user and click on the “My OPSWAT Central Management” application.