In this article you will learn at a high level how to:
Set up and configure My OPSWAT Central Management as a Service Provider (SP) in most IdPs
Export the resulting connection data from your IdP and import it to the My OPSWAT Central Management Console.
Enable SAML SSO for your Secure IT Access (SDP) end users.
Provide access to SDP-protected applications based on IdP group membership.
Invoke SDP by logging in to your IdP as an end user.
If you need help with your specific IdP, please see one of the pages below.
Here are steps to provision end-users from your own IdP
Log into your existing SAML IdP as an administrator or create a trial account
In an existing production IdP, you will likely already have a number of user accounts organized into groups. For a test IdP, you will need to create one or more users and assign them to groups
In your IdP, create an application. If there is a catalogue of common SP applications, you will NOT want to use those options. You will want to create a custom app.
Give the new app a label.
Configure the SP Entity IDs. If required, you may also need to fill in an IdP EntityID, but most IdPs specify this for you. These are identifiers the two ends are going to use to verify that authentication attempts are coming from and going to the right places. It doesn’t really matter what they are, just remember them for later when configuring MetaDefender IT Access.
In some IdPs, you will also need to configure an IDP URL.
Assign one or more existing Users or Groups to access the new application.
Enable group attributes for the application. Some IdPs will NOT let you pick a group attribute (Microsoft Azure for example). In this case, you will need to determine your IdP’s group attribute. Whatever your group attribute, you will need to remember it later for entry into MetaDefender IT Access.
NOTE: Some IdPs will not allow you to assign groups attributes at this point. For those providers, you will need to wait until after you configure My OPSWAT Central Management. As such, a couple of these steps will be repeated below. Please ignore them if you have already done the work here!
Export the IdP metadata that you will later load into the My OPSWAT Central Management Console. In some cases your IdP will require you to save the application first and go to a different part of the UI to export the metadata.
Navigate to the My OPSWAT Central Management administration console. Enable single sign-on for SDP.
Note: that there are two kinds of SAML SSO setup here. The “Console” setup is for logging into the My OPSWAT Central Management administration console itself. The “SDP” setup is for logging in end-users to the SDP product. We’re setting up SDP here.
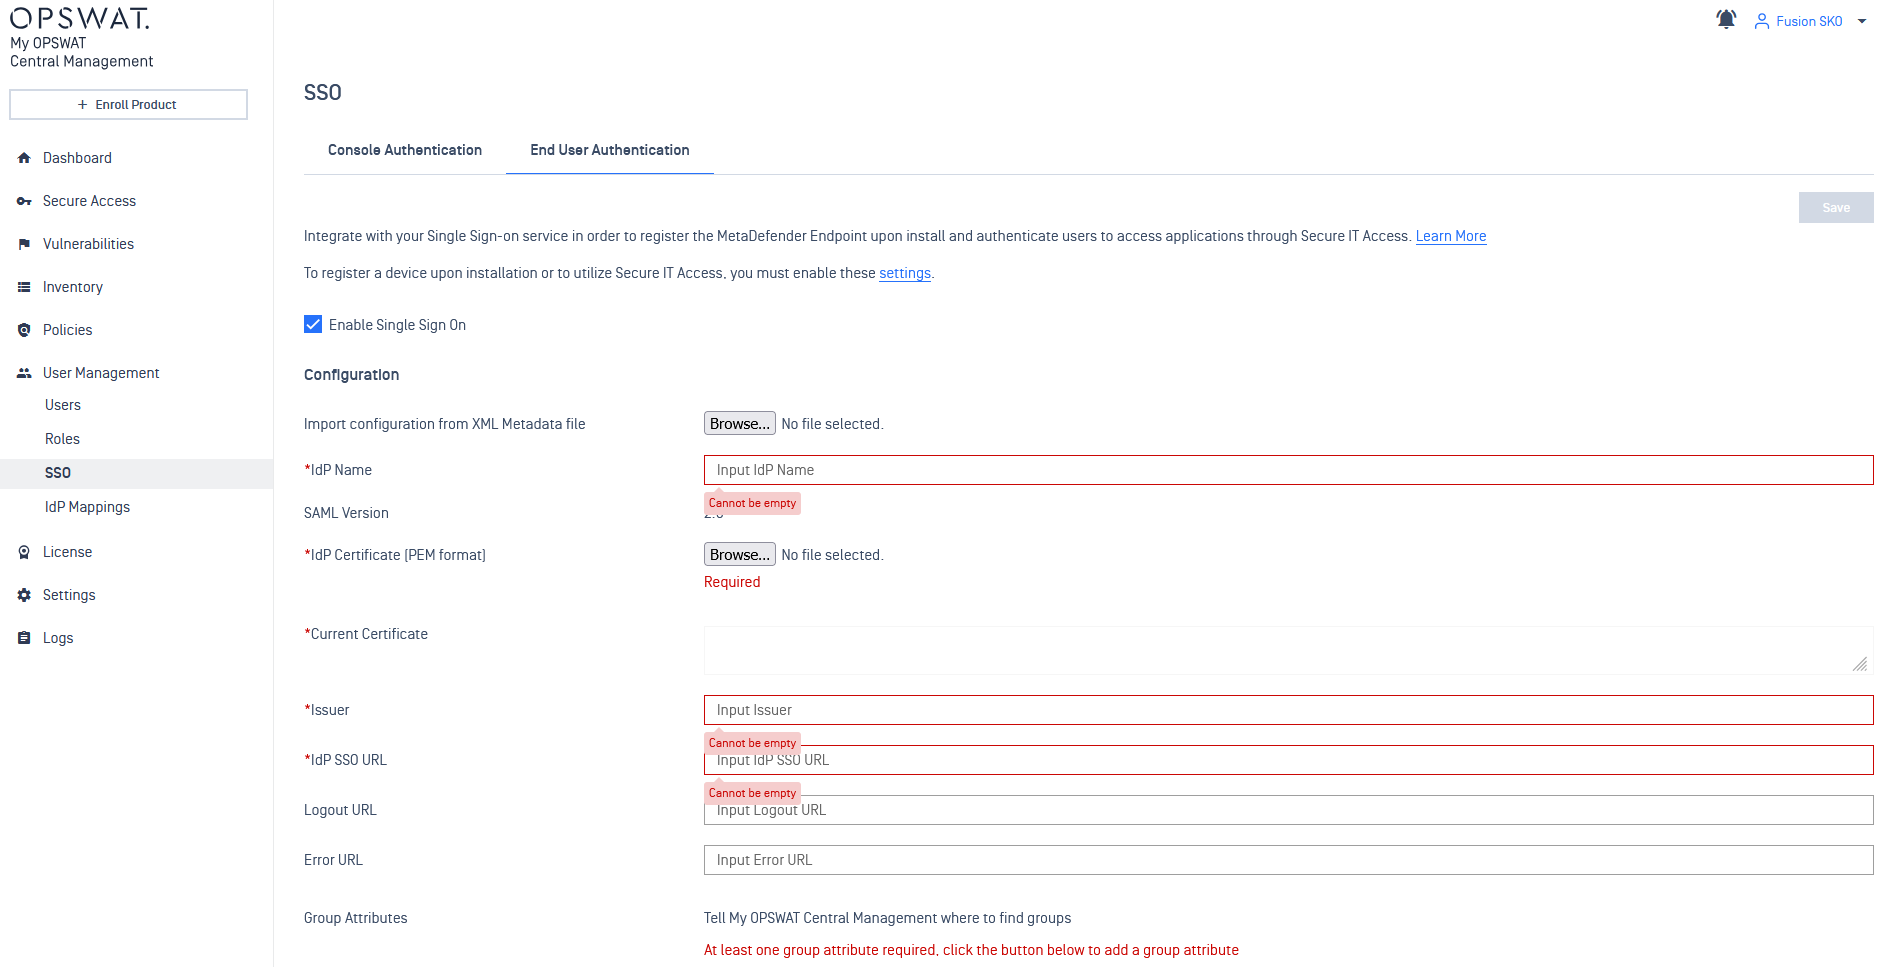
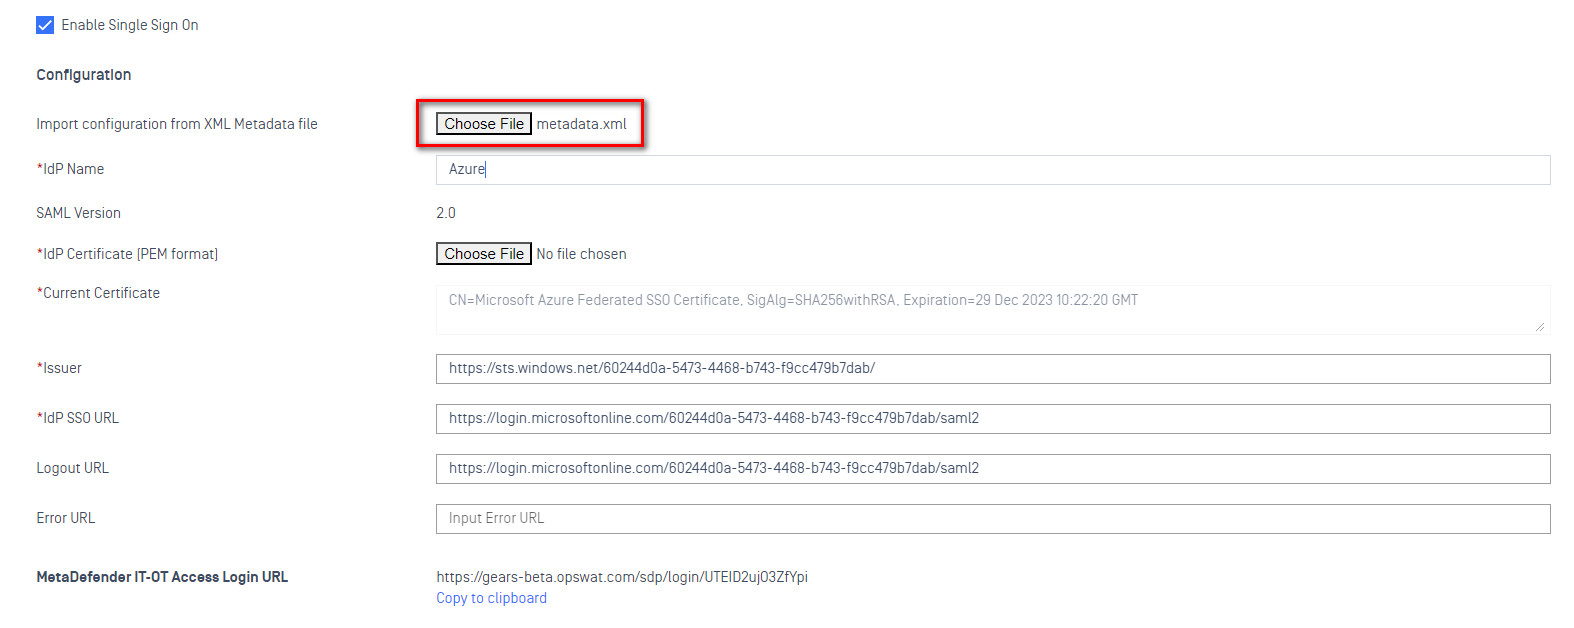
Import configuration from an XML file. Select the IdP Metadata file you downloaded earlier. This should populate a variety of fields on this page automatically.
Note: that while some of these fields are marked as mandatory (they have an asterisk next to them) they should all be provided by the IdP metadata xml file. All of the fields on this page other than the metadata upload are intended for cases where the metadata file isn’t provided by the IdP, or is incomplete.
At the bottom of this form is configuration for Group Attributes. You need to tell My OPSWAT Central Management what your IdP is going to use as the attribute containing group information. This can be anything, you’ll just need to enter the same thing into your IdP later.
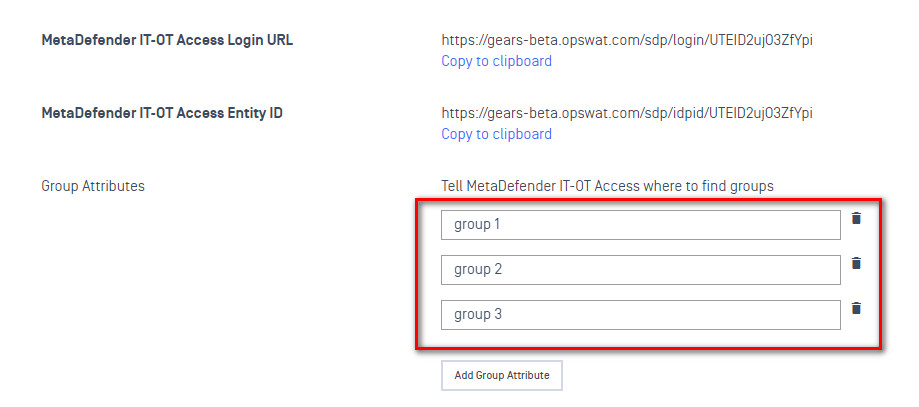
Copy the My OPSWAT Central Management Login URL.

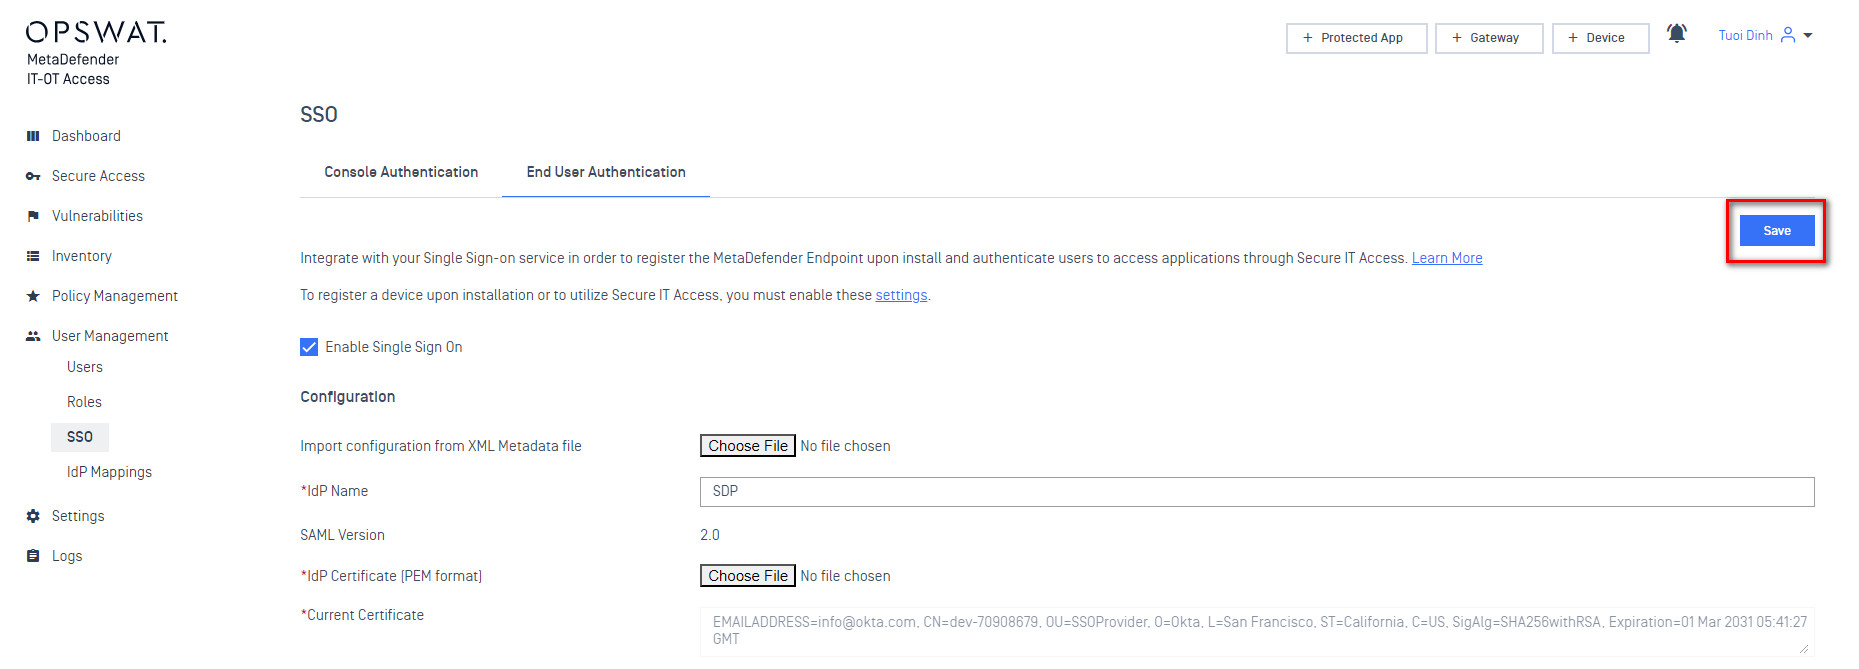
Save the My OPSWAT Central Management SDP SSO configuration using the Save button in the upper right of the current page.
Go back to the IdP configuration for this application. Paste the My OPSWAT Central Management Login URL as the ACS URL or the SP Login URL.
Enable group attributes for the application. Make sure to use the same name specified earlier in the My OPSWAT Central Management configuration.
Add the group you created earlier to this application in the User Groups tab.
Save the application again in your IdP.
The My OPSWAT Central Management settings applied to a device depend on what My OPSWAT Central Management group it is in.
You should now define the IdP groups. This should match the name of the group used earlier when configuring the group in your IdP.
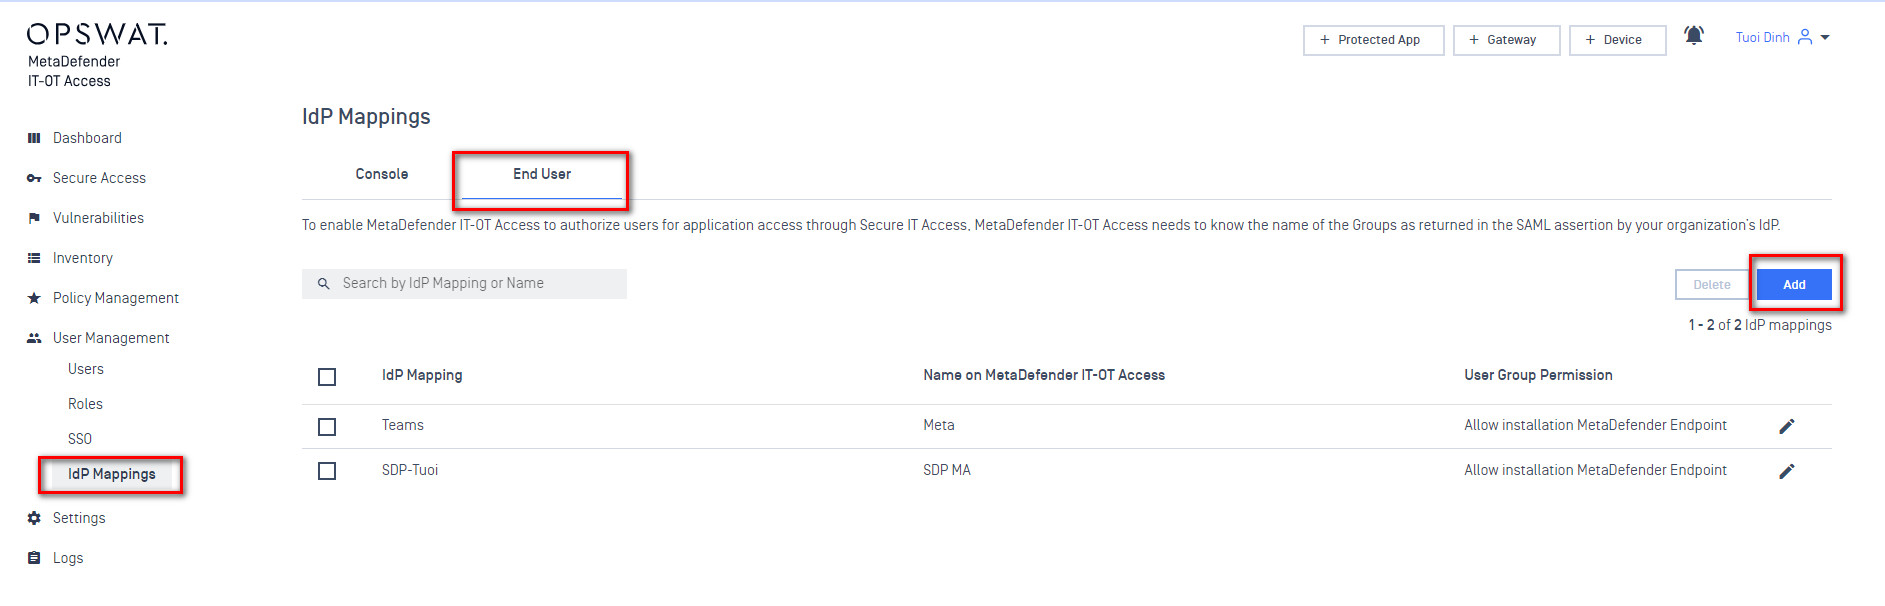
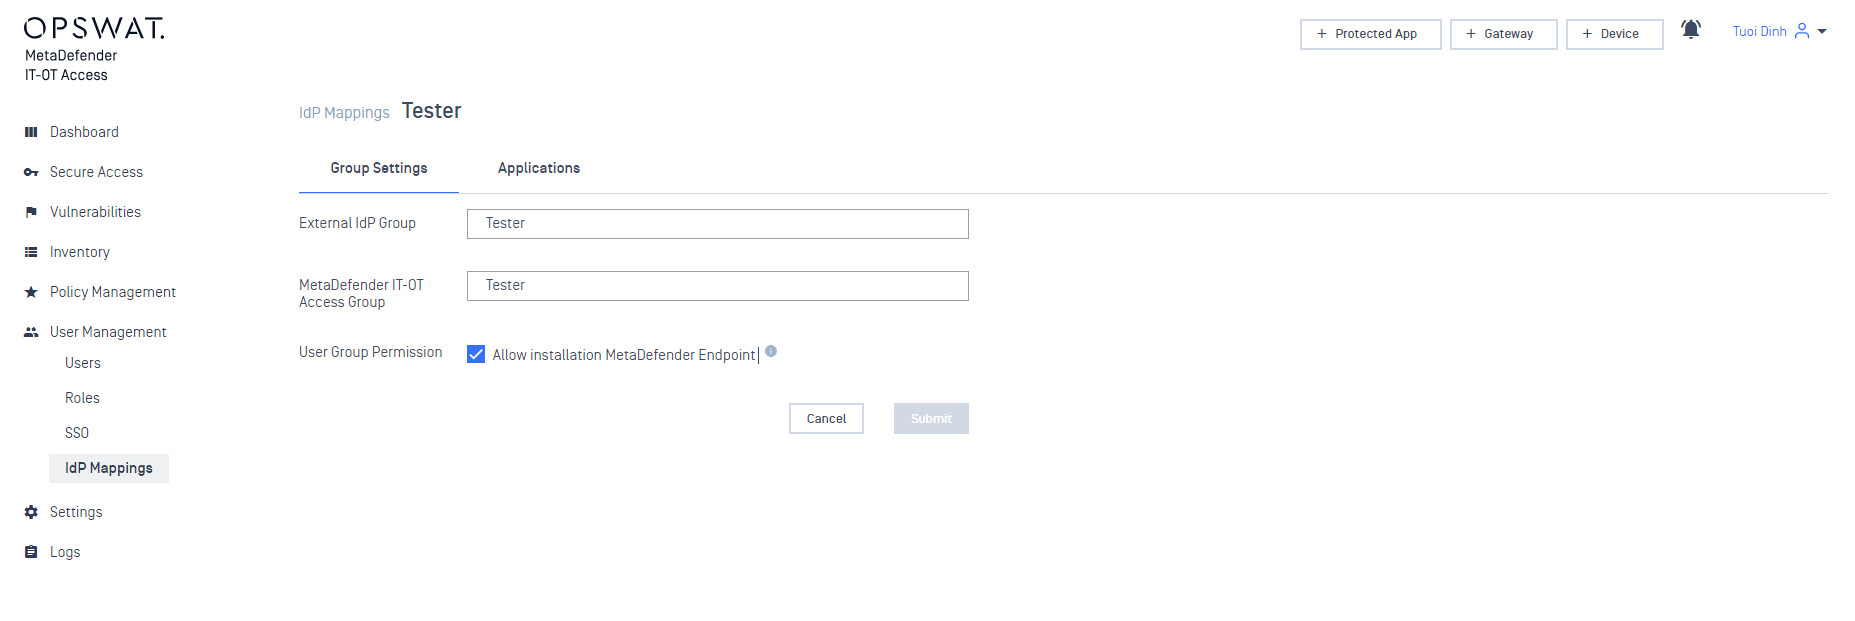
Add an IDP Group to act as an anchor for the SAML group within My OPSWAT Central Management. The “Identity Provider Group” value should match exactly what you entered as the group name in your IdP. The “Name On My OPSWAT Central Management” can be anything you like. Some IDPs don’t expose nice names for groups, so this is a chance to give the group a name that is easy to work with on the My OPSWAT Central Management side.
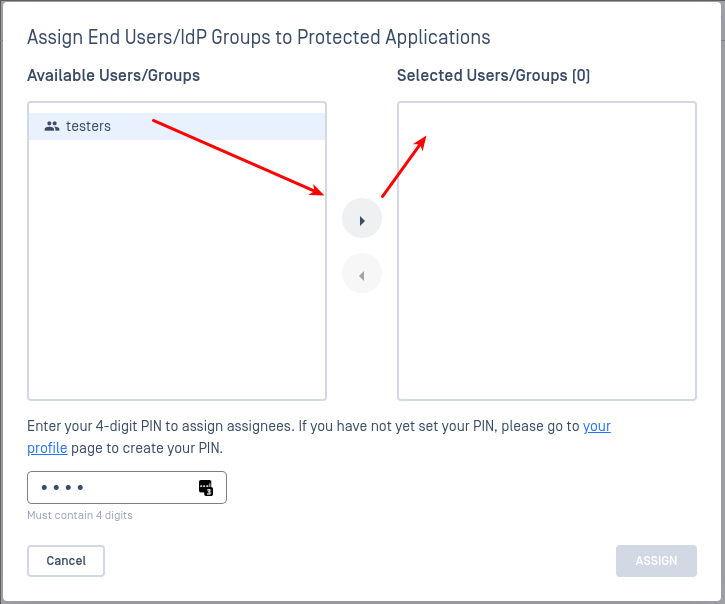
At this point you can add any protected applications. When prompted for what users have access to these applications select the IDP groups you created earlier.

Log in to your IdP as an end user. You may need to log out of the administrator console to get back to a login prompt.
Select the My OPSWAT Central Management application.
You’ll be prompted to launch the SDP client if it is already installed. If you still need to install the MetaDefender Endpoint you can do so from the link on this page.
SDP should launch and connect. You should have access to that test resource.