
If you manage a fleet of MetaDefender Kiosk devices with Central Management, you can import a certificate once and distribute it to one device or to a whole group of devices, instead of uploading it separately on every Kiosk. Once a certificate has been distributed to a device, it becomes available wherever that Kiosk needs a certificate — most commonly to serve its management console over HTTPS, or to sign its media manifest.
This article covers:
Importing a certificate into Central Management and distributing it to Kiosk devices
Using a distributed certificate to enable HTTPS on a Kiosk device
Using a distributed certificate to sign the Kiosk media manifest
Prerequisites
The Kiosk device (or devices) must be enrolled in Central Management.
You'll need administrator access to Central Management, and the certificate file you want to distribute (in
.pem,.crt, or.pfxformat) along with its private key and, if the key is encrypted, its passphrase.To distribute a certificate to a group of devices at once, you'll also need a Peripheral Media policy already set up for that group.
Importing a certificate into Central Management
In Central Management, go to Settings > Certificates.
Click Import Certificate.
Enter a name for the certificate, upload the certificate file, upload its private key, and enter the passphrase if the key is encrypted.
Save. The certificate now appears in the certificate list.
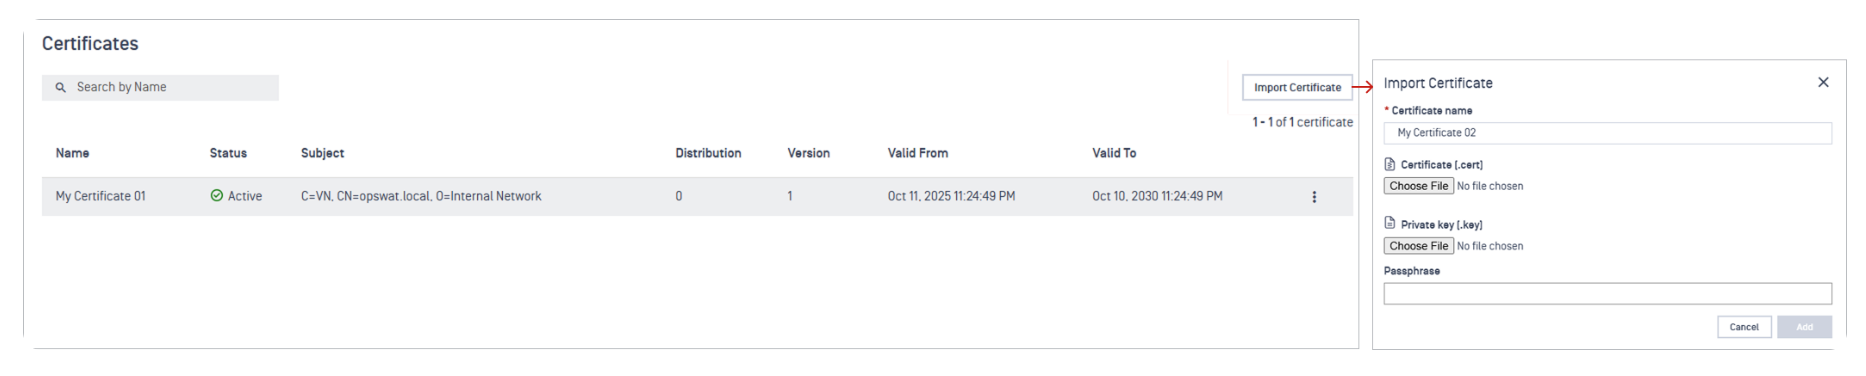
Distributing a certificate to a single Kiosk device
Open the certificate's details page and select Assign to Instance from the actions menu.
Choose the Kiosk device you want to send the certificate to, and confirm.
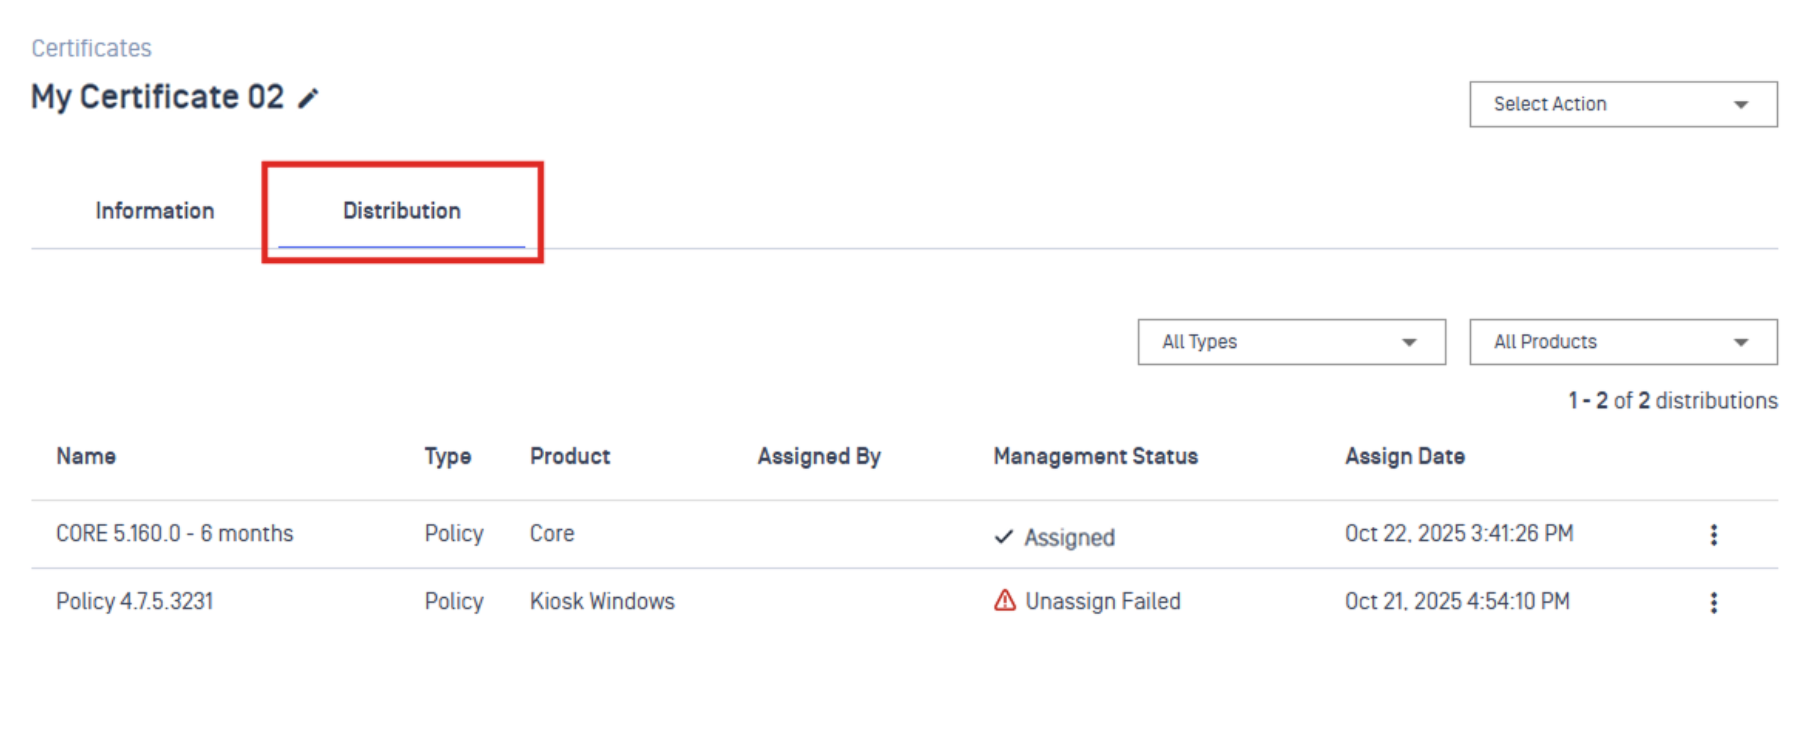
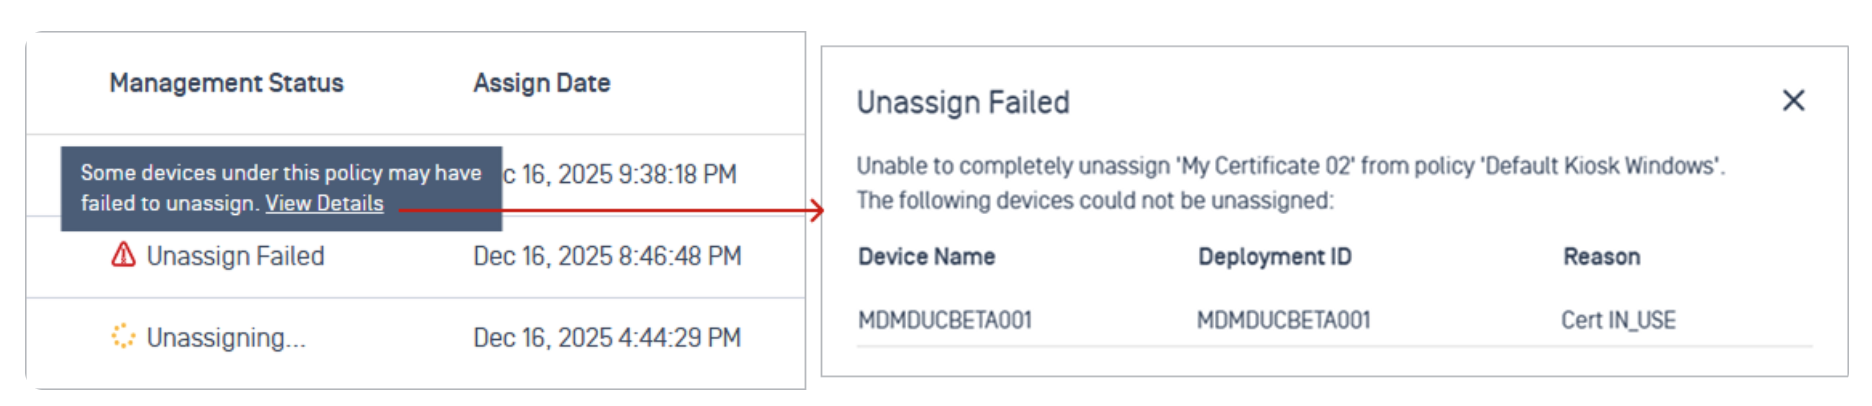
To confirm the certificate arrived, open the device under Inventory > Devices, select its Certificates tab, and check that the certificate appears there. If nothing has been distributed yet, this tab shows "No certificate."
Distributing a certificate to a group of Kiosk devices
If several Kiosk devices share a Peripheral Media policy, you can push a certificate to all of them at once instead of assigning it device by device.
Open the certificate's details page and select Assign to Policy from the actions menu.
Choose Peripheral Media and select the target policy, then confirm.
To have the certificate automatically apply to every device already in the group, open the group under Inventory > Groups, go to its Settings tab, turn on Automatically sync group policy for new instance, and save.
For devices that were already in the group before this step, open each device under Inventory > Devices, go to its Settings tab, and turn on Apply Group Settings > Automatically sync settings from the group's policy.
If you no longer want a certificate assigned to a device, open the certificate's details page, go to its Distribution tab, and choose Unassign. If the device can't be reached to confirm the change, use Force Unassign instead — this removes the assignment immediately and keeps the certificate available locally on that device rather than deleting it.
Keeping a device's own certificate instead of the group's
If several Kiosk devices share a group policy, that policy can only carry one certificate — so applying it pushes the same certificate to every device in the group, replacing any certificate that device already had. This is usually fine when one certificate (for example, a wildcard certificate covering multiple hostnames) is meant to be shared across the group, but it becomes a problem if even one device in that group needs its own, individually-issued certificate instead.
To let a specific device keep its own certificate while continuing to receive the rest of the group's settings normally:
Open the group's policy and go to its Security settings.
Turn on Do not apply this configuration to the device.
Apply the policy to the group as usual.
On the device that needs its own certificate, open it under Inventory > Devices, go to its Settings tab, and turn off Automatically sync settings from the group's policy.
Configure that device's own certificate under its Security settings, following the HTTPS steps below.
Every other setting in the group's policy still applies to this device as normal — this only affects the Security/certificate settings.
"Do not apply this configuration to the device" only stops a future policy sync from overwriting the device's certificate — it does not undo a certificate the group policy already pushed. If the device already received the group's certificate before you turned this setting on, turning it on afterward won't bring back the device's previous certificate. In that case, simply reconfigure the device's own certificate directly (step 5 above); once you've done that, it will be preserved on every future sync.
Reverting a device back to the group's certificate
To have a device go back to using the group's shared certificate:
Open the group's policy, go to its Security settings, and turn off Do not apply this configuration to the device.
Apply the policy again. On the next sync, the group's certificate replaces the device's individual certificate.
Using a distributed certificate for HTTPS
Once a certificate has been distributed to a Kiosk device, it becomes available in that device's own Choose Certificate setting.
Open the device under Inventory > Devices, select its Settings tab, and choose Security from the settings category list.
Click Edit.
Turn on Enable HTTPS.
From Choose Certificate, select the certificate you distributed.
Select which TLS versions to allow — TLS 1.2 and/or TLS 1.3. If you don't select either, Kiosk uses its default TLS setting.
Click Save.
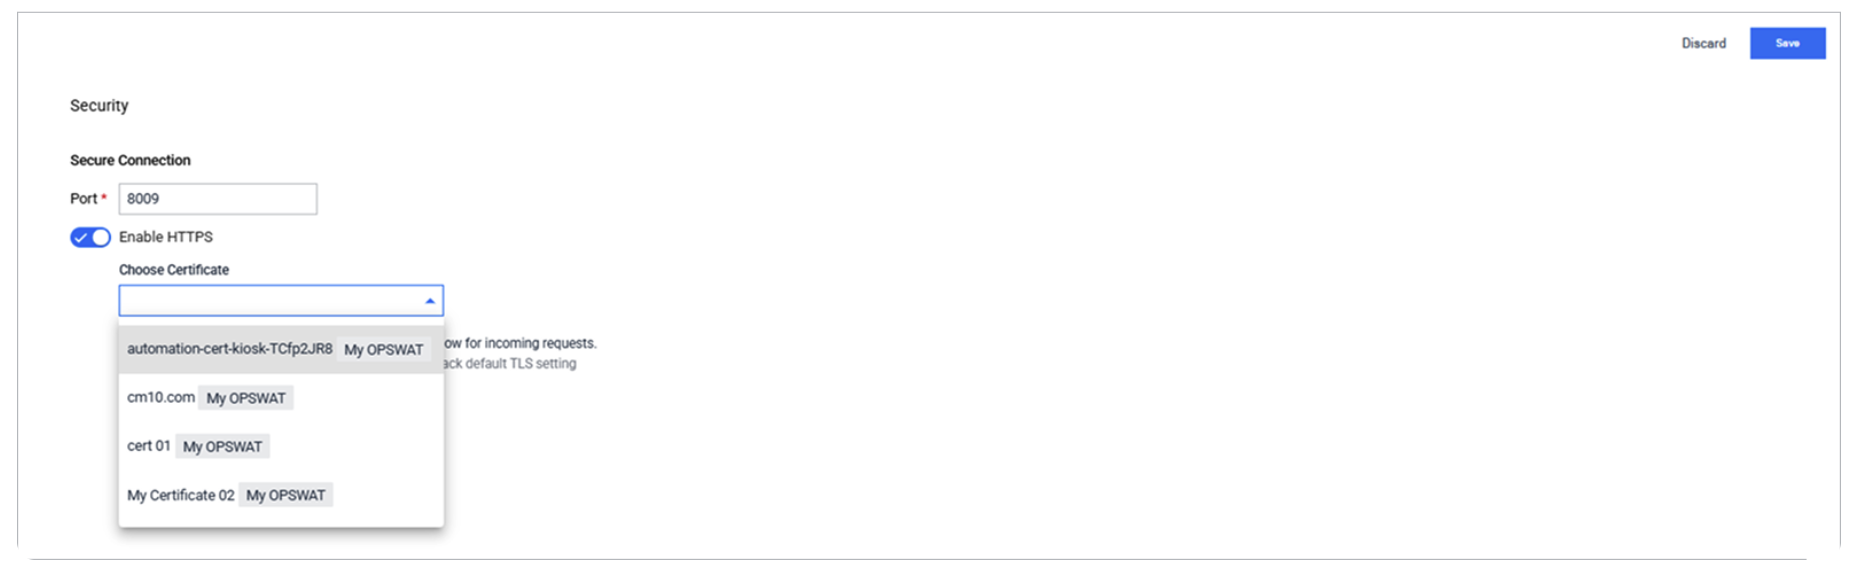
The same fields are available at the policy level (Peripheral Media policy > Settings > Security) if you'd rather configure HTTPS once for an entire group of devices that share a distributed certificate.
Using a distributed certificate to sign the Kiosk media manifest
The media manifest is a signed record of files processed during a Kiosk session. When Kiosk generates and signs the manifest itself, it uses whichever certificate is set on that device's Security page — so distributing a certificate and setting it up for HTTPS (above) also makes it available for manifest signing.
Open the device under Inventory > Devices, select its Settings tab, and choose Workflows from the settings category list.
Find the workflow you want to configure and click its edit icon.
Select the Processing tab.
Under Configuration of scan options, select Use MetaDefender Core — the manifest option is only available for workflows that scan files.
In the Specify the manifest section, turn on Enable Media Manifest.
Choose From MetaDefender Kiosk so the manifest is generated and signed by the Kiosk itself, using the certificate configured on its Security page.
(Optional, Kiosk 4.8.0 and later) Turn on Exclude scan result of original file when its remediated file is available if you want end users to only see the sanitized version of a file when one exists.
Click Save.
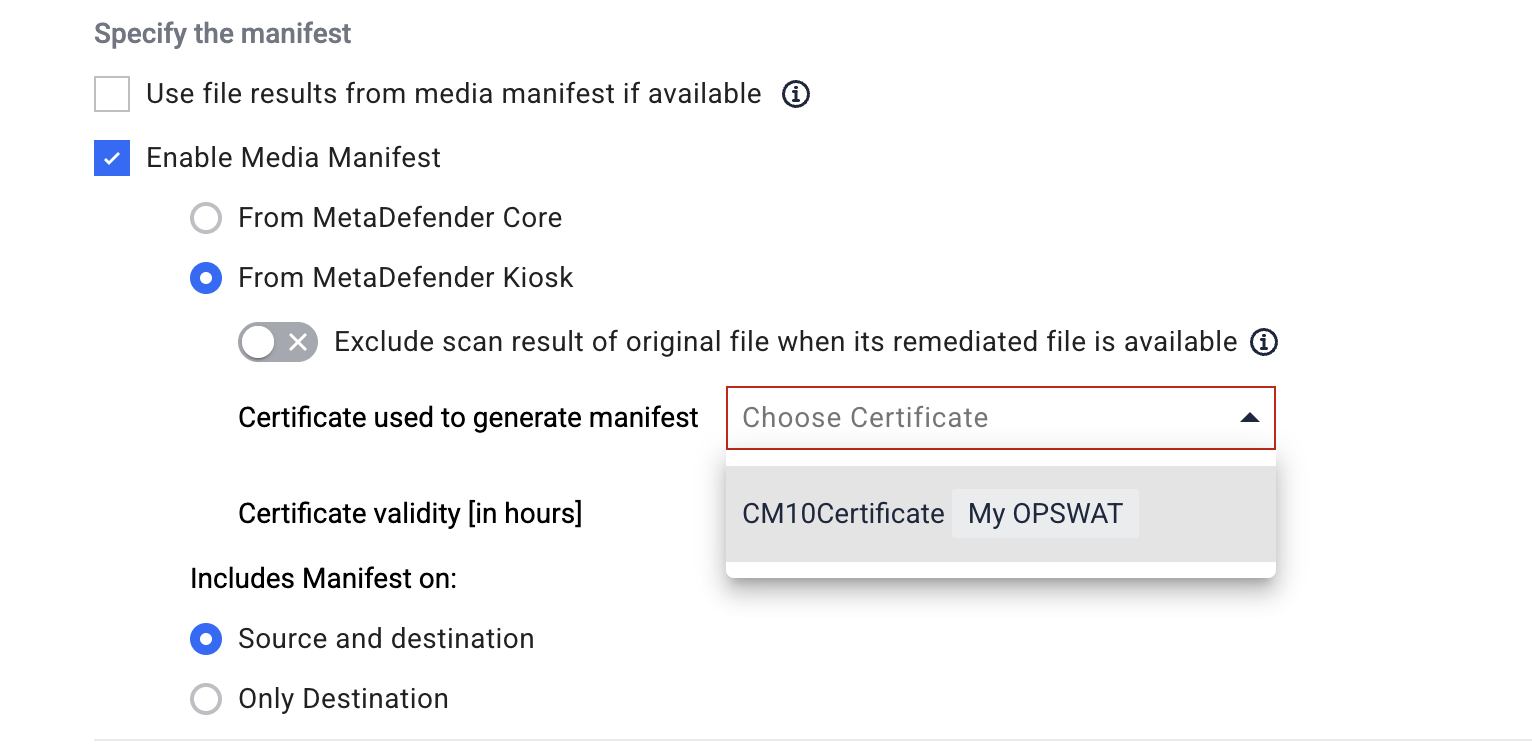
There's no separate certificate picker just for the manifest feature — it always uses whichever certificate is currently set for HTTPS on that device's Security page. If you want the manifest signed with a different certificate than the one used for HTTPS, distribute and select that certificate on the Security page first.
Support
If you run into trouble managing or distributing certificates from Central Management, please follow the instructions on How To Create a Support Package before logging a Support Case with the OPSWAT team.