Follow the steps to create a bootable flash drive containing the hardened Kiosk image to facilitate the efficient deployment of MetaDefender Kiosk on various Kiosk hardware models
Requirements:
- An OPSWAT Kiosk device: Tower, Desktop, Mobile or Mini
- A USB v3.2 flash drive with a storage capacity of at least 32GB.
The new version of Deployment Tool is required to deploy Kiosk Hardened Image 25.06.0 or later
Before re-imaging the Kiosk device, it is essential to back up all settings and configuration files. The backup must be copied to an external USB drive, as the Kiosk’s internal hard drive will be completely formatted during the re-imaging process. Failure to back up may result in permanent loss of configuration data.
- Backup Kiosk Configuration: Backing Up and Restoring the Configuration - MetaDefender Kiosk Windows
- Backup Core Configuration: Import/Export configuration - MetaDefender Core
Step 1: Download Deployment Tool and Kiosk Hardened Image
Download the following packages:
The Deployment Tool: WinPEBootable.vhd ( SHA256: B2241323EB405696F44C767A391163642B25C1044CA43F0F68CDF3E0015AB649)
Kiosk Hardened Image corresponding to the model of the device at My OPSWAT Portal. There are available images on Product Downloads page:
Kiosk Tower:
- Dell 18s
- Dell 17s
- Dell 15s
- Lenovo M70a
Kiosk Desktop:
- Dell Pro 24
- Dell 7420
- Dell 7410
Kiosk Mobile/Mini:
- Dell 7230
- Dell 7220
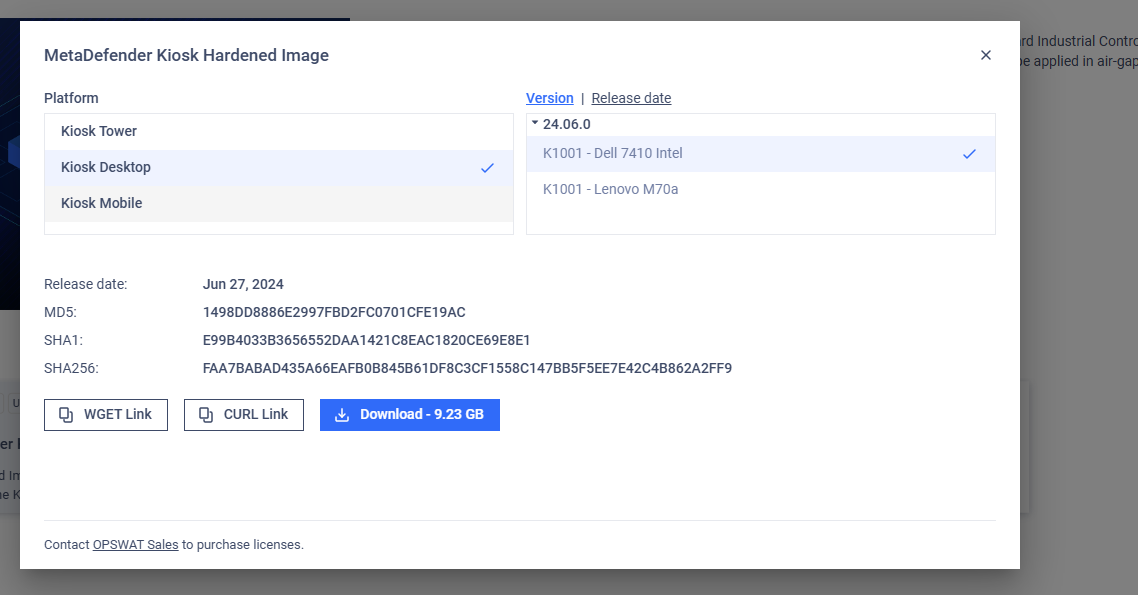
Image: Download page of MetaDefender Kiosk Hardemed Image on My OPSWAT Portal
The download page for MetaDefender Kiosk Hardened Image on My OPSWAT Portal is accessible only to logged-in accounts in the Organization that has a valid license for MetaDefender Kiosk K-Series.
Step 2: Creating the Kiosk deployment flash drive
1. Create bootable USB
Download Rufus tool (version 3.15.1812 is recommended) to format and create bootable USB flash drive by the following steps:
- Open Rufus and insert the USB drive.
- Select your USB drive under "Device".
- Click SELECT and select the downloaded WINPEBootable.vhd.
- Click START.
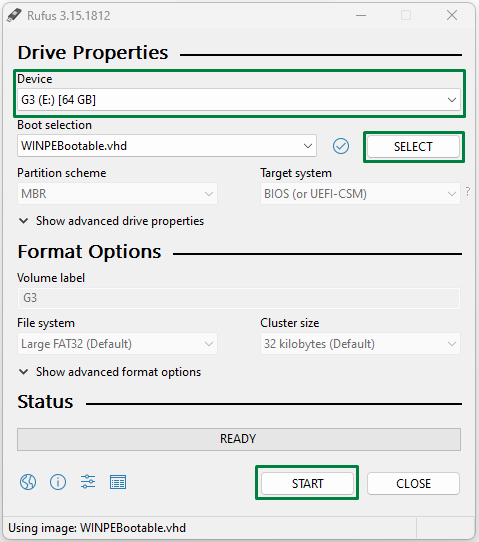
Image: Rufus 3.15 UI to create bootable USB
The USB flash drive will now be formatted, so any data on the drive will be lost.
The setup process takes around 20 minutes to complete.
2. Copy MetaDefender Kiosk Hardened Image
The USB now consists two partitions:
- WINPE: To store the WinPE files used for booting to winPE for deployment actions.
- KioskImage: To store the deployed image.
Copy the downloaded MetaDefender Kiosk Hardened image file (install.wim) to the KioskImage partition to finish the flash USB creation.
Step 3: Flashing a device with the bootable Kiosk USB drive
To install MetaDefender Kiosk on a new device by using your newly created Kiosk deployment flash drive, do the following:
By default, Kiosk devices (Kiosk Tower, Desktop, Mobile, and Mini) have the USB boot option disabled for security reasons. For instructions on re-enabling USB boot support, see this KB (link)
1. Boot Into WinPE Environment
- Plug USB into Kiosk Hardware
- Restart/Power on the device.
- Keep pressing F12 during booting up to open Boot Menu
- Select the created USB as boot up media (base on device name)
- Press enter.
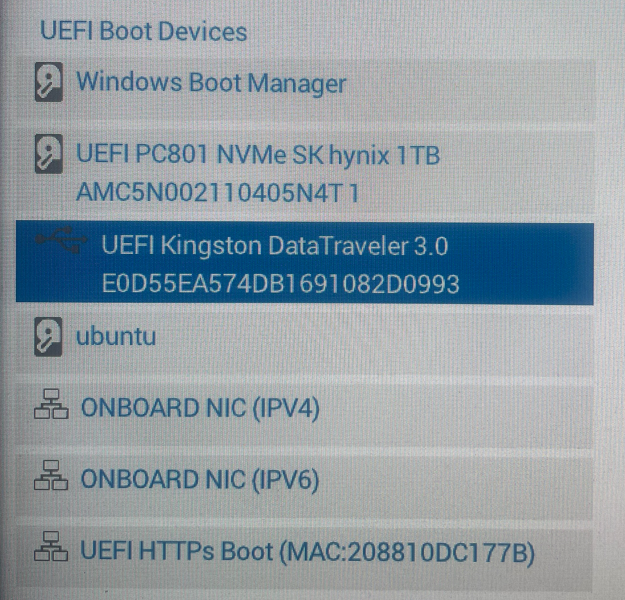
Image: UEFI boot Devices menu on BIOS
2. Deploy Hardened Image
Following the boot into the WinPE environment, a command prompt window will appear.
Please respond to the prompts in the command window:
- Select the drive where you want to install the image. Keep in mind that all data on that drive will be permanently erased.
- Decide whether you want to perform a full-pass wipe. Note that a full-pass wipe will take significantly longer.
- Choose whether you want to restart the device once the installation is complete.
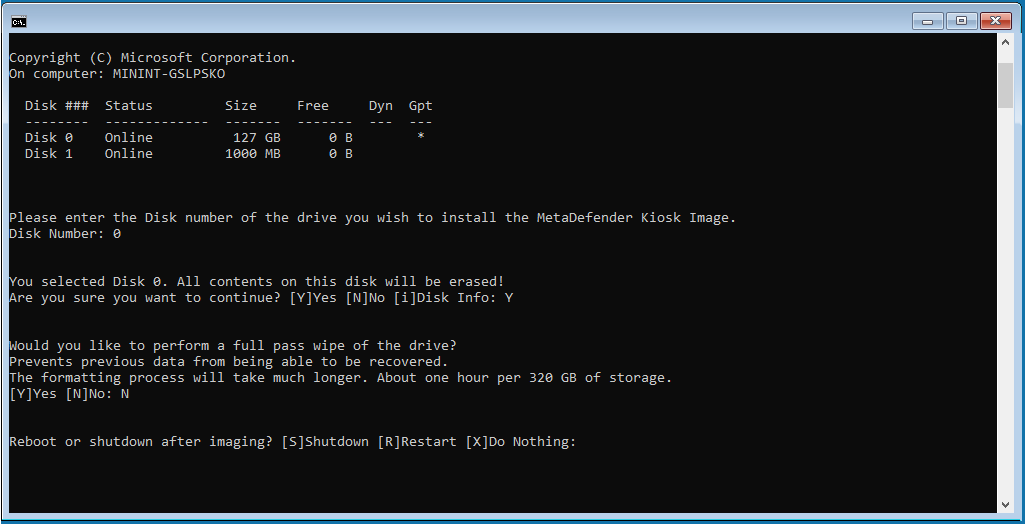
Image: Command prompt window on WinPE environment
Step 4: Post Installation Actions
Change default log-in information for the local windows account:
- Username: KioskUser
- Password: Contact the Customer Support to get the default password.
To activate MetaDefender Core, you will need to run the Setup Wizard on MetaDefender Core, as follows:
- Go to http://localhost:8008 and follow the Wizard in order to create an account and activate MetaDefender Core.
Connect Kiosk to MetaDefender Core by following the instructions Here.
To activate MetaDefenderKiosk, you will need to run the Setup Wizard on MetaDefender Kiosk, as follows:
- Go to http://localhost:8009/ and follow the Wizard in order to create an account and activate MetaDefender Kiosk.
Finally, accept any changes from baseline in the Kiosk UI.
If you have followed the instructions above but are Unable To Install And Run MetaDefender Kiosk Using A Bootable Kiosk Flash Drive, please follow these instructions on How To Create a Support Package, before logging a Support Ticket with the OPSWAT team.