Secure File Storage enables using MetaDefender with Smart Touch to securely transfer files across isolated zones, by securing storing files and making them inaccessible until they are scanned by a MetaDefender Kiosk.
For more information on how to enable and configure this feature, please follow the instructions here and make sure the configurations are correct and ready to use.
If you are also using Media Validation, you can follow that all the instruction. If you are only using Secure File Storage, you just need to have Media Manifest enabled.
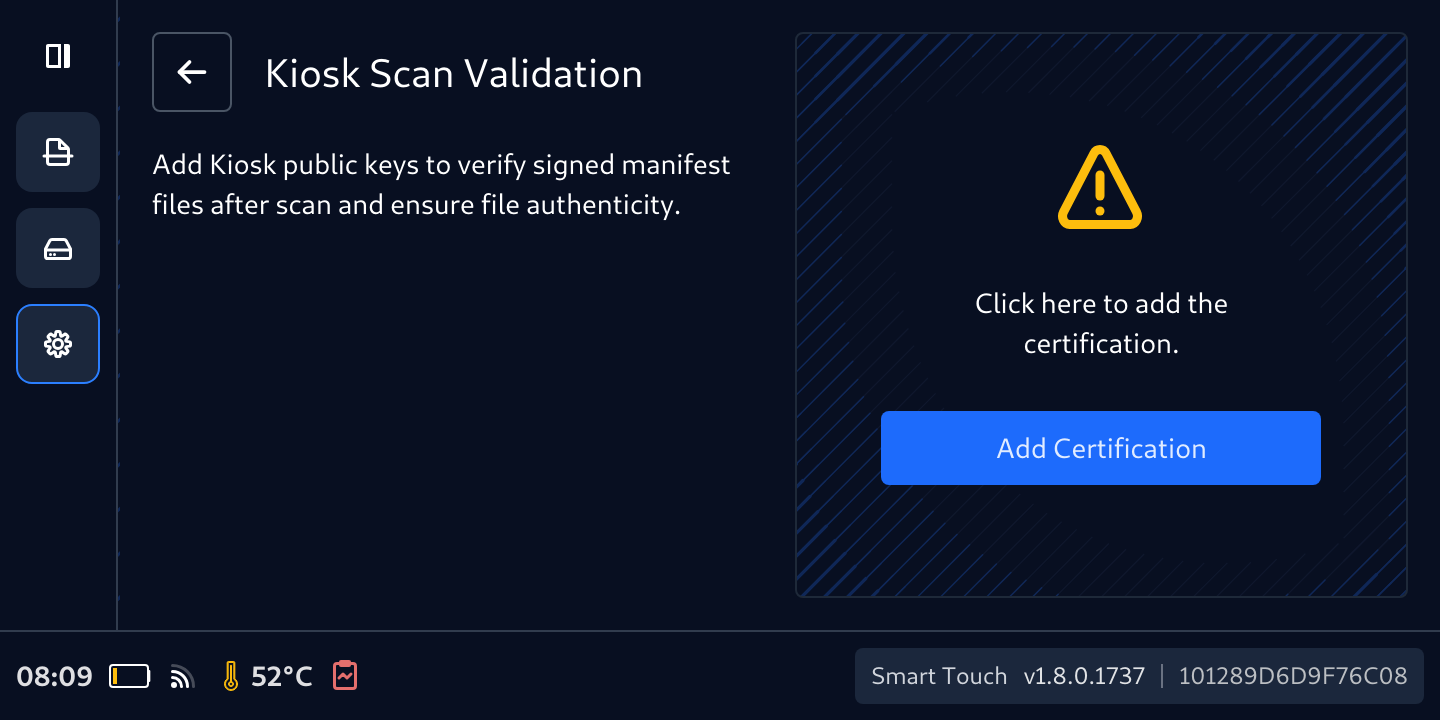
Add Kiosk's public key to Secure Storage
To use Secure Storage with Kiosk, follow the steps to add the valid key, on a Secure Storage that does not currently have a public key
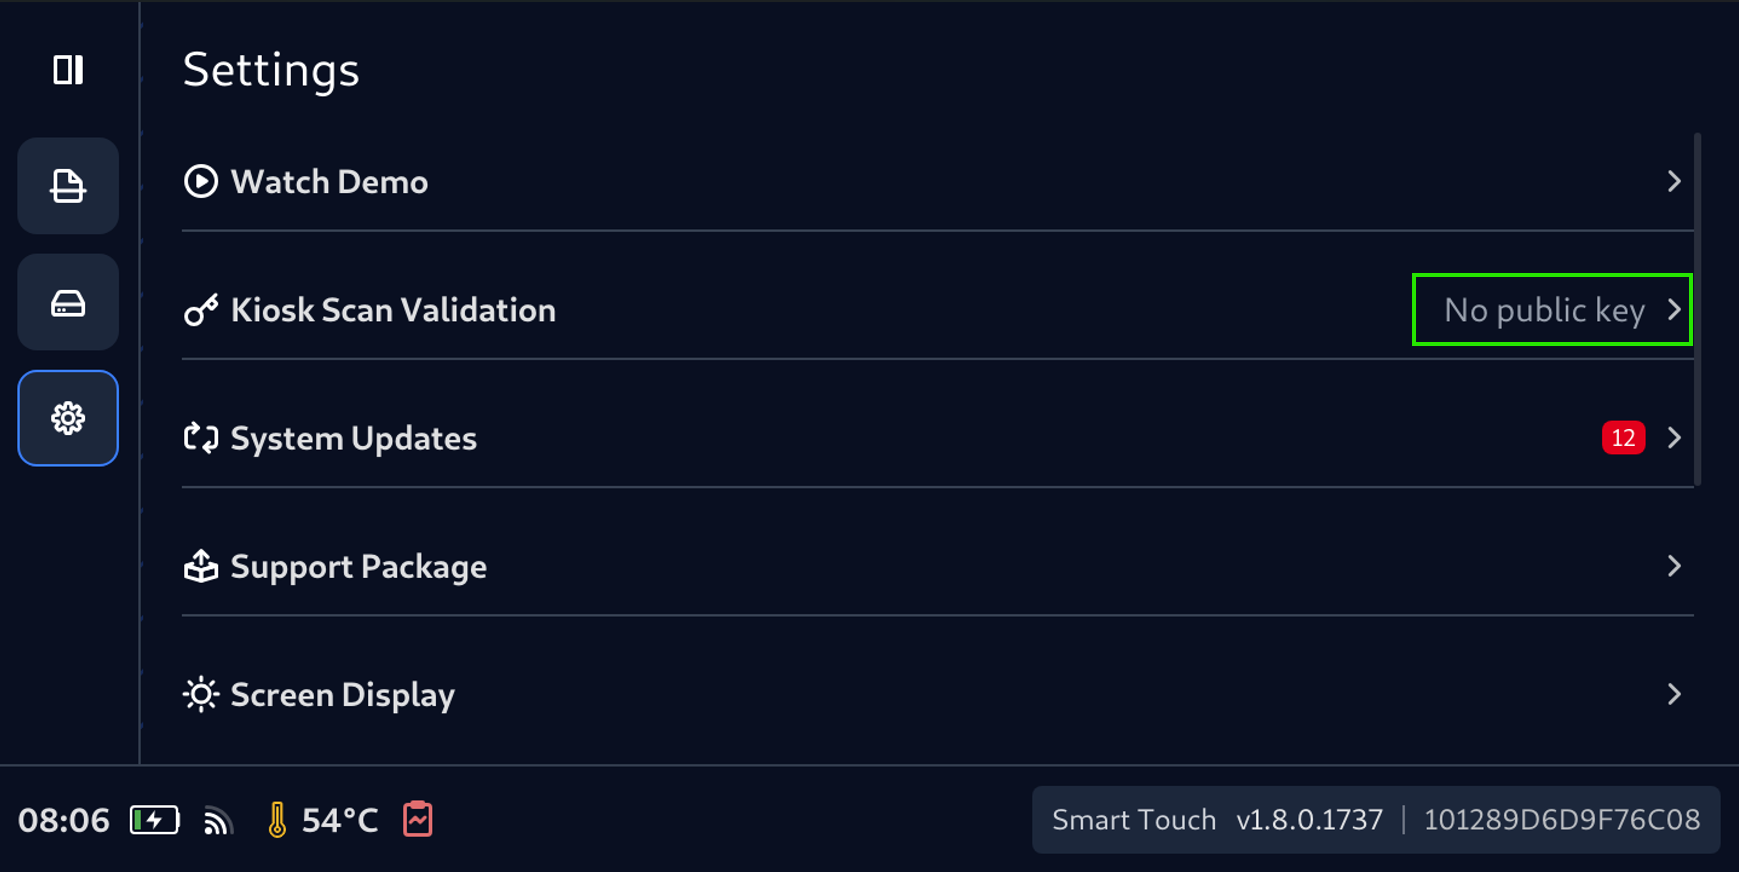
- Tap Kiosk Scan Validation
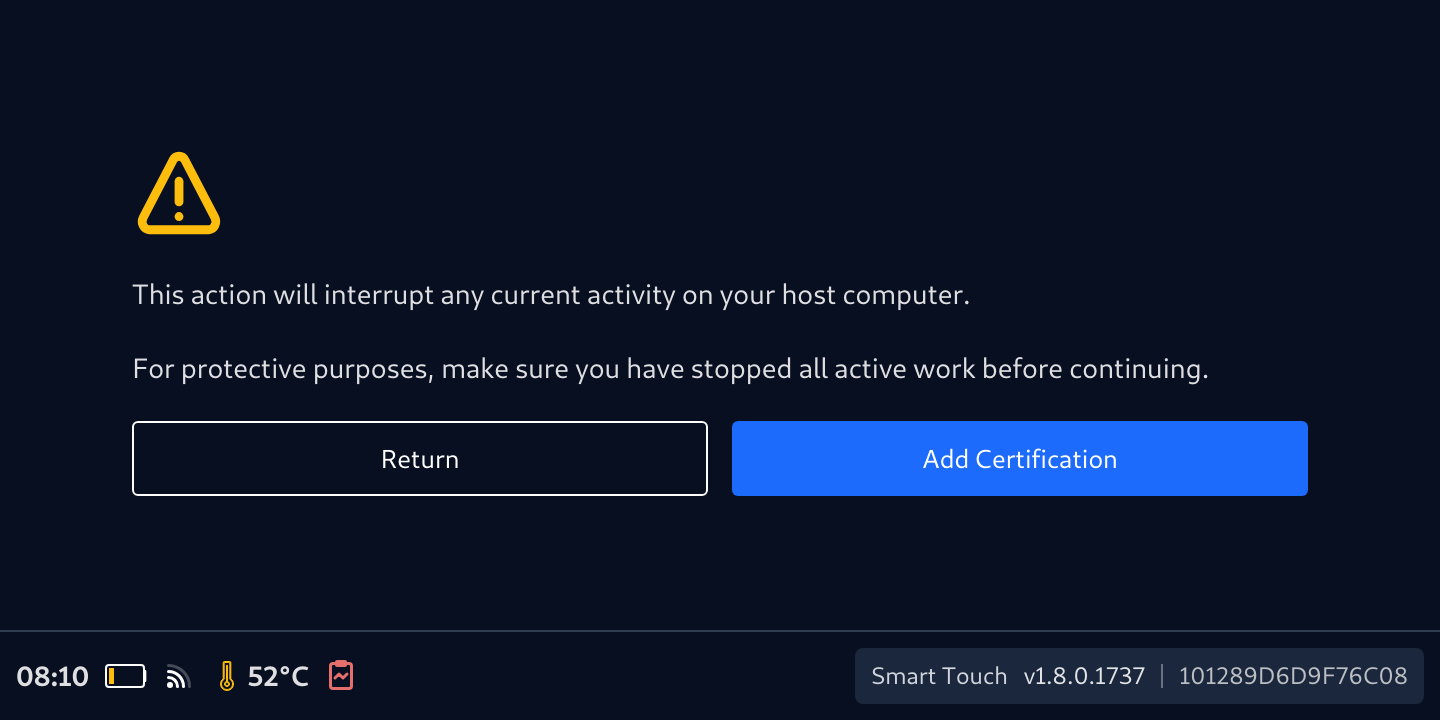
- Tap Add Certification button
- Tap Add/Replace Certification button again to confirm the acknowledgement
- Then this screen displays, waiting for the key. Now, connect the device to a machine that store the Kiosk public key
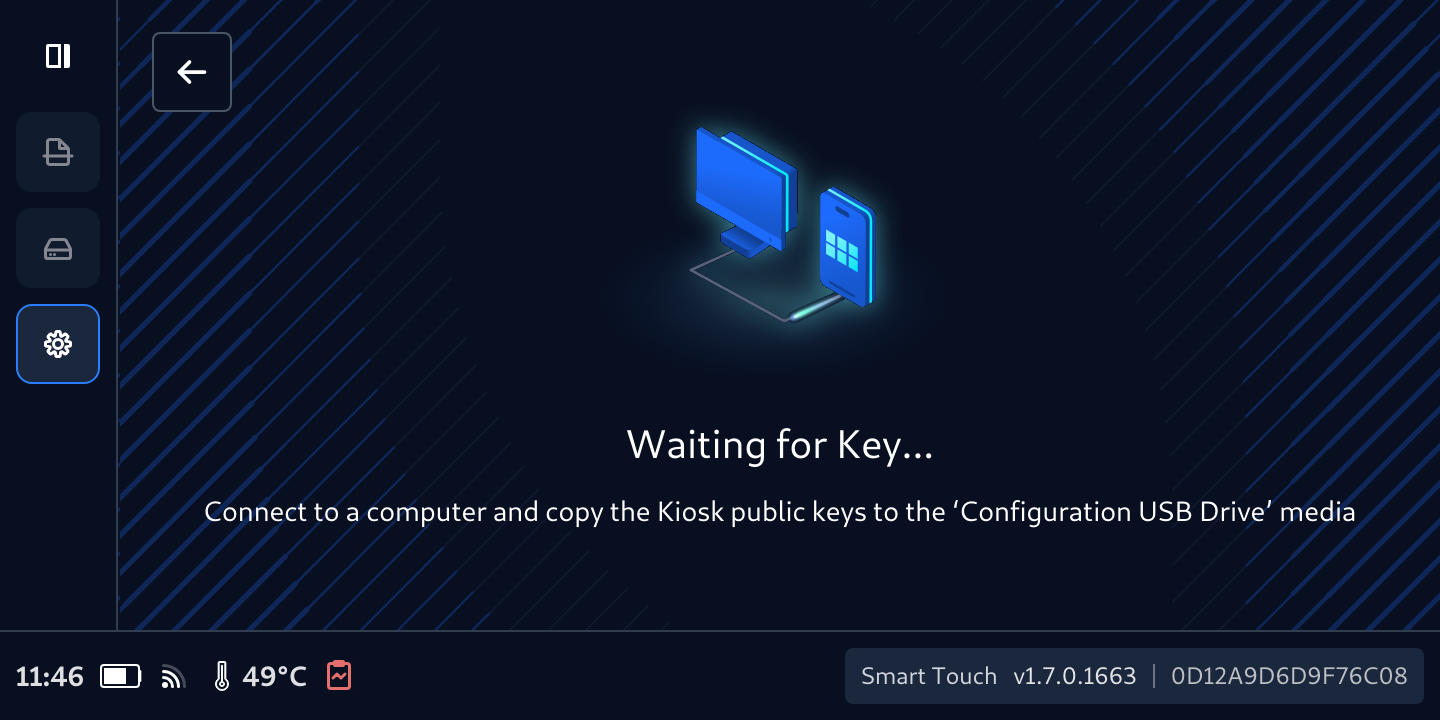
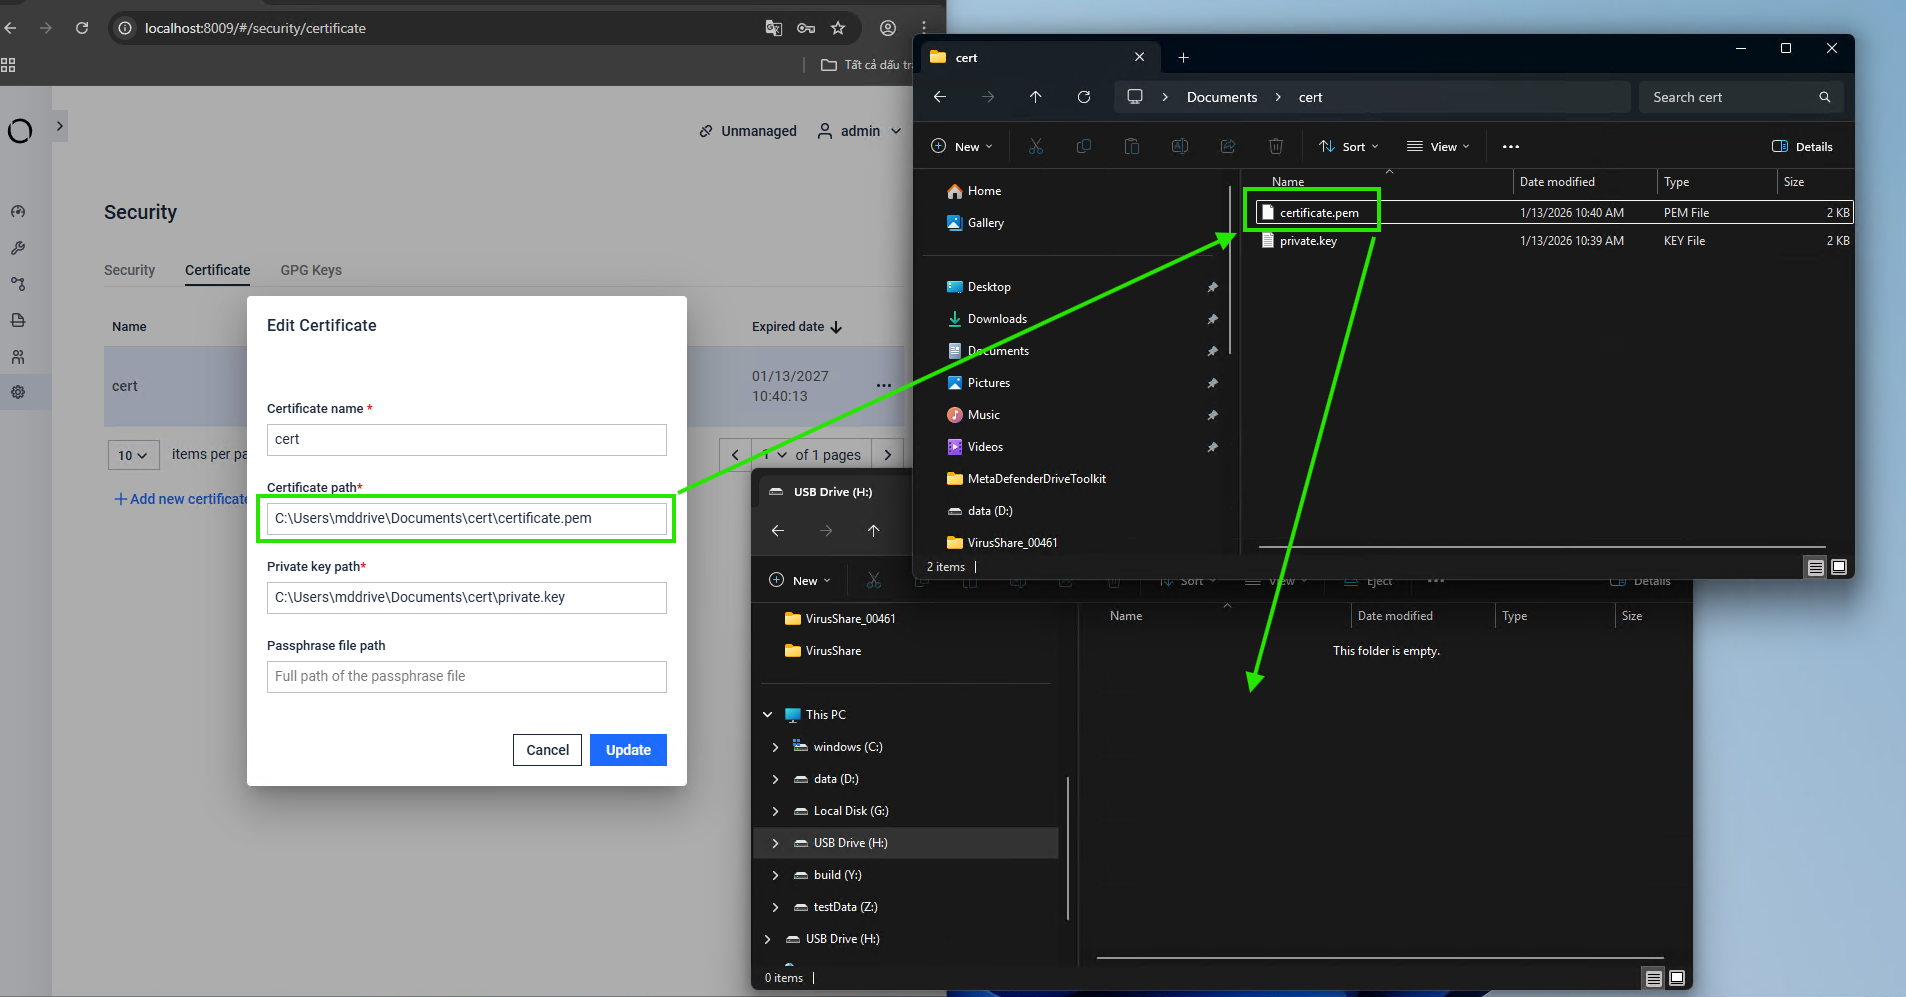
- On that computer, copy the public key to the USB storage has been mounted.
- Don't remove the cable, wait for the key to be accepted when this screen appears
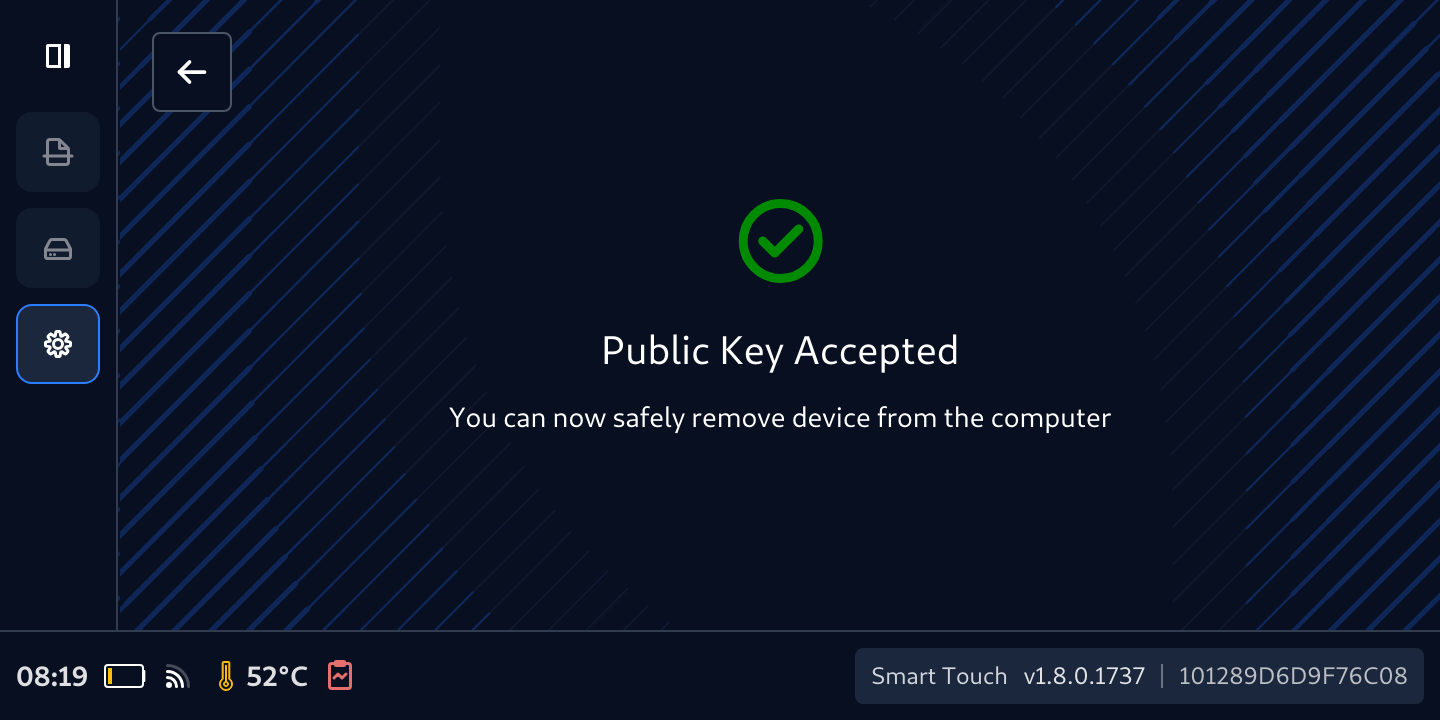
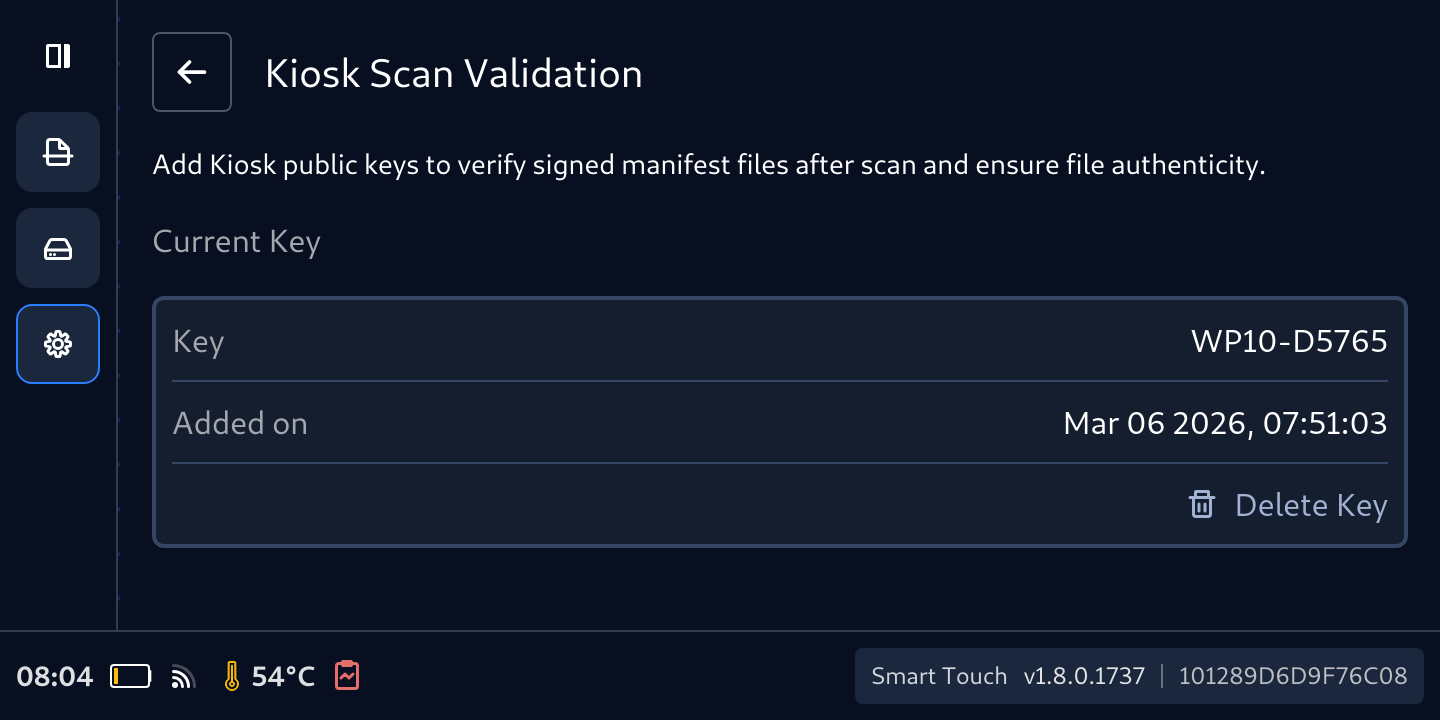
- Your Secure File Storage now is ready to be used with the Kiosk that has the information showed in the Current Key
Delete Added Cert
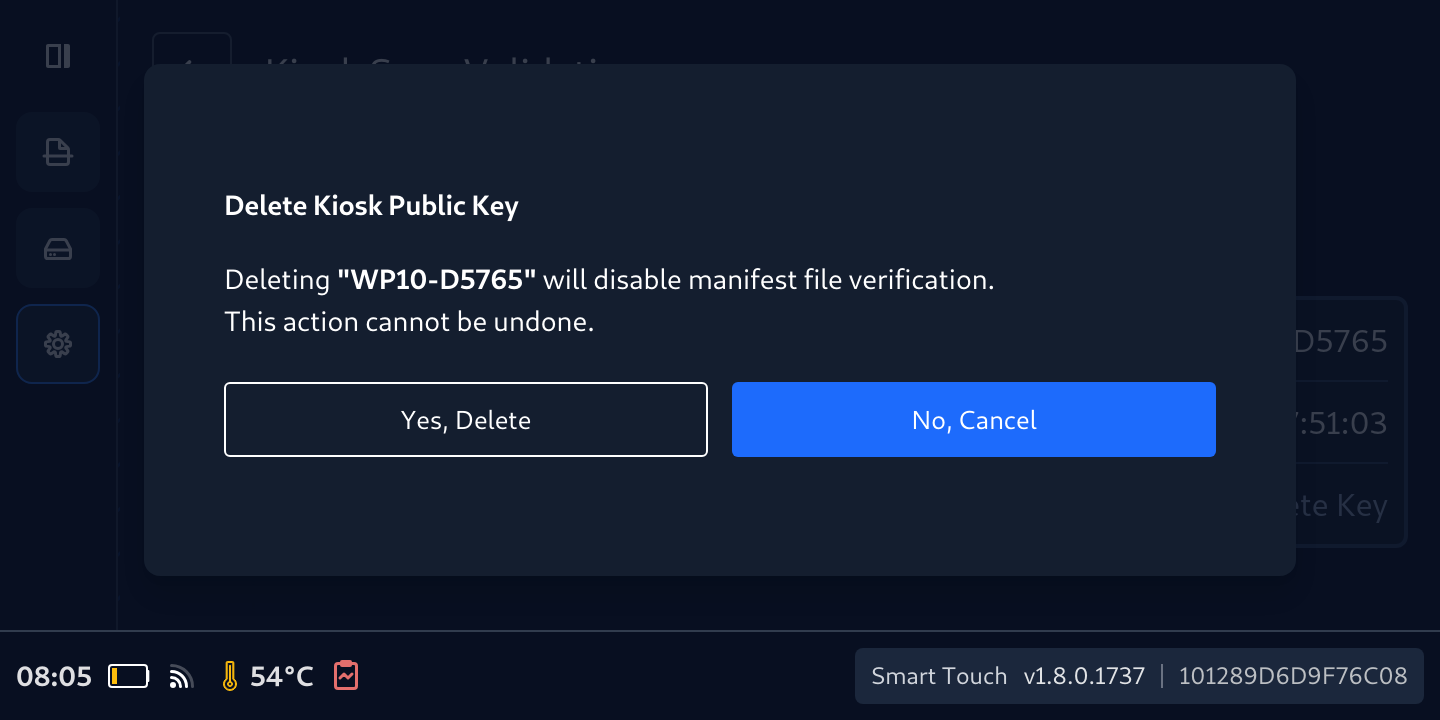
- From Kiosk Scan Validation screen, tap the Delete Key
- To confirm deletion, tap Yes, Delete on the Delete Kiosk Public Key popup
- Now the public key has been deleted. Repeat step Add Kiosk's public key to Secure Storage to add new key if you want to use the Secure File Storage with manifest feature
Switch to Secure File Storage
To start using Secure File Storage:
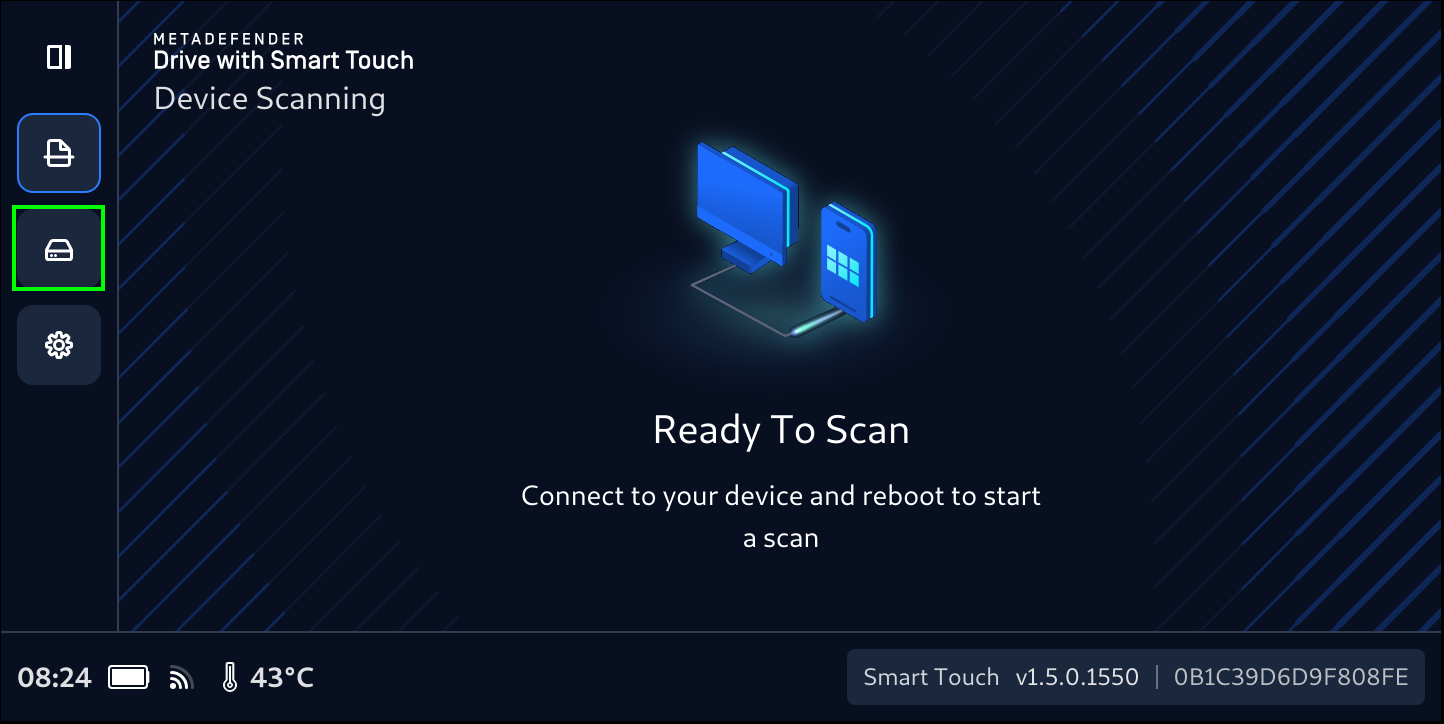
- Tap the Disk Icon to expand the left navigation bar, then tap Secure Storage
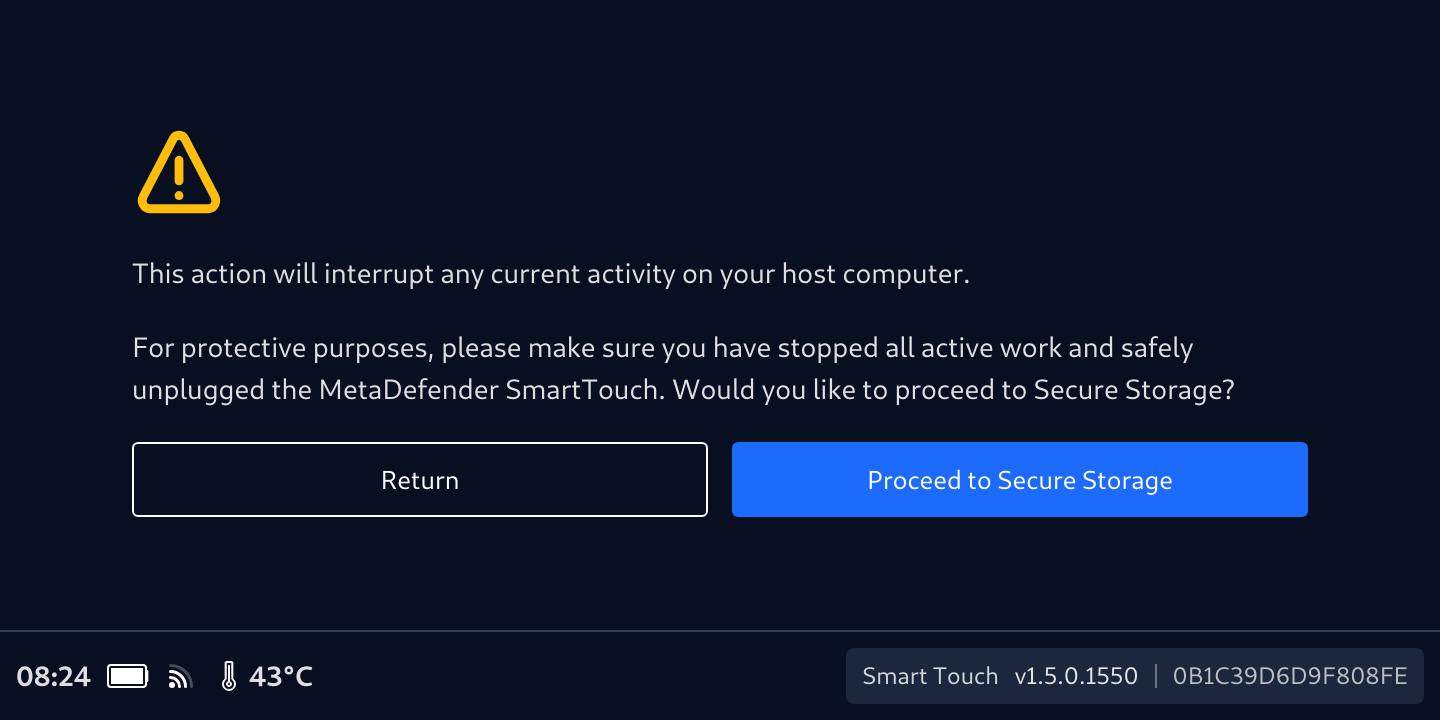
- Confirm your selection by tapping Proceed to Secure Storage
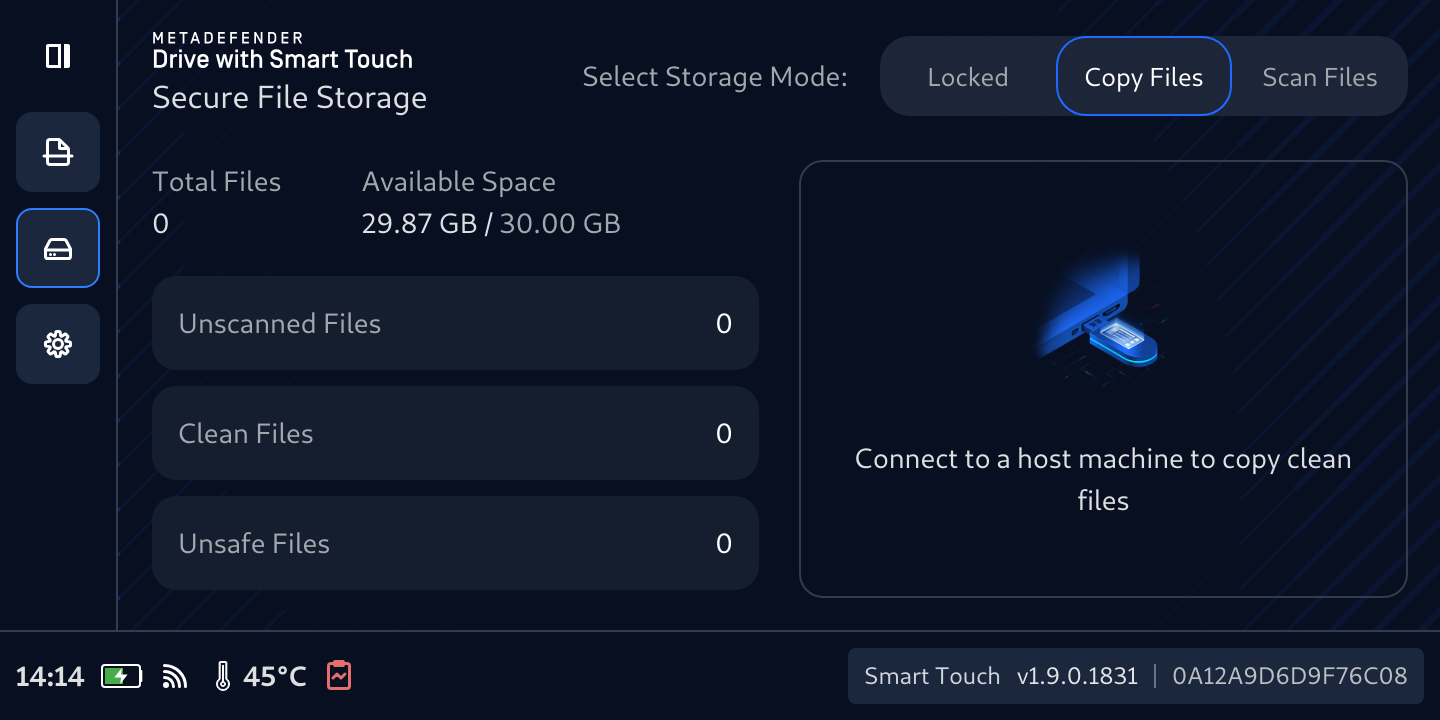
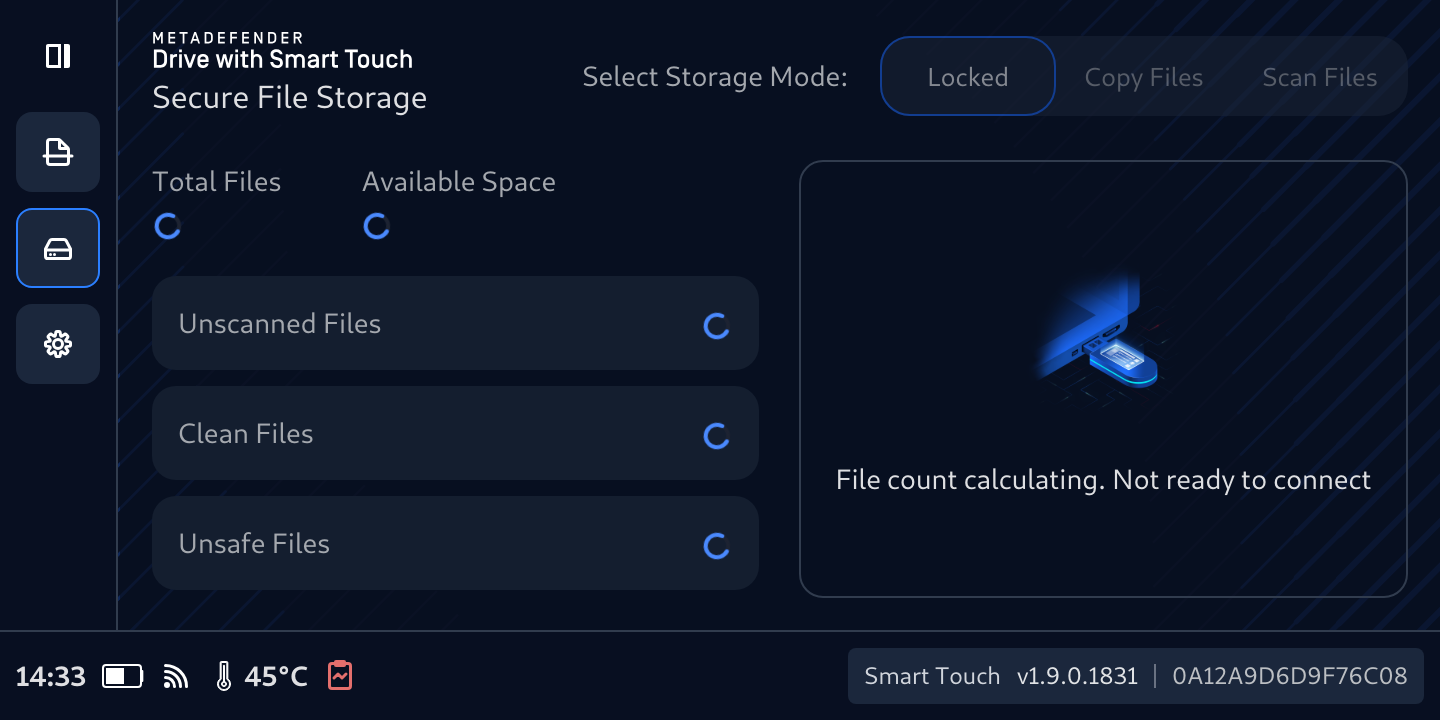
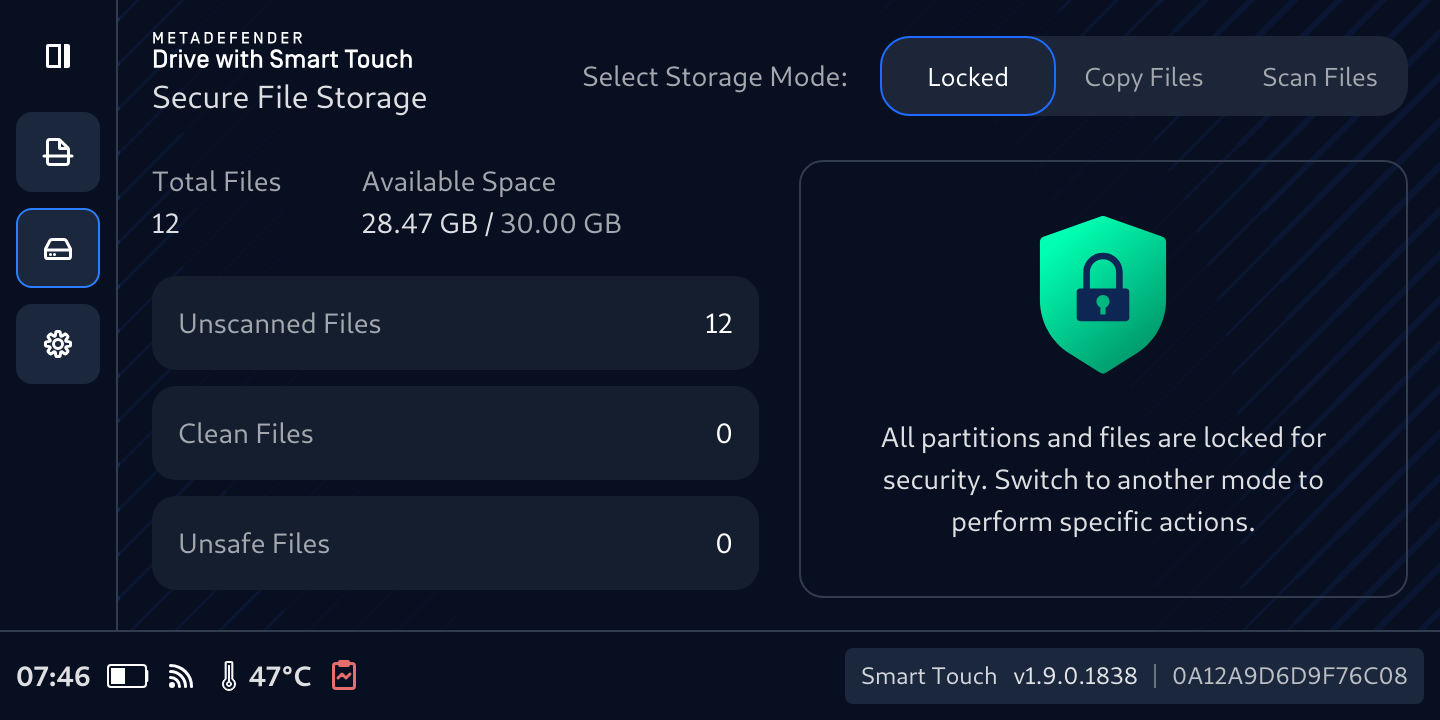
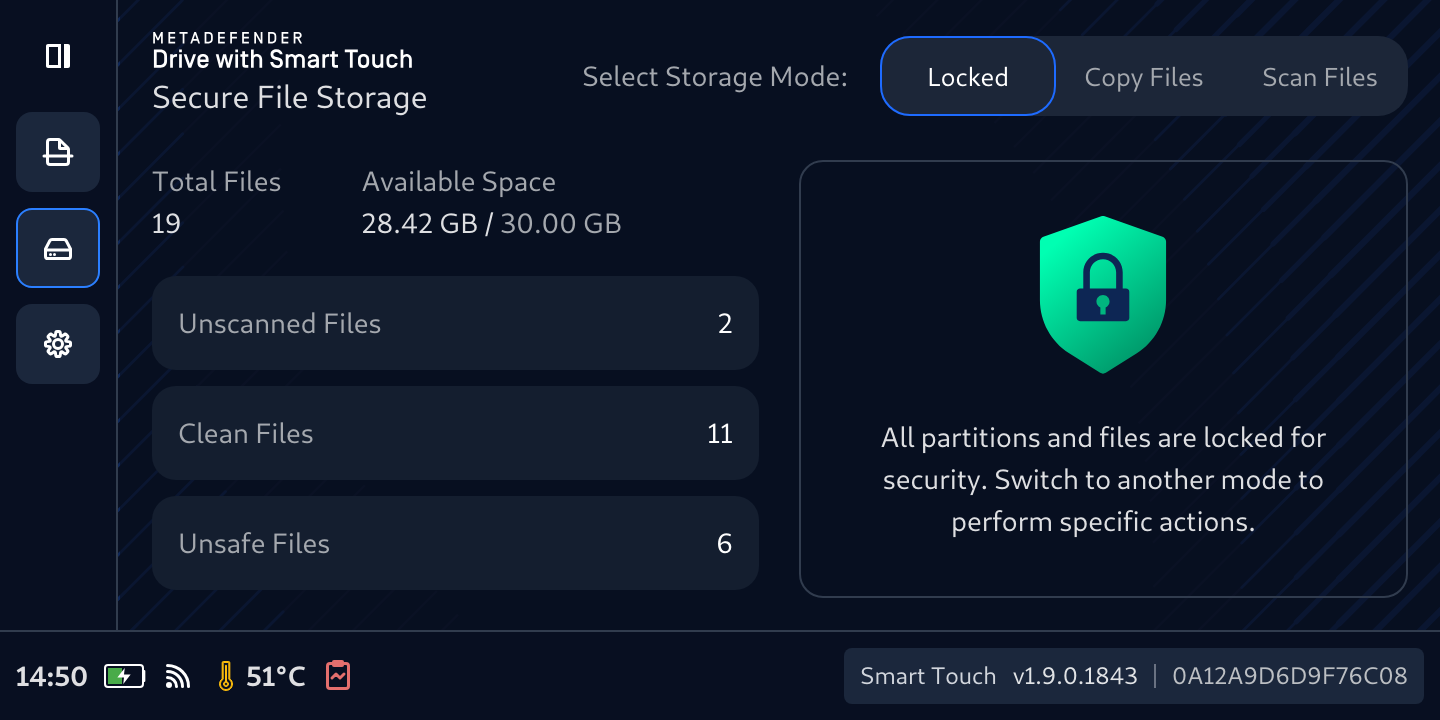
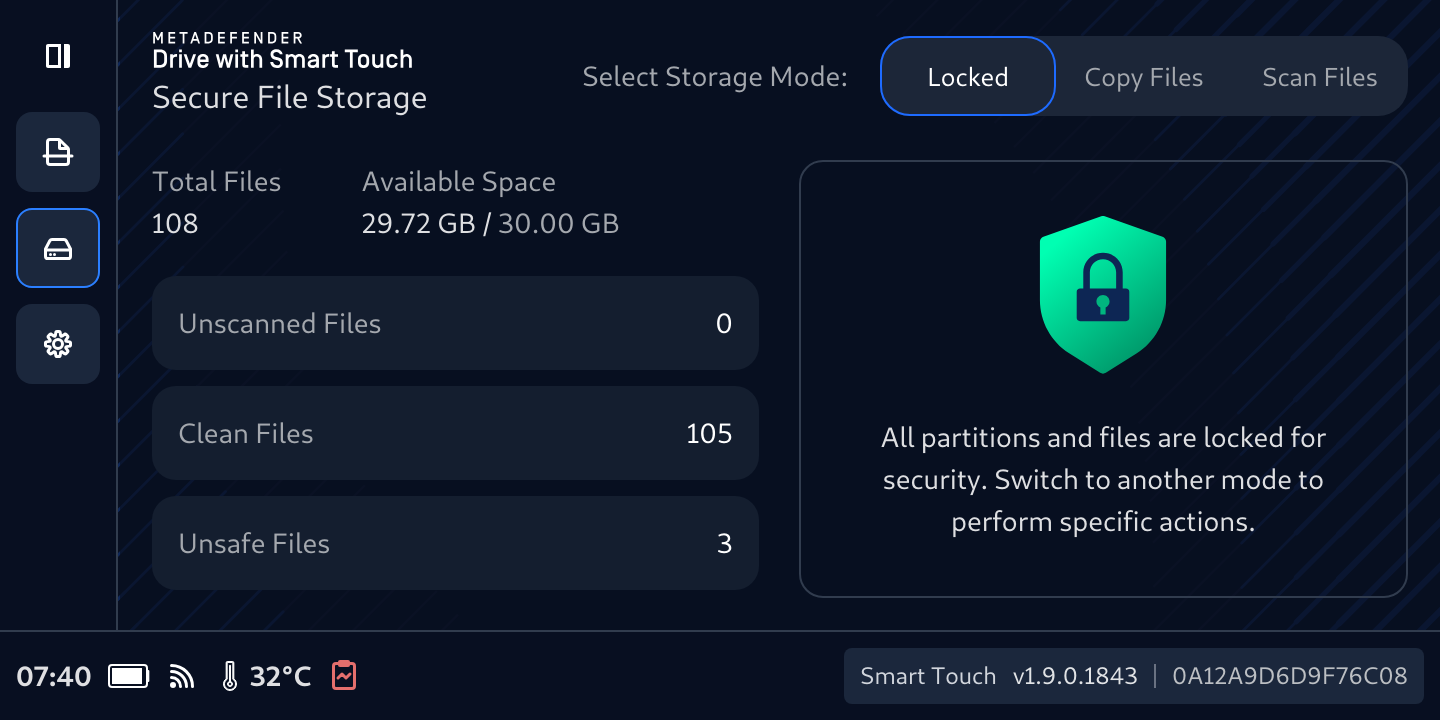
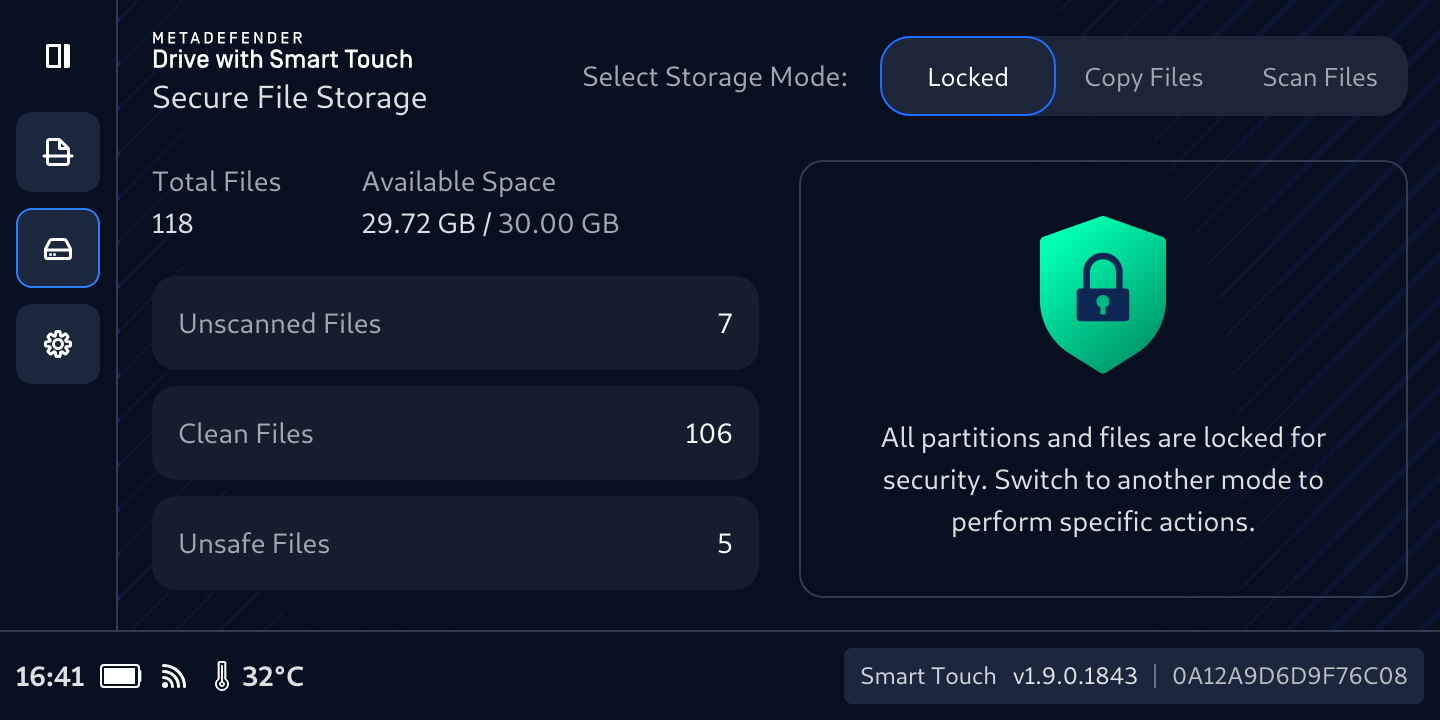
- Secure File Storage will start first with calculating the Total Files. and the Initializing Secure File Storage__... message will be displayed. The files count will be updated once the calculation is completed. This time of this process depends on the number of files being transferred. After Initializing, Secure File Storage will start into this Locked screen.

During this initialization, if the MetaDefender Drive with Smart Touch is plugged into a computer, a small partition (with about 4.2 MB of size) containing only a busy.txt file will appear in the file browser of the target device, stating that the initialization phase is in progress. 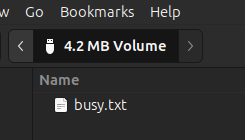
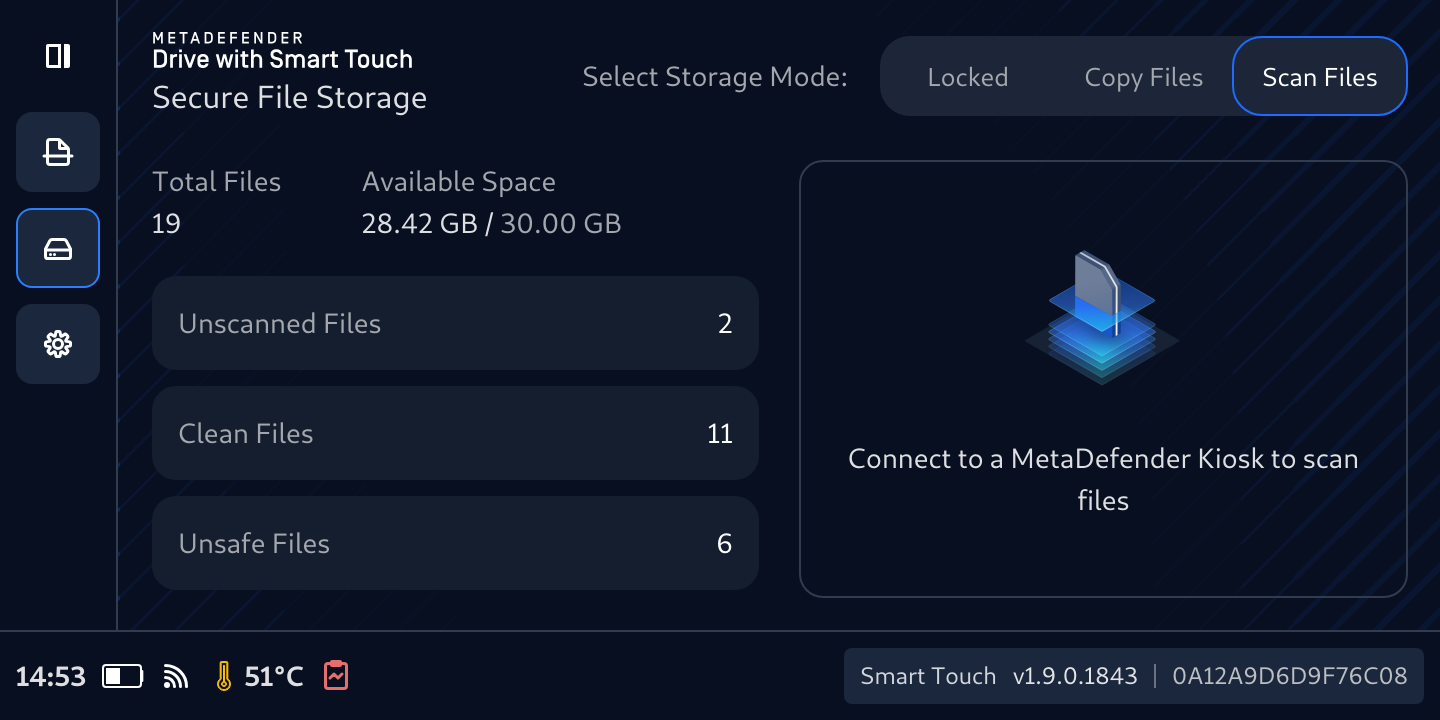
- Once the initialization is complete, files counter completes and populated, the Copy Files tab now is available. Tap it and the Connect to a host machine to copy files message is displayed on the MetaDefender Drive with Smart Touch screen, Secure File Storage is ready.
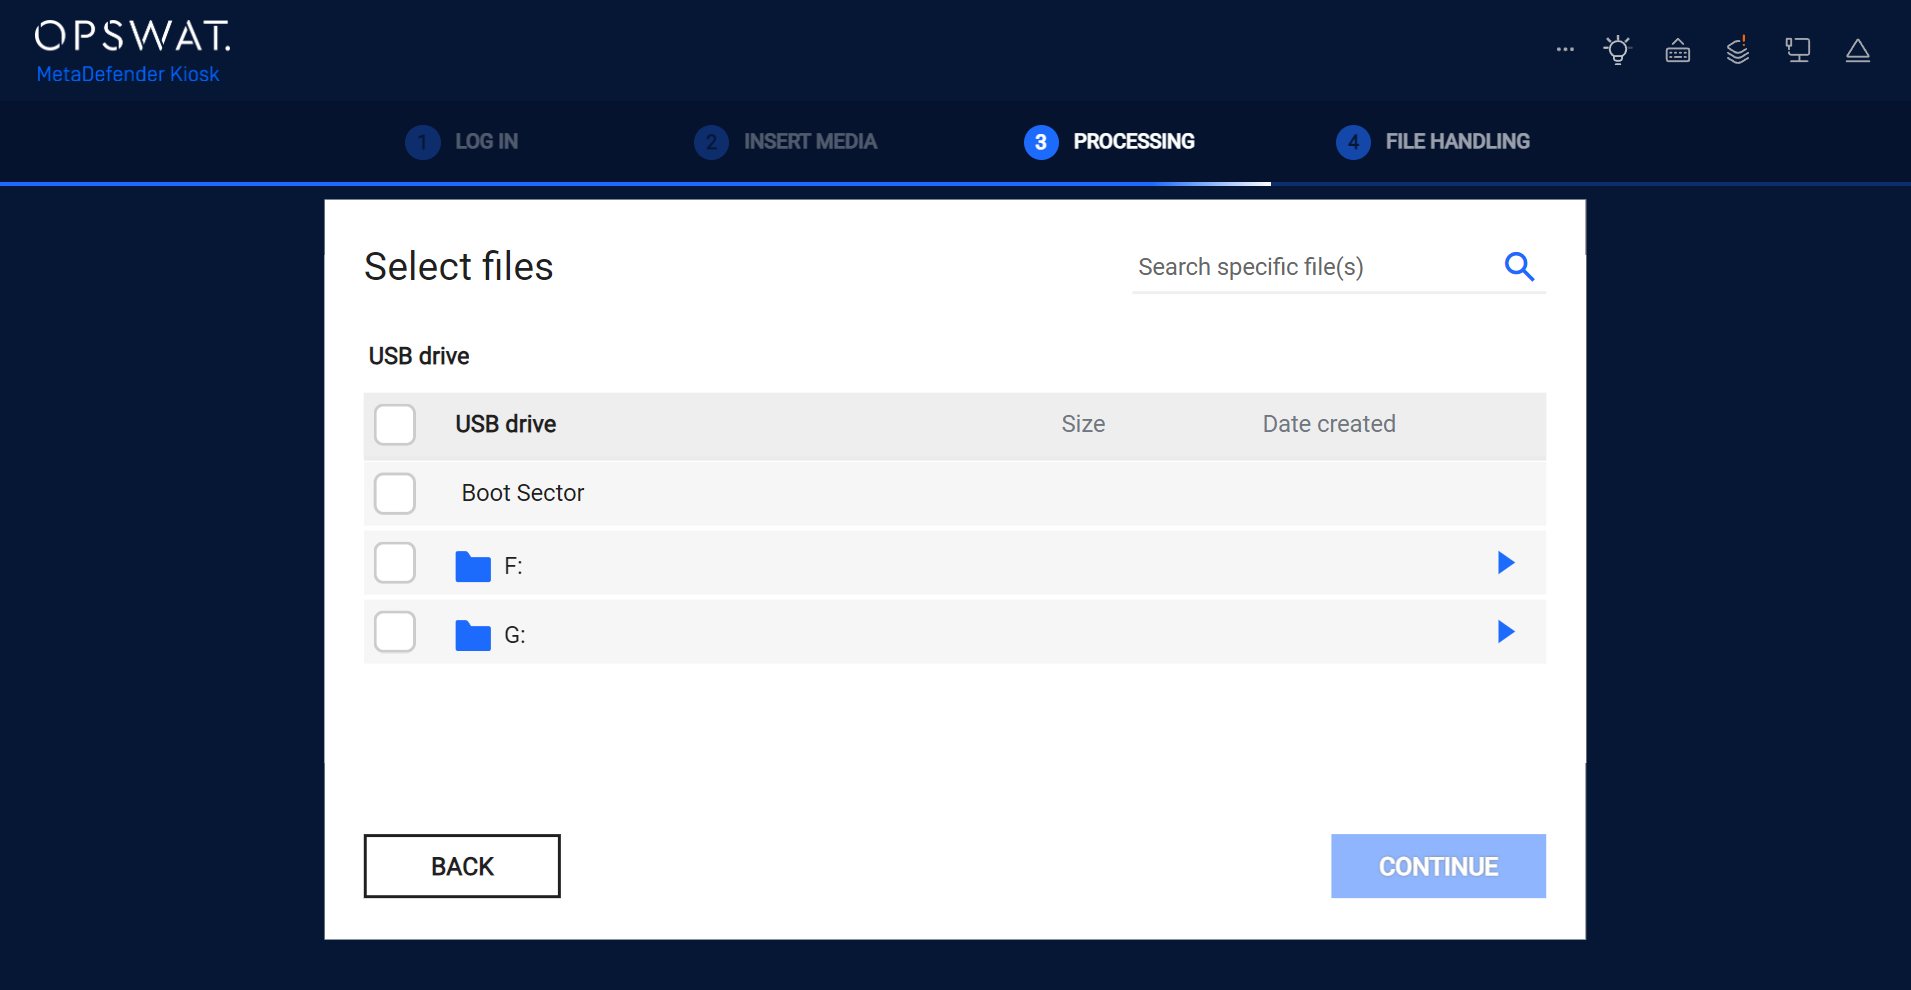
Copy Files to Secure File Storage
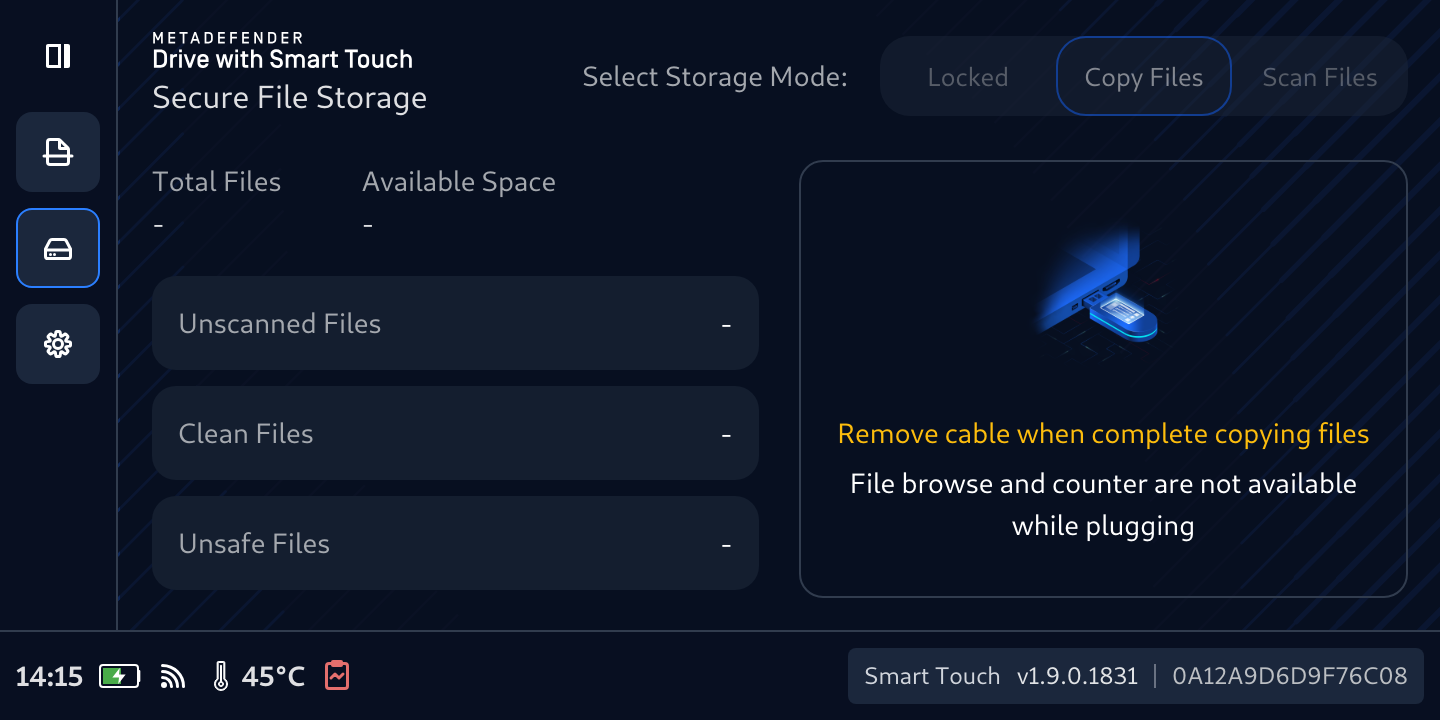
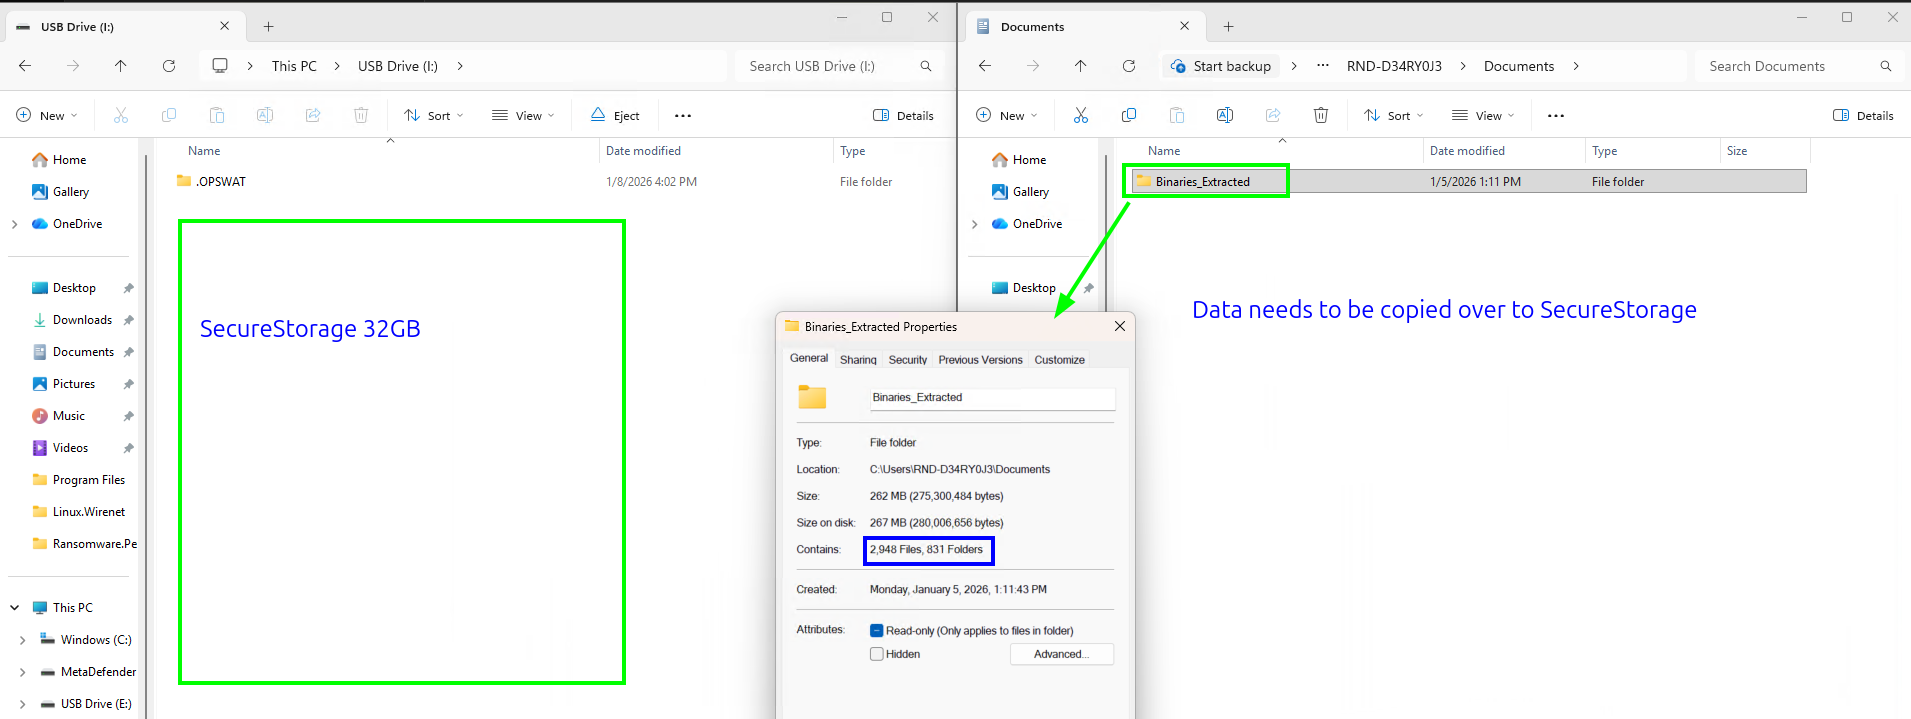
- Insert MetaDefender Drive with Smart Touch with Secure File Storage enabled to the target device and wait for a new partition to appear in your file browser with the size of 32 GB and NTFS file system.
- After the copying files is completed and the USB cable is safely unplugged, Secure File Storage will recount the files.
- The total number of files in secure storage will be calculated after the file calculation is done.
- The Available Space will show up, giving clear visibility into total and remaining Secure File Storage capacity
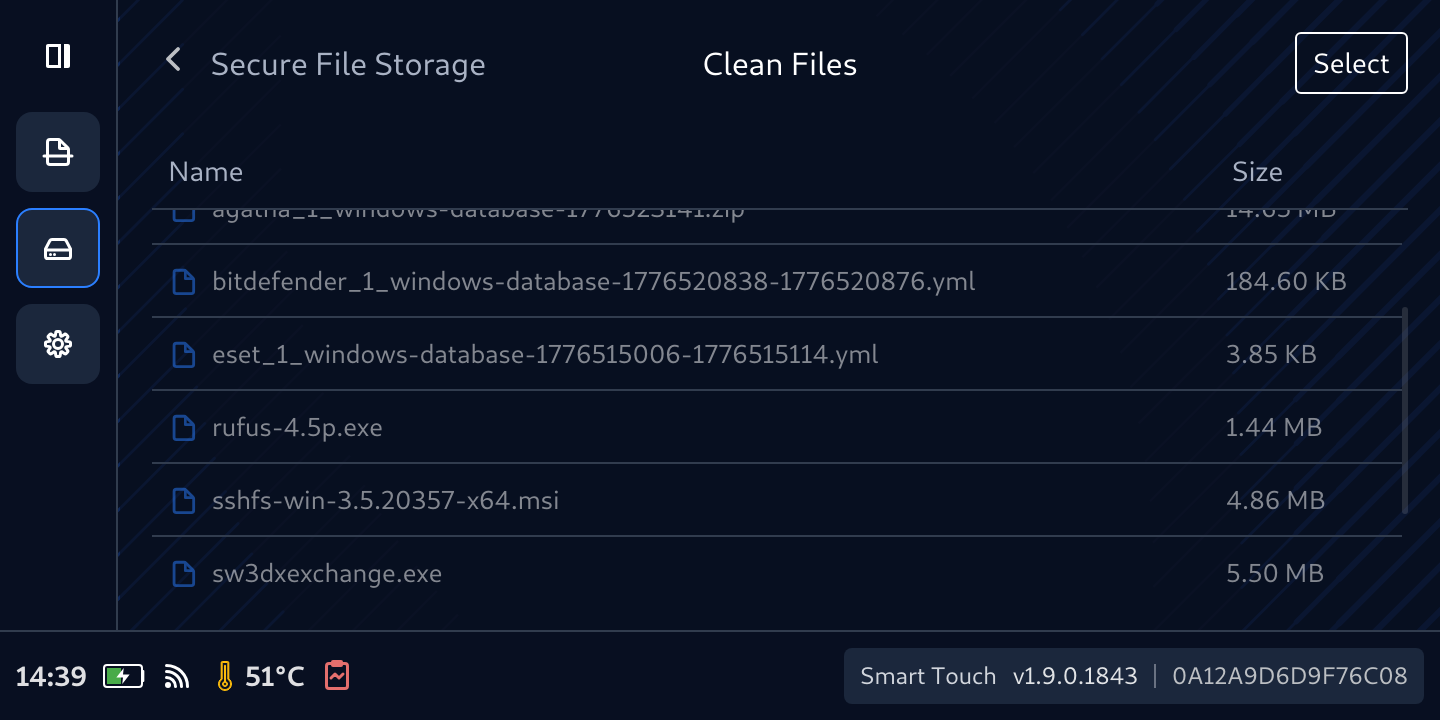
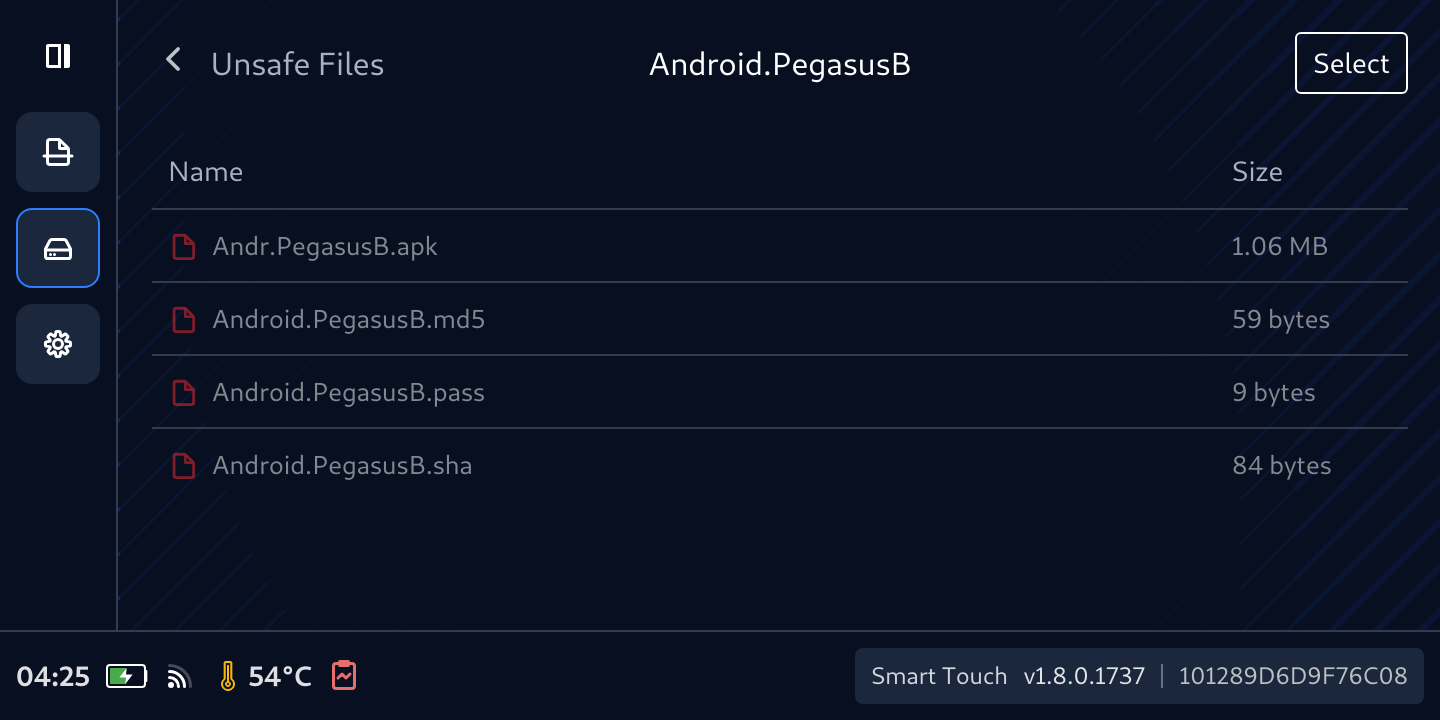
- Tap any title Unscanned Files, Clean Files, or Unsafe Files to view what in there, and see what is consuming space, verify expected content, and make better decisions about sharing or cleanup. Note: info of size will just populate for Files only.

If you plug the Secure File Storage into a host you will see an empty 32GB storage that is ready for another copy session, and the files that were previously copied into Secure File Storage can only be accessed from a computer only when they have been scanned and confirmed safe by an OPSWAT MetaDefender Kiosk.
Scan Files in Secure File Storage with MetaDefender Kiosk
The Scan File tab will be enabled when the file calculation is complete.
To scan file with MetaDefender Kiosk:
- Tap Scan Files
- Confirm that you would like to proceed with the scan when prompted
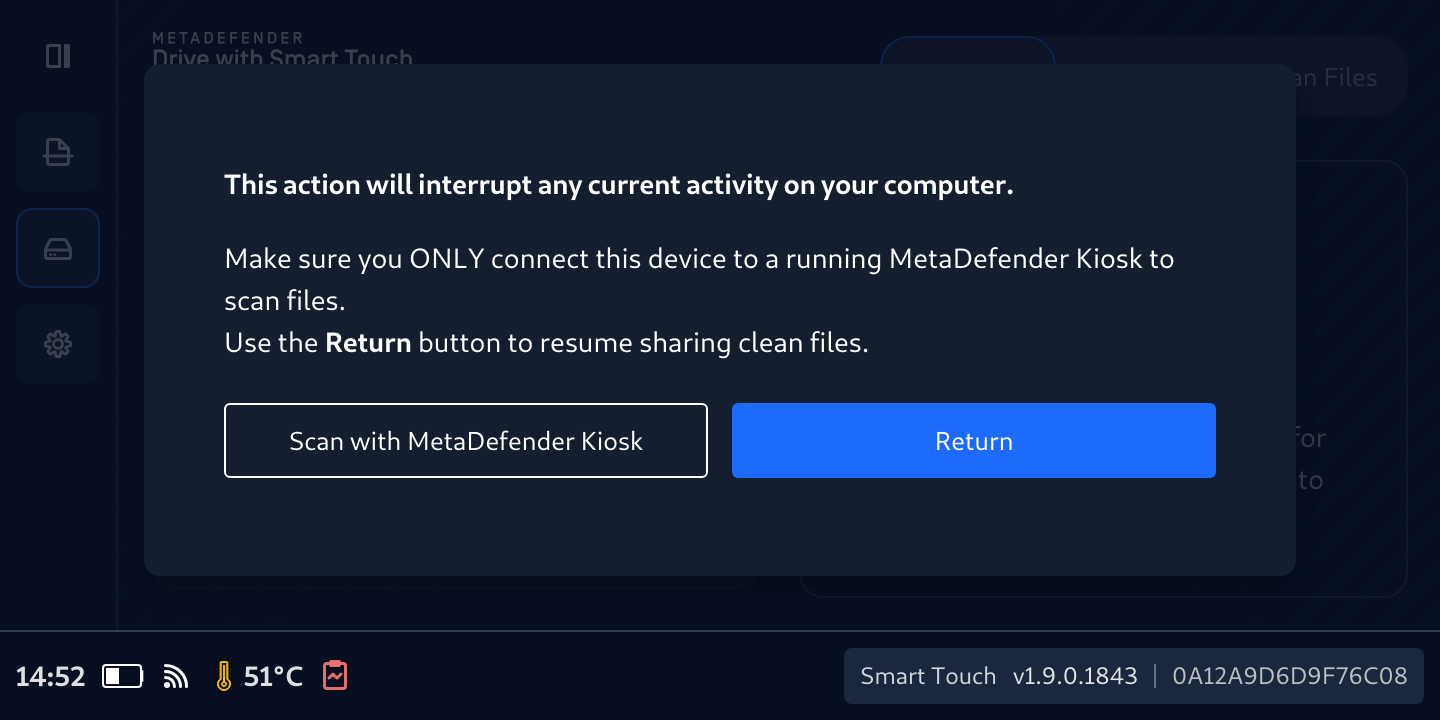
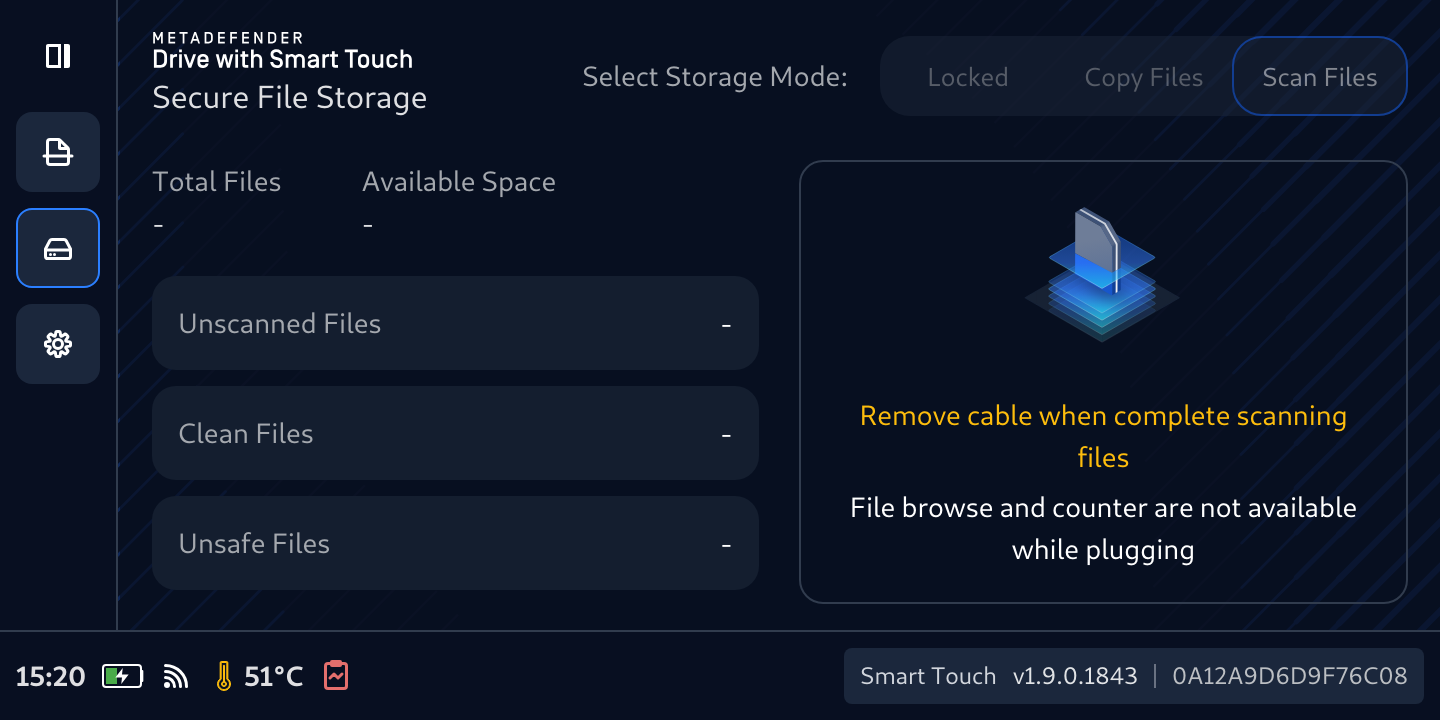
- MetaDefender Drive with Smart Touch will start preparing files with a warning displayed to avoid cross infection because the file stored in Secure FIle Storage have not been scanned yet.
- Once files are staged, they will be ready for scanning with Kiosk
- Follow the steps on MetaDefender Kiosk to scan the stored files
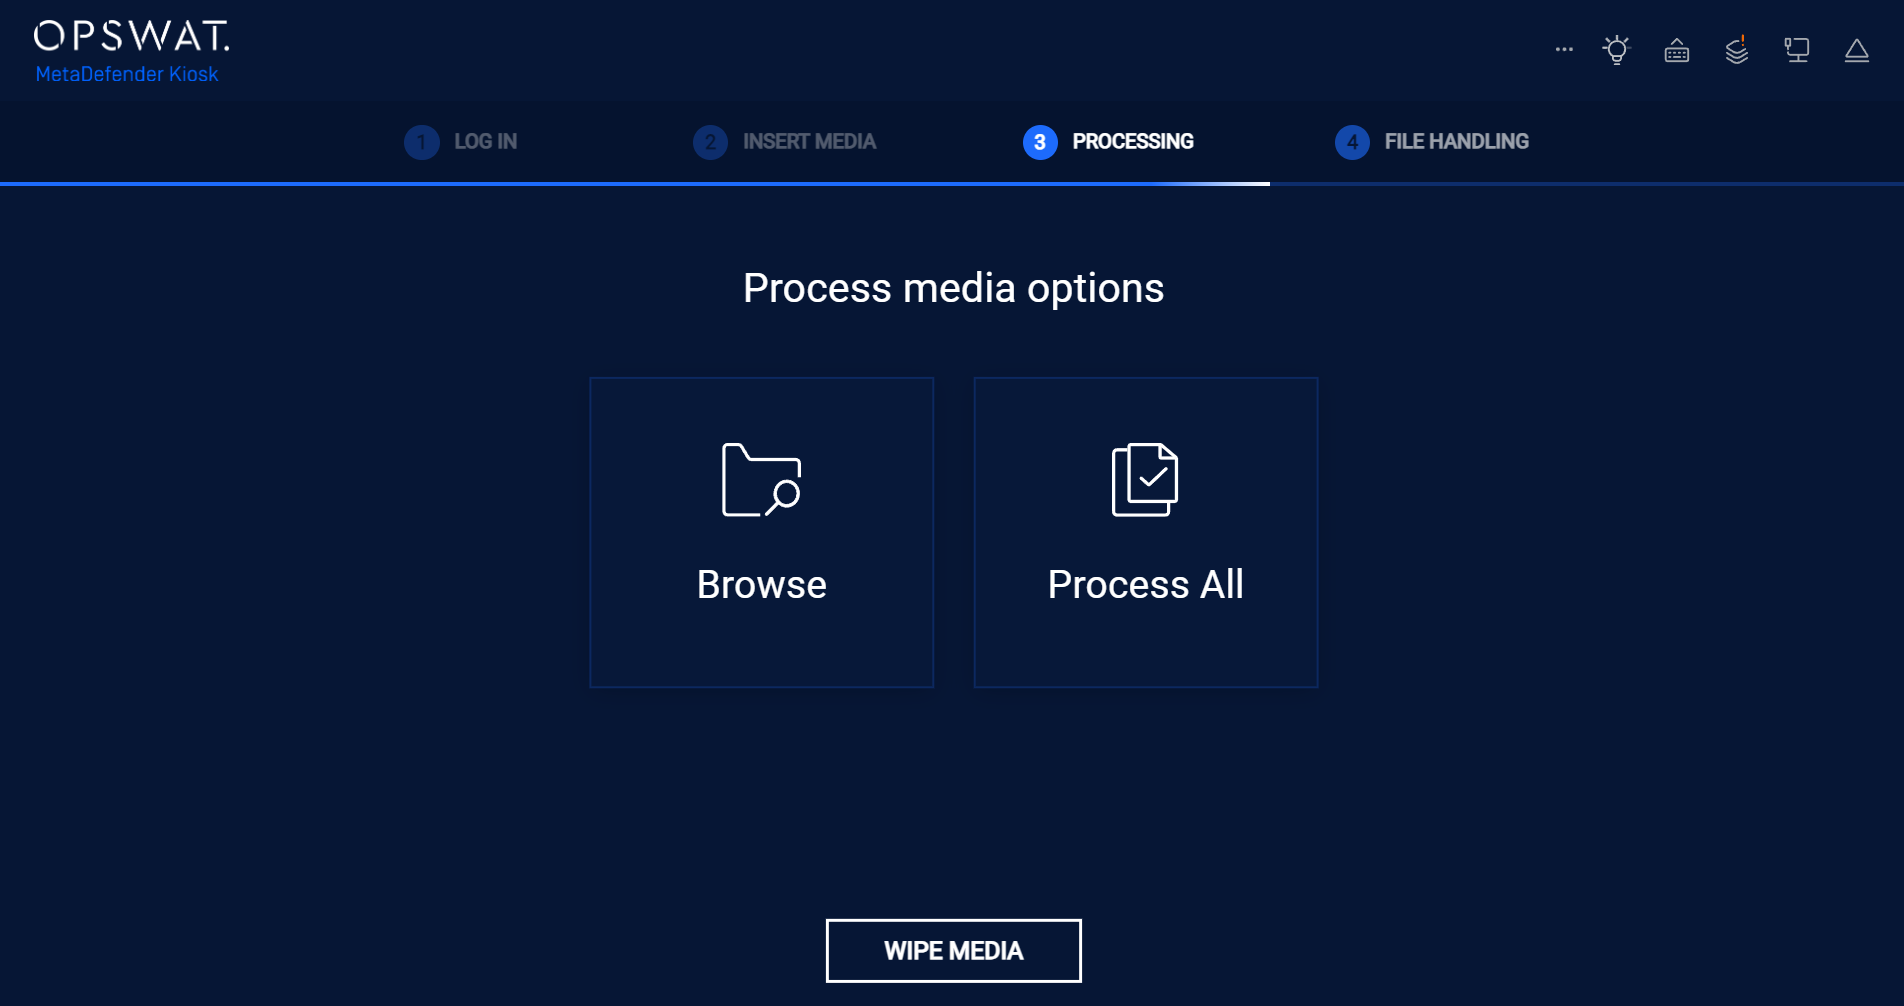
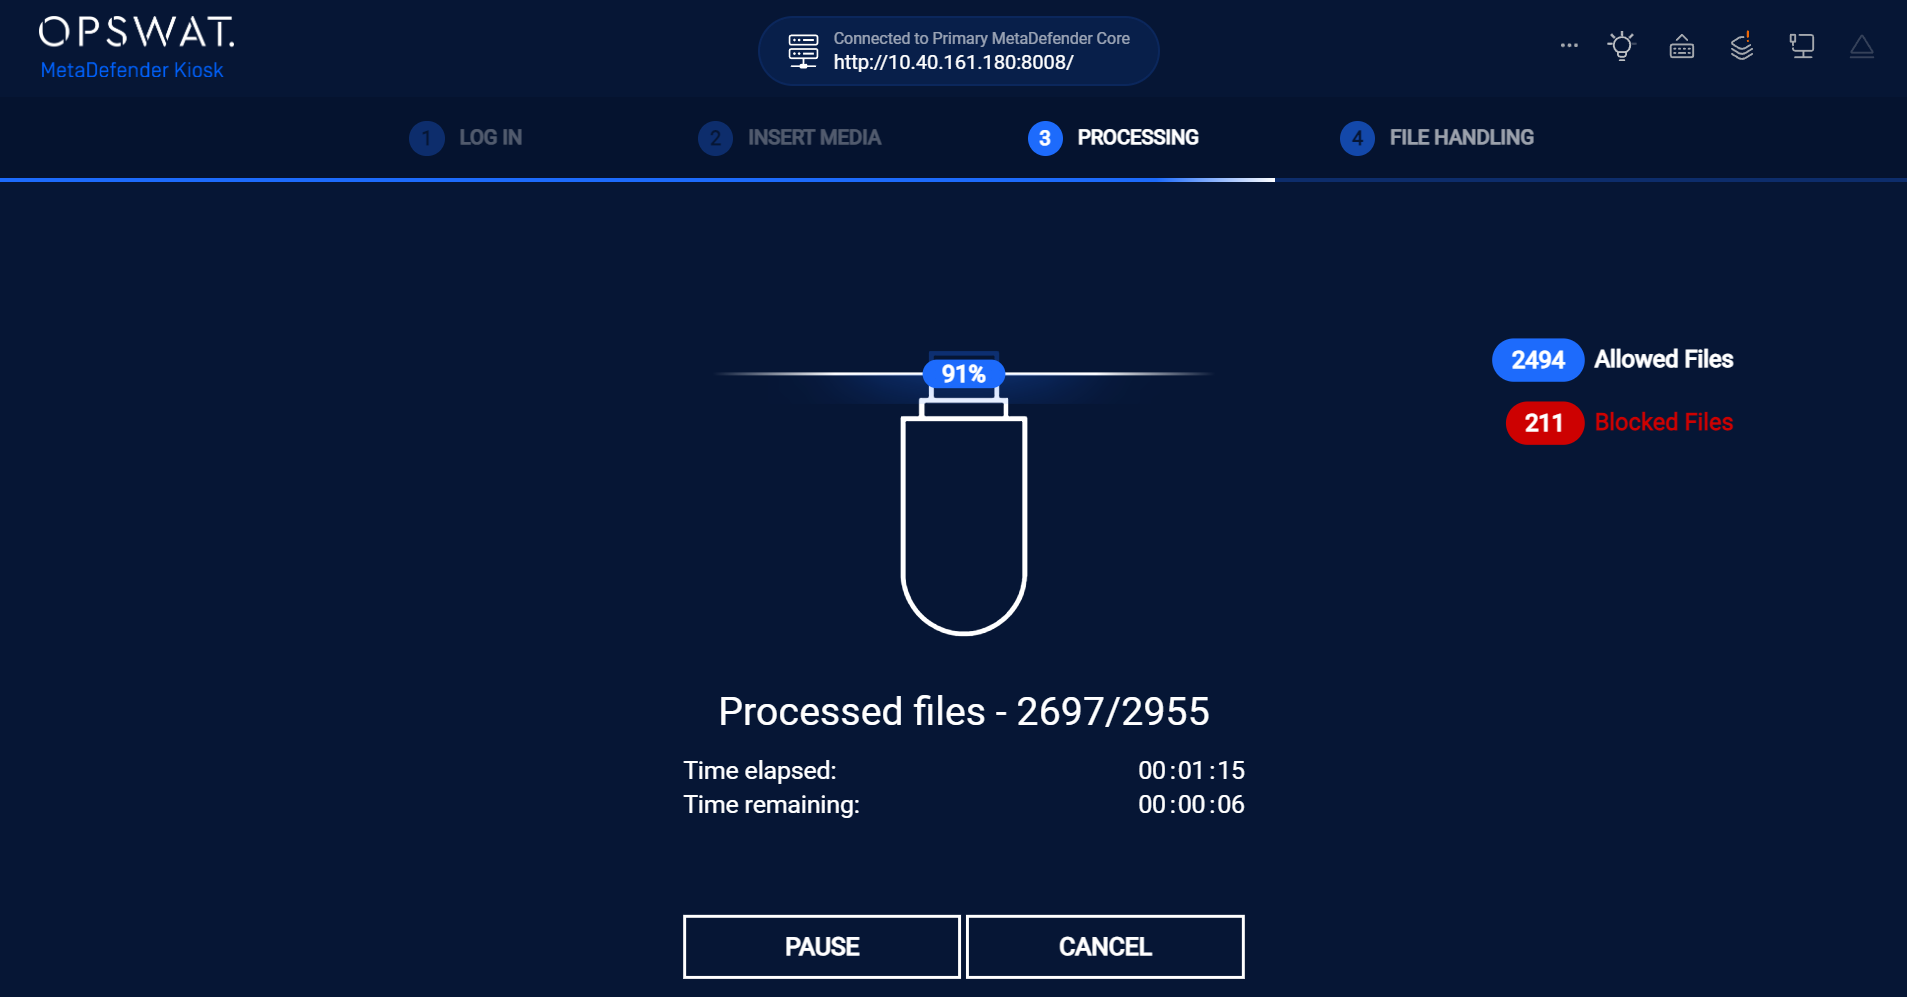
- During MetaDefender Kiosk processing steps, you will see 2 storage partitions.
- Wait until the MetaDefender Kiosk scan is completed, and view the on-screen report showing how many files are Allowed or Blocked.
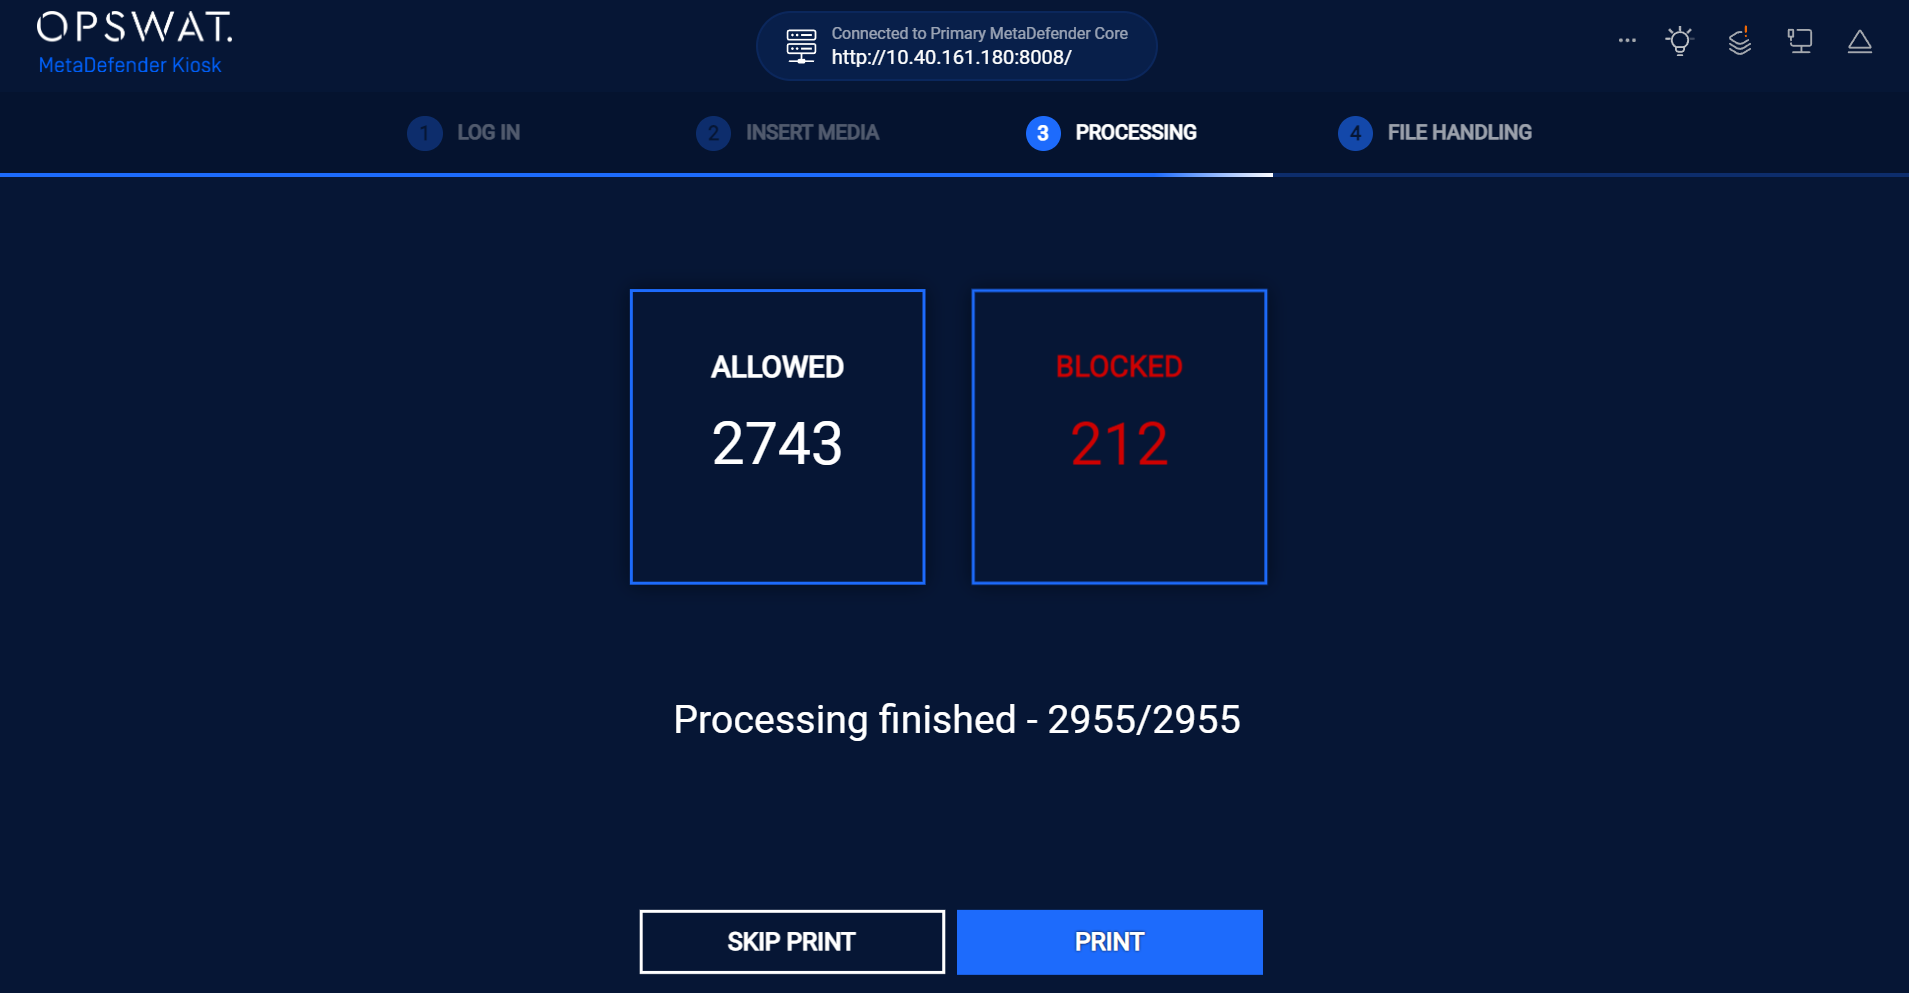
- Choose to Print the scan report or not.
- Safely unplug the USB cable once you are ready. The files will be recalculated again display the correct numbers of Clean Files, Unsafe Files, and Unscanned Files.
On the MetaDefender Drive with Smart Touch screen, Allowed files will be considered as Clean by Secure Storage, and Blocked files are considered as Unsafe Files. Skipped files will be considered as Unscanned Files.
Securely access Clean Files in Secure File Storage
When plugging to a host computer, on its file manager, the Clean files will be made visible in a 32GB storage partition, and the Unscanned and Unsafe files will be hidden.
Please notice that Secure File Storage will automatically and safely create these folder and files in the Clean storage so that Files Browser and MetaDefender Kiosk can find and scan them, but Secure File Storage will ignore them during its calcualtion.
- .OPSWAT (manifest files, session, tokens)
The following folder and files will be automatically generated by Windows operating system and will be counted by Kiosk and Secure File Storage:
- System Info folders
Manage files in Secure File Storage
The total space available for Secure File Storage is 32GB and can be filled up if data not being cleaned up.
View files and folders inside Secure File Storage
- Tap any title Unscanned Files, Clean Files, or Unsafe Files to view what in there, and see what is consuming space, verify expected content, and make better decisions about sharing or cleanup. Note: info of size will just populate for Files only.
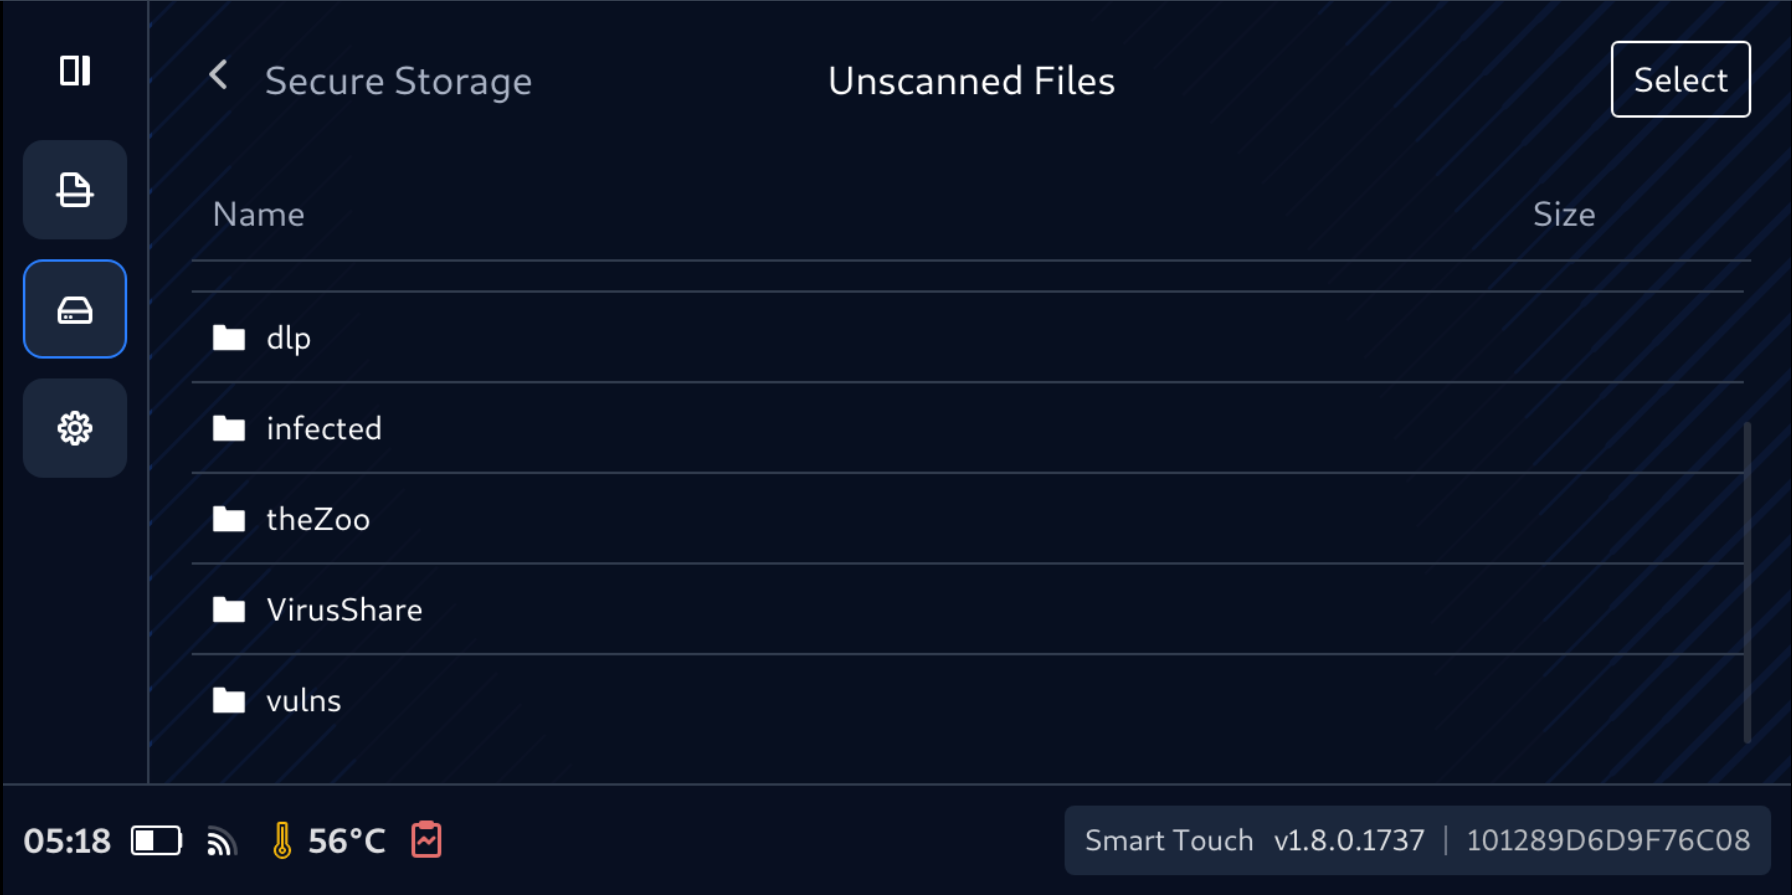
- Size information is available only for Files, not for Folder
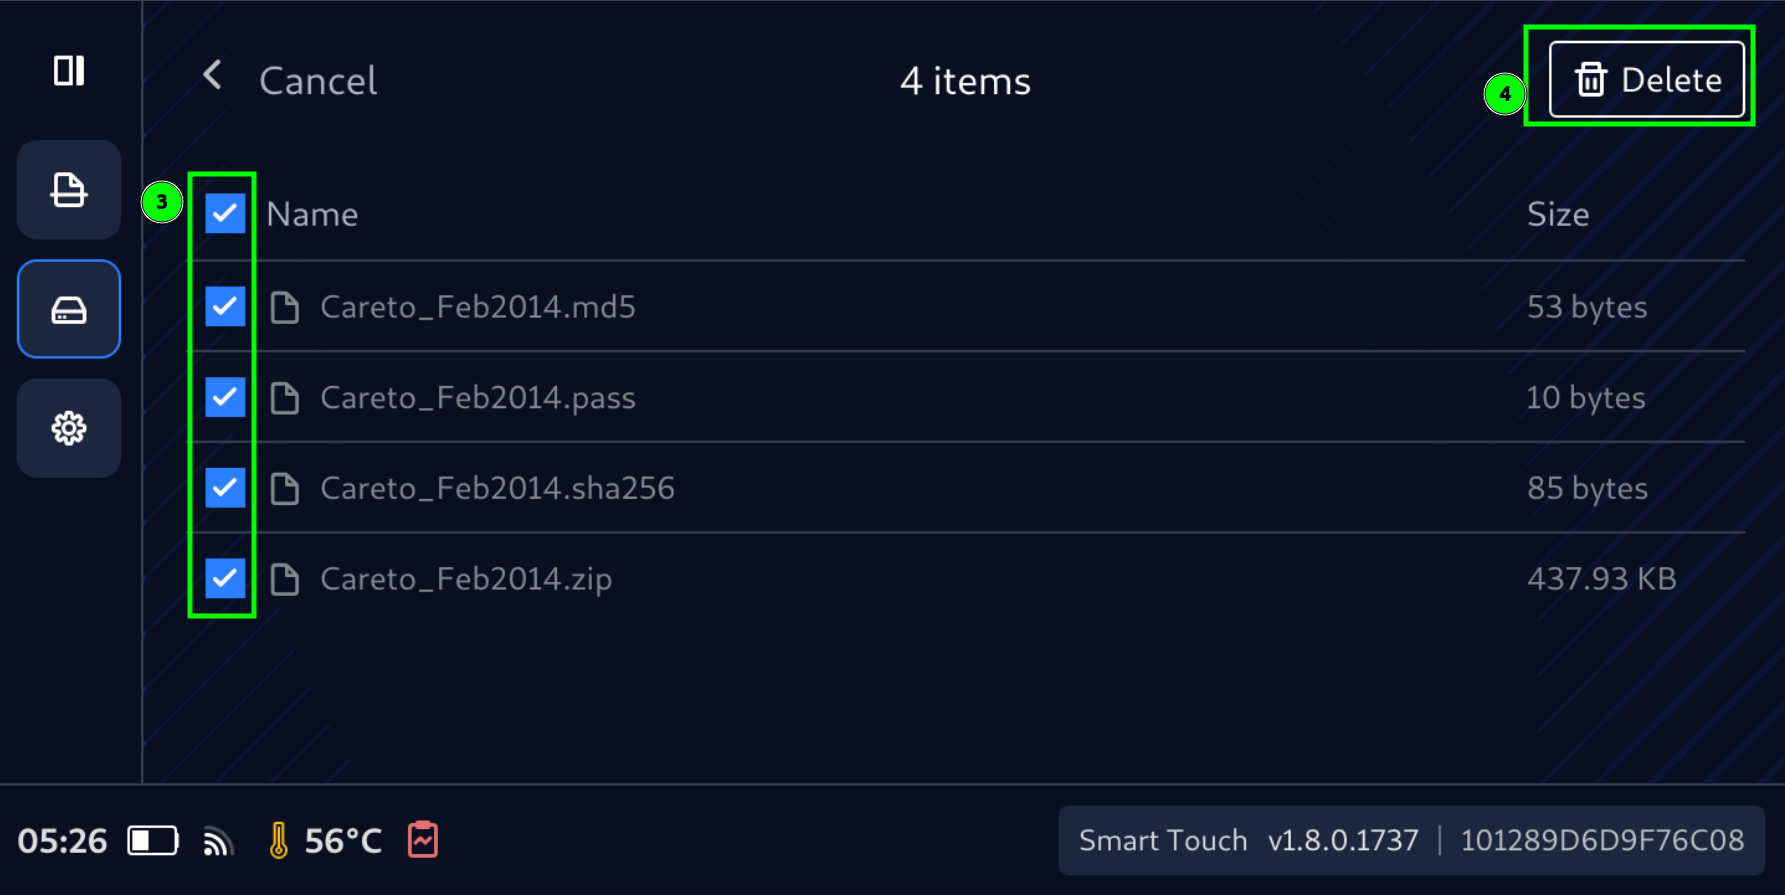
Select and Delete Files and Folders
- Navigate to folder and files you wanted to manage
- Tap Select button
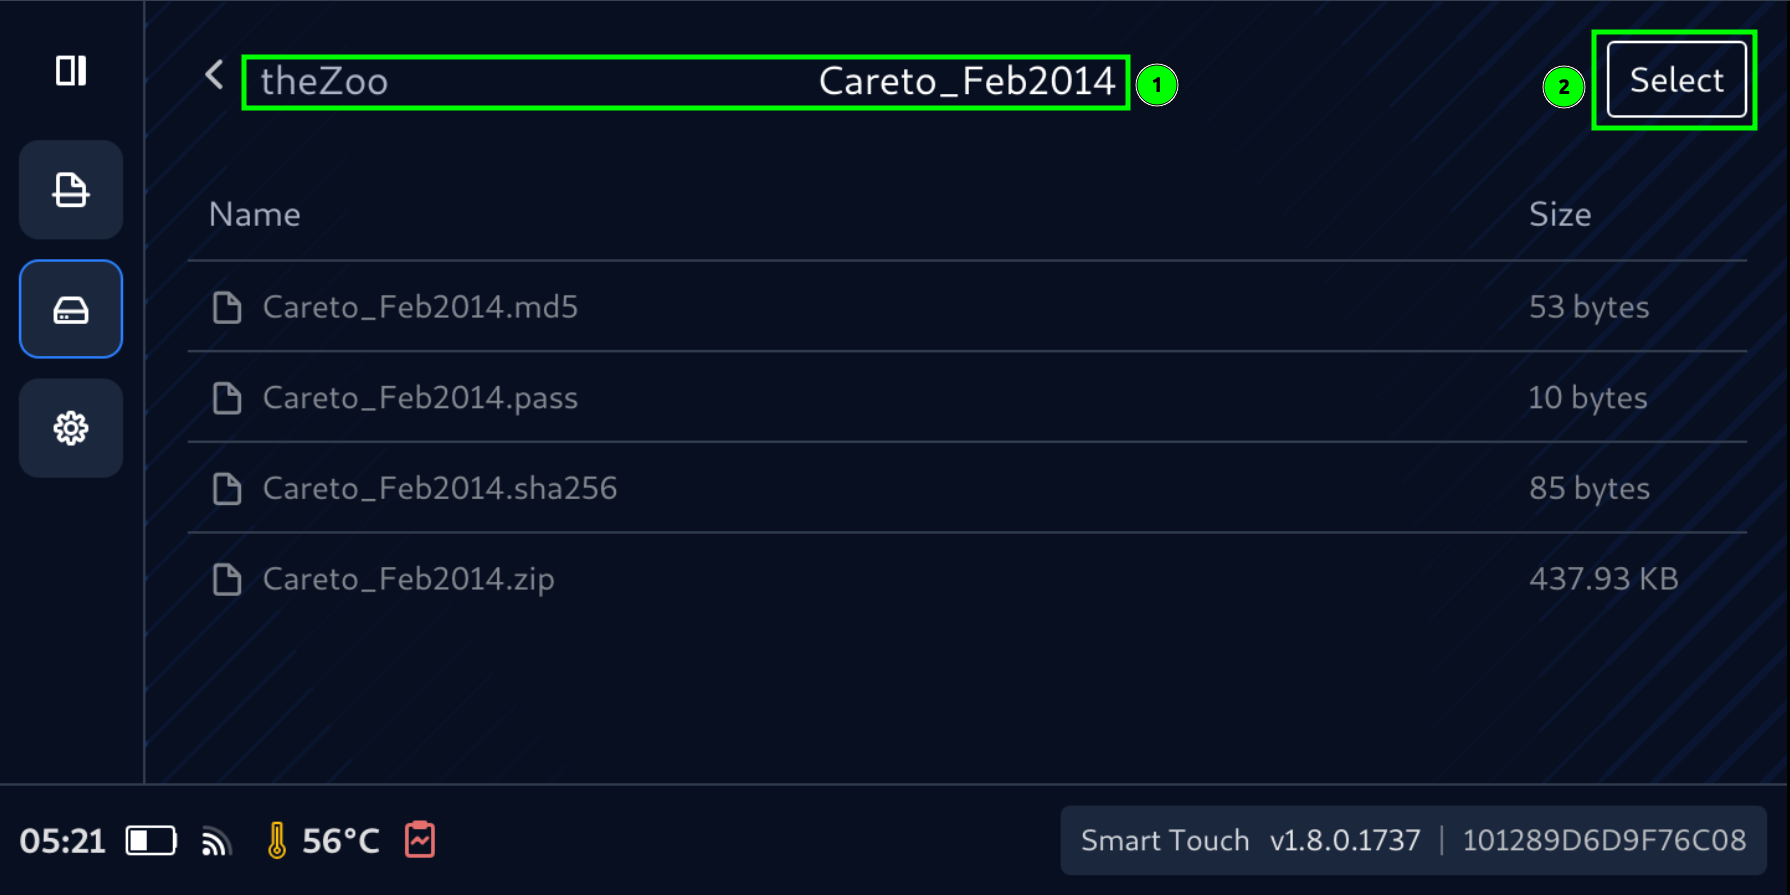
- Check boxes will be available for each files and folder
- Select files to delete, then tap Delete button
- Confirm Yes, delete to delete selected files permanently
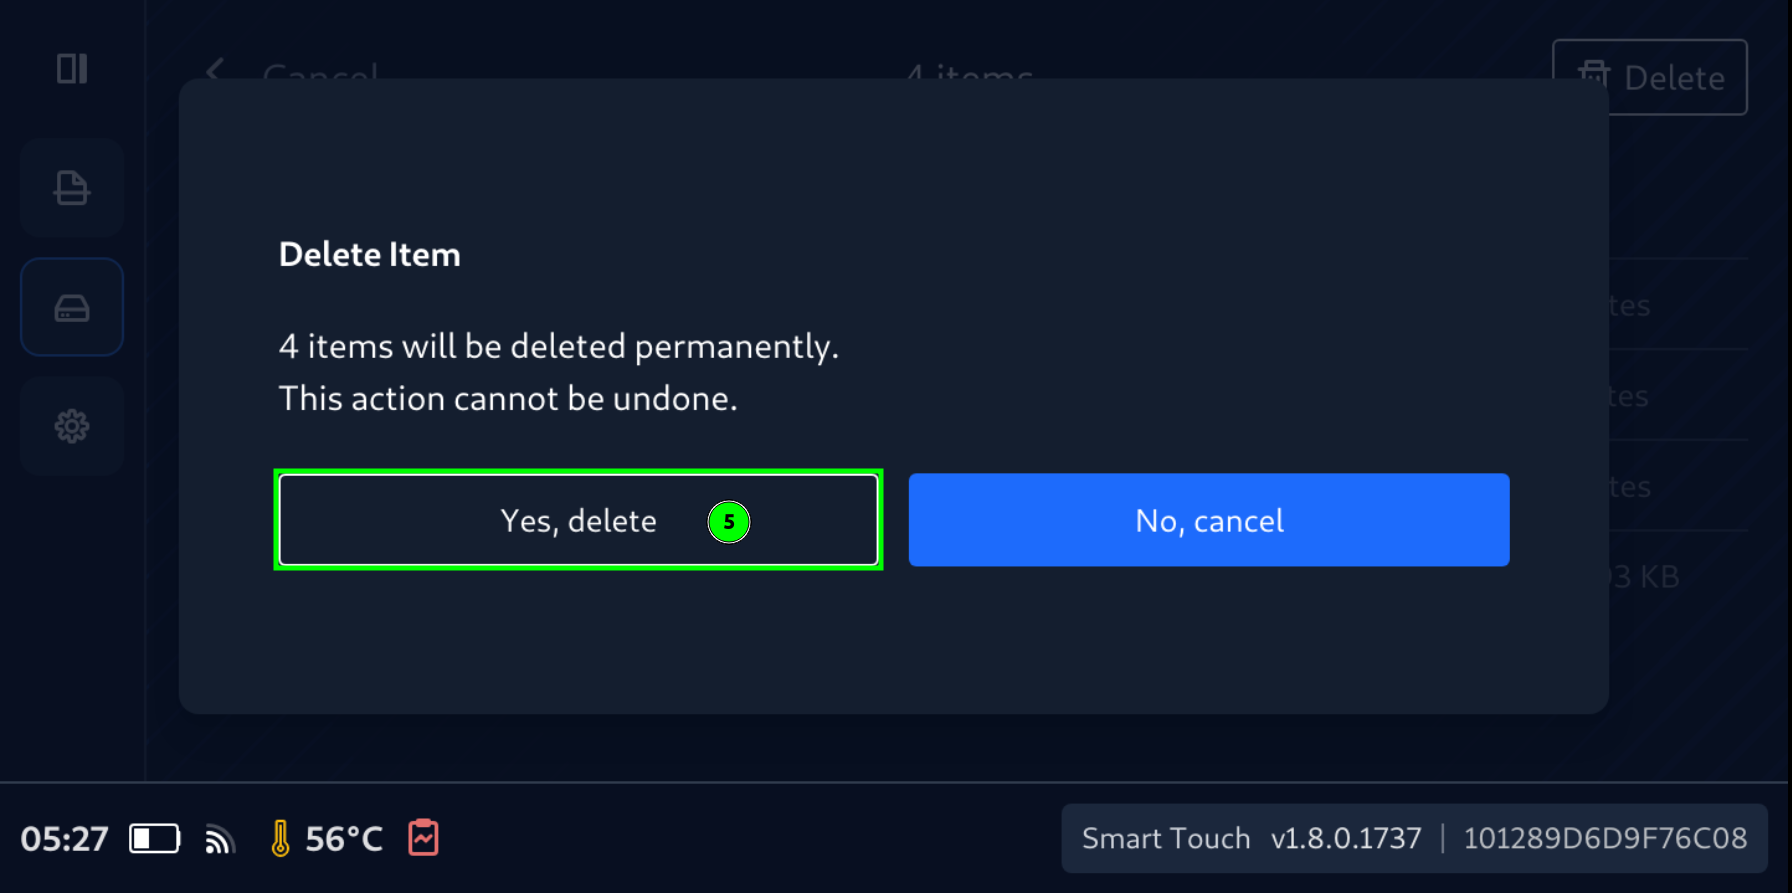
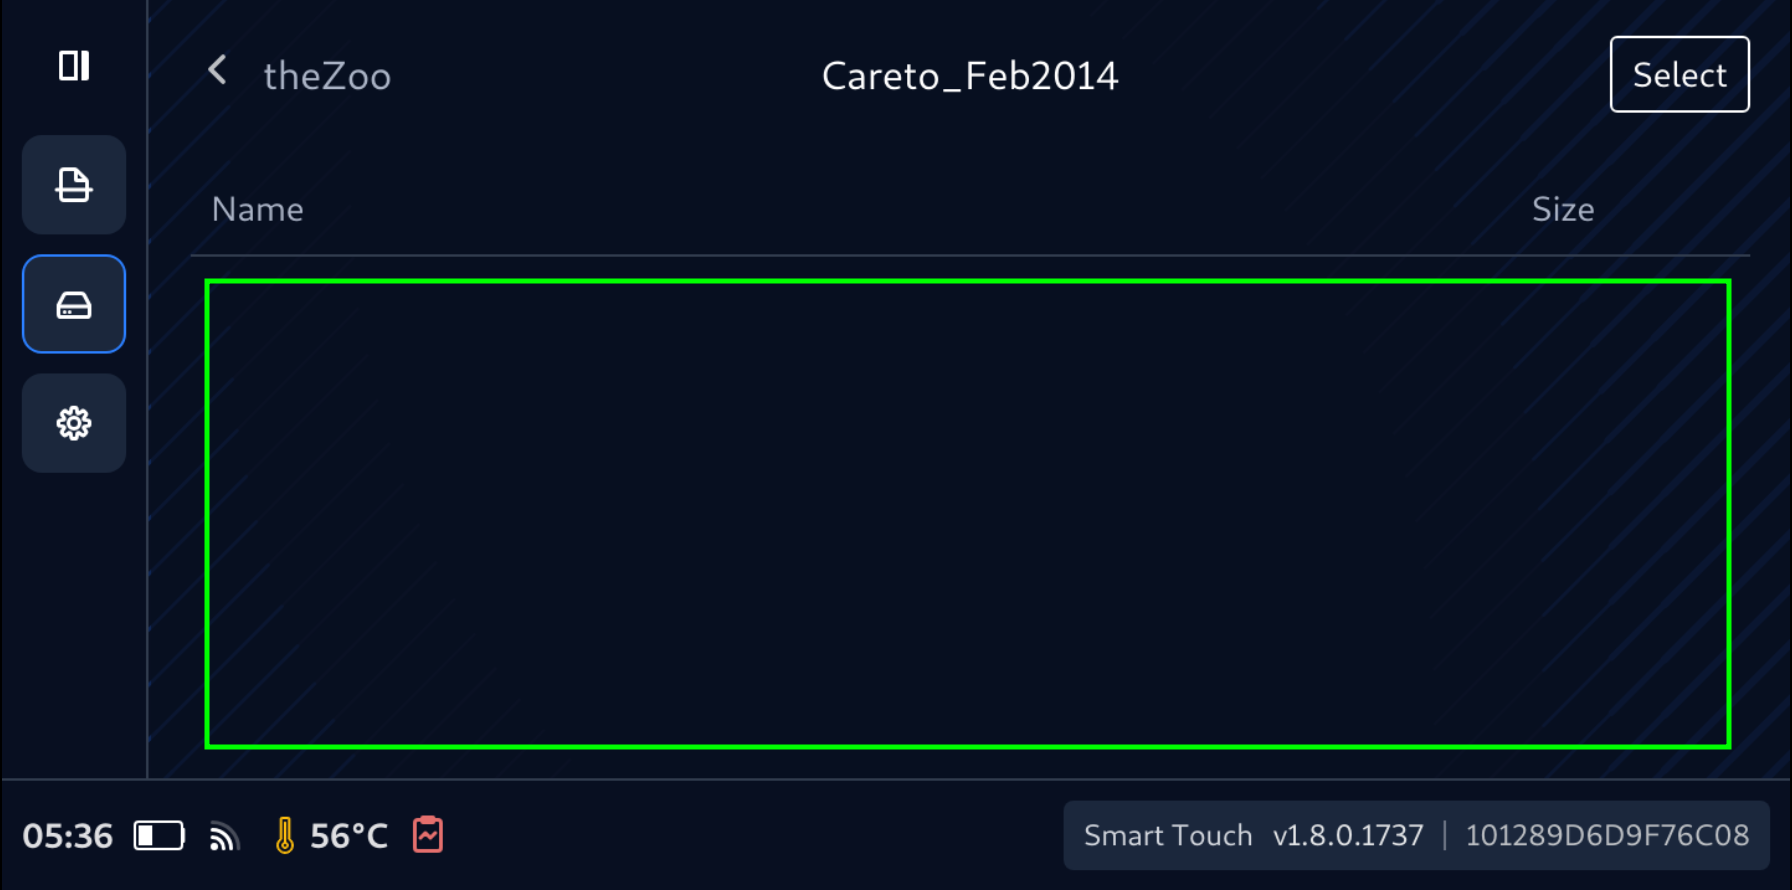
- Confirming deleted files are gone
Notice that Select and Delete function is also available for Folder. So it should be handled with caution.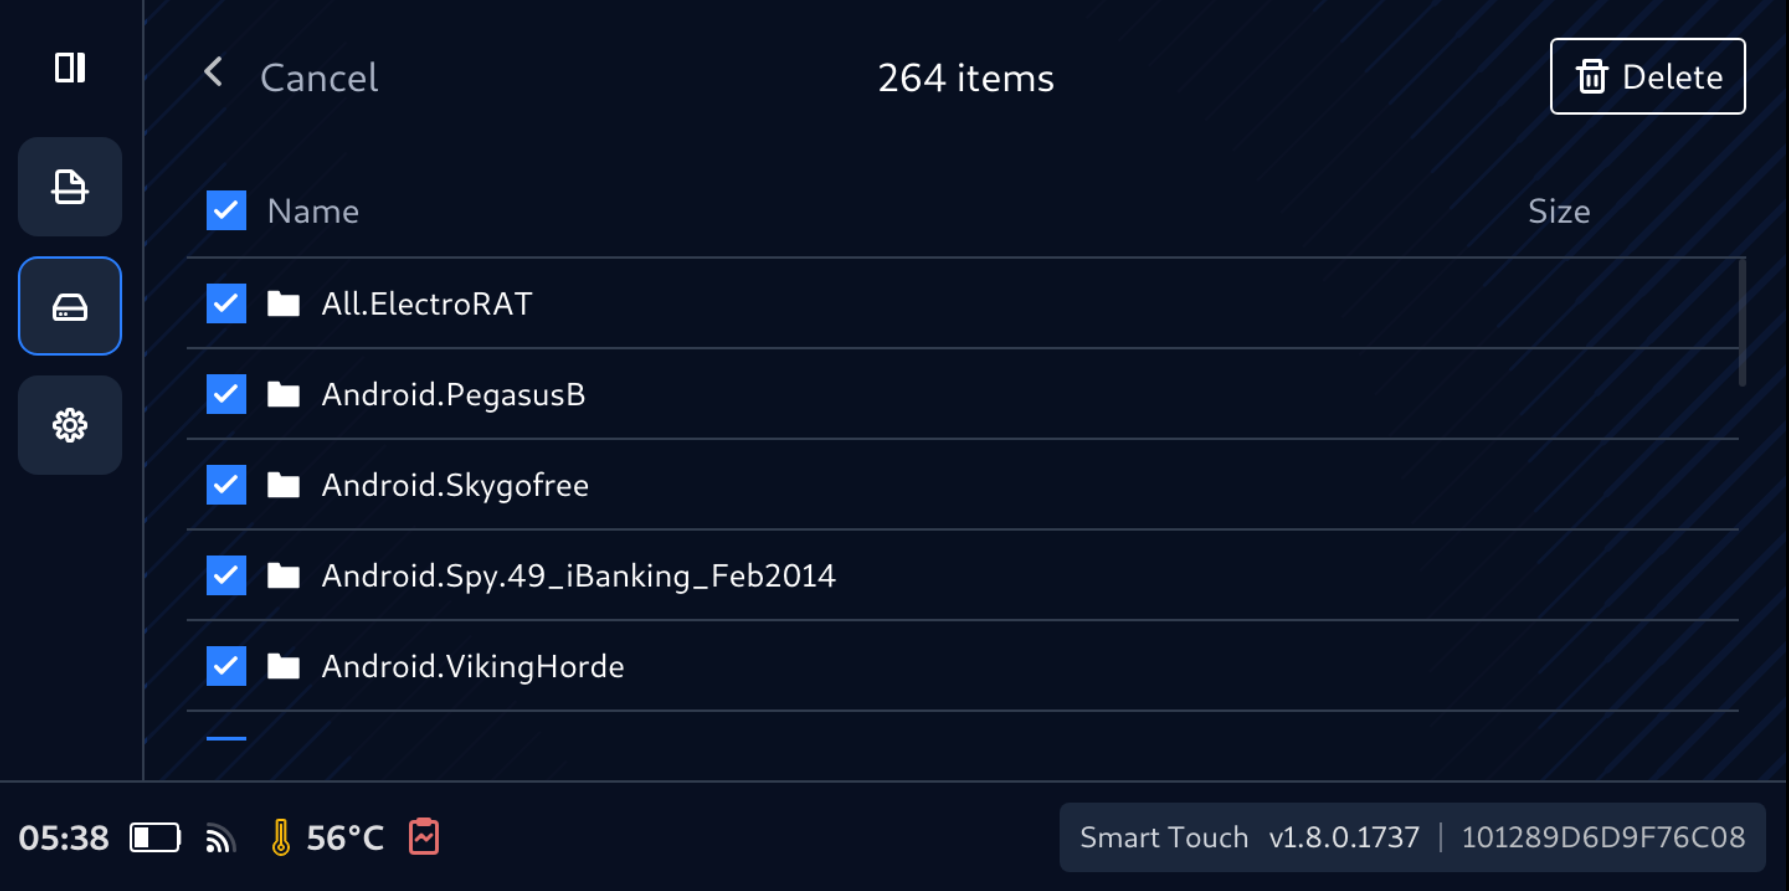
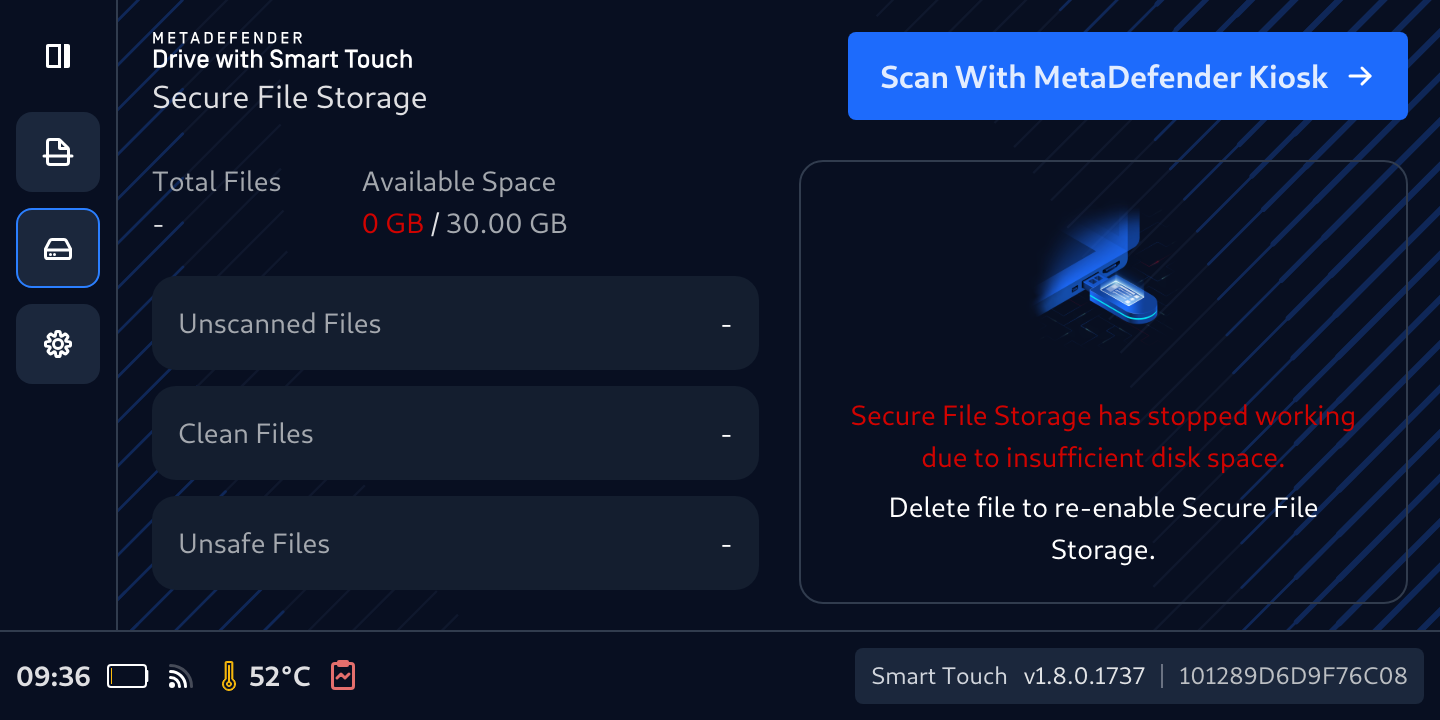
Remediation when File Secure Storage gets full
There will be the time when Secure Files Storage got full and the message will appear reminding that a clean-up is needed.
To clean-up the storage there are two ways:
- Tap Erase All Data then follow instruction on screen
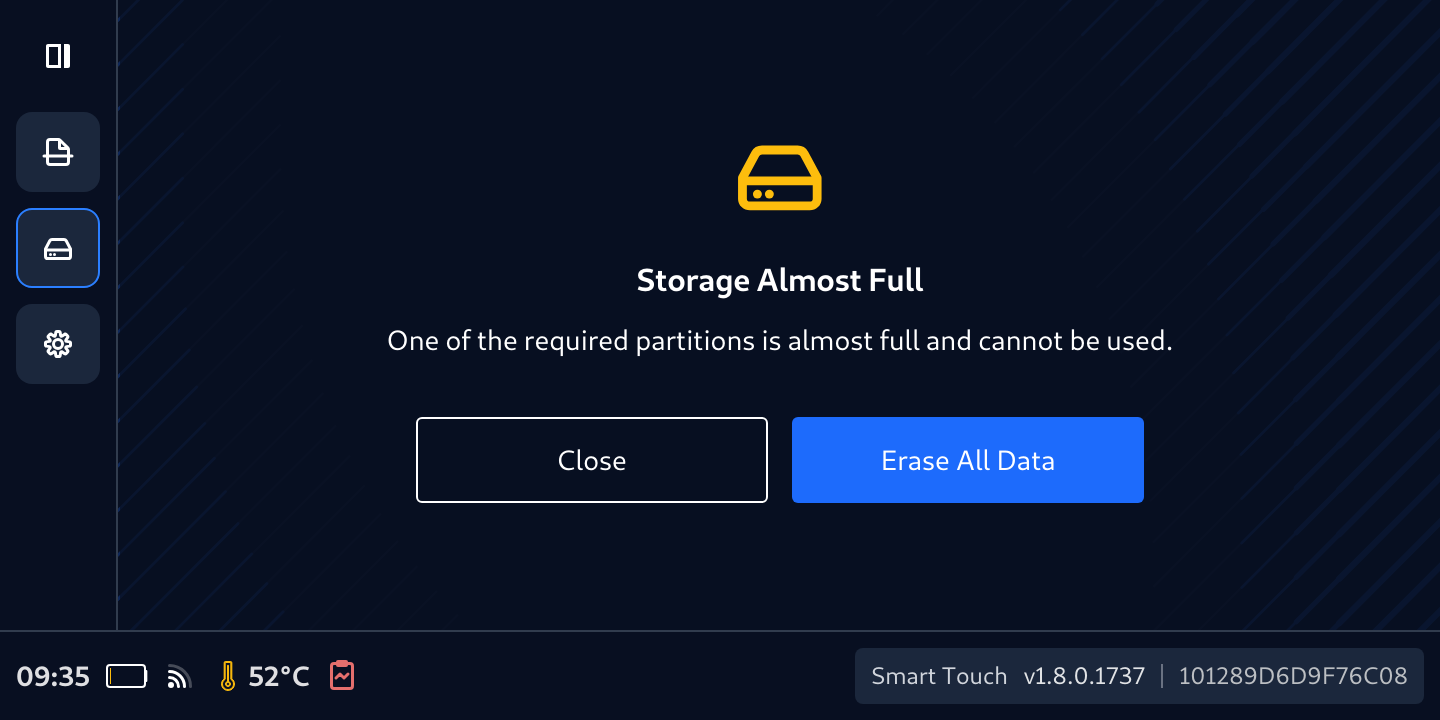
- Tap Unsafe Files then select files or directories to delete them