
From MetaDefender Drive v4.4.5 and MetaDefender Drive Toolkit v3.8.5, pre-boot and in-session scan reports auto-sync to MetaDefender Kiosk on insertion. The Kiosk emails the user a signed PDF with a tamper-evident Media Passport (QR-coded) reflecting the drive's latest scan result.
What you get
Automatic report sync — no manual export step.
Engine and firmware refresh — drive stays up to date in the same insertion.
Signed PDF and Media Passport — emailed to the user with QR code.
Unified device posture report — boot and in-session results in one format.
Kiosk Setup
Configure these on the Kiosk management console before going live.
Enable the MetaDefender Drive integration
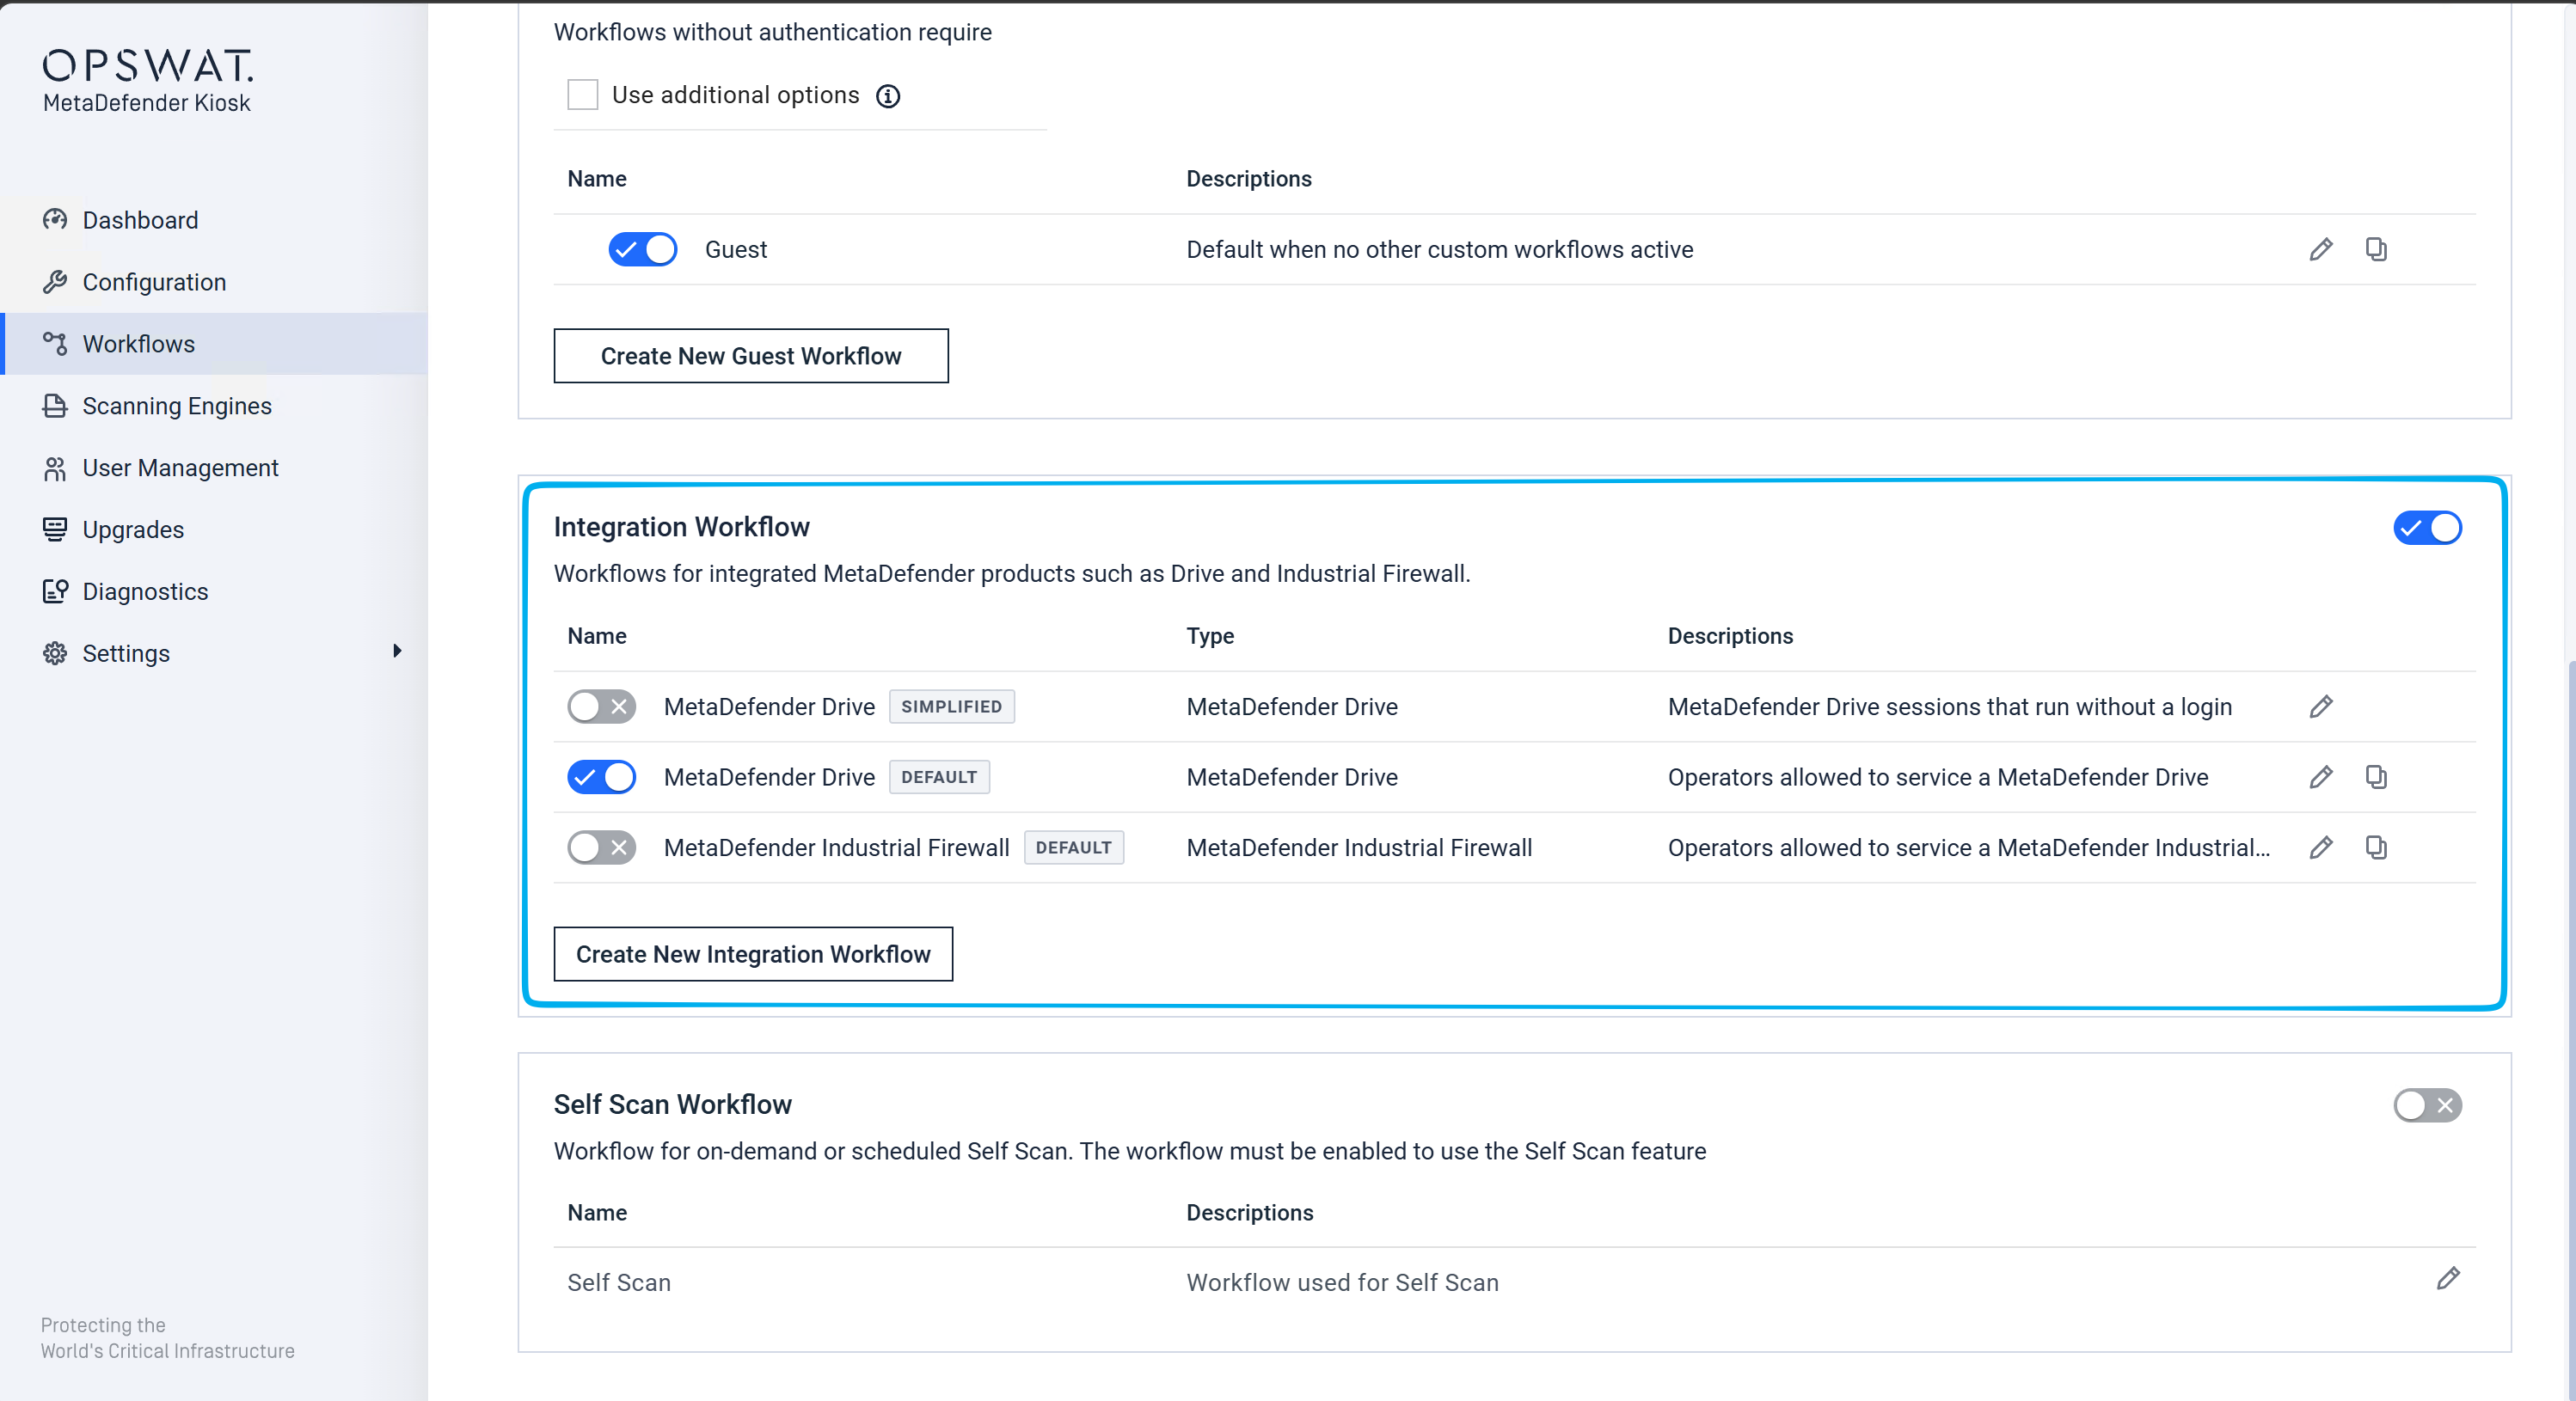
Go to Workflows > Integration Workflow > MetaDefender Drive.
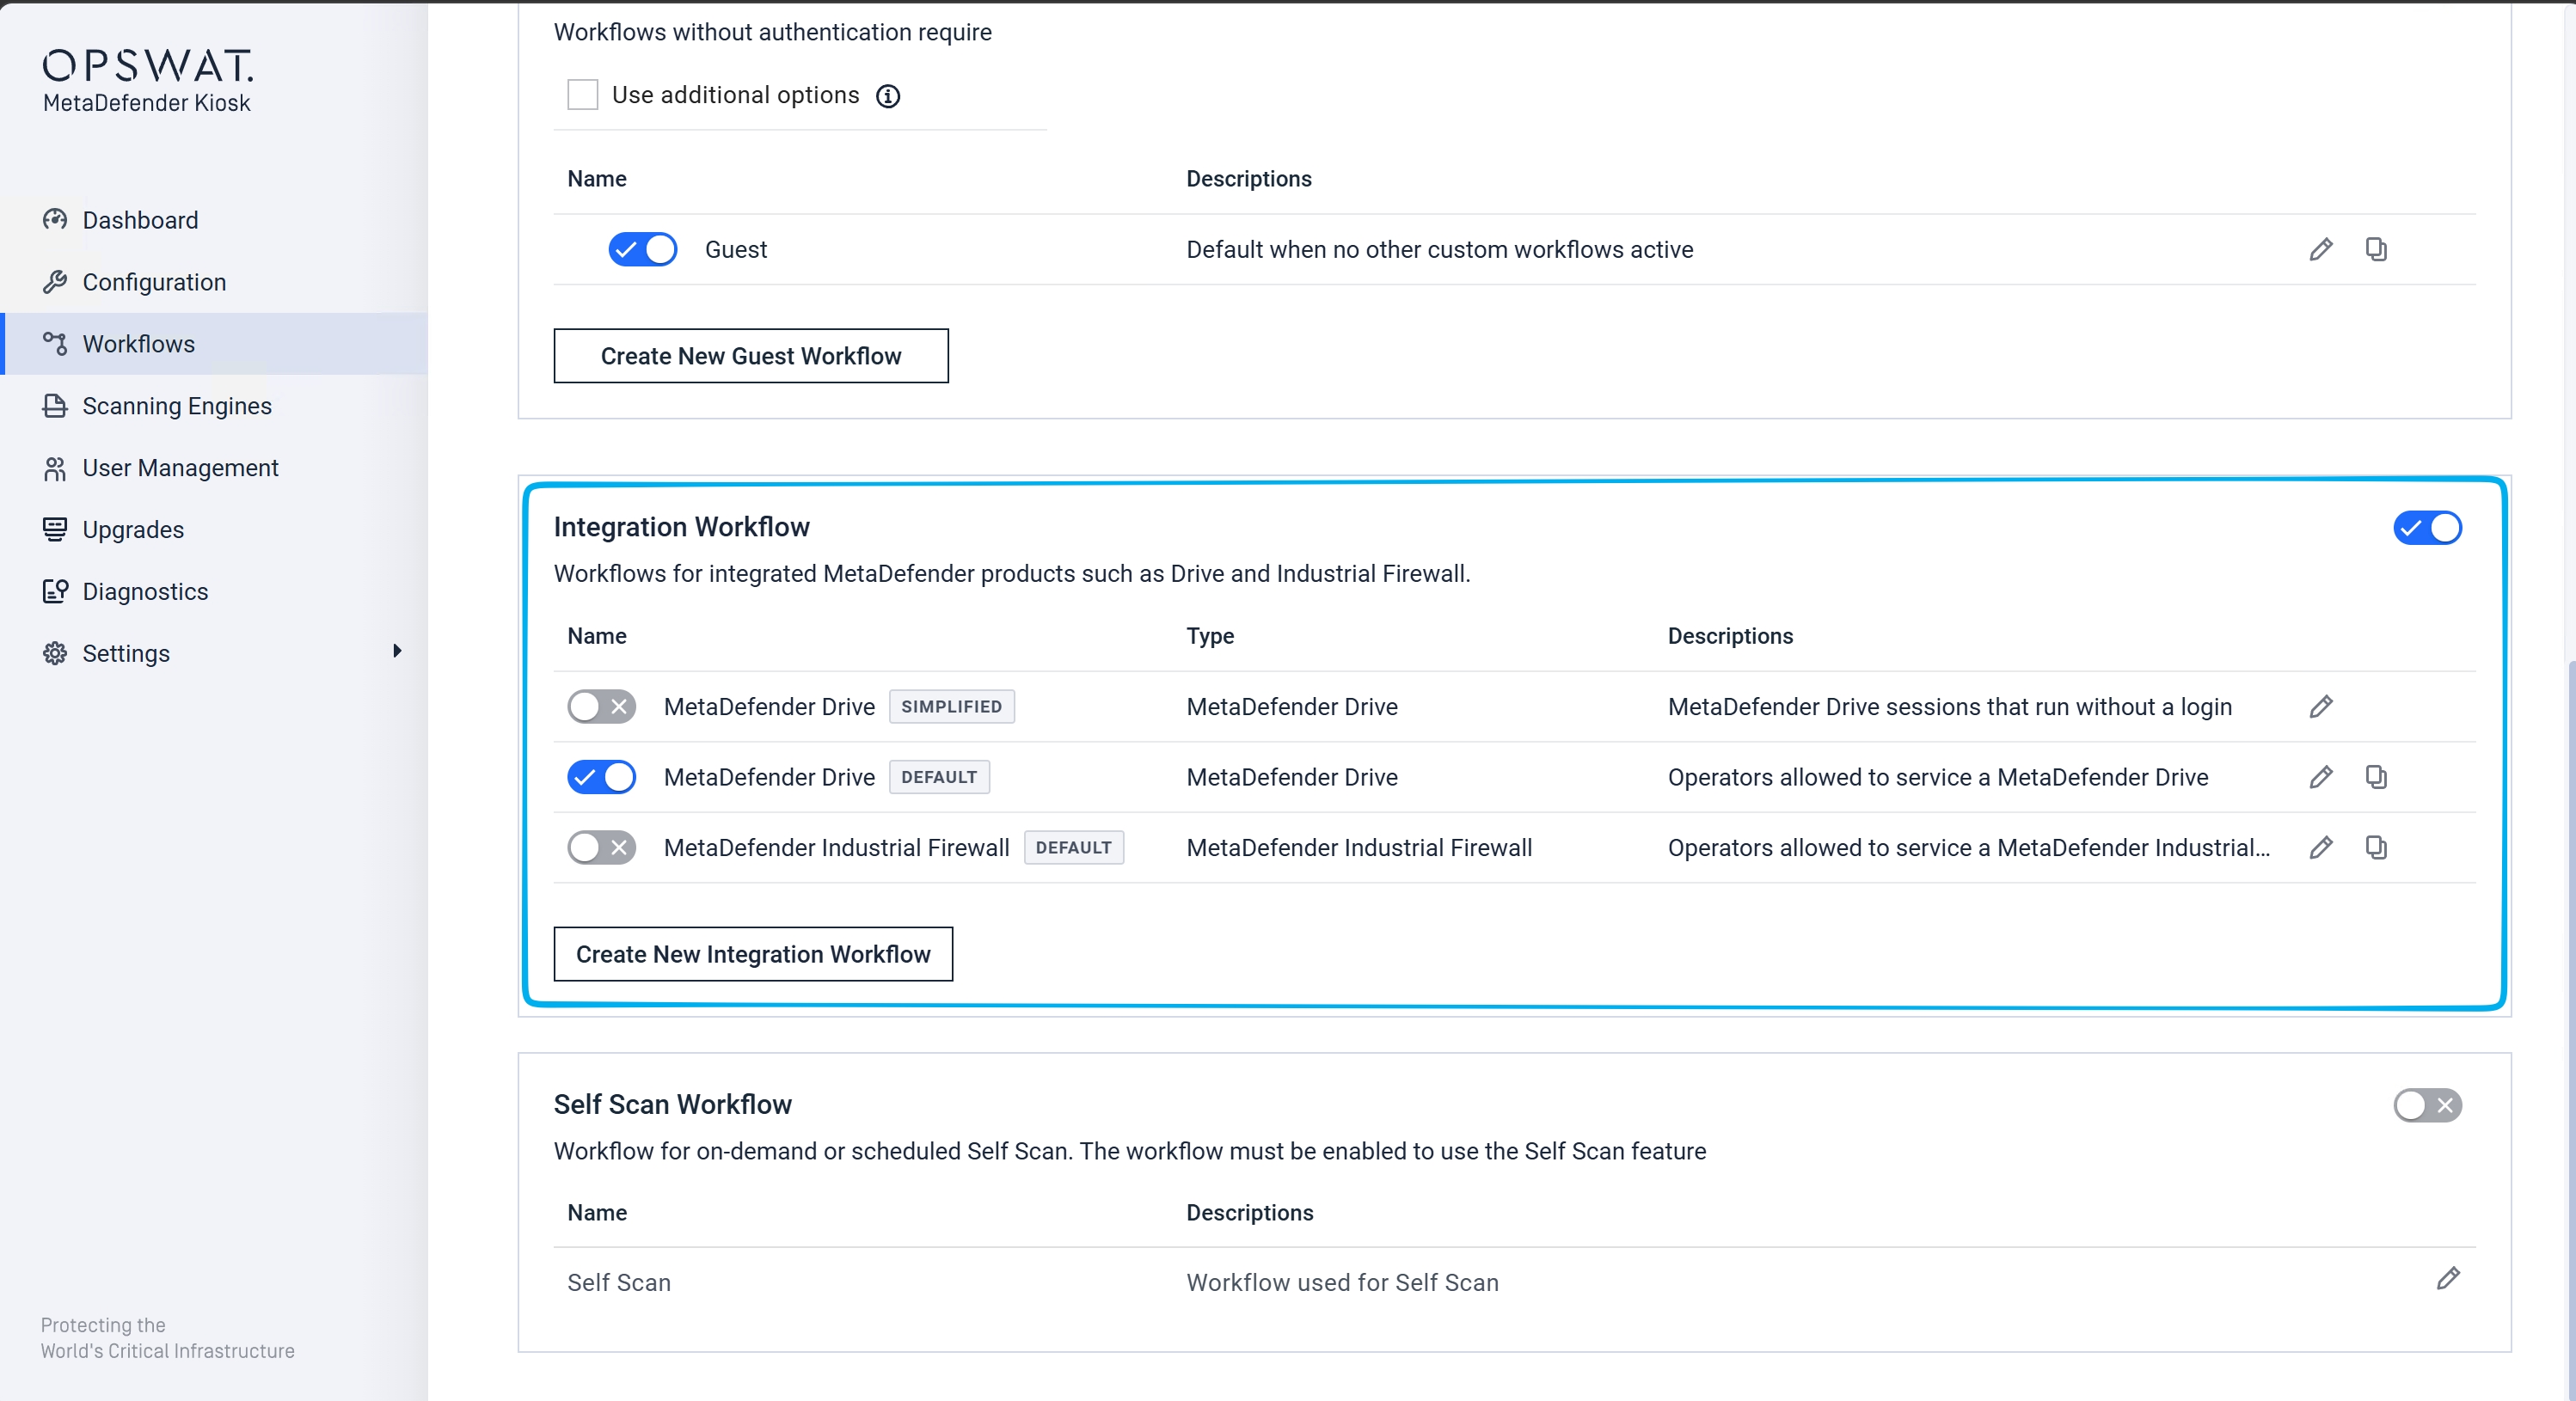
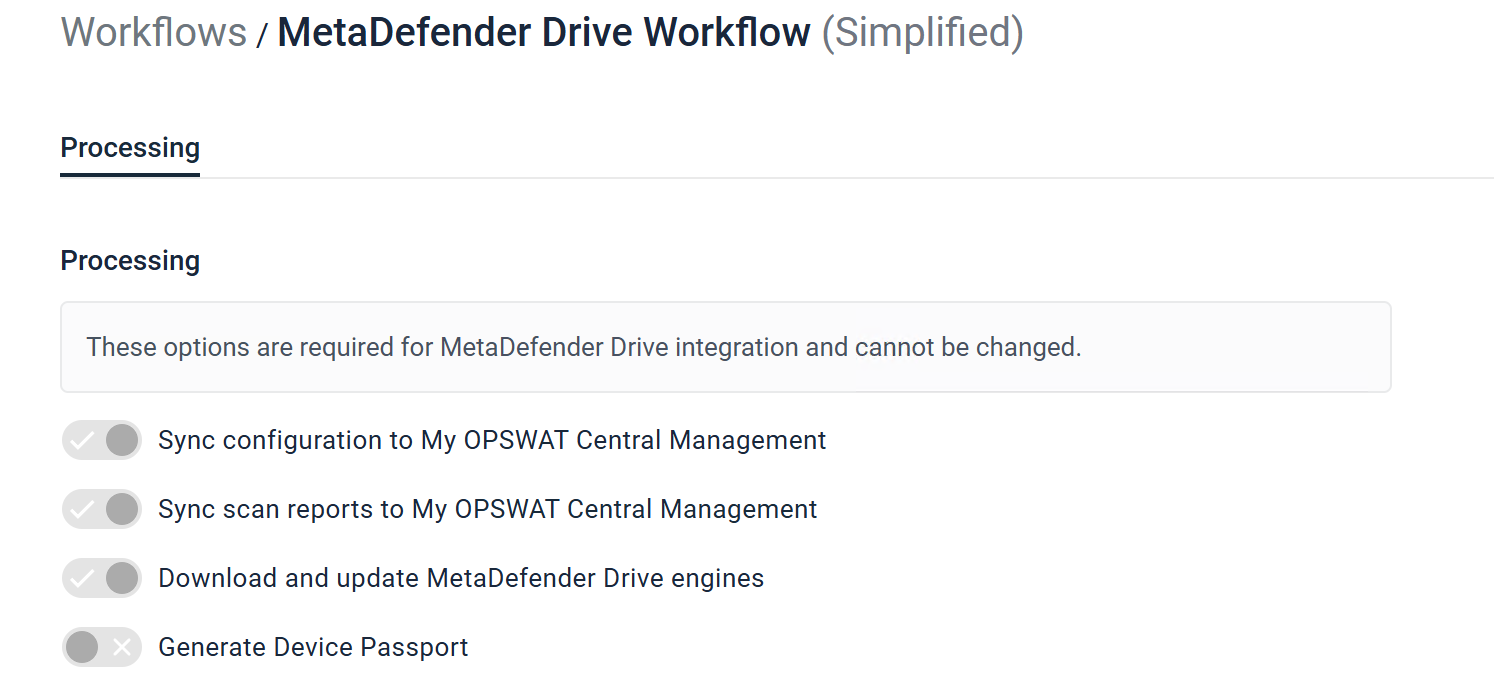
Switch MetaDefender Drive SIMPLIFIED ON to simply use the default options without generating the passport.
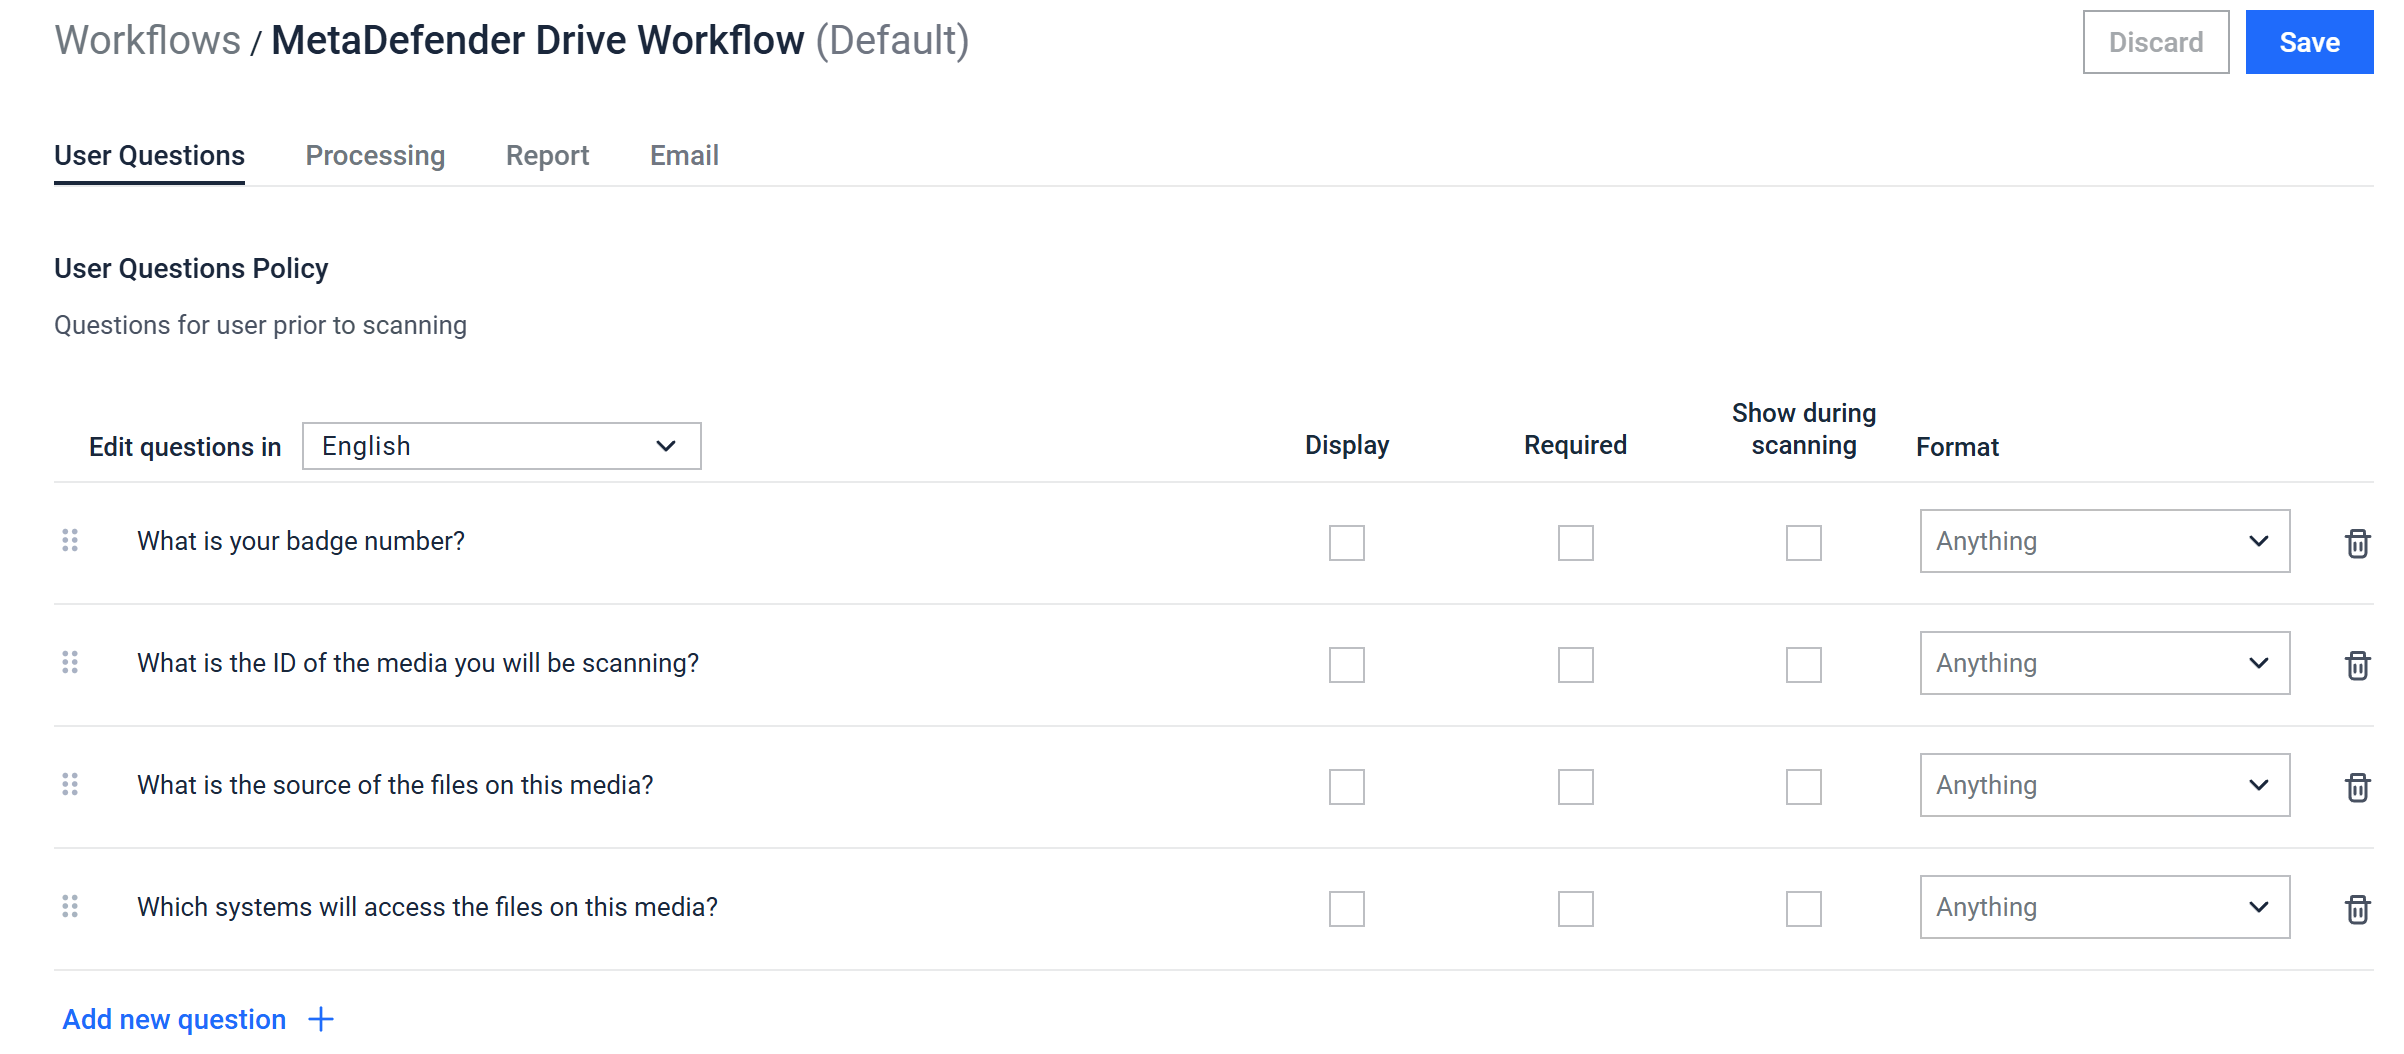
Switch Metadefender Drive DEFAULT ON to start custom it with options like with other Kiosk workflows and more specific settings for Drive Kiosk integrations.
User Questions:
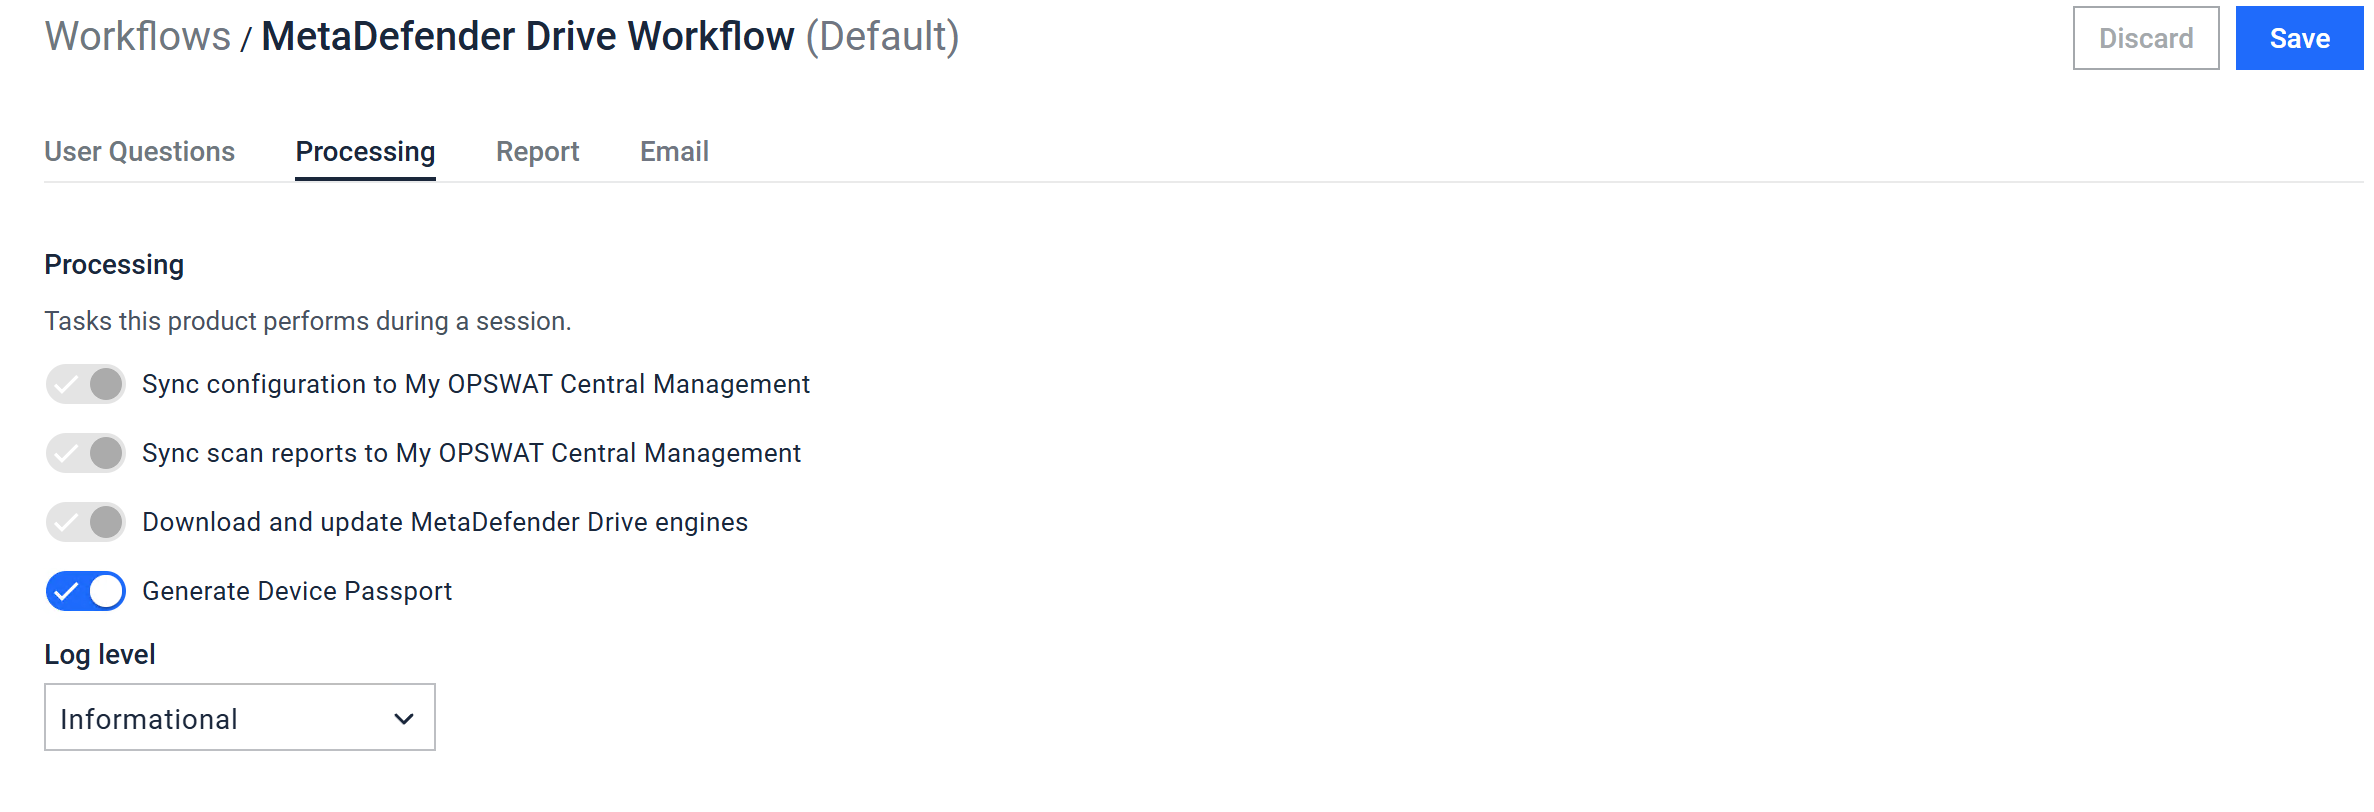
Processing Configurations:
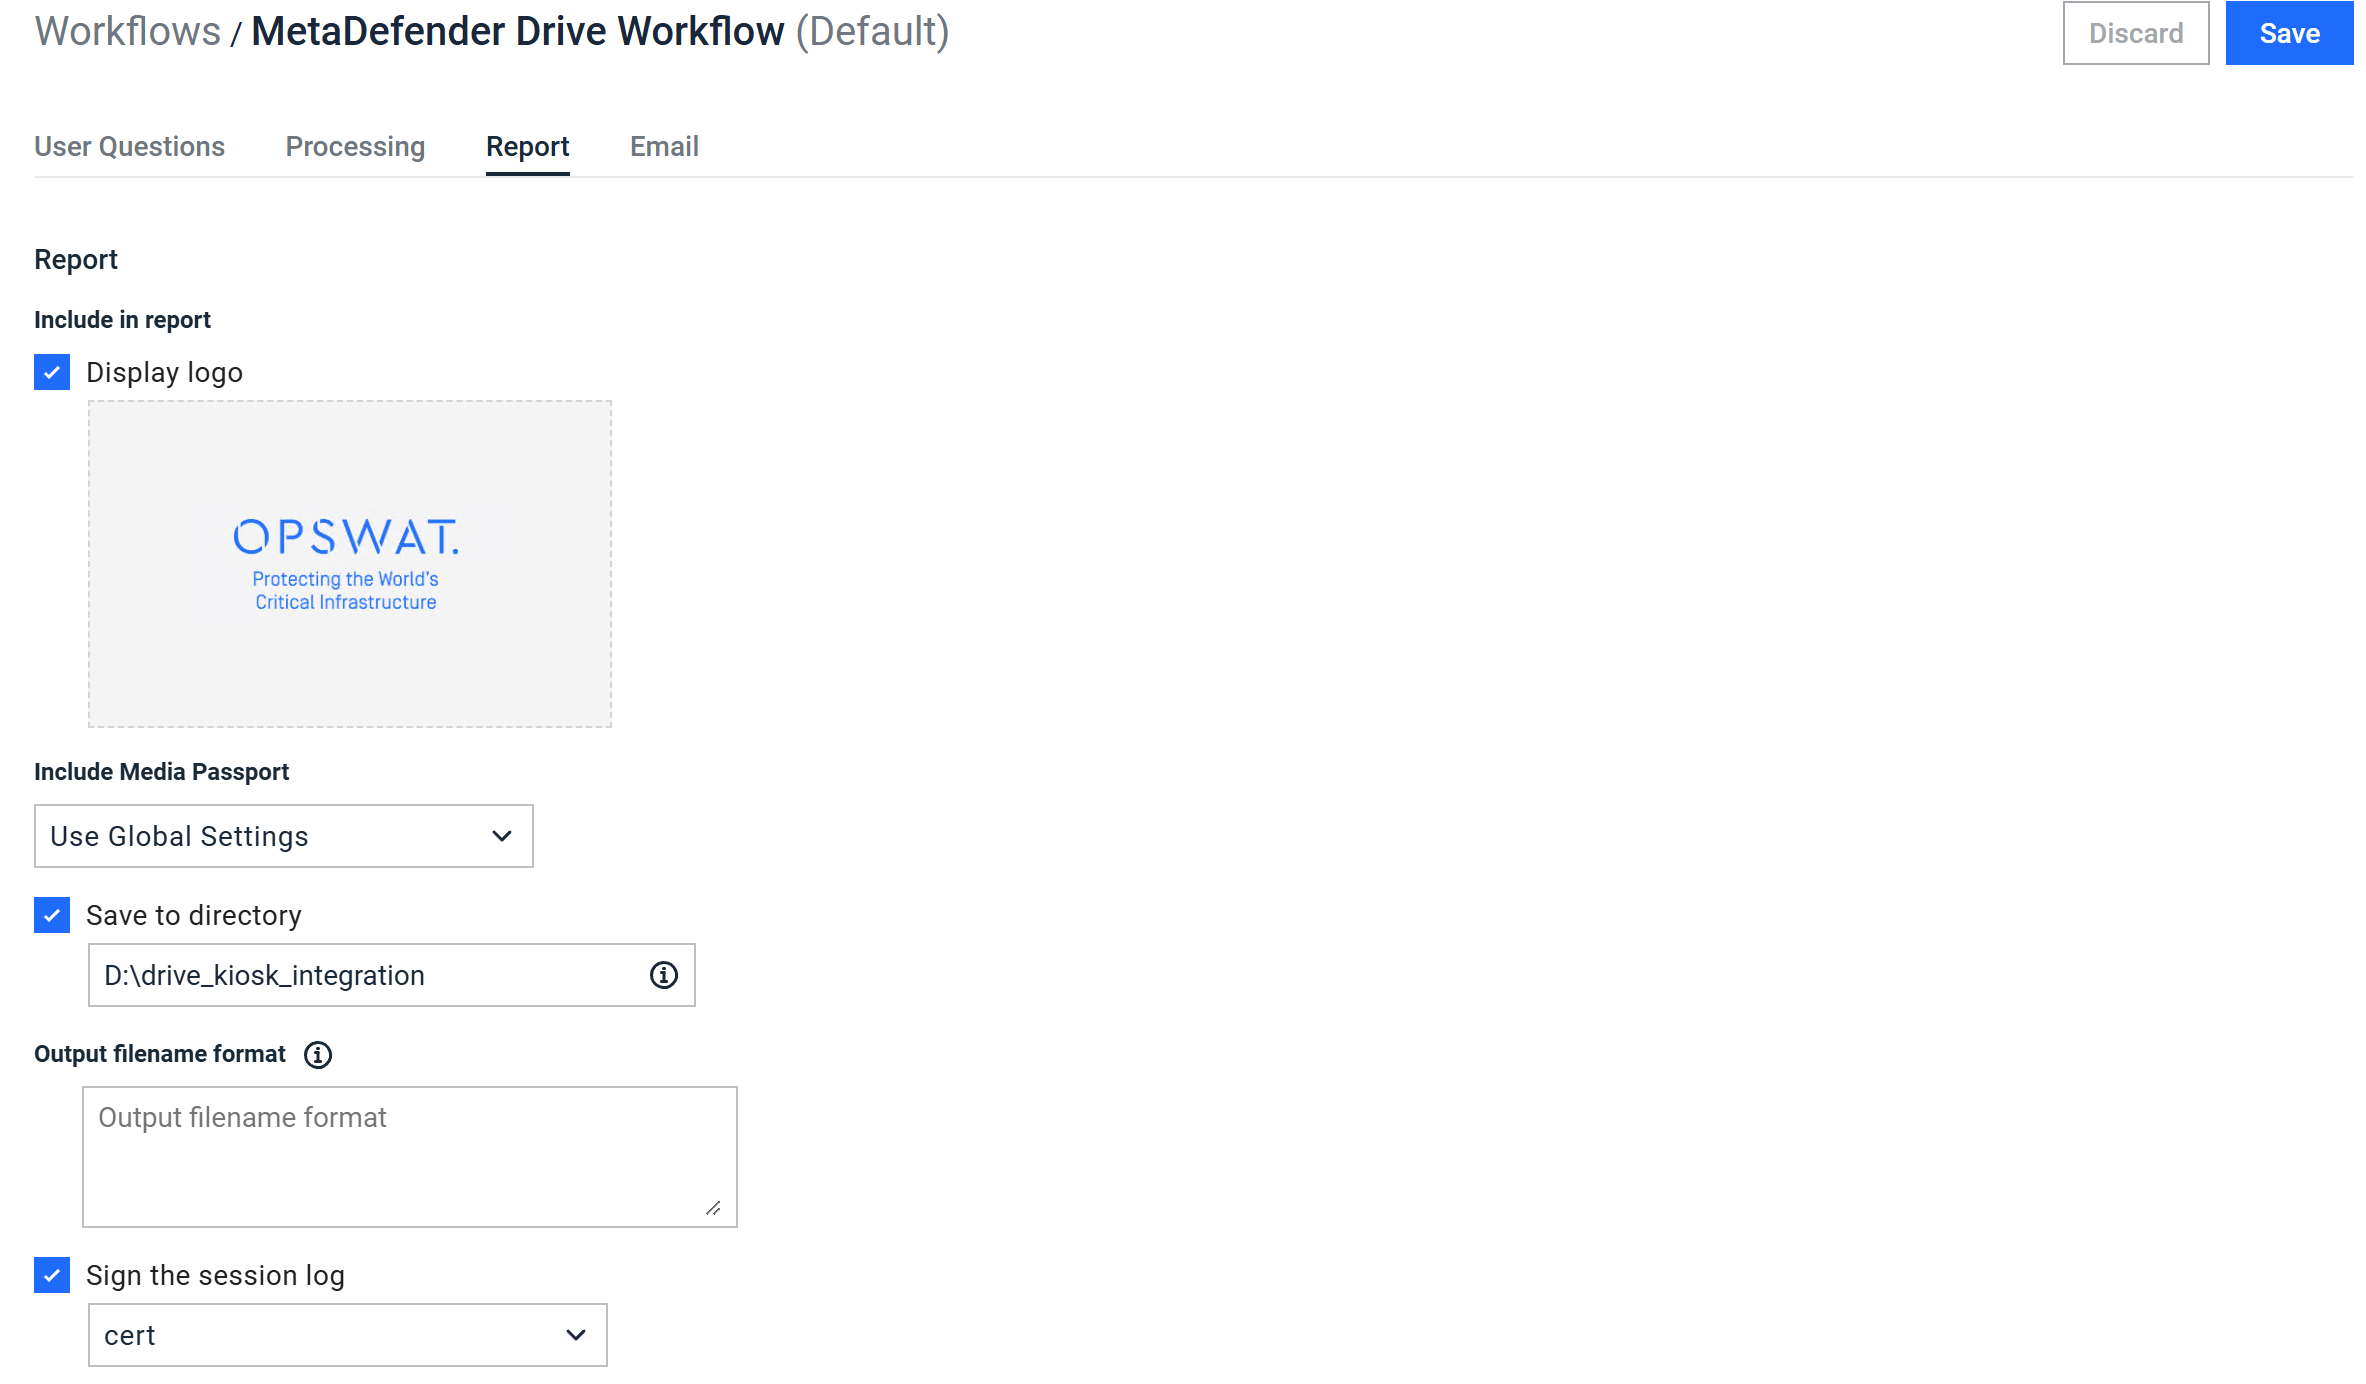
Report Configurations:
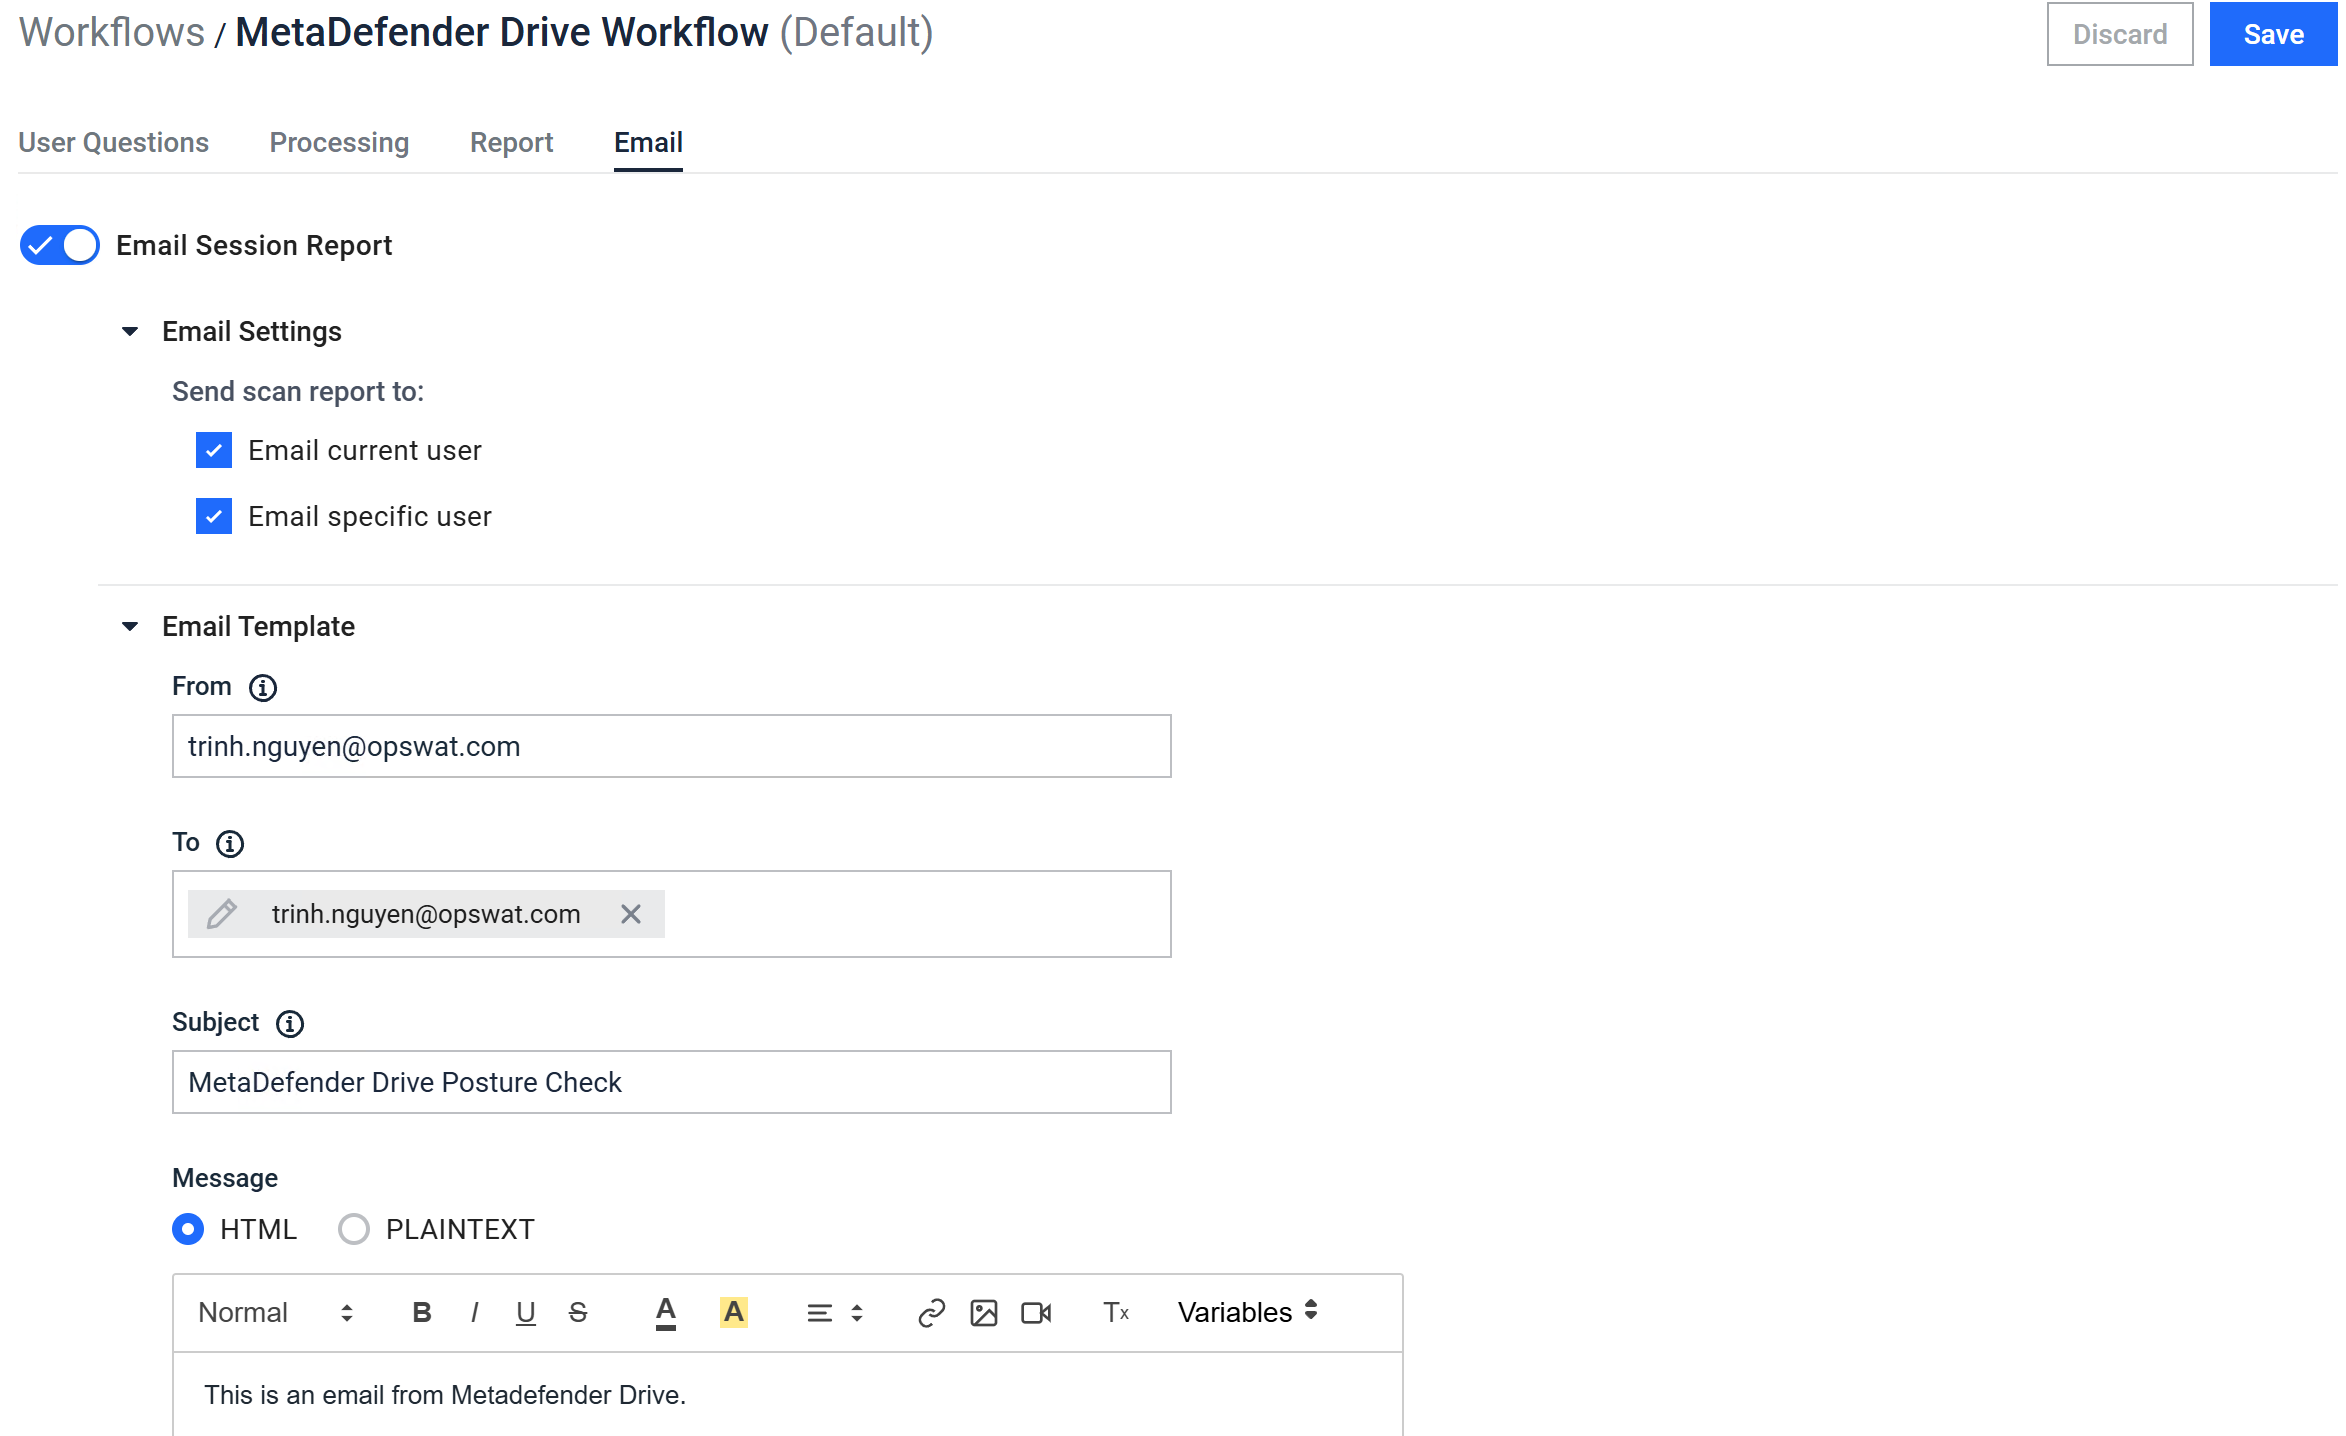
Email Configurations:
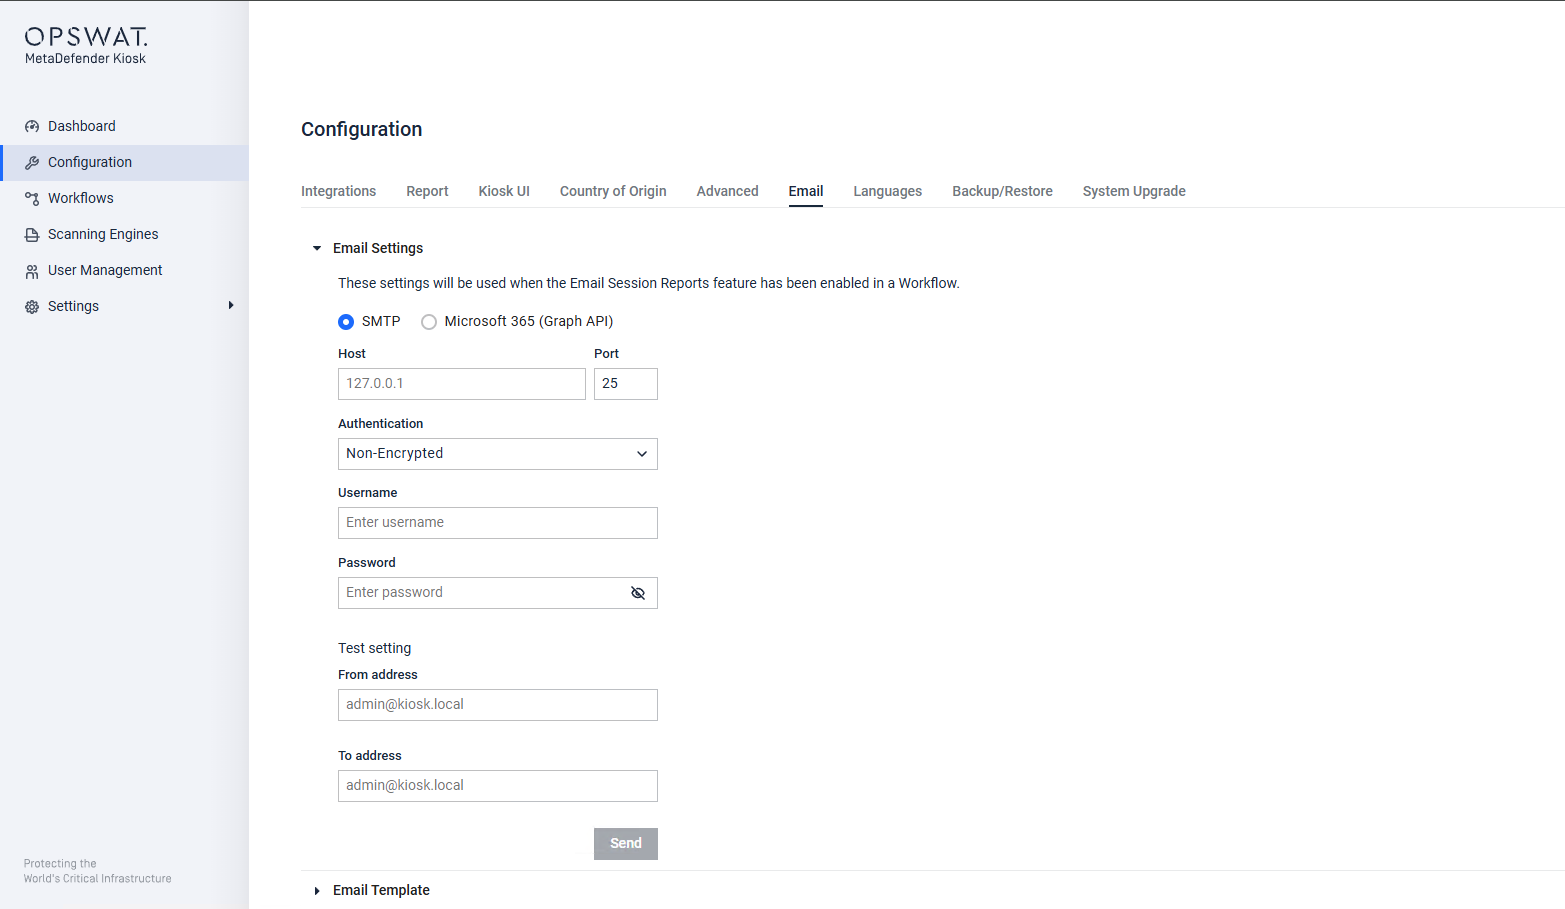
Configure SMTP / Microsoft 365 for sending emails
Go to Configuration > Email > Email Settings. Pick SMTP or Microsoft 365 (Graph API), fill in host / port / authentication, then use Test setting to verify before going live.
End-user workflow at the Kiosk
If the inserted device is a Smart Touch, on the Smart Touch screen user will see this
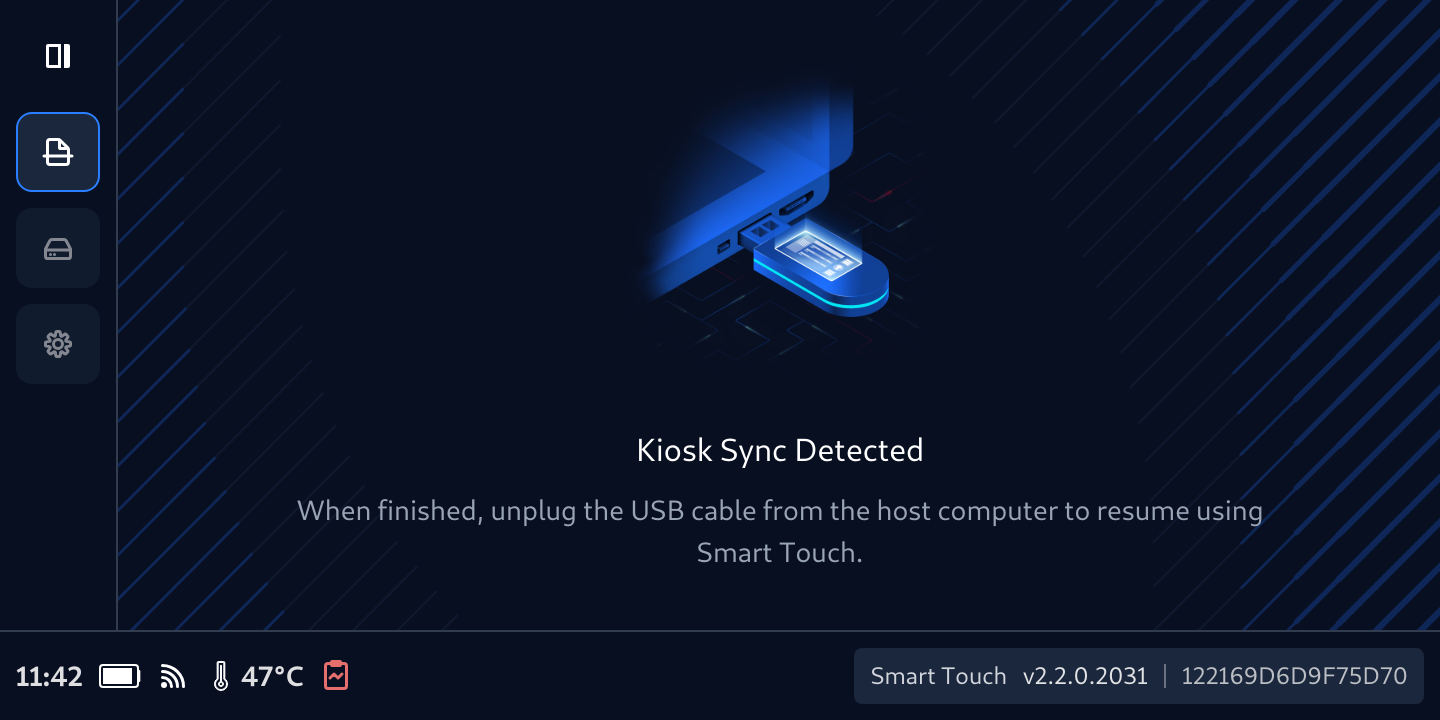
Depending on the Selected Workflow, user will be prompt for login or not

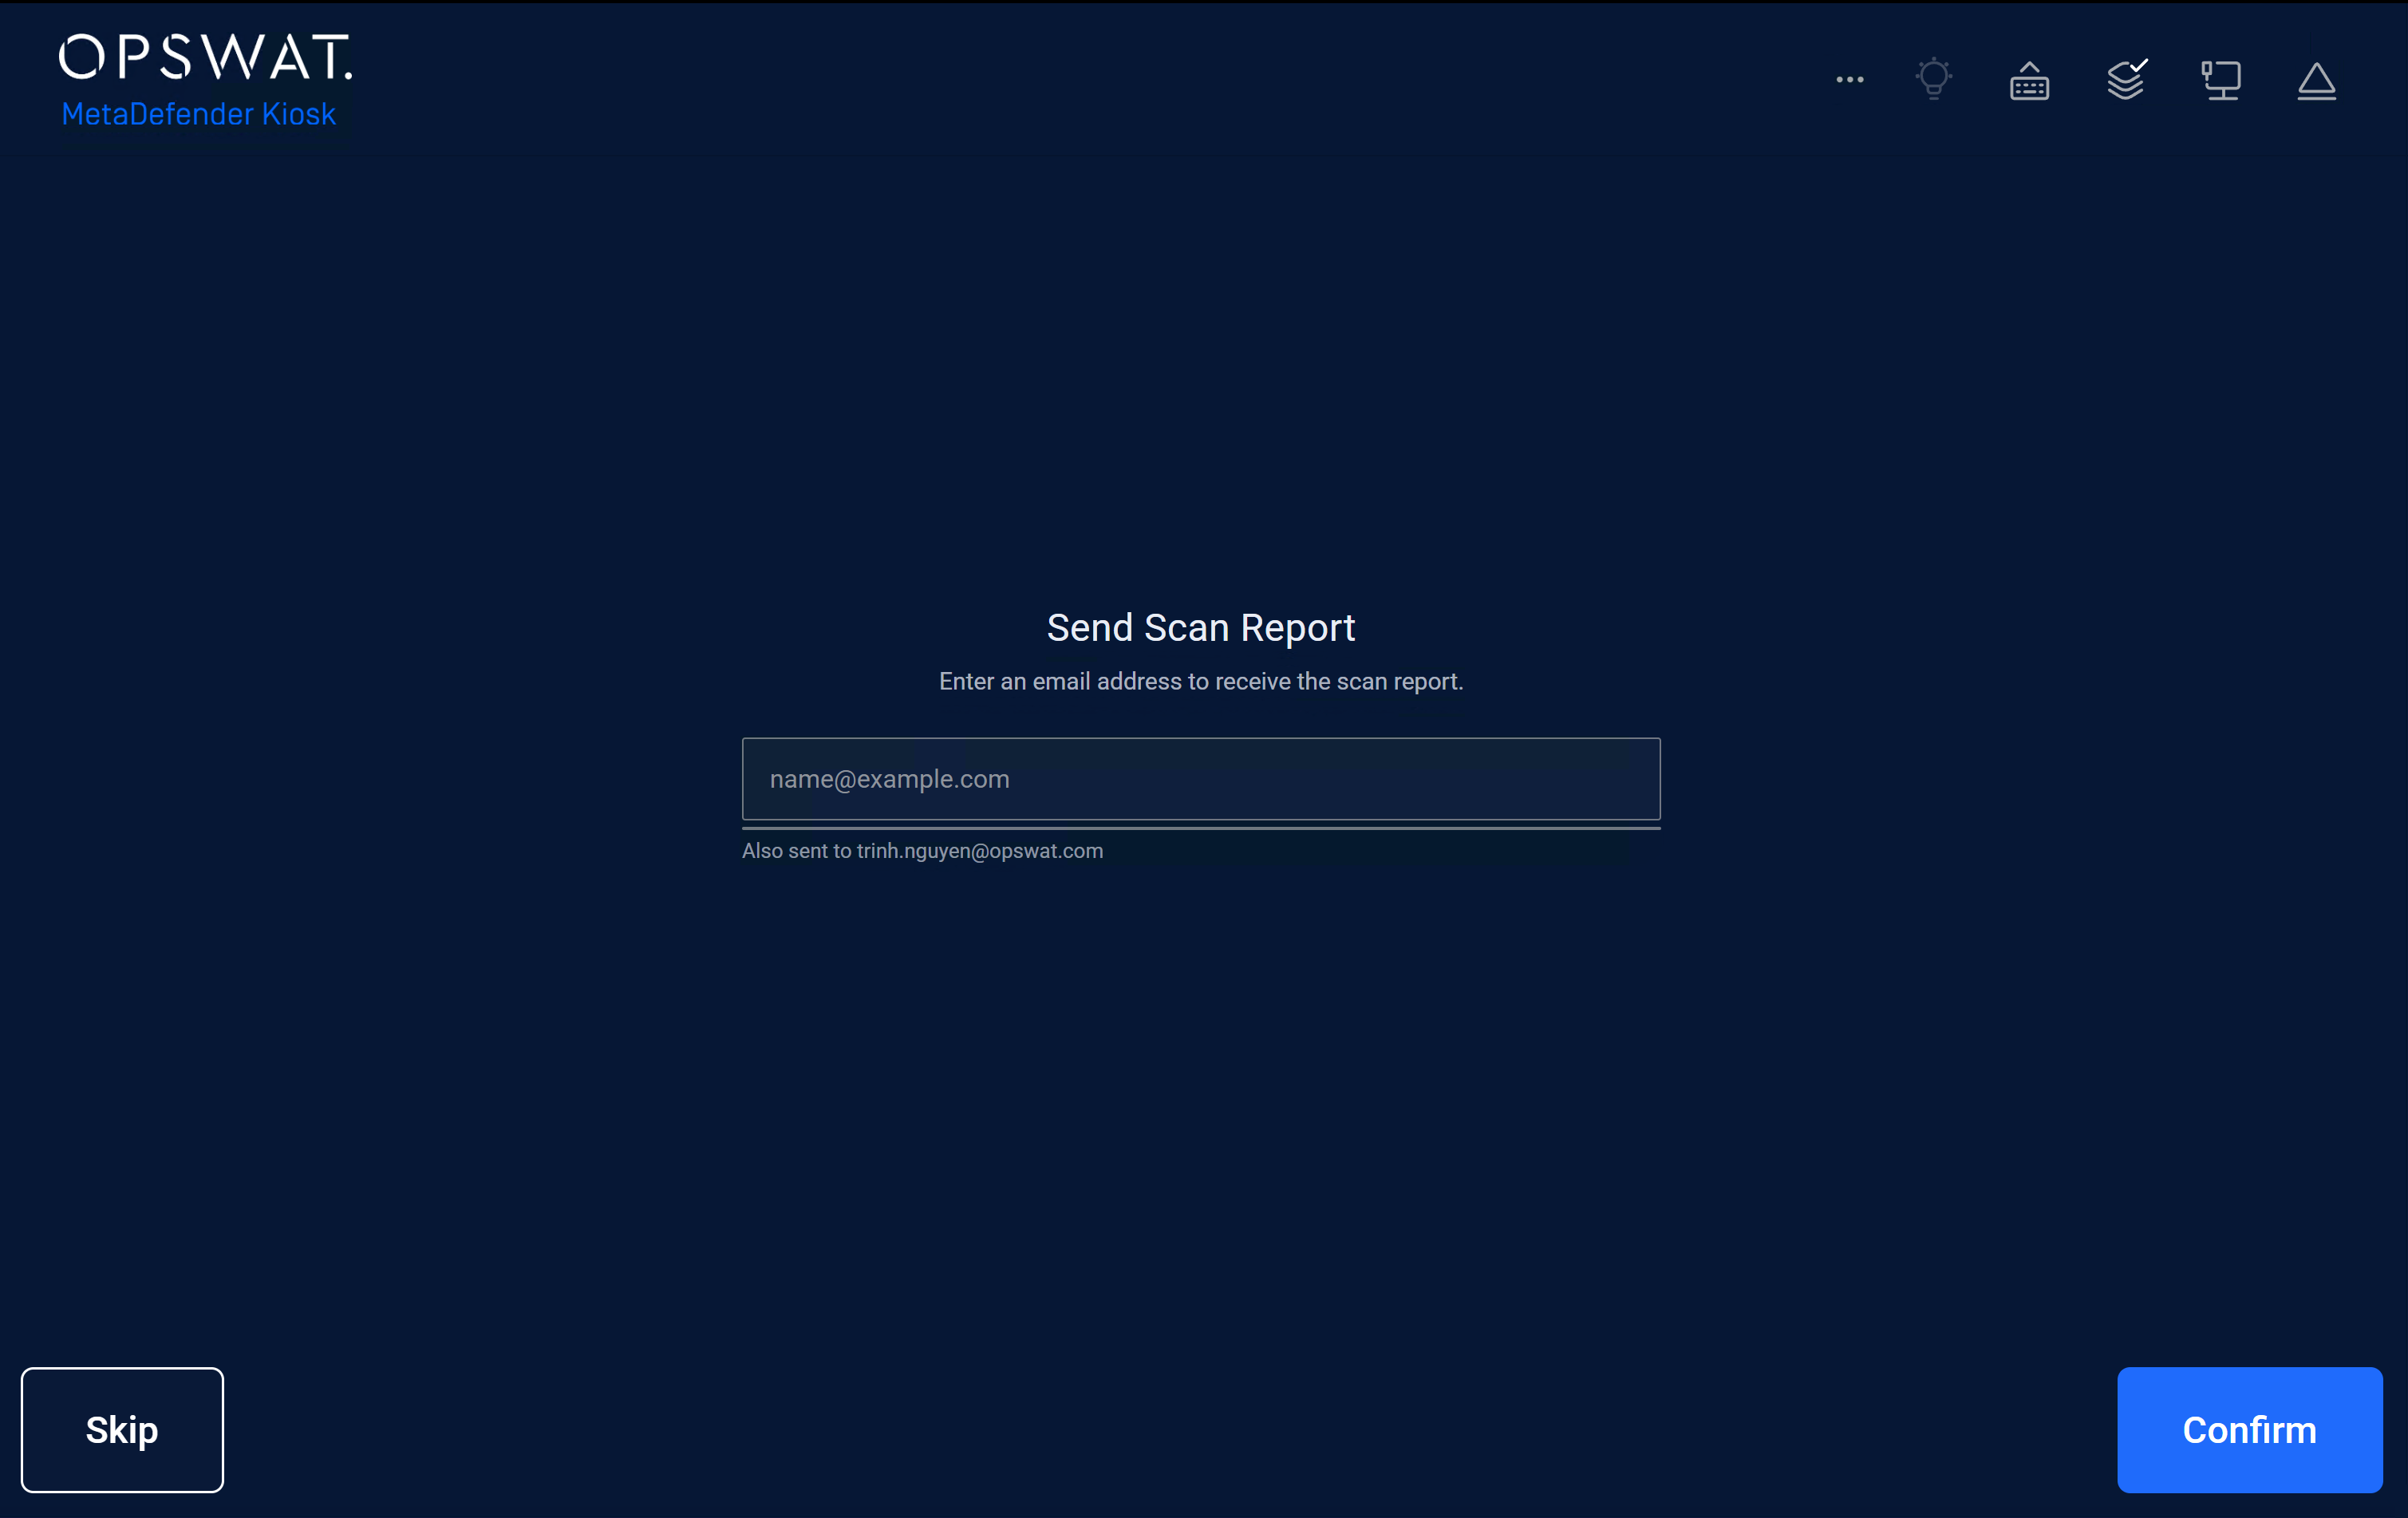
Enter email to receive the scan report
The Kiosk prompts Send Scan Report. The user enters an email address.
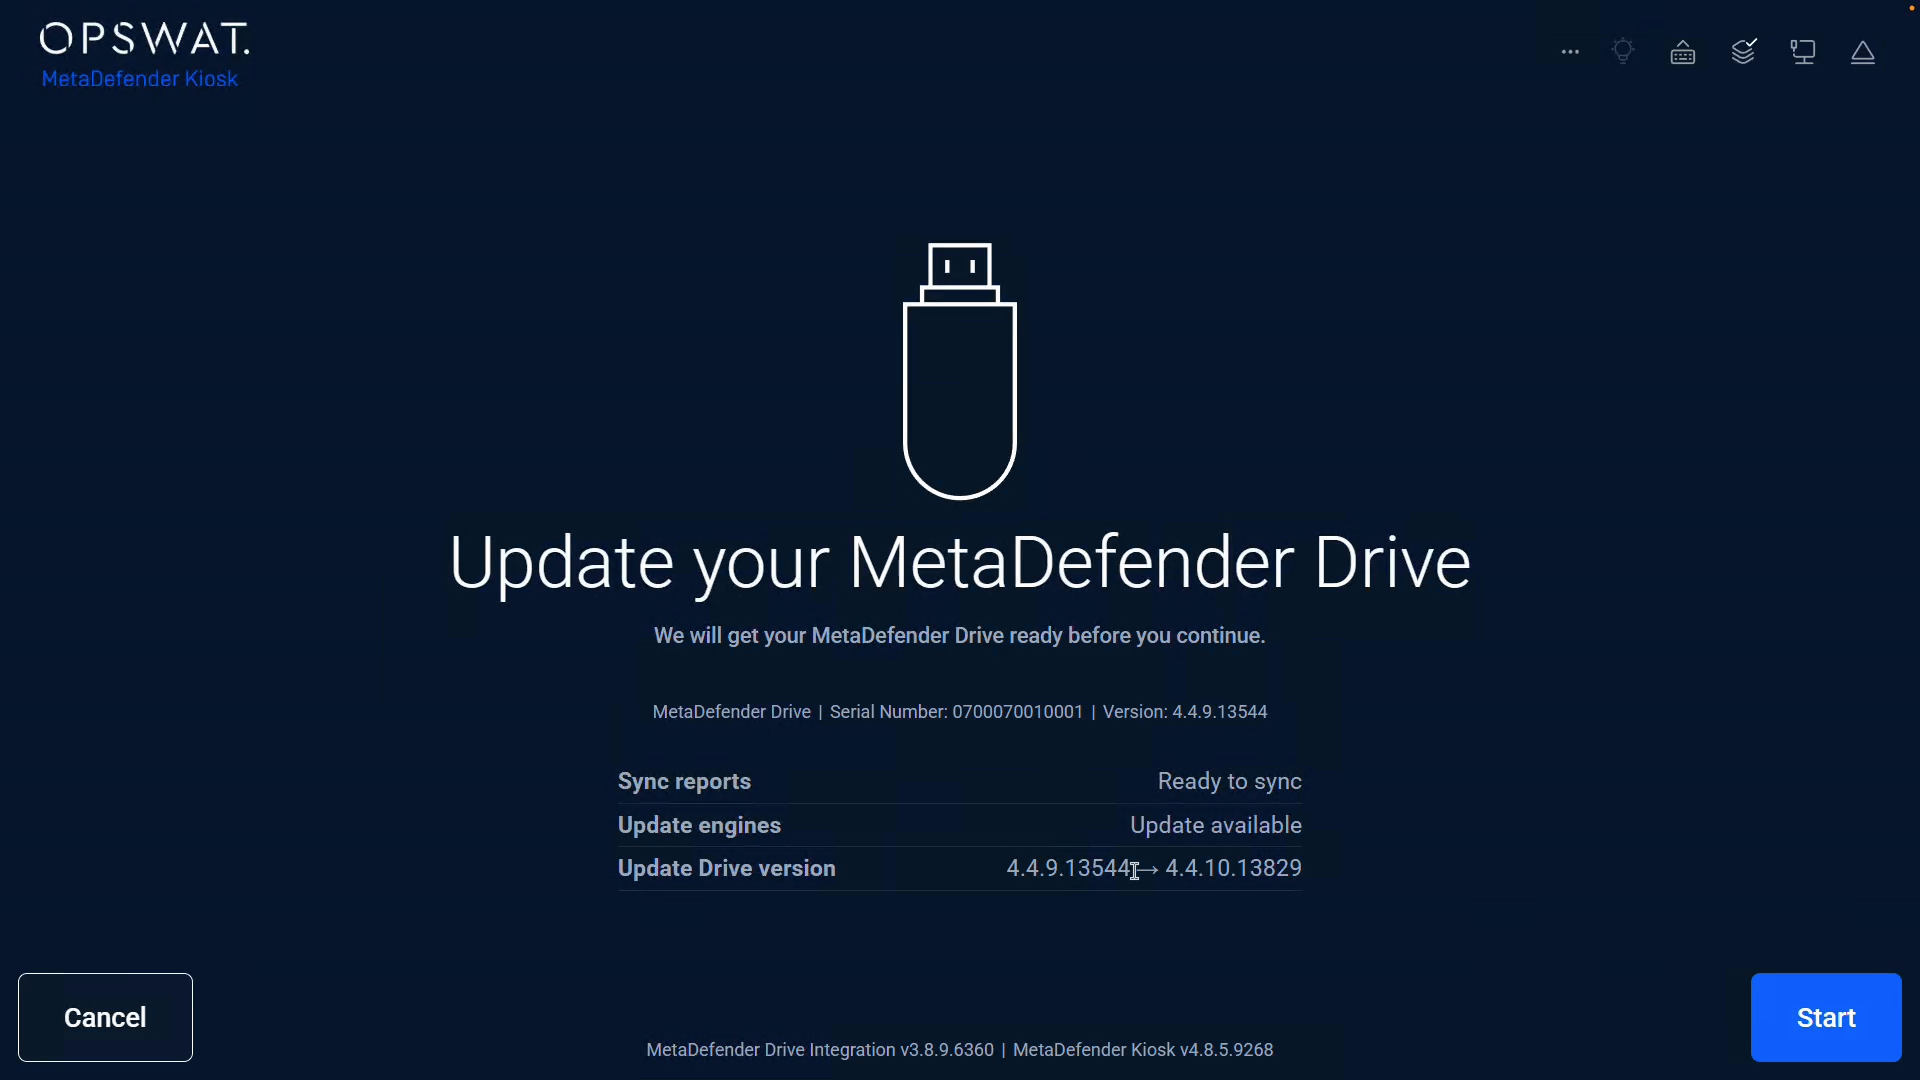
Drive detected — start sync
The Kiosk recognizes the MetaDefender Drive (Serial Number + Version shown) and offers: Syncing Reports, Update Engines, Upgrade Drive version. User clicks START.
Sync and update progress
The Kiosk runs each action in sequence with live progress until Finish.
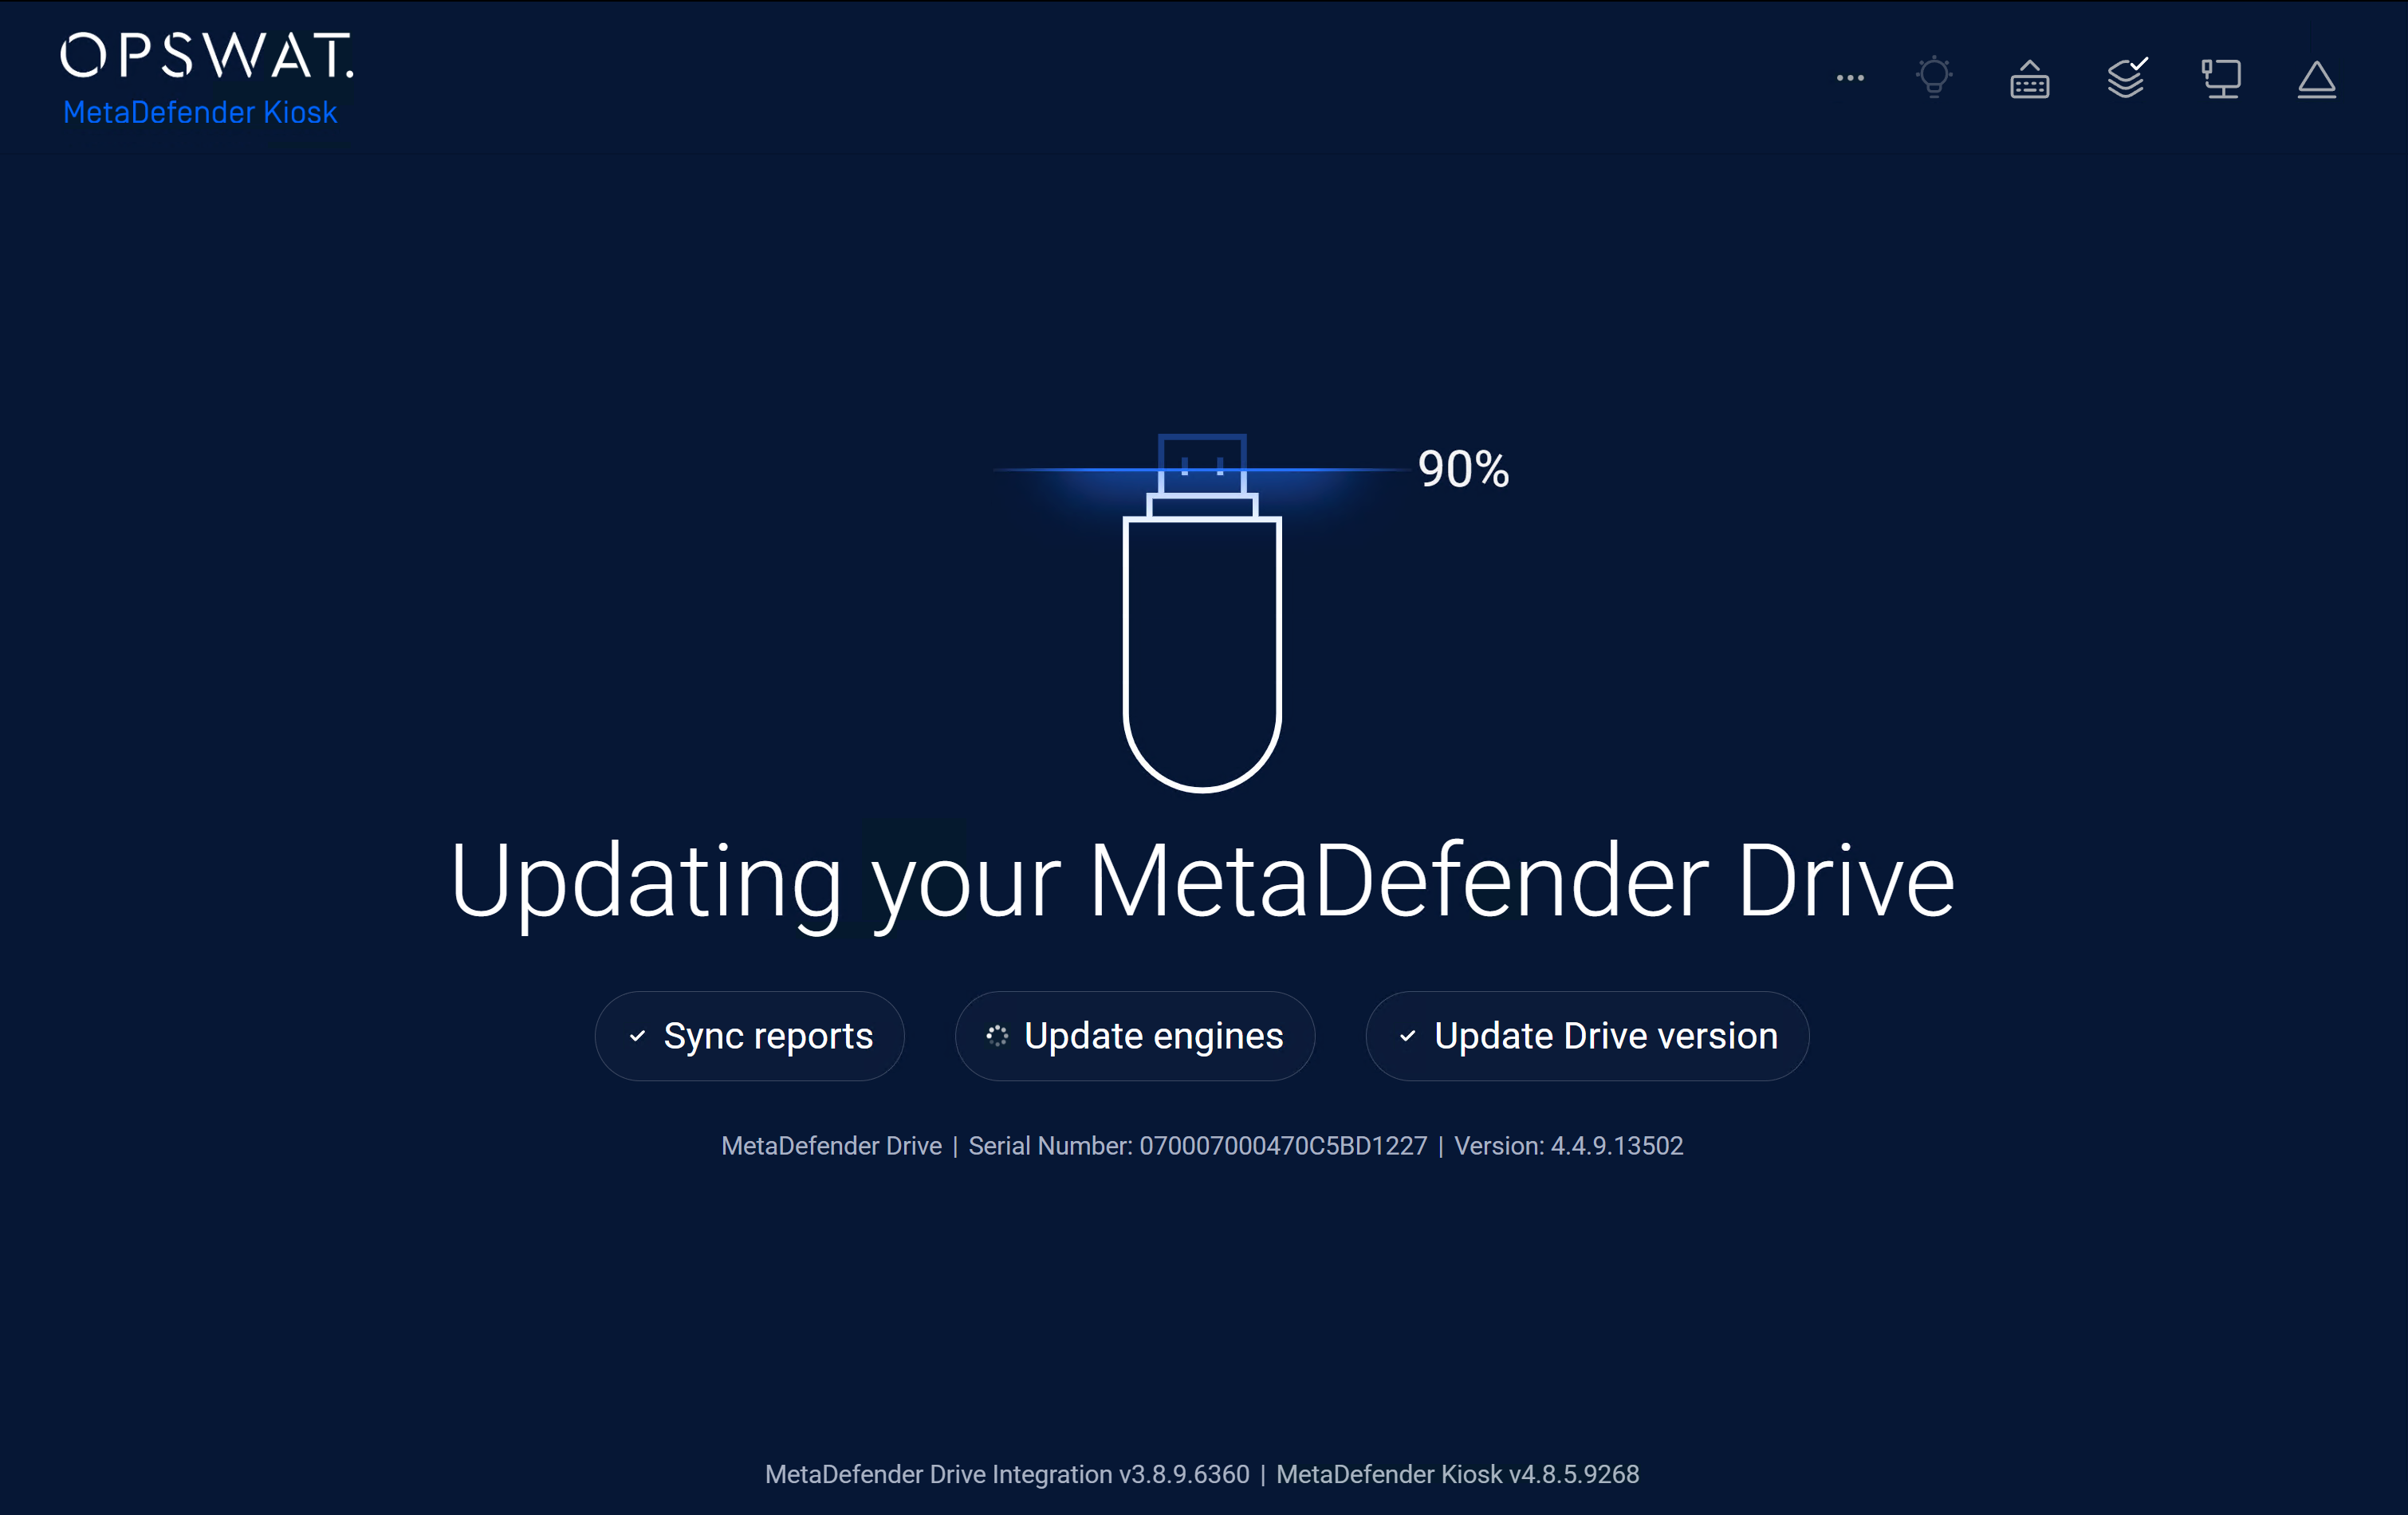
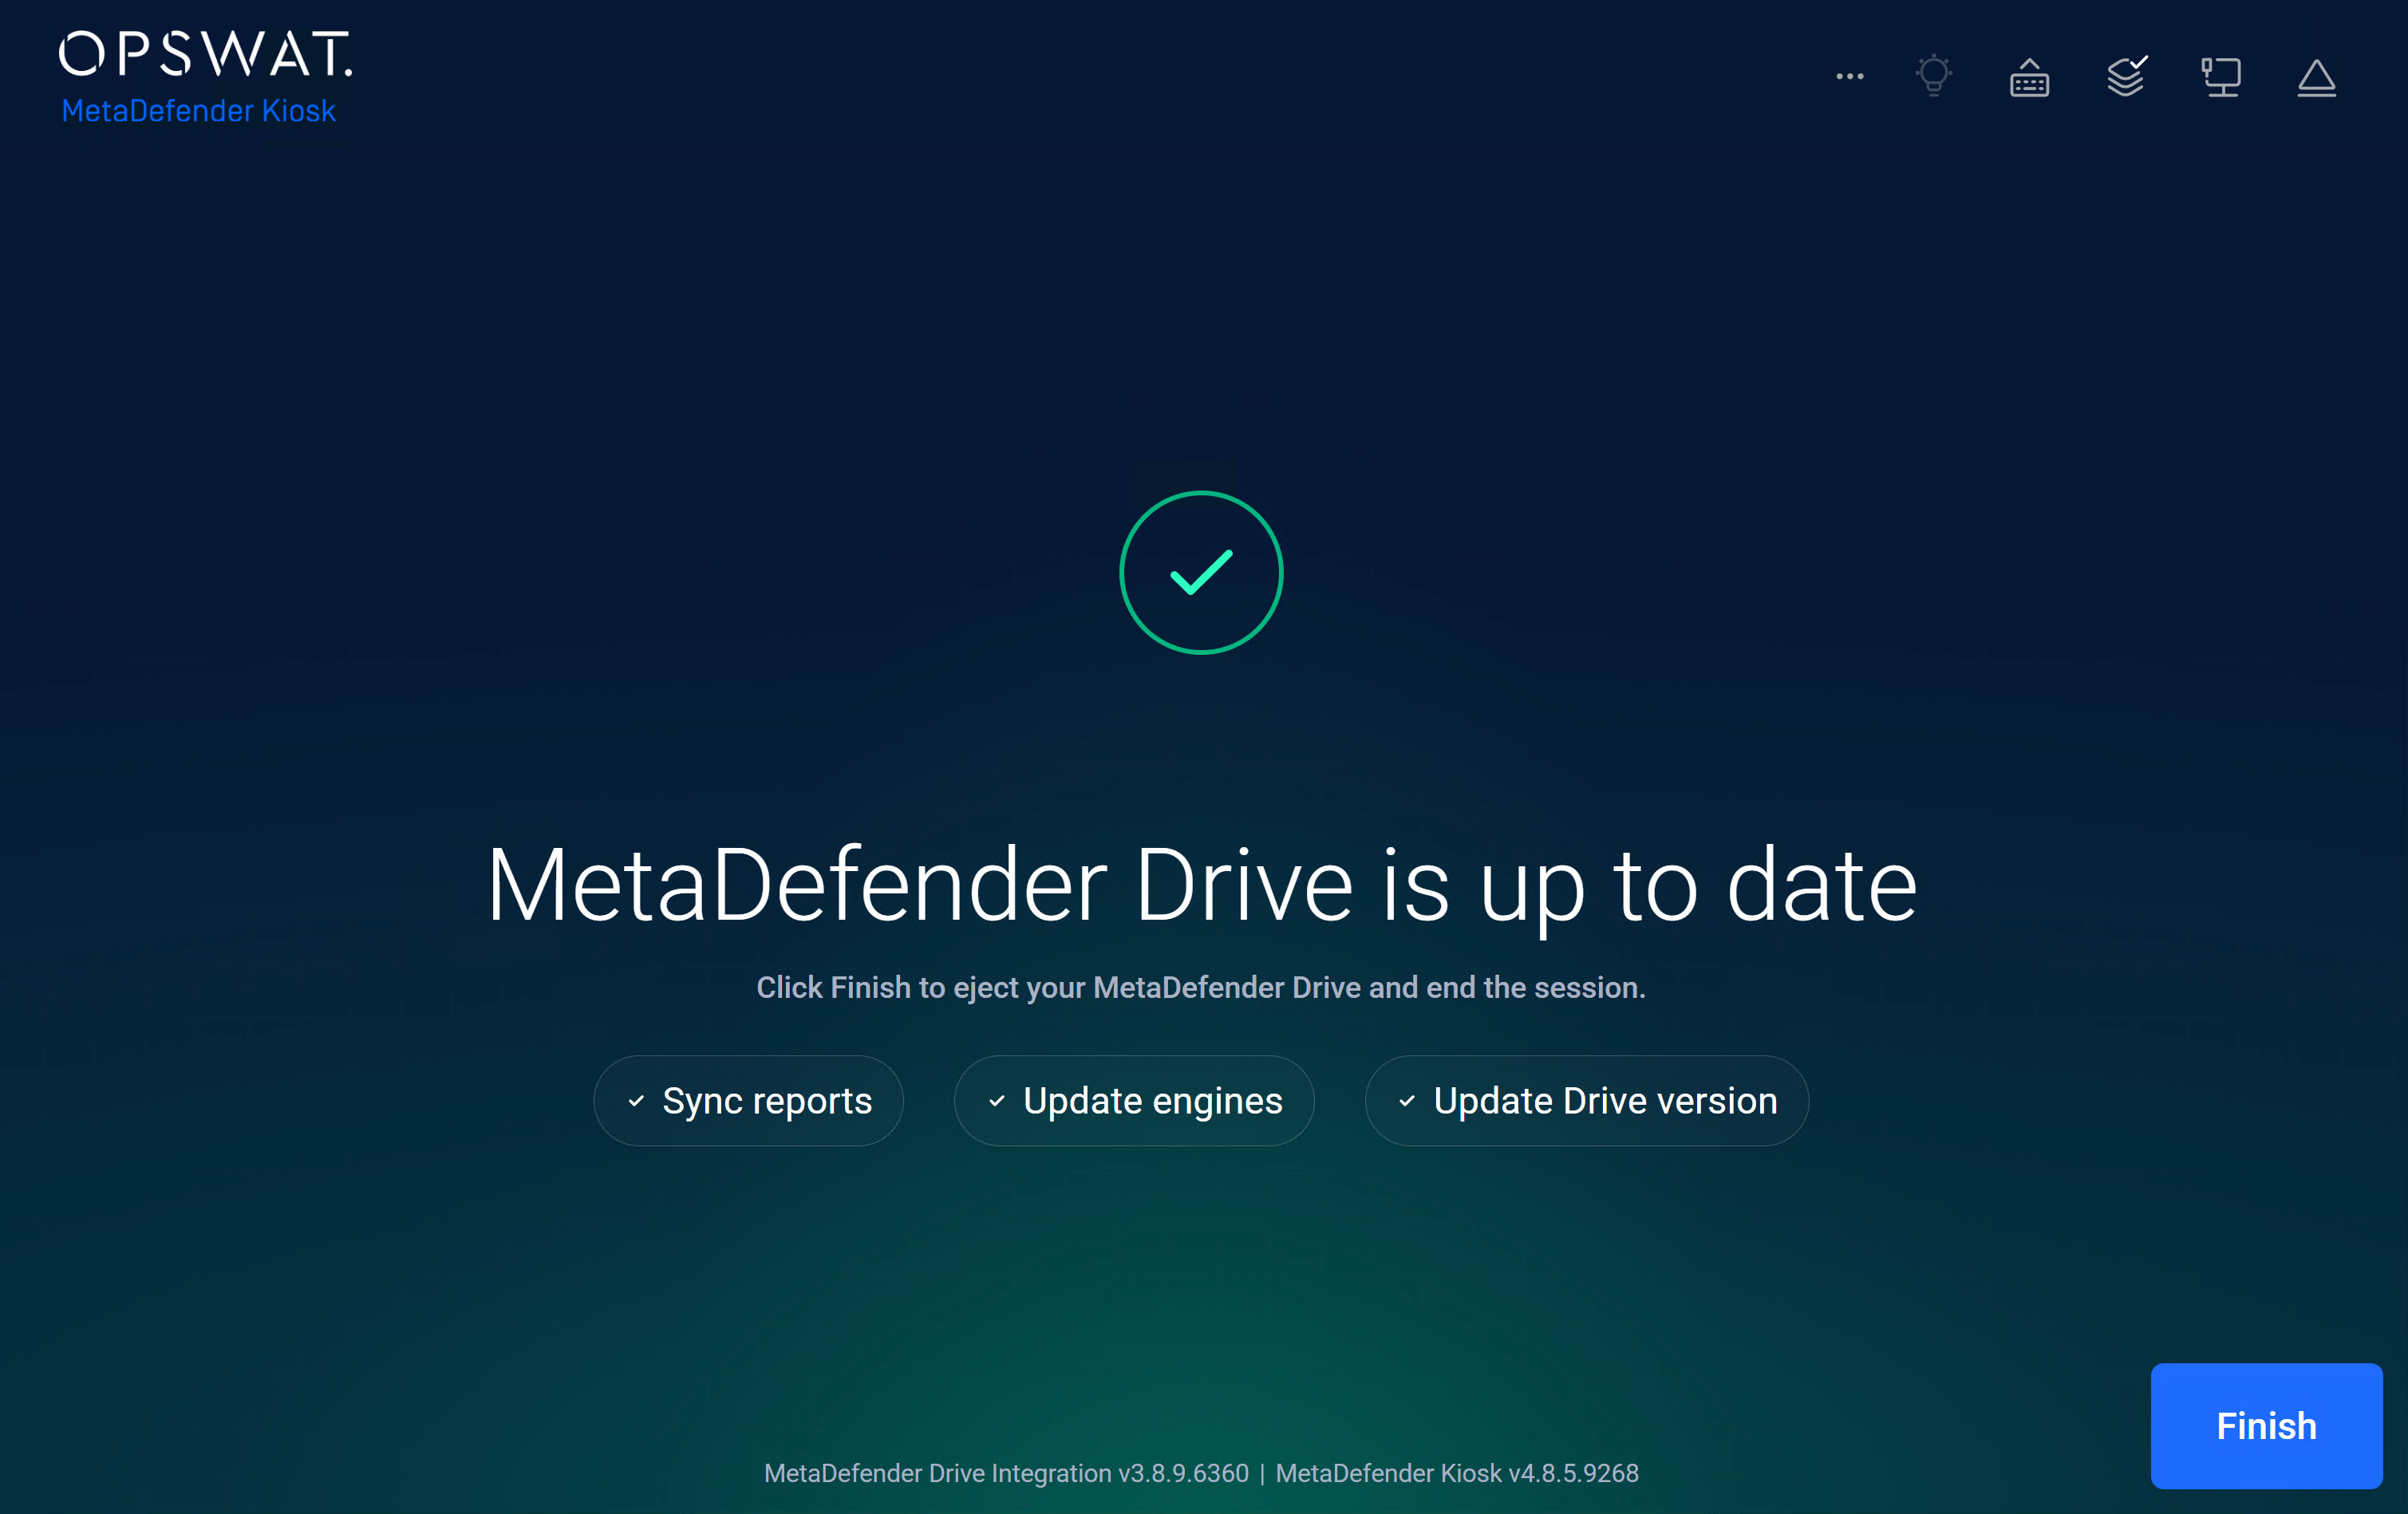
Please notice that engines have been copied from MetaDefender Drive to the MetaDefender Drives and be only fully installed and become fully functional with the next boot.
Email delivered to the user
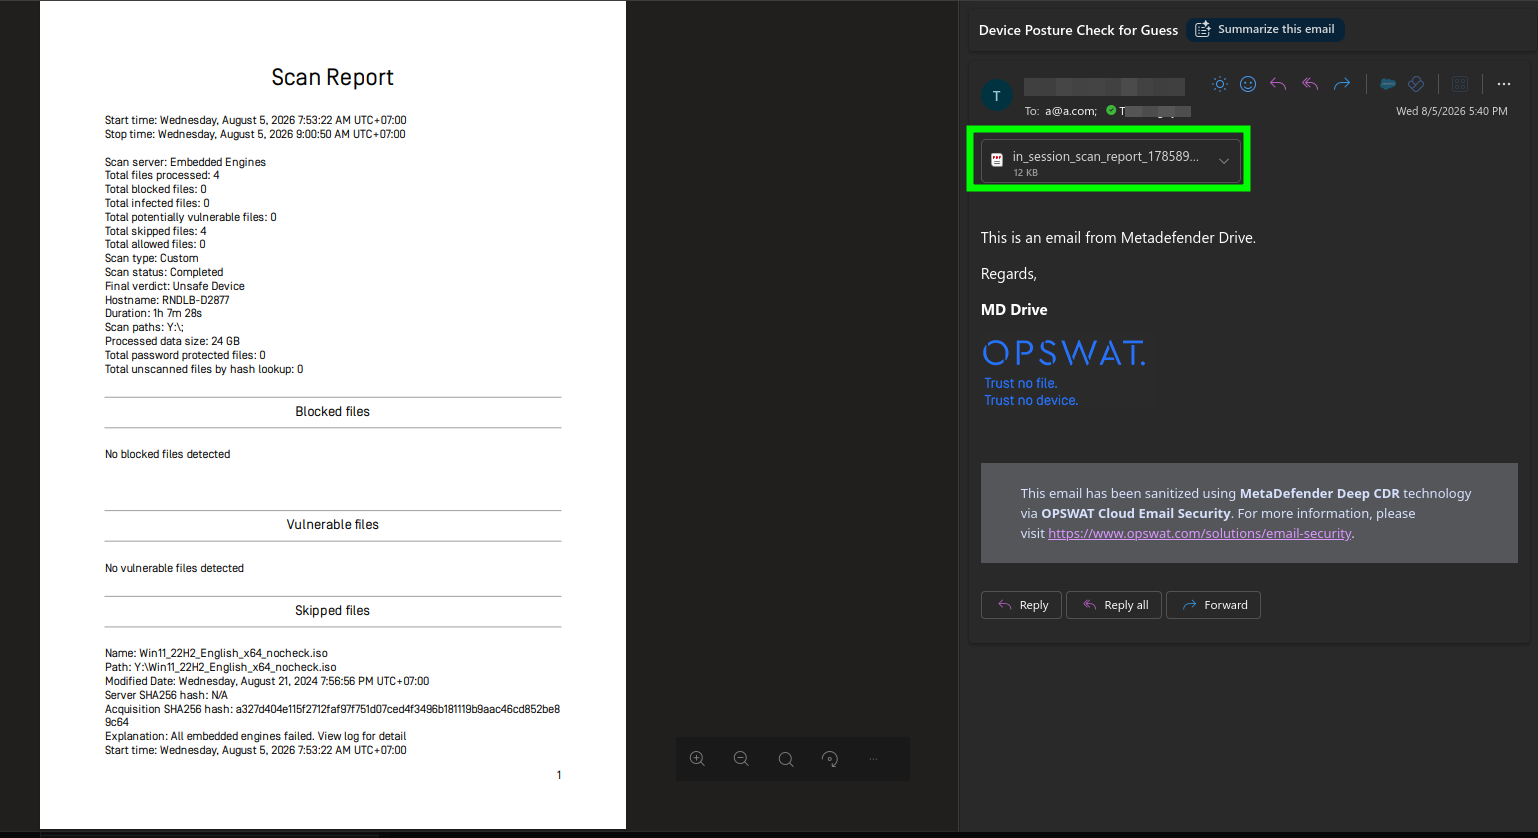
If SMTP server and the workflow have been configured properly, after the session, emails will be sent to the designated mailbox with relevant email titles for each scan, both In-Session and Bare Metal scan
In-Session Scan Email:
Bare Metal Scan Email:
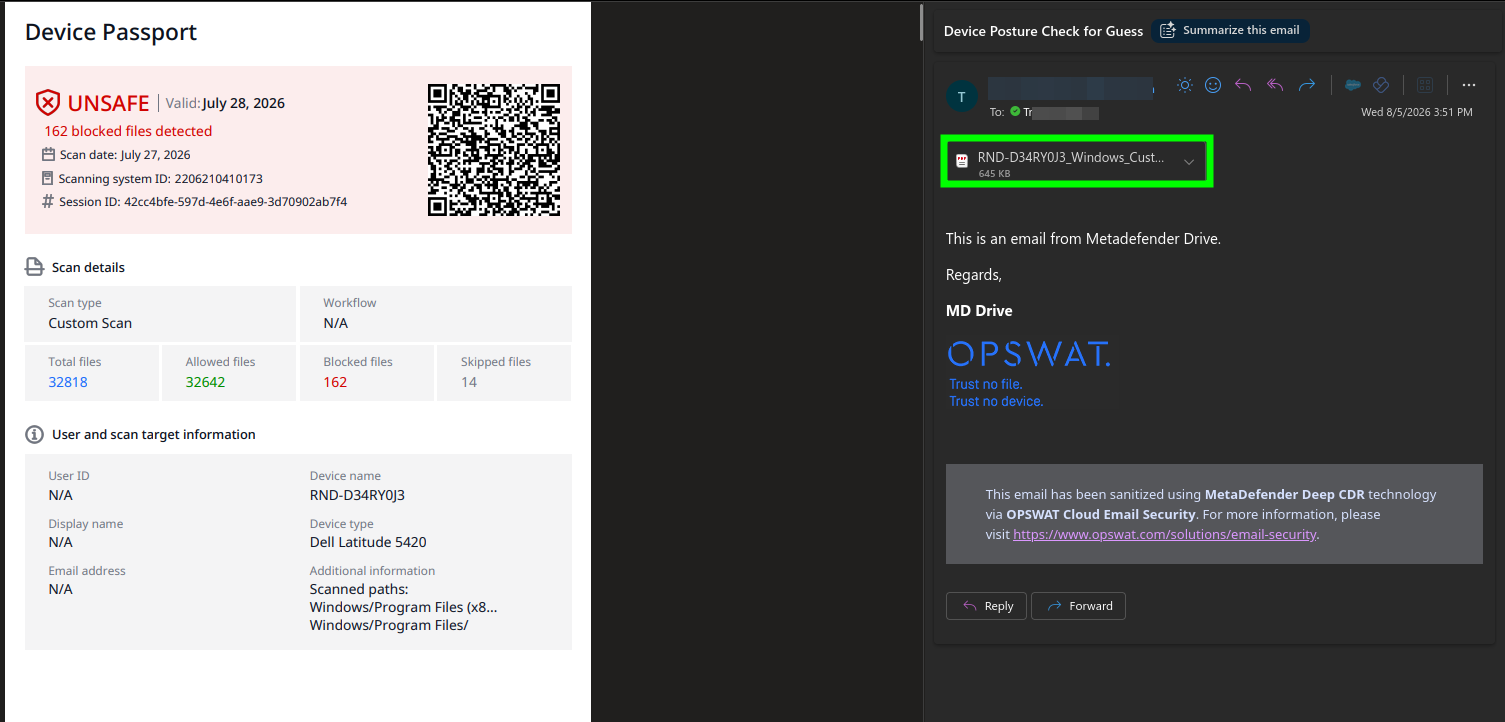
The emailed PDF contains:
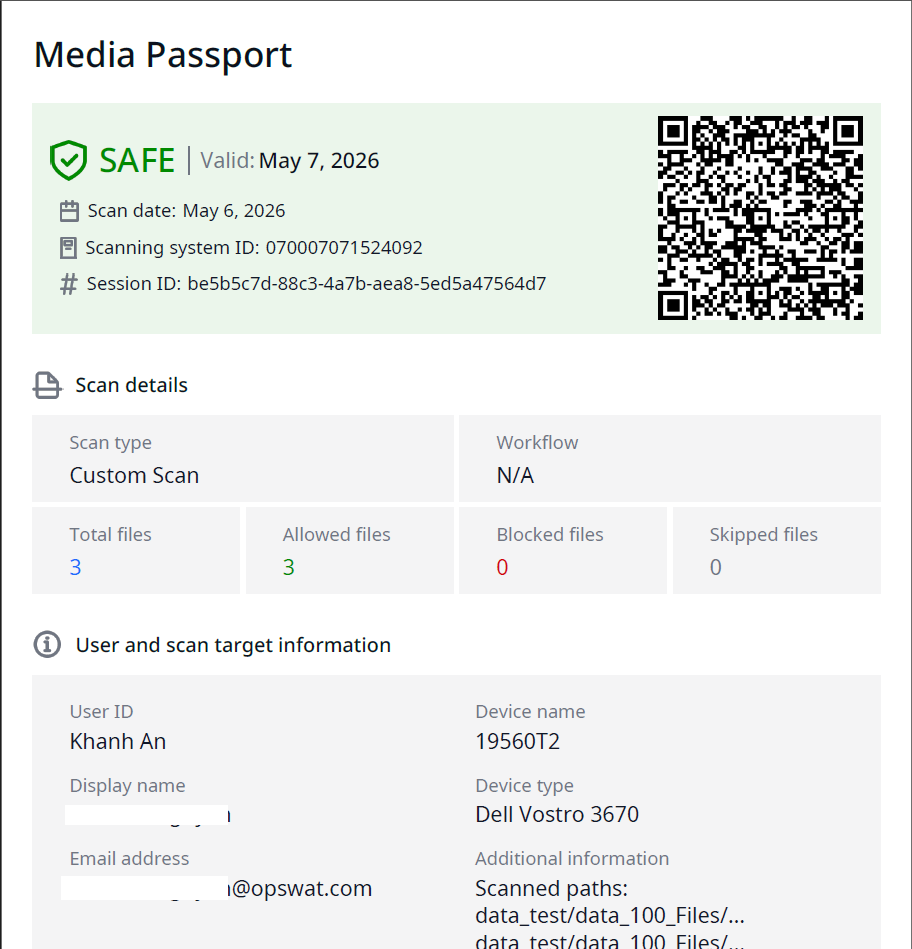
Page 1 — Media Passport: SAFE/UNSAFE badge, validity, QR code, scan totals, user + device info.
Following pages — Full session log: report ID, totals, MDD version + hardware, BIOS, archive settings, disks, engine versions, scan paths.
Three example outcomes, same template:
Outcome 1 — Clean drive (SAFE)
No threats found. Green SAFE badge; all files under Allowed files.
Outcome 2 — Cancel / No Threats (UNSAFE)
Scan was cancelled. With Cancelled Scans included in Scan Result settings, the passport shows UNSAFE / Reflects Scan Result settings even though no threats were found.
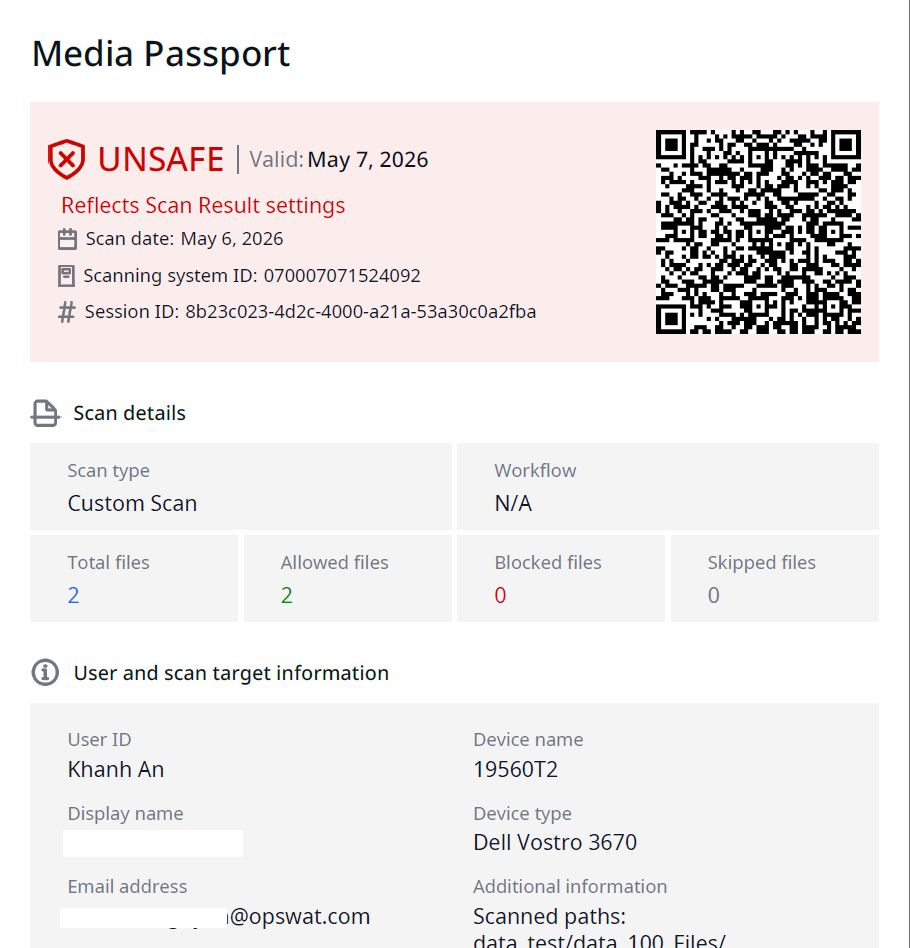
Outcome 3 — Infected drive (UNSAFE)
Blocked files detected. UNSAFE badge shows the exact count (e.g. 28 blocked files detected).
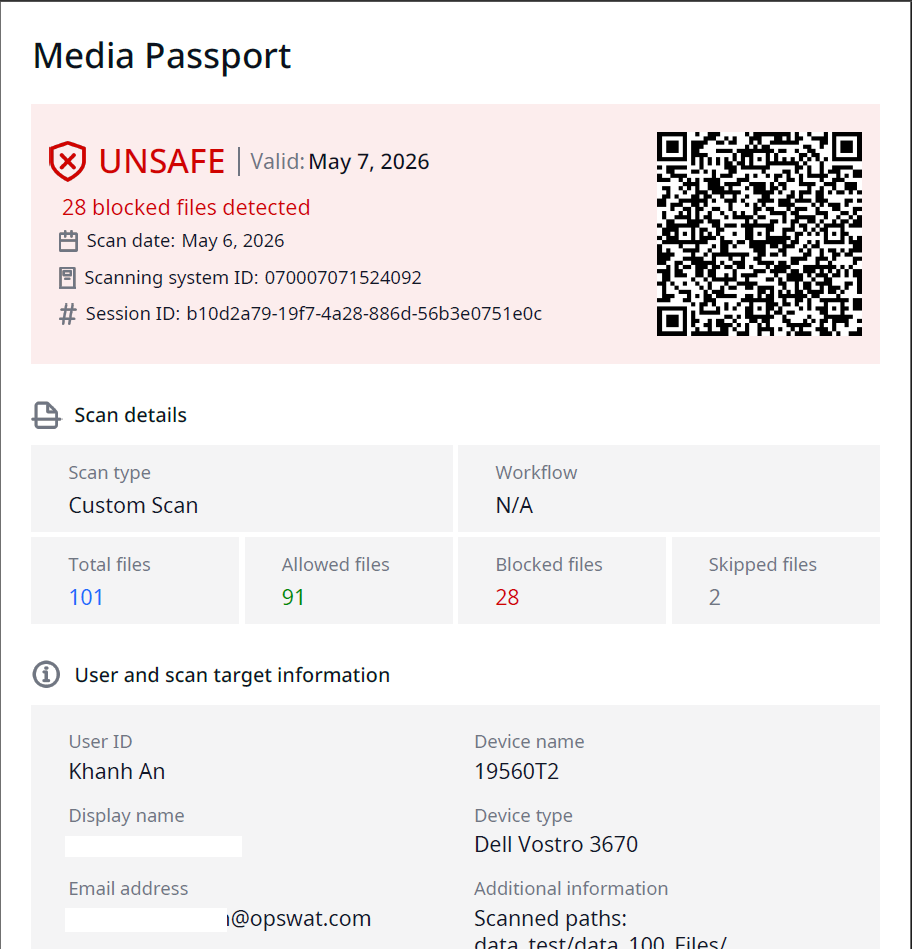
For In-Session, on a Full Scan will generate the Passport
Troubleshooting
No email received — re-run the test in Email Settings; check From address is allowed by your SMTP relay.
QR code missing — confirm Include QR code is enabled and placeholders are valid.
Drive not detected — confirm Enable Drive Integration is ON and the USB port supports USB 3.x.
Signature invalid in PDF — verify the certificate selected under Logging is valid and trusted by the recipient.