For a single deployment of MetaDefender Core in Azure you can use this example to test this deployment type, besides the MetaDefender EC2 instance, additional resources are being generated and set up.
Prerequisites and Requirements
Azure knowledge: This guide assumes familiarity with Azure Services
Azure account: needs permission to create Azure Services listed in Recommended Architecture for Azure
Tools installation: Terraform
System/OS requirements
For OS, database type, 3rd party dependencies and storage requirements on Windows installations, please refer to the Microsoft Windows Deployments section of the Recommended System Configuration page.
For OS, database type, 3rd party dependencies and storage requirements on Linux installations, please refer to the Linux Deployments section of the Recommended System Configuration page.
Deploy using Terraform
- Locally clone the metadefender-csp repository and go to Azure/single-vm-deployment
git clone git@github.com:OPSWAT/metadefender-csp.gitcd Azure/single-vm-deployment- Modify terraform.tfvars with the desired options
- LICENSE_KEY_CORE required if wanted to have the instance activated automatically
- APIKEY_GENERATION=true to have the apikey generated by terraform
- There is one general section and one section for each product that is supported using this Terraform project in case of needing to install additional OPSWAT products
# General variablesRG_NAME = "metadefender" # Prefix to add to all the resourcesMD_REGION = "eastus" # Region for all the resourcesMD_VNET_CIDR = "192.168.0.0/16" # VPC CIDR where to create the MetaDefender productsPUBLIC_ENVIRONMENT = trueAPIKEY_GENERATION = trueIMPORT_RG = falseVM_PWD = "<SET_UP_VM_PWD>"# MetaDefender Core variablesDEPLOY_CORE = trueCORE_INSTANCE_TYPE = "Standard_D8s_v5" # Instance type for MetaDefender CoreLICENSE_KEY_CORE = ""OFFER_PRODUCT_CORE = "opswat-mdcore-linux" # Windows opswat-mdcore-windowsSKU_CORE = "opswat-mdcore-linux" # Windows opswat-mdcore-windows- Run terraform init and apply. Check the resource to be created, after that enter "y"
terraform initterraform applyDeploy using Azure portal
For having MetaDefender Core in a Single Azure VM as showed in Single Azure VM Architecture it is needed to follow the next steps
1. Create Resource Group
- Go to you Azure account and create a new resource group (we will refer to it as "metadefender-rg")
2. Create Azure VM
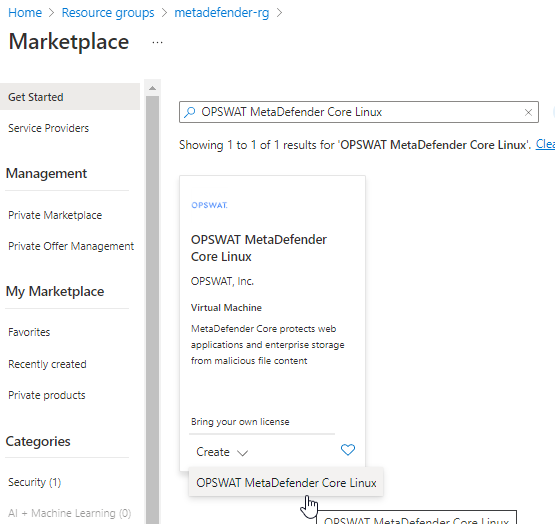
- Inside the resource group click on create resource and search for "OPSWAT MetaDefender Core Linux"
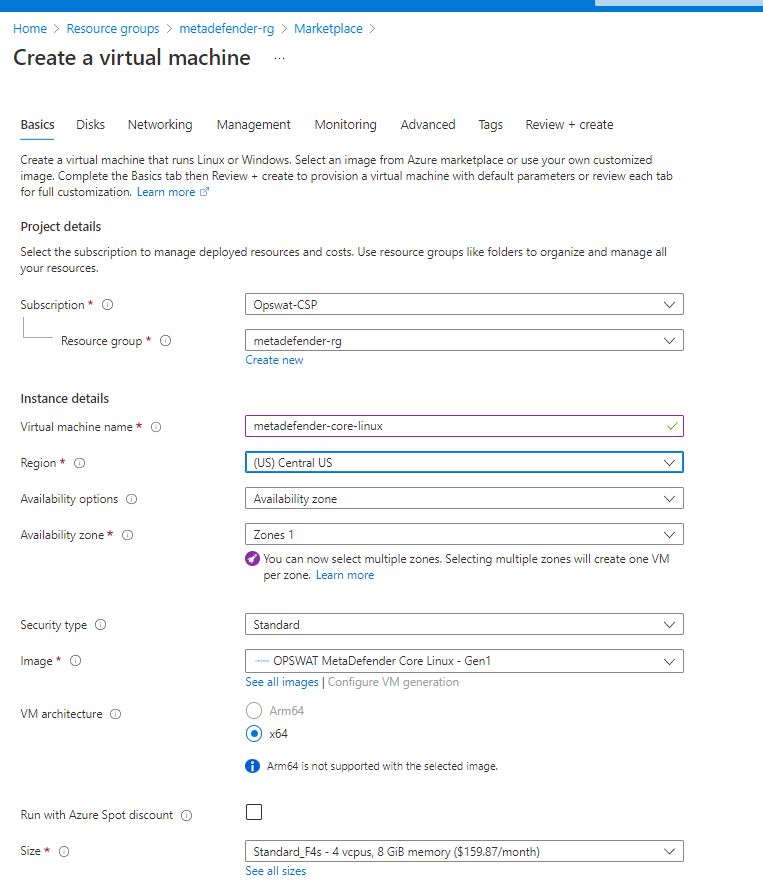
- Input the vm name and select the size based on Recommended System Configuration.
- Under Administrator Account section select the desired way to access to the VM. For this guideline we will generate a public key to access to it
3. Storage Configuration
Storage step can be skipped.
In general there's no need for additional storage by MetaDefender. However, there are 2 situations where additional local storage might be required:
- MetaDefender will process large files or a high volume of files which submitted in MetaDefender's queue will need over 10GB files storage
- MetaDefender is configured to store files in the Quarantine section which will eventually fill the entire root volume.
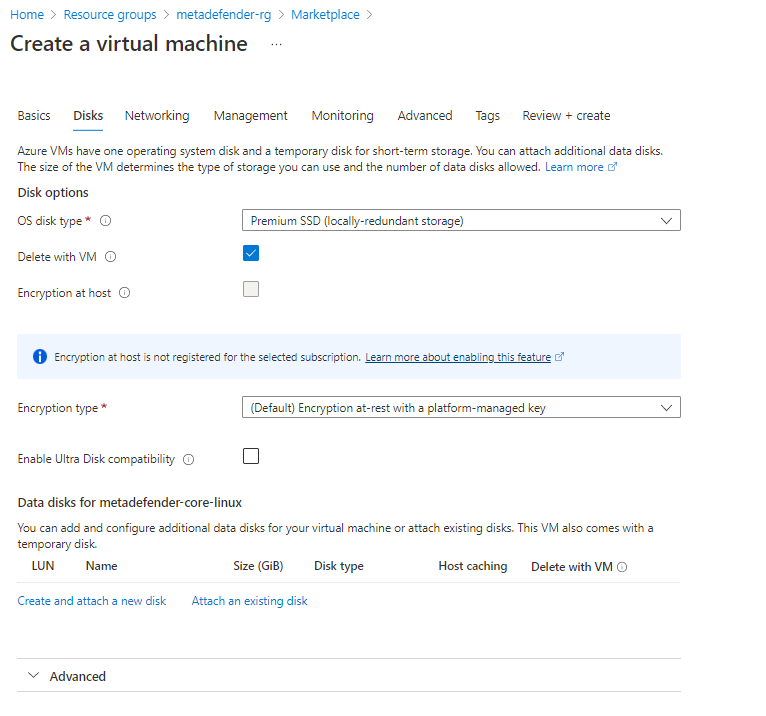
In case quarantining the files in the MetaDefender instance or analyzing high volumes of files is a requirement, please consider adding an additional Azure Managed Disk
- Premium SSD is recommended for having the best performance
3. Network Configuration
- Change public IP to None in case you do not want to access from internet.
- Select the Virtual network and Subnet in case you already have them created, if not leave it to create them
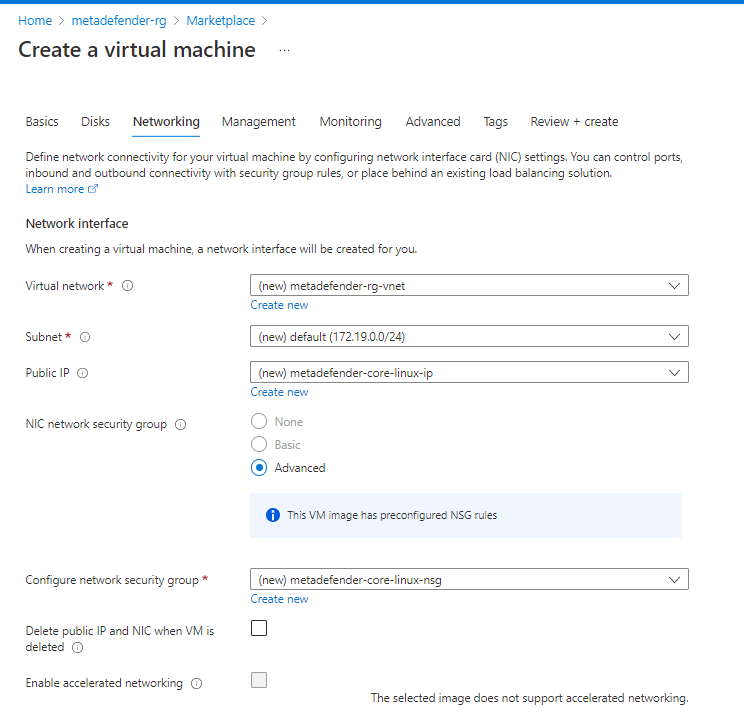
- Create Security Group adding rules for 8008 and SSH
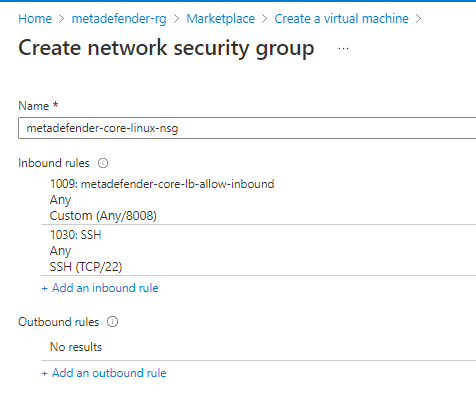
- Under Load Balancing section as it is a single vm it is not really needed but it can be used to set up a health check using the /readyz endpoint
4. Review & Create the VM
- Under Management, Monitoring, Advanced and Tags there are not any configuration different from the default ones that are needed to be selected. So customize it as it is needed for each use case.
- After creating it will show you a window to download the private key to access to the VM in case that option was selected for accessing
Additional Configurations
For controlling the engine and database health OPSWAT offer an endpoint to use as health check, there are different ways of using it

