Hardening
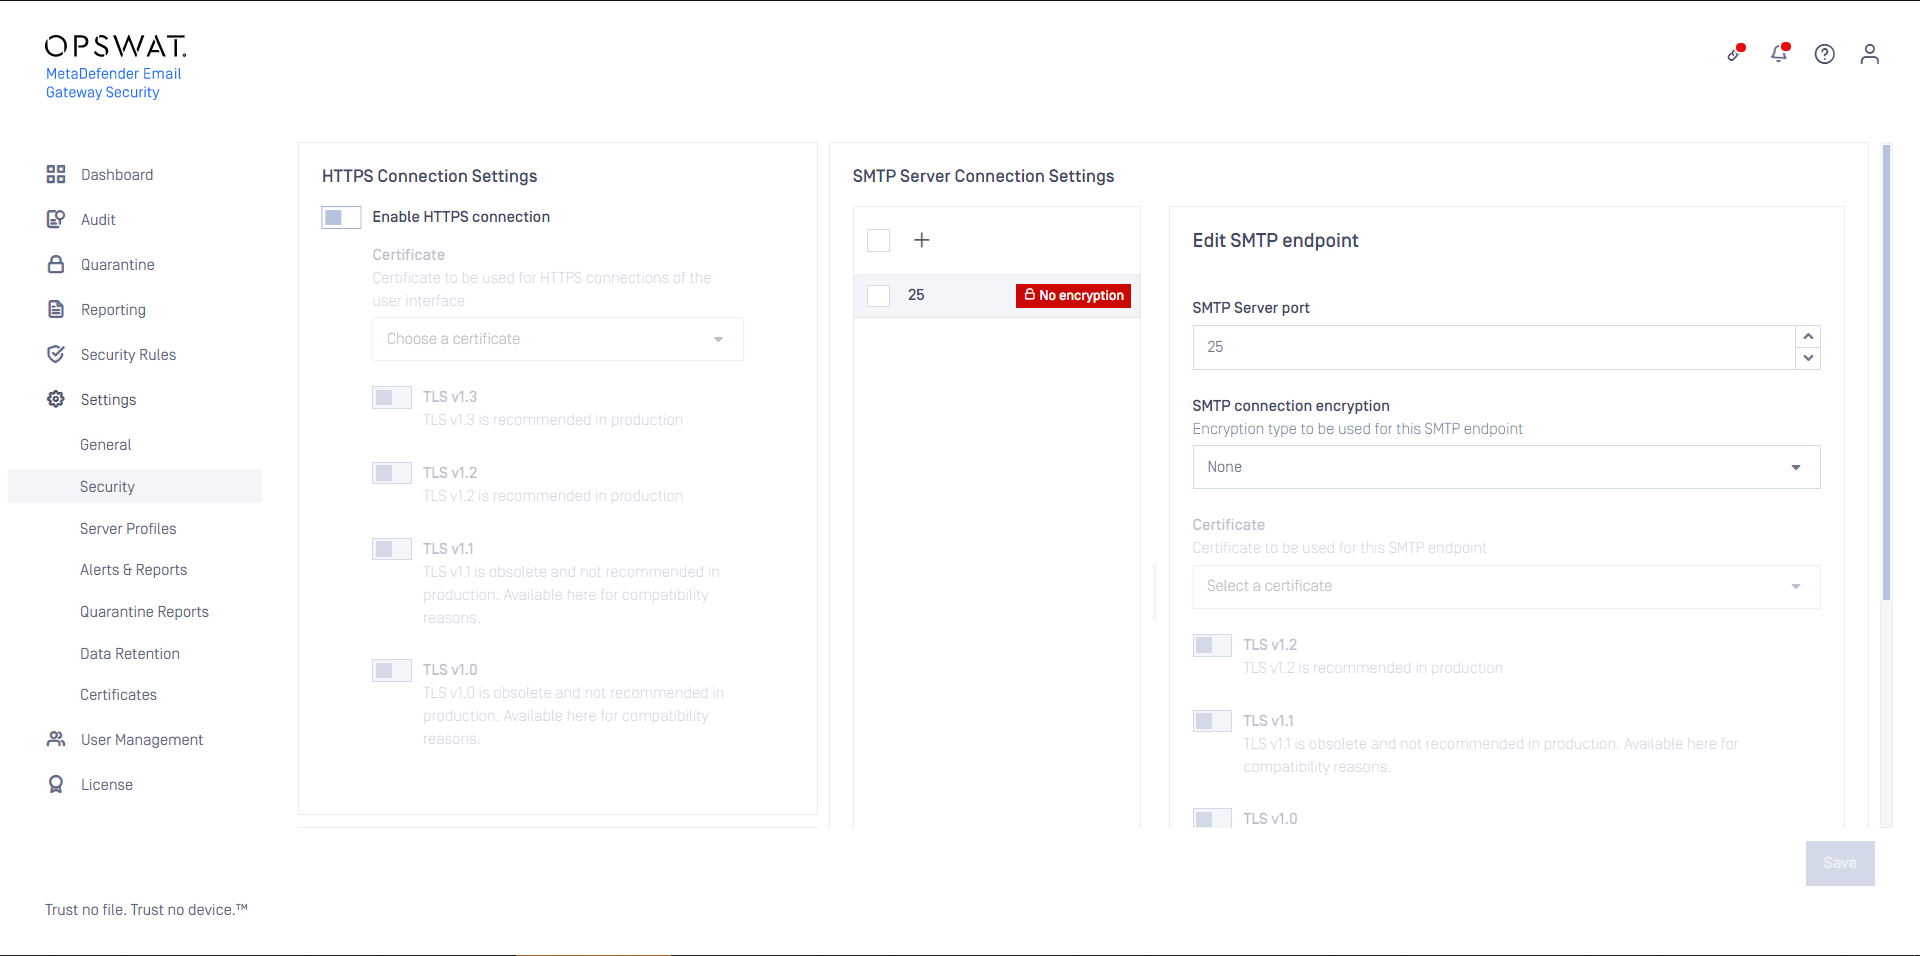
Use TLS whenever it is supported by Google Workspace.
Cloud Email Security supports SMTP-over-TLS (SMTPS) or StartTLS for both inbound and outbound SMTP connections.
For details see the SMTP servers section in Configuration/Settings and Configuration/Server profiles.
Under certain conditions - especially when integrated to Google Workspace as an outbound gateway - Cloud Email Security may be exploited as an open relay.
For details (risks and resolution) see Configuration/Hardening.
Inbound email gateway
Overview
To configure Cloud Email Security with Google Workspace for inbound email, we will perform the following steps:
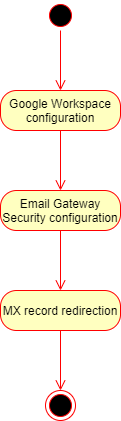
Google Workspace configuration
The configuration described in this document focuses on a working connection only, and it may not result in a secure configuration.
For detailed information about Google Workspace configuration see https://support.google.com/a/answer/60730.
Perform the following steps:
- Sign in to your Google Admin console.
Sign in using an administrator account.
- From the Admin console Home page, go to Apps > Google Workspace > Gmail > Advanced settings.
Tip: To see Advanced settings, scroll to the bottom of the Gmail page.
- In the Organizations section on the left, select the top-level organization (typically your primary domain).
- Scroll to the Inbound gateway setting in the Spam section. Hover over the setting and click Configure to create a new setting or click Edit to edit an existing one.
- Enter a description.
- Under Gateway IPs, click Add and enter the IP address or range of addresses of Cloud Email Security server(s).
Note: Be sure to enter public IP addresses, as private IP addresses are not accepted.
- Click Save.
Cloud Email Security configuration
Perform the following steps:
Install and configure MetaDefender Cloud Email Security. For details see Installation/Prerequisites.
Configure SMTP server profiles according to the existing MX record setup (SMTP server URL address values to point to the addresses present in the MX records). This is the way for Cloud Email Security to forward incoming emails to Google. For details see Configuration/Server profiles and Configuration/Policy.
Configure the appropriate security rules (the ones that will handle incoming email) as Inbound under Security Rules / rule / GENERAL / Rule direction. For details see Configuration/Policy.
- Set the server profiles created in the previous step as SMTP relay server profile for these rules.
Configure MetaDefender Cloud Email Security to listen on port 25. For details see the SMTP servers section in Configuration/Settings.
Verify routing settings by sending an email to a Google Workspace recipient directly to the MetaDefender Cloud Email Security server and verify that it arrives correctly in the recipient’s inbox.
MX record redirection
Refer to your Internet domain registrar for details how to change MX record to point to MetaDefender Cloud Email Security IP address.
Make sure that the MX record changes have propagated and Time to Live (TTL) has expired before verifying email routing.
Verify email routing by sending an email to a Google Workspace recipient and verify that it arrives correctly in the recipient’s inbox.
Outbound email gateway
Overview
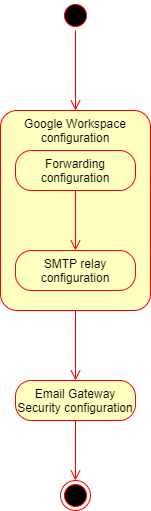
To configure Cloud Email Security with Google Workspace for outbound email, we will perform the following steps:
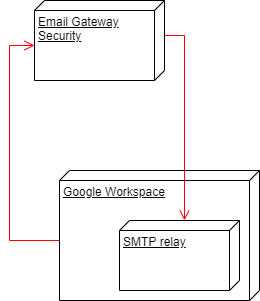
An architecture like this is going to be created:
Google Workspace configuration
Outbound forwarding configuration
The configuration described in this document focuses on a working connection only, and it may not result in a secure configuration.
For detailed information about Google Workspace configuration see https://support.google.com/a/answer/178333.
Perform the following steps:
- Sign in to your Google Admin console.
Sign in using an administrator account.
- From the Admin console Home page, go to Apps > Google Workspace > Gmail > Advanced settings.
Tip: To see Advanced settings, scroll to the bottom of the Gmail page.
- In the Organizations section on the left, select the top-level organization (typically your primary domain).
- Scroll to the Outbound gateway setting in the Routing section.
- Enter the outbound gateway server address of the Cloud Email Security server.
- At the bottom of the Advanced settings page, click Save.
SMTP relay configuration
The maximum number of messages a user can send in a 24-hour period is 10,000. However, this can vary, depending on the number of user licenses in your Google Workspace account.
A registered Google Workspace user can't relay messages to more than 10,000 unique recipients in a 24-hour period.
Limits per customer
The maximum number of total__recipients allowed per customer per 24-hour period is approximately 130 times the number of user licenses in your Google Workspace account, with an upper bound of 4,600,000 recipients per 24-hour period for large customers.
The maximum number of total__recipients allowed per customer in a 10-minute window is approximately 9 times the number of user licenses in your Google Workspace account, with an upper bound of 319,444 recipients per 10-minute window for large customers.
The configuration described in this document focuses on a working connection only, and it may not result in a secure configuration.
For detailed information about Google Workspace configuration see https://support.google.com/a/answer/2956491.
Perform the following steps:
- Sign in to your Google Admin console.
Sign in using an administrator account.
- From the Admin console Home page, go to Apps > Google Workspace > Gmail > Advanced settings.
Tip: To see Advanced settings, scroll to the bottom of the Gmail page.
- In the Organizations section on the left, select the top-level organization (typically your primary domain).
Note: You can configure the SMTP relay service setting for the top-level organization only.
Scroll to the SMTP relay service setting in the Routing section, hover over the setting, and click Configure. If the setting is already configured, hover over the setting and click Edit or Add another.
For a new setting, enter a unique description.
In the Allowed senders section, select Only addresses in my domains. This way the sender must be in one of your registered domains.
In the Authentication section, check Only accept mail from the specified IP addresses. This way the system only accepts email sent from Cloud Email Security.
Enter the IP address of Cloud Email Security:
- Click Add IP RANGE,
- Enter a description for the IP address,
- Enter the IP address of Cloud Email Security,
- Check the Enabled box to enable this IP address,
- Click Save.
Click Add setting or Save. Any new settings are added to the Advanced settings page.
At the bottom, click Save.
Cloud Email Security configuration
Perform the following steps:
Install and configure MetaDefender Cloud Email Security. For details see Installation/Prerequisites.
Configure SMTP server profiles accordingly to route outgoing messages back to Google for delivery (SMTP server URL address values to point to Google SMTP-relay address smtp-relay.gmail.com). This is the way for Cloud Email Security to loop outbound emails back to Google after processing. For details see Configuration/Server profiles and Configuration/Policy.
Configure the appropriate security rules (the ones that will handle outgoing email) as Outbound under Security Rules / rule / GENERAL / Rule direction. For details see Configuration/Policy.
- Set the server profiles created in the previous step as SMTP relay server profile for these rules.
Configure MetaDefender Cloud Email Security to listen on port 25. For details see the SMTP servers section in Configuration/Settings.

Email Assessment
Email Assessment is a service that can help organizations to uncover gaps in their existing email security systems. Email Assessment can also help to discover how OPSWAT Cloud Email Security can improve the security of the current email security system.
To setup the Email Assessment with Microsoft 365 Graph API integration, perform the following steps:
- Sign in to your Google Admin console.
Sign in using an administrator account.
From the Admin console Home page, go to Apps > Google Workspace > Gmail > Compliance.
(Optional) On the left, select the organization.
Scroll to the Content compliance setting in the Compliance section, hover over the setting, and click Configure. If the setting is already configured, hover over the setting and click Edit or Add another.

For each new setting, enter a unique short description, e.g. OPSWAT Email Risk Assessment.
In Email messages to affect, select Inbound.

From the list, specify whether any or all conditions must match to trigger what happens to the message. Select If ANY of the following match the message.
In the Expressions box click Add.

From the dropdown choose the type Advanced content match.
- In Location, select Headers and body from the dropdown.
- In Match type select Matches regex.
- In Regexp input the desired regular expression that matches the messages you want to assess. For example if you want to assess messages of
joe@example.comanddan@example.comthen use the regular expression(joe@example\.com)|(dan@example\.com). If you want to assess all messages use the regular expression.*. - Select SAVE.
Under If the above expression match, do the following select Modify message from the dropdown.

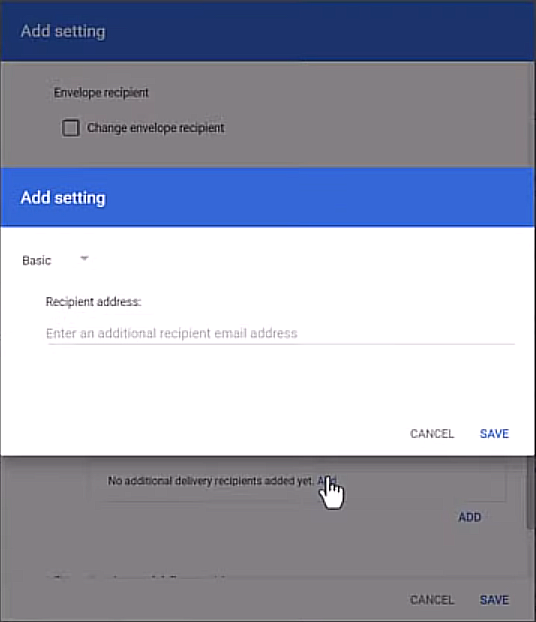
Set up dual delivery: check the Add more recipients box then in the Recipients box click Add .

Add your individual assessment email address:

Select Advanced from the dropdown.
In Envelope recipient select Change envelope recipient.
Select Replace recipient and add your individual assessment email address (see below).
Make sure that in Spam and delivery options the option Do not deliver spam to this recipient is not checked.
Under Headers select Add X-Gm-Spam and X-Gm-Phishy headers.
Click Save.
After enrolling to the OPSWAT Email Risk Assessment OPSWAT will provide you with your individual assessment email address.
For more details about Google Workspace content filtering and for instructions for more complicated content matching rules see https://support.google.com/a/answer/1346934.