
The device alerts list tab is accessible under Assets → Update History.
This page contains update history of all devices in the system.
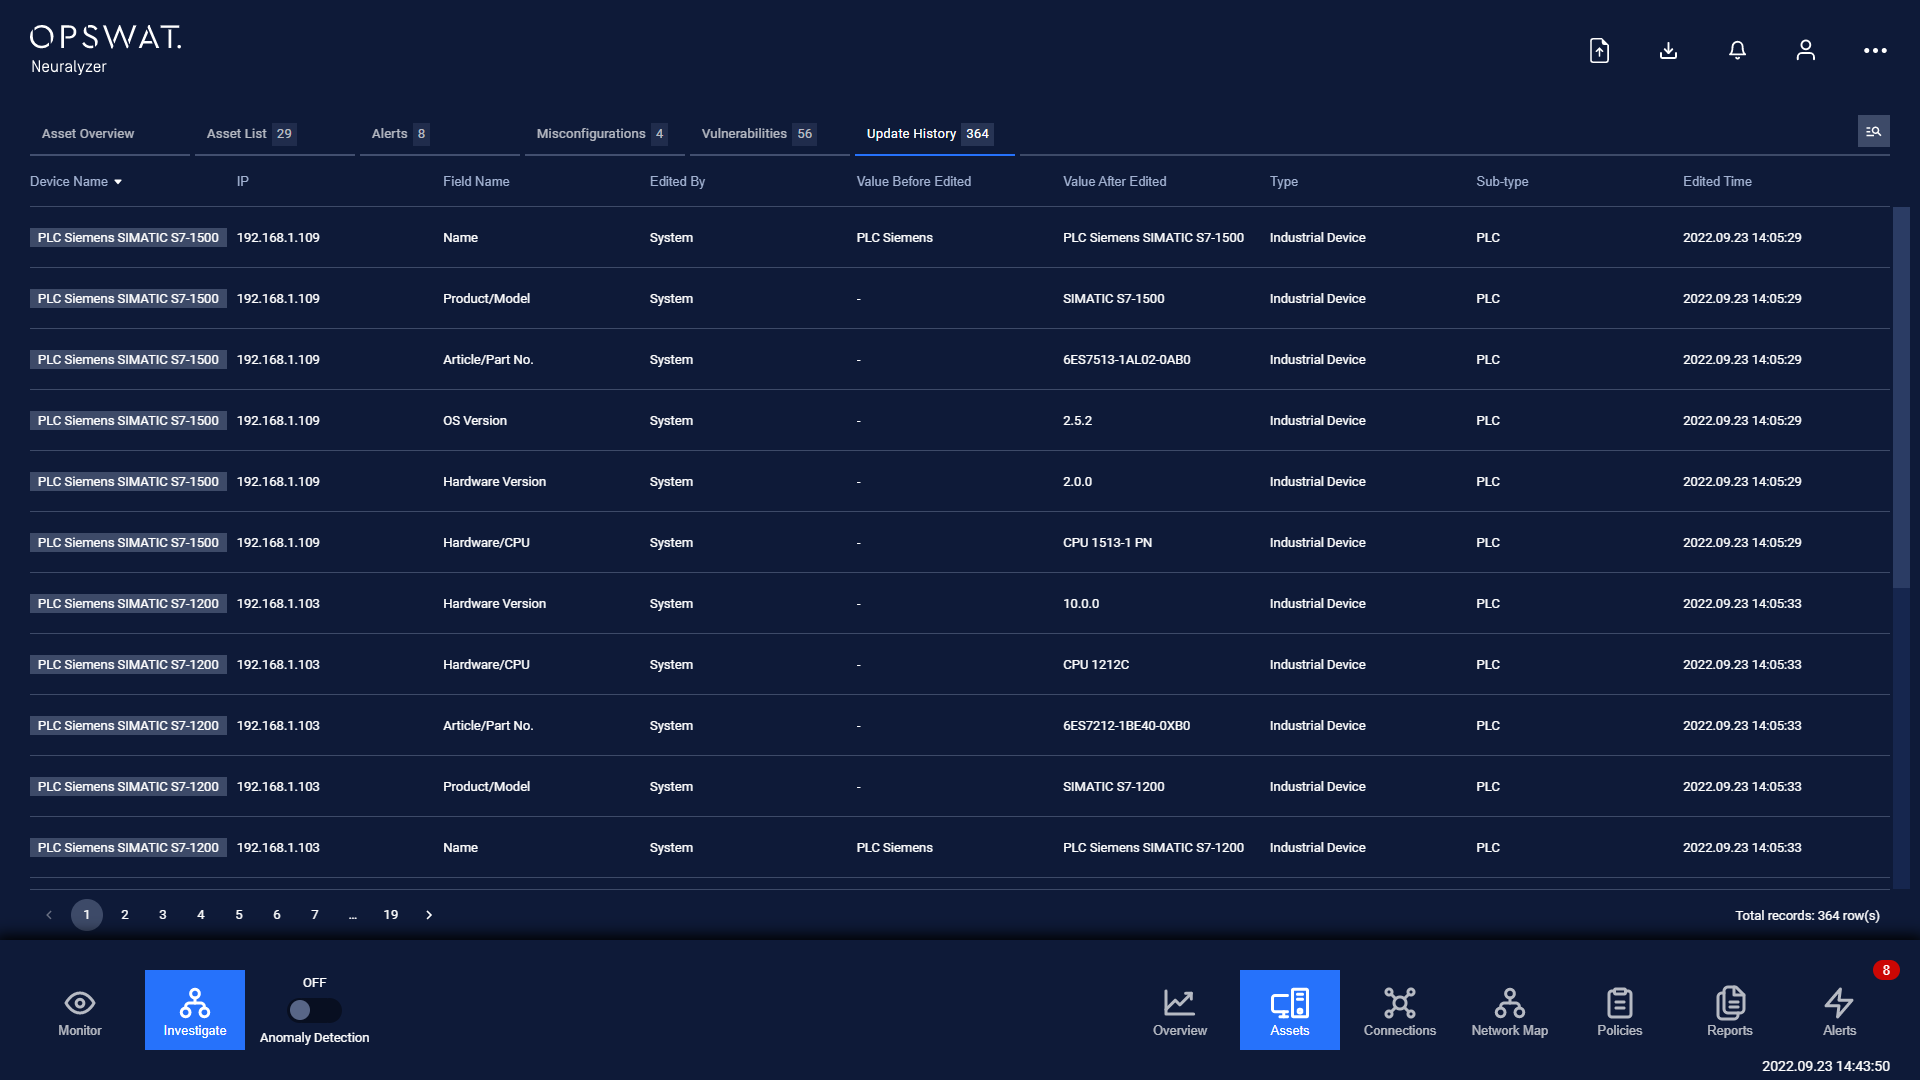
Each record contains:
Basic information of that device such as Name, IP, Type, Sub-type.
Updated information: field name, edited by, value before and after edited and edited time.
Note: you can sort a field in ascending or descending order by clicking on the its name.
Filter
We support searching and filtering on the device update history list:
You can enter value for one or more fields, and the result list and number of total records will be updated according to the value(s) you entered.
Index | Field | Data type | Type of input | Support multi-input | Note |
|---|---|---|---|---|---|
1 | Name | Text | Input text | No | |
2 | IP | Number | Input number in IP address format (e.g. 192.168.1.102), IP netmask format (e.g.192.168.1.0/24) | No | |
3 | Type | Text | Select from drop-down list | Yes | |
4 | Sub-type | Text | Select from drop-down list | No | |
5 | Field Name | Text | Input text | No | |
6 | Edited By | Text | Input text | No | |
7 | Value Before Edited | Text | Input text | No | |
8 | Value After Edited | Text | Input text | No | |
9 | Edited Time | Date time | Select from pop-up calendar and clock | No |
We support searching and filtering on the misconfigurations list:
You can enter value for 1 or more fields, and the result list and number of total records will be updated according to the value(s) you entered.
You can change the order of the fields displaying on the list by clicking "..." -> “Filter preference” then drag and drop the fields and arrange them in the desired order.
You can choose to show/hide the fields in the list by clicking "..." -> “Filter preference” and tick/untick the box on the left of field name. If you choose more than 10 fields to be displayed on the list, an horizontal scroll bar will appear, just scroll it to the right to see more fields.
You can save a custom filter for your convenience when you need to reuse them in the future. Enter values into the fields to filter then select "..." -> "Create filter", give a name for your filter. Every time you come back, click on "..." → Your saved filter to apply it.
You can update your saved custom filters by editing/adding values to the fields and selecting "..." then "Save filter”.
You can delete a saved custom filter by selecting “…” → “X” button on saved filter.