MetaDefender IT Access On-Premise allows administrators to generate Diagnostic Reports to access critical diagnostic data essential for troubleshooting and resolving issues when the system is not working properly. The feature offers an easy-to-use UI directly on the console and alternative methods in scenarios where the console is unreachable.
Retrieve the reports directly on the console
After logging in to the MetaDefender IT Access On-Premise, administrators should follow the below steps to generate and download the diagnostic reports.
On the top-right corner, click on your account > Help Center.

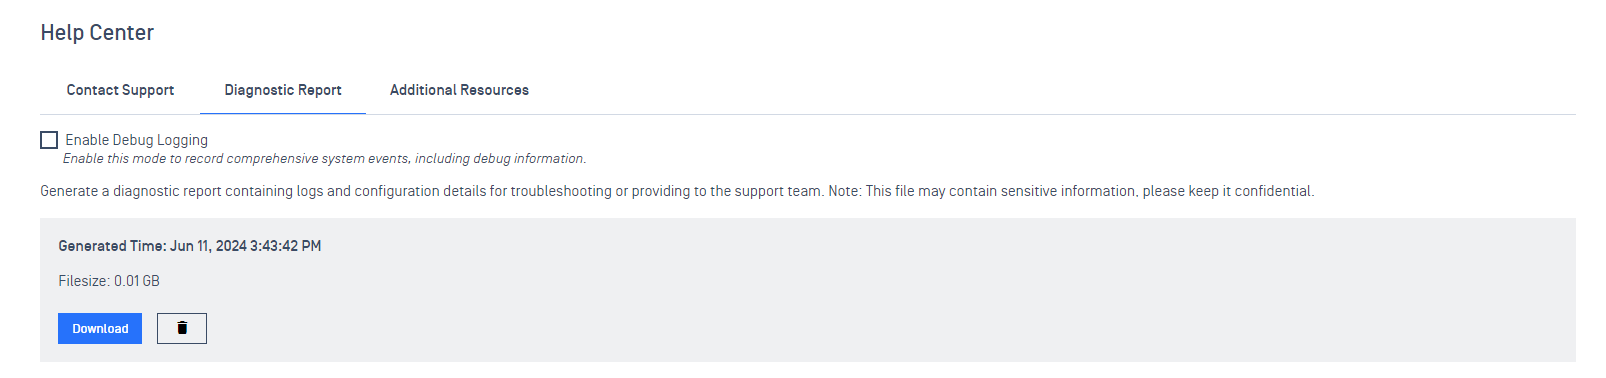
Navigate to the Diagnostic Report tab. There are several sections in the dedicated report:
System logs: Contain the logs from the system’s components, such as databases, web servers, etc.
MetaDefender IT Access On-Premise services logs: Contain the logs from the system’s main services.
Directory and file information: Contain the file structure of the server itself.
Choose the sections that you want to attach to the report and click Generate.
Once the generating report process is done, click Download to retrieve the report, or click the delete button next to it to create a new one.
Retrieve the reports when the console is unreachable
We suggest the administrators obtain and save the SFTP server information on the Diagnostic Report page. These credentials are essential when you want to retrieve the reports in scenarios when the console is unreachable.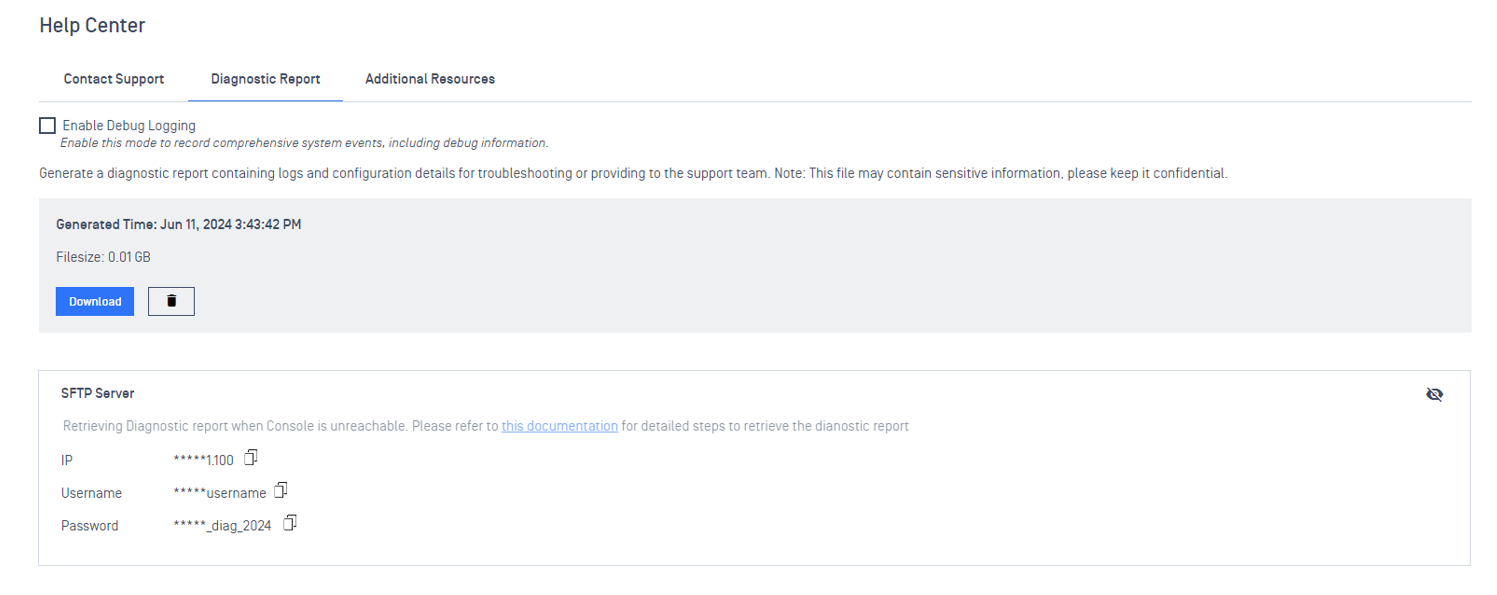
Firstly, you need to trigger the generating report process manually by replacing the serverIP part in the below URL with your server IP and accessing it directly by any web browser:
Wait for several minutes for the generating report process, then access the SFTP server to retrieve the desired report. In this document, we will provide two methods: Using Command-Line SFTP and Using an SFTP Client.
Using Command-Line SFTP
Ensure you have
sftpinstalled on your system.Connect to the SFTP server by replacing the
serverIPandusernamewith your credentials in the following command : sftp <username>@<serverIP>When prompted, enter the password obtained previously.
When the authentication process is done, download the desired report:
get diagnostic_report.zip /local/path/to/save/diagnostic_report.zip
Using an SFTP Client
You can also use an SFTP Client to access the SFTP server and download your report. We will use FileZilla as an example.
Ensure you have FileZilla installed.
Go to File > Site Manager and click New Site.
Enter the following details and click Connect:
Host: the system’s server IP
Protocol: SFTP
Logon Type: Normal
Username and Password: as obtained earlier
Port: 22
Once connected, you will see the directory containing the diagnostic reports. Select the report you need to download it to your local machine.