This article applies to all MetaDefender Endpoint releases deployed on Windows, Linux, macOS, iOS or Android systems.
MetaDefender Endpoint Installation Guide for Windows
Getting started:
- For company users, IT department will issue the installation file.
- For individuals, you can download a free version at this following link: MetaDefender Endpoint for Endpoint Vulnerability & Application Patching - OPSWAT
- After downloading the file, please follow the below steps to install the application
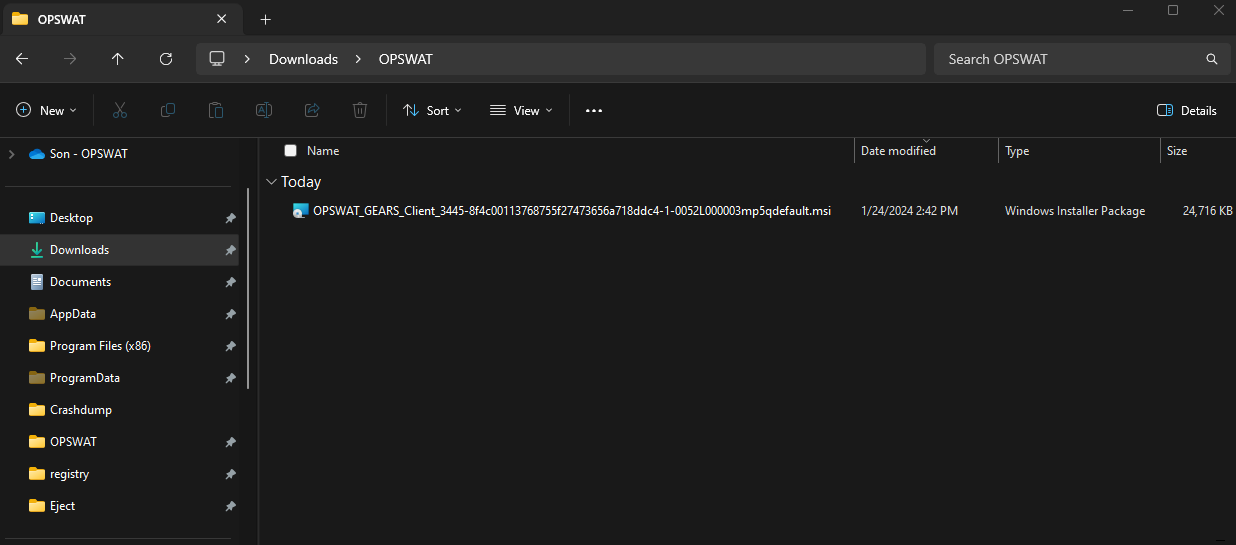
Installation for files with .msi extension:
- Step 1: Double-click to install the file.
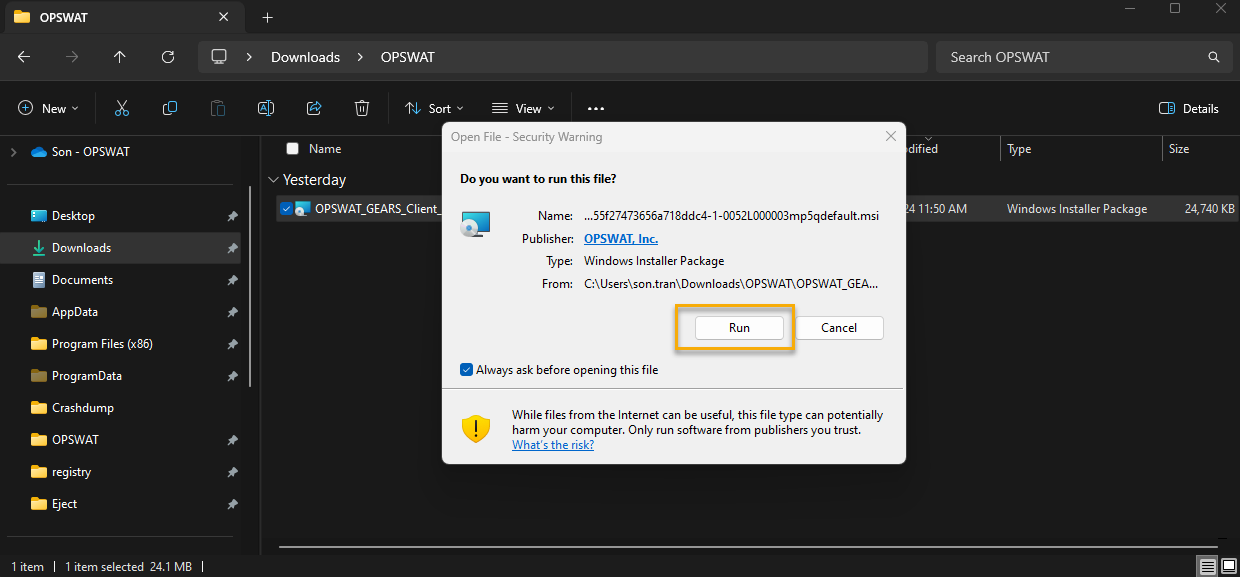
- Step 2: Click “Run” on the installation popup to start the process.
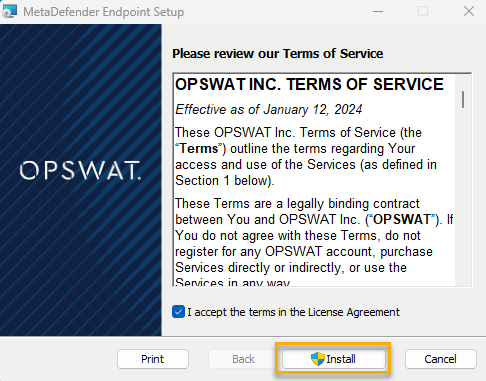
- Step 3: By clicking "I Agree," you are agreeing to License Agreement. Then choose “Install” to continue.
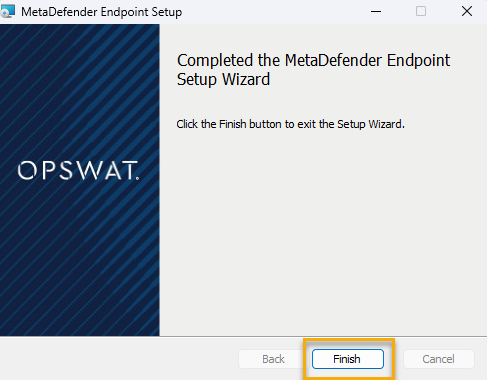
- Step 4: After the process is completed, click “Finish” to exit the installation wizard.
MetaDefender Endpoint Installation Guide for MacOS
Installation for files with .dmg extension:
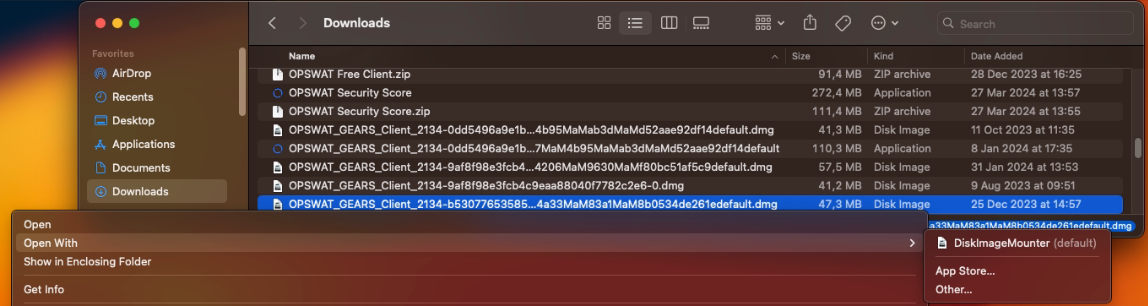
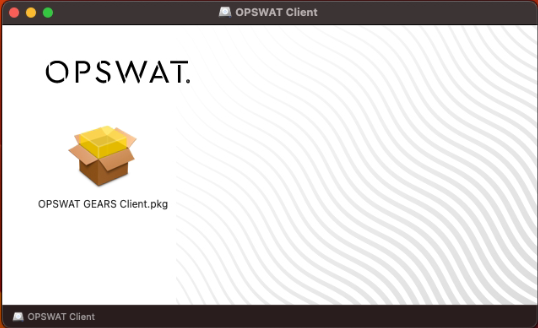
Step 1: Double-click / righ-click on the file OPSWAT_GEARS_Client_xxxxxxxxx.dmg and select menu item Open to open and run the installer "OPSWAT GEARS Client.pkg" to install the MetaDefender Endpoint application
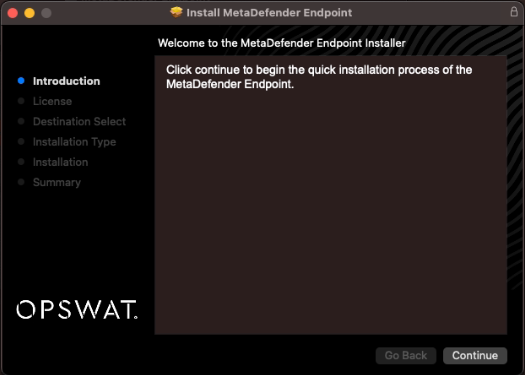
Step 2: Click "Continue" to start the MetaDefender Endpoint installation.
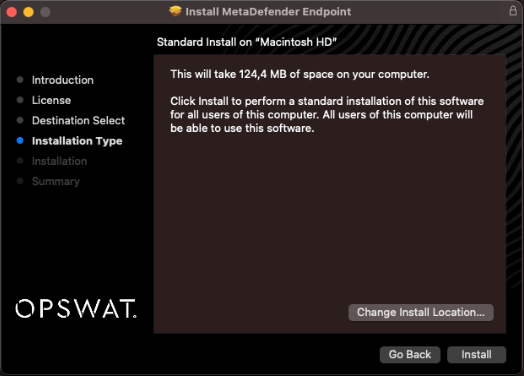
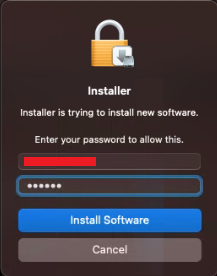
Step 3: Here, you can choose a different installation location or continue with the default. You will need to grant permission to install the MetaDefender Endpoint application.
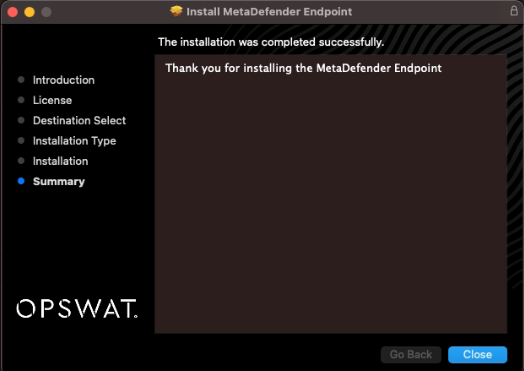
Step 4: Click "Close" when the installation is complete.
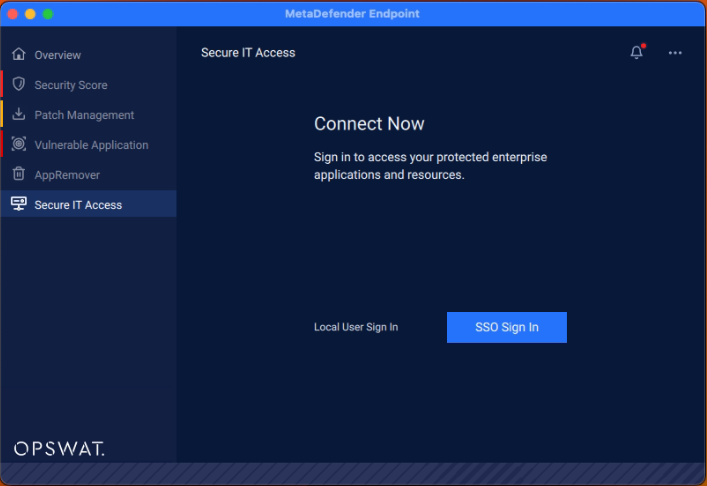
Step 5: Launch MetaDefender Endpoint, then go to the "Secure IT Access" tab and sign in with your SSO account or local user credentials.
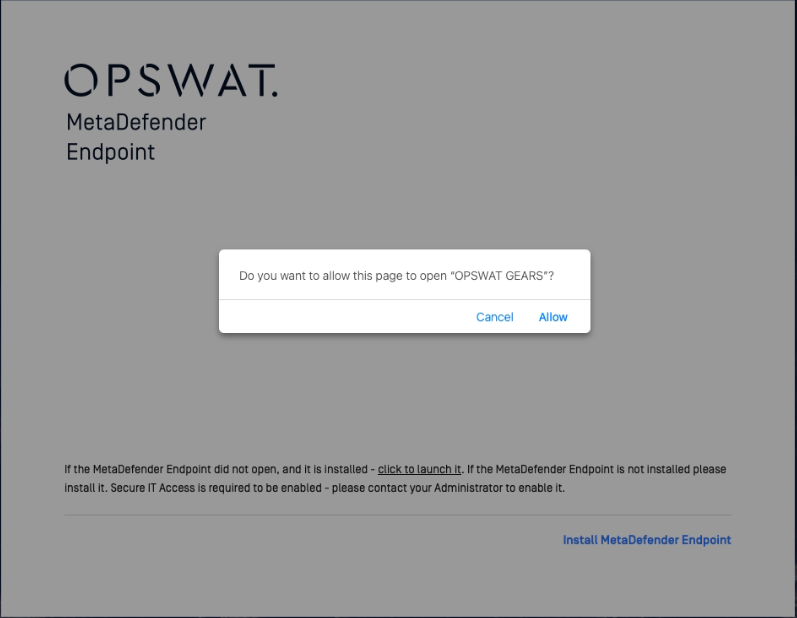
During sign-in, you will be prompted to allow access to the "OPSWAT GEARS" page. Click the "Allow" button to proceed
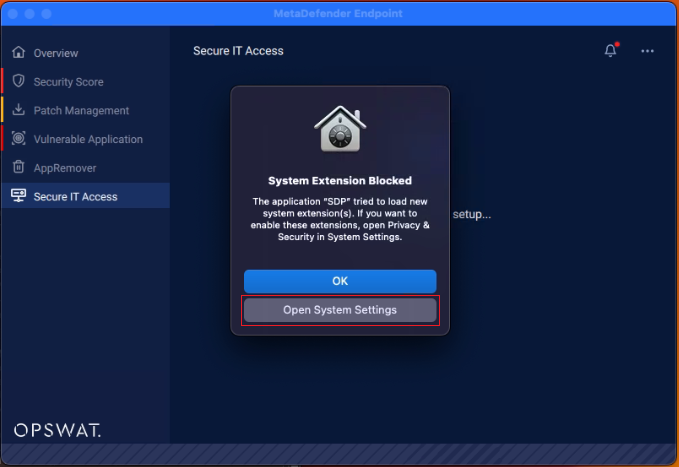
Step 6: The MetaDefender Endpoint will also request to enable its SDP extension(s). Click "Open System Settings" to proceed to the Privacy & Security settings.
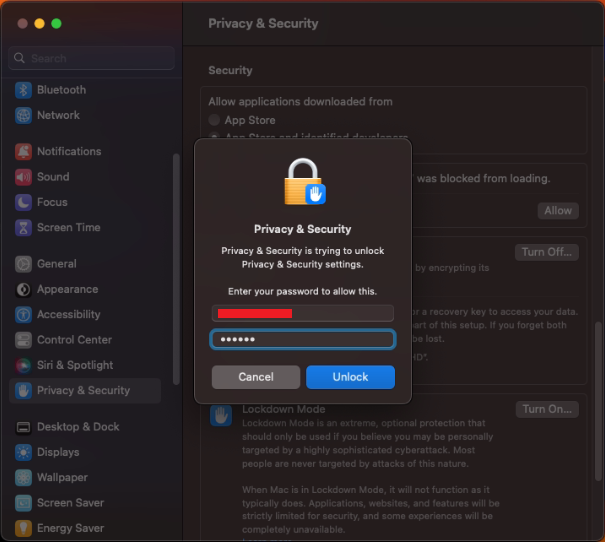
Step 7: In "Privacy & Security" settings, grant permission for the "SDP" application to load system software. Click the "Allow" button to do this.

And, it will require your permission to complete it.
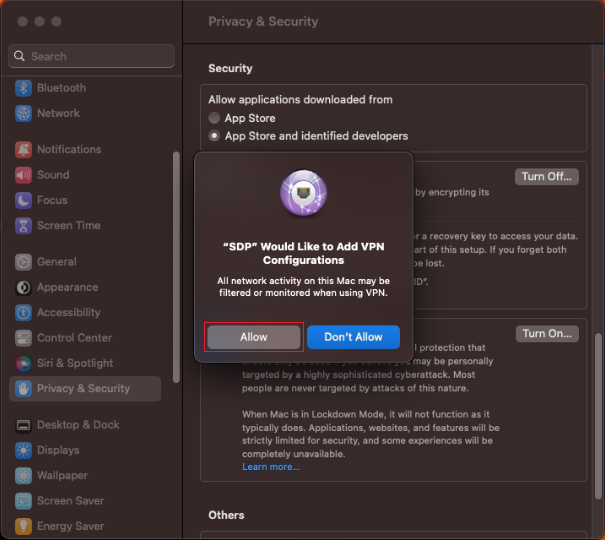
Step 8: The SDP will request to add VPN configurations. Click "Allow" to proceed with adding the configurations.
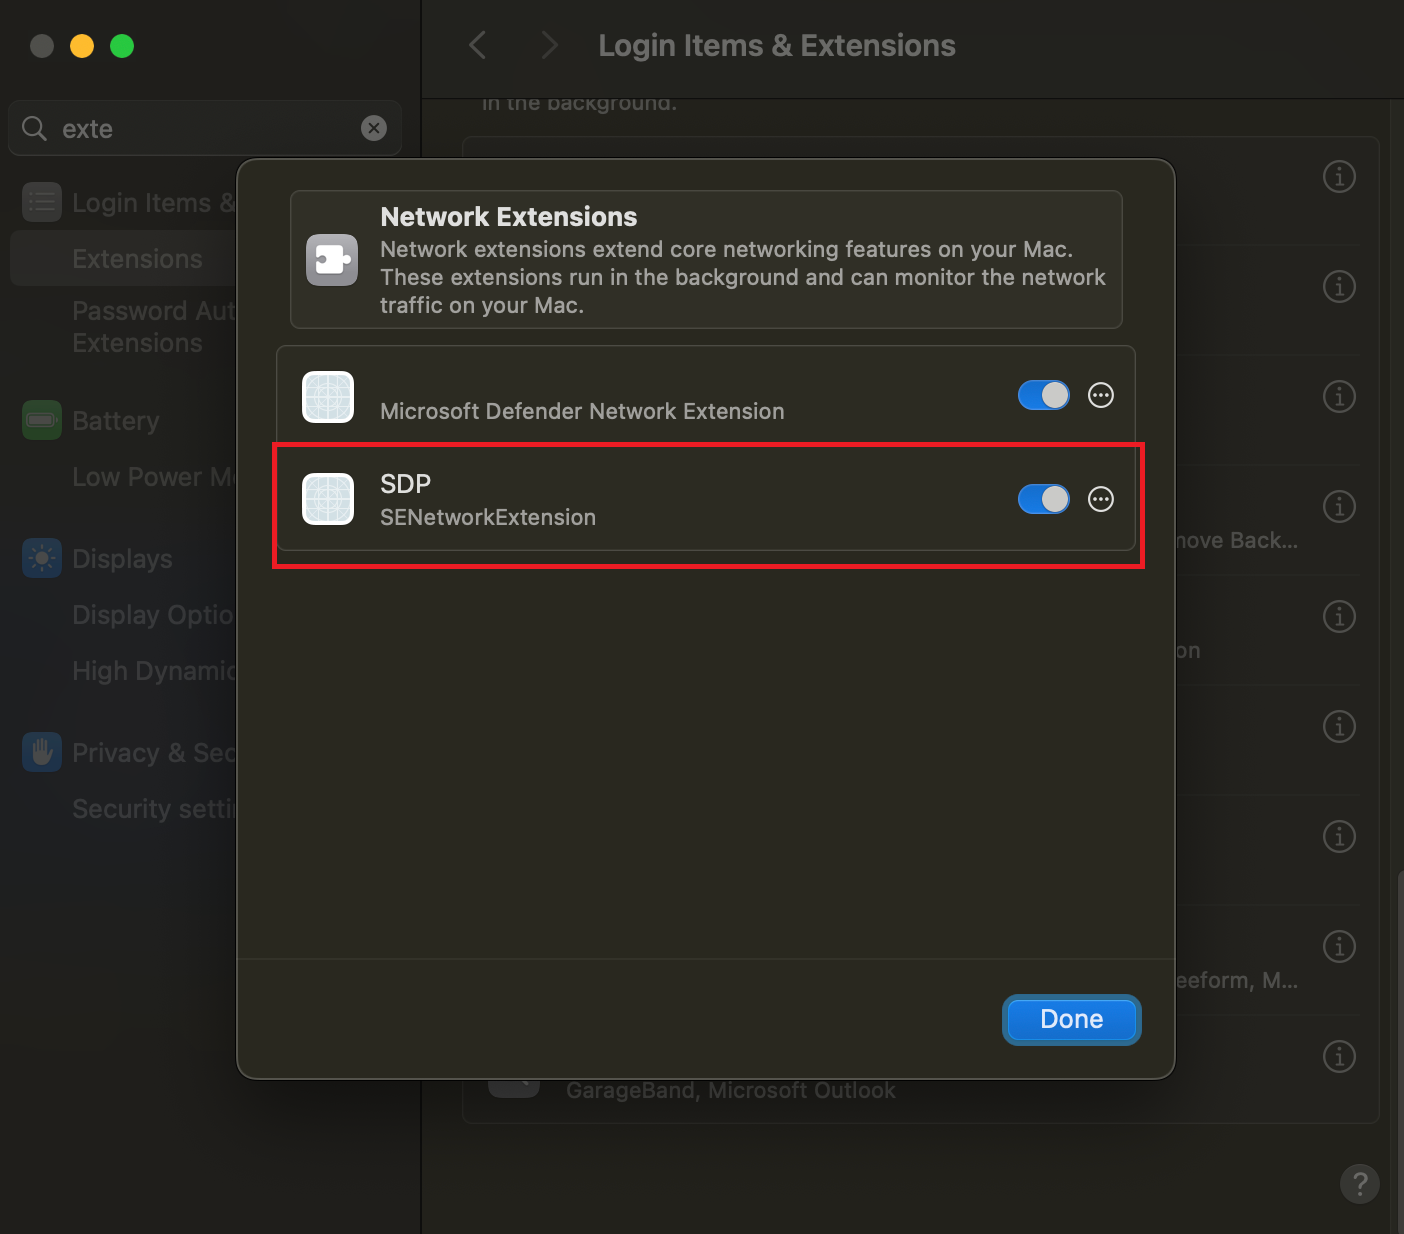
Step 9: Go to System Settings > General > Login Items & Extensions, then enable SDP SENetworkExtension.
More information about the MacOS's "Privacy & Security", please refer to:
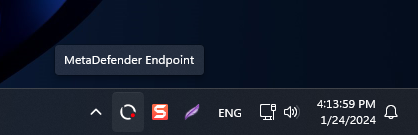
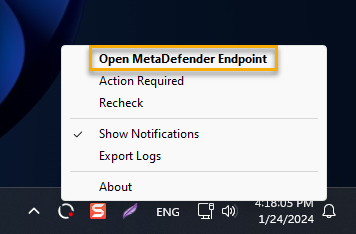
Open MetaDefender Endpoint: Open MetaDefender Endpoint from the Tray menu or Start menu.
Case 1: You can open MetaDefender Endpoint by clicking the tray icon on the taskbar
Case 2: Right-click on the tray icon and choose “Open MetaDefender Endpoint” from the menu.
MetaDefender Endpoint Malware Scanning
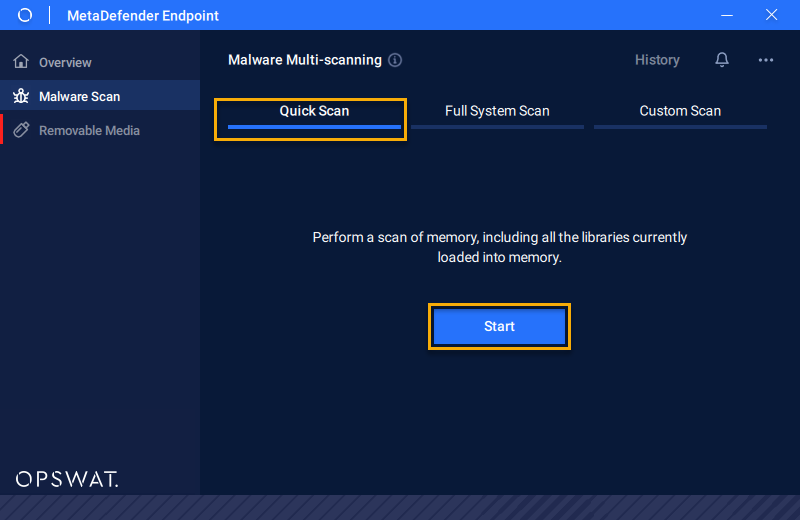
- Initially: Select the “Malware Scanning” tab on the left menu.
- Then you can select the type of scan which fit your need
- The available type of scan: Quick Scan, Full System Scan, and Custom Scan

Quick Scan
Select the “Quick Scan” tab and then click on the “Start” button.
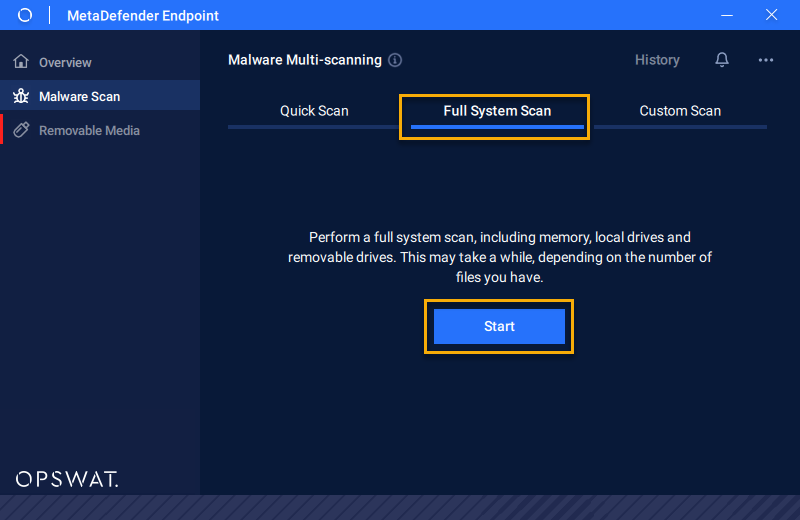
Full System Scan
Select the “Full System Scan” tab and then click on the “Start” button.
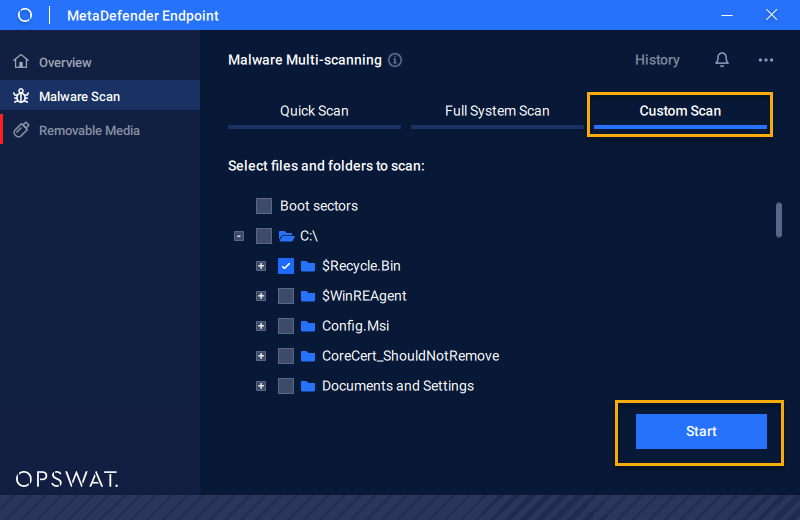
Custom Scan
Select the “Custom Scan” tab, choose the file type that you want to scan and then click "Start" to scan these custom files.
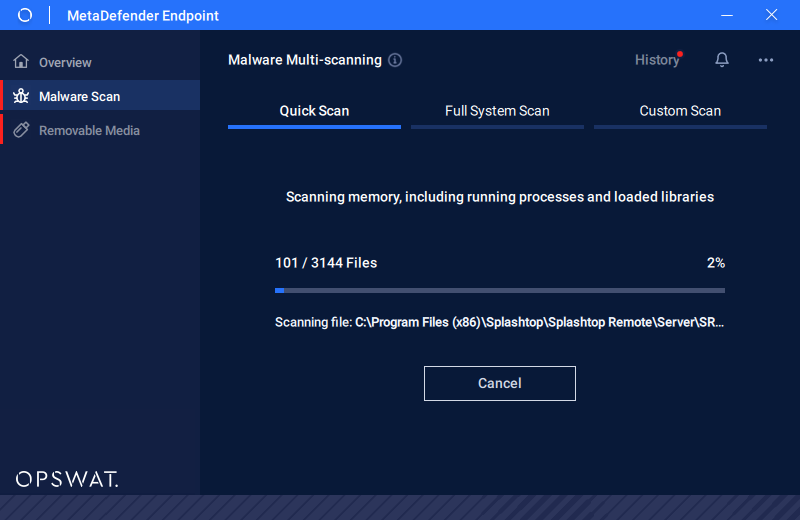
Scanning Process
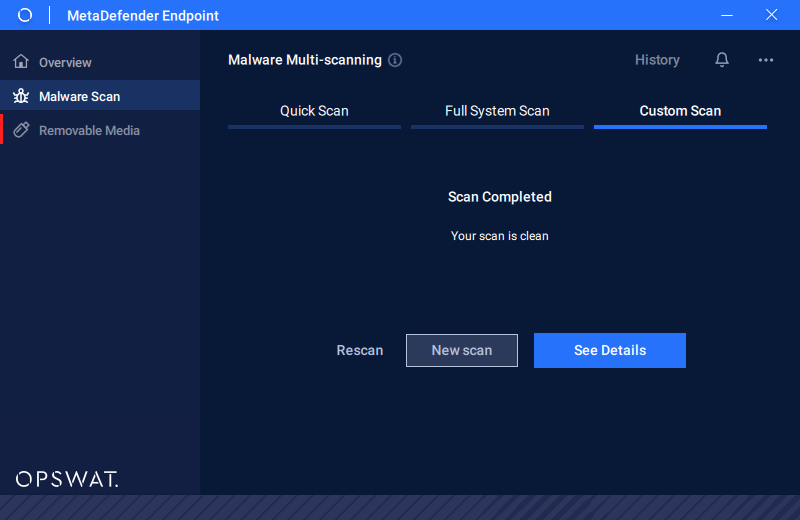
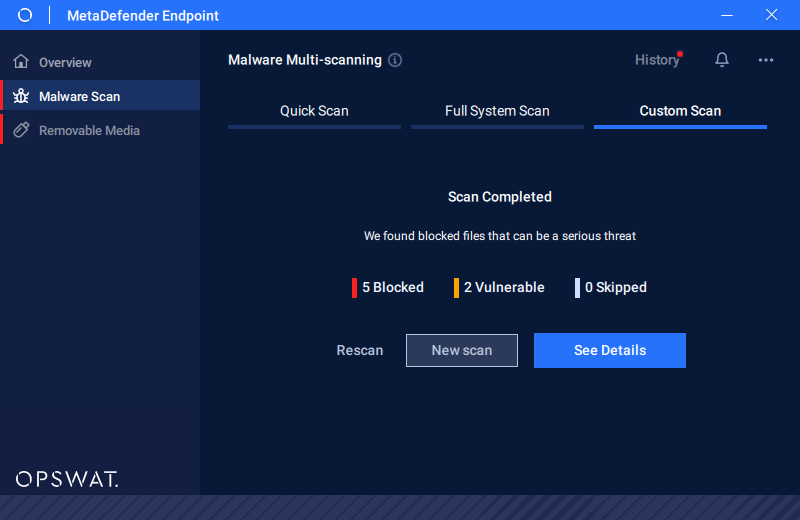
You can monitor the scanning process (see picture below). When it is completed, check the scanning's result
- Scanning in Progress
- Scan Completed as the files are clean
- Scan Completed with threats from the files
Review old scans and export its report
You can review the previous scans by clicking on History on the top right. To view the results reports, click on the scan to review.
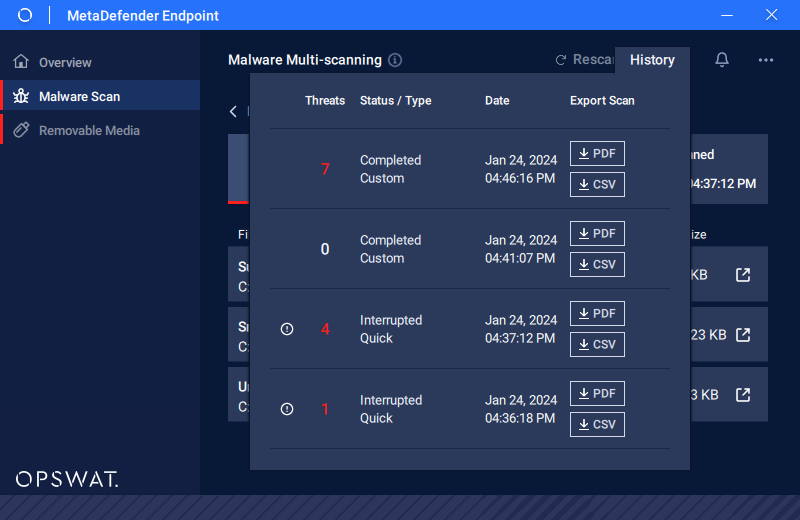
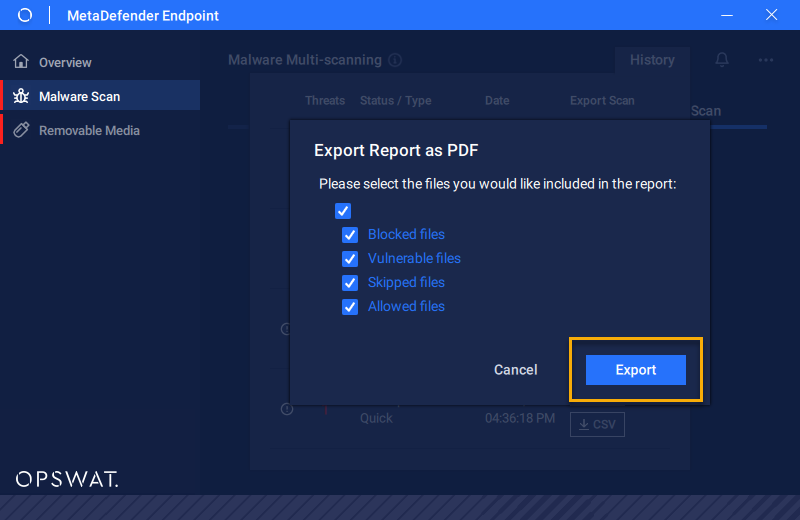
- Step 1: With the scanning list, click on “PDF“ (generate a file report with .pdf extension format) or “CSV” (generate a file report with .csv extension format) button to generate the report.

- Step 2: Select the file type and then click “Export”.
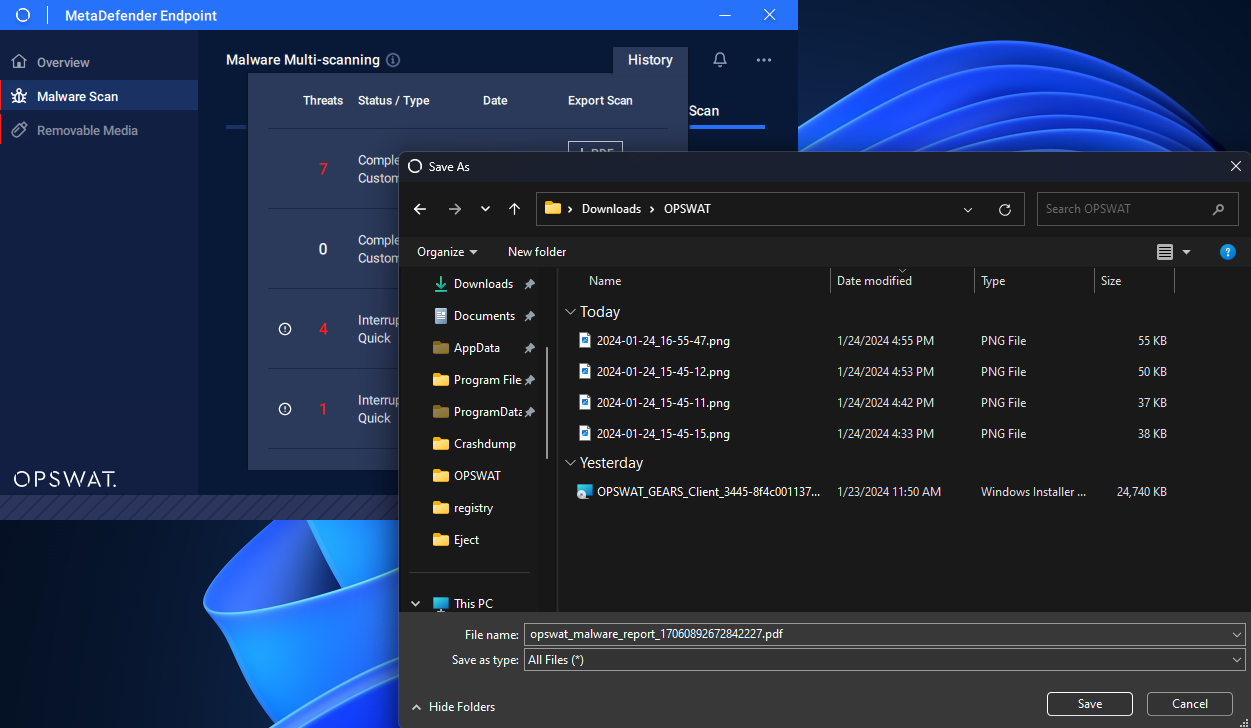
- Step 3: As the “Explorer” popup shows up, please choose the destination path save this file report, and click “Save” to proceed.
MetaDefender Endpoint Removable Media Protection
The guide to Unblock USB
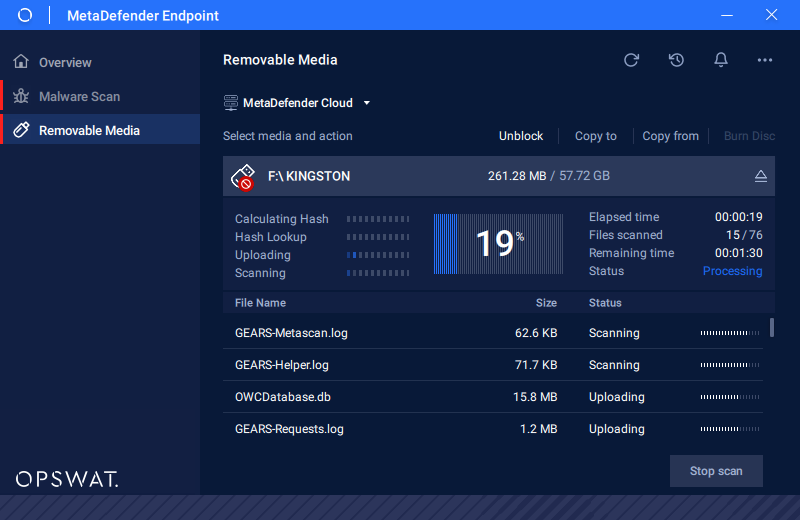
- Step 1: To unblock USB, click on the “Unblock“ tab and then click ”Scan” to scan this USB.
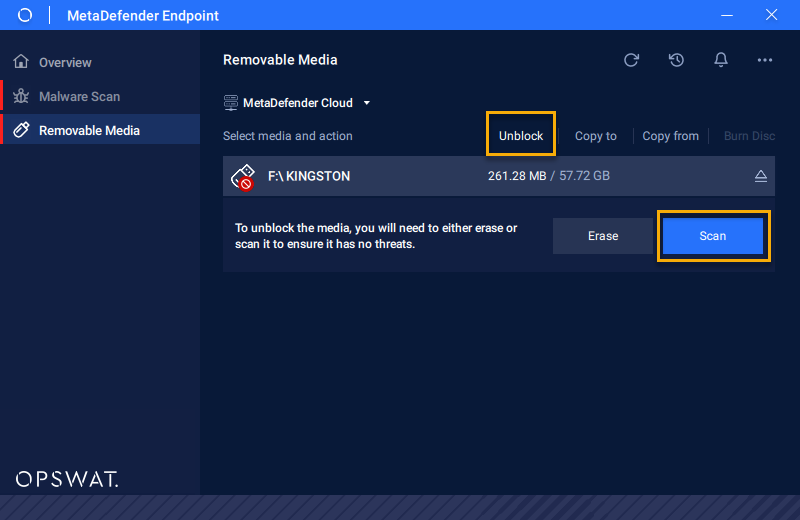
- Step 2: Wait for the scanning process to complete and check the scan result.
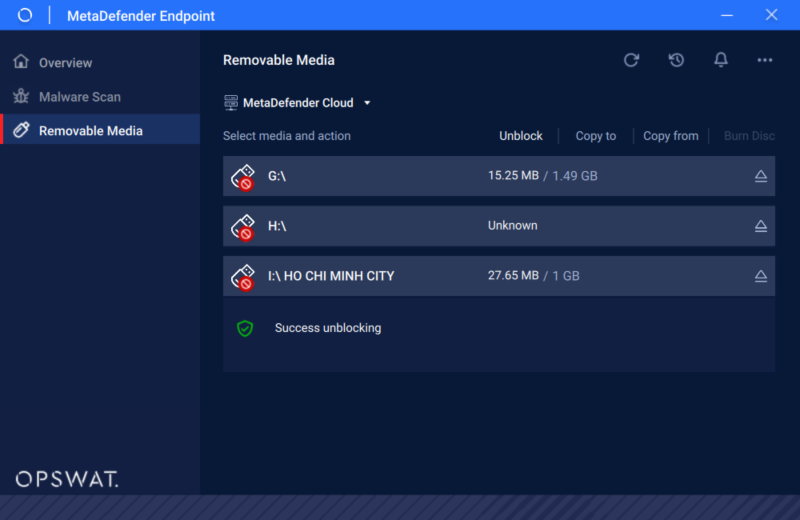
Unblock Success: The result of unblocking USB
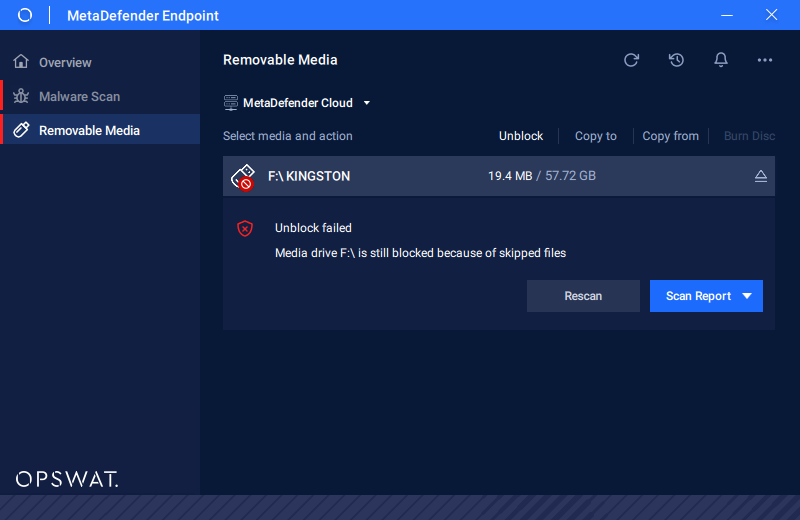
Unblock Fail: The result of unblocking USB
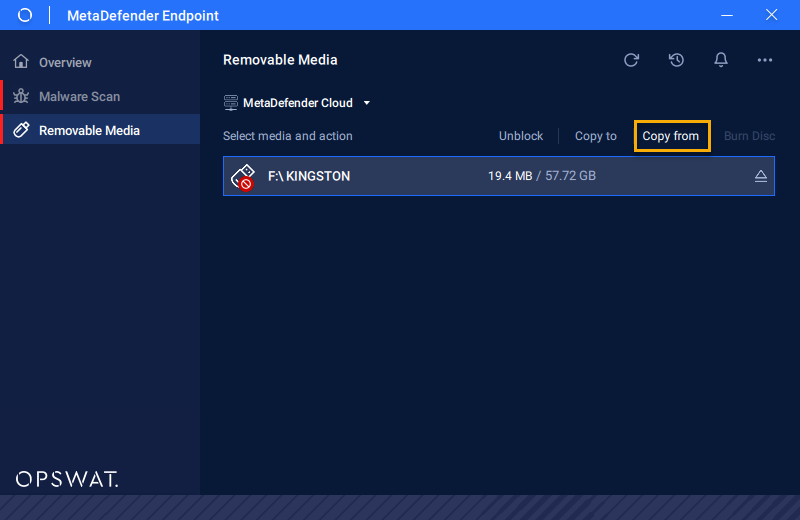
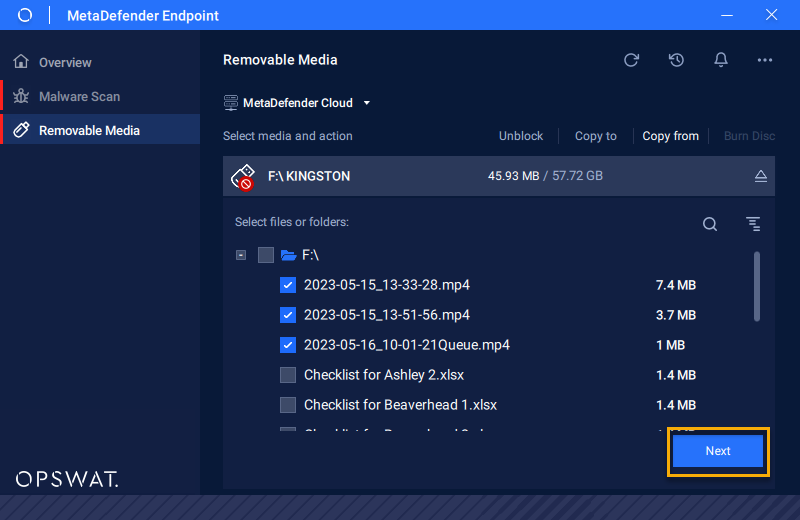
The guide to Copy file from USB
- Step 1: Click on the “Copy from” tab to copy files from Media to the local drive. Select the file you want to copy and choose “Next” to continue.
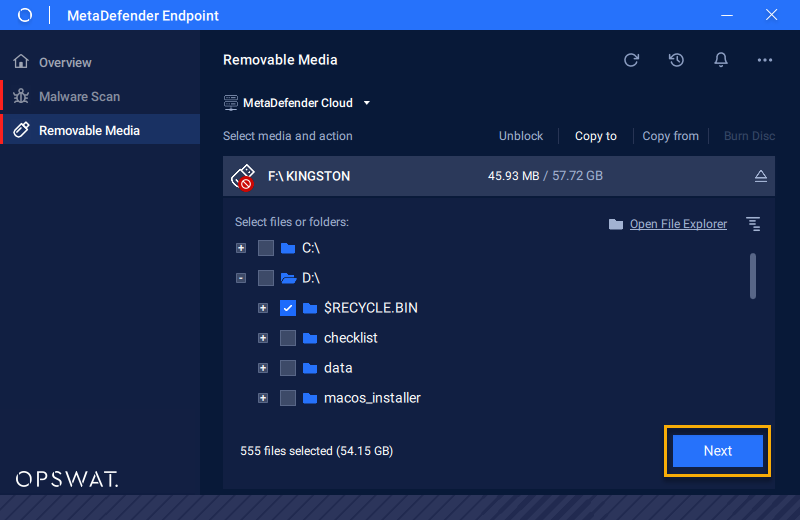
- Step 2: Expand the media file to select the files you want to copy, then click “Next“.
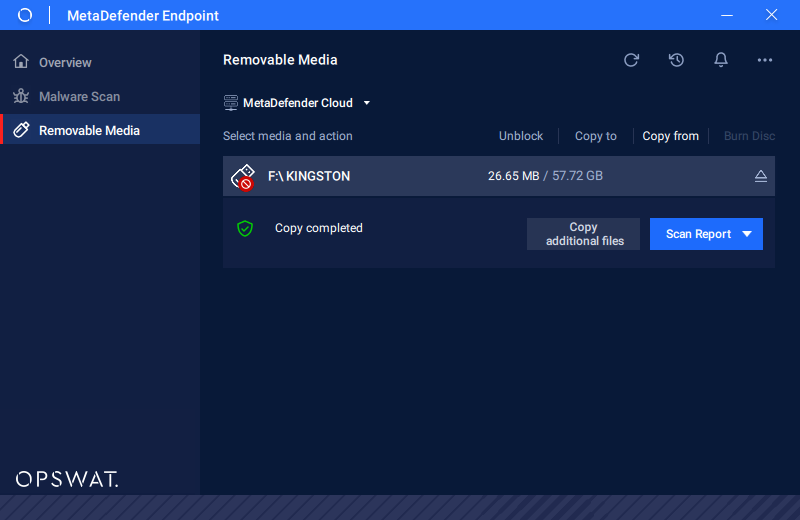
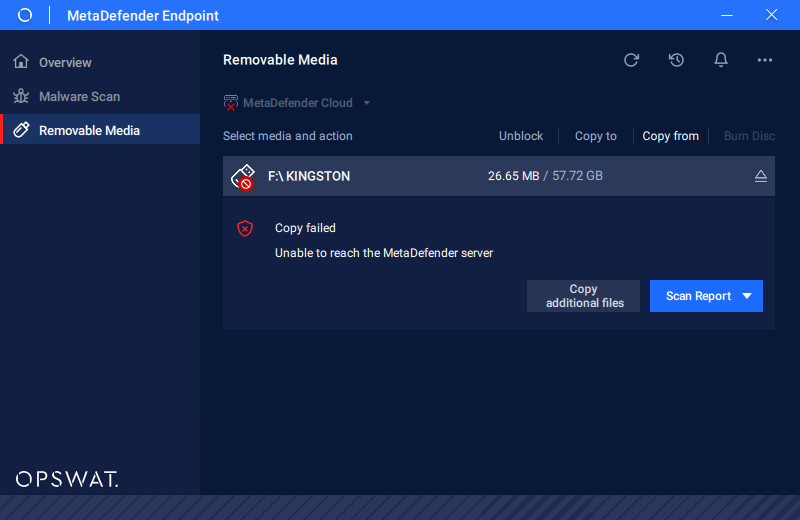
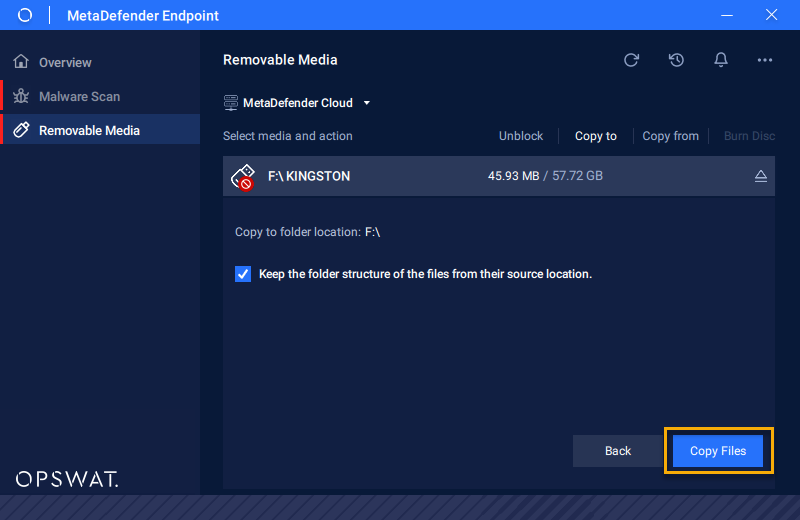
- Step 3: Configure the file copy settings, including the destination path and the option to maintain folder structure. Afterward, click 'Copy Files' to initiate the file copying process, or click 'Back' to return to file selection.

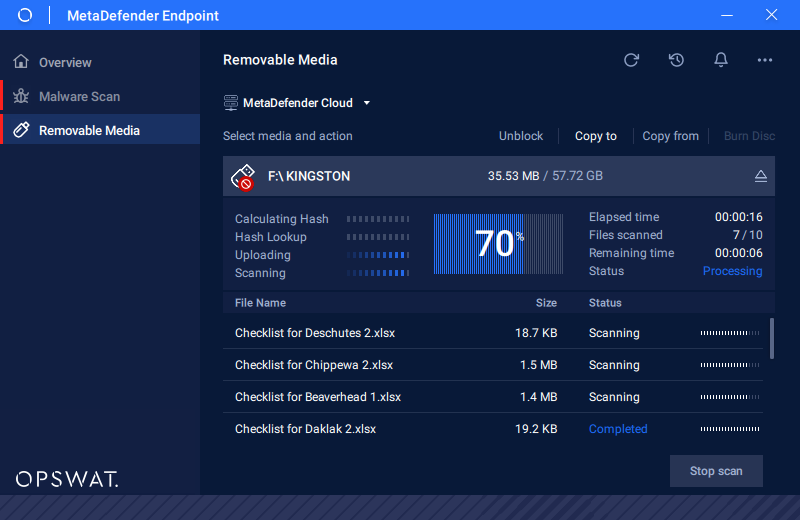
- Step 4: Wait for the copying process to complete and check the file.

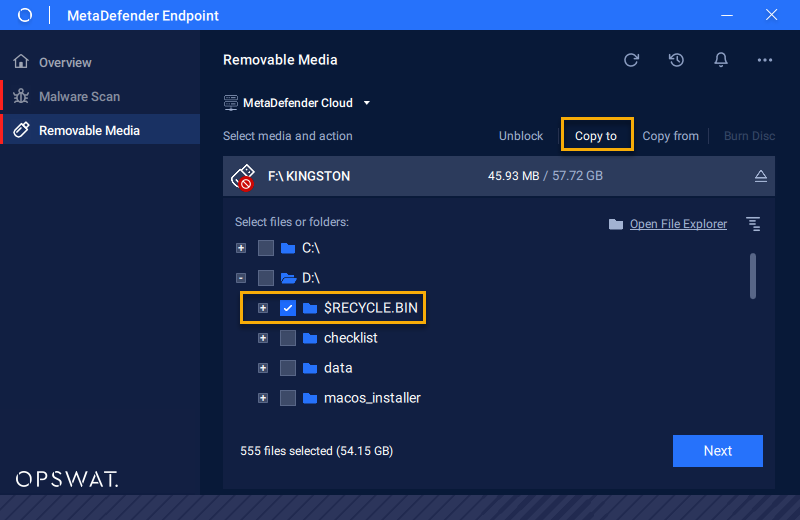
The guide to Copy file to USB
- Step 1: To copy files from the local drive to Removable Media, Click on the “Copy to” tab to copy the files from the local drive to Removable Media. Click “Next” to continue.
- Step 2: Check the correct information and then click “Copy Files“ to start the copying process.
- Step 3: Wait for the copying process to complete and check the file.
The guide to export the report
You can export a report for each action by two different ways:
- Action to Unblock Media
- Action to Copy From Media
- Action to Copy to Media
Solution 1: Export the report at the result screen
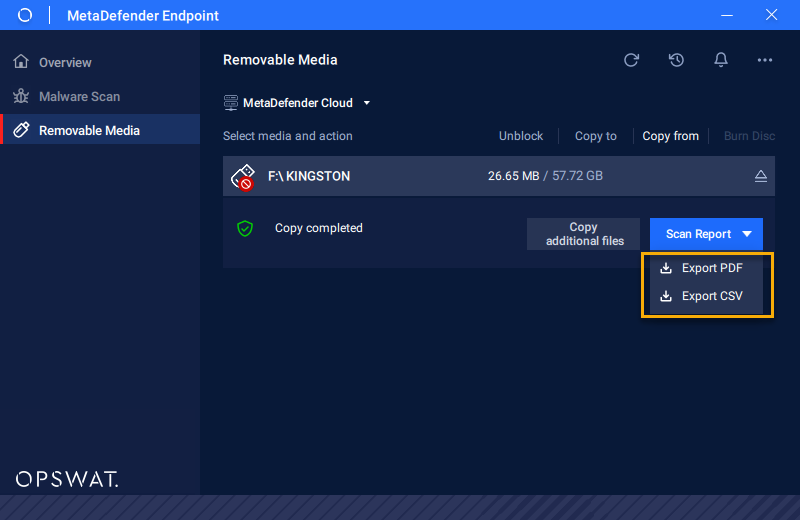
- Step 1: After completing copying the file, click “Export PDF“ or “Export CSV“ to generate the relevant file.
- Step 2: In the popup display, select the details of the file to be shown in the report.
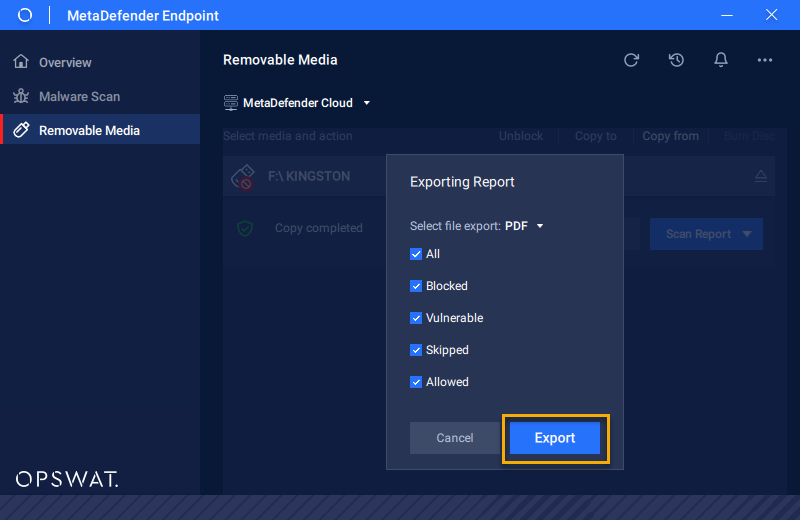
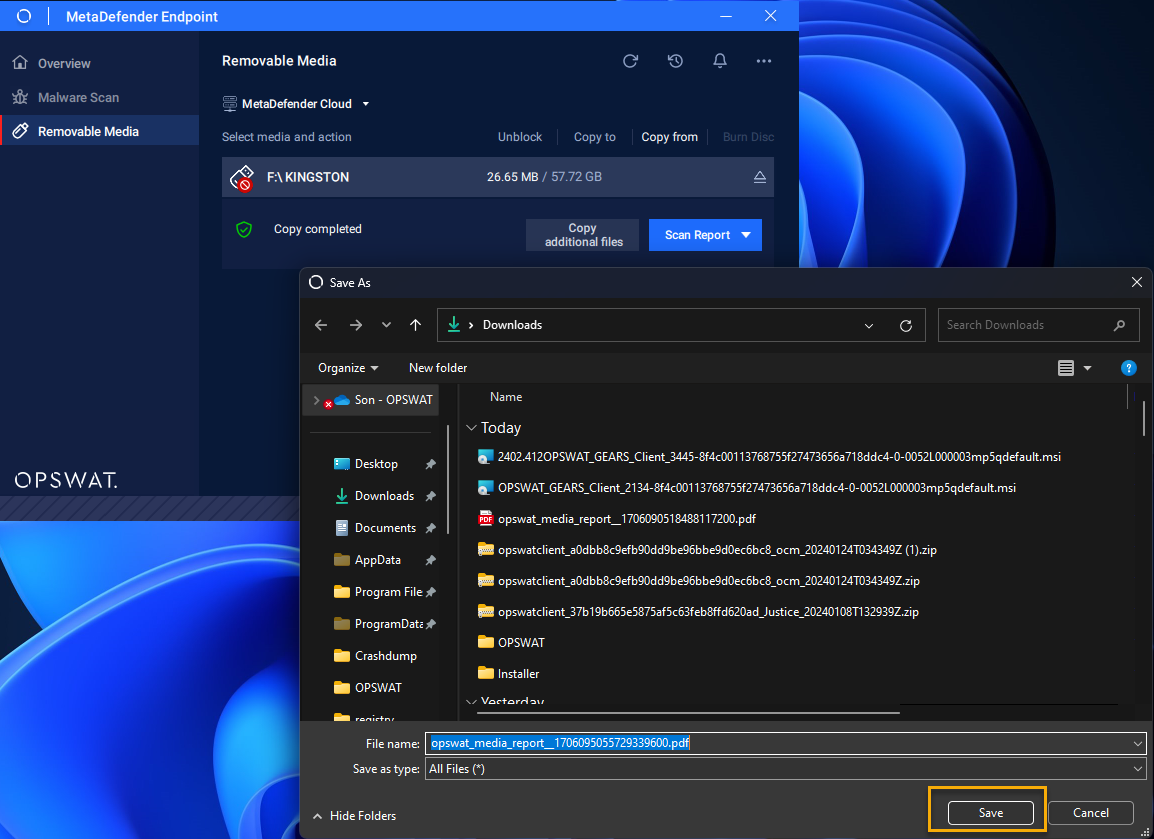
- Step 3: As the “Explorer” popup shows up, please choose the destination path save this file report, and click “Save” to proceed.
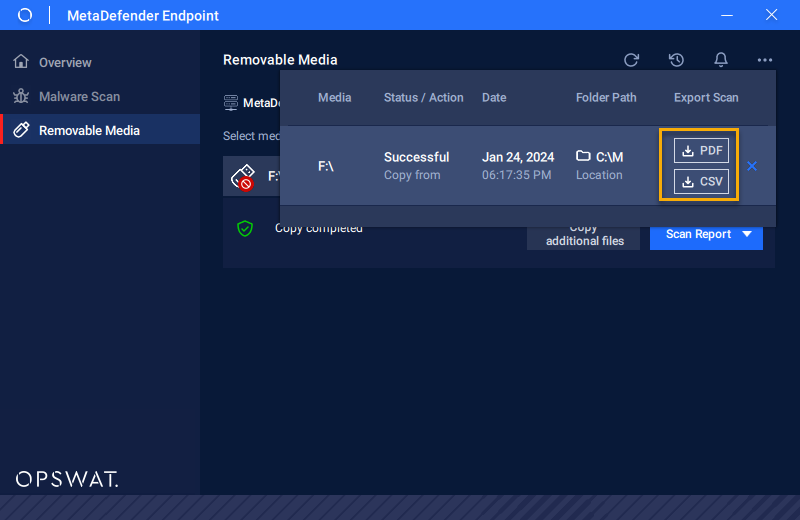
Solution 2: Export the report into the History list
Please note that the platform can't generate previous reports through solution 1. To generate previous reports, go to the “History” tab and click on “PDF” or “CVS to generate the requested file. The remaining steps are similar to other solutions.
Troubleshooting
As you are facing issues and need to troubleshoot, this is the export log guide.
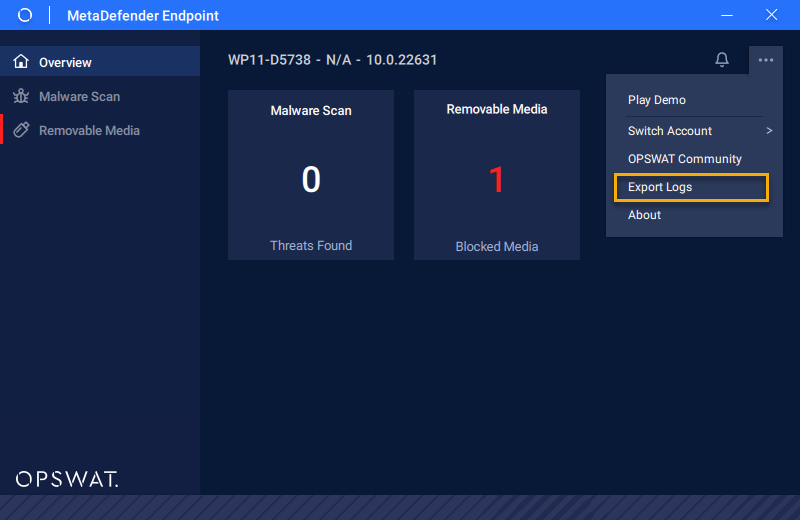
Case 1: Click on the “…” on top right of MetaDefender Endpoint and choose “Export Logs”.
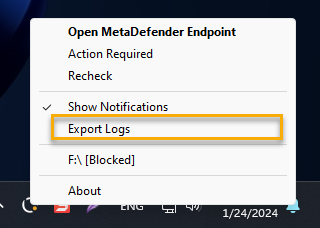
Case 2: You can also export logs from the Tray icon menu by right-clicking on the icon and selecting “Export Logs”.
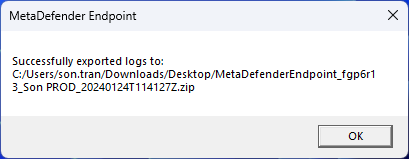
Exporting the file will take a few seconds for Client to generate the log (.zip) on the desktop. When completed, a notification will be displayed.
If you have any difficulty Accessing Device Client Version Information, please open a Support Case with the OPSWAT team via phone, online chat or form, or feel free to ask the community on our OPSWAT Expert Forum.