
This guide uses the SMB/CIFS protocol exclusively for all storage operations. Despite references to "NFS storage" in MDSS terminology, no NFS (Network File System) protocol is involved. The term "NFS storage" refers to MDSS's storage subsystem name that is using the local file system API, not the NFS network protocol. All connections use SMB/CIFS (Common Internet File System).
1. Map SMB share as a drive
The below command needs to be run as NTSYSTEM user because our internal NFS service is running as NTSYSTEM user.
To run terminal as NTSYSTEM, please do the following (on the same machine where MetaDefender Storage Security is installed):
download and extract PsTools
Open an Administrator console
cd to PsTools folder
run
.\PsExec.exe -i -s cmd.exe. It will open another terminal as a NTSYSTEM user
In the above-opened terminal, run the following command:
Alternatively, if supported, you can map the drive using QUIC transport:
For example, this SMB share is mapped to drive G:
The SMB share mapping configured using this method is temporary and will not survive system reboots. The mapping will be automatically removed when the machine is restarted.
To create a persistent mapping please refer to this article..
2. Add the SMB share as NFS storage in MDSS UI
In order to integrate SMB share as NFS unit with MetaDefender Storage Security, please follow these steps:
As NFS is not using any credentials, you can have only one NFS account in MDSS. If you already have one, please go to step 4
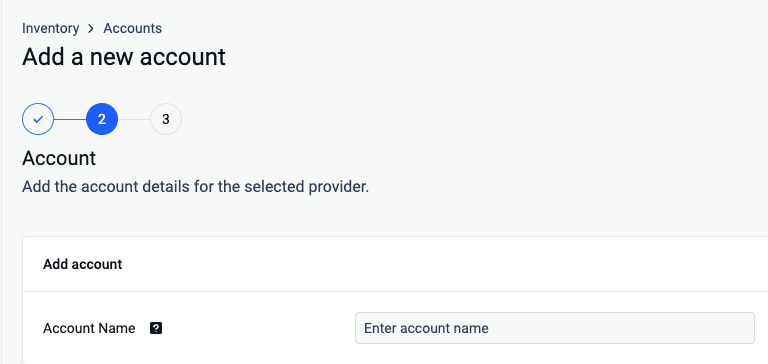
From the left side menu, navigate to Inventory, click Add New > Account, choose NFS (Network File System) and click Next.
Give your account a name so you can easily identify it later
From the left side menu, navigate to Inventory, click Add New > Unit, choose the previously created account and click Next.
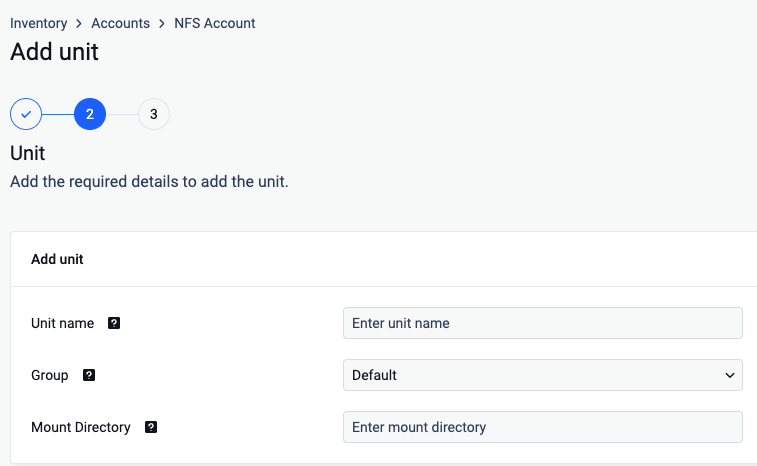
Give your unit an unique name so you can easily identify it later
Assign your unit to a Group
In Mount Directory, enter the drive the share was mapped to in 1. Map SMB share as a drive. In this example,
G:\Click Next in order to finish the process.
Please follow the Microsoft recommendation for file and directory names.