
The Inventory page is where you view and manage all the storage resources that MetaDefender Storage Security (MDSS) protects. From here you can see every storage unit registered for scanning, the groups they are organized into, and the accounts used to connect to your storage providers.
Access: Select Inventory in the left navigation menu.
Tabs
The page is organized into three tabs:
Units — Individual storage locations registered for scanning (for example, an Amazon S3 bucket or an NFS share).
Groups — Logical collections of units, used to apply shared settings and workflows.
Accounts — The connections and credentials MDSS uses to reach each storage provider.
Units
Individual storage locations registered for scanning (for example, an Amazon S3 bucket or an NFS share).
To add a new storage unit, please follow the Integrations page.
Accounts
What are Accounts?
Accounts in MetaDefender Storage Security allow you to:
Store and manage access credentials for storage services in one centralized location (credentials are encrypted and stored securely in the database)
Associate multiple storage units with a single account for simplified management
Enable automatic discovery of new storage units for supported services (currently Amazon S3)
Organize storage resources within groups for better administration
Role-based access control governs all account operations - Administrator, SSO Administrator, and Tenant Administrator roles have full permissions to create, modify, and delete accounts, while Read-Only Administrator and SSO Read-Only Administrator roles cannot perform these actions.
Creating a New Account
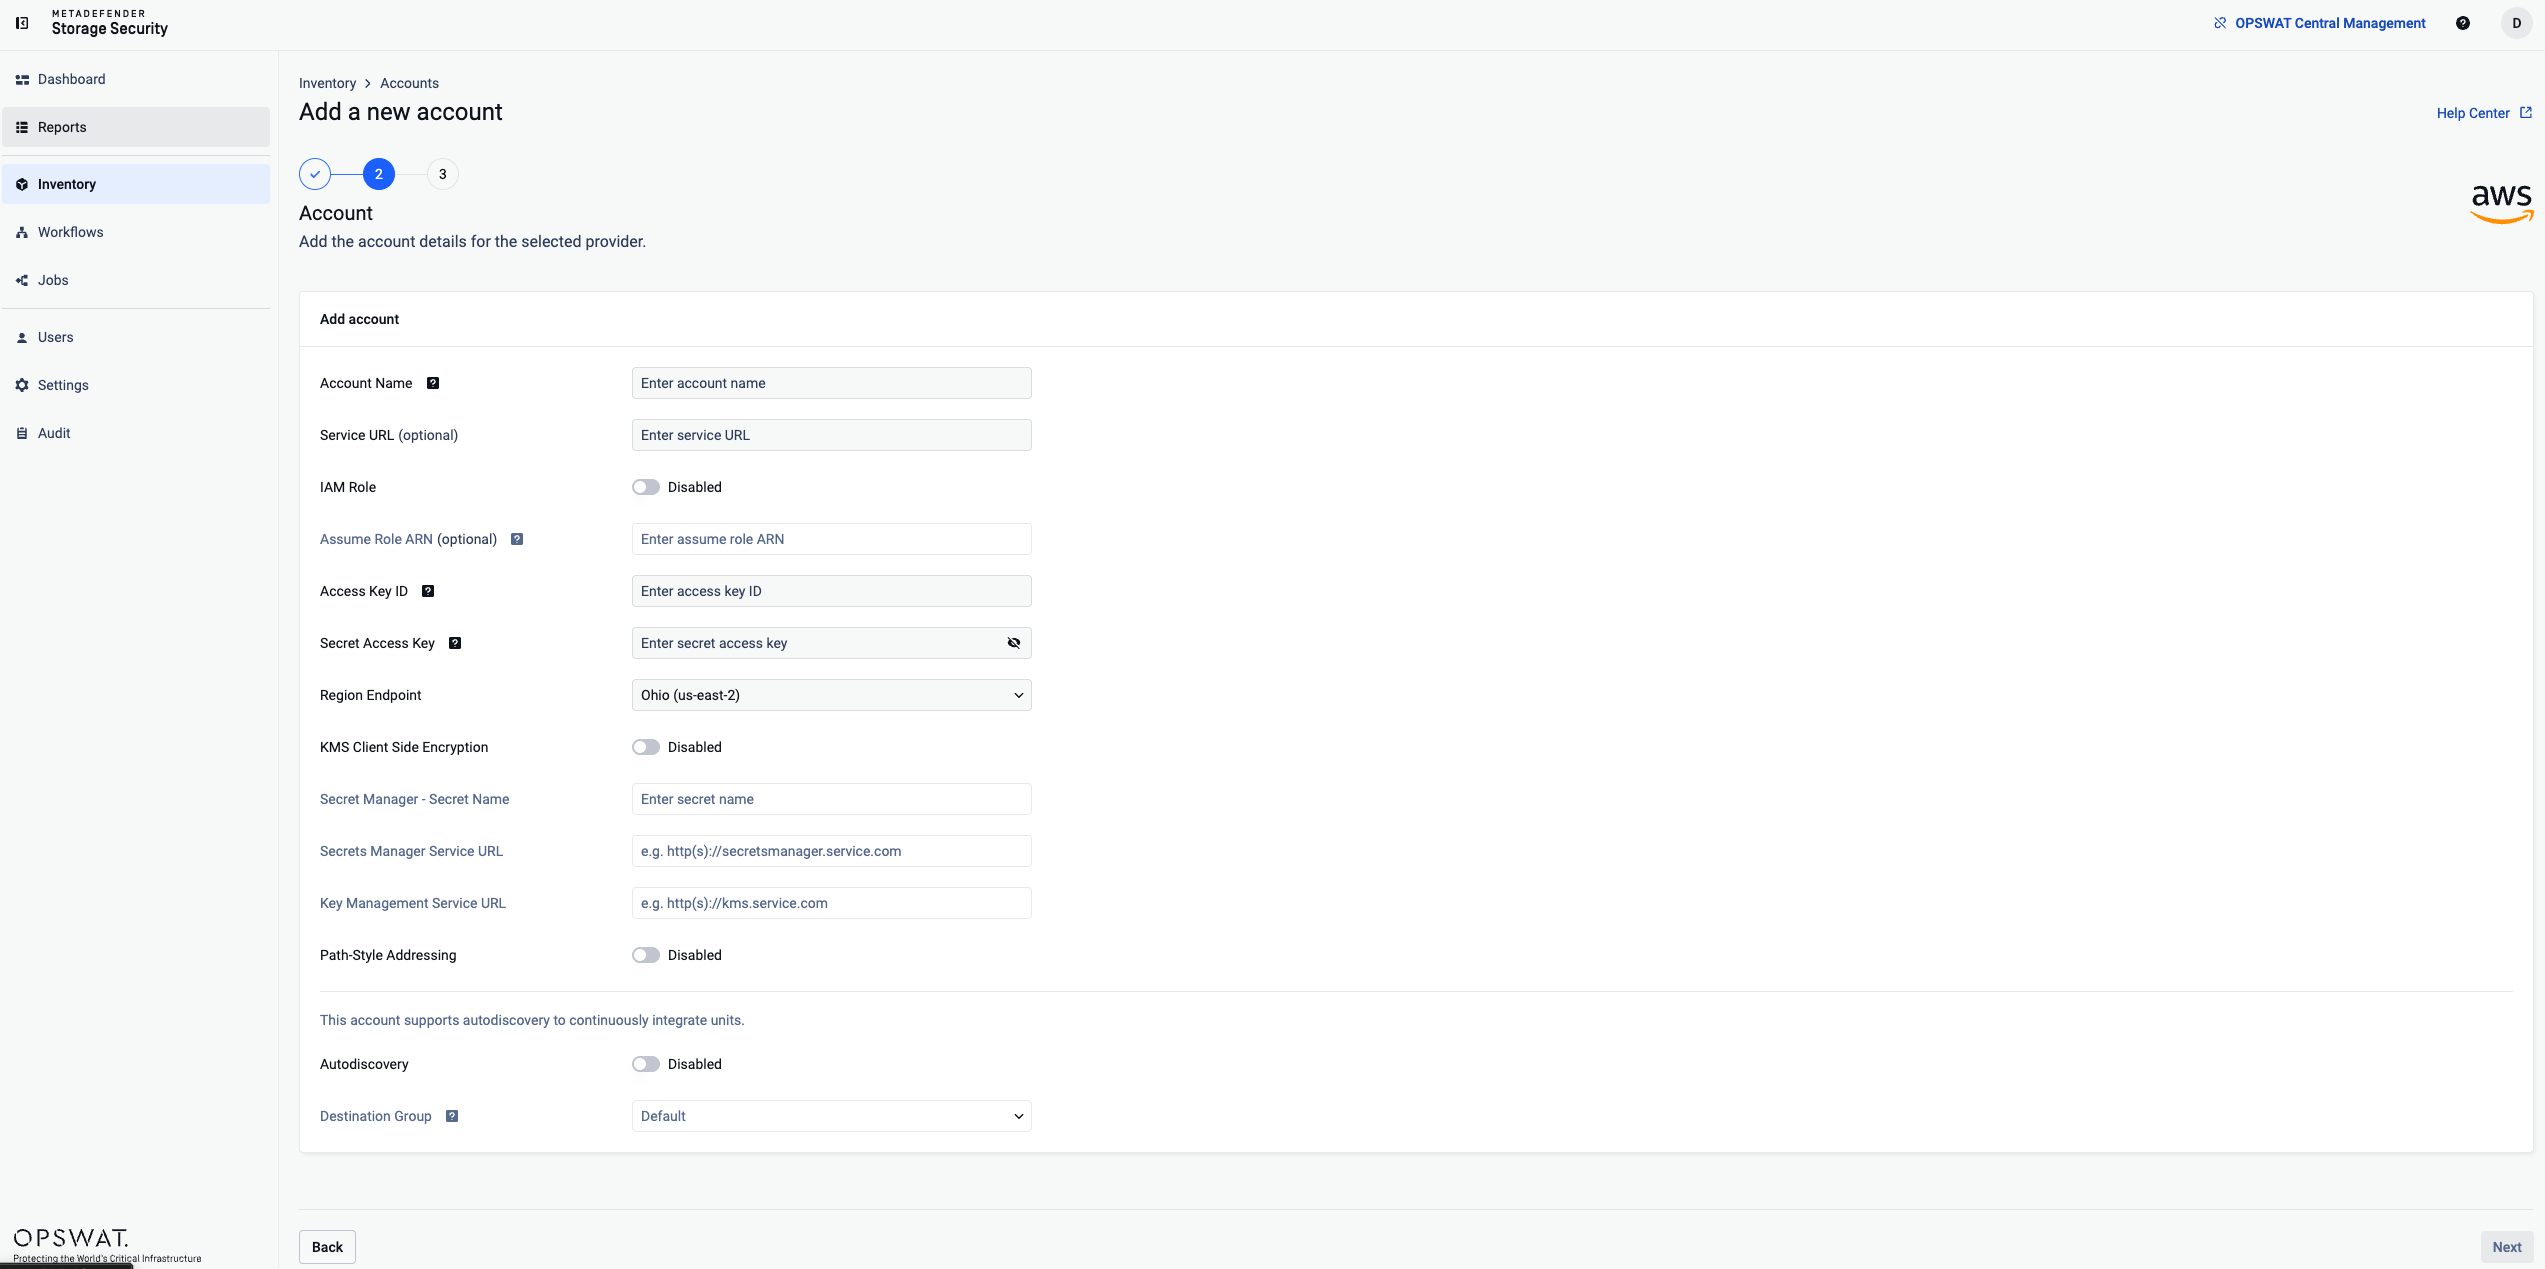
Accounts can be created during Storage Unit addition:
Navigate to the Storage Units page and click on "Add storage unit" button
Select the service you want to integrate
From the top toggle, select "Add new account"
Fill out the required account's credentials and the storage's specific fields
Click "Continue" to create both the account and storage unit
There are no limits on the number of accounts that can be created.
Managing Existing Accounts
Navigate to the Storage Units page
Switch to "Accounts" view using the toggle in the top-right
Locate the account you want to manage
Click the three-dot menu next to the account name
Available Account Actions

Create Job - Starts instant scans for all storage units under the account. These scans can be monitored through the ongoing scans interface. If individual scans fail, they are handled independently without affecting other scans in the batch.
Account Settings - Opens modal to modify account credentials
Add unit - Add a new storage unit in this account
Delete Account - Removes the account
Edit Account Information
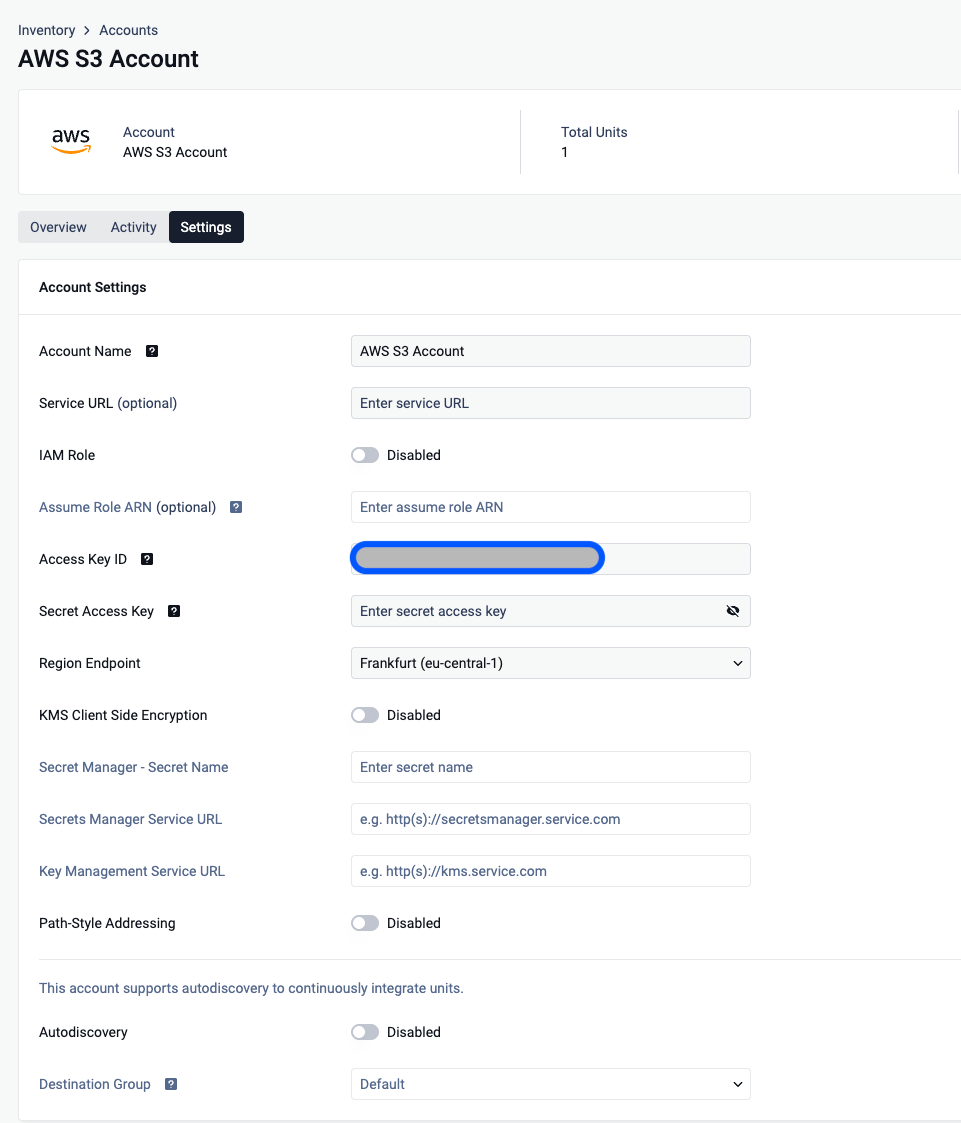
From the account's three-dot menu, select "Edit Account Information"
The modal opens pre-populated with current account details
You'll be required to input credentials or credentials file to validate changes
Click "Save changes" to update the account
Delete Account
From the account's three-dot menu, select "Delete Account"
Accounts with storage units: Cannot be deleted - you'll see a warning message with the count of associated storage units
Empty accounts: Can be deleted after explicit confirmation
Confirm the deletion when prompted
When accounts are deleted, all associated reports and historical scan data are permanently removed and cannot be exported - there are currently no data export capabilities for this purpose.
Groups
What are Groups?
Groups in MetaDefender Storage Security provide an organizational structure for managing storage units and accounts. They enable logical grouping of related storage resources, simplifying administration and enhancing visibility across the system.
Key Features include ways to:
Organize storage units and accounts in logical collections
Perform actions on multiple storage units at once
Clear visual separation of resources in the user interface
MDSS groups operate as a single-level organization system without nesting capabilities, and storage units cannot belong to multiple groups simultaneously. All storage units are mandatory to be assigned to a group.
Default Group
The system includes a default group. This ensures that all storage units and accounts always have a group assignment, even if a custom group is deleted.
Storage units or accounts can be moved to the default group if their assigned group is deleted
The default group has a predefined ID and name but can have its description modified
Creating and Managing Groups
Creating a New Group
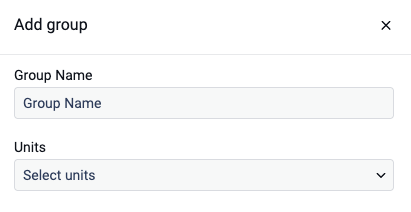
Groups can be created from the Storage Units and Dashboard View
Click the "Create New Group" button in the header actions
Enter a group name (required field)
Optionally select existing storage units to include in the group
Click "Create Group" to finalize
During storage unit creation, the first available group is pre-selected by default. There are no limits on the number of groups that can be created.
Managing Existing Groups

Navigate to the Storage Units page (Groups view)
Locate the group you want to manage
Click the three-dot menu next to the group name
Role-based access control governs all group operations - Administrator, SSO Administrator, and Tenant Administrator roles have full permissions to create, modify, and delete groups, while Read-Only Administrator and SSO Read-Only Administrator roles cannot perform these actions.
Available Group Actions
Scan All Group Items
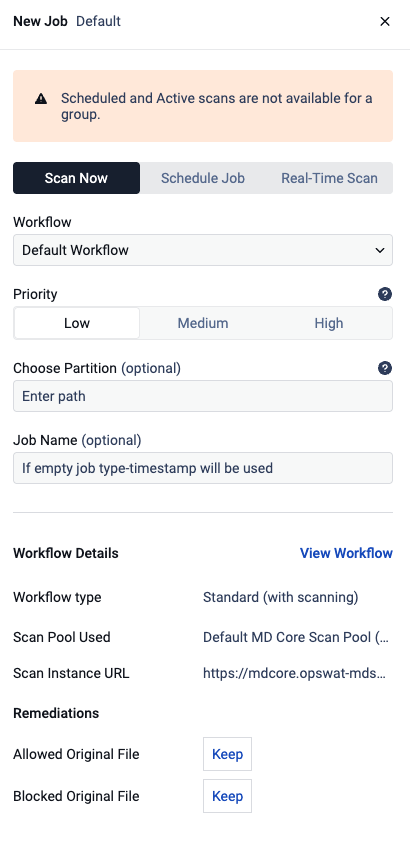
Starts instant scans for all storage units under the group. These scans can be monitored through the ongoing scans interface. If individual scans fail, they are handled independently without affecting other scans in the batch.
Group Status Information
Storage Count Badge
Shows the total number of storage units in each group with format: "X storage units"
Status Badges
Visual indicators showing:
Error Count - Badge showing storage units with errors
Testing/Untested Count - Badge showing storage units being tested or untested
Success State - No badges when all storage units are operational
Moving Storage Units Between Groups
From any storage unit's management options(three-dots), select "Move to Group"
Choose the destination group from the dropdown
Confirm the move to complete the transfer