SPO Add-in Integration (referred to as "SPOA" in this documentation) is a registered trademark of Microsoft Corporation.
This section covers the integration of SPO Add-in into MFT.
MetaDefender MFT in Microsoft® Entra ID
Register MetaDefender MFT
Before integrating SPO with MetaDefender® MFT, you must register MetaDefender® MFT in Microsoft® Entra ID.
Set API permissions
MetaDefender® MFT uses the Microsoft® Graph API to access SPO document libraries as a Microsoft® Cloud service resource. To enable API usage, you need to grant the necessary permissions to the registered MetaDefender® MFT application with Microsoft® Entra ID.
In the API permissions section of the registered MetaDefender® MFT application in Microsoft® Entra ID, add the following Microsoft Graph application permissions for SPO:
For pull jobs only: Sites.Read.All
For both pull and push jobs, or push jobs only: Sites.ReadWrite.All

Setup SPO Add-in at MetaDefender MFT
To manage SPO integration instances, go to "Settings" → "Integrations" → "SPO Add-in".
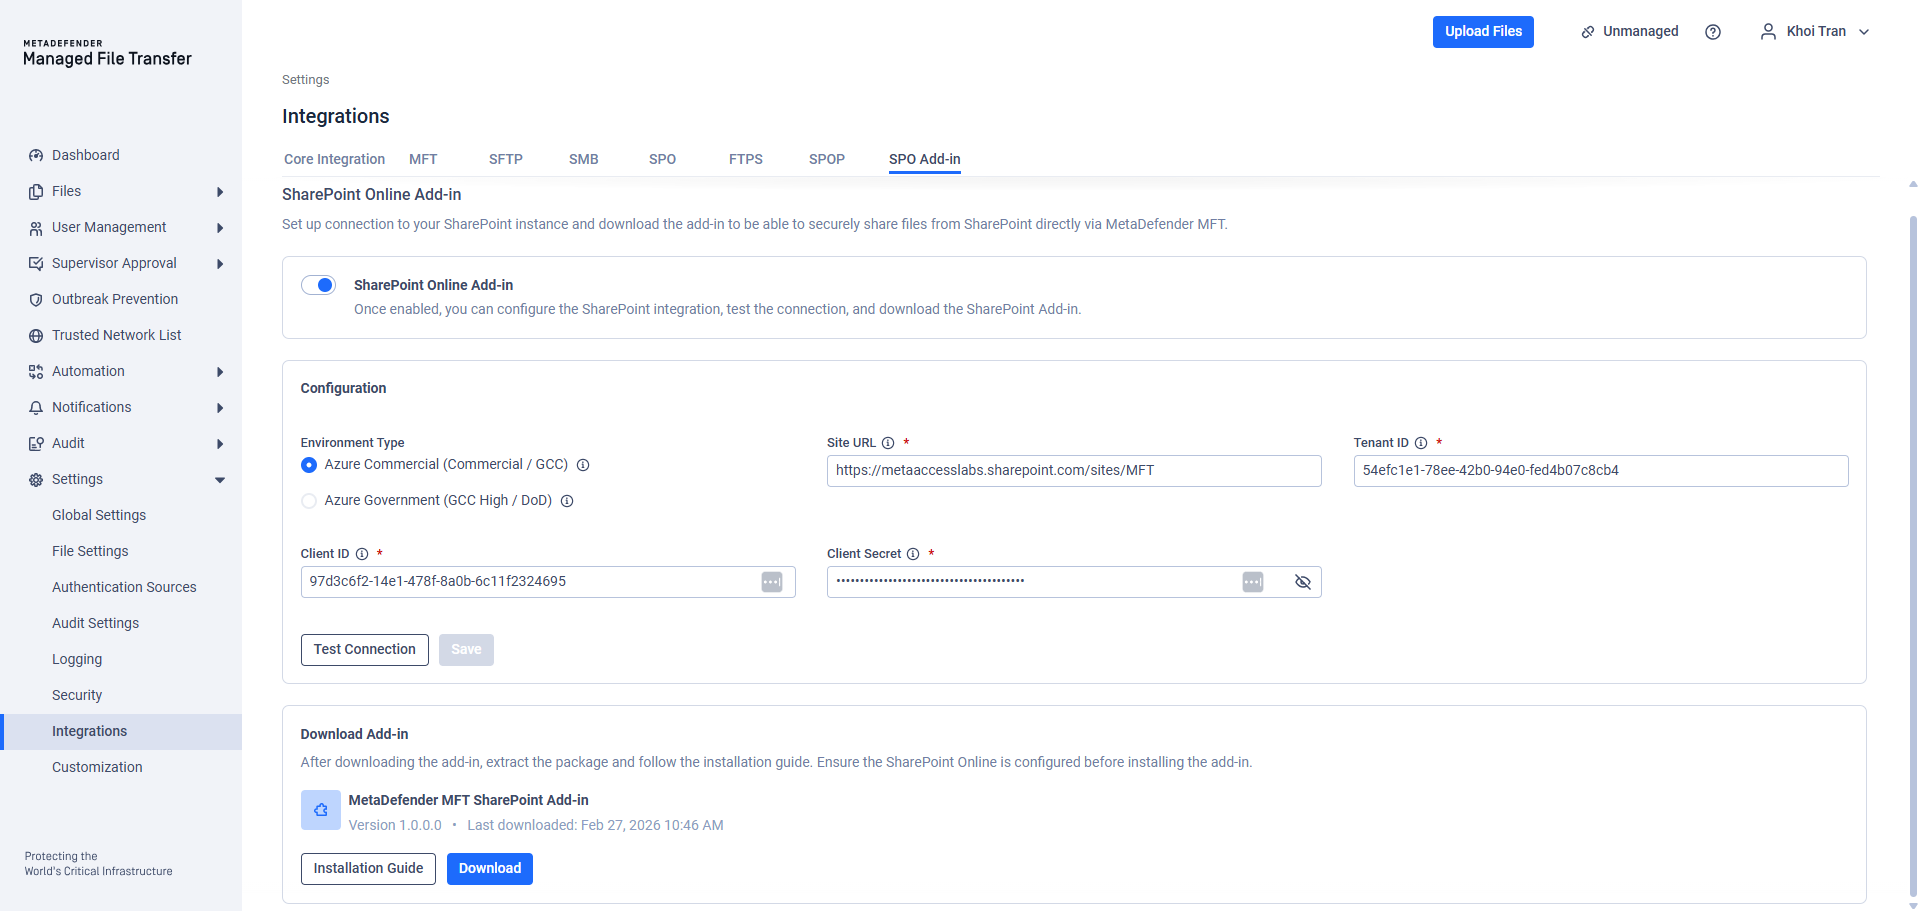
SPOA integrations are globally available, meaning all users with the appropriate permissions can view the same set of integrations.
SharePoint Online Add-in
This section contain the switch that will let admin user enable/disable request from your SharePoint site.
Configuration
This section let will require you input your company SharePoint site information, and the credential that MFT will use to access the SharePoint resource.
Environment Type: Choose the appropriate environment based on your organization’s SharePoint SPO configuration:
Azure Commercial (Default): Most organizations use this option. It connects to .com endpoints such as login.microsoftonline.com, http://graph.microsoft.com , and http://sharepoint.com.
Azure Government: Select this if your SharePoint URL ends with .sharepoint.us or if your organization operates in a U.S. Government environment. This connects to .us endpoints such as login.microsoftonline.us, http://graph.microsoft.us , and sharepoint.us.
Site URL: The URL of the SPO site. To locate the URL, you can:
Go to the "SharePoint admin center" → "Active sites" → Locate the desired SPO site → Copy its URL.
Go to the SPO site and copy the site portion from the browser's address bar. The URL should resemble: https://mycompany.sharepoint.com/sites/MySite
Tenant ID: The unique identifier for the Microsoft Entra ID instance where MetaDefender MFT is registered. This can be found in the "Azure Portal" under the "Entra ID" section.
Client ID: The Client ID is listed in the 'Overview' section of App registrations.
Client Secret: The Client Secret is listed in the 'Certificates & secrets' section of App registrations.
Test Connection
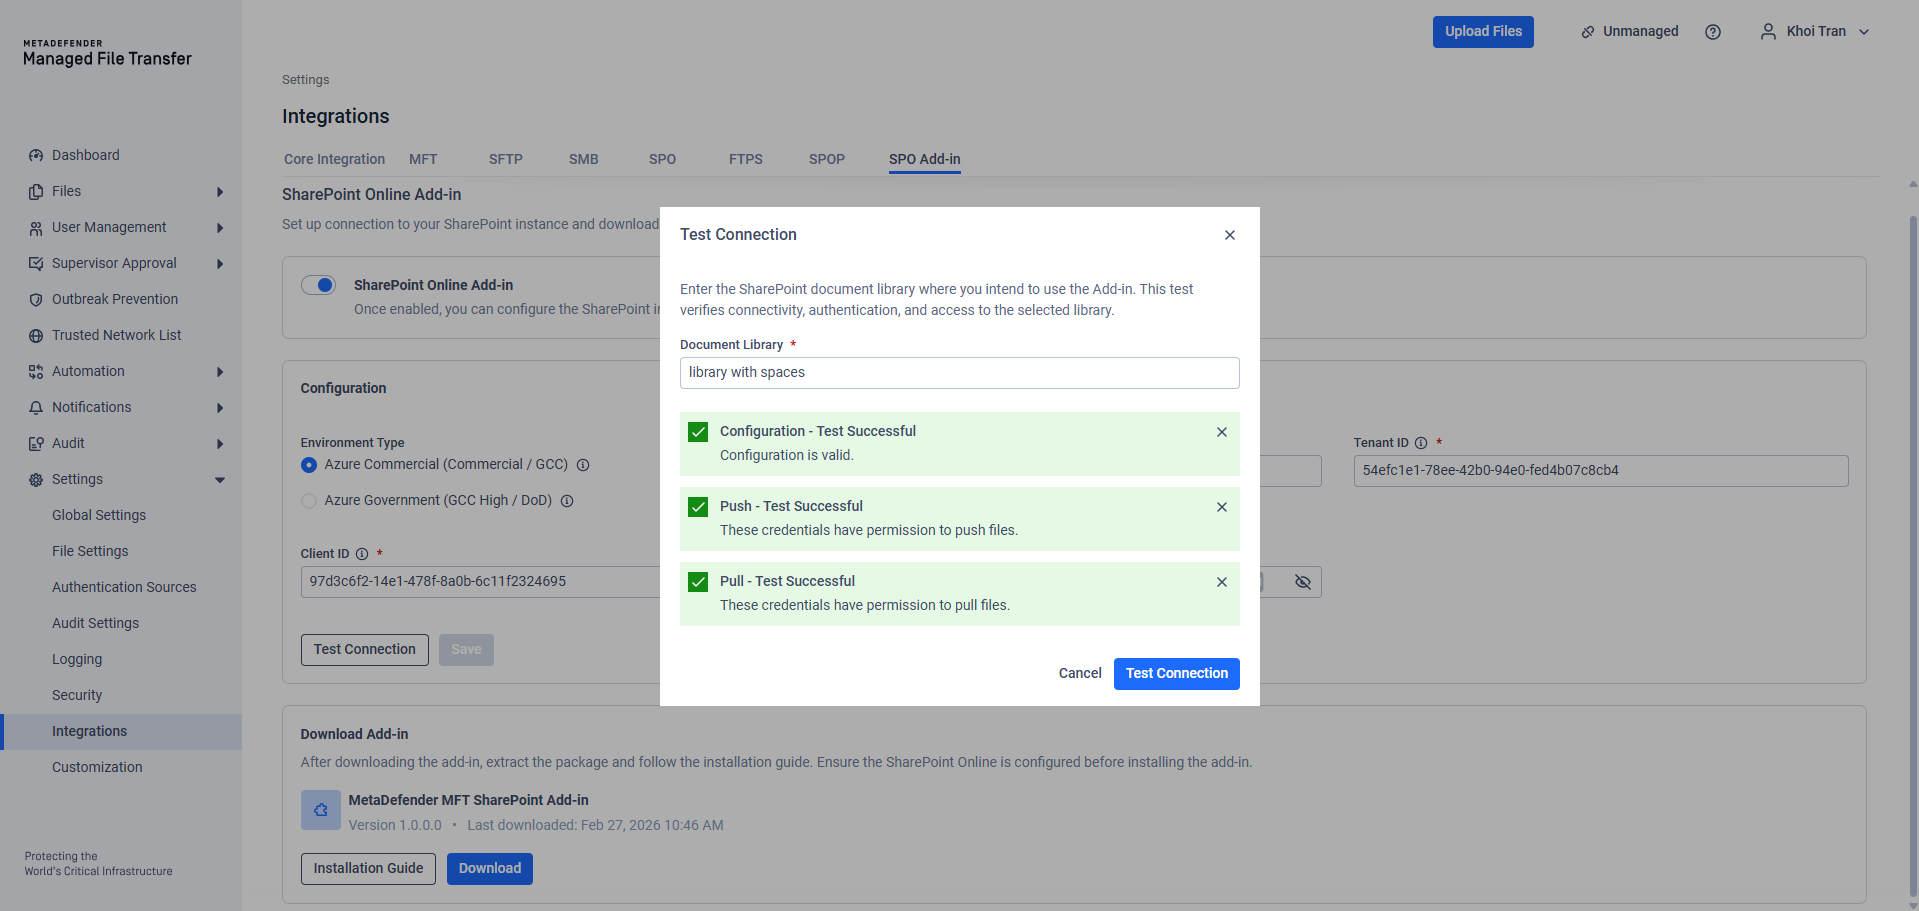
You can test the connection for a configured SharePoint Online (SPO) integration by following these steps.
Please note: You will need to provide the Document Library name of MetaDefender® MFT you want to test with.
Document Library: The name of the document library, which can be found in the left pane of the SPO site. Each integration is limited to a single document library, which will serve as the root path for automated jobs.
The Test Connection process validates your SPO configuration by checking:
Environment Type & Site URL: Confirms the URL points to a valid SharePoint site and matches the selected environment.
Document Library: Ensures the specified library exists within the site.
Tenant ID: Verifies the provided Microsoft Entra ID tenant is valid.
Credentials & Permissions: Confirms credentials have sufficient rights to pull and push files in the document library.
Your SharePoint Online™ integration with MetaDefender® MFT is now complete. Learn how to configure Automated Jobs using this integration by reading more here.
Download Add-in
This section will let you download the OPSWAT MetaDefender File Transfer SharePoint Add-in. This is client package that will seamlessly help you interact with MFT right from your SharePoint site.
The package file is: mft-spoa.sppkg
Setup SPO Add-in at your company SharePoint site
This section will guide admin user how to setup and apply the SPO Add-in to your company SharePoint site.
Publish to your company SharePoint Store site
Go to Manage Apps page of your tenant, the url would be similar to this:
https://**yourtenantdomain**.sharepoint.com/sites/appcatalog/_layouts/15/tenantAppCatalog.aspx/manageApps
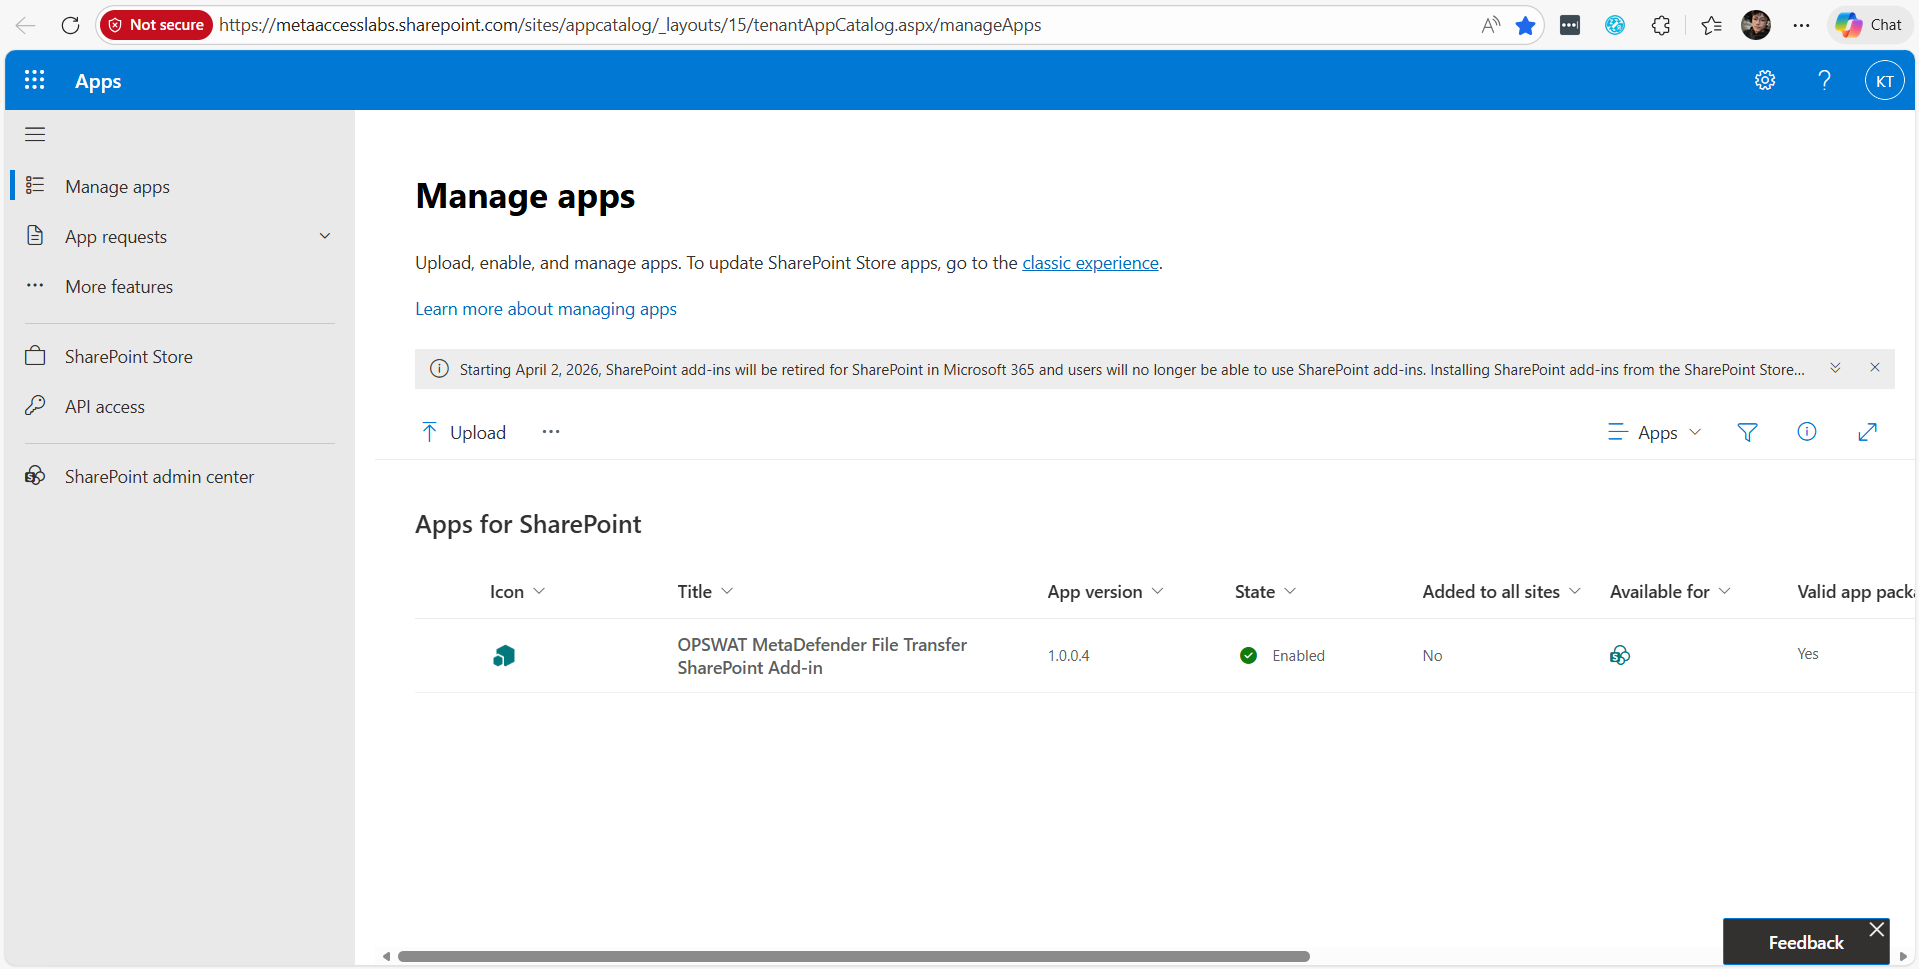
The app name is OPSWAT MetaDefender File Transfer SharePoint Add-in.
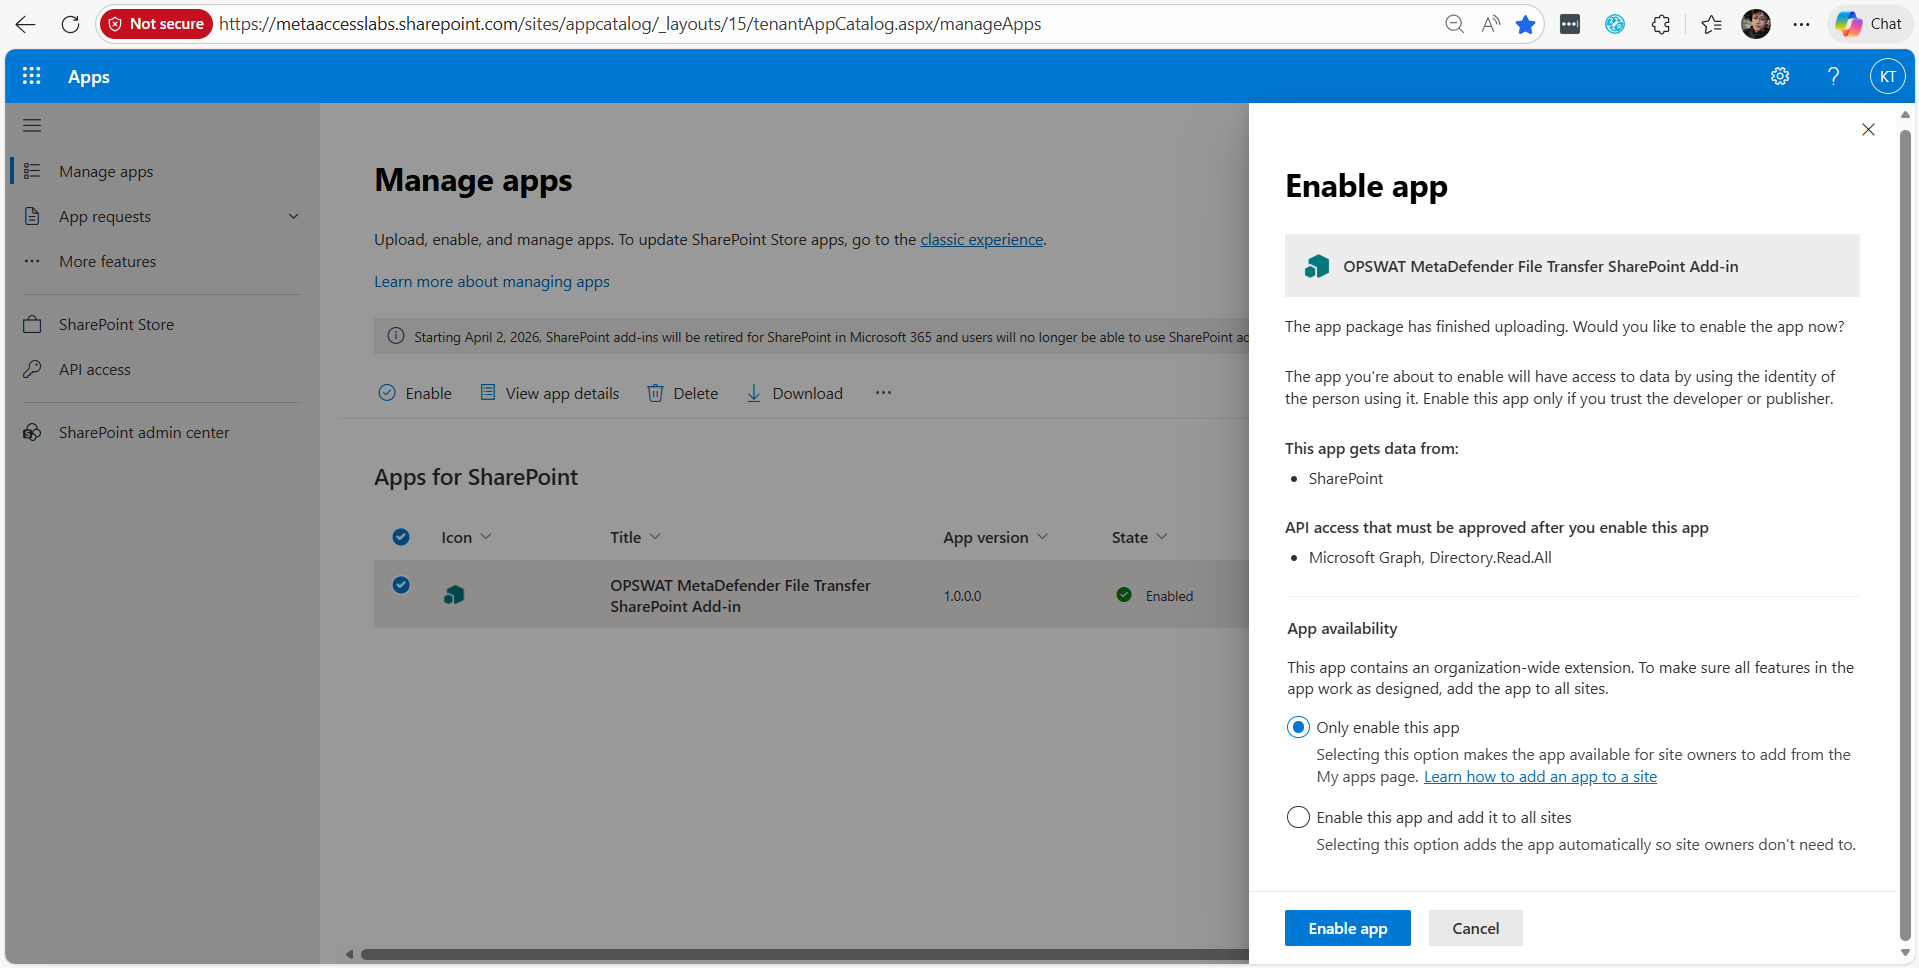
Tips: Select the "Only enable this app" then manually apply it to your specific site later. This will save your time on the whole deployment process.
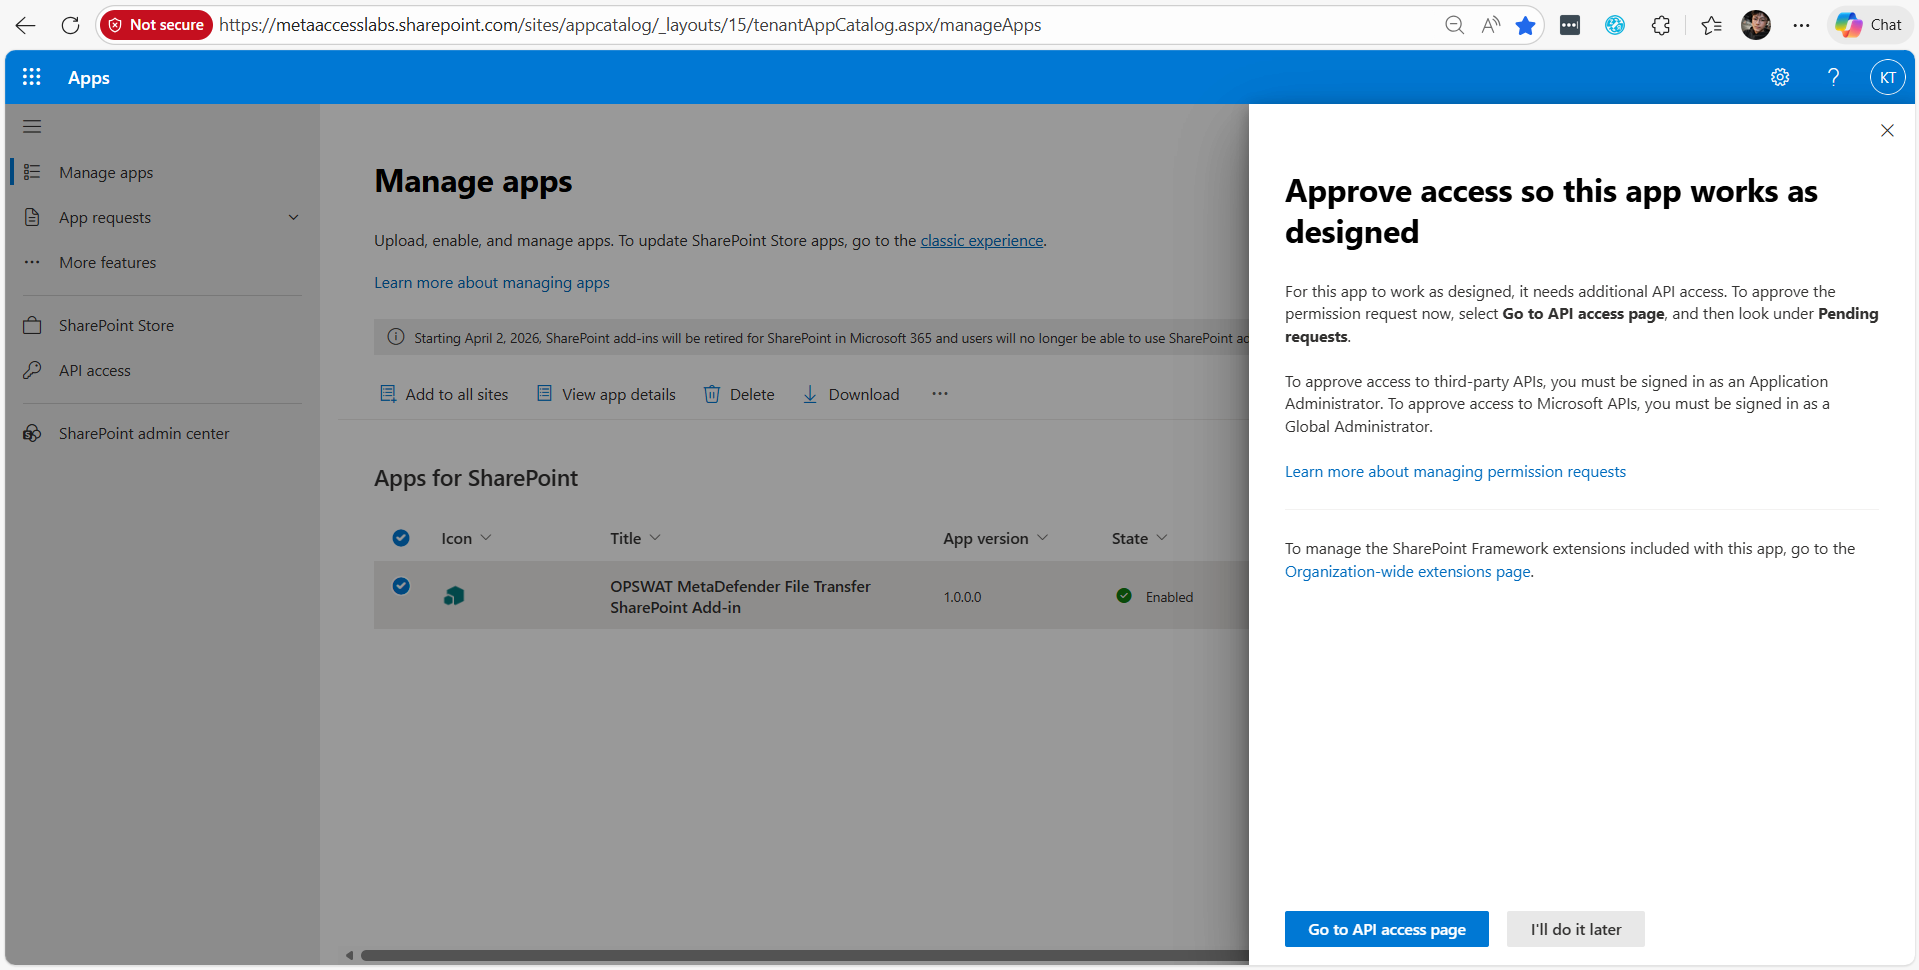
Tips: Click "Go to API access page" then follow the guideline from SharePoint to grant appropriate permissions.
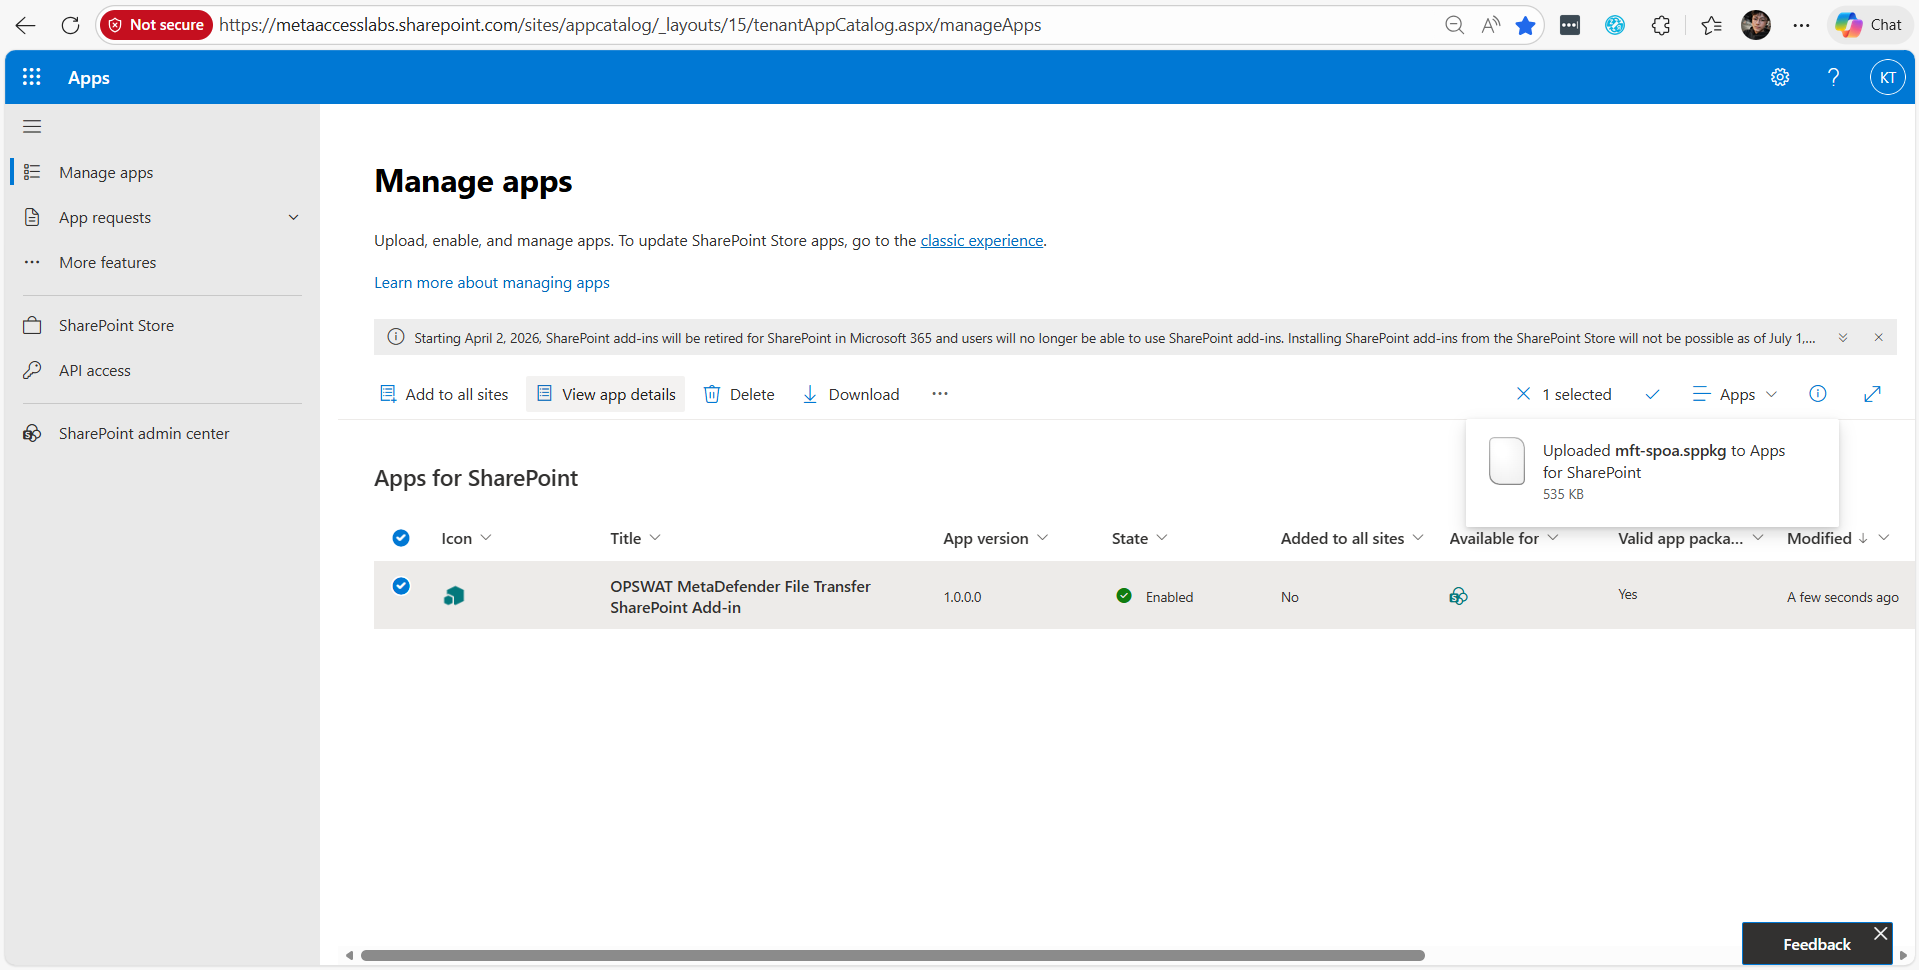
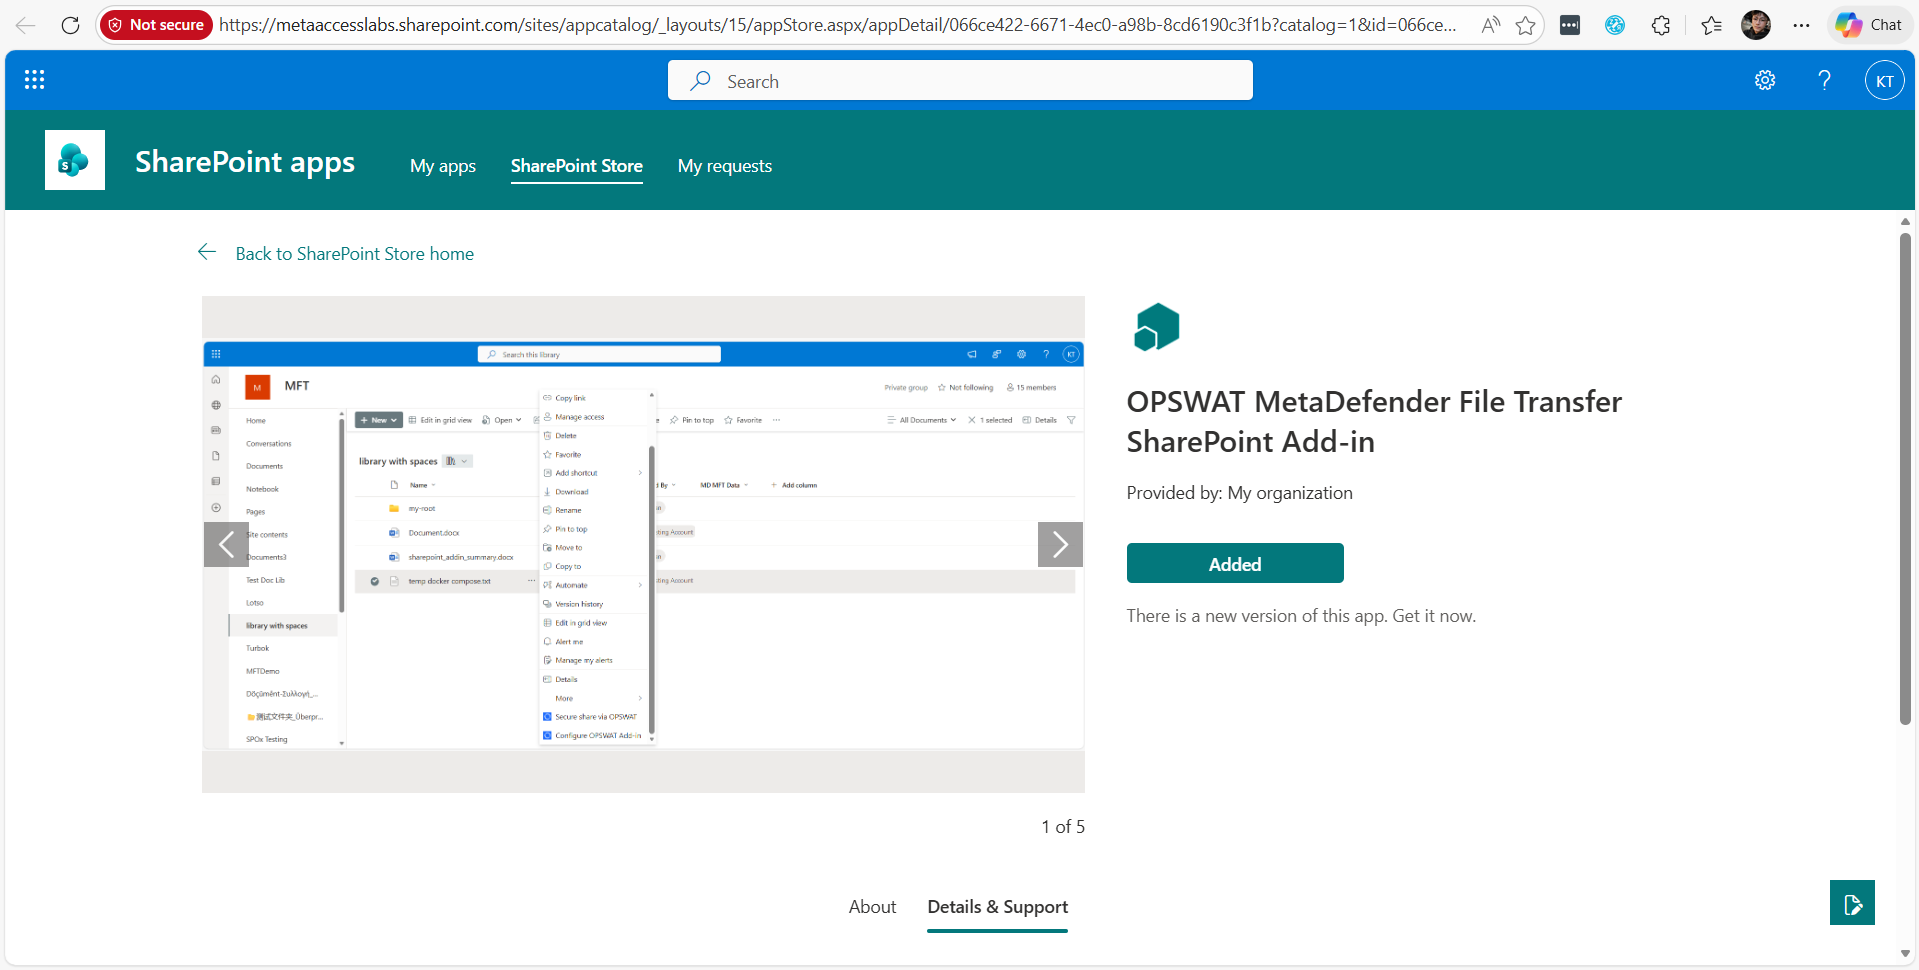
Install to your company site
After deploy the app to SharePoint store, this section will guide you how to install the app to your site.
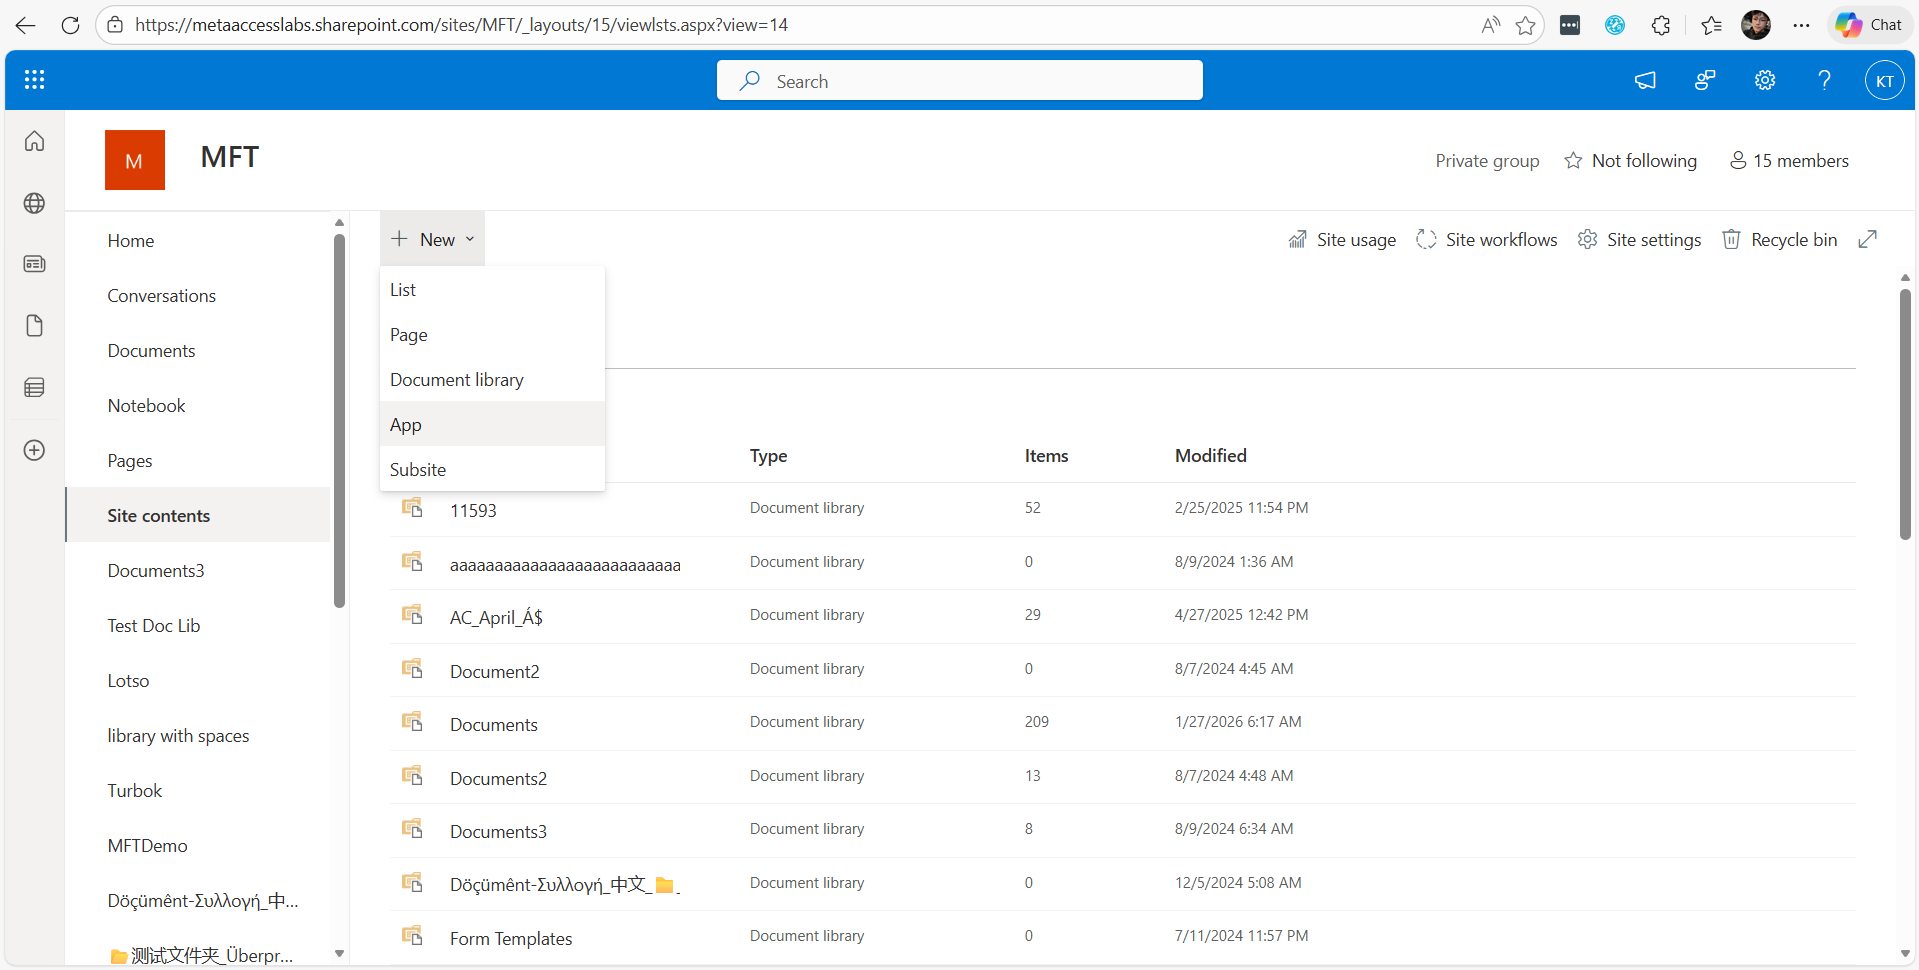
This action will guide you to the SharePoint store, then you can install the app
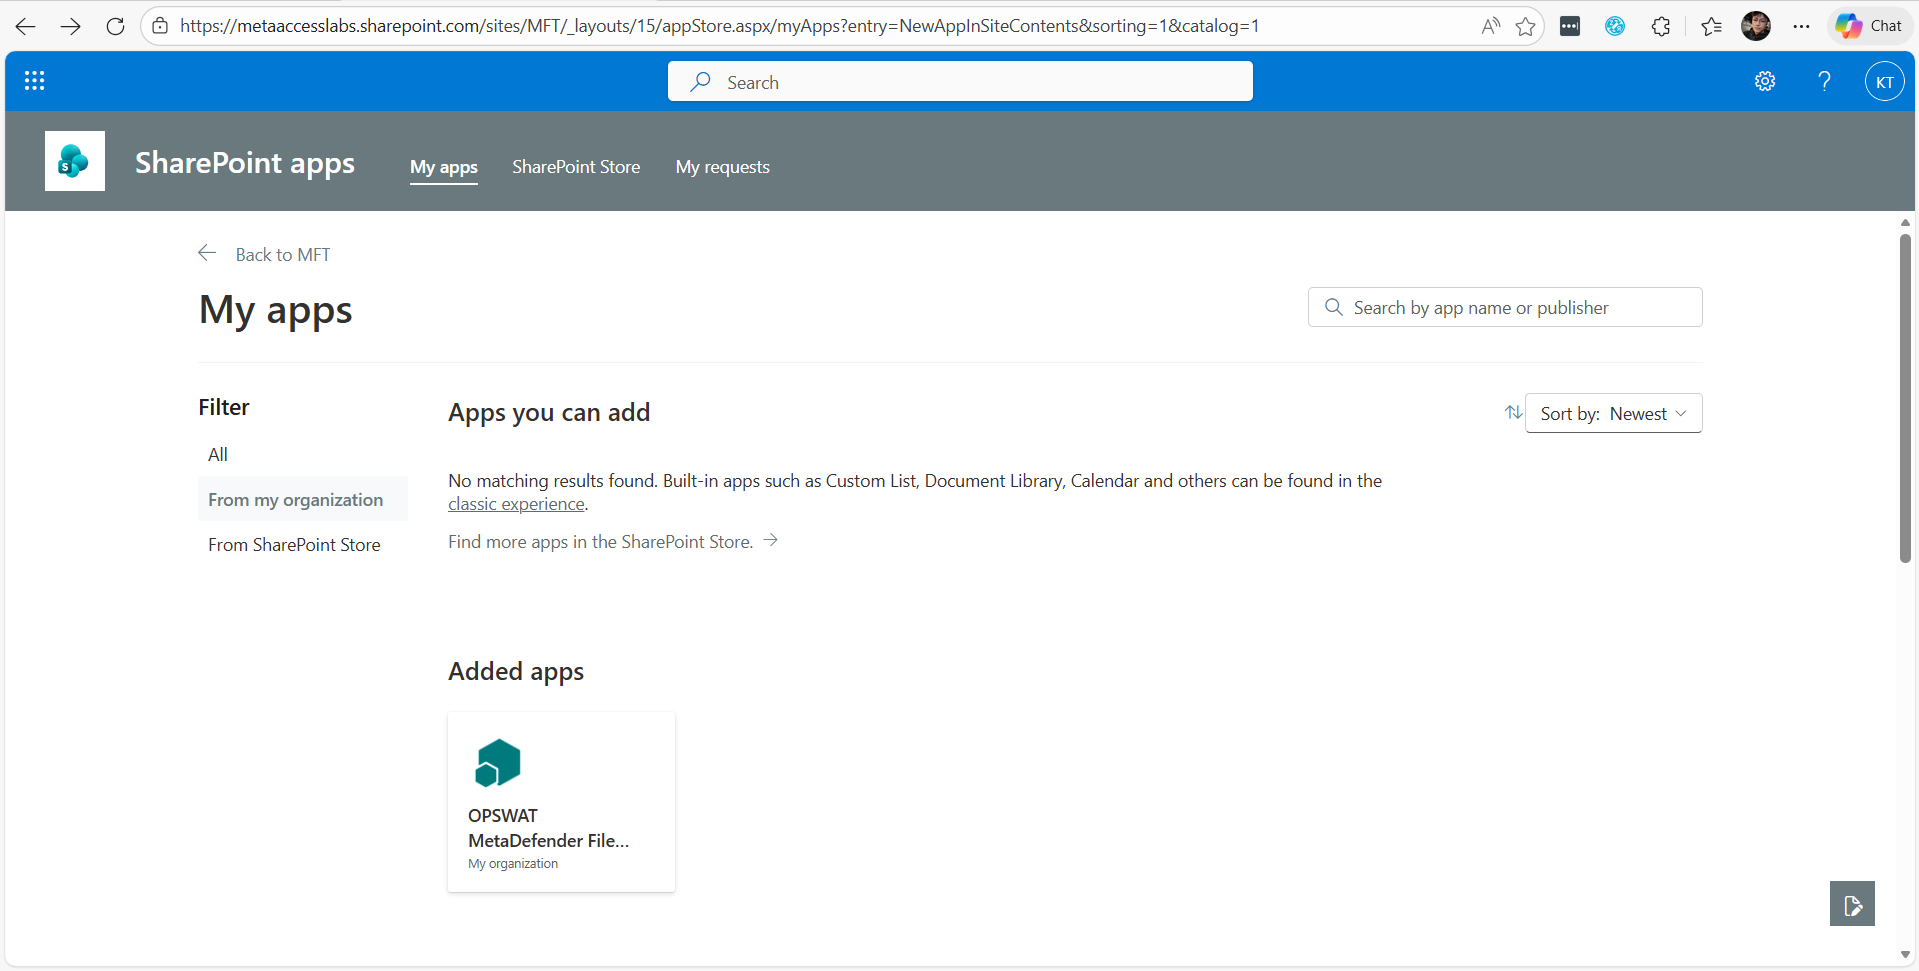
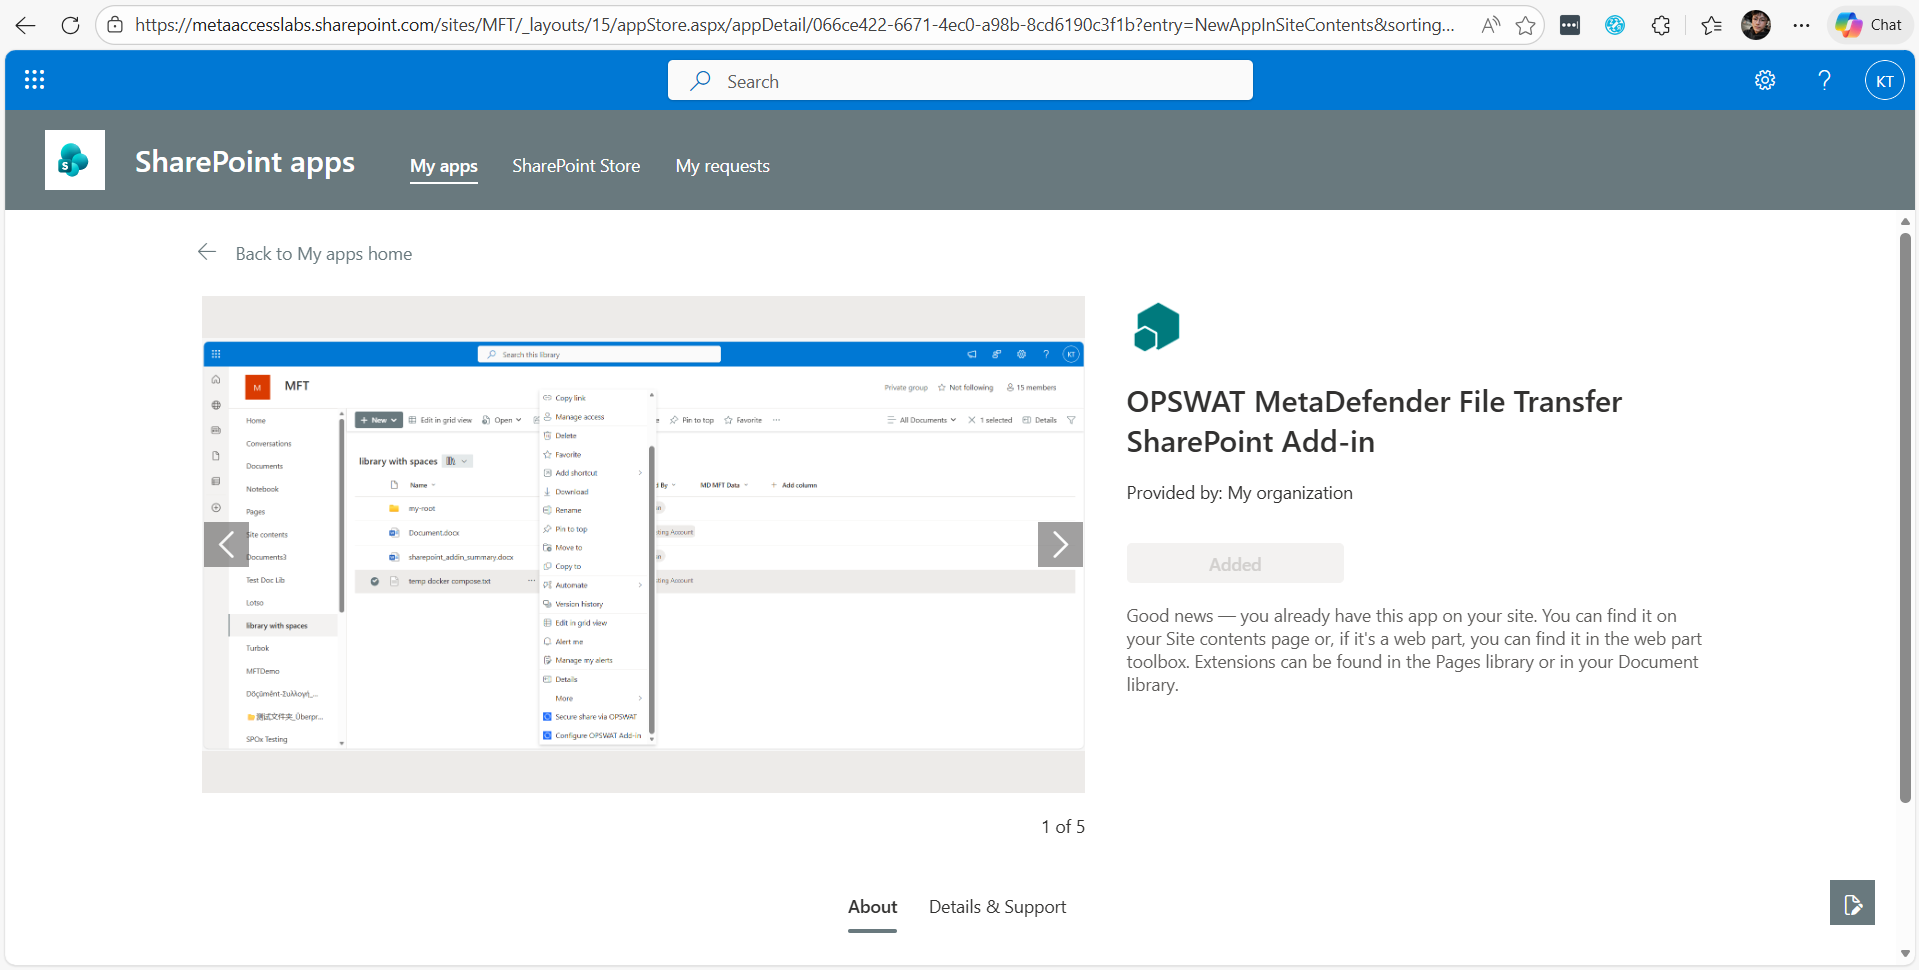
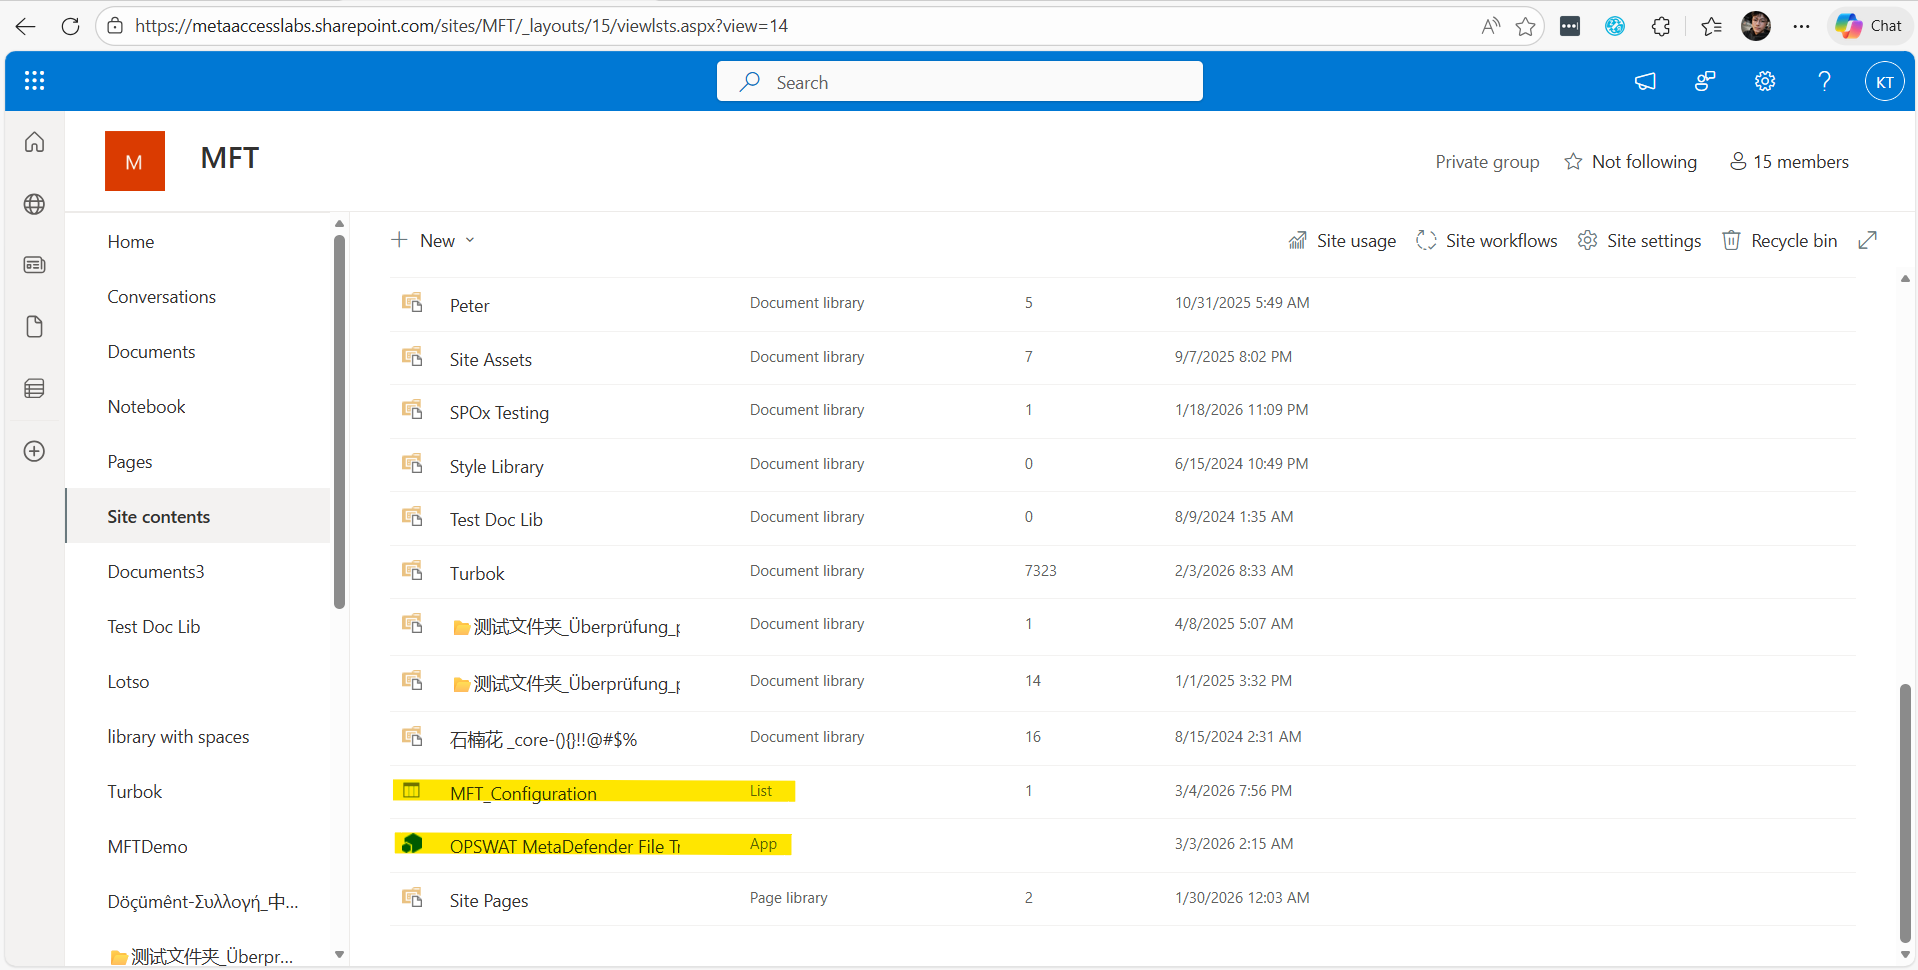
MFT_Configuration: this contain the configuration of the app
OPSWAT MetaDefender File Transfer SharePoint Add-in: this is the main application
Configure for the first use
Prerequisites: your SharePoint account need to be the Owner of the site.
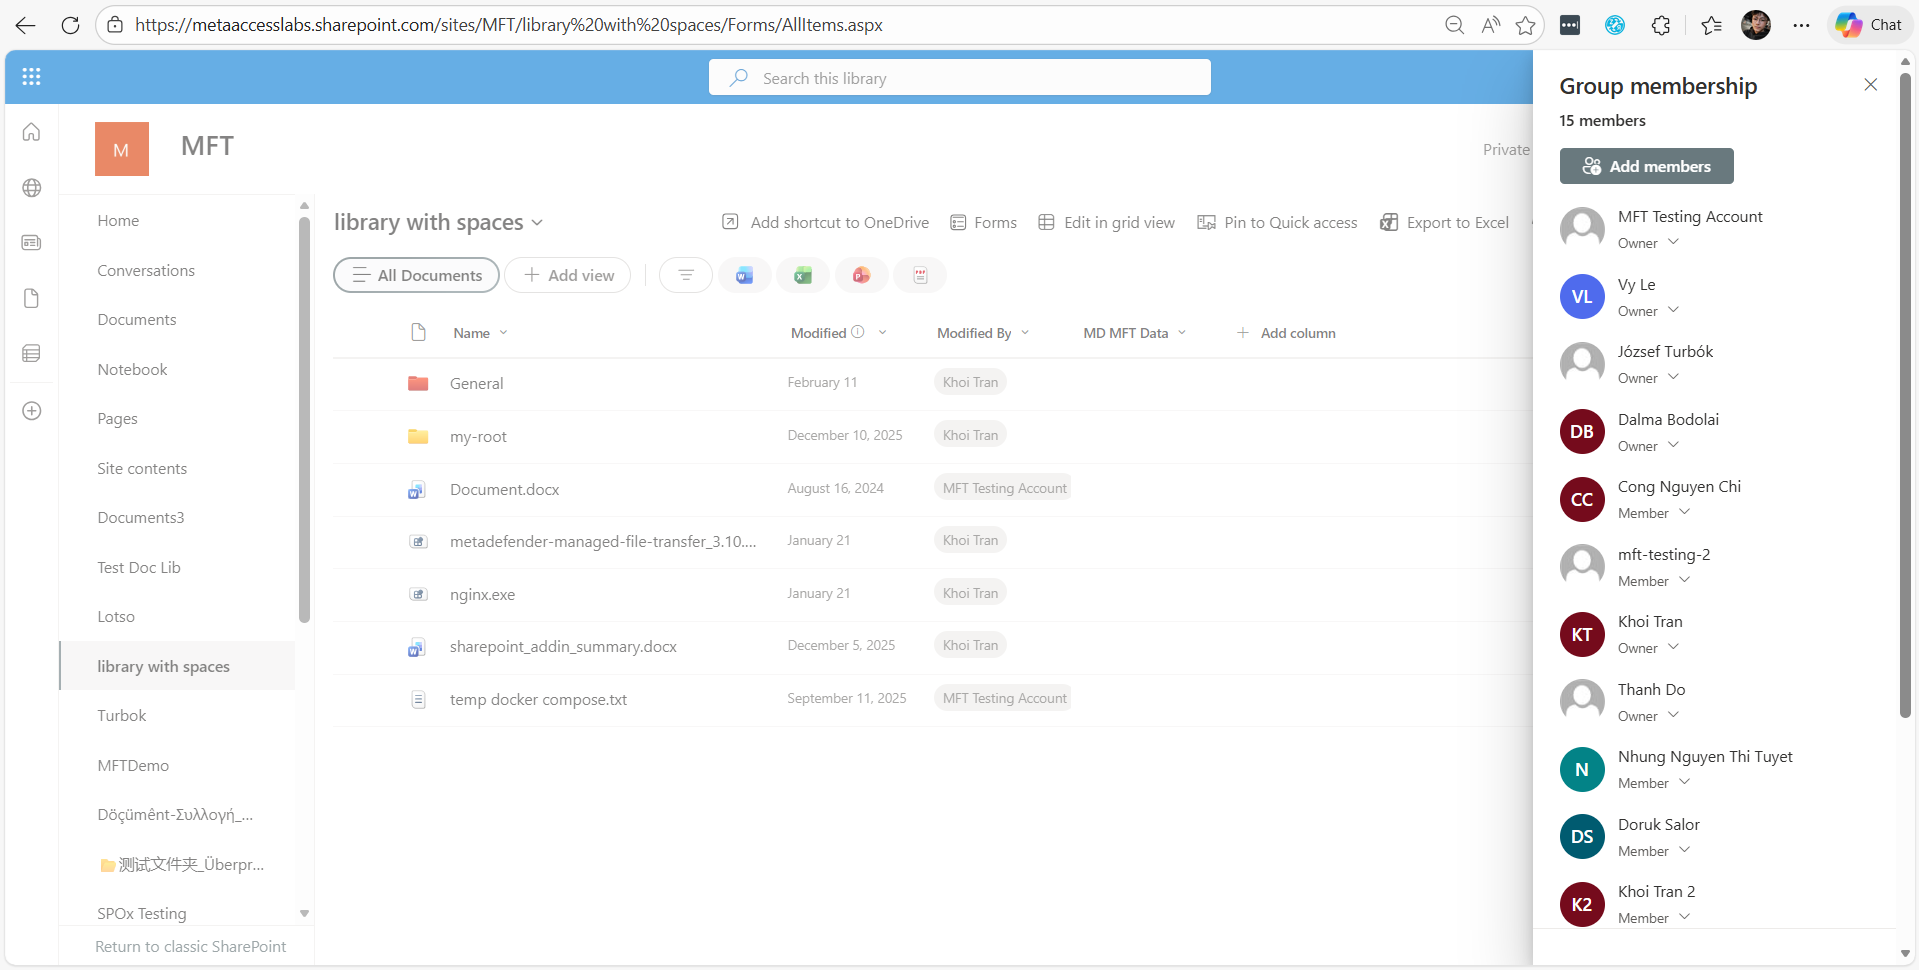
Configure the OPSWAT Add-in:
After installing the app on your site, open any Document Library to begin the configuration. This step allows the SharePoint app to identify which MFT Server it should connect to.
In this instruction, I will use "library with spaces" as a sample Document Library.
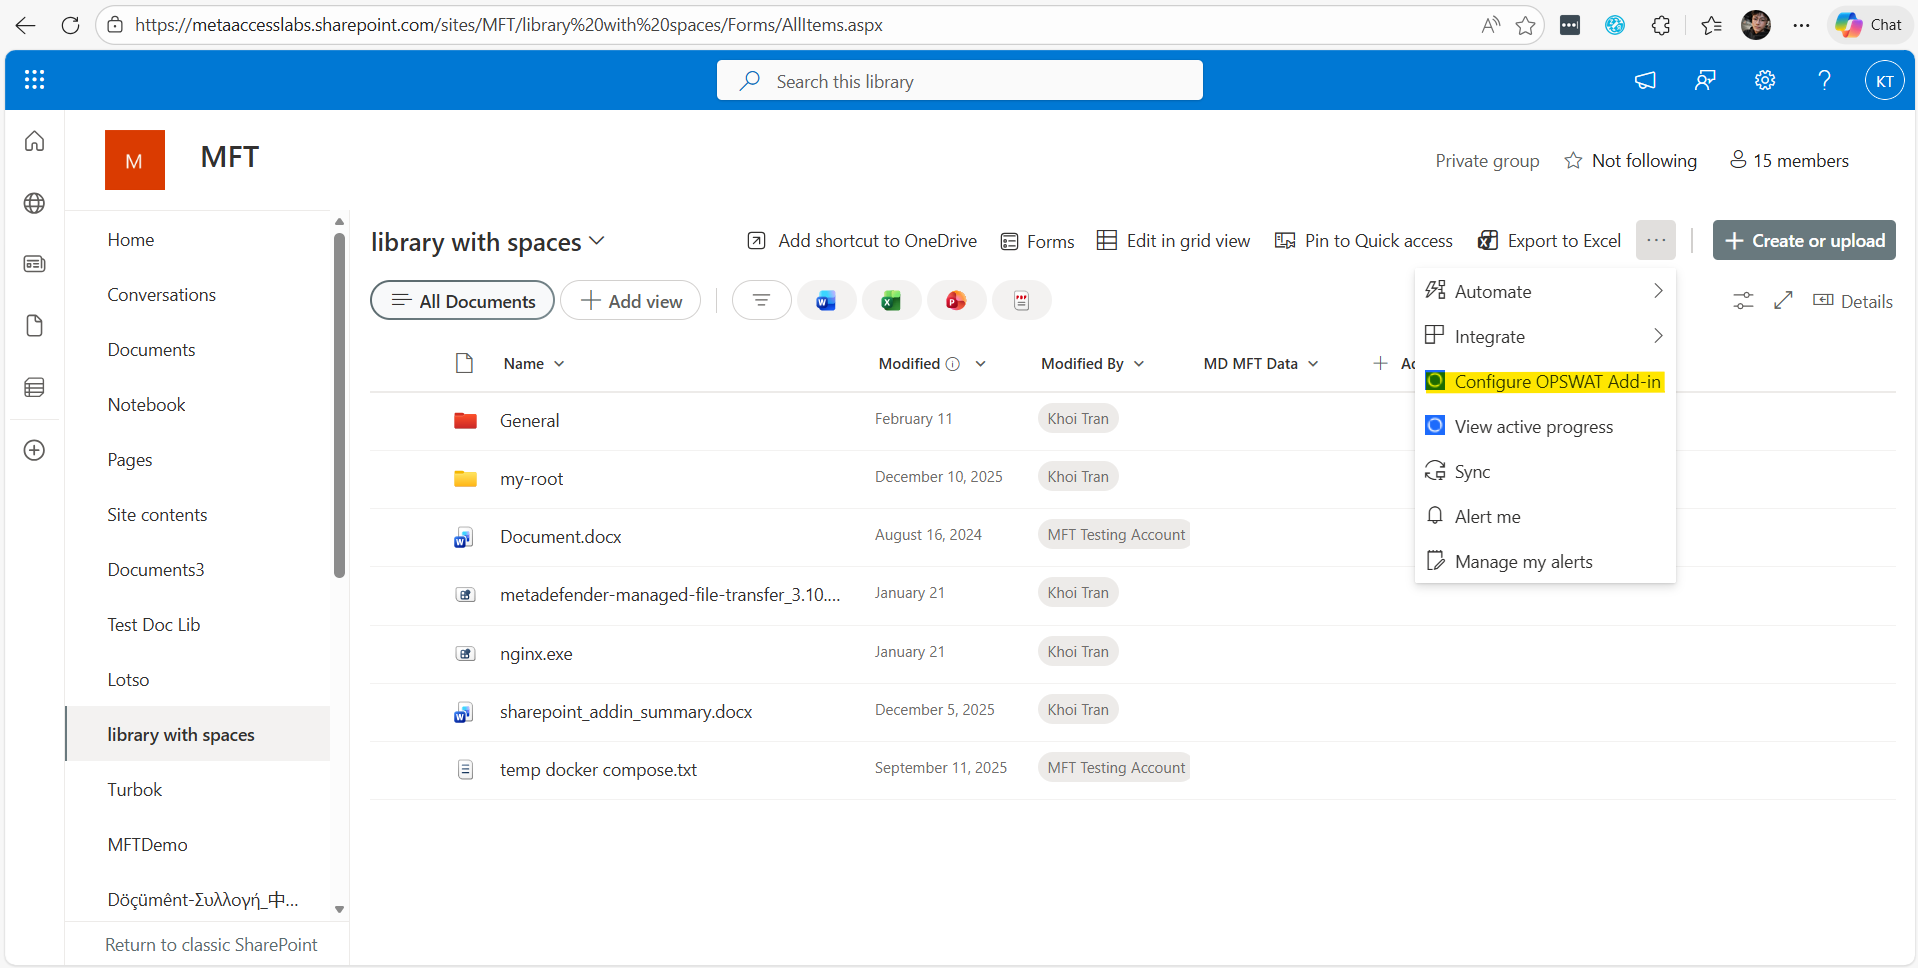
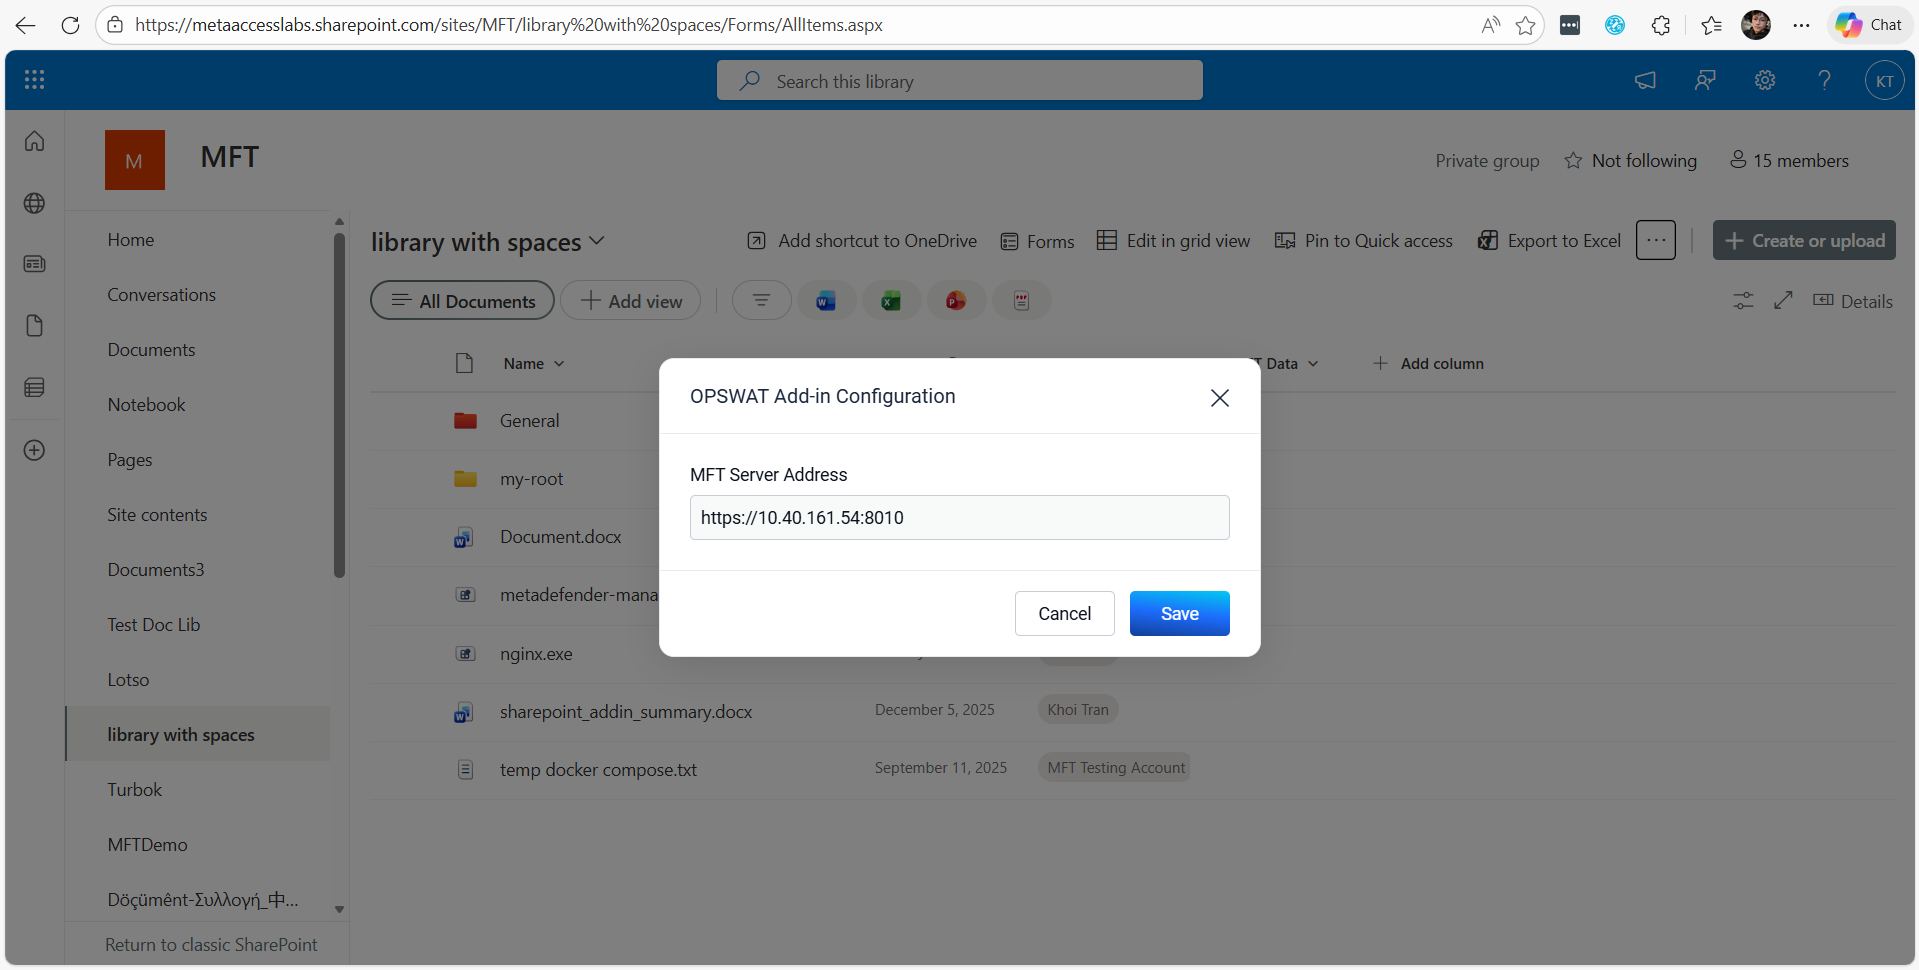
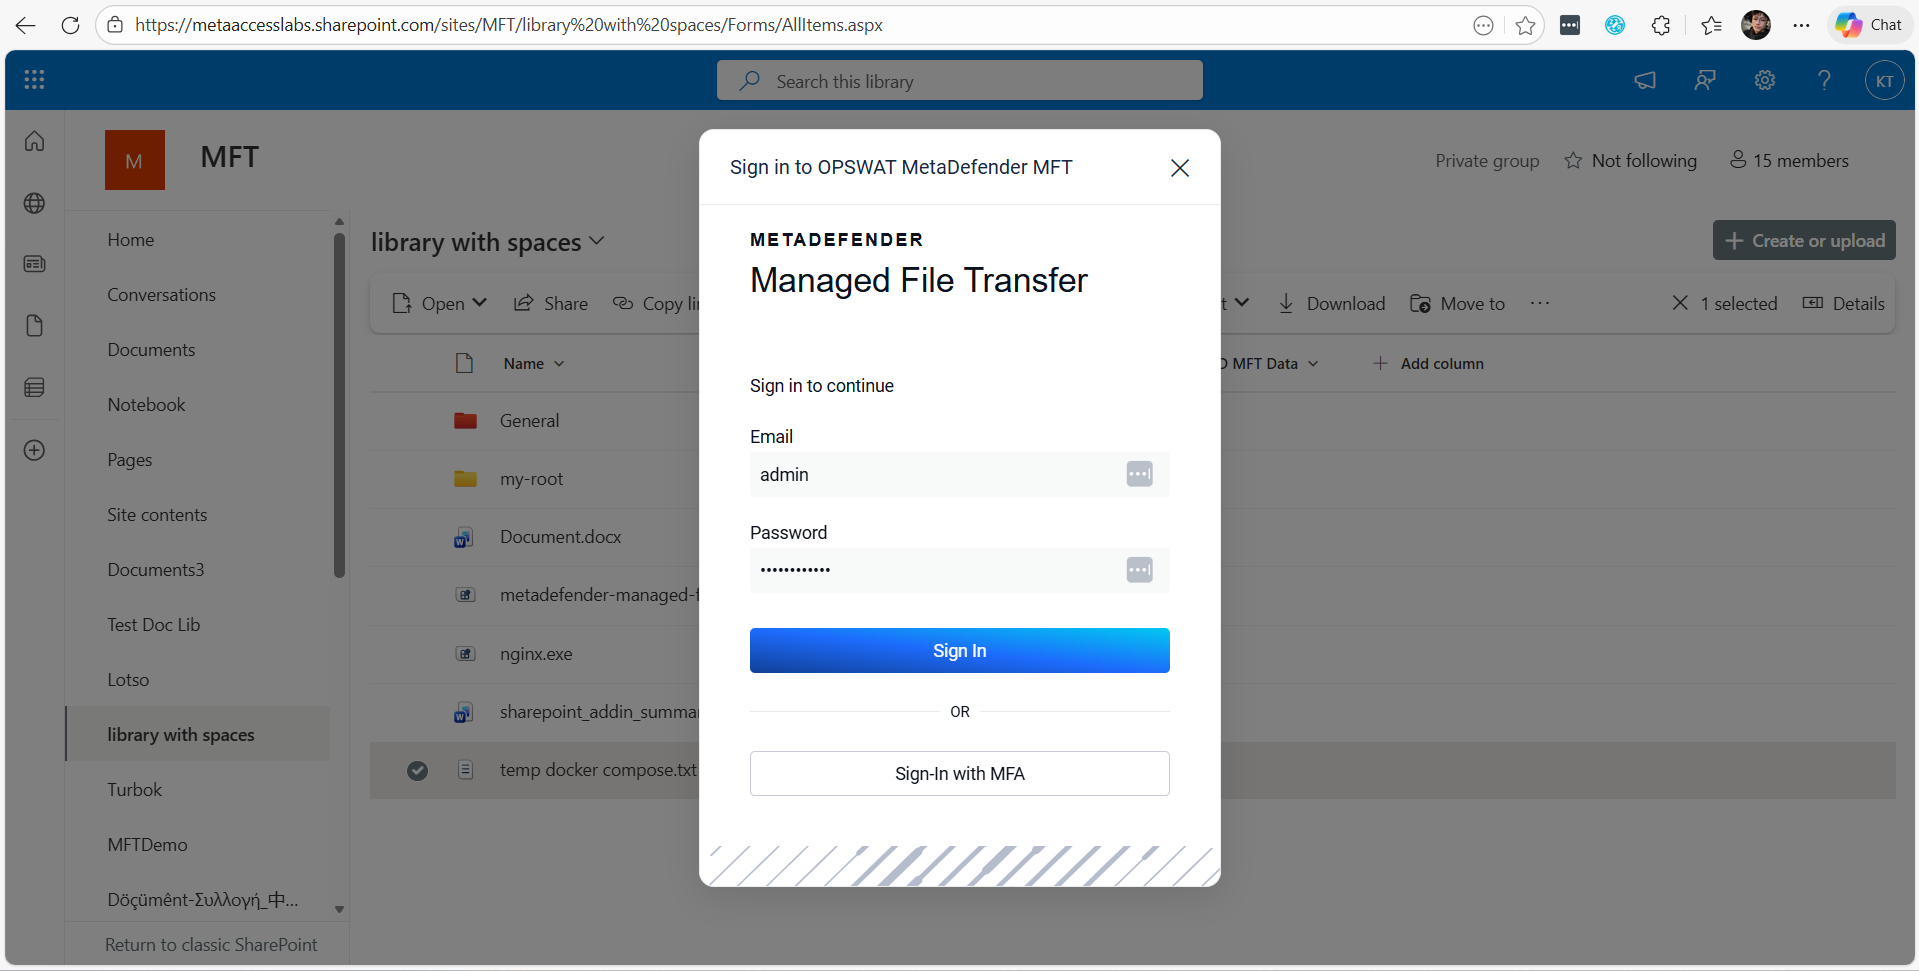
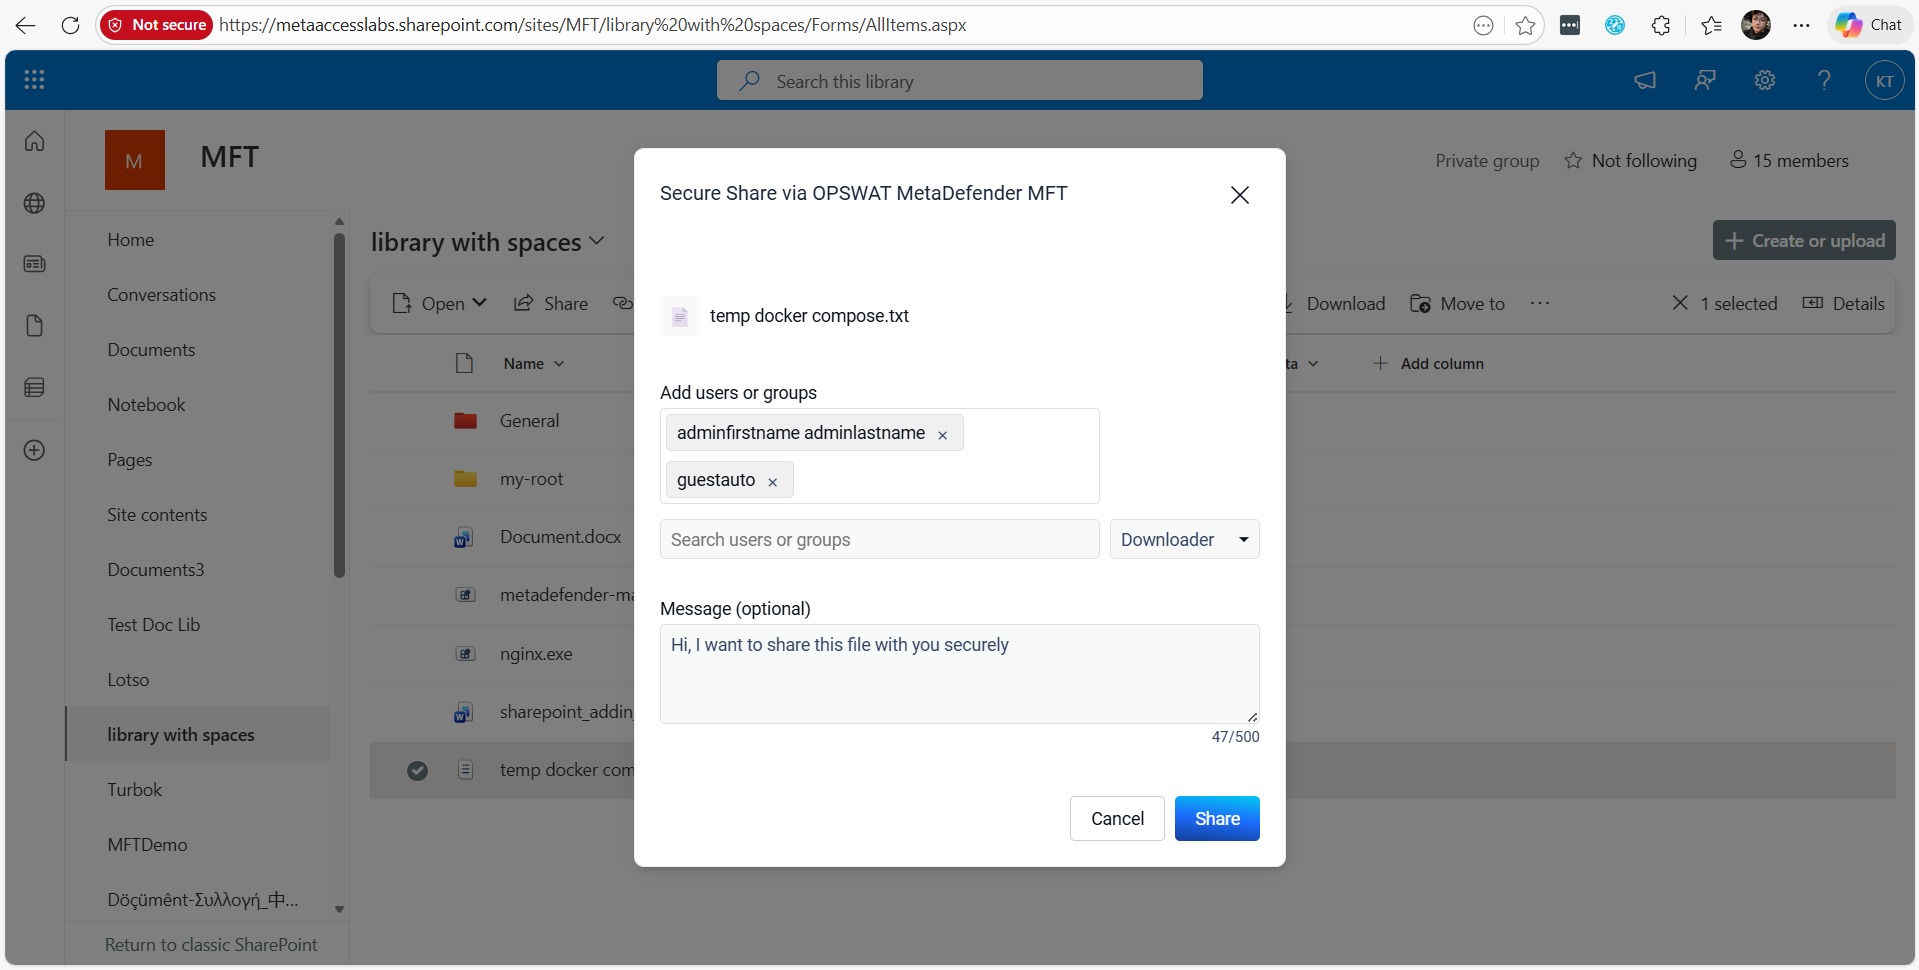
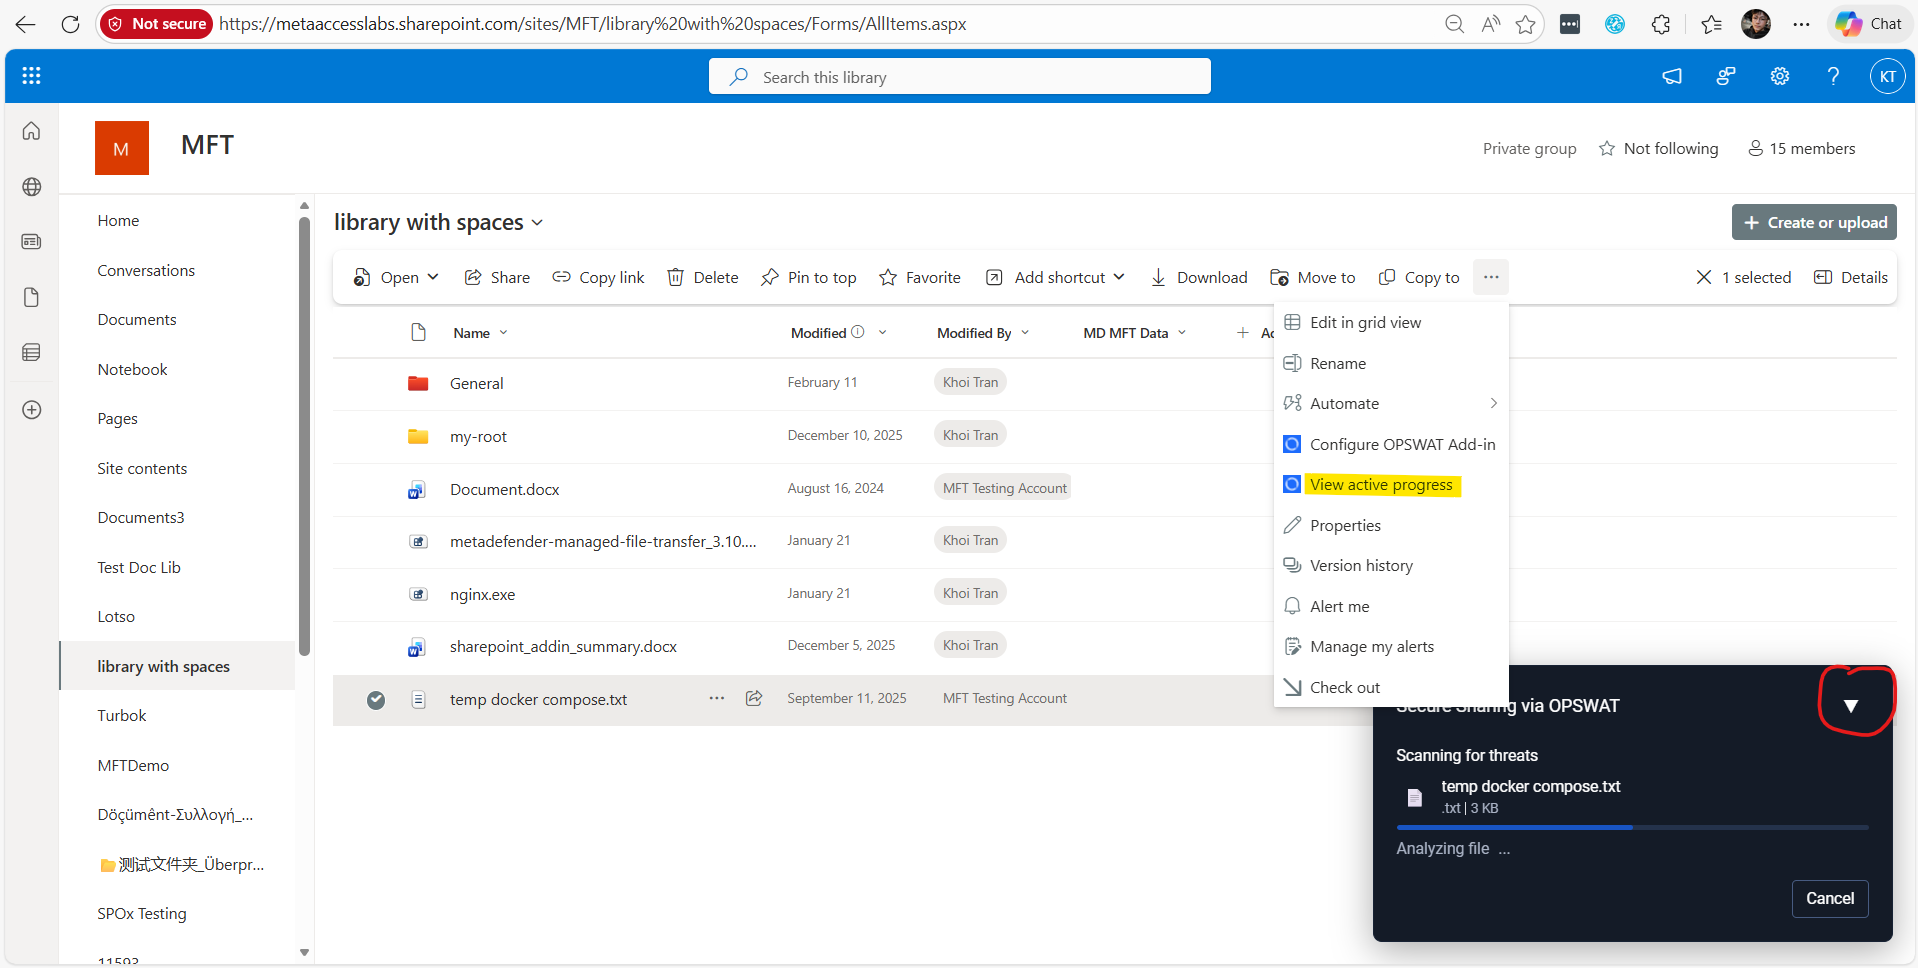
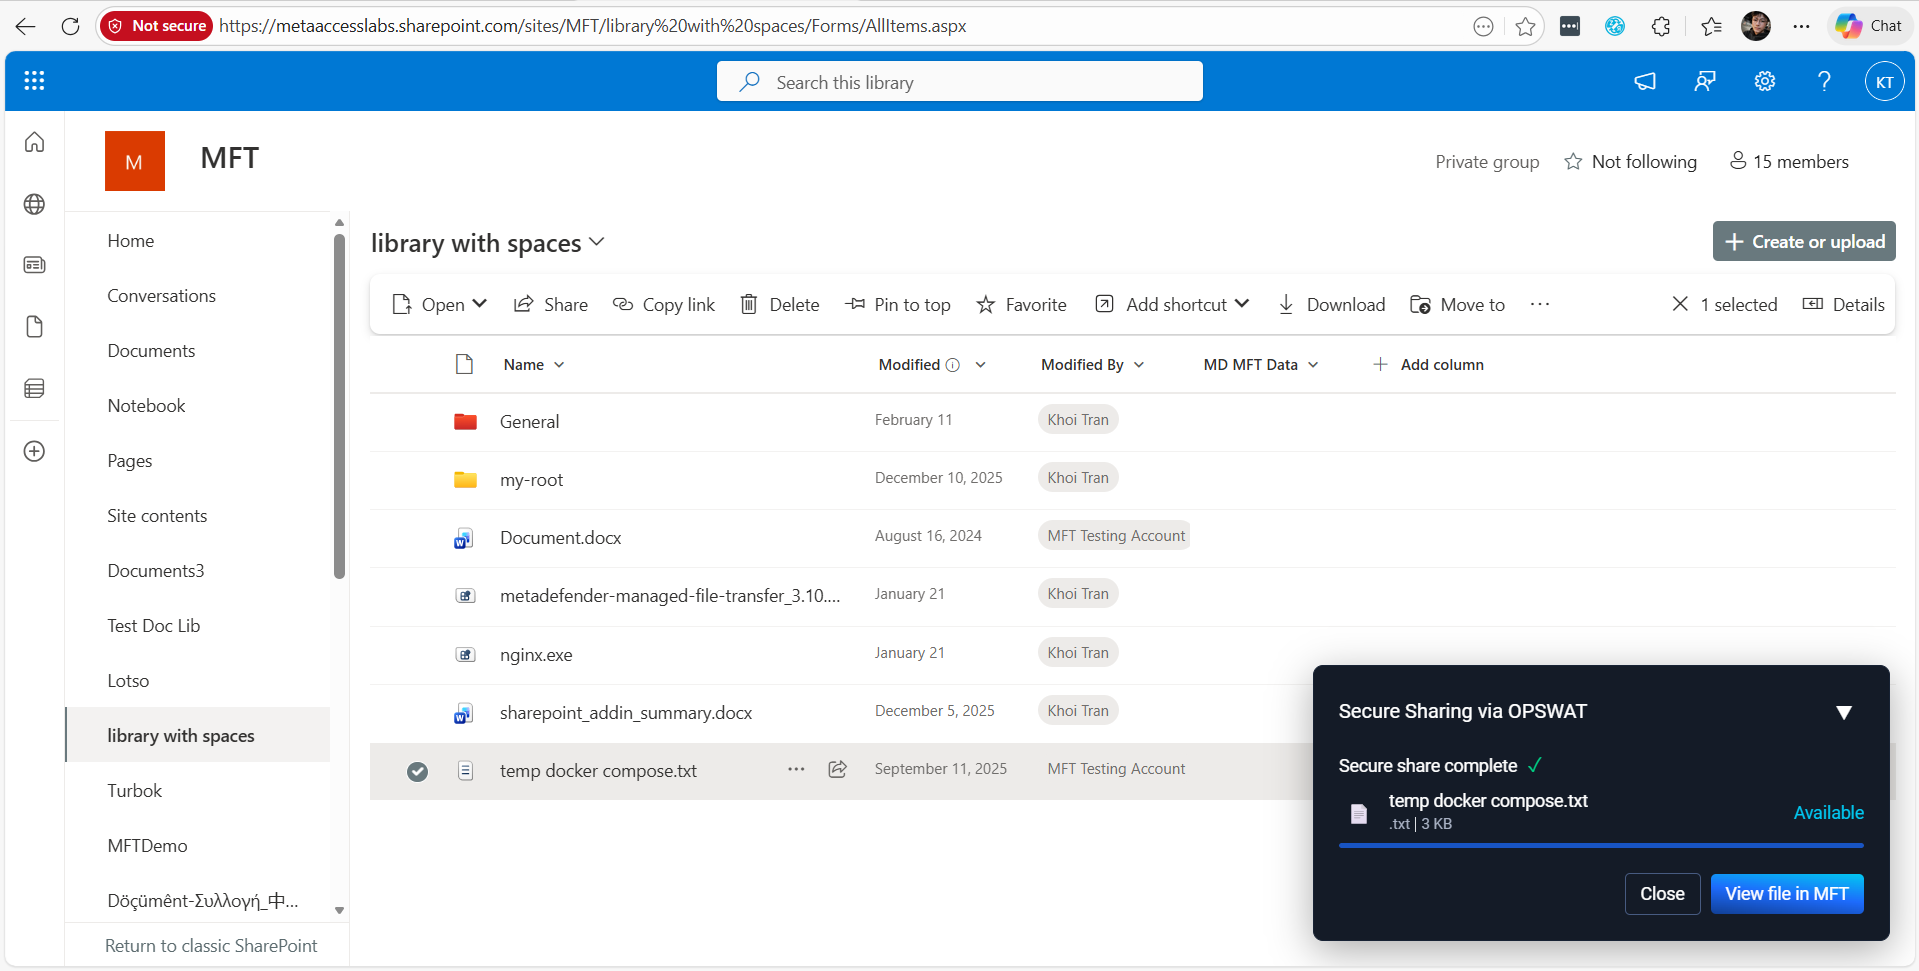
Transfer SharePoint file securely with MetaDefender MFT
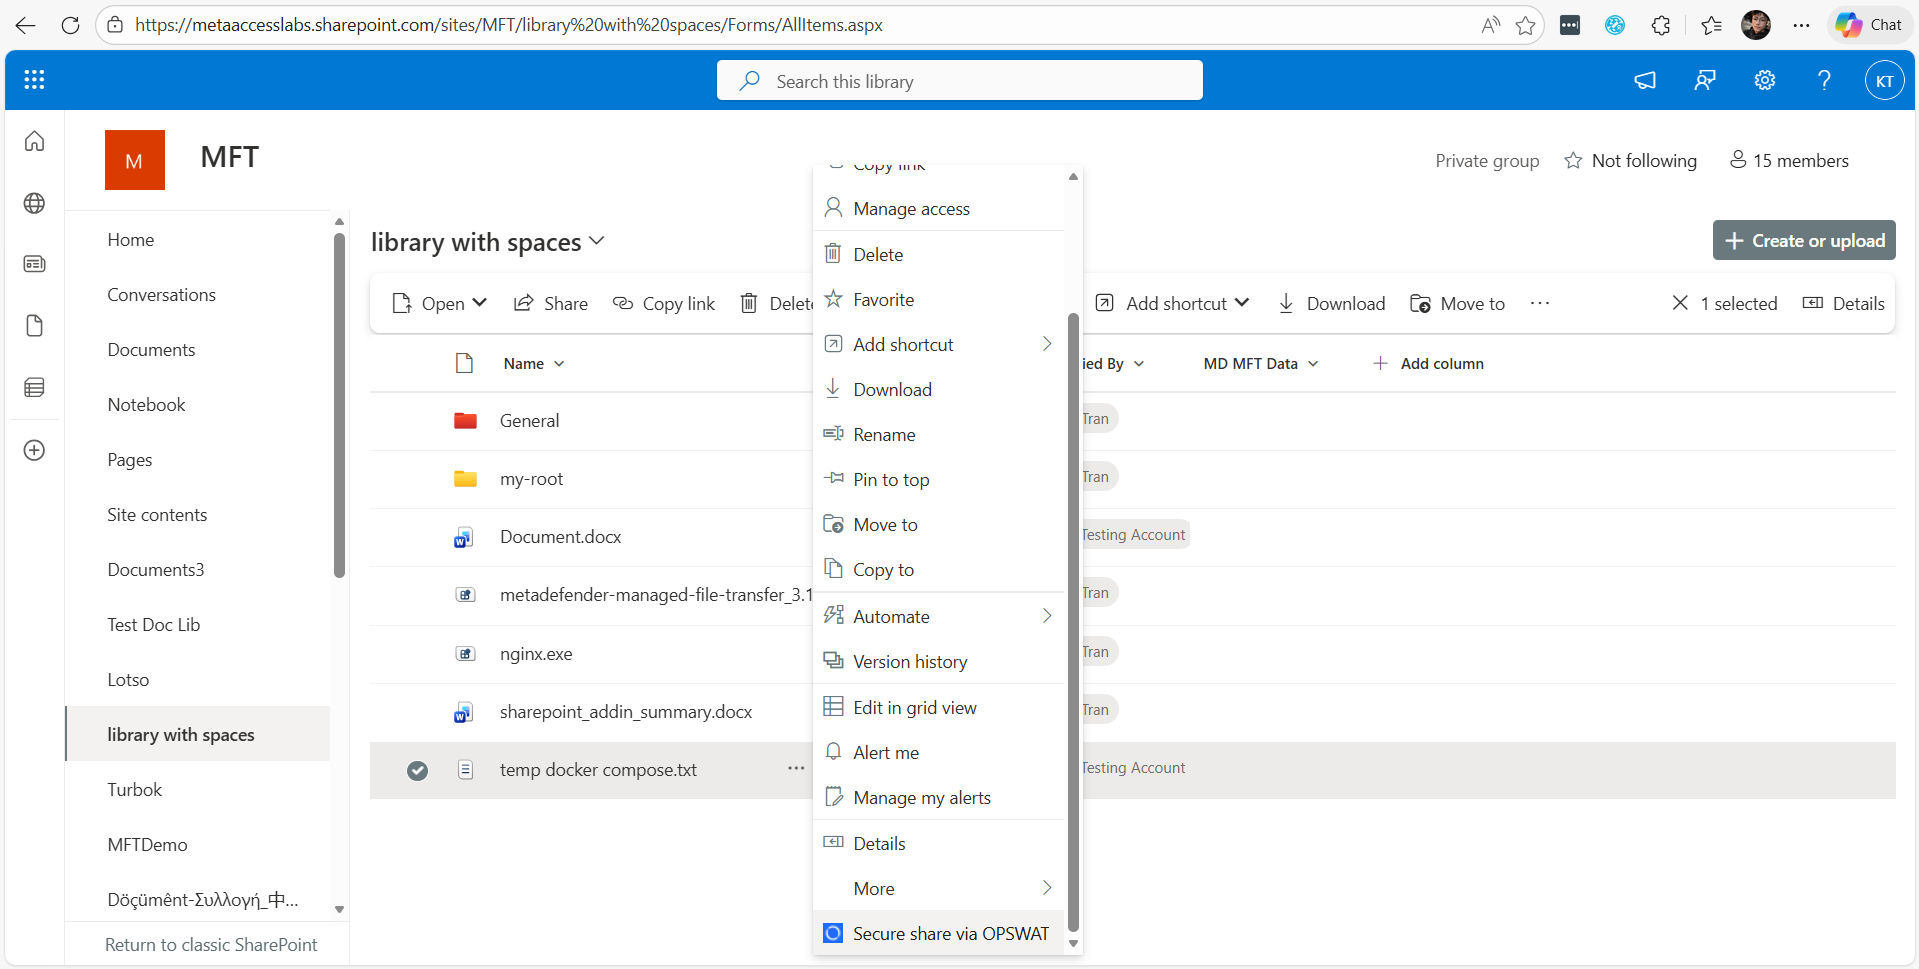
File/Folder Transferring
This section to guide normal user transfer file securely with SharePoint Add-in.
Notification (optional)
Configure notifications in the Notifications tab in MFT to receive email alerts when files or folders are successfully transferred.