Management Console users are managed in the User Management section.

User Management configuration page
This page consists of multiple sections:
- User Directories manage Active Directory (AD) integration or Single Sign-On (SSO)
- Local manage the local users of the Management Console
- Policies manage remote login permission to the Management Console
The user configurations in Login Settings only affect access to the management console. Login Settings does not affect who can log into the KIOSK UI itself.
User Directories
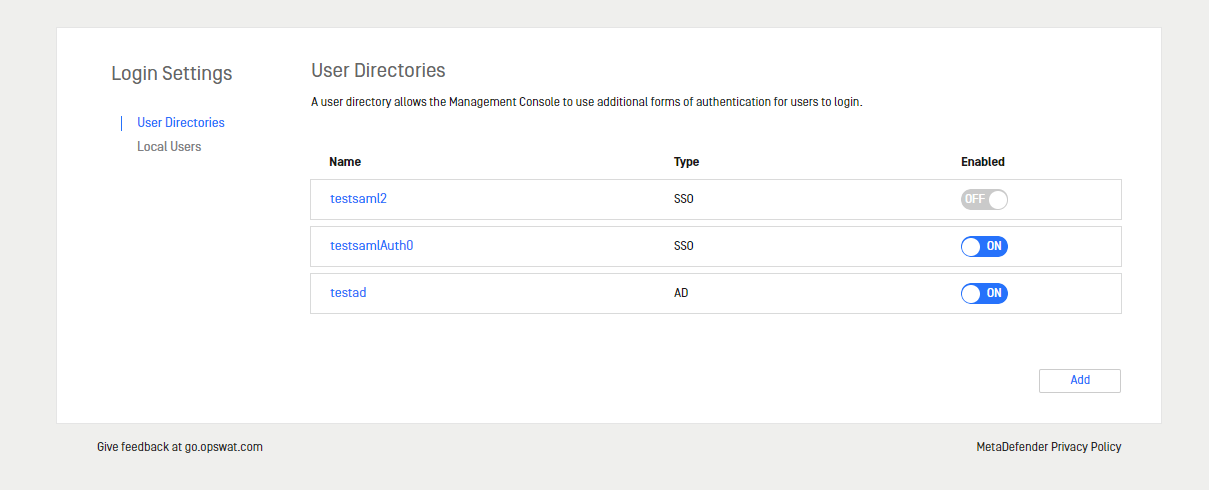
The User Directories section is used to create and configure User Directories for the management console. Clicking the Add button will open a wizard to create a new User Directory:
- How to configure an AD User Directory (section 3.1.2)
- How to setup an SSO User Directory to connect to an Identity Provider that supports SAML 2.0 (section 3.1.3)
When enabling an AD user directory, a quick connection check is performed. If a connection is not established, an error indictor will appear. The user directory will remain disabled until the connection is restored.

Local Users
Users are local to the Management Console and are separated from the users assigned to Kiosk workflows. Local users can be created from any user with an Administrator role. For a user that is logged in from a user directory, they cannot edit or delete any local user.
Creating a new user
Step 1. Click Add new user
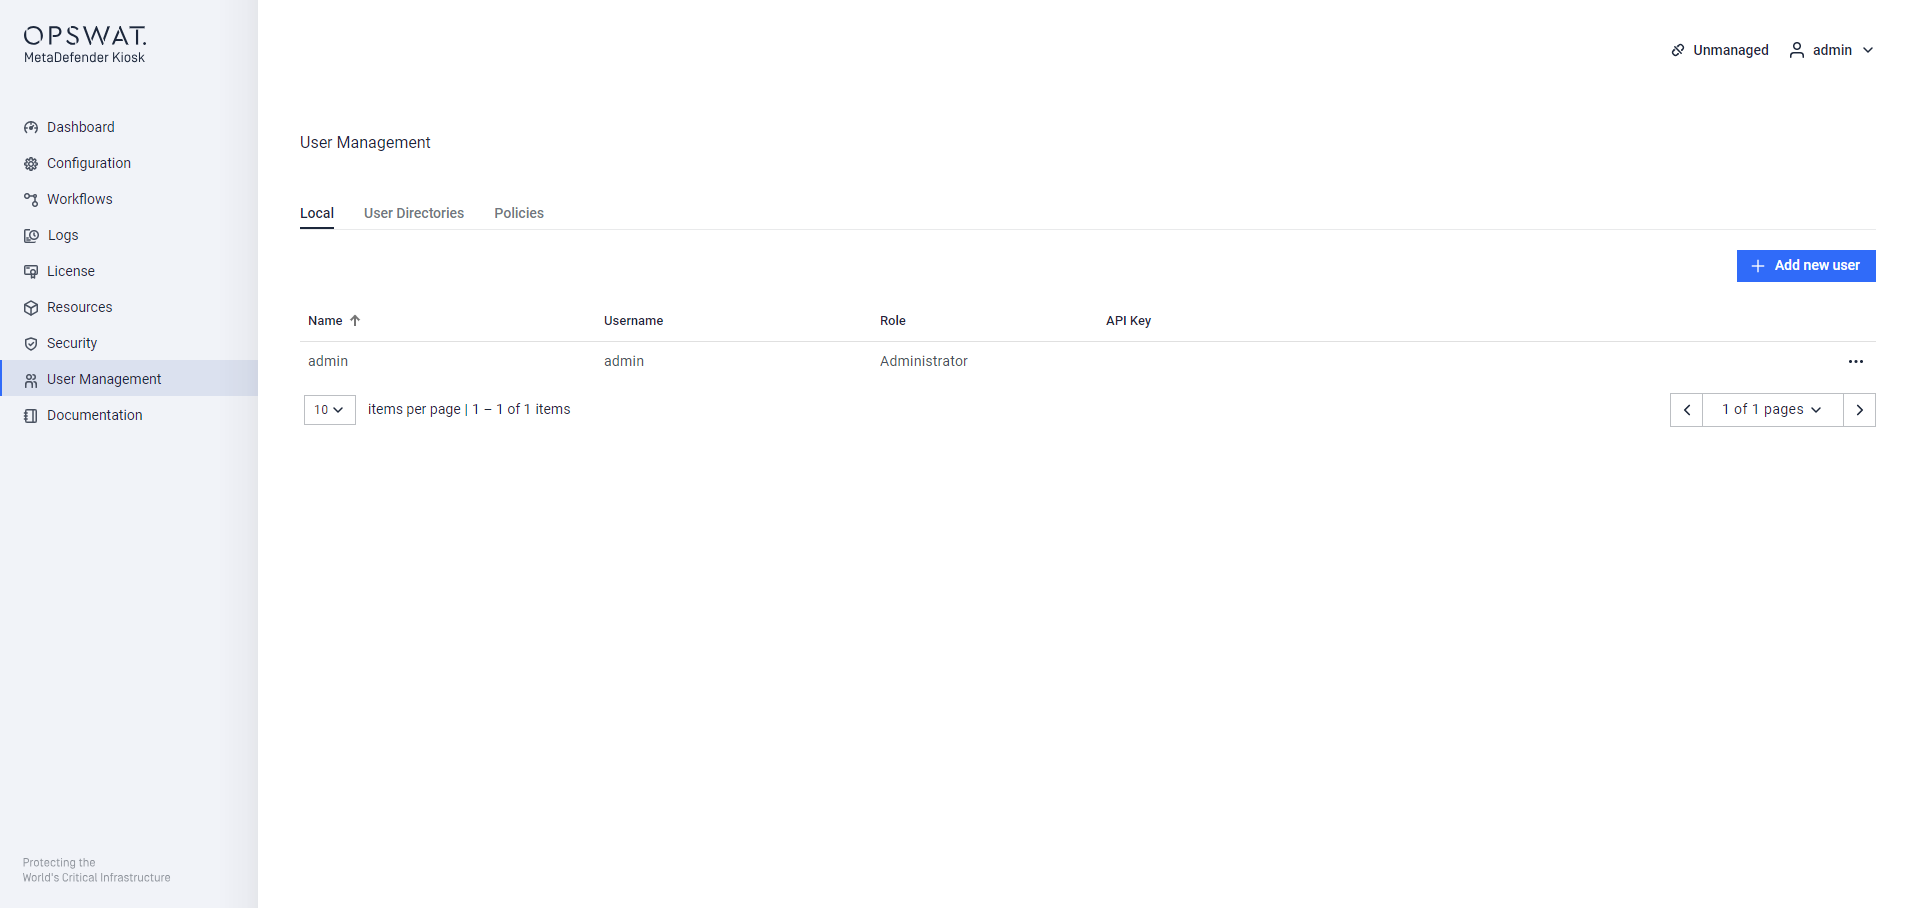
Step 2. Input the user information
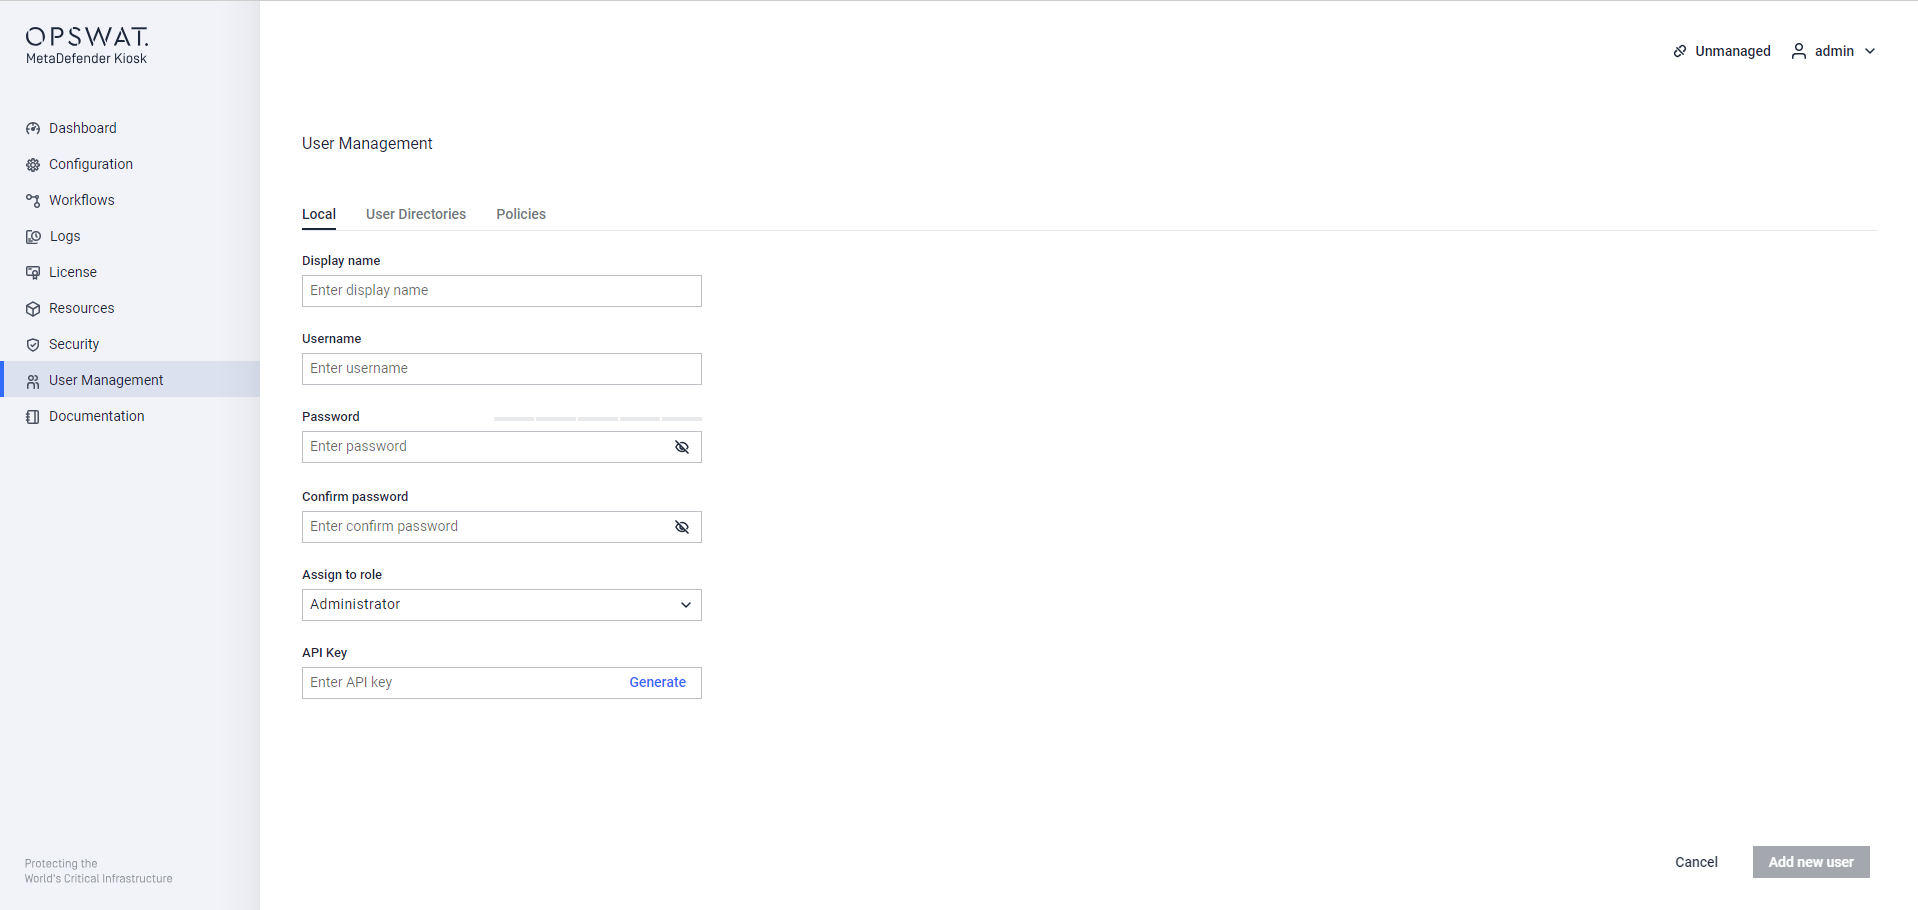
- Display name: user name used in any logs, such as which user logged in to the WebMC
- Account name: user name used to log in to the WebMC
- Password: used for logging into the WebMC
- Assign to role: the created user could be Administrator or Auditor role
- API Key: used for integrations to other products such as Central Management, click Generate to fill in the box
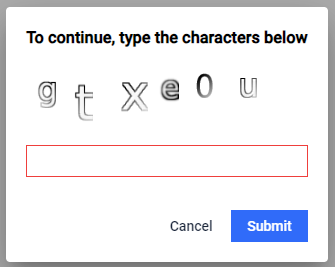
Step 3. Type the characters of captcha
To prevent automation of the user creation process, a captcha will be displayed for administrators to confirm and continue. The random sequence of 6 characters and numbers expires after 1 minute. If input does not match what is displayed, a new sequence is generated again.
Once a user is created, it is requested to change its password at the first attempt to log in to the mgmt console. A maximum of 50 users can be created. Local administrators can add/modify/delete any user and change their own respective password. Local auditors can only change their own password, they cannot view any other users.
Note: Account name is case-insensitive from 4.4.12 release. Case-sensitive account names from backward are upgraded and kept unchanged.
Change the current password
Step 1. Navigate to the top right drop down > My infomation
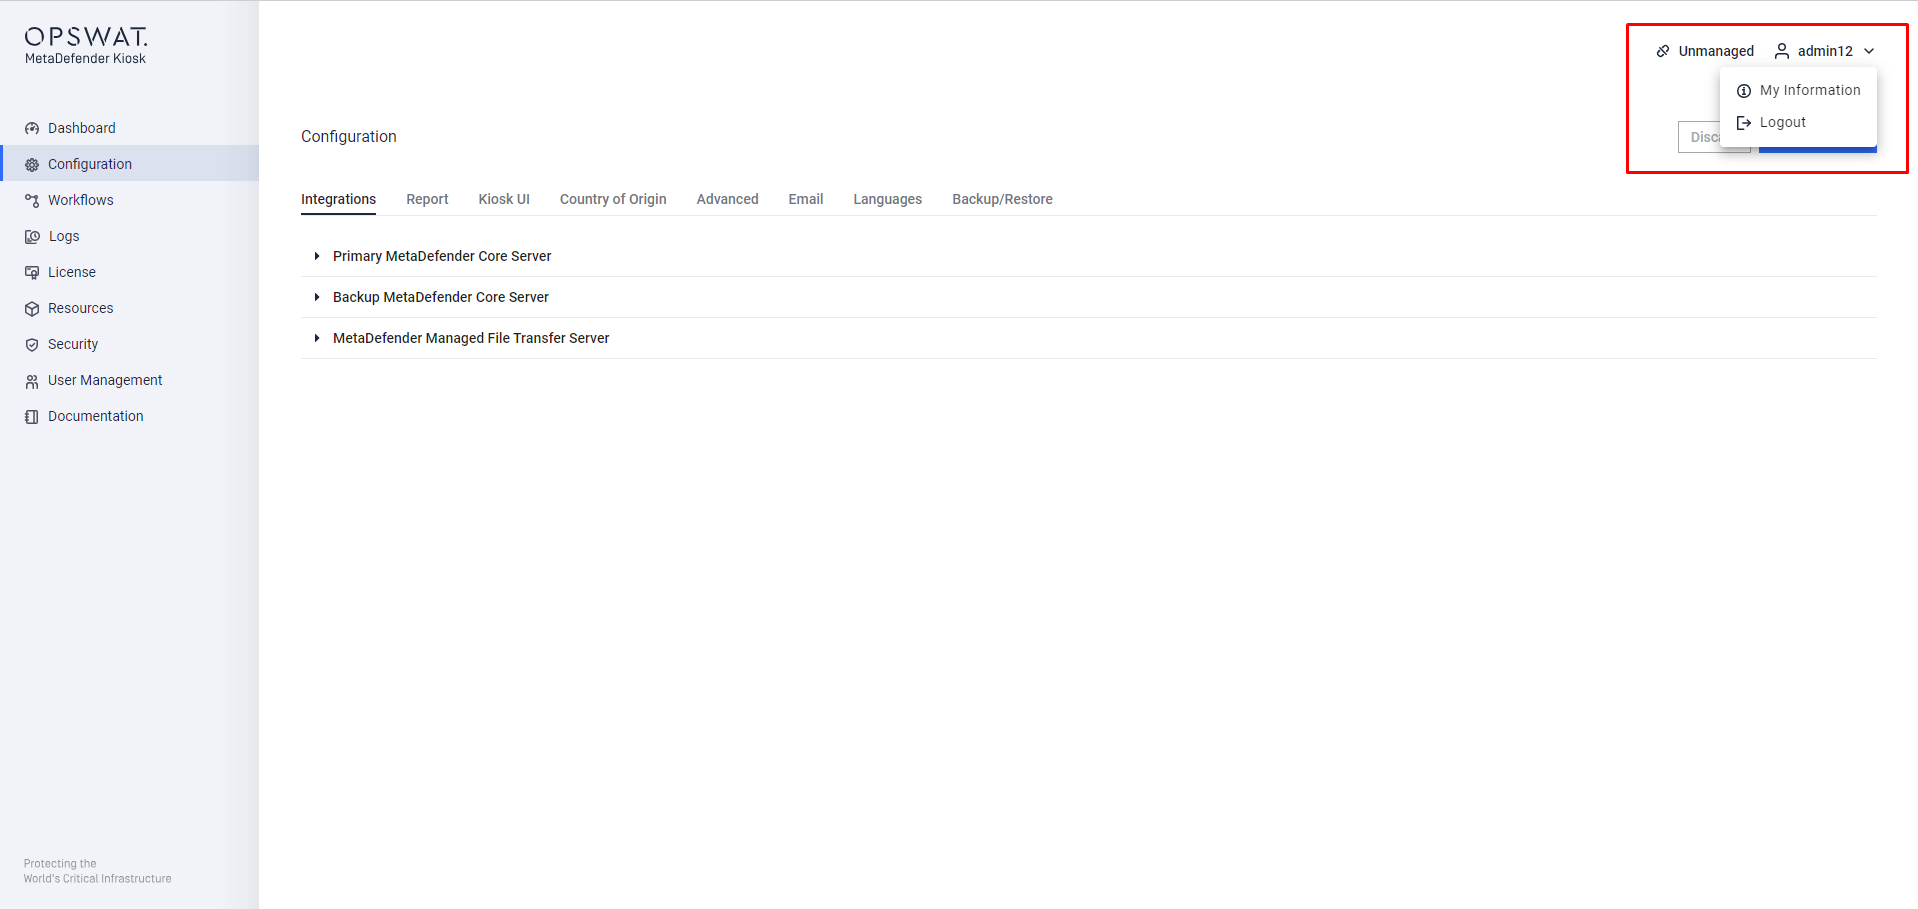
Step 2. Enter your curent password and new one. You can also edit your display name.
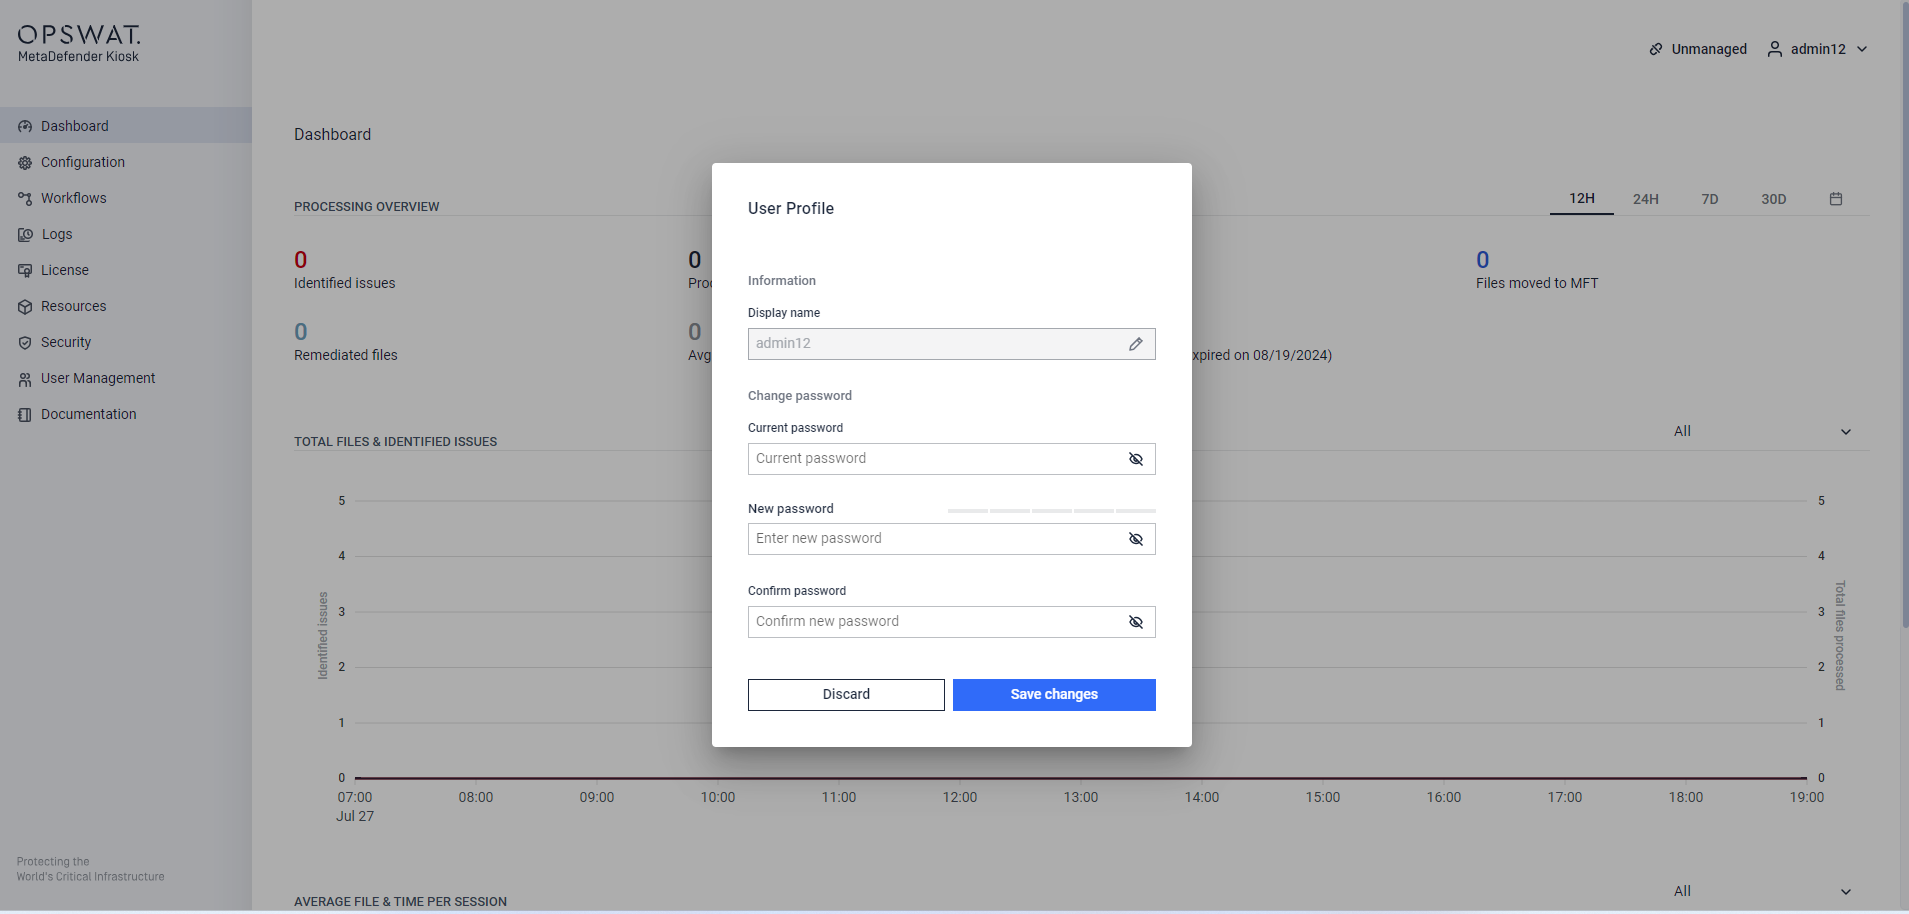
Step 3. Save changes and you will be required to log in again with a new password.
Manage the current users
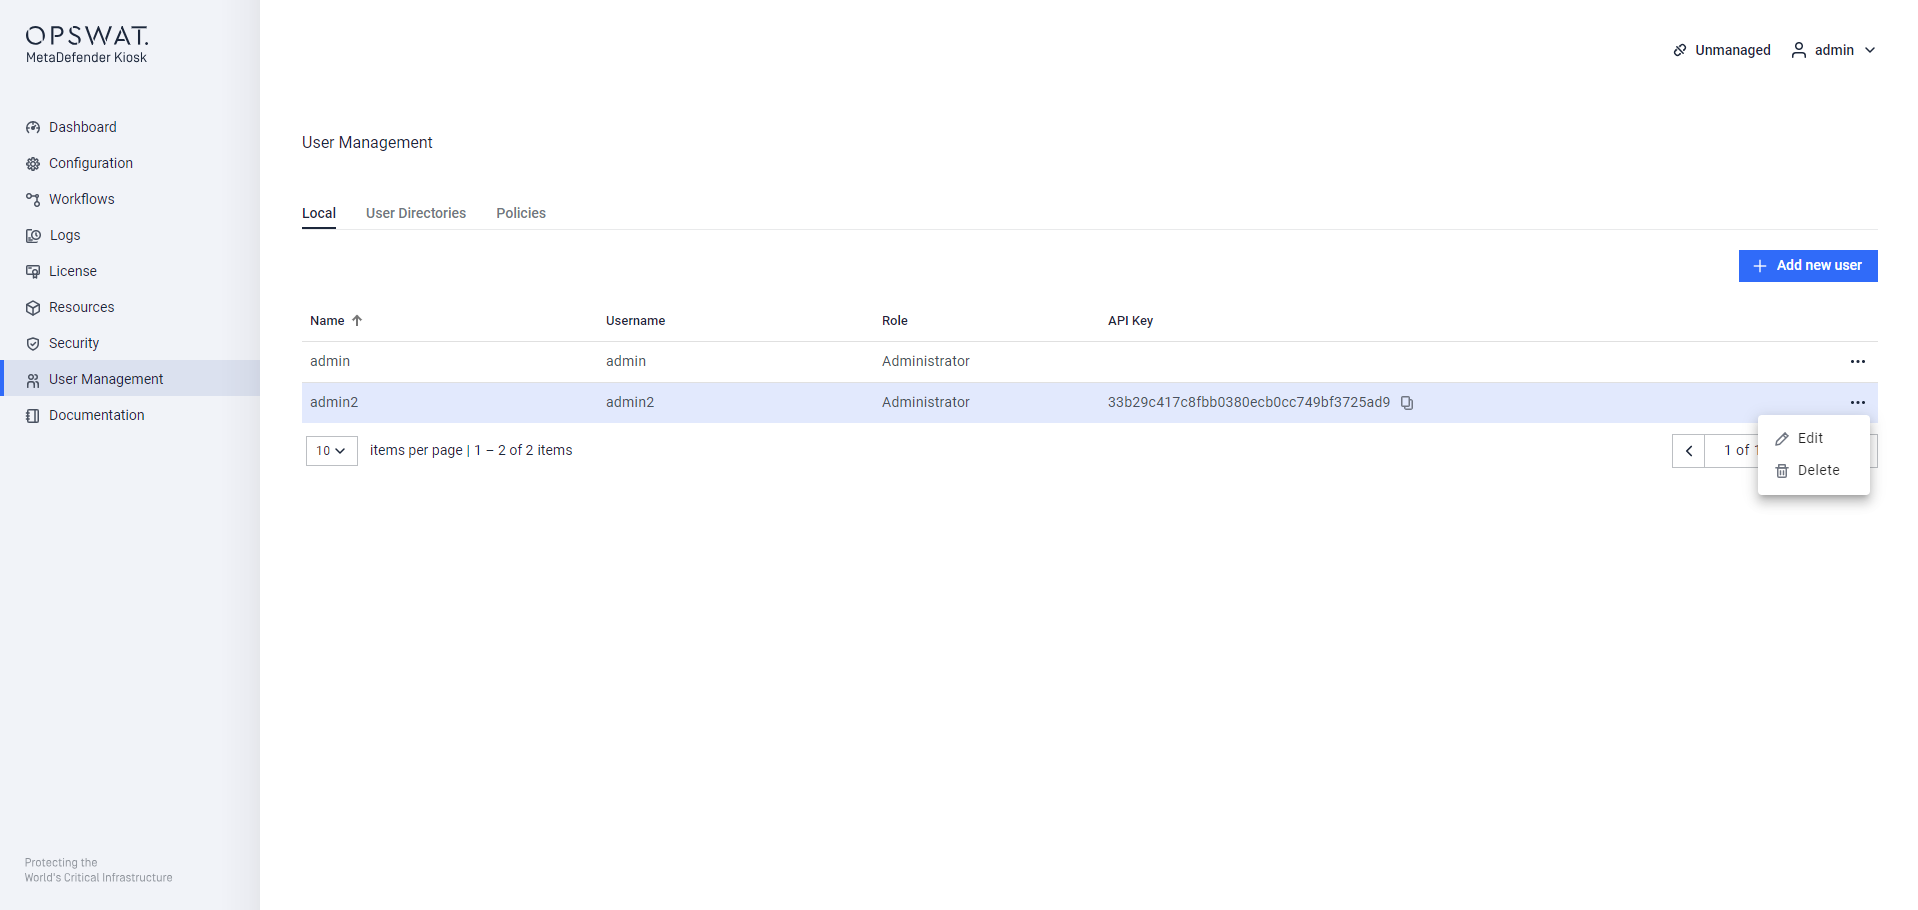
The administrative users are authorized to oversee the following user management tasks:
- Modify display names
- Manage user roles
- Update the API Key
- Delete any user except themselves
Active Directory
Once configured, Kiosk (version 4.7.4 or newer) supports AD login with following format:
- Username
- Domain\Username
- Username@Domain
Select AD in the Type of directory dropdown to configure a User Directory for Active Directory users. Give your User Directory a name and use the toggle button to enable or disable this directory. Click CONTINUE to go to the next page.
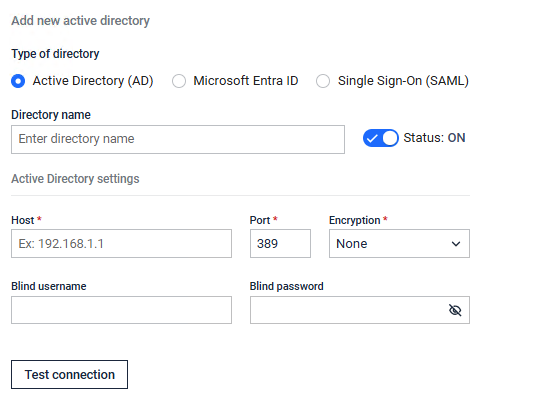
The next page is where the AD connection is configured. After the credentials are entered, the status of the connection is shown on the right. The CONTINUE button will be disabled until a valid connection can be made and the status shows “Connected” as shown below:
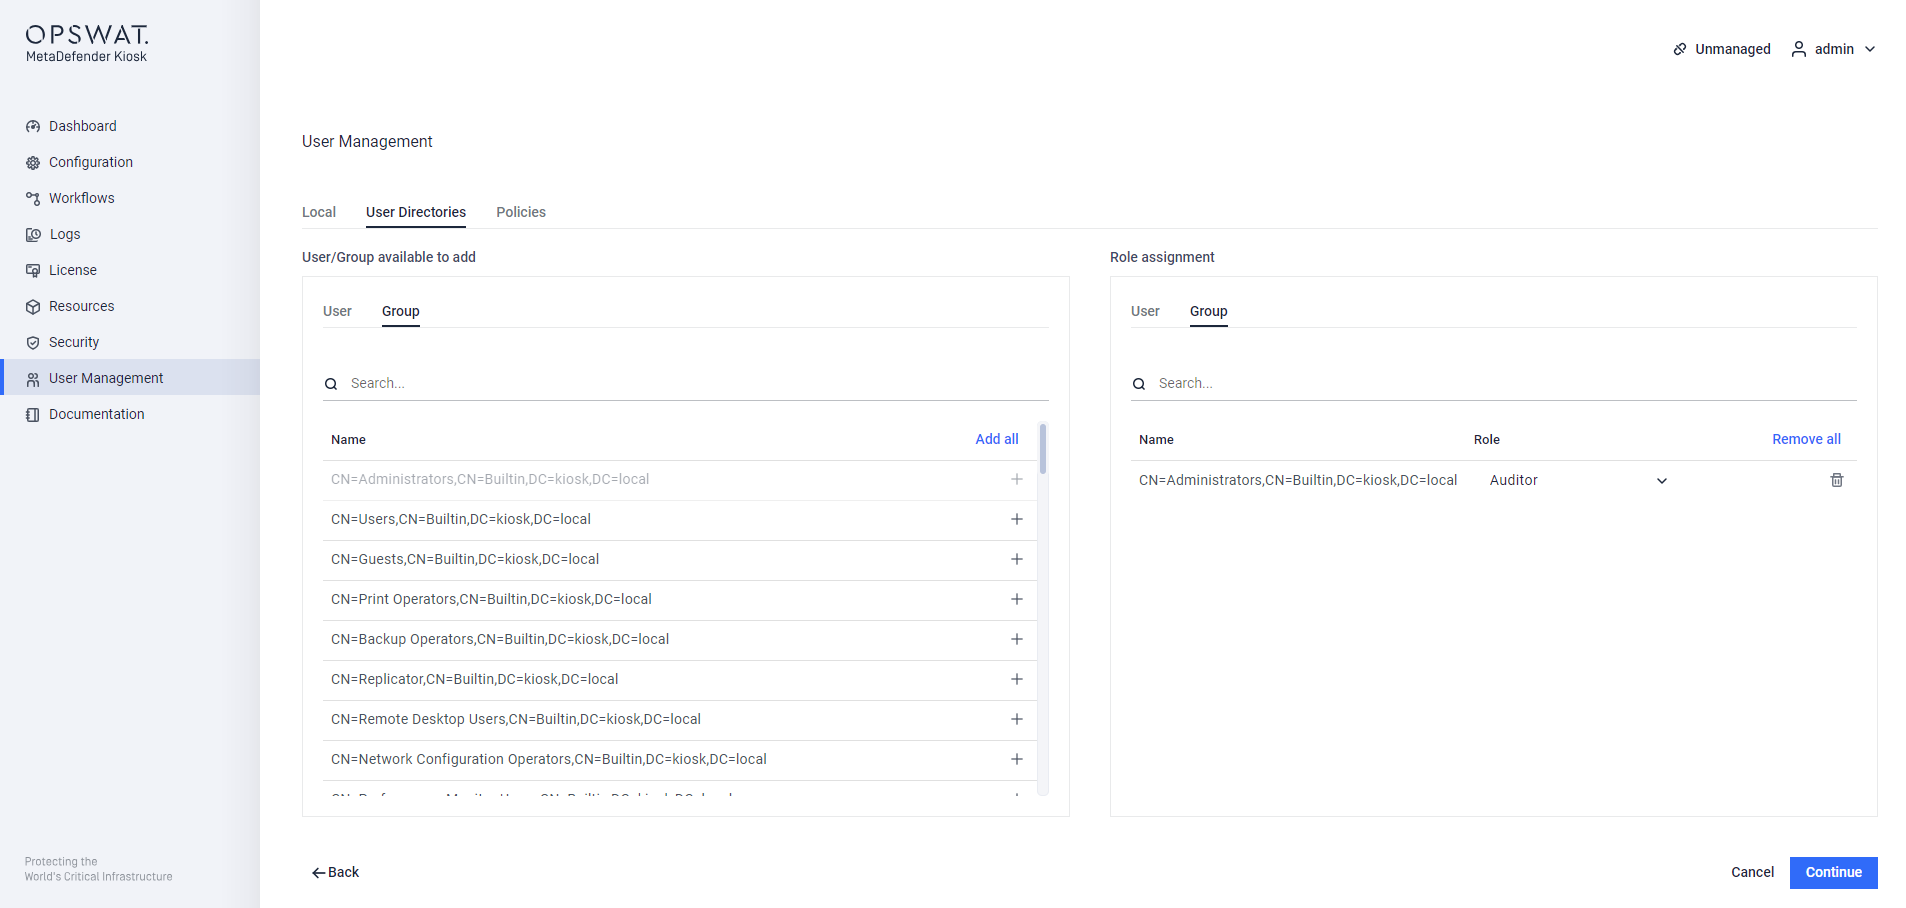
The next page allows you to assign users to either the Administrator or Auditor role.

You can click on Group to add AD groups to different roles
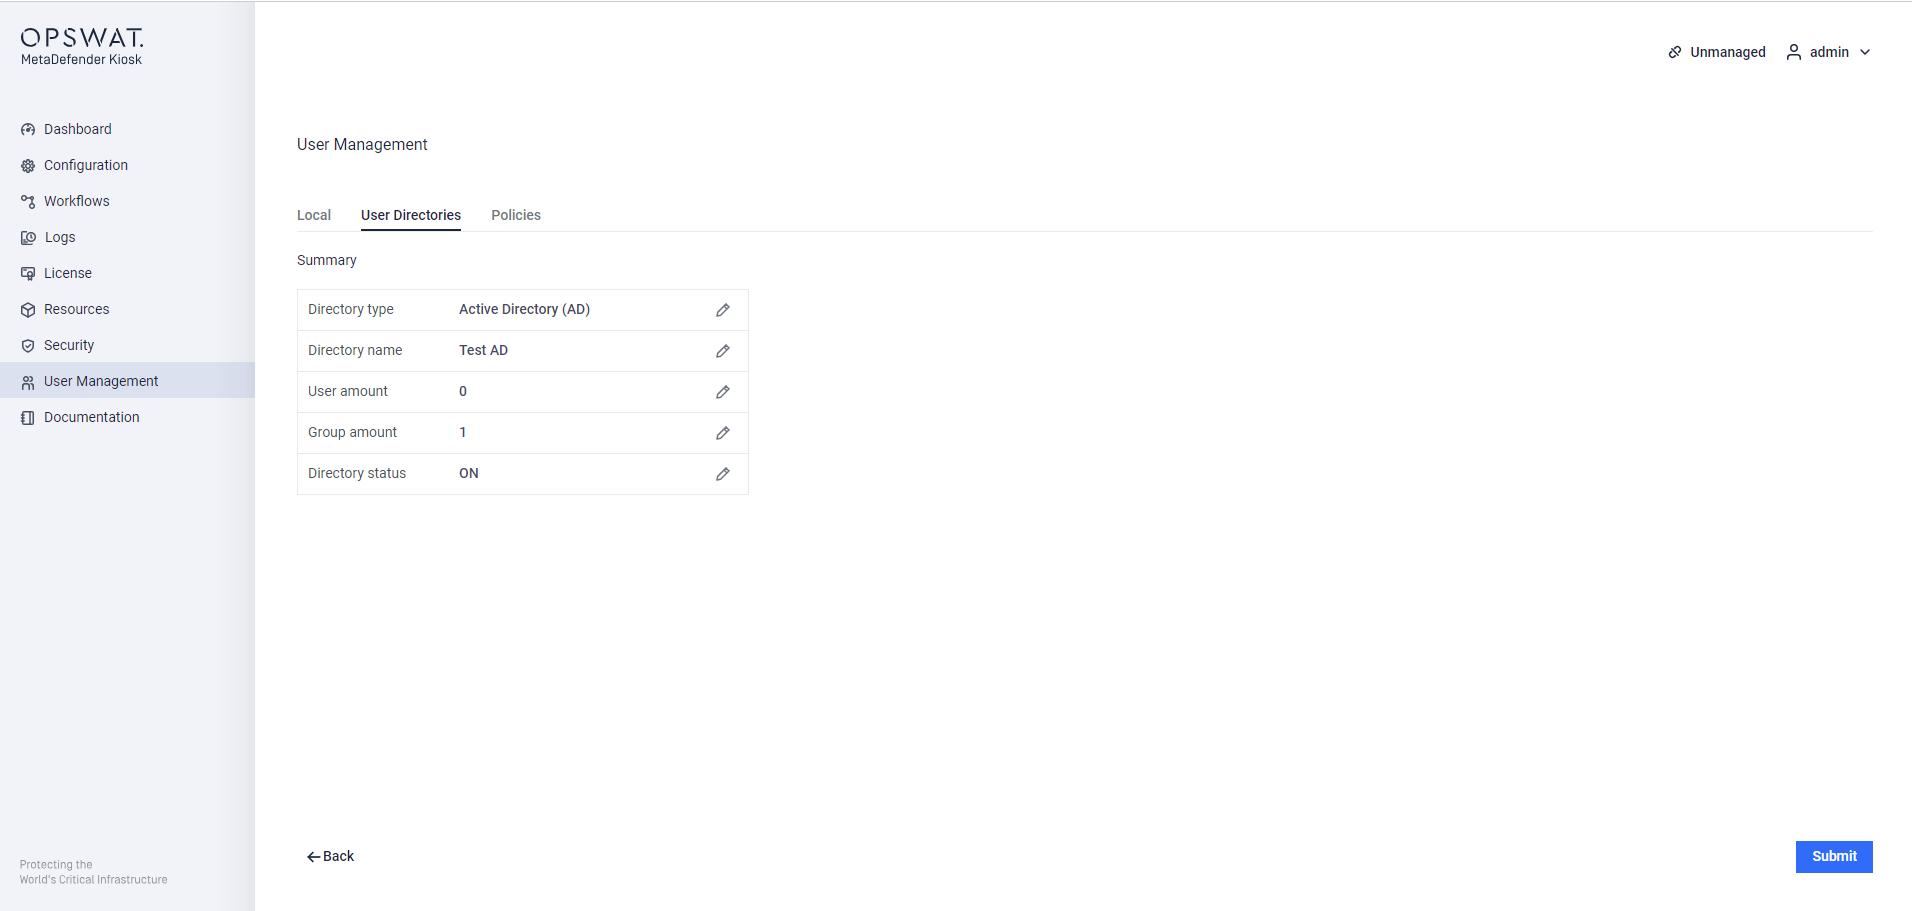
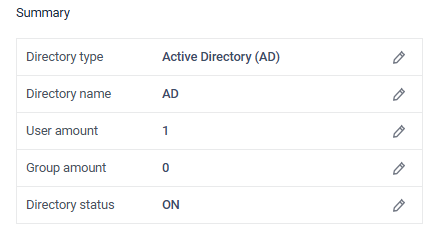
The final page shows a summary of the User Directory configuration and gives the option to edit before saving. Use the SUBMIT button to save the User Directory.
SAML 2.0
Kiosk supports Okta and ADFS as the SSO Identity Provider. See Configuring ADFS as SAML Identity Provider for more detail about configuring ADFS.
The following example will use Okta as the SSO Identity Provider
Multiple SAML User Directories can be configured but only one can be enabled at a given time.
Select SAML (SSO) in the menu to create a User Directory that integrates with a SAML 2.0 SSO Identity Provider (IdP). Switch the toggle button to ON to enable this User Directory. As soon as it is submitted, any other User Directories configured with SAML (SSO) will be automatically disabled. Switching to OFF only creates the User Directory and will not change any currently enabled User Directories.
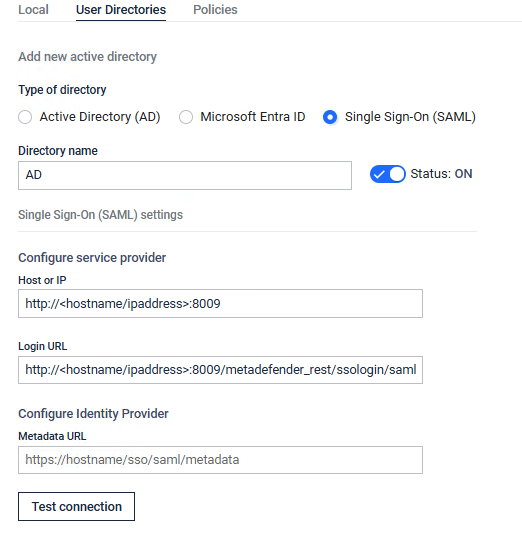
Click CONTINUE to go to the Configure Service Provider page. This will set up the login URL the Identity Provider uses to redirect after a successful login. Fill in Host or IP to generate the Login URL.
Make sure to enter a URL in Host or IP that can be accessed by all of the users that will log in through SSO.
Use the value in Login URL when setting up the application in your Identity Provider
Keep this tab open in your browser then open up your IdP admin page to the section where Applications are added. In Okta, it looks like the following:
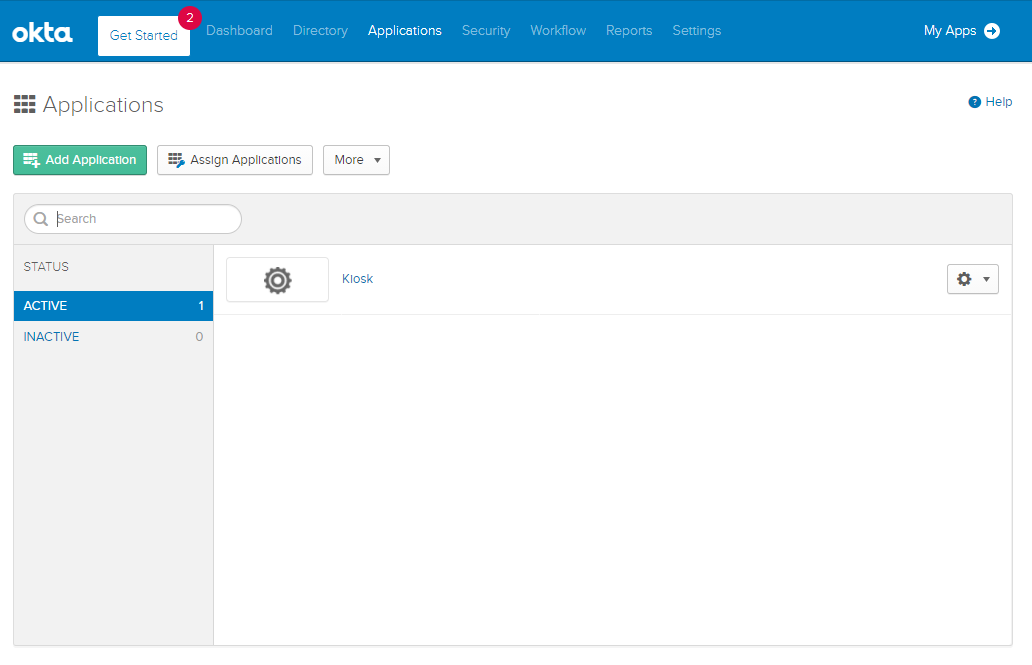
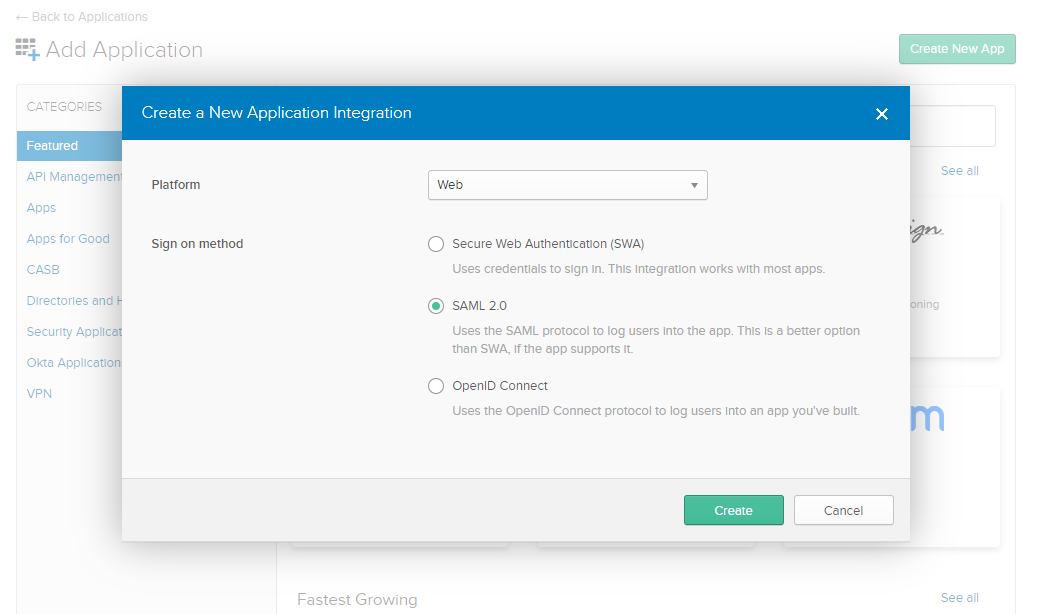
Select the option to add an application and then choose to create a new application that uses SAML 2.0. The way to create a new SAML 2.0 application will vary between Identity Providers. Refer to the documentation for your IdP for more details. In Okta, it looks like the following:
Continue until the step where the Identity Provider will ask for the Single Sign-on or Login URL. Switch back to your tab with the Kiosk User Directory setup. Copy and paste the Login URL from Kiosk into the Identity Provider application setup and finish the setup.
There may be multiple places where you will need to enter this login URL. In Okta you will need to enter it in the Single sign on URL section and the Audience URI (SP Entity ID) section. Refer to your Identity Provider documentation for information.
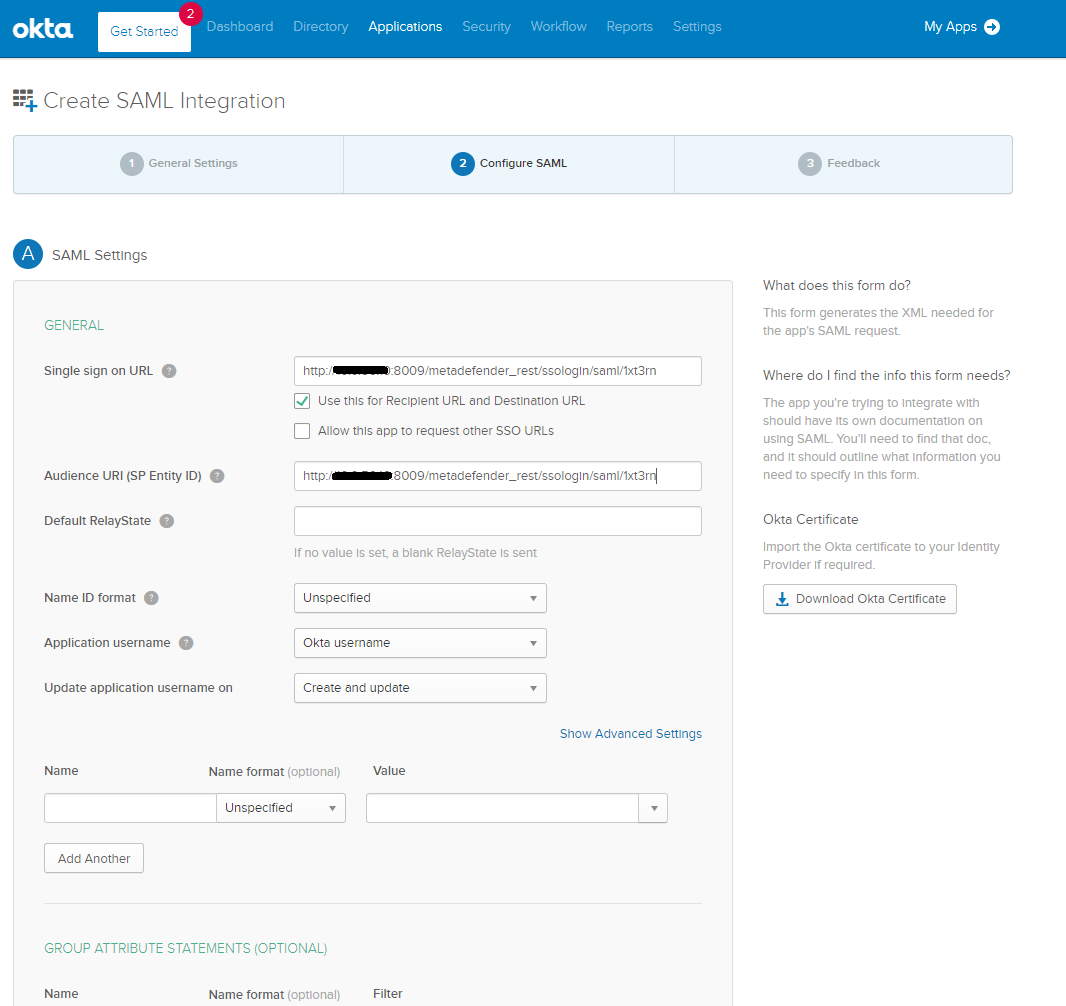
You should now have access to the Identity Provider metadata URL for your newly setup application. Go back to Kiosk and click CONTINUE to go to Configure Identity Provider. Copy and paste the metadata URL into the Metadata URL section.

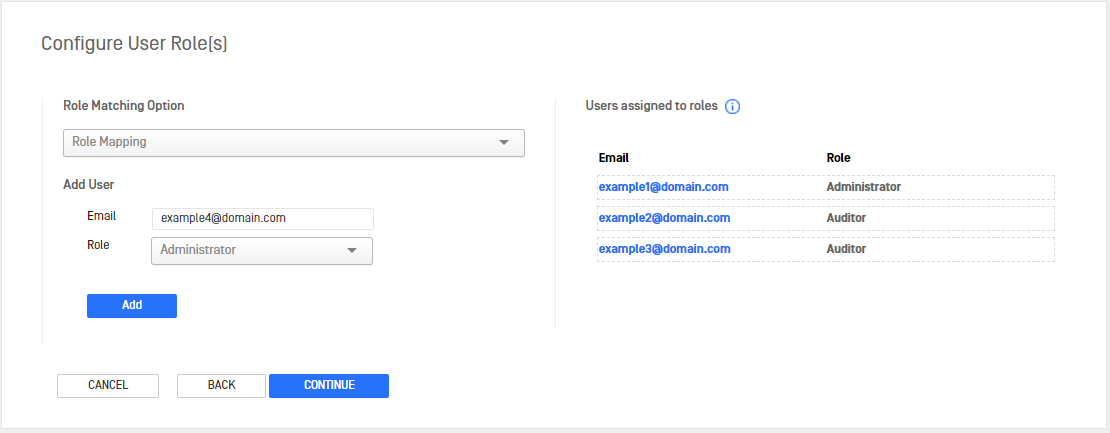
Click CONTINUE to go to Configure User Role(s). Here you will configure the role users will get when they log in using SSO.

Role Matching Option allows you to choose between:
- Default Role: assign one user role to anyone that successfully signs in through SSO
- Role Mapping: assign specific users to specific roles
Select Role Mapping to show the list of assigned users.
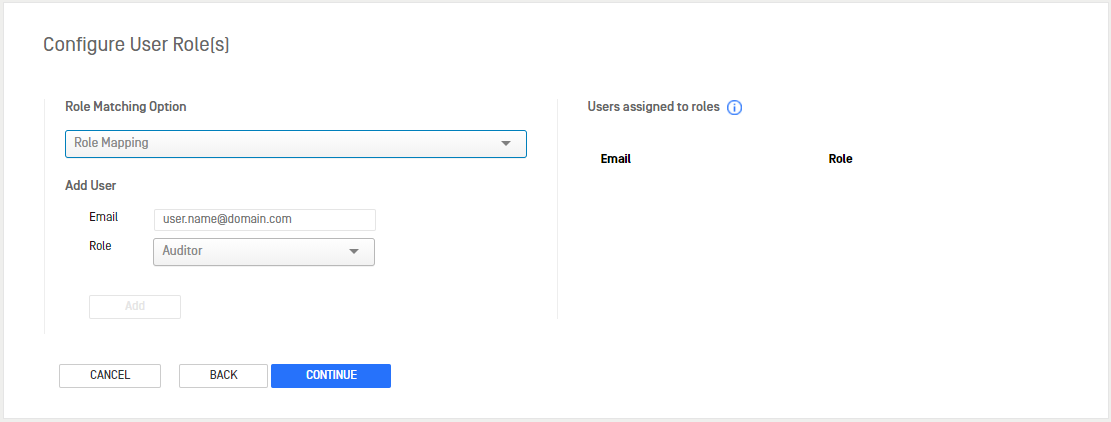
Fill in the email address or user name in the Add User section and use the dropdown to select a role. Click Add to add the user to Users assigned to roles.
Click CONTINUE to go to SAML (SSO) Wizard Complete and review the User Directory configuration. Use the BACK button to go back and make any changes if needed.
Click SUBMIT to create the User Directory. If the toggle is set to ON, SSO will now be enabled for any users attempting to log in to the Management Console.

SAML Validation Logging
SAML authentication logging exists in the Kiosk logging directory (<kiosk install dir>\Log) within omdauth.log. There may be some verbose logging such as: "Failed to compare notAfter timestamp to required regex notAfter=". This is not a critical error and should not have an affect on the basic usage of SSO login for the Management Console. It does indicate that the SessionNotOnOrAfter attribute is not being provided by the IdP.
| SessionNotOnOrAfter [Optional] \nSpecifies a time instant at which the session between the principal identified by the subject (Kiosk) and the SAML authority (IdP) issuing this statement MUST be considered ended. |
If it is desired to use this attribute, please refer to your Identity Provider documentation to either enable the attribute or add it as a custom attribute.
Per the Okta example, it can be added as a custom attribute in SAML Settings -> General -> Show Advanced Settings:
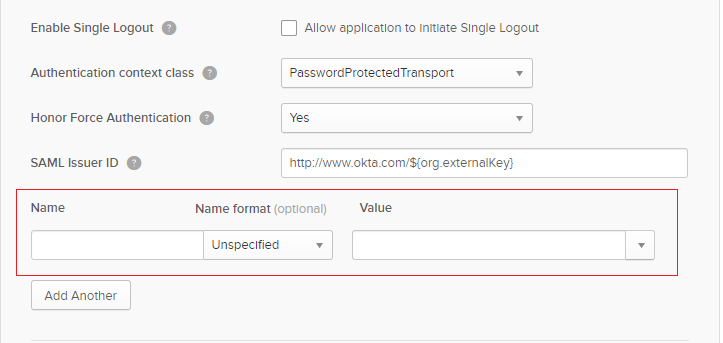

Then preview the SAML Assertion to ensure it is correct:

Policies
By default, all users are allowed to log in remotely or locally to the management console.
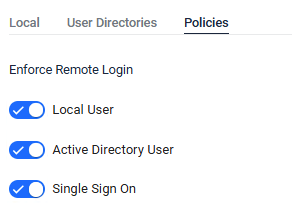
Enforce remote login
This controls the policy for allowing users to log in to the management console from a remote system. Administrators can disallow only remote login by turning off the policy.
Enforce local login
This controls the policy for allowing users to log in locally to the management console. Administrators can disallow only local login by turning off the policy.
To disable Local user in both Enforce Remote Login and Enforce Local Login, the prerequisite is that at least one user directory is enabled and has an admin user/group.

