The Kiosk is ready for use when Insert Media to Start is displayed.
If the Kiosk is not in use for some time, an instructional video plays on the screen. Any interaction with the screen returns the Kiosk back to the Insert Media page.
Scan Mode
When configured in Scan Mode, inserting media immediately starts a processing session and navigates to the scan progress page.
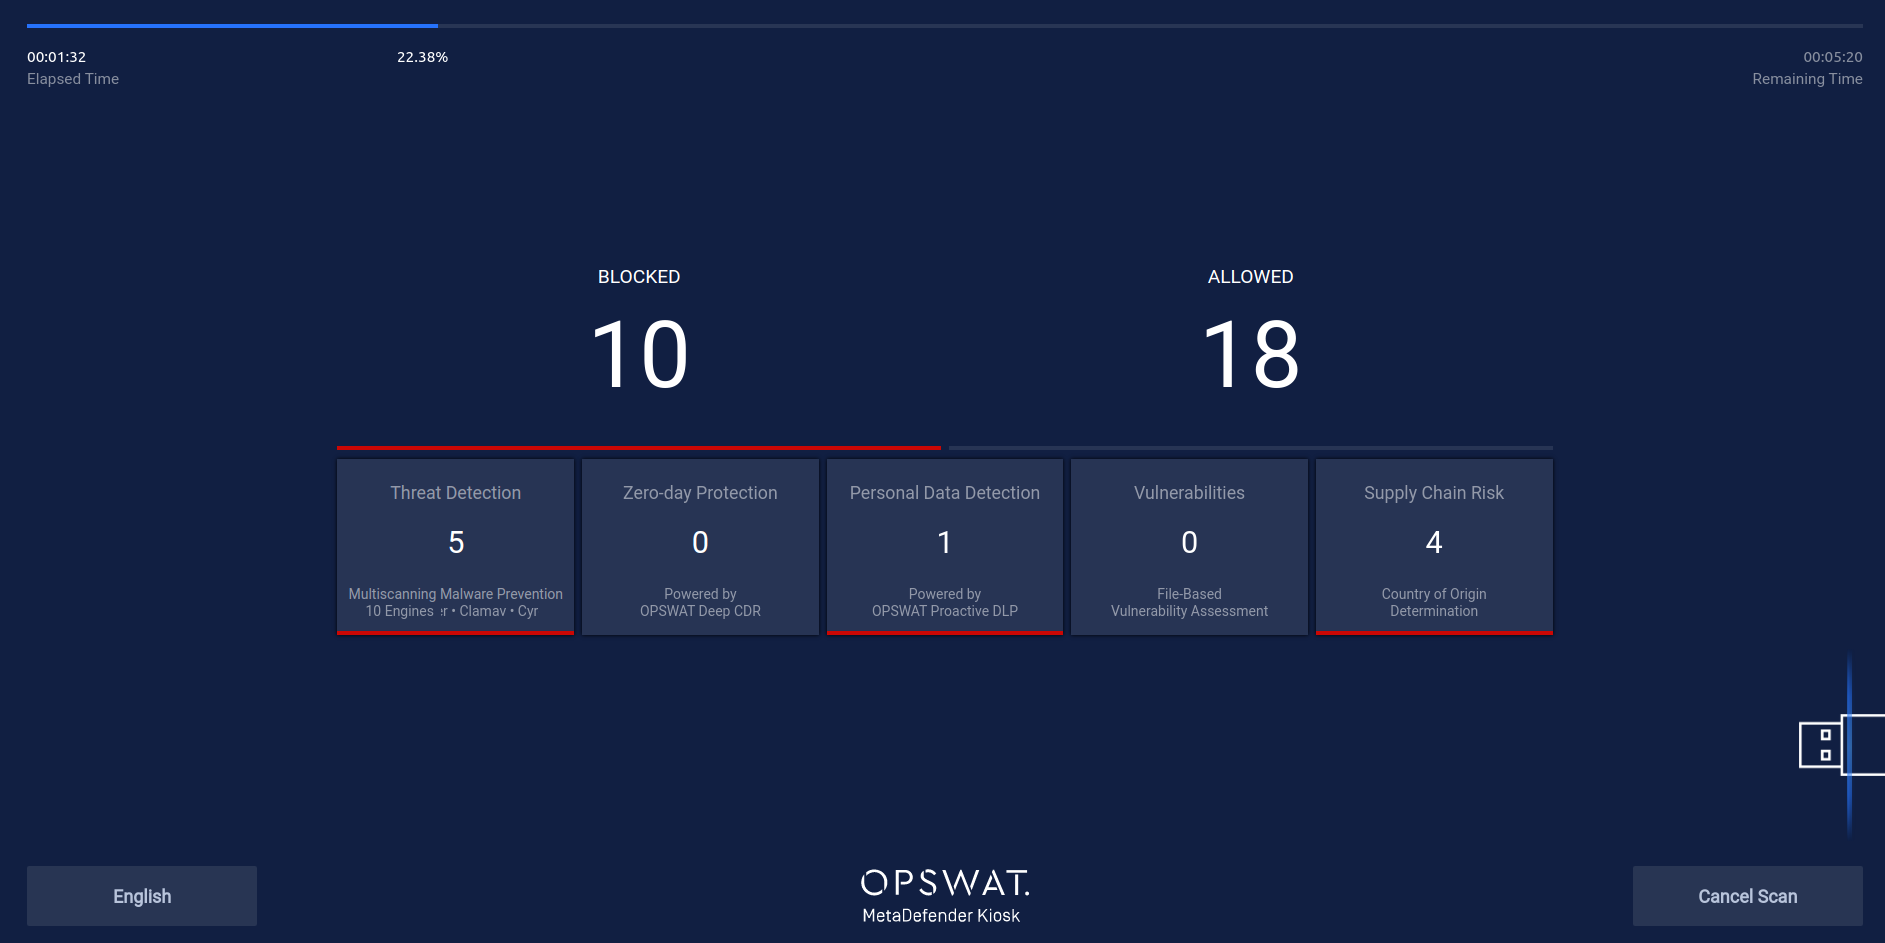
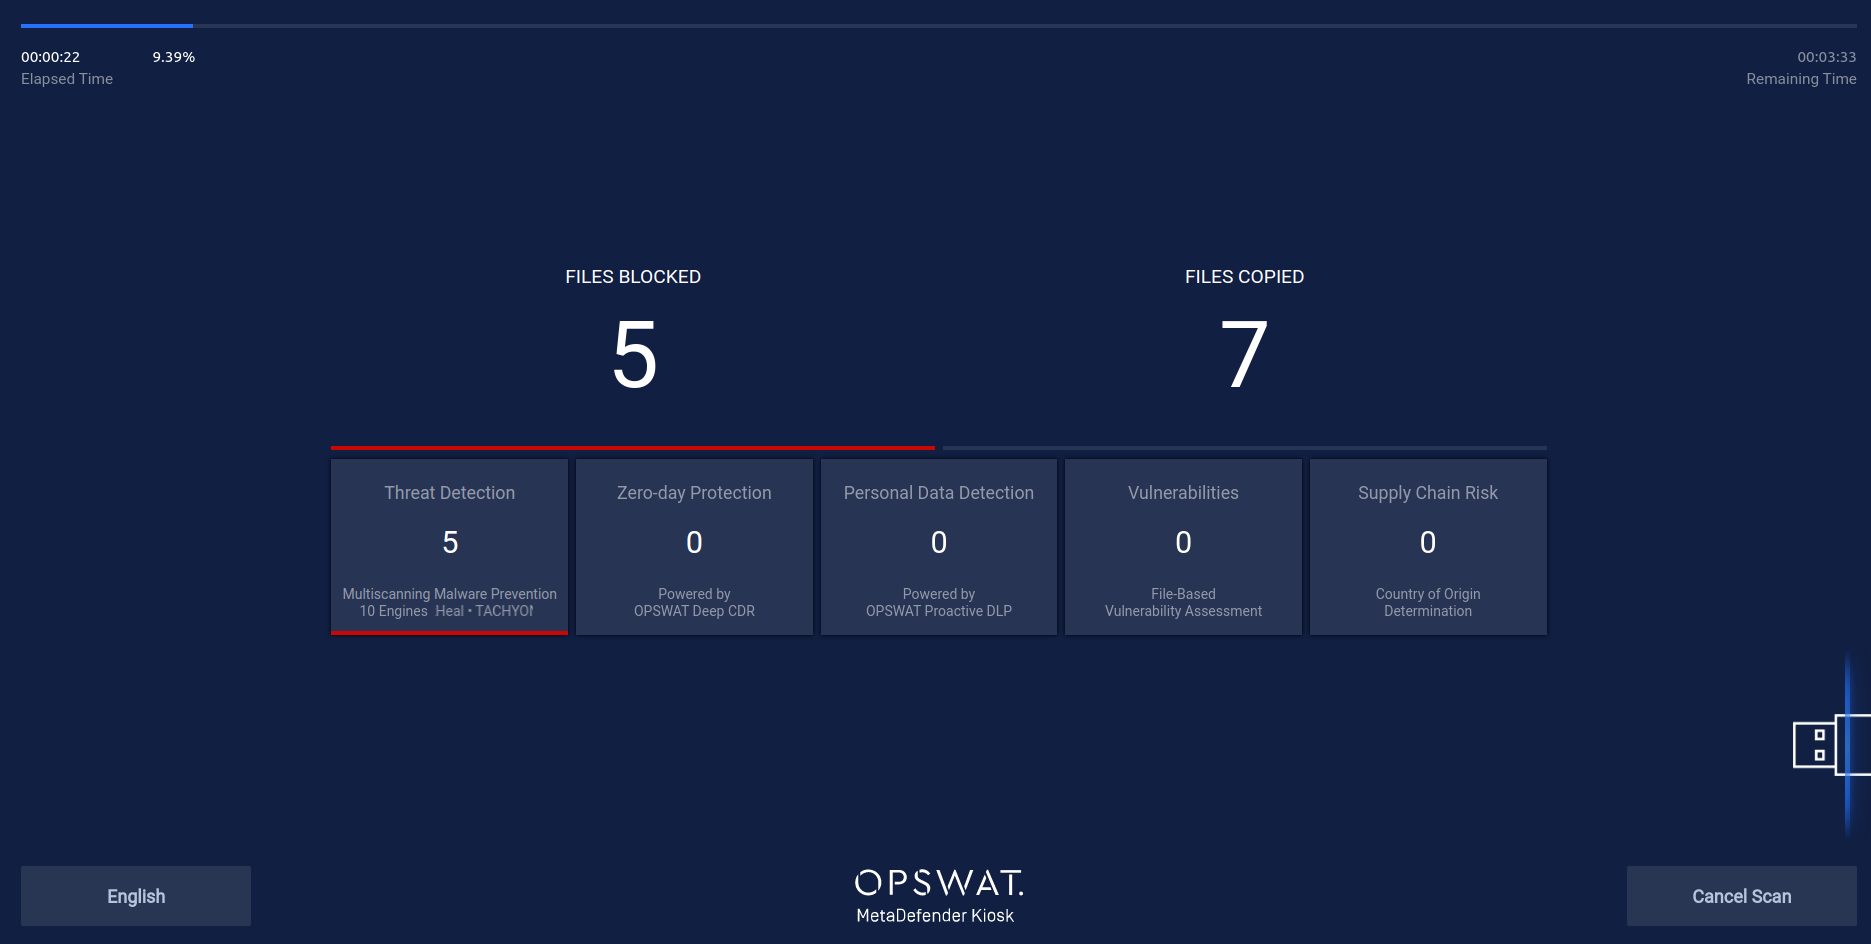
The progress bar at the top of the screen indicates current elapsed time and estimated remaining time for processing.
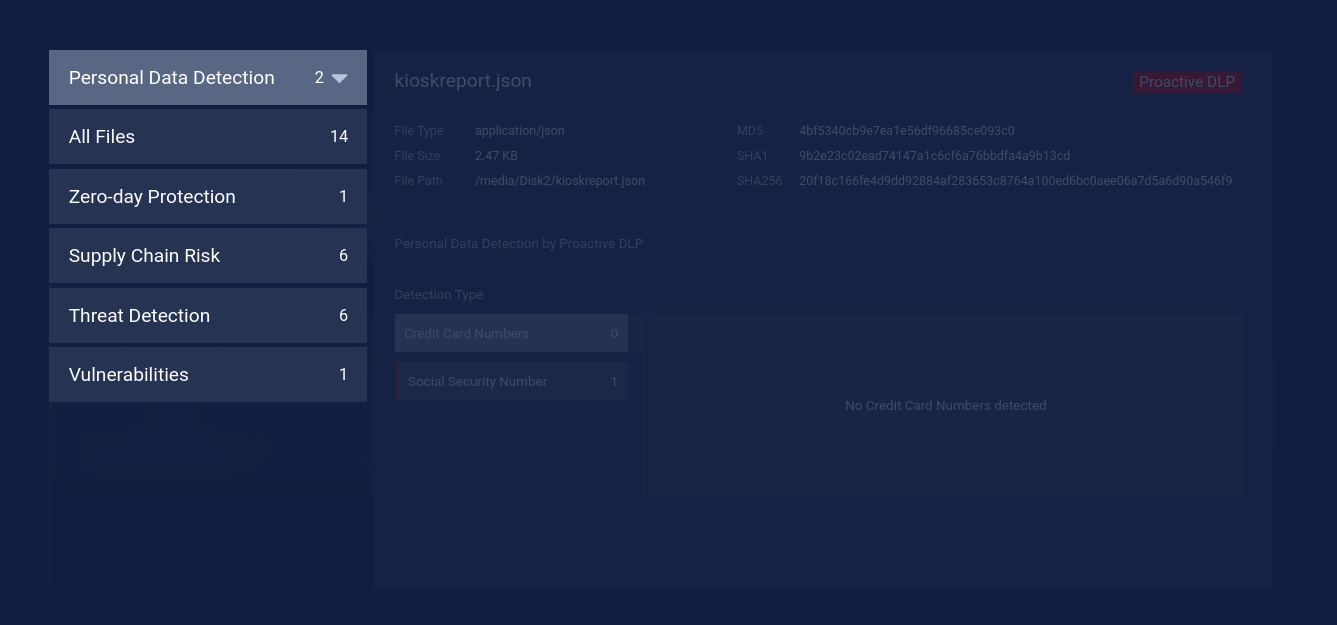
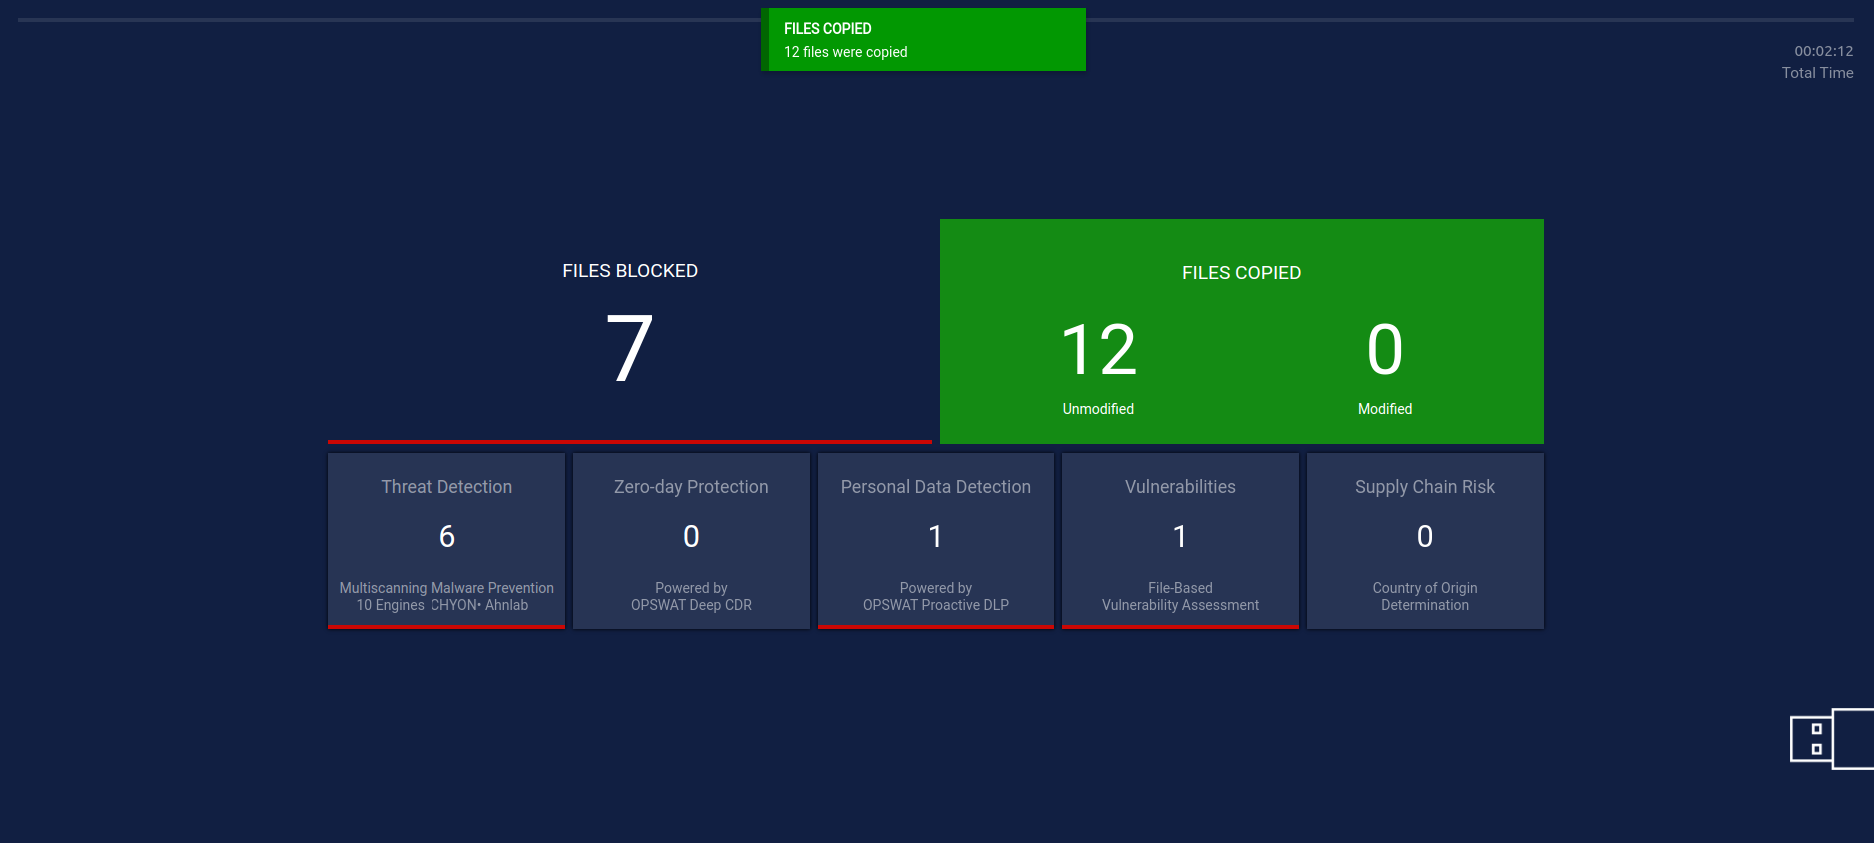
The middle of the screen shows the total Allowed and Blocked file counts and are updated as file results are identified. Under the total file counts, detailed file counts for Threat Detection, Zero-day Protection, Personal Data Detection, Vulnerabilities, and Supply Chain Risk update as the scan proceeds. Clicking any of these boxes after a scan completes opens the Scan Details page listing each file identified by the selected category.
Threat Detection - Total number of infected files found
Zero-day Protection - Total number of files where active content was detected. In Transfer Mode, Kiosk automatically copies a sanitized version of the file to the destination media.
Personal Data Protection - Total number of files found with potentially sensitive data such as Social Security or Credit Card numbers
Vulnerabilities - Total number of CVE vulnerabilities identified in files
Supply Chain Risk - Total number of files blocked due to Country of Origin settings
After processing completes, a button to View scan details will appear.
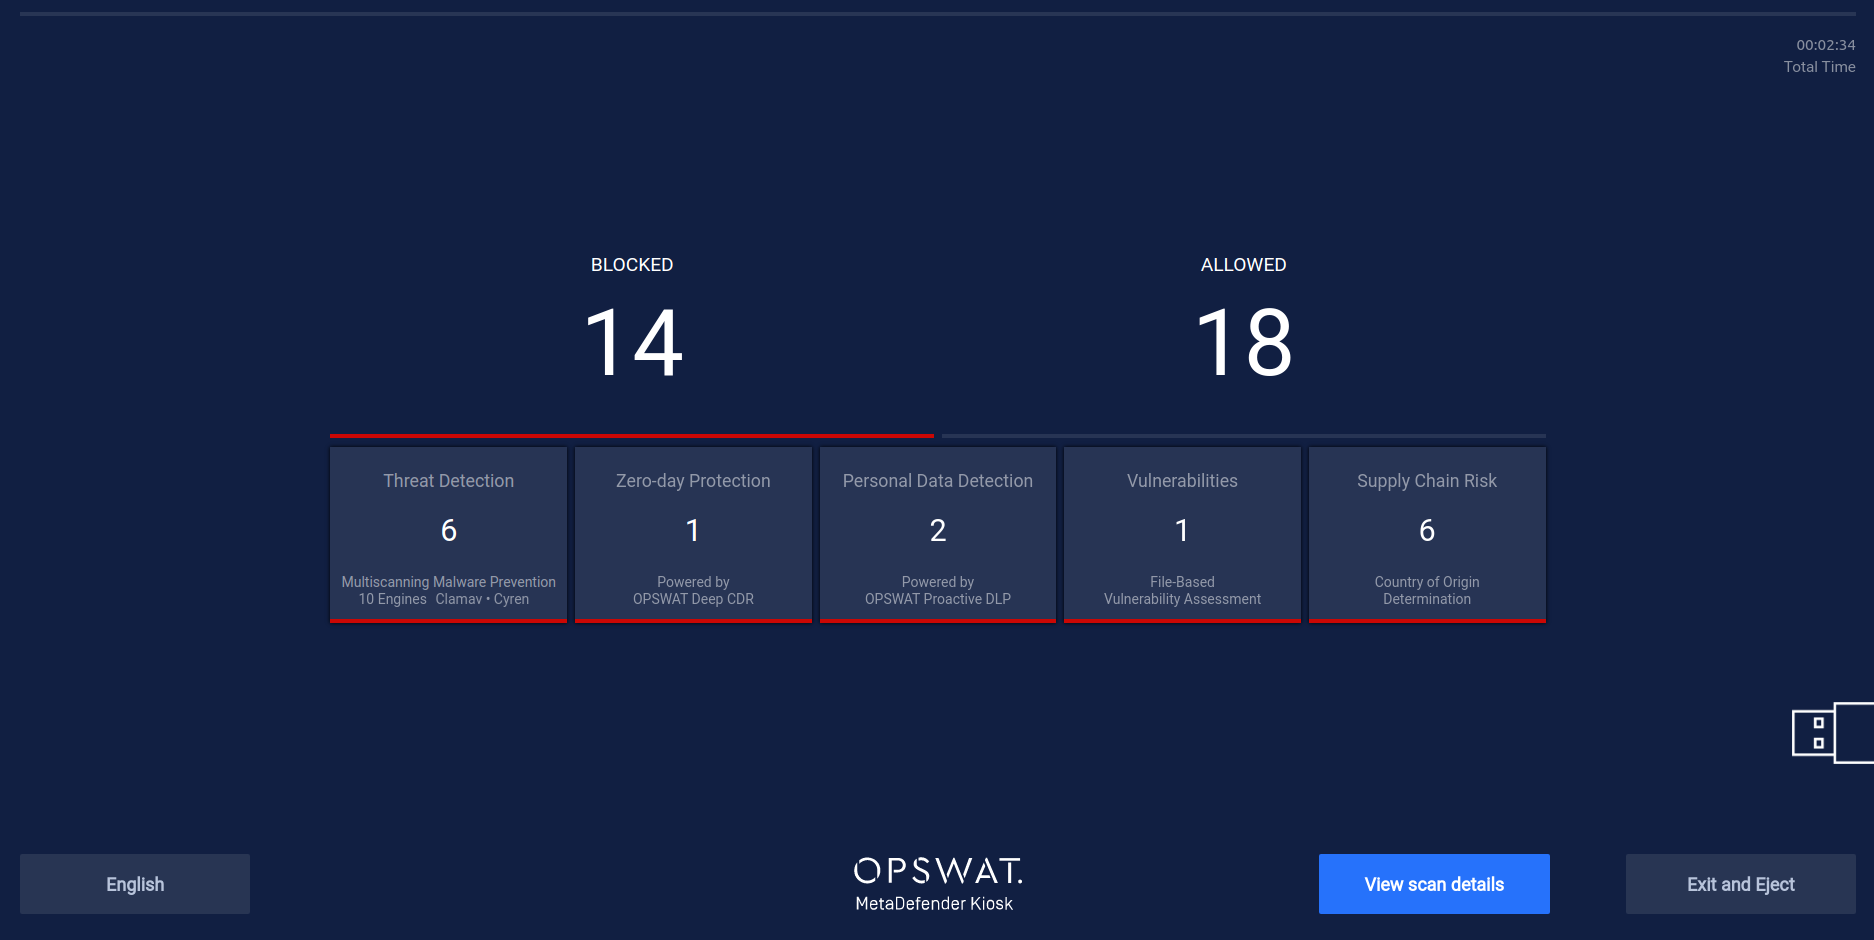
Clicking View scan details displays details on threats, vulnerabilities, zero day protection, personal data protection and blocked files due to country of origin that were detected during processing.
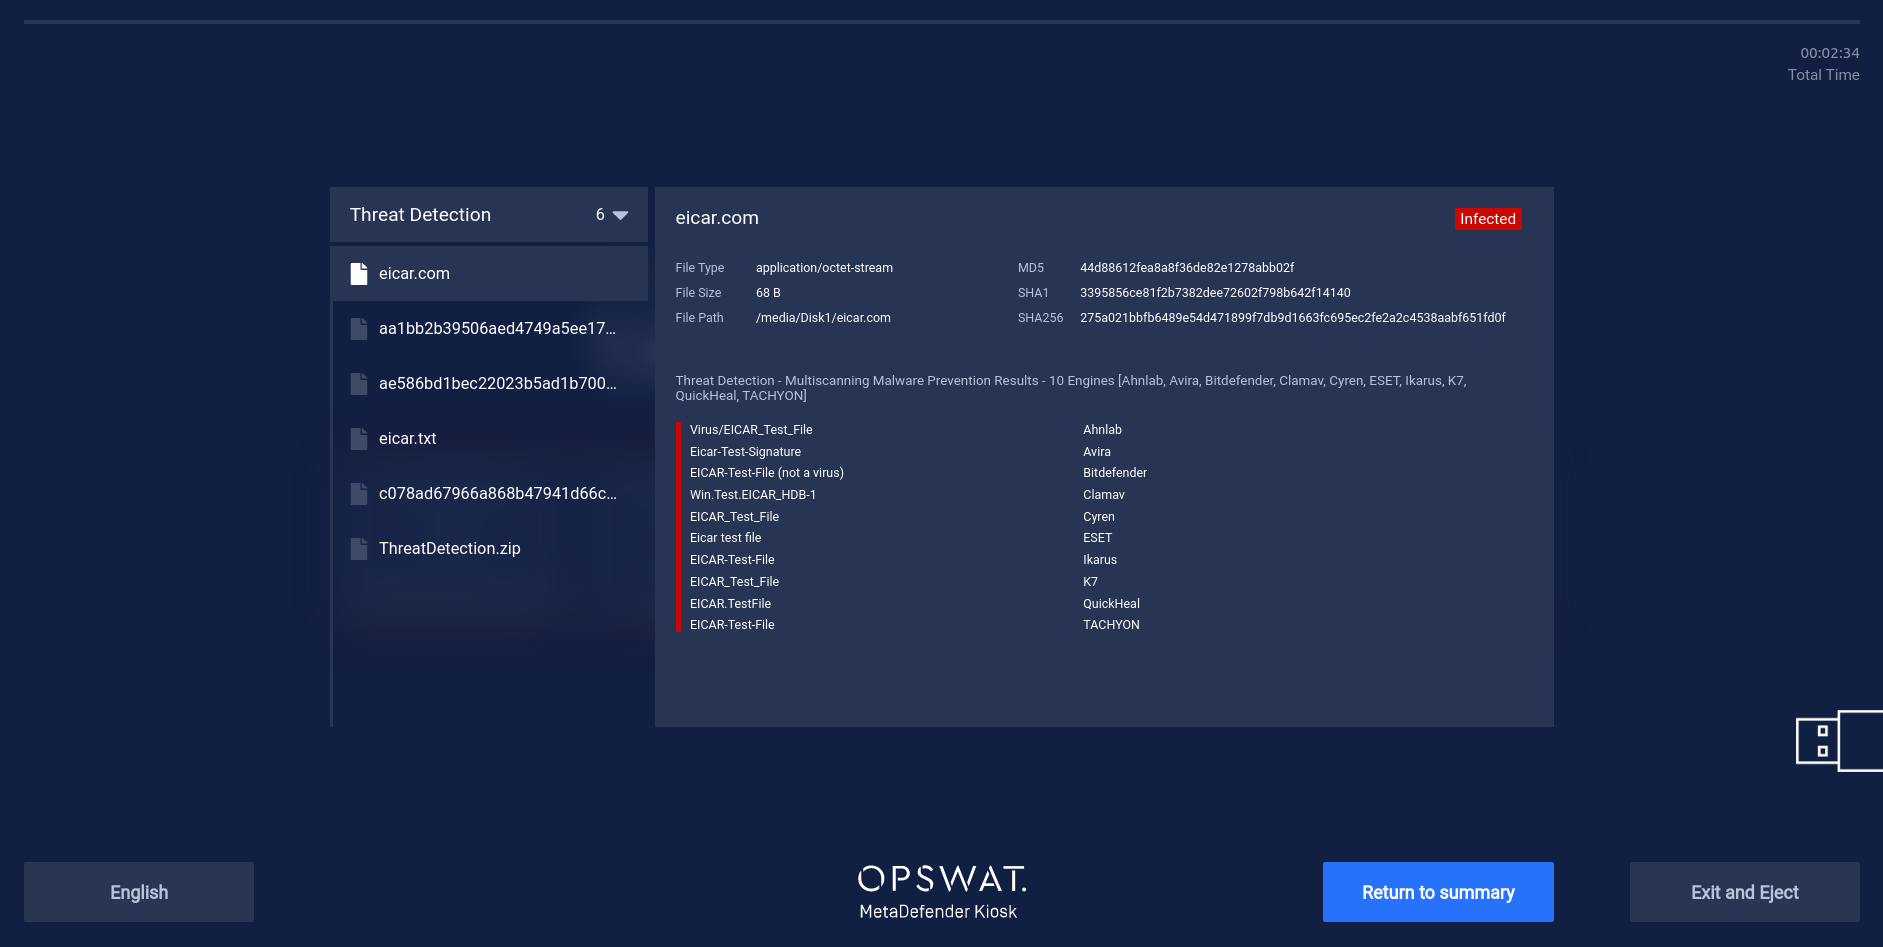
Clicking on the header at the top of the file list displays a dropdown where you can access the other scan details:
Clicking Exit and Eject ends the processing session and the media can be removed. Kiosk Linux goes back to the Insert Media to Start page and another scan can be started.
Transfer Mode
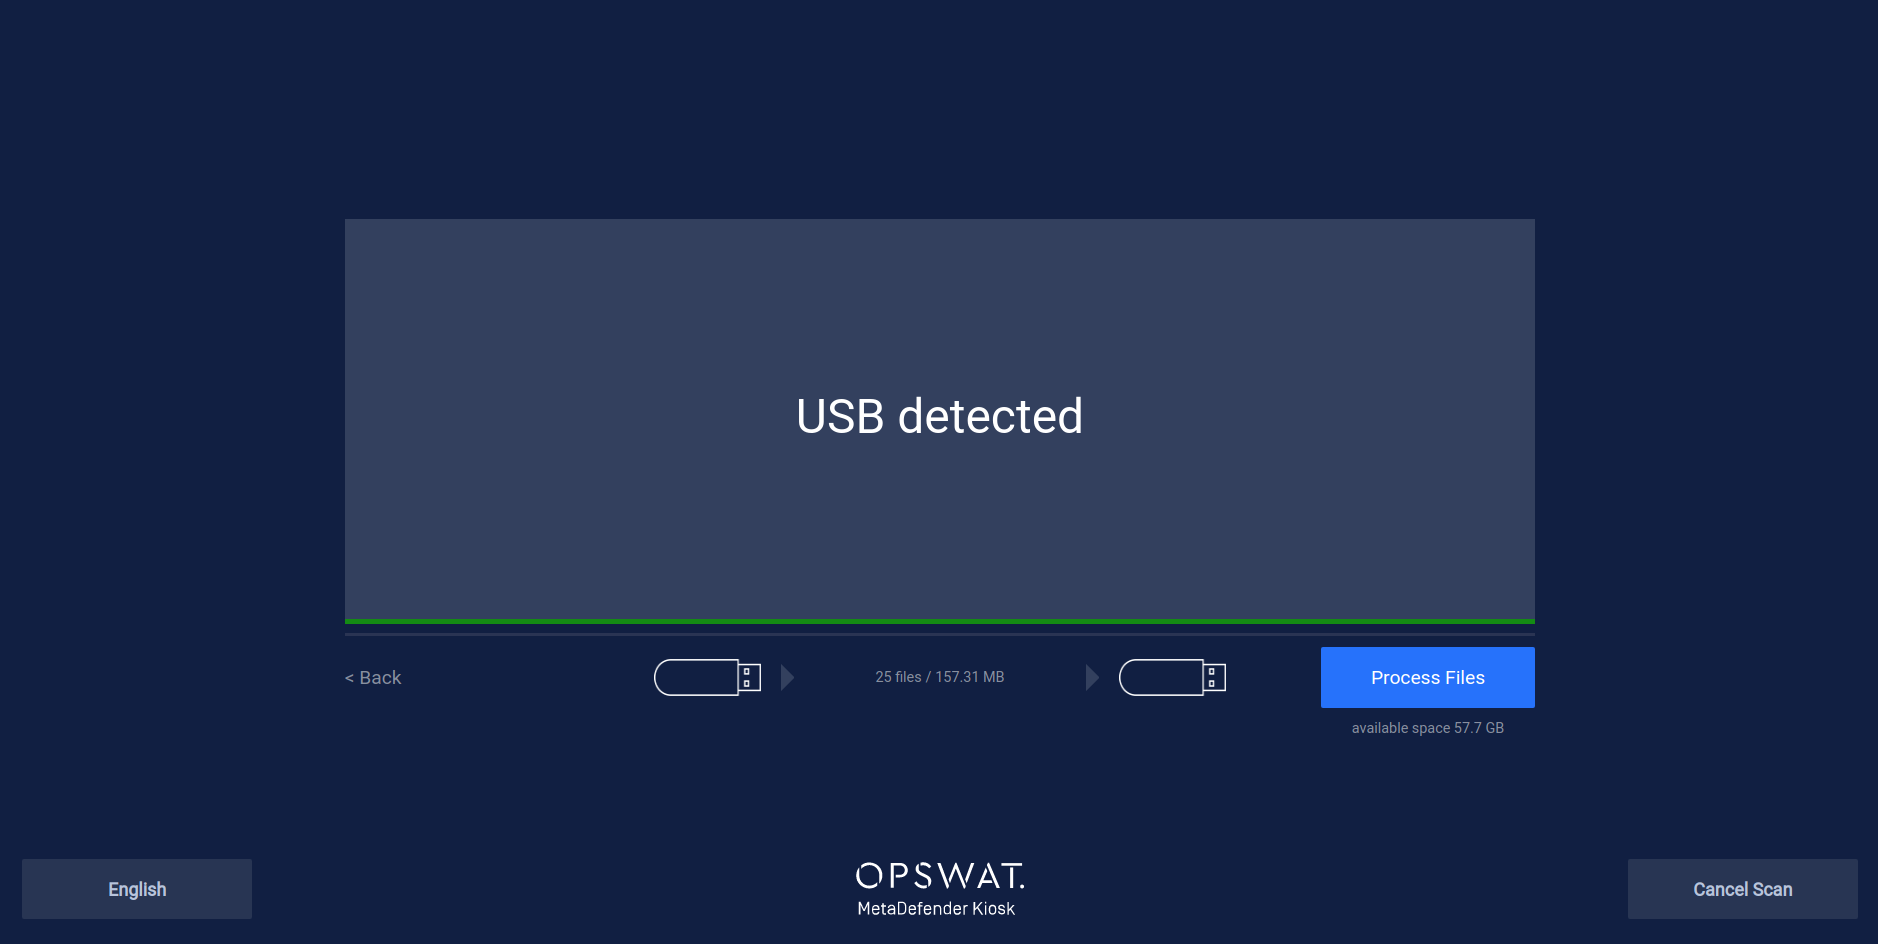
Transfer Mode allows the user to select specific files to scan and copy to another USB drive. After inserting the source media device, the user will be presented with a screen alerting them to select files to copy:
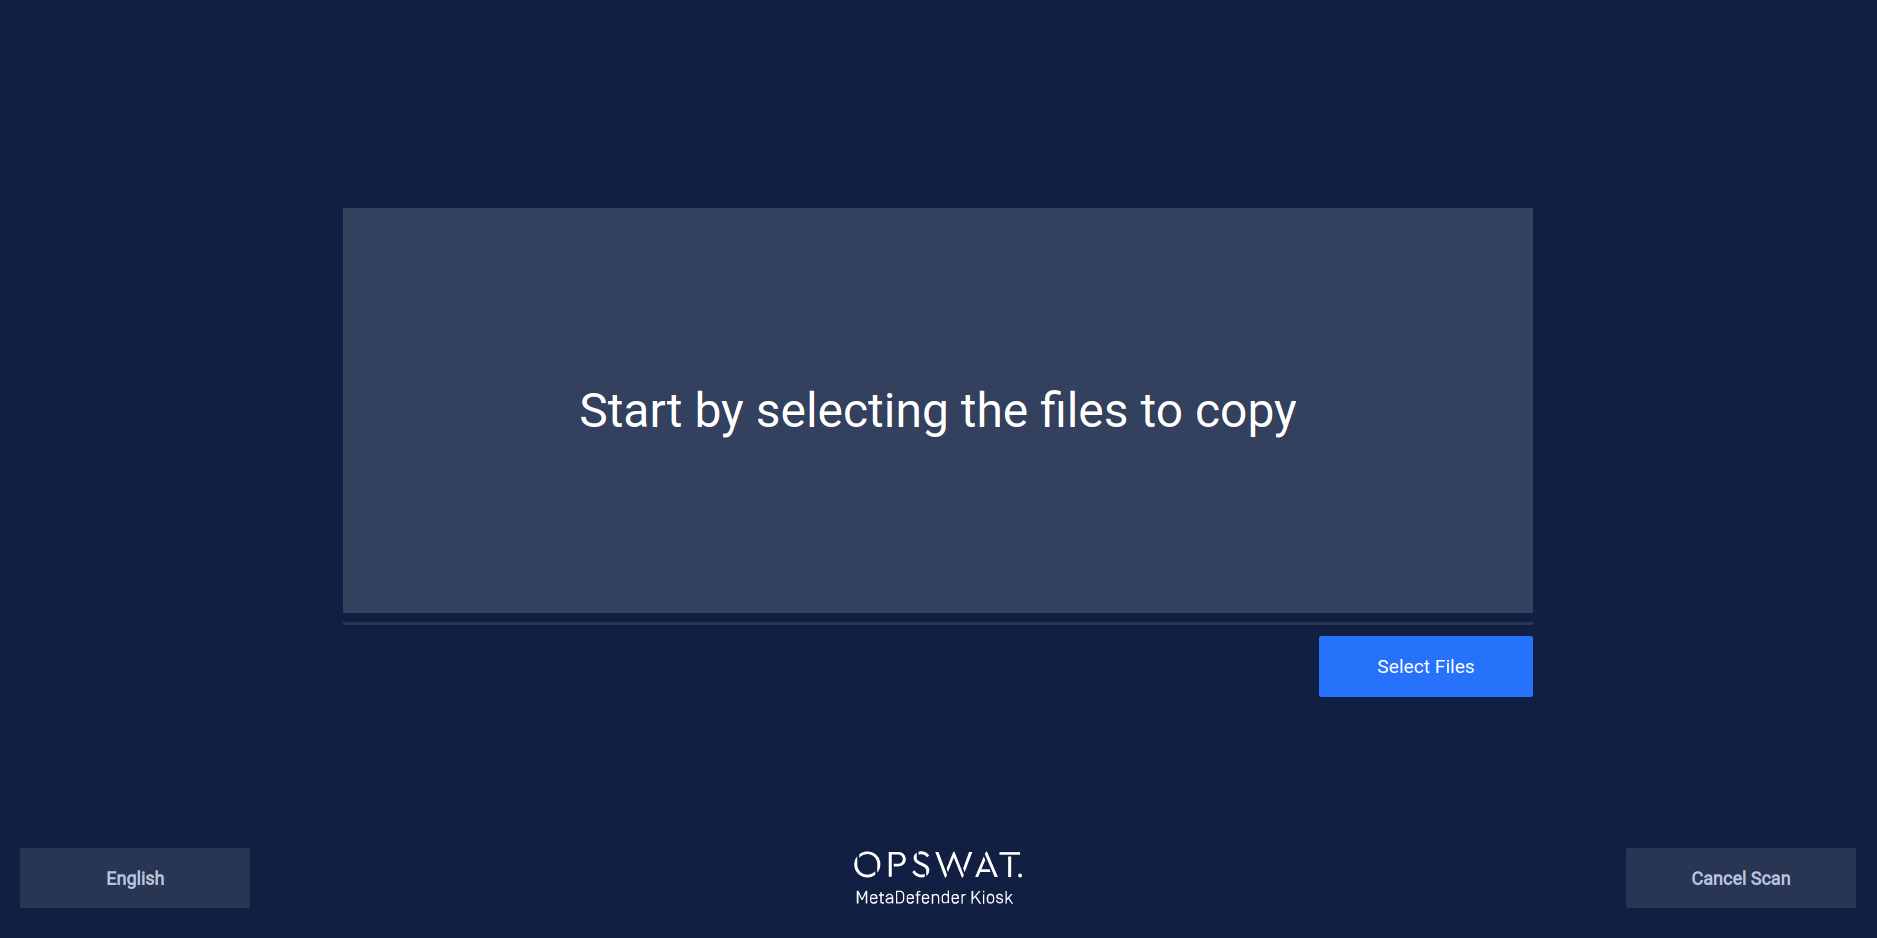
Click the Select Files button to select the files to scan and transfer to the destination media.
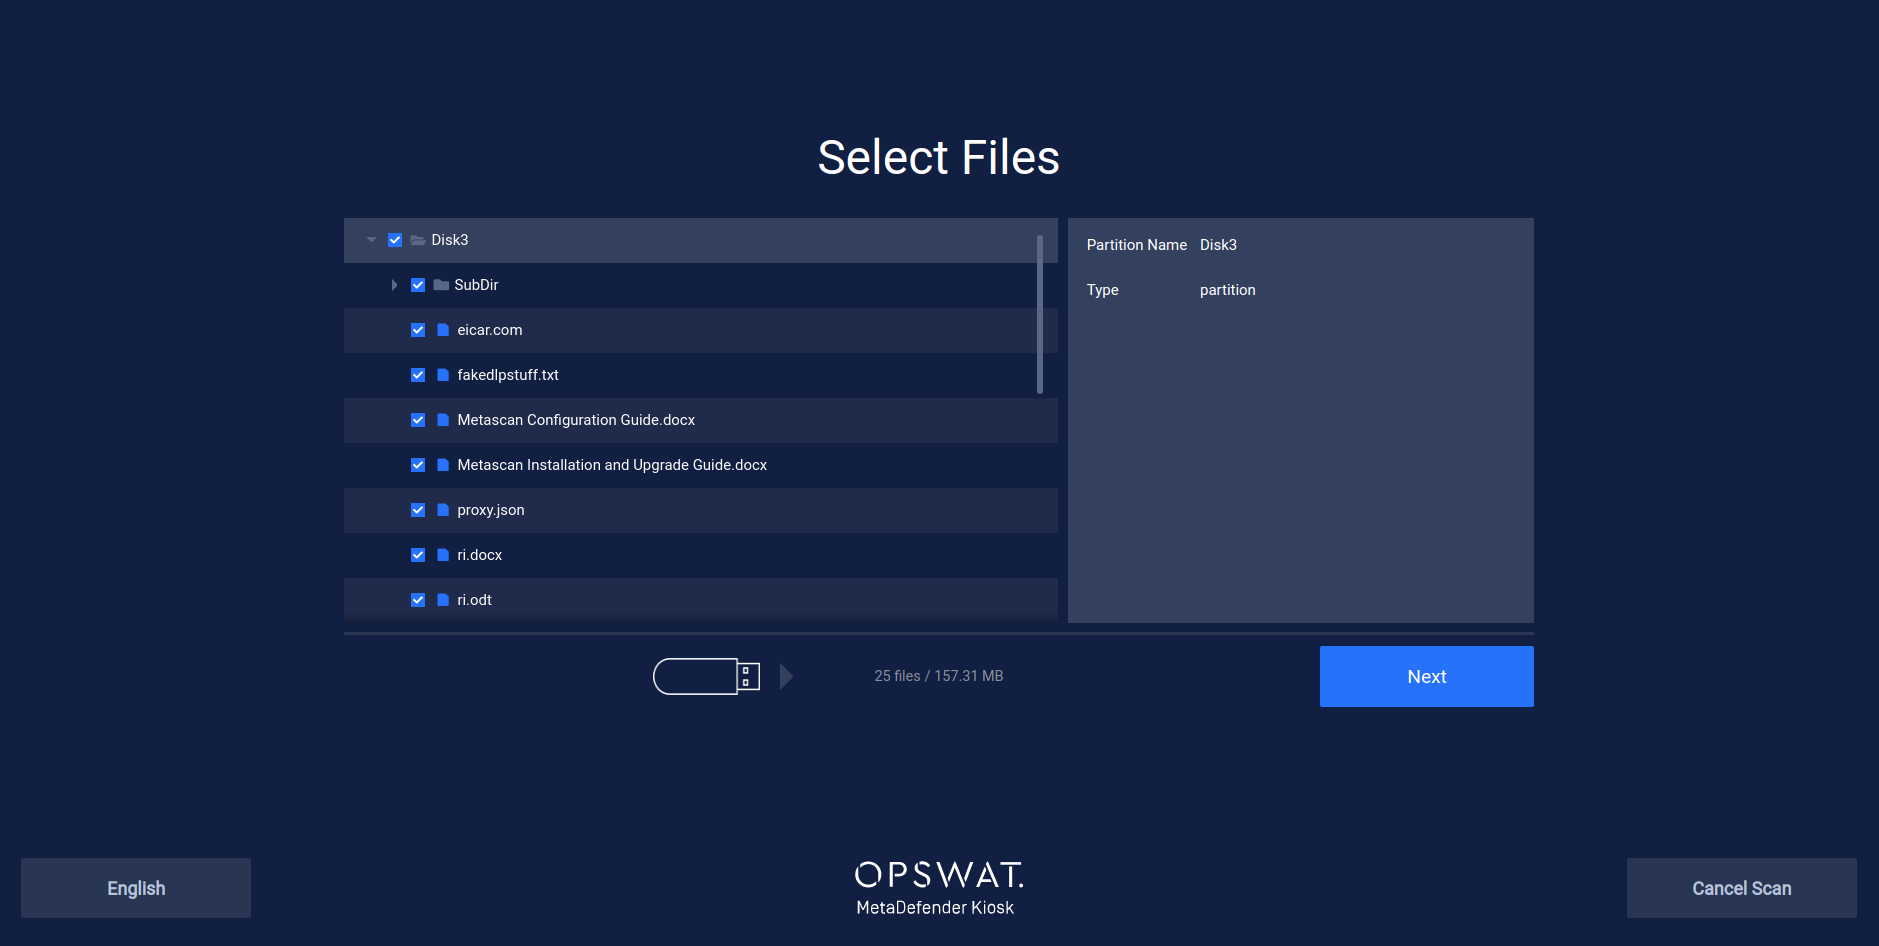
Kiosk will automatically keep track of the number of files selected and their total size so that you can choose a destination media with a large enough capacity to store these files. After clicking Next the user is prompted to insert the Destination Media.
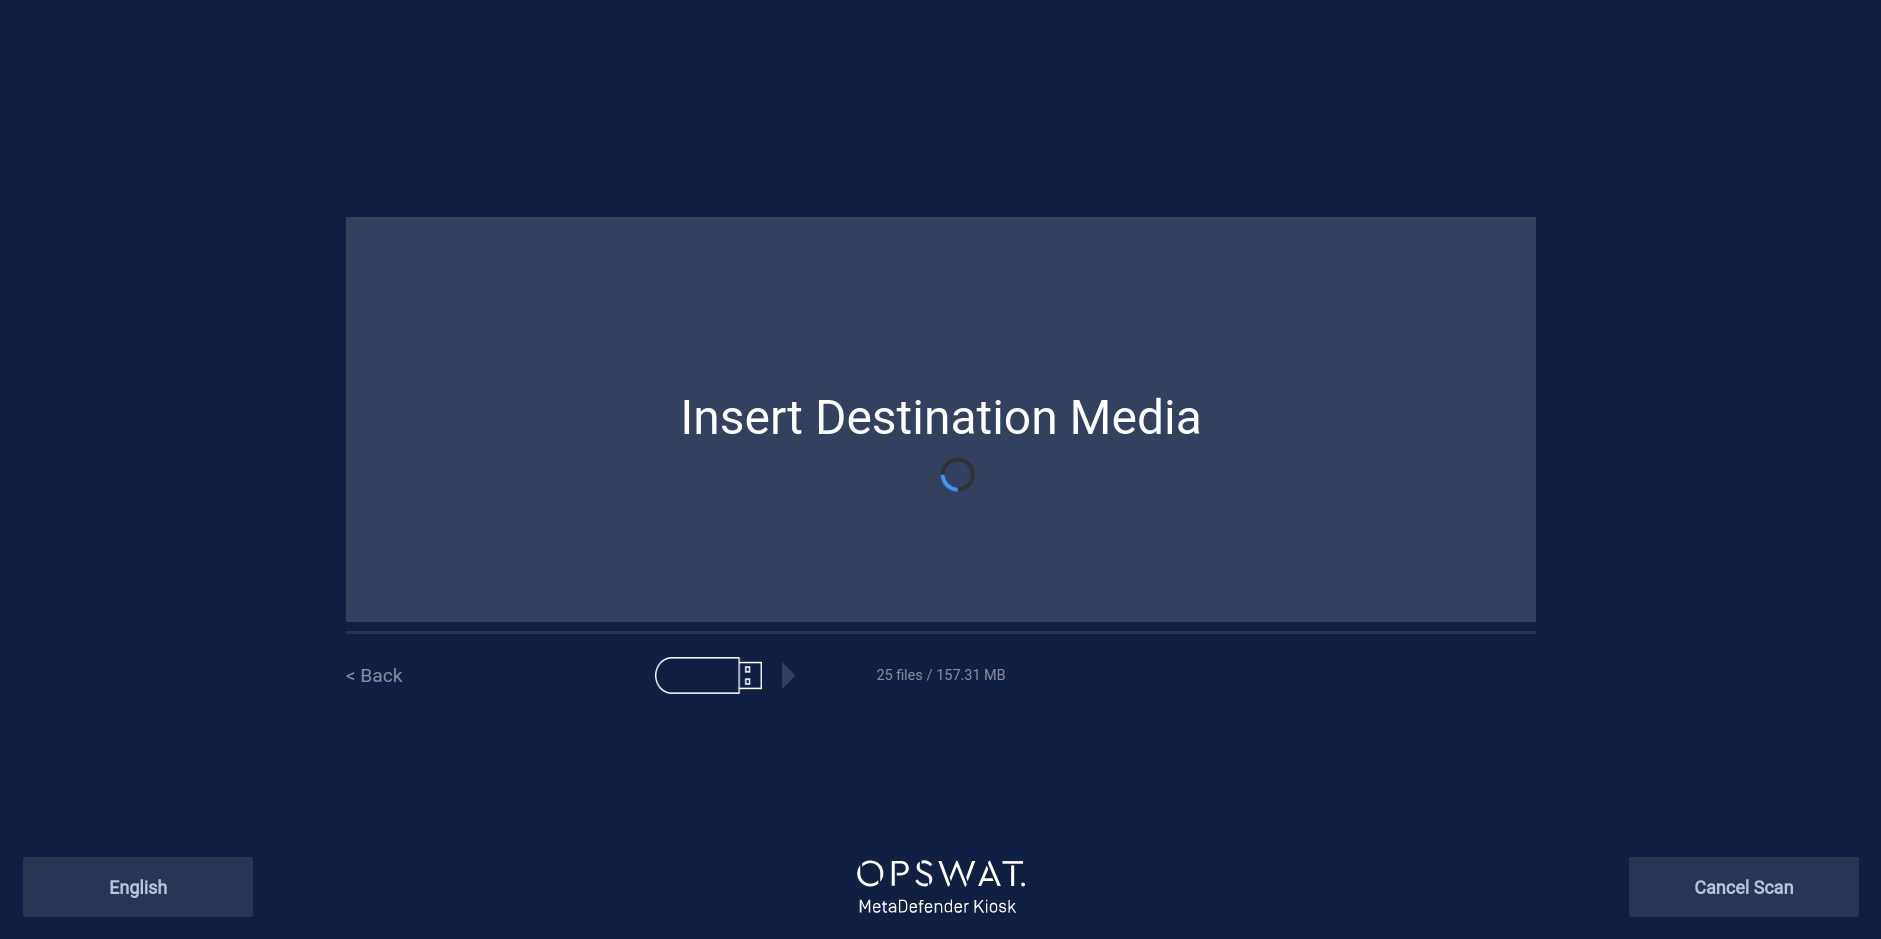
After inserting Destination Media:
The user will be presented with an error message if there is an issue with the Destination Media such as not enough capacity or if the media is not writeable.
Click Process Files to begin scanning and transferring the files. Kiosk alerts the user that the Destination Media will be wiped before scanning. This is to ensure only the scanned files exist on the media after Transfer Mode completes.
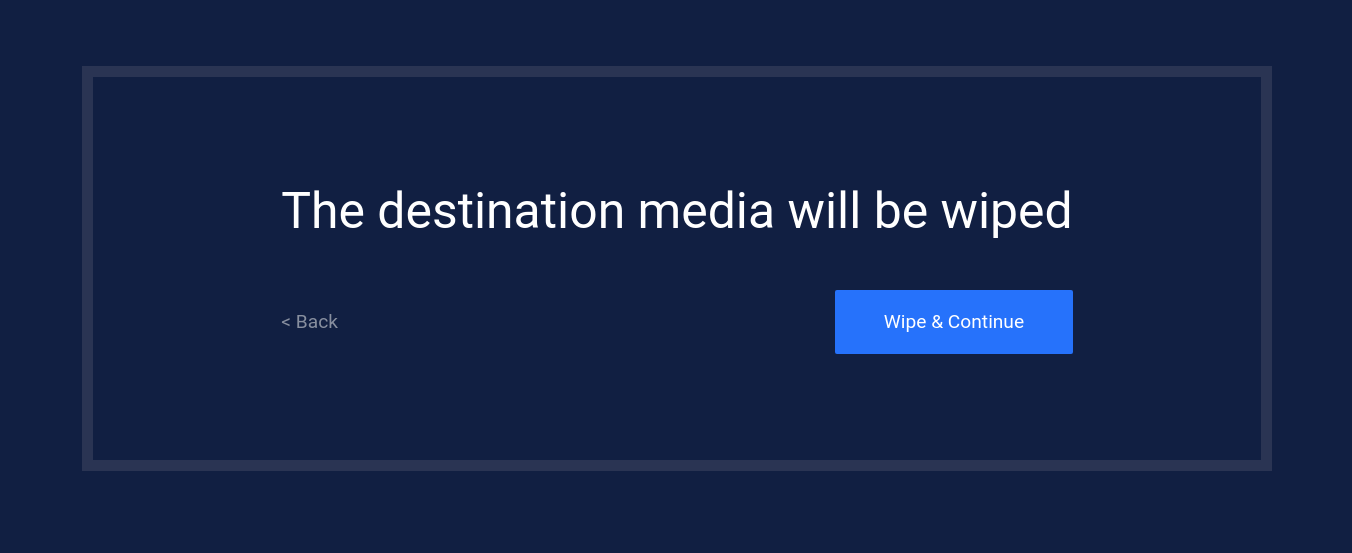
Click Wipe & Continue to format the Destination Media and continue to the scanning and copying stage. The scanning process is similar to Scan Mode and shows a similar progress page that shows the counts of files successfully copied rather than the total Allowed files.
Clicking on the Files Copied section will show how many modified and unmodified files were copied from this session. Modified means the file was sanitized by Zero-Day Protection or had sensitive data redacted by Proactive DLP.
After a Transfer Mode session completes the user will find all allowed and modified files copied to their destination media.