To create an Azure application in Microsoft 365 for OAuth SMTP authentication for an Outbound/SMTP server profile or to integrate to for an Outbound/Microsoft365 server profile, perform the following steps.
Register application
First, register the application performing the following steps:
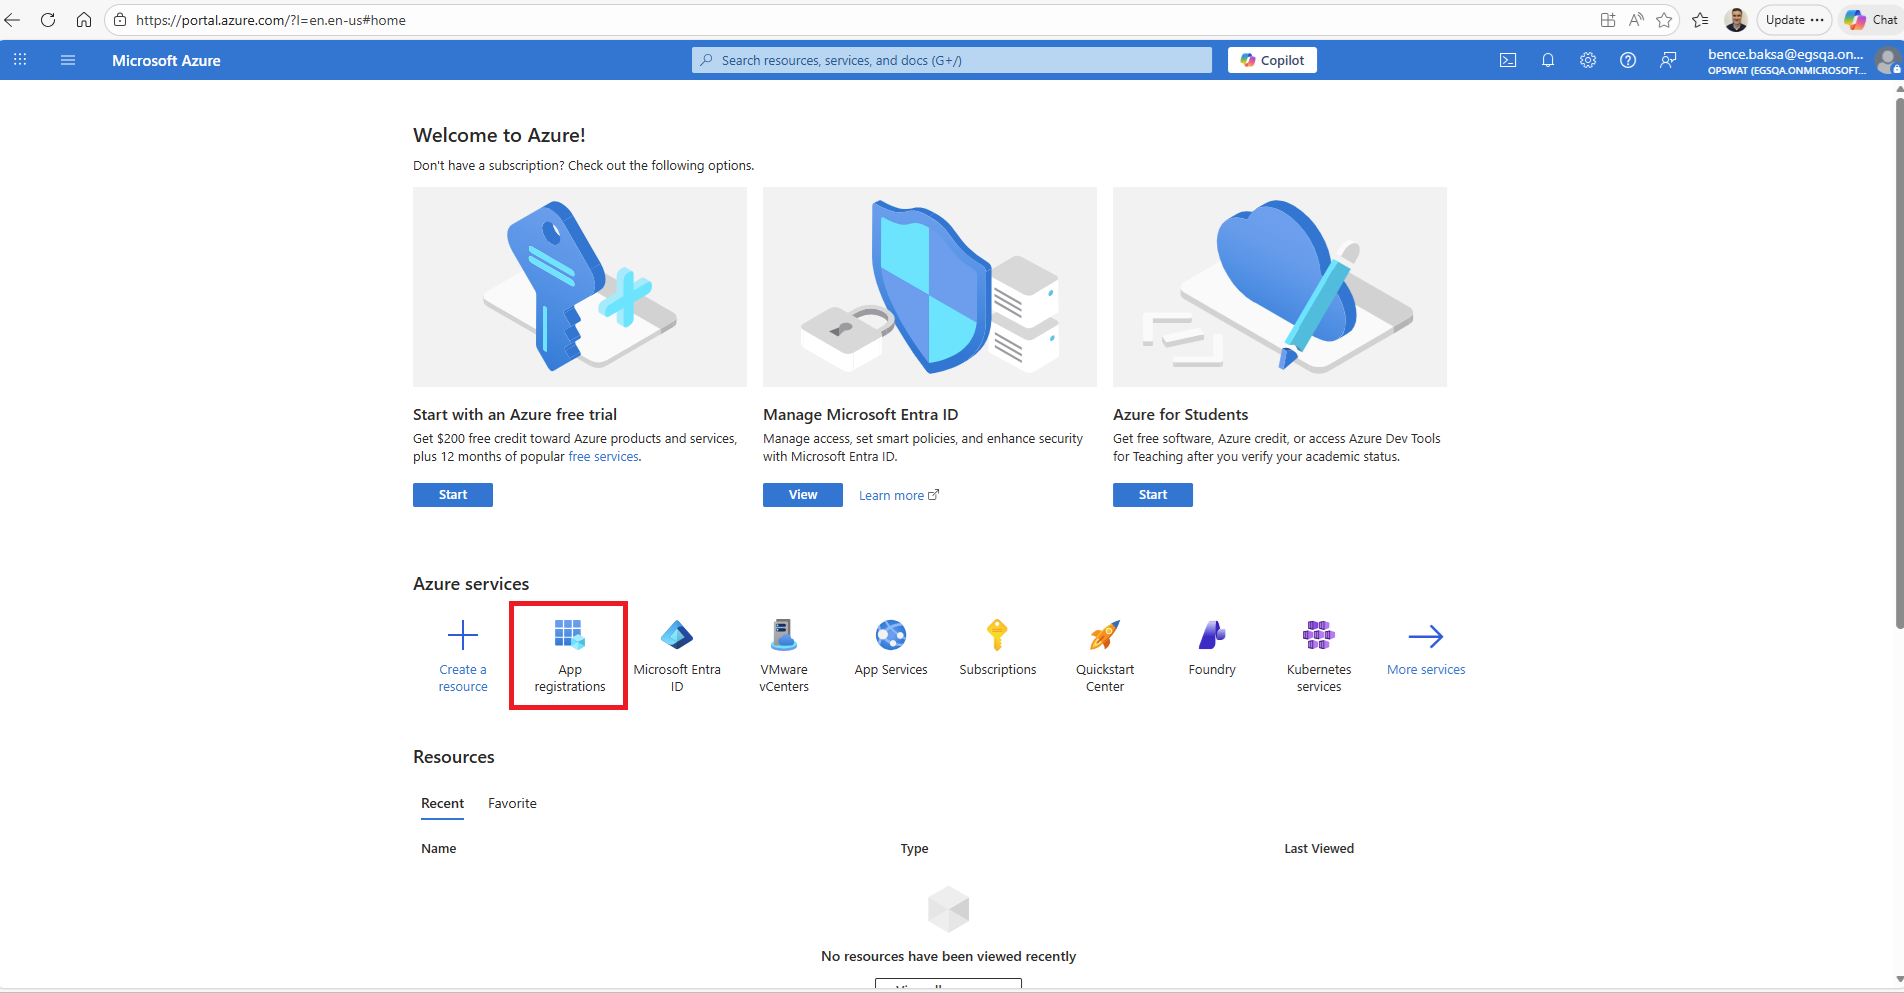
Go to
portal.azure.comand log inAmong Azure services click on App registrations
__
On the App registrations page click New registration
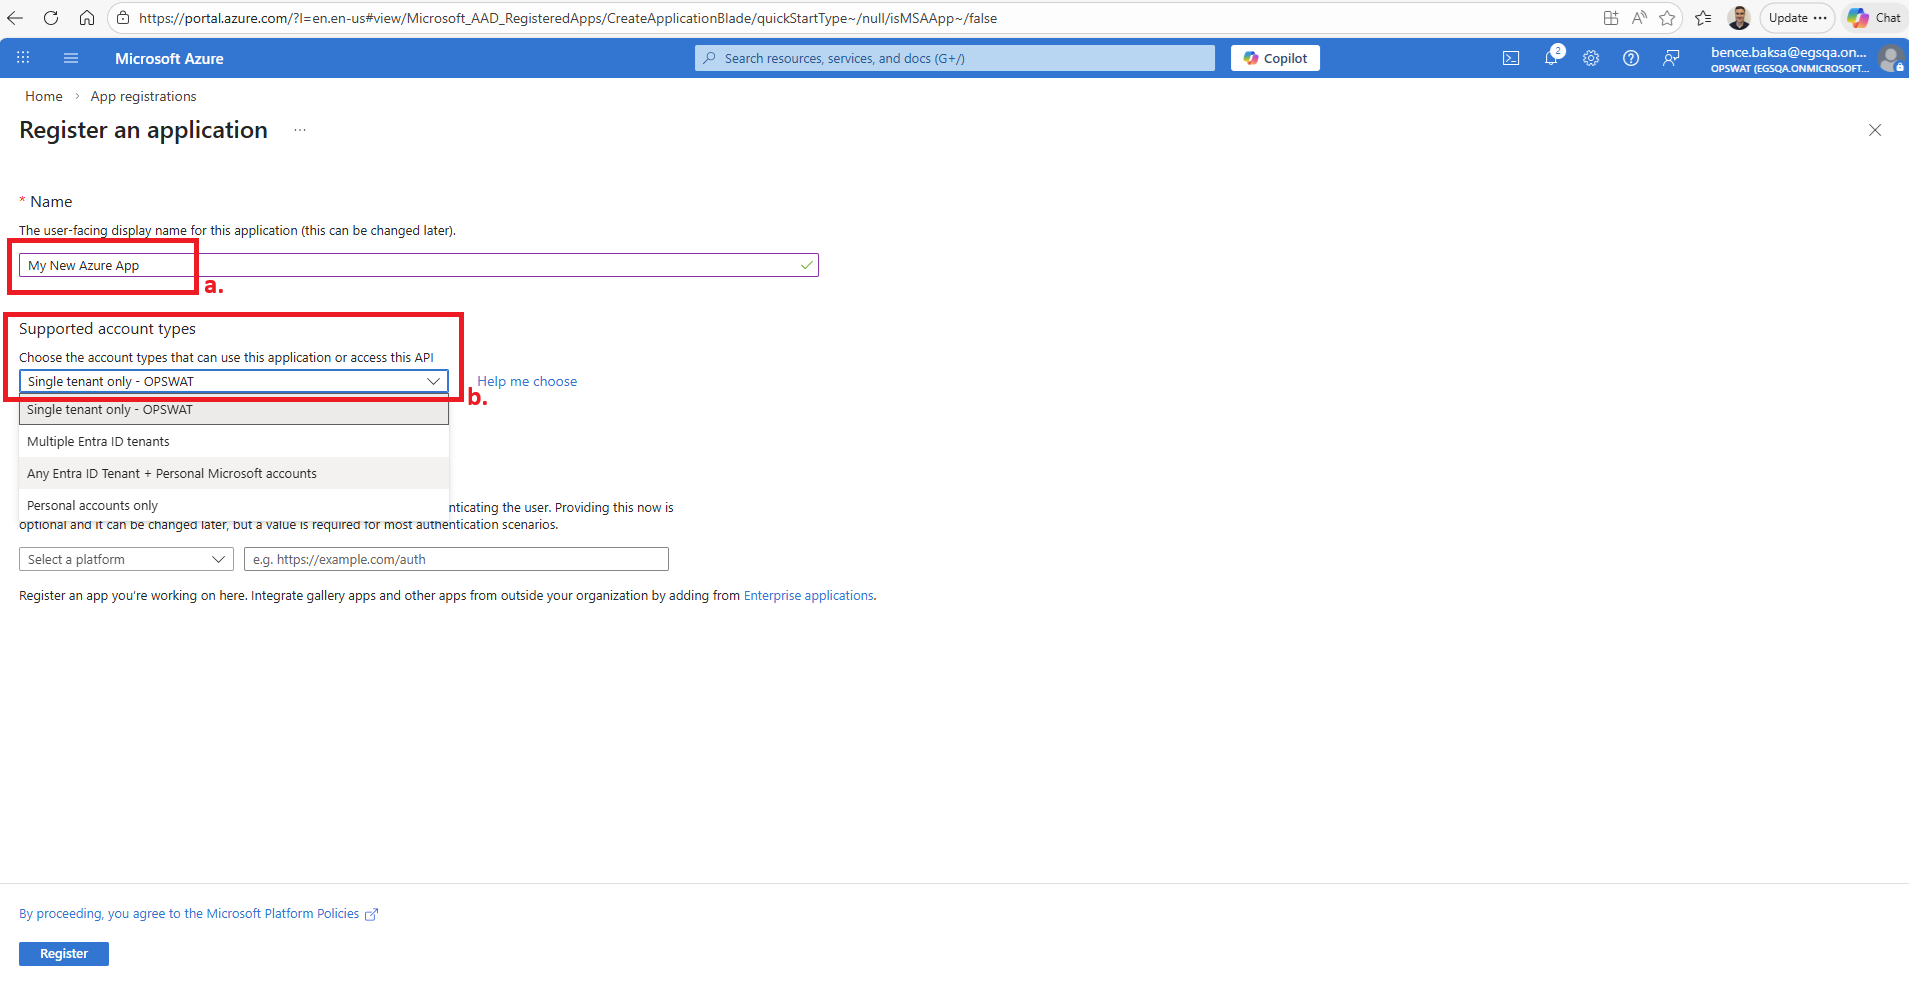
Give a name to this new Azure application
Set the account type to Single tenant only
Click Register to commence the registration
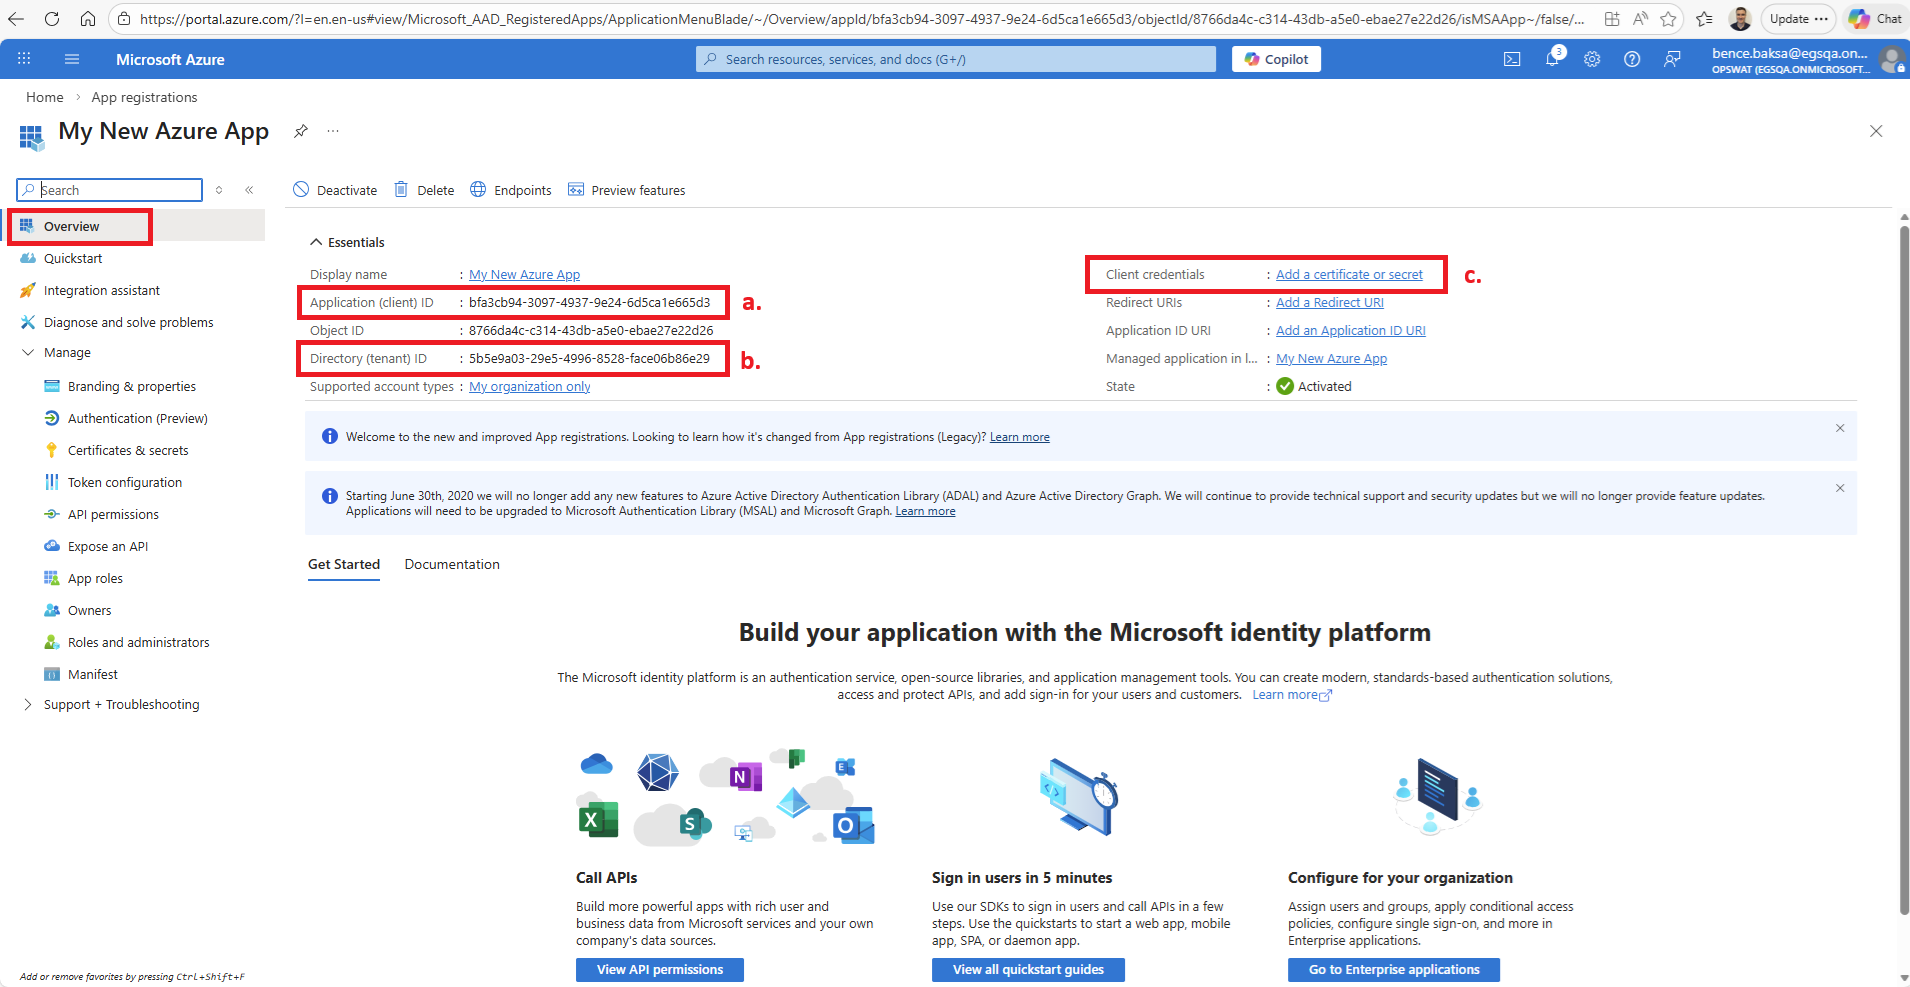
You land on the page of the the newly created application
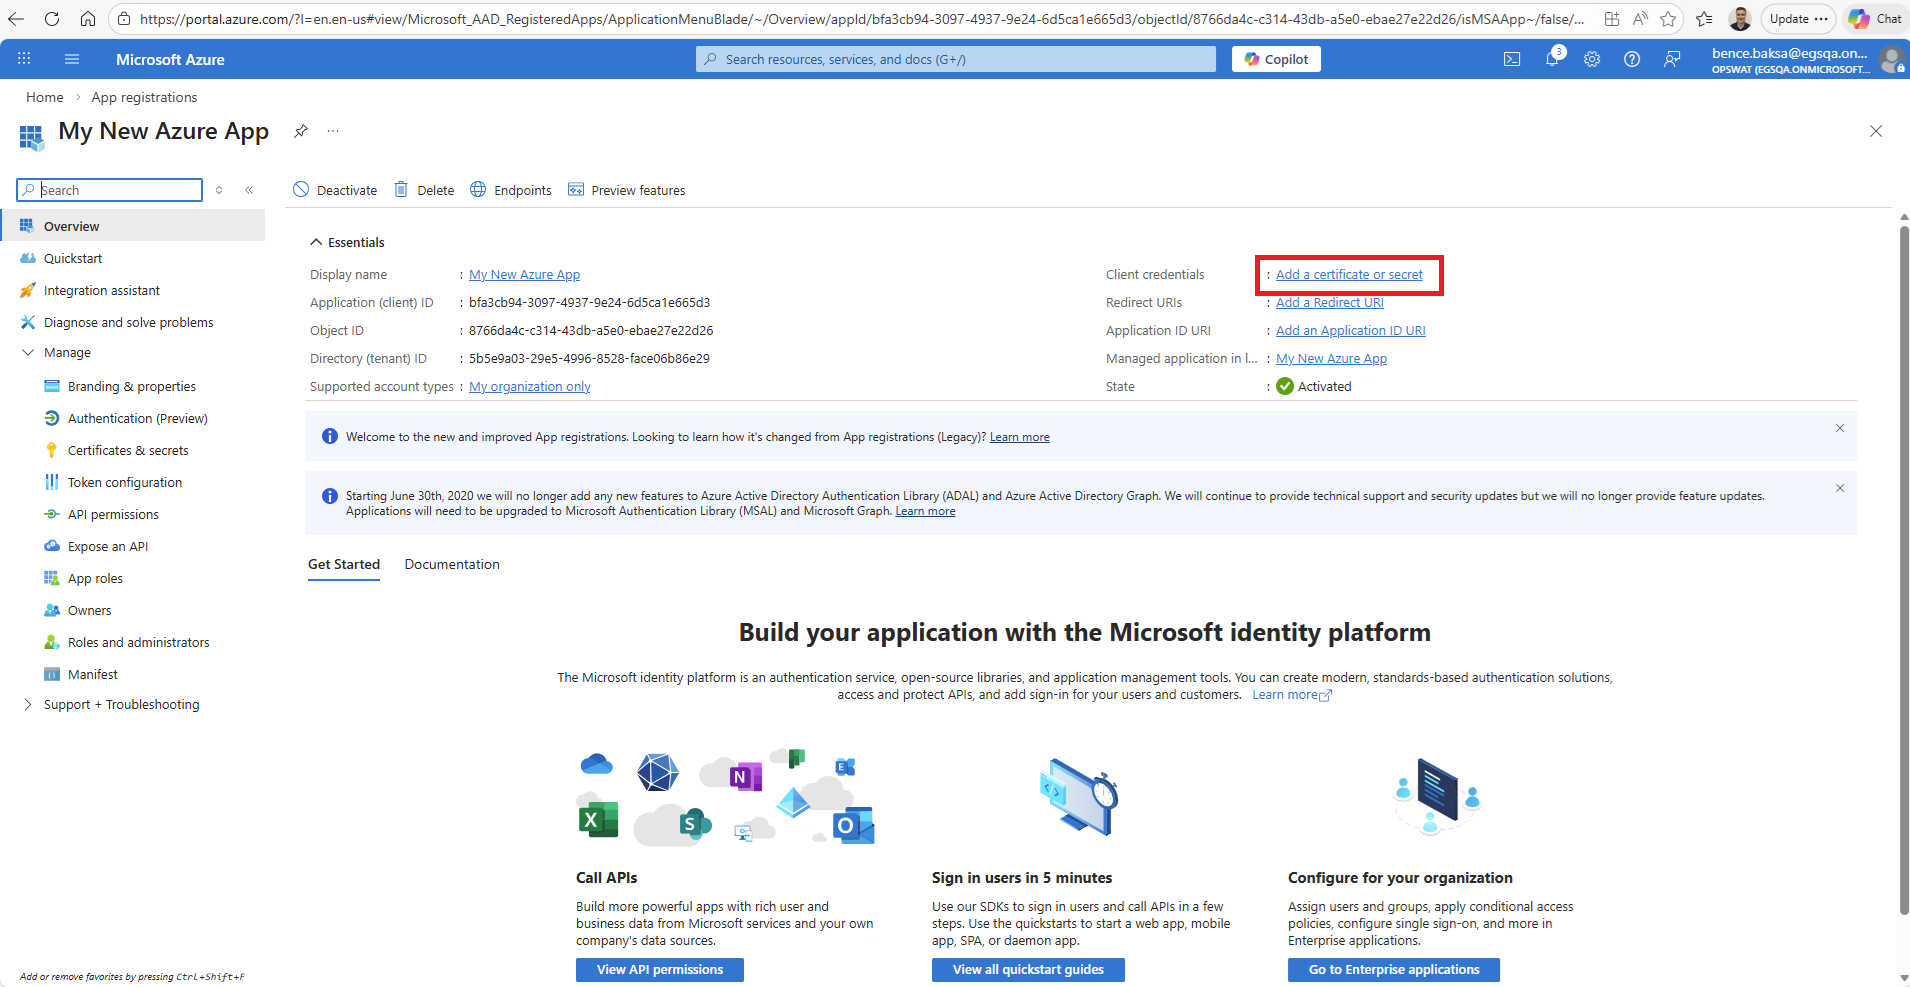
Click Overview and take note of the following properties:
Client ID
Tenant ID
Client secret (not existing yet, created in the next steps)
Create client secret
Create the client secret performing the following steps:
Click on Add a certificate or secret
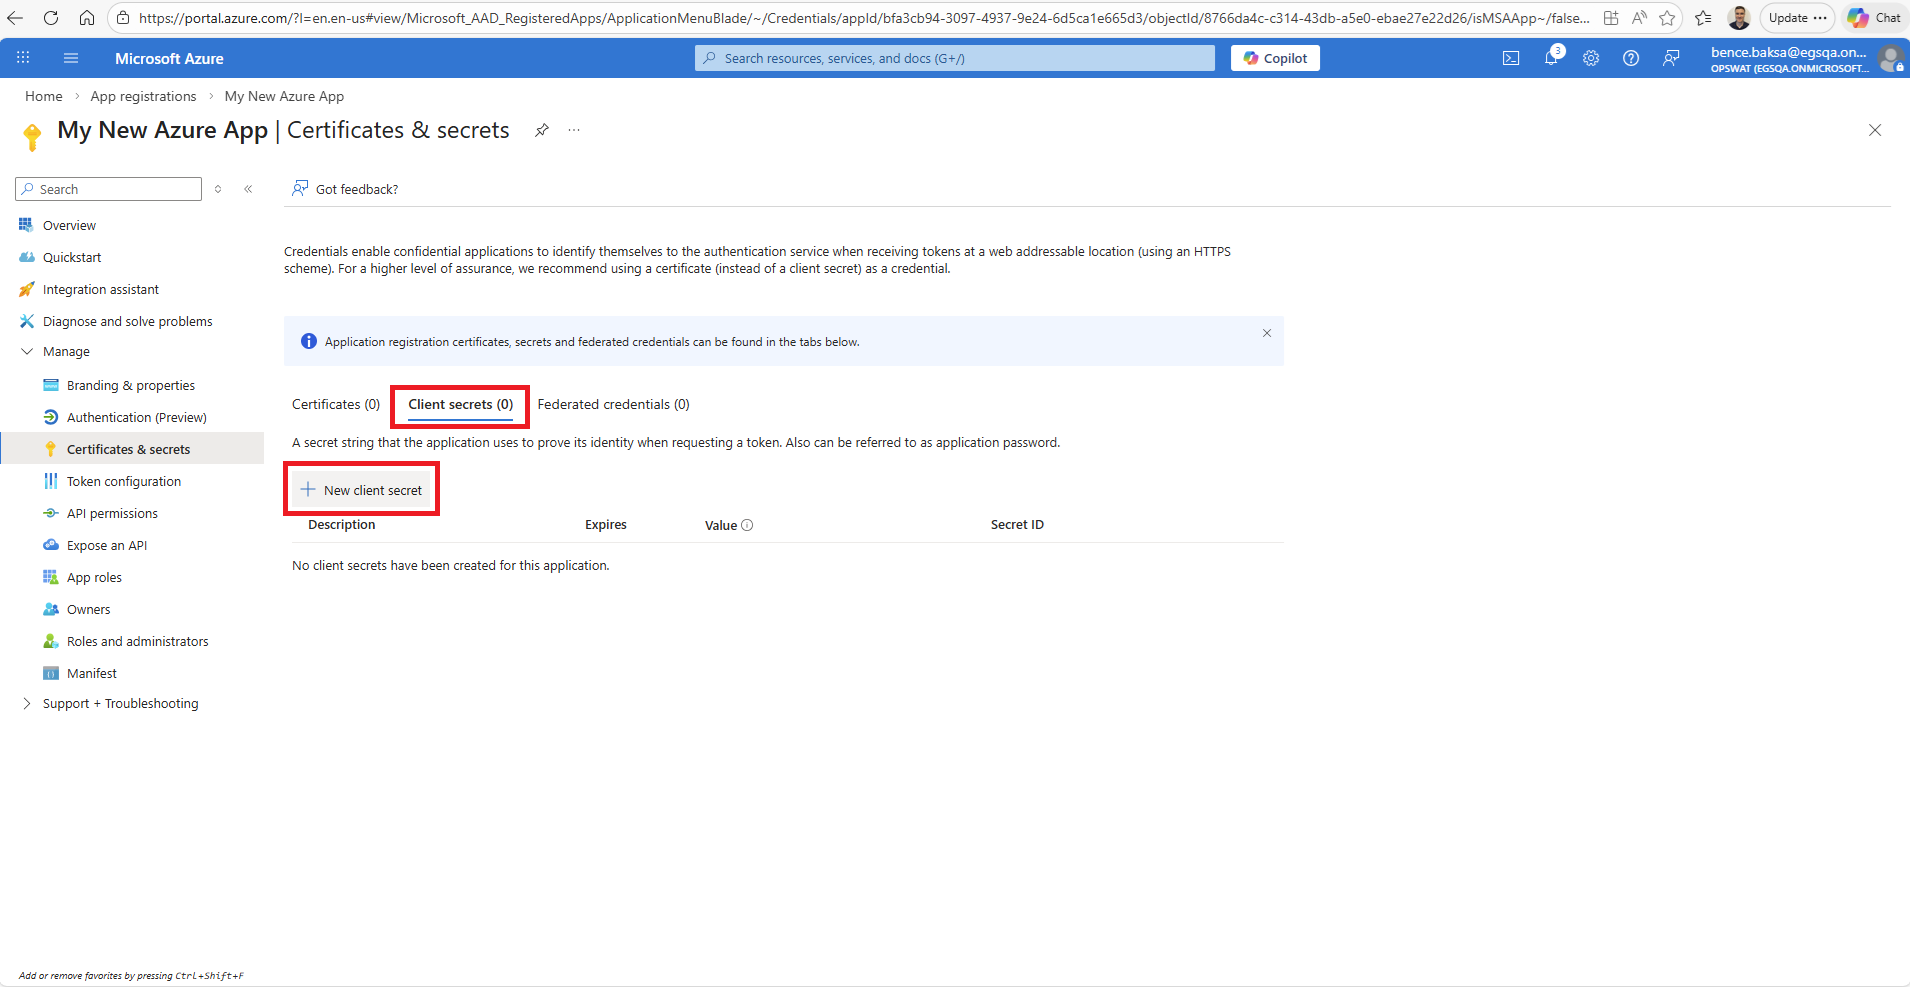
Select Client secrets and click on New client secret
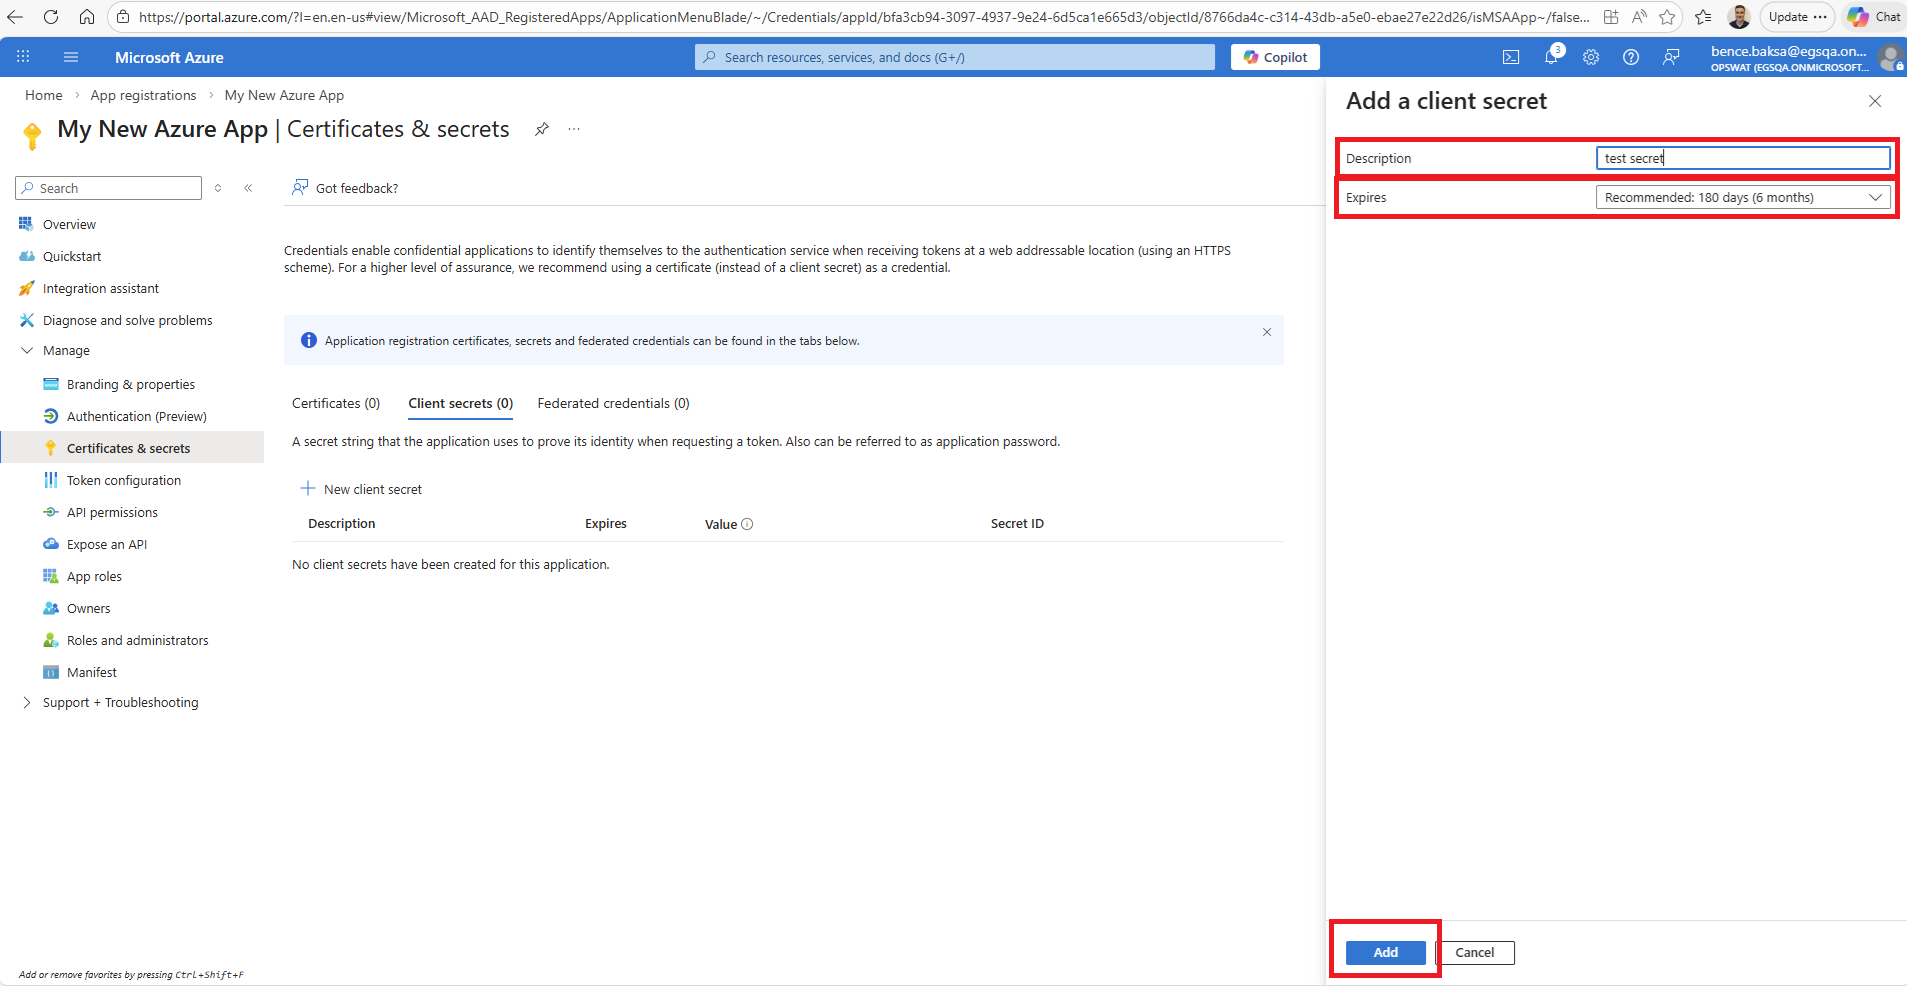
Add a Description to the new secret and set the expiry
Click Add to add the new secret to the application
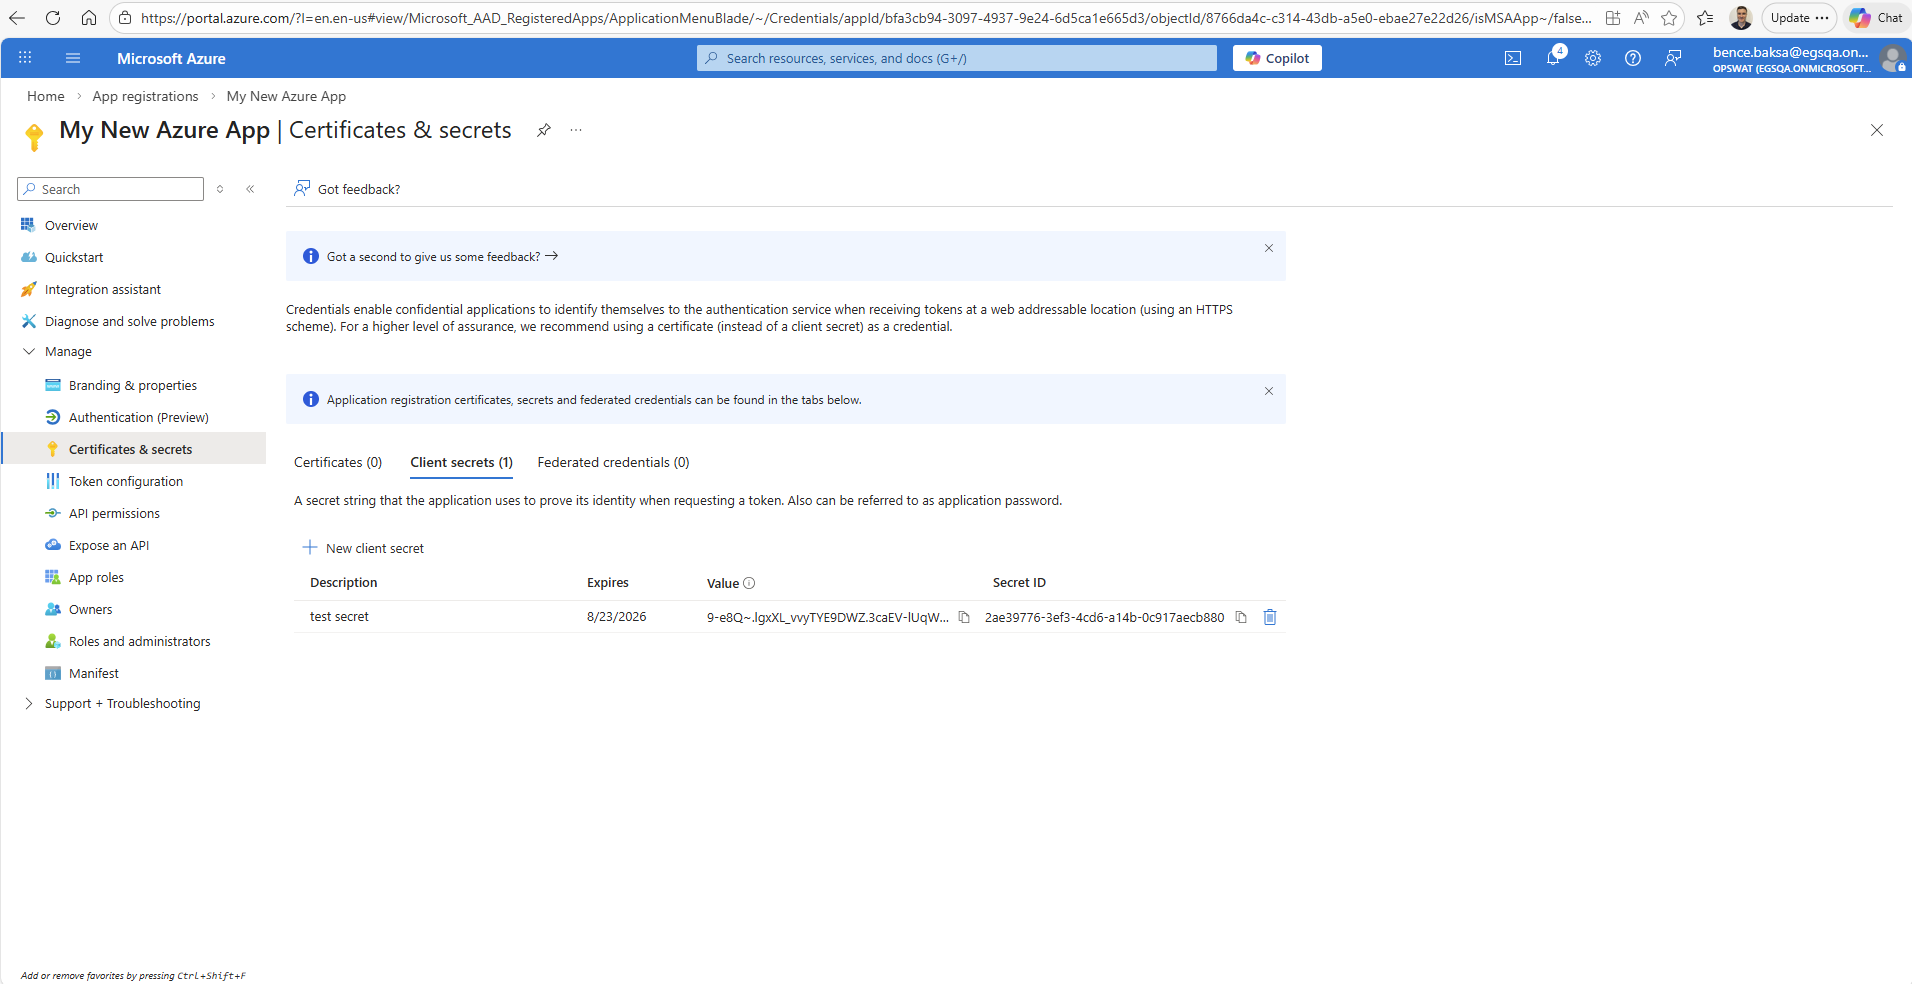
The value of the new client secret together with the client ID and the tenant ID will be used to configure oAuth or Graph API access in Email Gateway Security
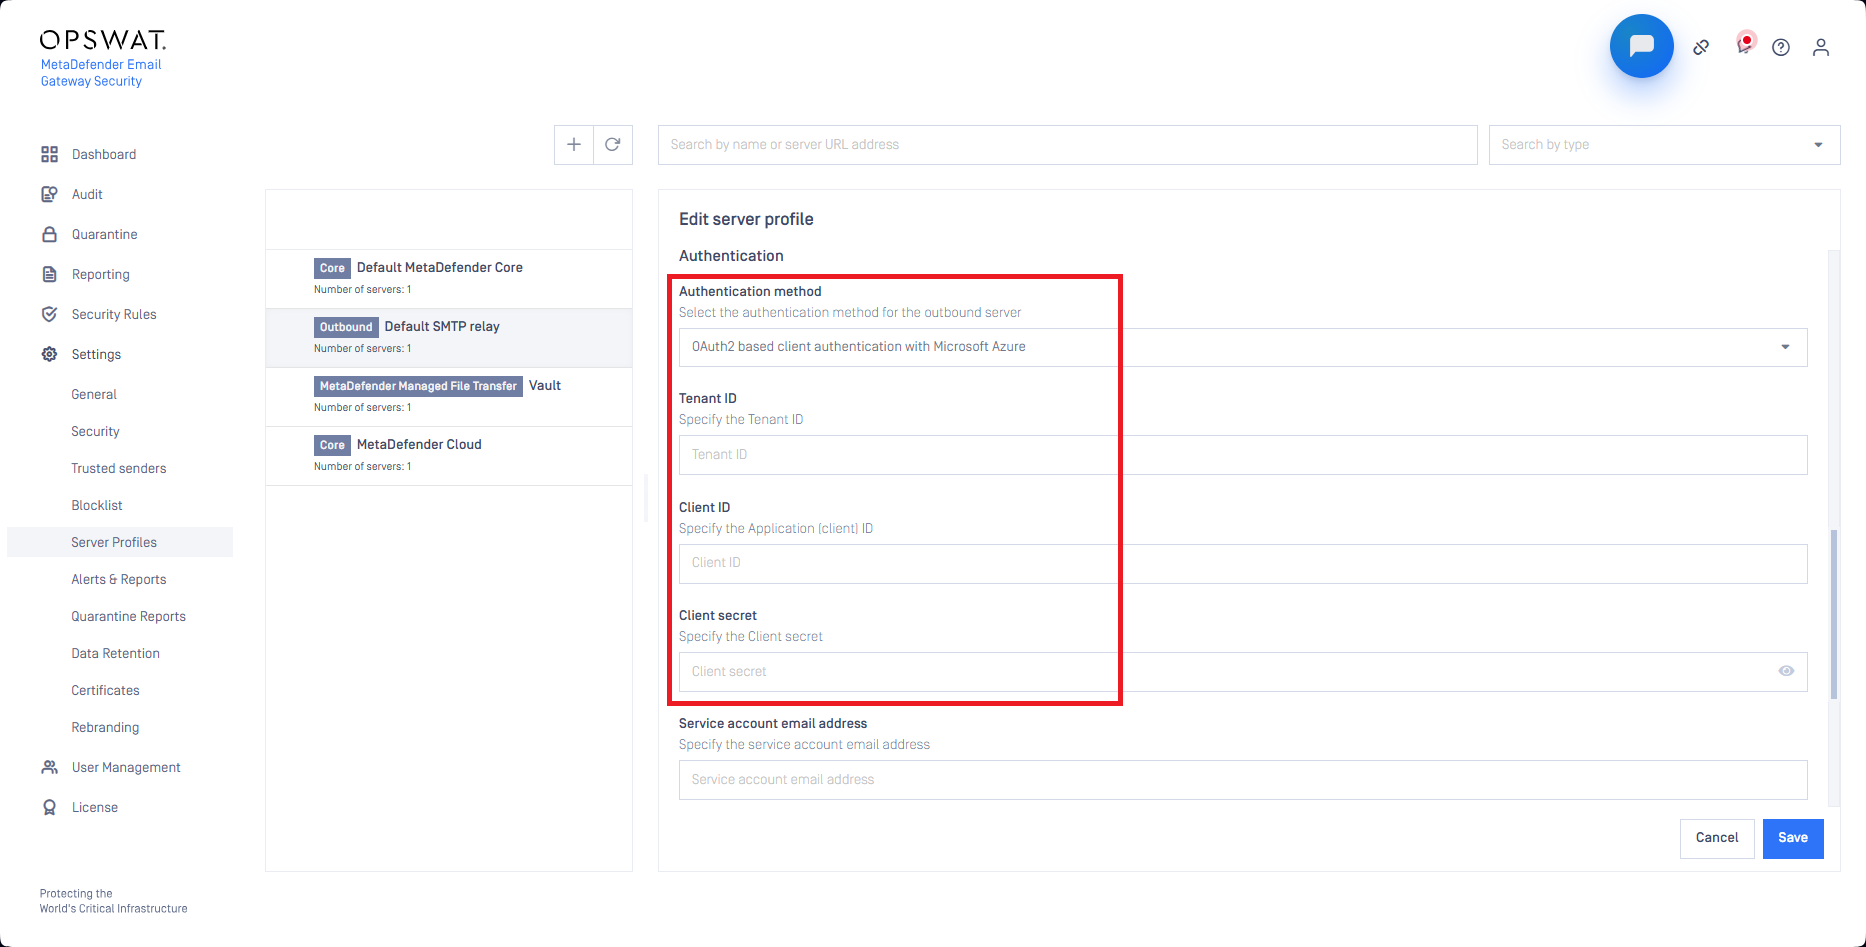
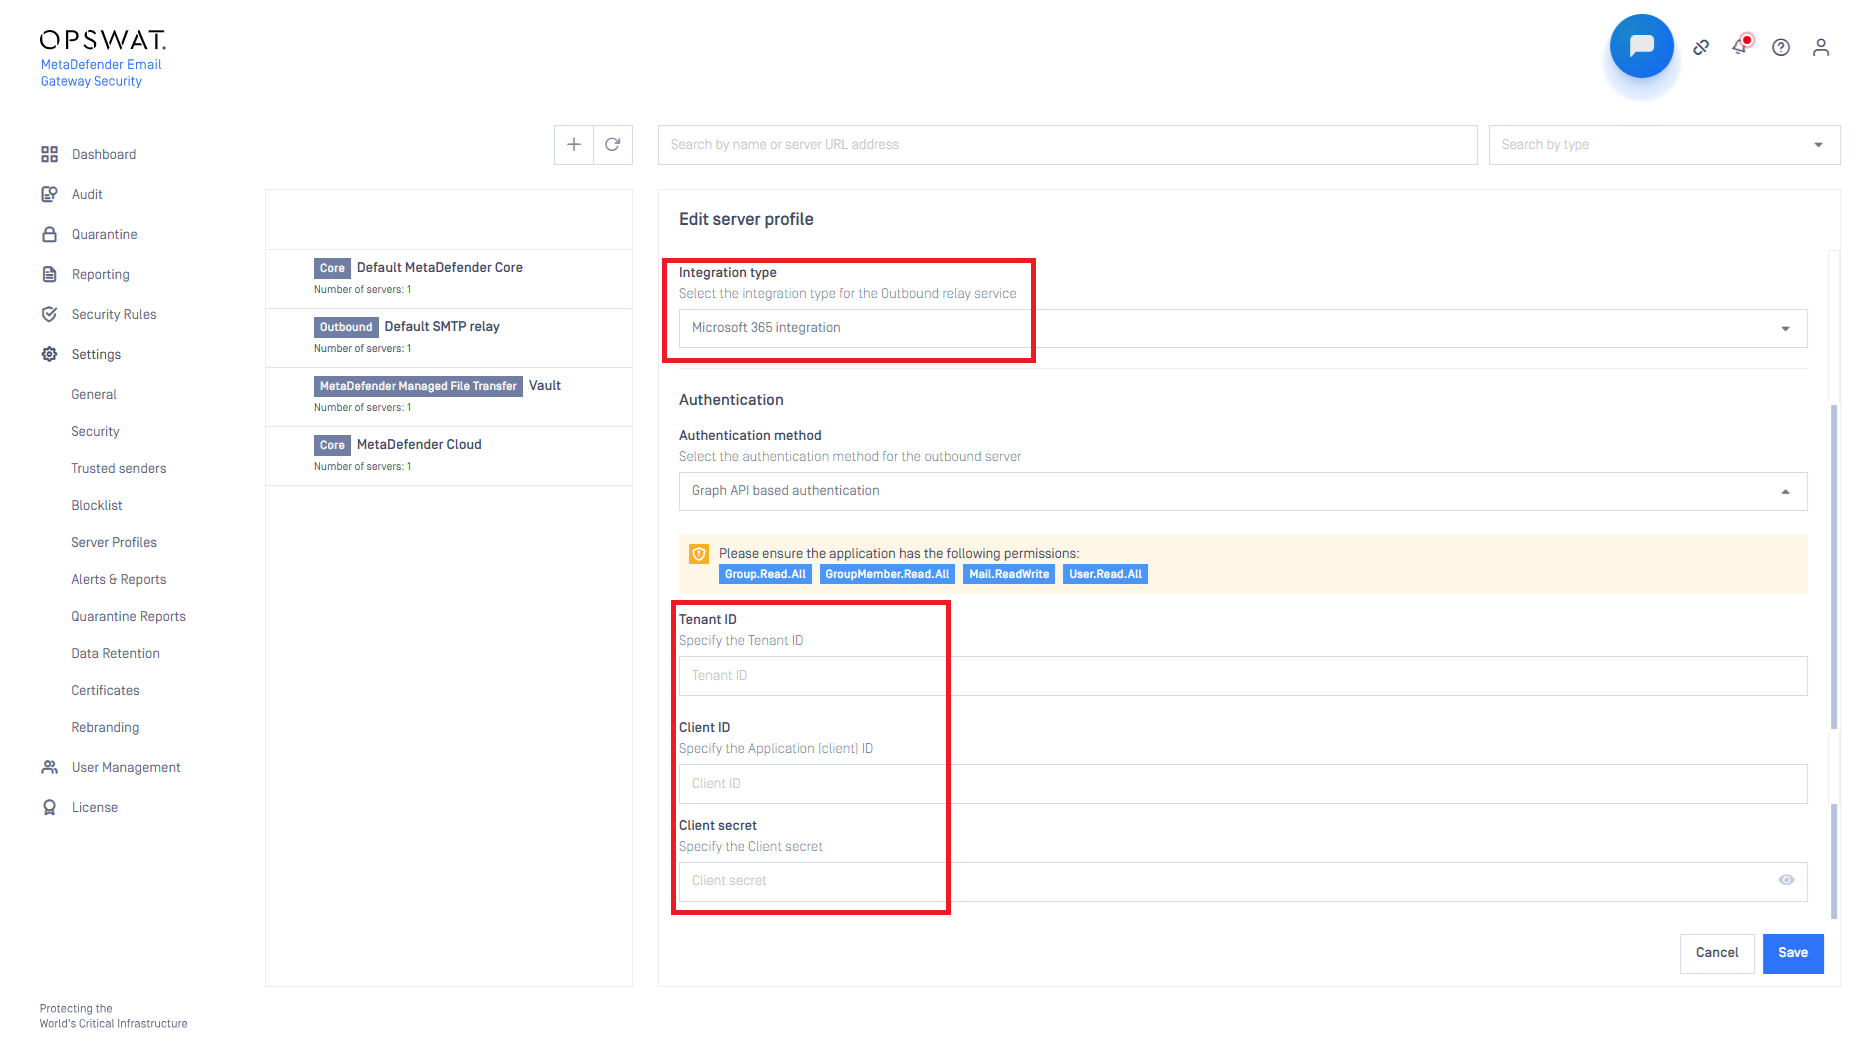
Set application permissions
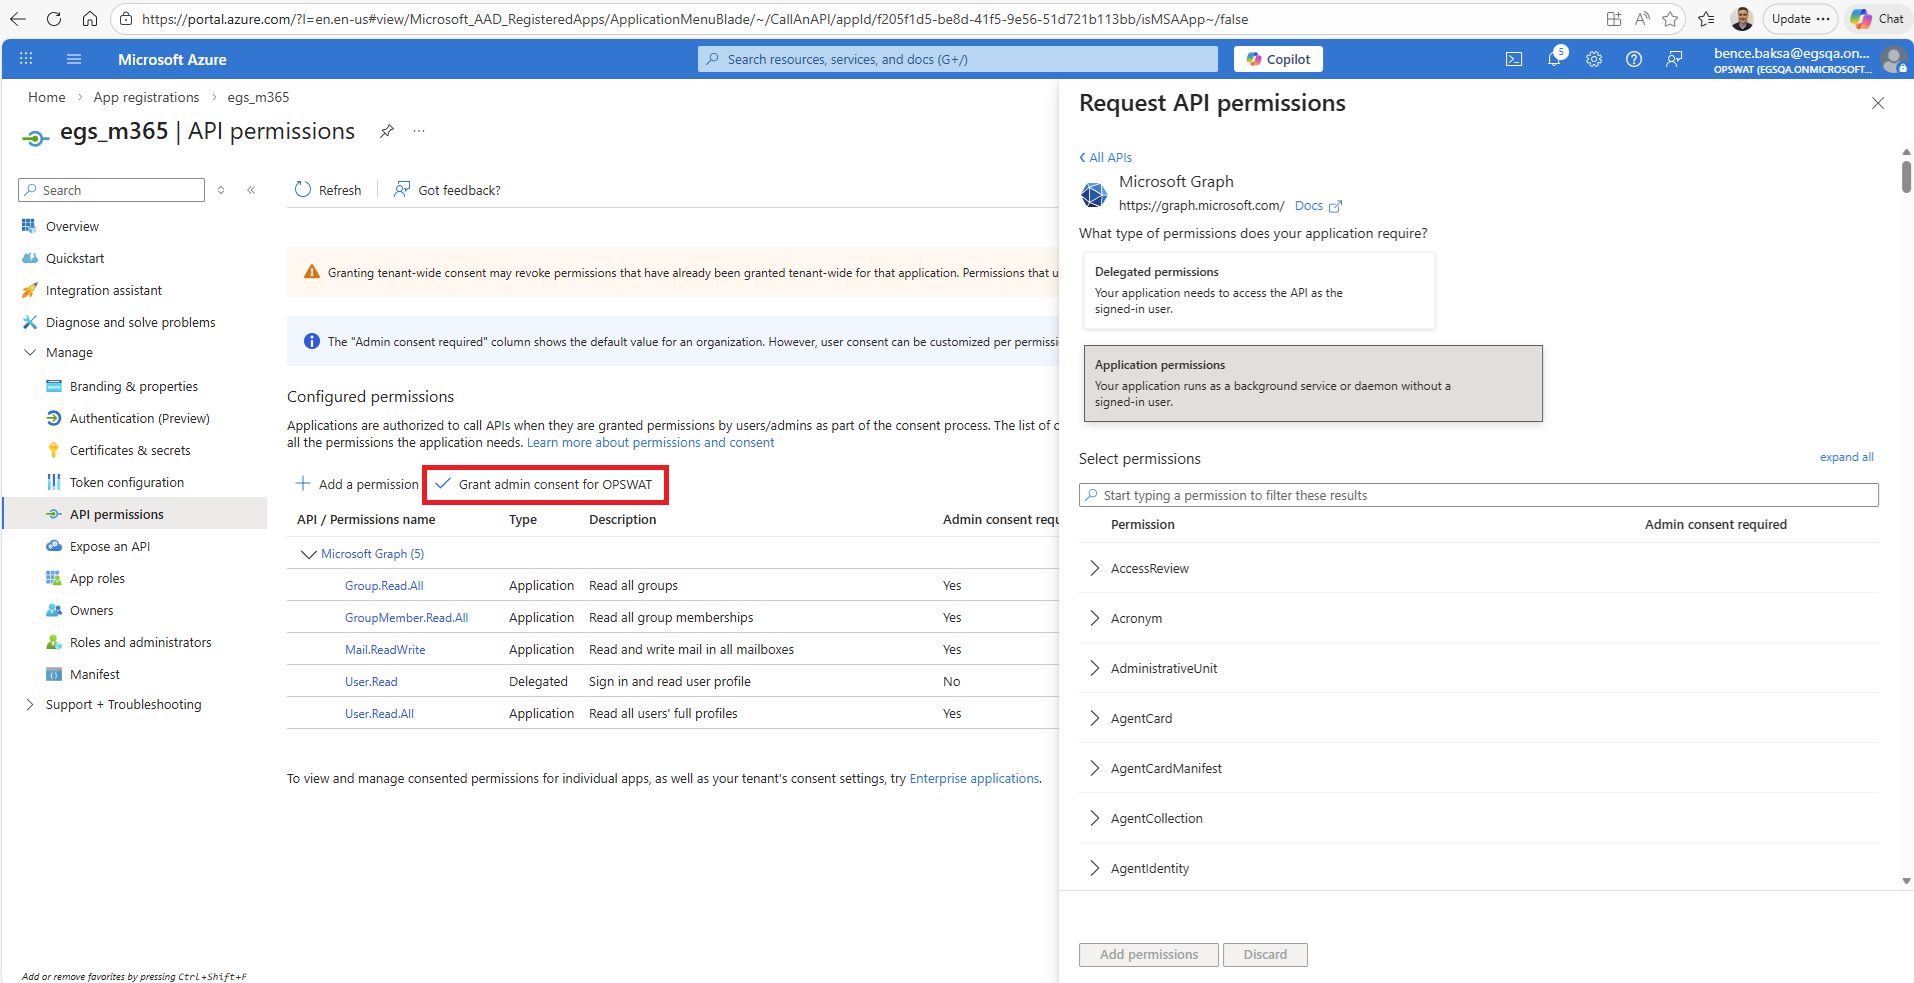
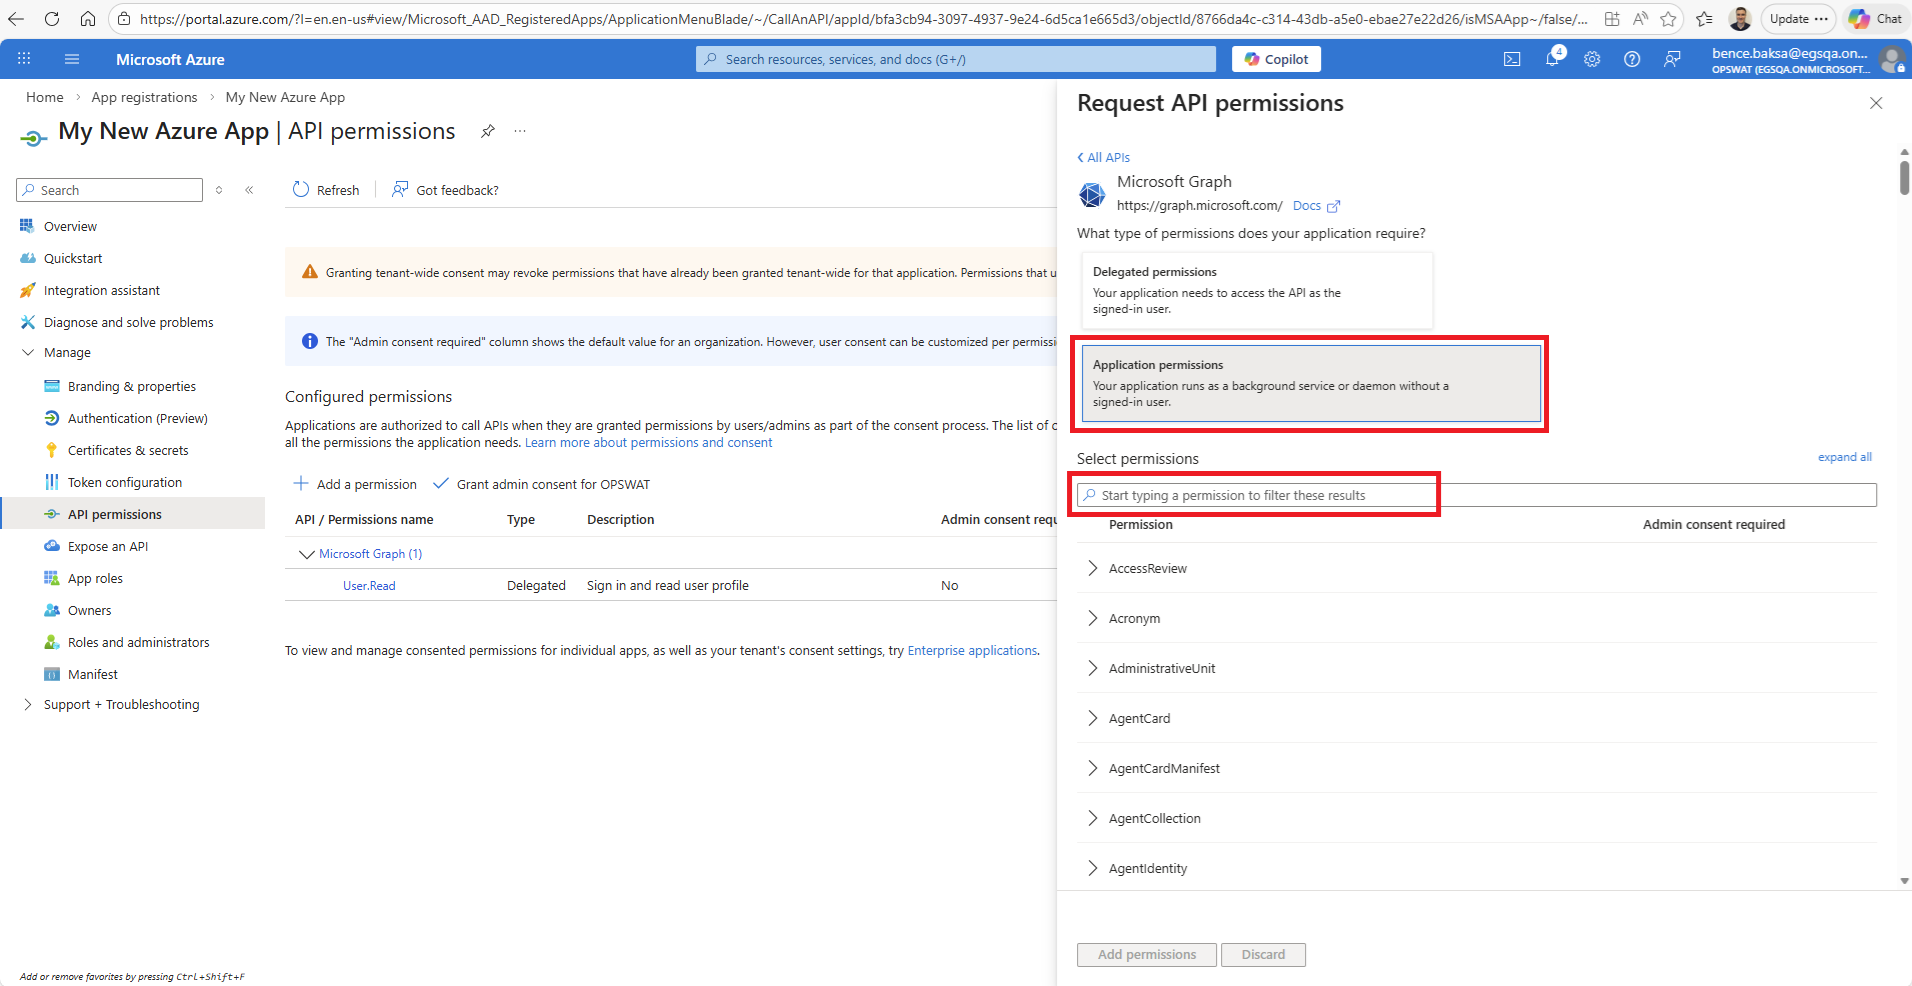
Click on Manage > API permissions. By default only the User.Read permission is set.
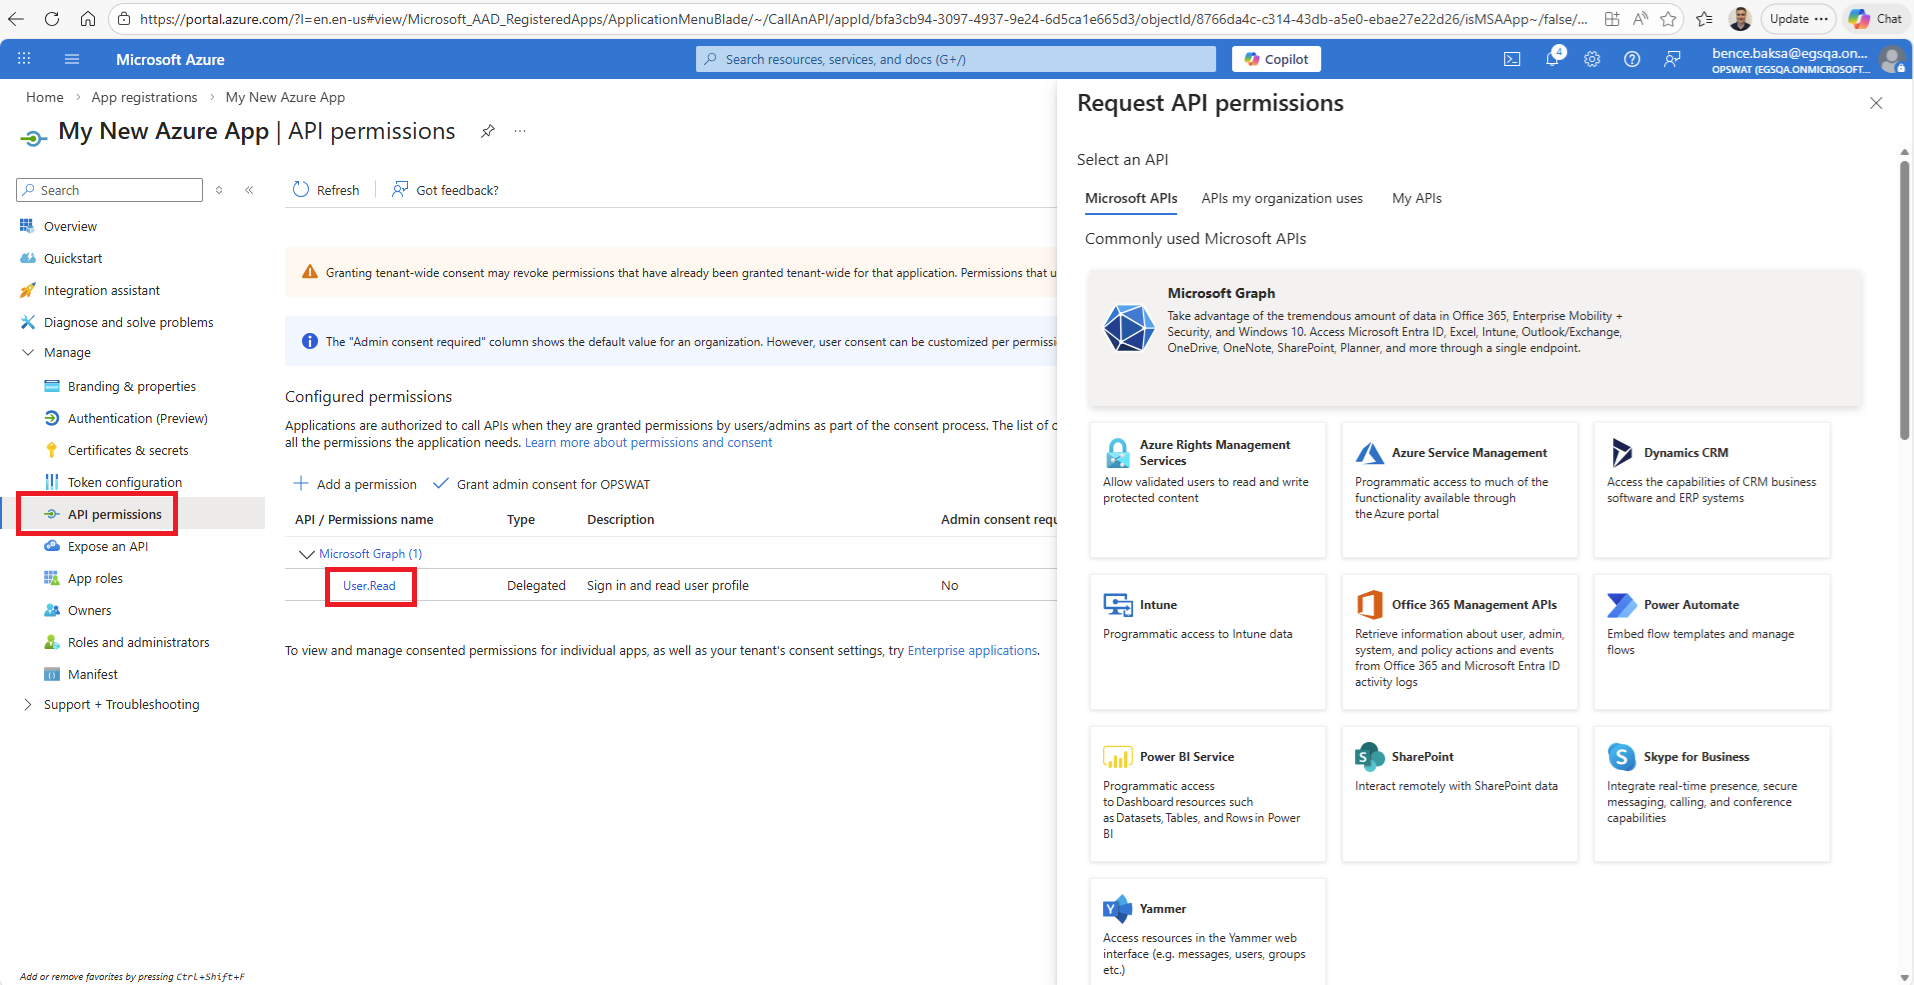
The following permissions still need to be added taking the next steps:
In the Select an API dialog select Microsoft Graph
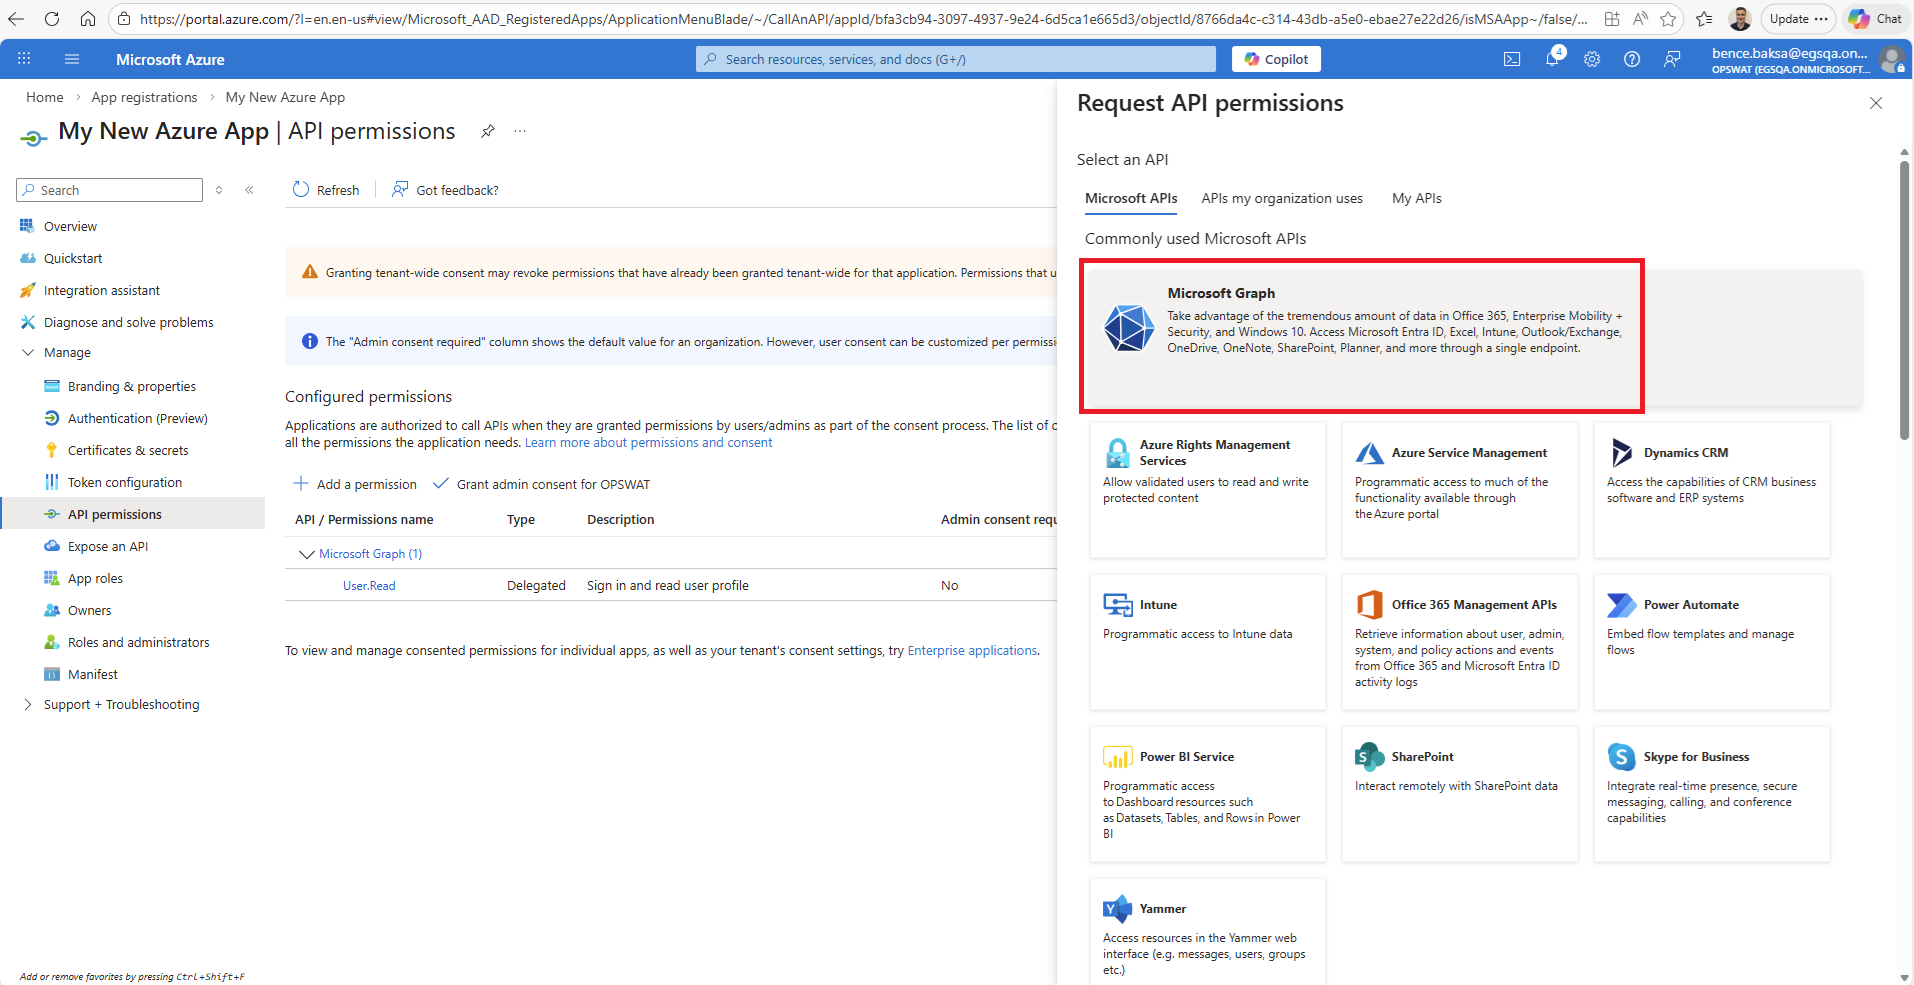
In the Microsoft Graph dialog select Application permissions then add the following permissions (the filter can help in finding them):
For OAuth authentication in an Outbound/SMTP server profile:
Mail.ReadWrite
For delivering emails through Graph API in an Outbound/Microsoft365 server profile:
Group.Read.All
GroupMember.Read.All
Mail.ReadWrite
User.Read.All
These permissions may require admin consent so after selecting the permissions click on Grant admin consent for <tenant name>