Clean files can be transferred and stored securely to a connected MetaDefender Managed File Transfer (formerly Vaults) instance after being scanned by MetaDefender Drive.
If you don't have a MetaDefender Managed File Transfer instance connected to your MetaDefender Drive, please go to Settings → MetaDefender MFT and follow the instructions.
Transferring Clean Files to MetaDefender Managed File Transfer
- On the scan results page, open the Clean Files tab. Then, click the Transfer Clean Files button:
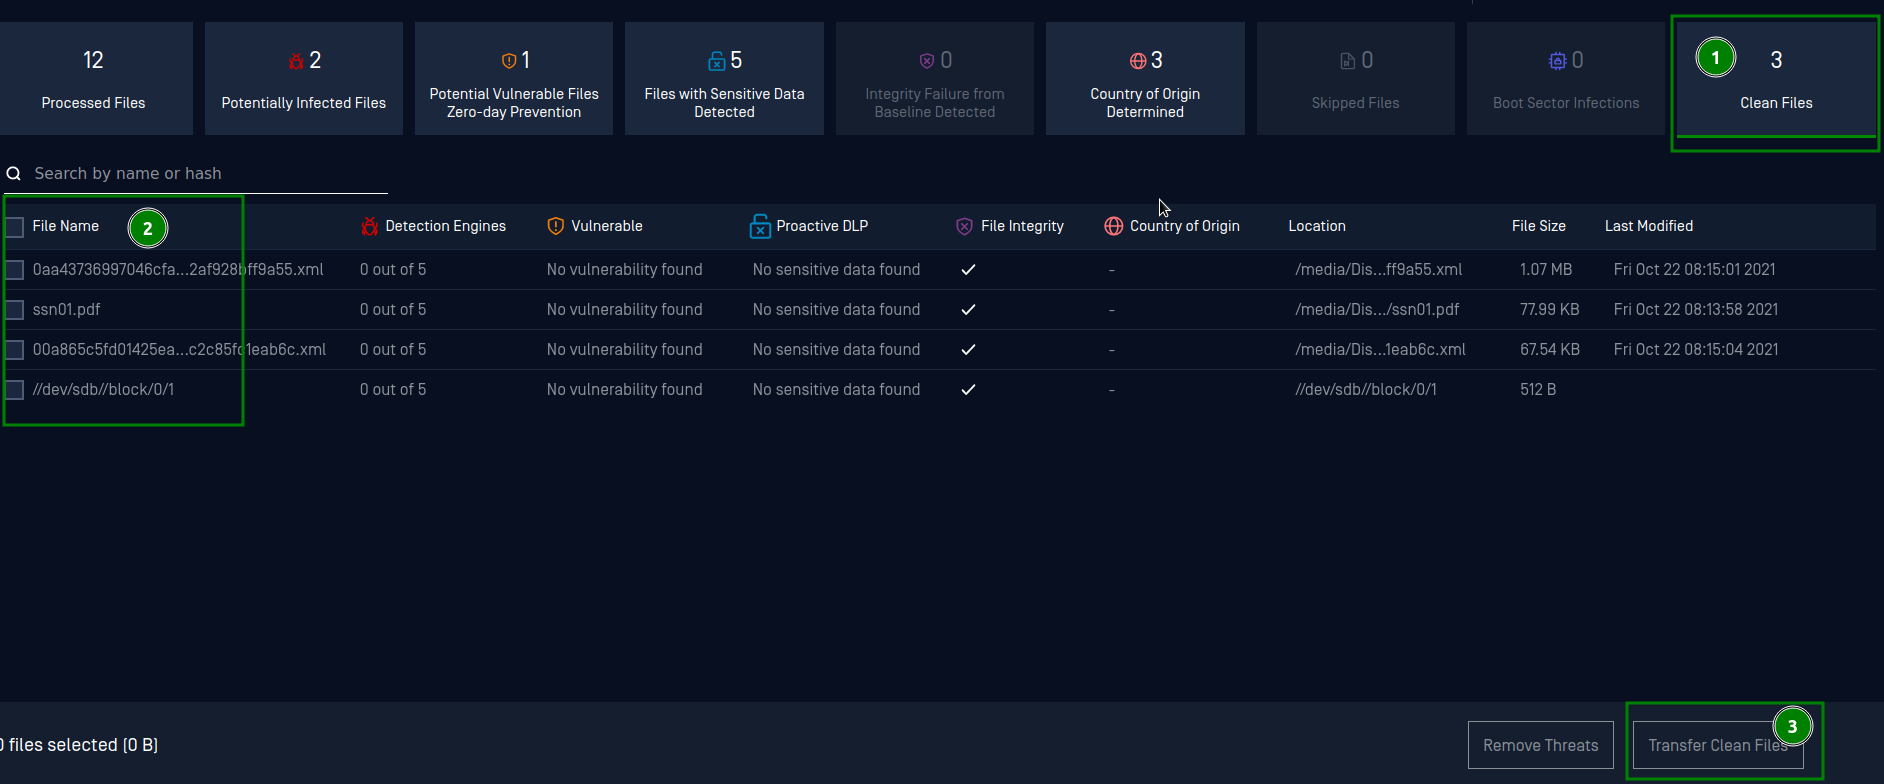
Clean files list
- The Transfer Files dialog will open in a new window. Select the connected Managed File Transfer instance and the destination folder. Then, click Confirm to start the data transfer:
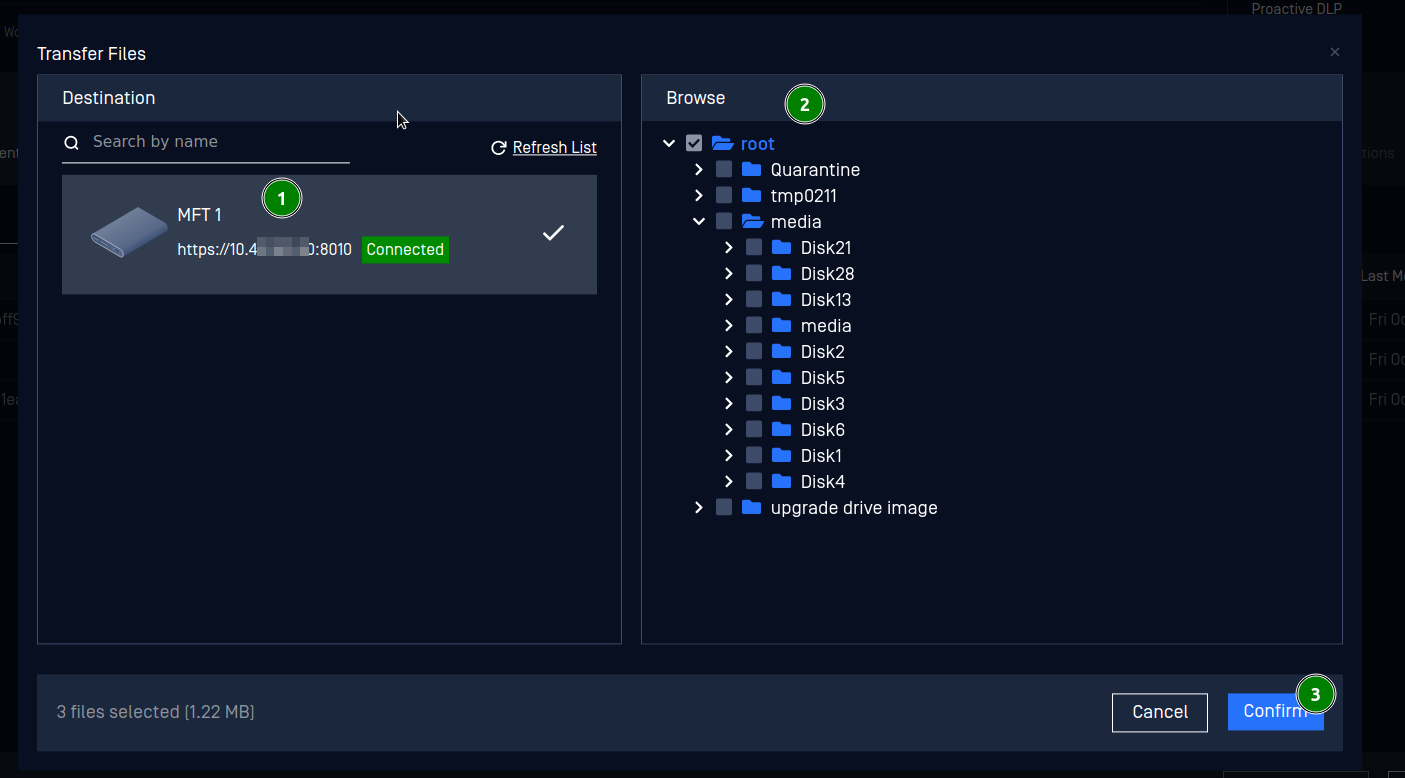
USB device and file path selection dialog
__
- Track the file transfer progress from the status bar at the bottom of the screen:
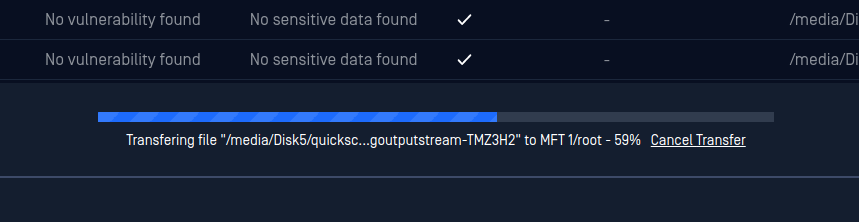
File transfer progress bar
- Once the file transfer is completed, you will receive the following notification. Click OK to confirm:
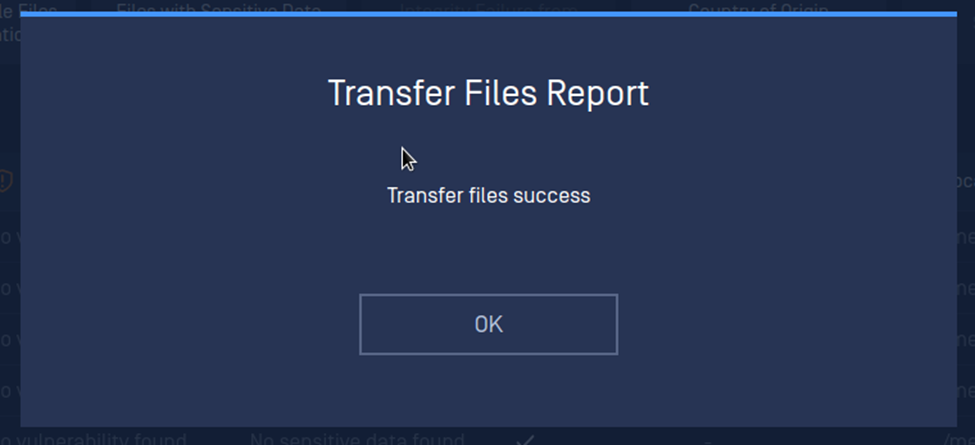
File transfer success notification
__
- Go to your MetaDefender Managed File Transfer account to view your transferred files:
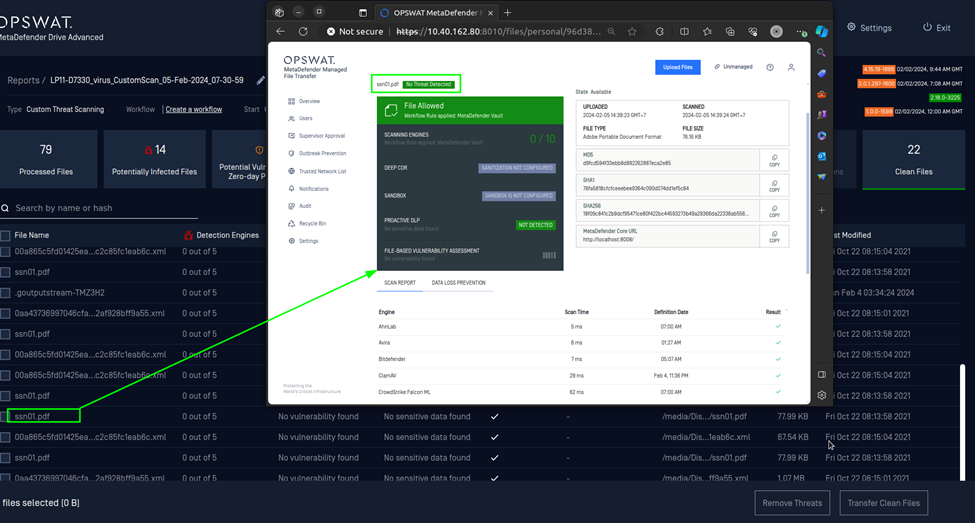
MetaDefender Managed File Transfer view
If you transfer data to MetaDefender Managed File Transfer as a guest user, your data will be securely stored for a limited period of time and will be automatically deleted afterward.
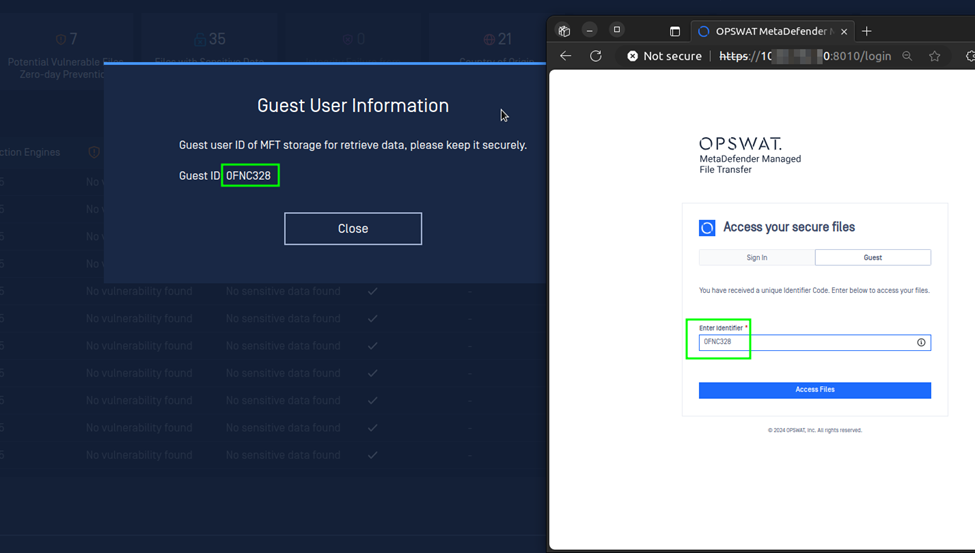
Using a Guest ID to access backed-up data on MetaDefender Managed File Transfer