Configuration
Create a realm in Keycloak
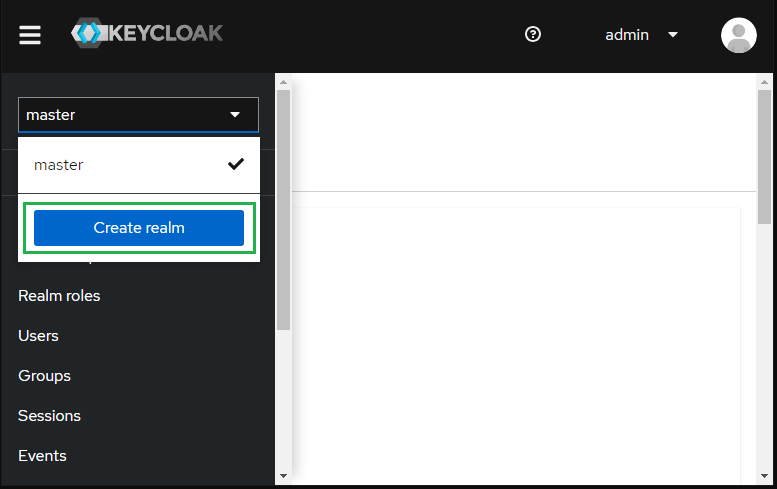
- Sign in to Administrator Console, drop the list in the top left corner, and click
Create realm.
Keycloak initially includes a single realm master which is used for managing Keycloak only and not for any applications.
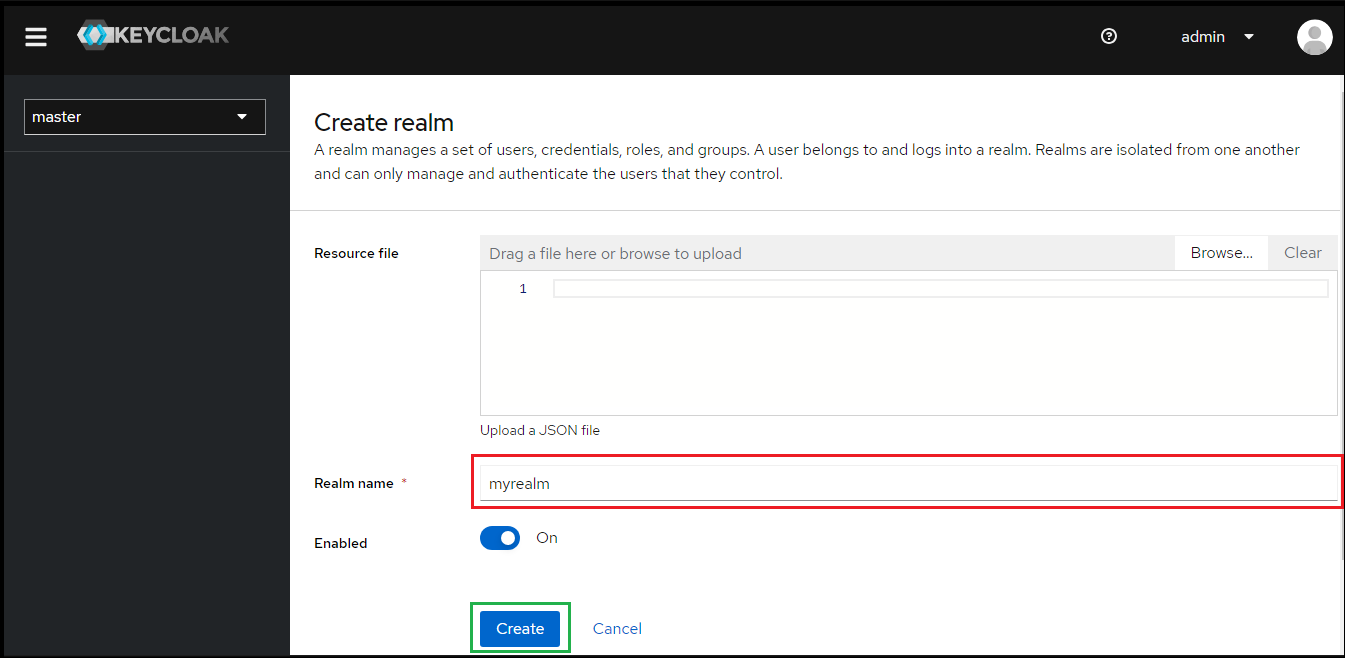
- Enter
Realm namee.g. myrealm and clickCreate.
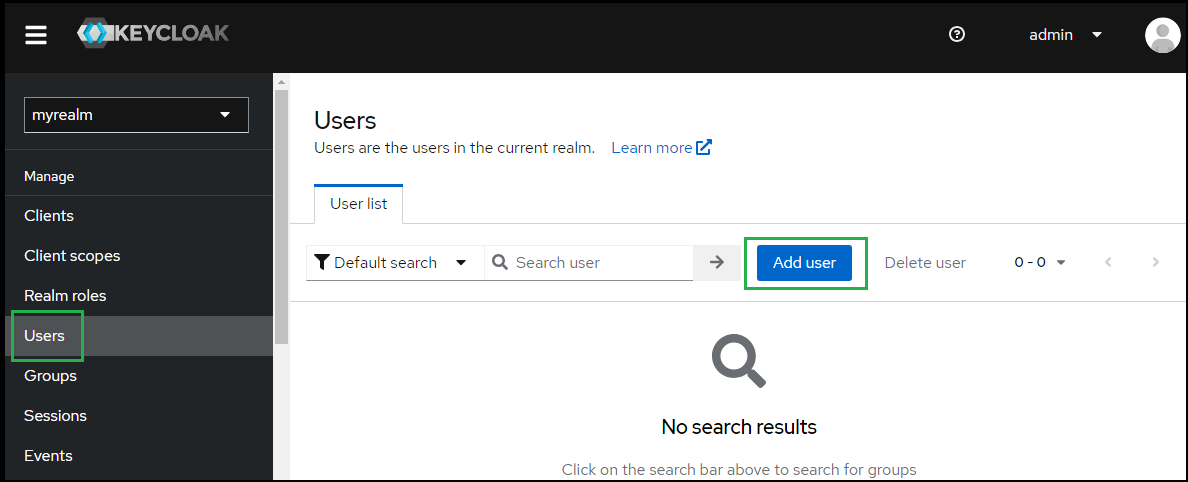
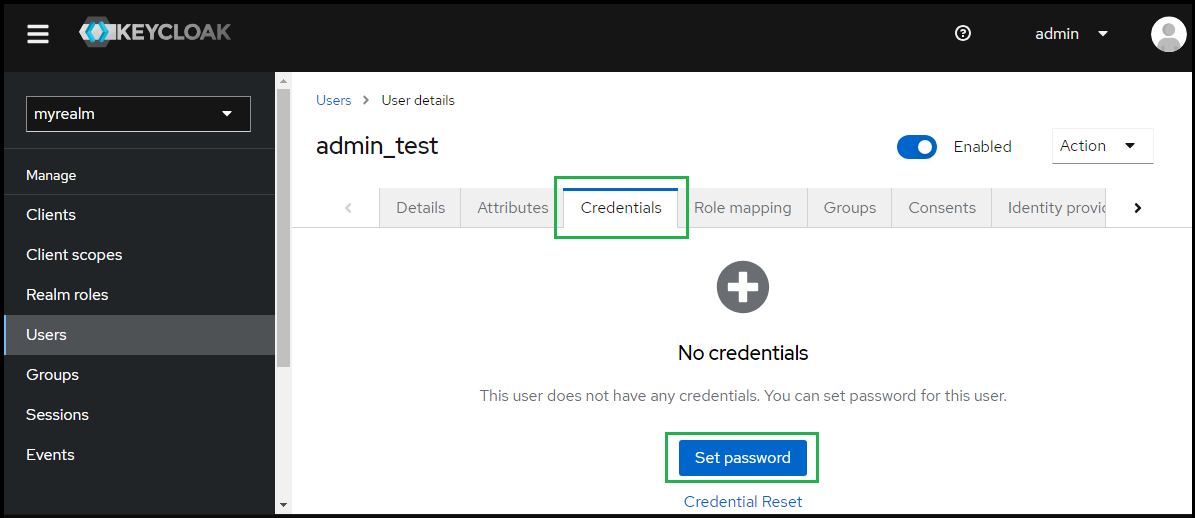
- Select
Usersin the left sidebar and clickAdd user.
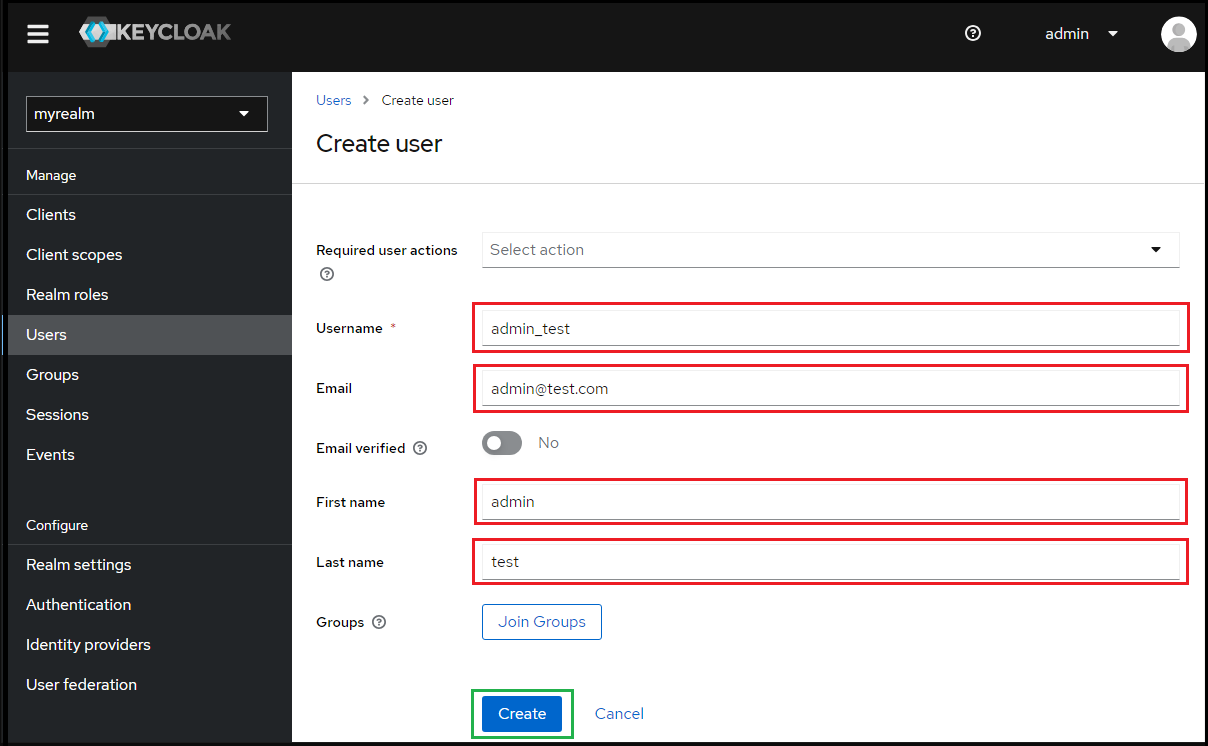
- Enter values for
Username,Email,First nameandLast name; then clickCreate.
- Under
User details, selectCredentialstab and clickSet passwordto create a password for the user created in the previous step.
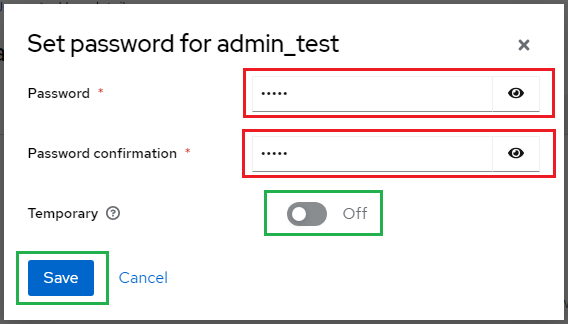
- Enter the password and toggle
Temporaryto Off, then clickSave.
Create SAML directory in MetaDefender Core
- Sign in to MetaDefender Core management console.
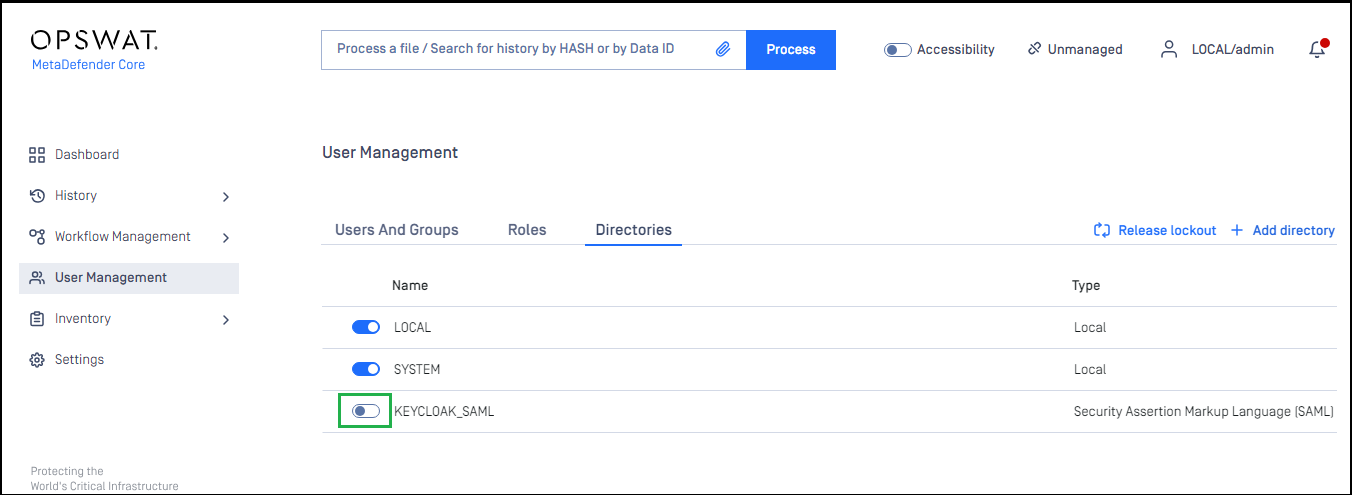
- Under
Dashboard, clickUser Managementin the left sidebar. - Under
User Management, selectDirectoriestab and hitAdd directoryin the top right.

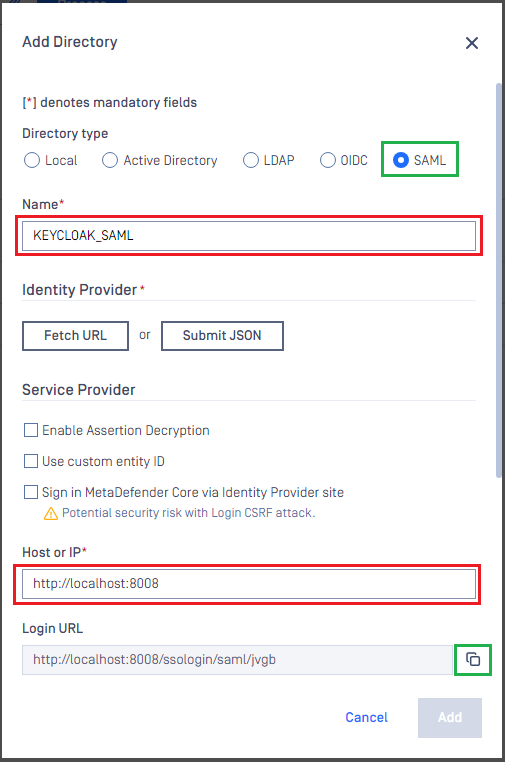
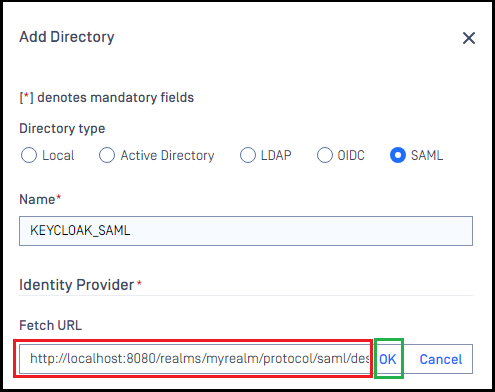
- On
Add Directorypage, select SAML inDirectory type. - Fill
Nameof the new directory, such as KEYCLOAK_SAML. - Under
Service Provider, fill inHost or IPwhere MetaDefender Core is being hosted, using https://localhost:8008 as an example. - Copy the value of
Login URL.
Create Keycloak application
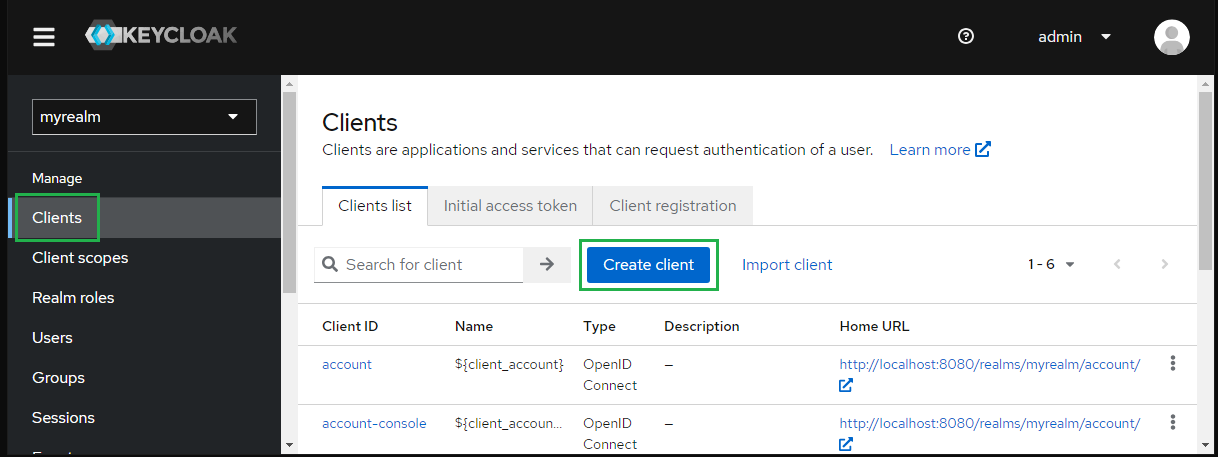
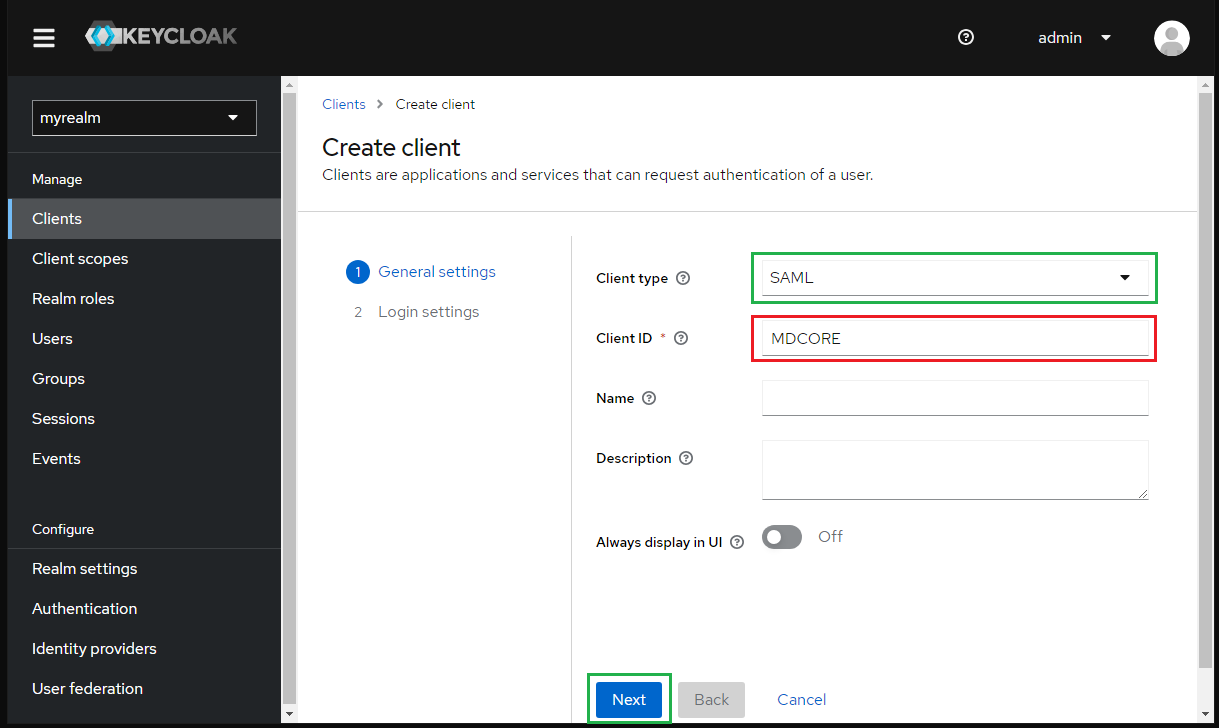
- On screen
myrealm, selectClientsin the sidebar and clickCreate client.
- Choose SAML for
Client typeand enter MDCORE forClient IDthen clickNext.
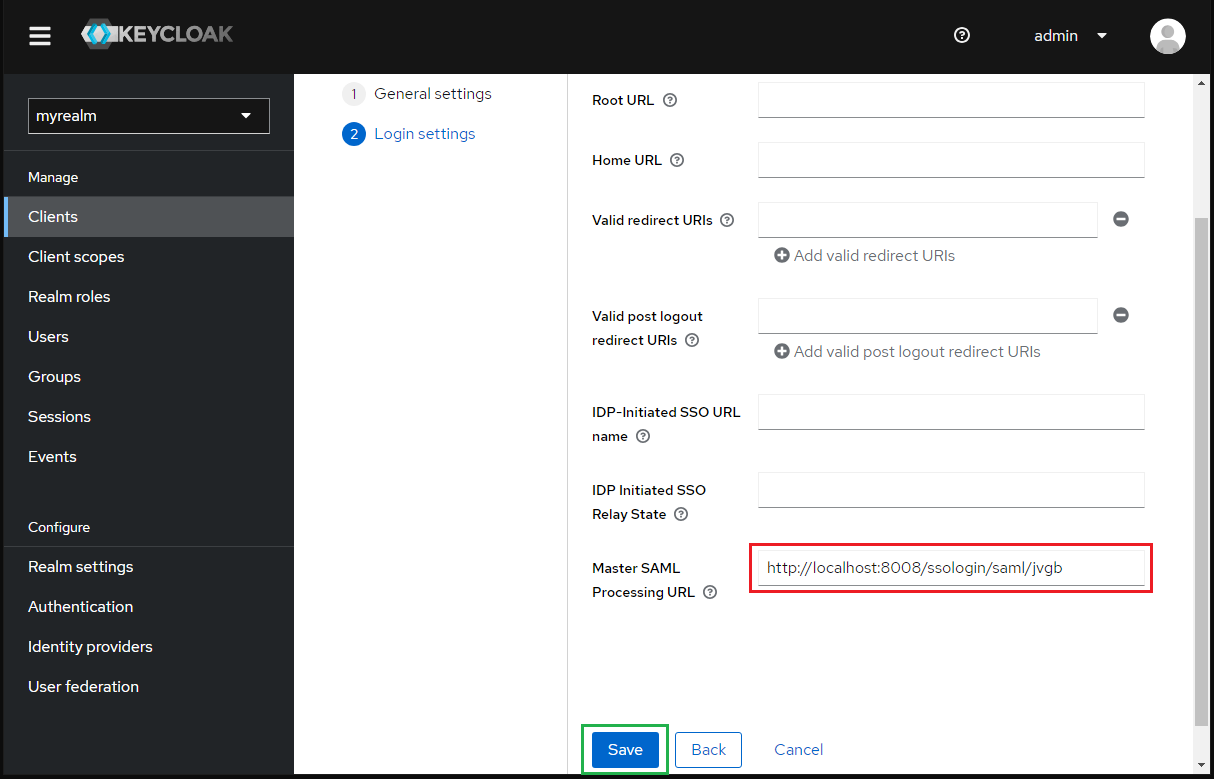
- Paste the value of
Login URLfrom MetaDefender Core intoMaster SAML Processing URLand clickSave.
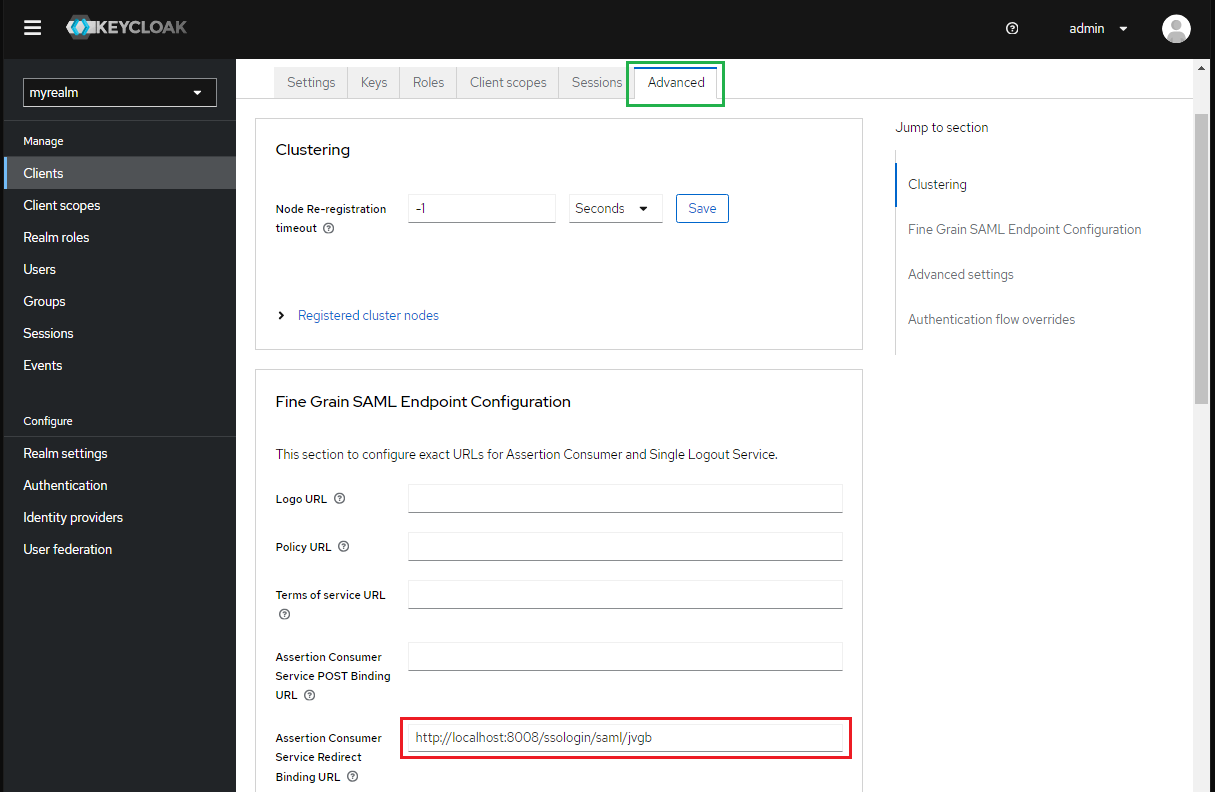
- Go to
Advancetab and paste the value ofLogin URLfrom MetaDefender Core toAssertion Consumer Service Redirect Binding URLand clickSave.
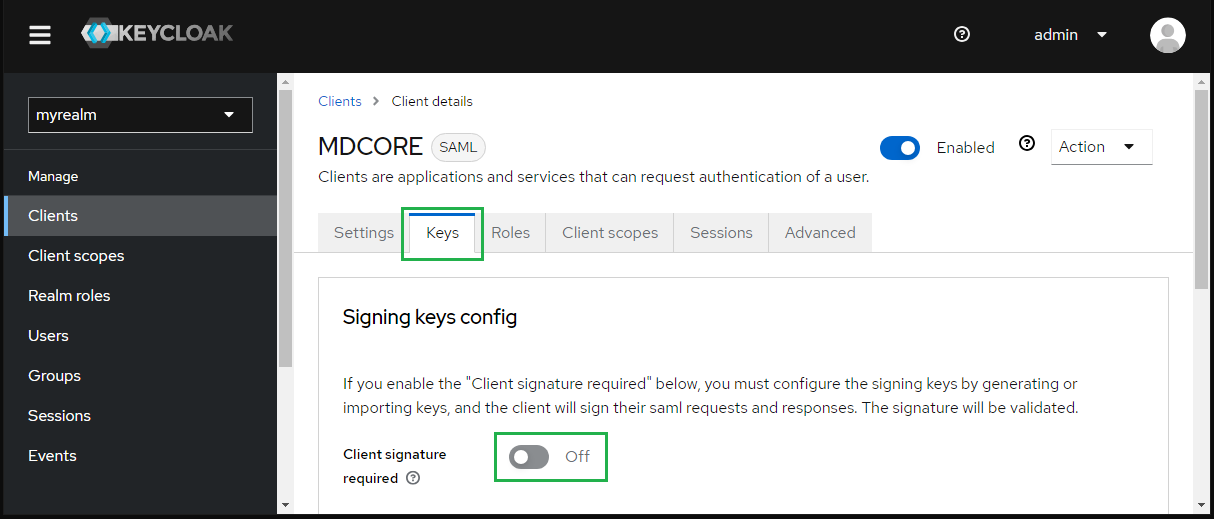
- In
Keystab, toggleClient signature requiredto Off.
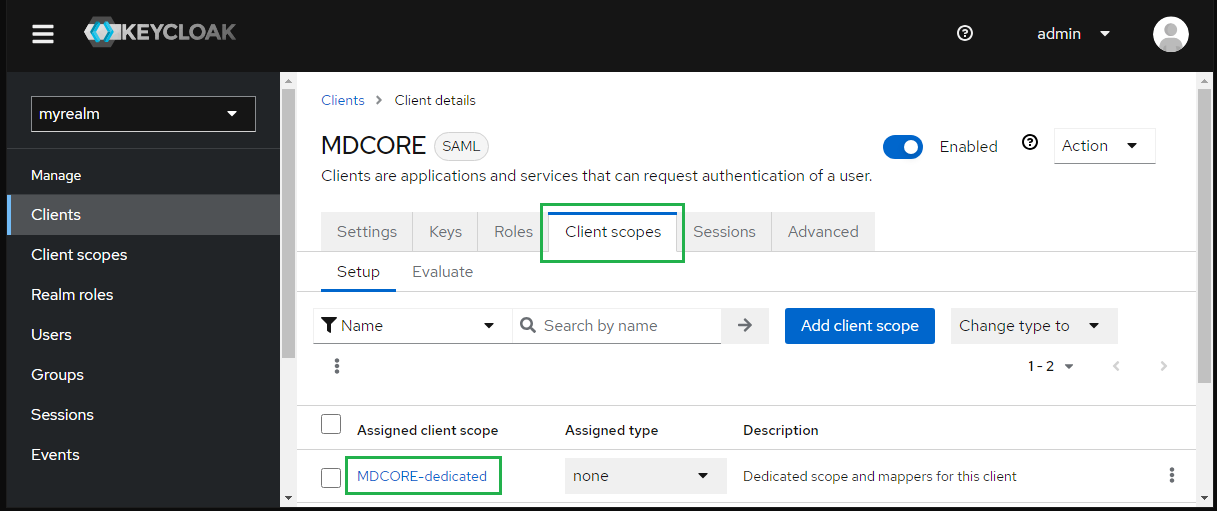
- In
Client scopestab, selectMDCORE-dedicated.
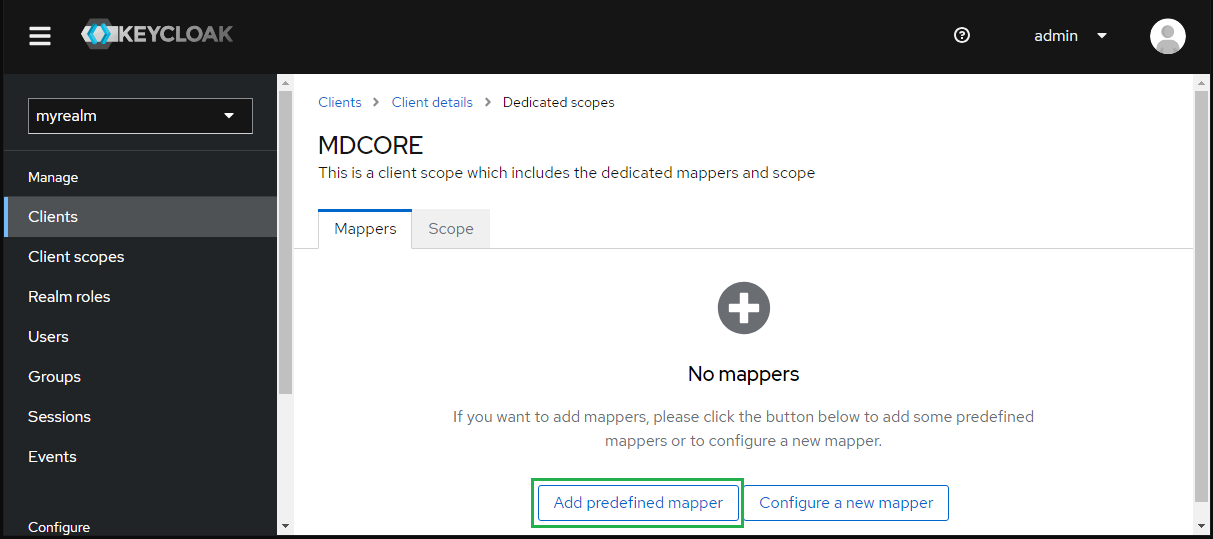
- Under
Dedicated scopes, navigate toMapperstab and clickAdd predefines mapper.
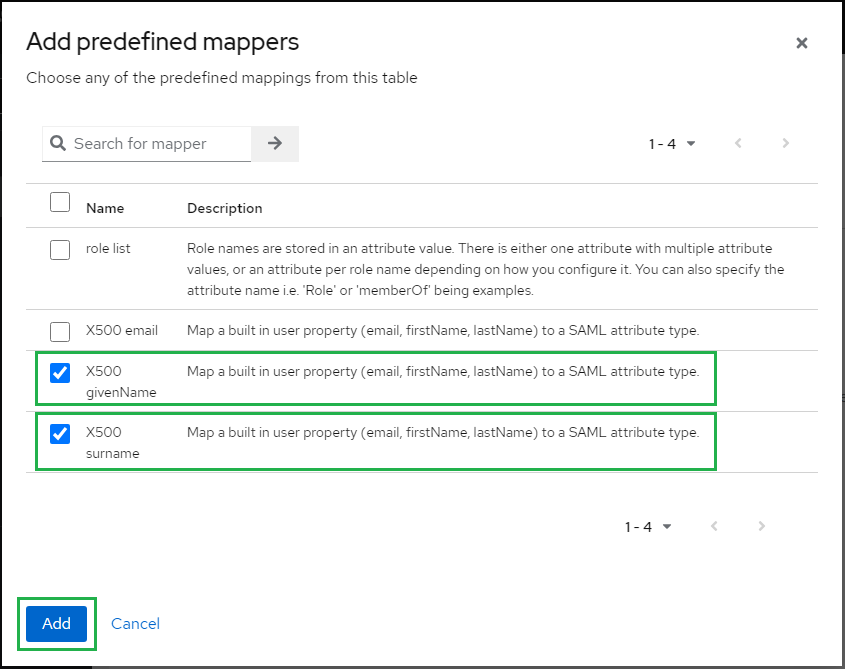
- Check
X500 givenNameandX500 surname, then clickAdd.
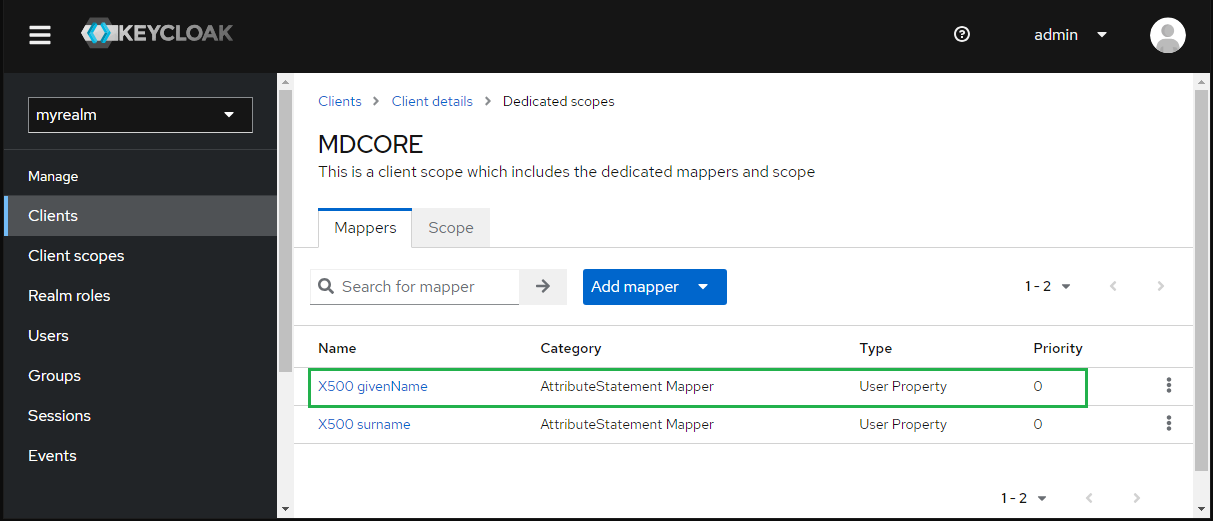
- Back to
Mapperstabs, click onX500 givenName.
- Enter first_name to
SAML Attribute Nameand clickSave.

- Click
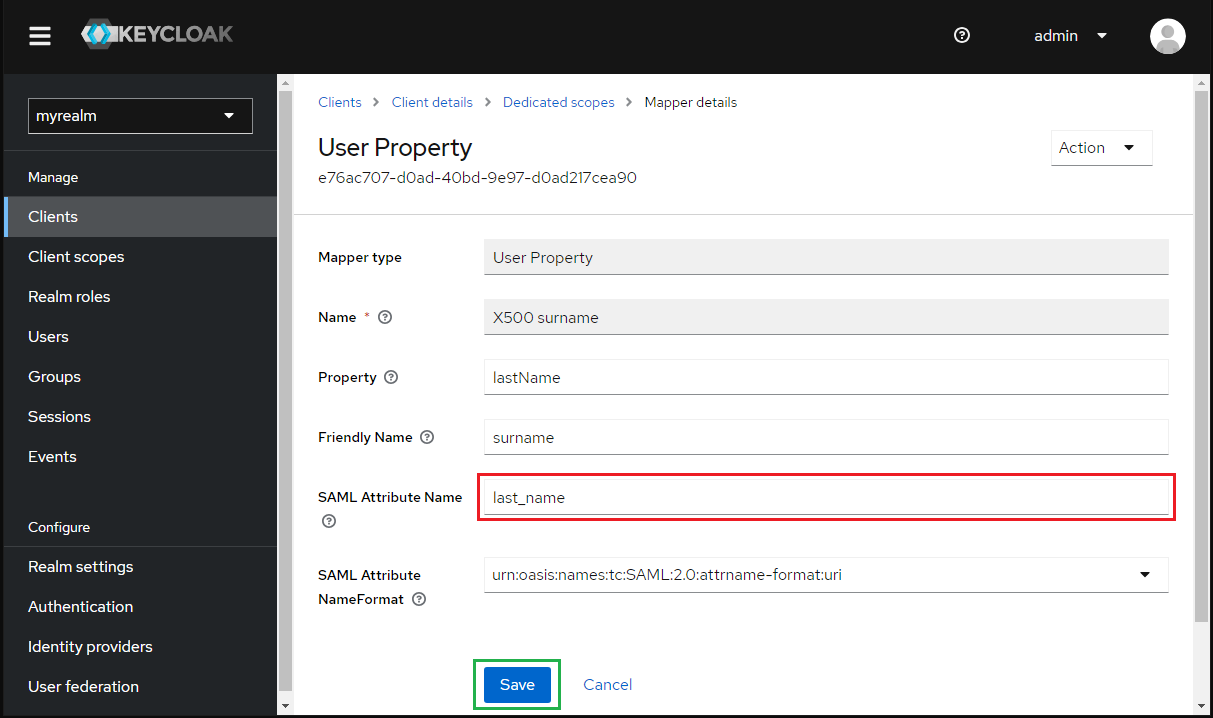
X500 surnameinMapperstab.

- Enter last_name for
SAML Attribute Nameand clickSave.
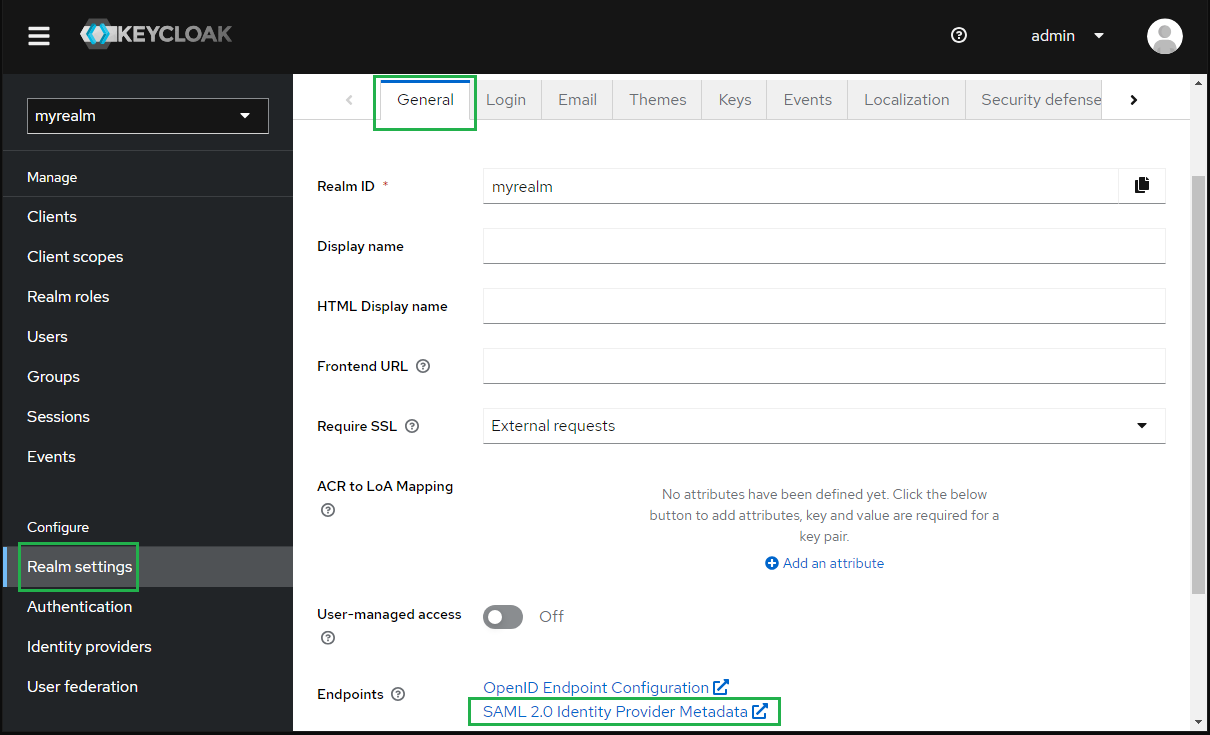
- Select
Realm settingsin the sidebar, navigate toGeneraltab, clickSAML 2.0 Identity Provider Metadataand copy the metadata link.
Complete configuration in MetaDefender Core
- Switch to MetaDefender Core screen, under
Identity Provider, clickFetch URL. - Paste the metadata link from Keycloak to the box under
Fetch URLand clickOKto ensure MetaDefender Core can set Keycloak as its IdP.
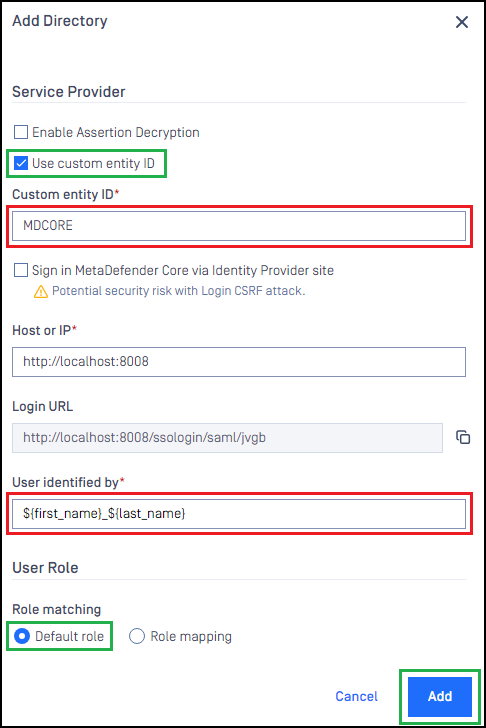
- Under
Service Providersection, enableUse Custom Entity IDand enter MDCORE inCustom Entity IDfield.
The ID set for Use Custom Entity ID must match Client ID created by Keycloak.
- Fill in the user identity under
Use Identified bywith ${first_name}_${last_name}, for example. - Select the appropriate role for the user under
User Role. - Click
Addto complete the settings.
- On
User Managementscreen, toggle the new directory, KEYCLOAK-SAML in this example. A dialog box will appear to confirm the action. OnceEnableis clicked, all existing sessions will expire immediately.
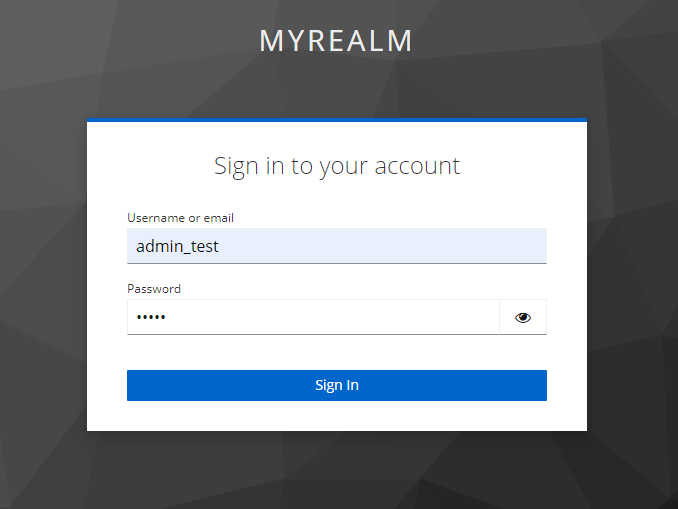
Test the integration
- Click
Loginfrom the home screen of MetaDefender Core; the user is redirected to Keycloak page.
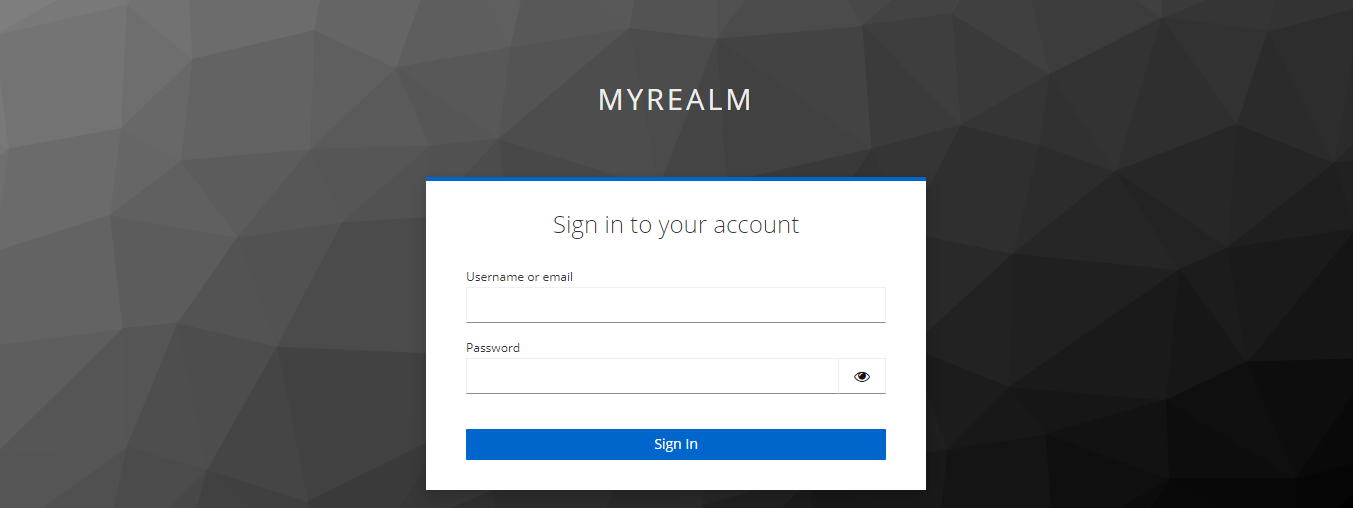
- Sign in with the account registered in Keycloak.
- If everything goes well, MetaDefender Core dashboard will be displayed with user identity set in the top right corner.
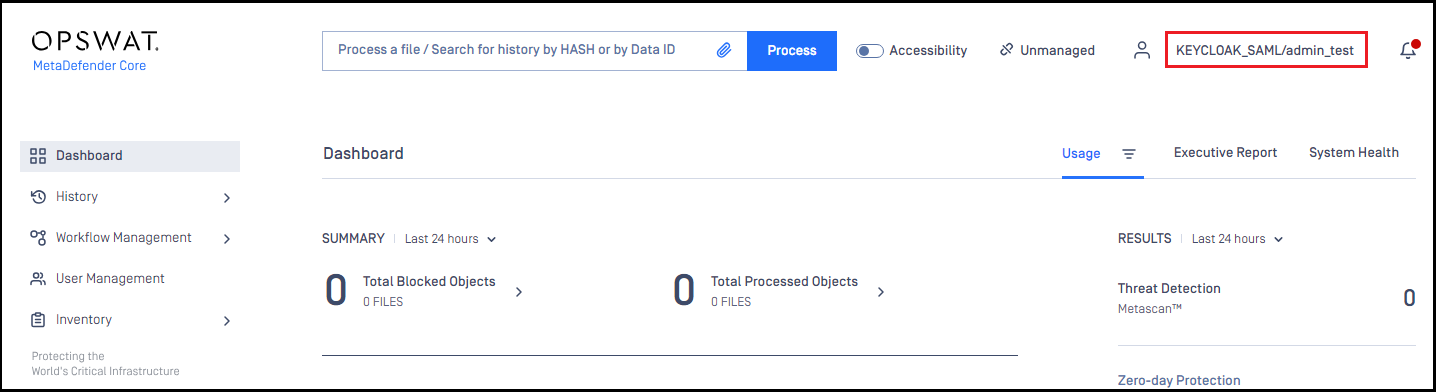
- Otherwise, access backup login page at
<mdcore-host>#/public/backuploginfor trouble shooting.
Was this page helpful?