The integration is demonstrated using ForgeRock version 7.2.0.
Configure Identity Provider in ForgeRock
Access ForgeRock console.
On
Realmspage, selectTop Level Realmlocated in the upper left corner.Go to
Applicationsin the sidebar, expandFederation, chooseCircles of Trust, and pressAdd Circle of Trust.
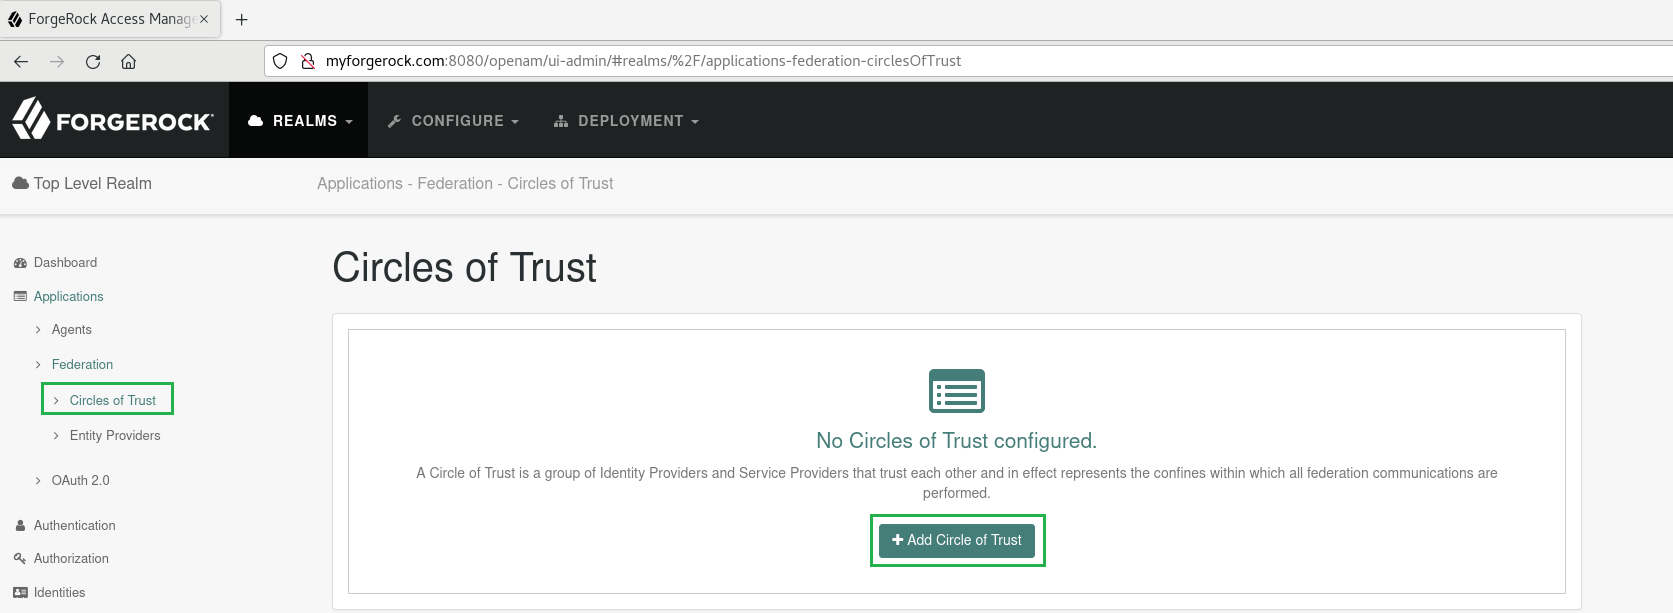
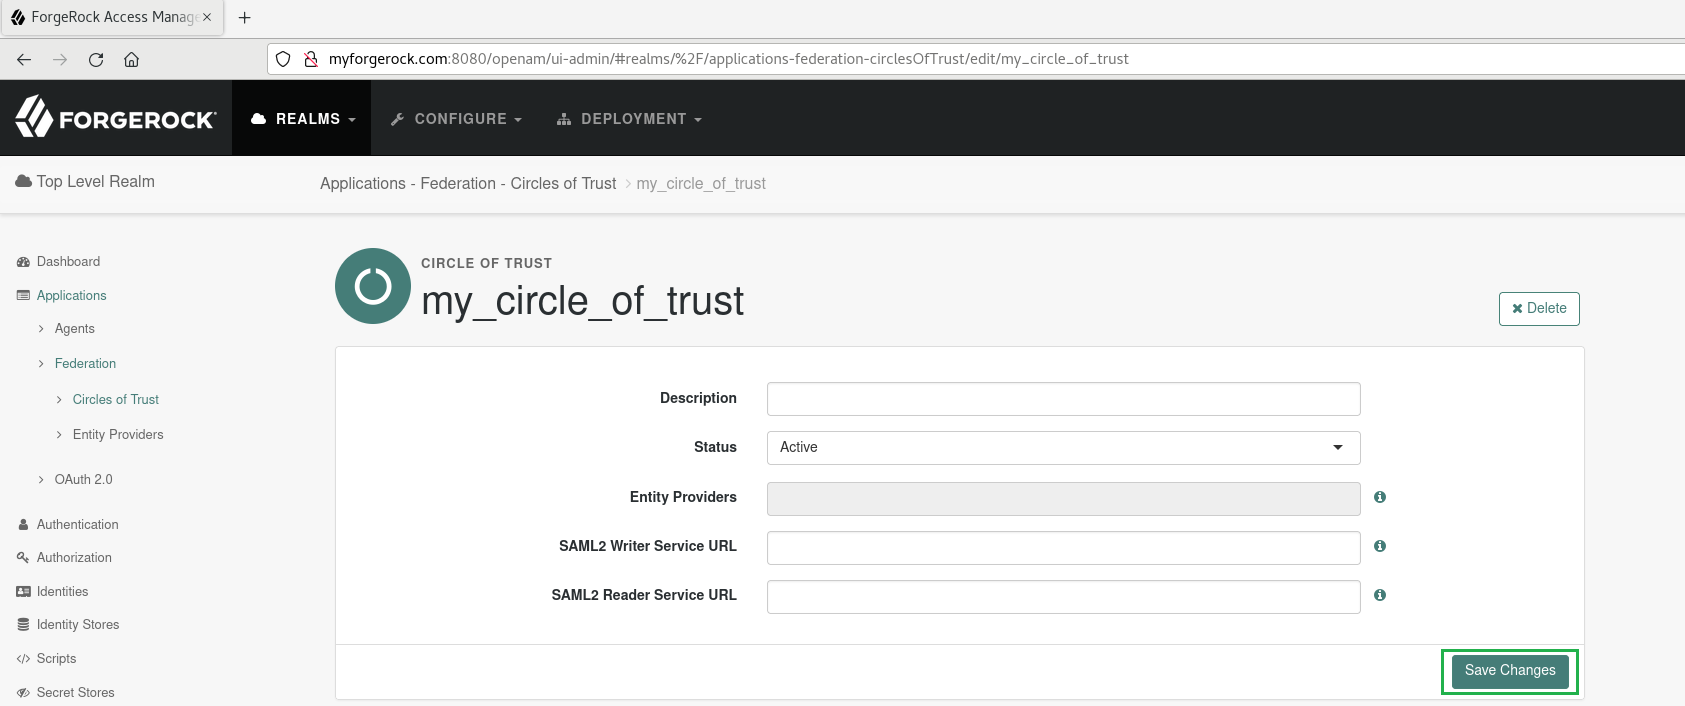
Input the name, 'my_circle_of_trust' for instance, then select
CreateandSave Changes.
Select
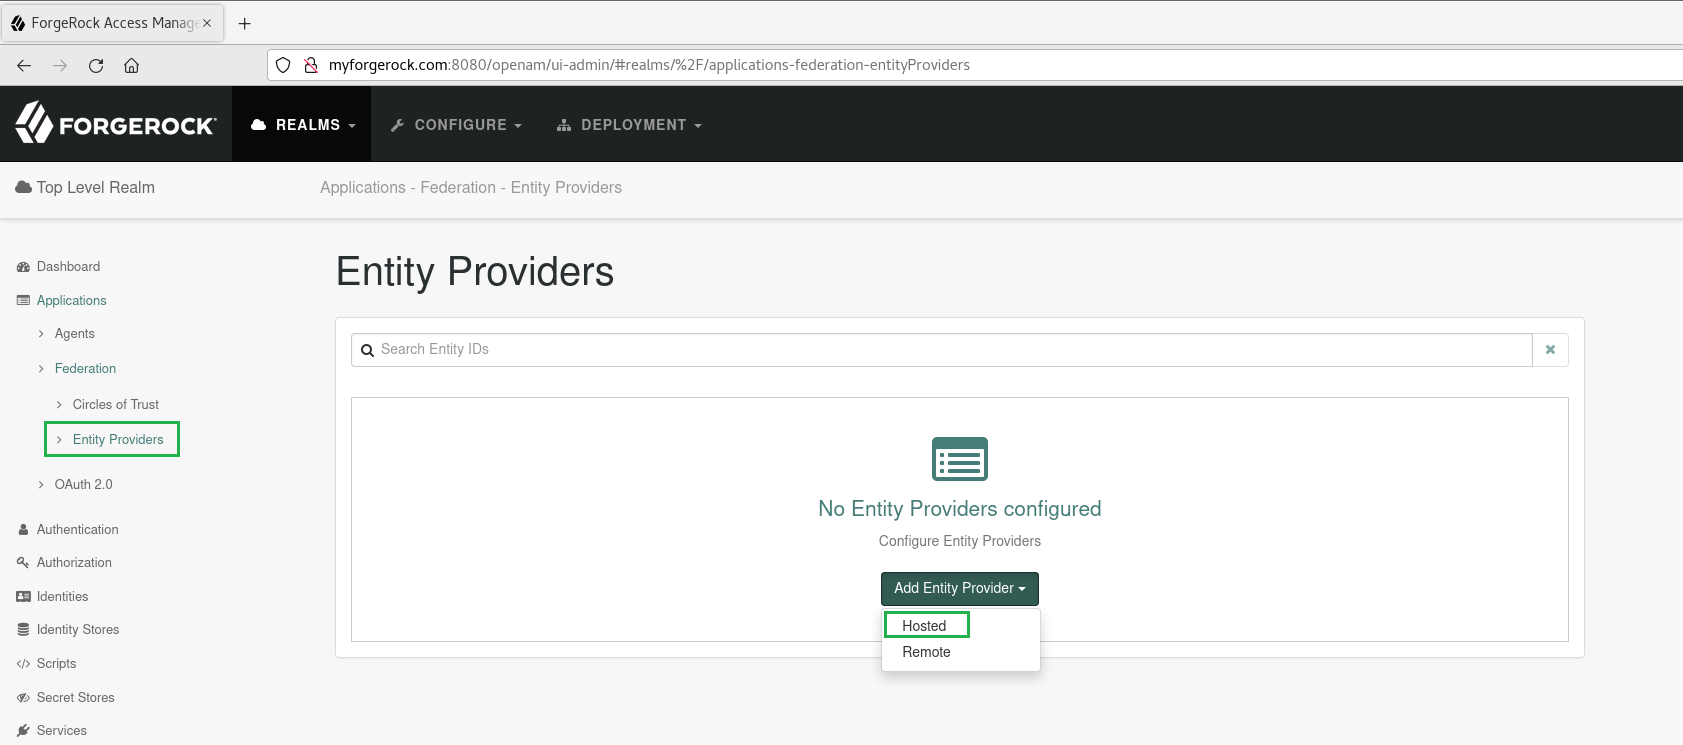
Entity ProvidersfromFederationin the side bar, selectAdd Entity Provider, and pickHosted.
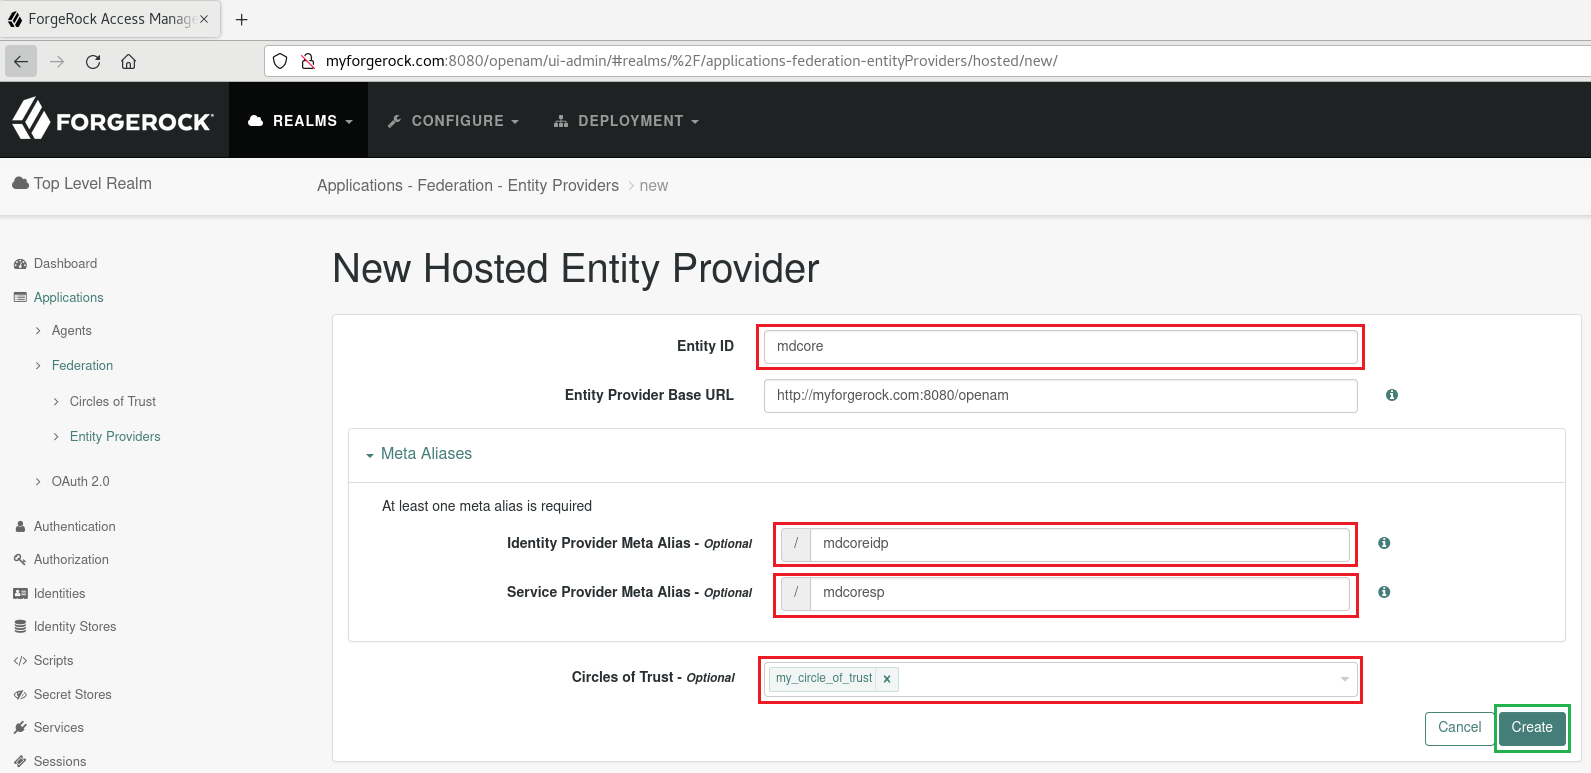
Input 'mdcore' for
Entity ID, 'mdcoreidp' forIdentity Provider Meta Alias, 'mdcoresp' forService Provider Meta Alias, and 'my_circle_of_trust' forCircles of Trust, then clickCreate.
The value of Entity ID, 'mdcore' in this case, will later be used to configure Custom entity ID in MetaDefender Core.
Create SAML directory in MetaDefender Core
Access MetaDefender Core console.
On the dashboard, select
User Managementfrom the sidebar.On
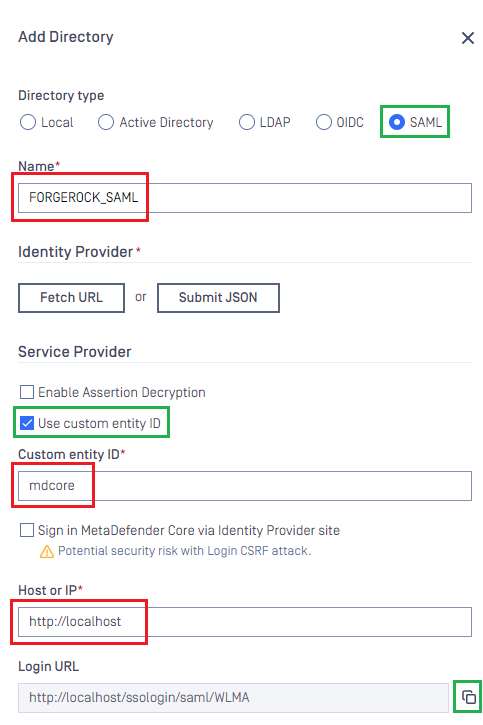
User Managementpage, chooseDirectoriestab and then click onAdd Directoryin the upper right corner.On
Add Directorypage, selectSAMLfor directory type.Input the name of the new folder, such as 'FORGEROCK_SAML'.
In
Service Providerarea, toggleUse Custom Entity IDoption and type 'mdcore' inCustom entity IDbox.Fill in
Host or IPwith the address of the machine where MetaDefender Core is located, using 'http://localhost:8008' as an example.Click the copy button beside
Login URL.
The copied login URL will be used subsequently in Location setting of ForgeRock.
The setup in MetaDefender Core is incomplete, please refrain from clicking outside of Add Directory screen.
Configure Service Provider in ForgeRock
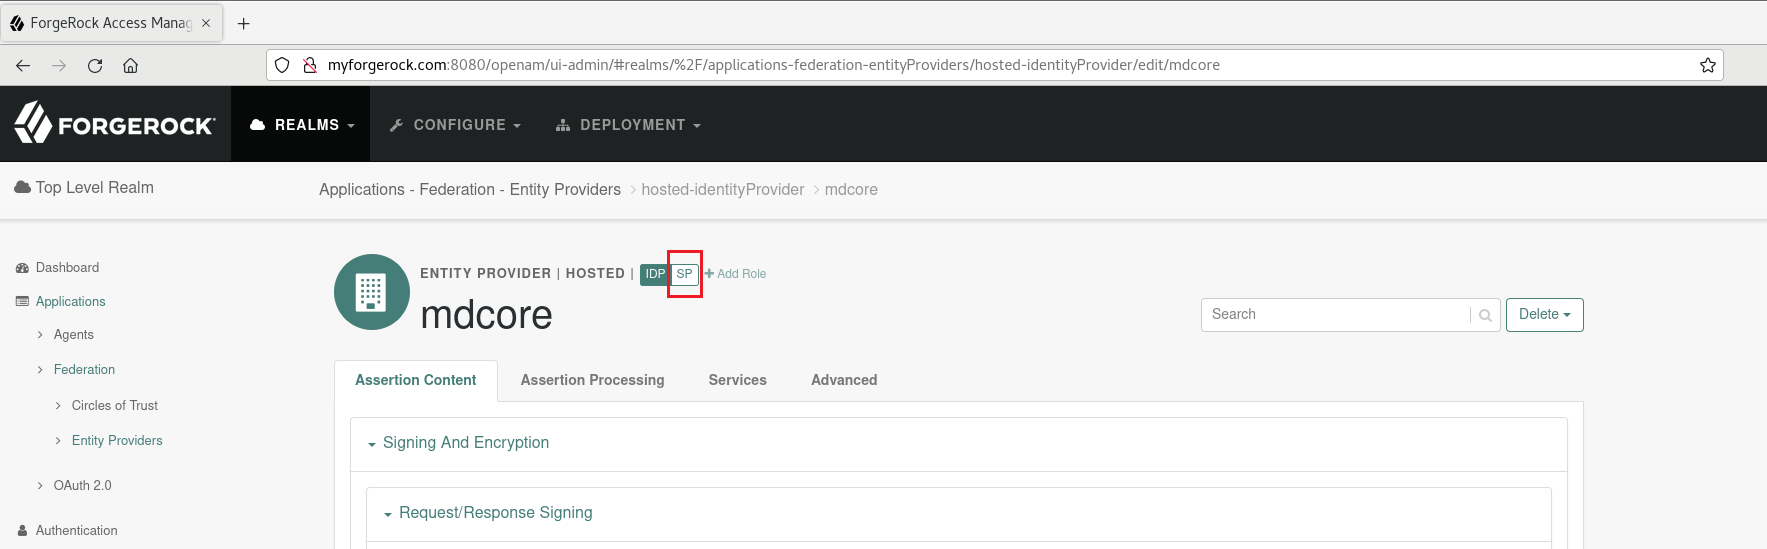
In the ForgeRock console, switch to
SPfor the entity provider 'mdcore'.
Click on
Servicestab.

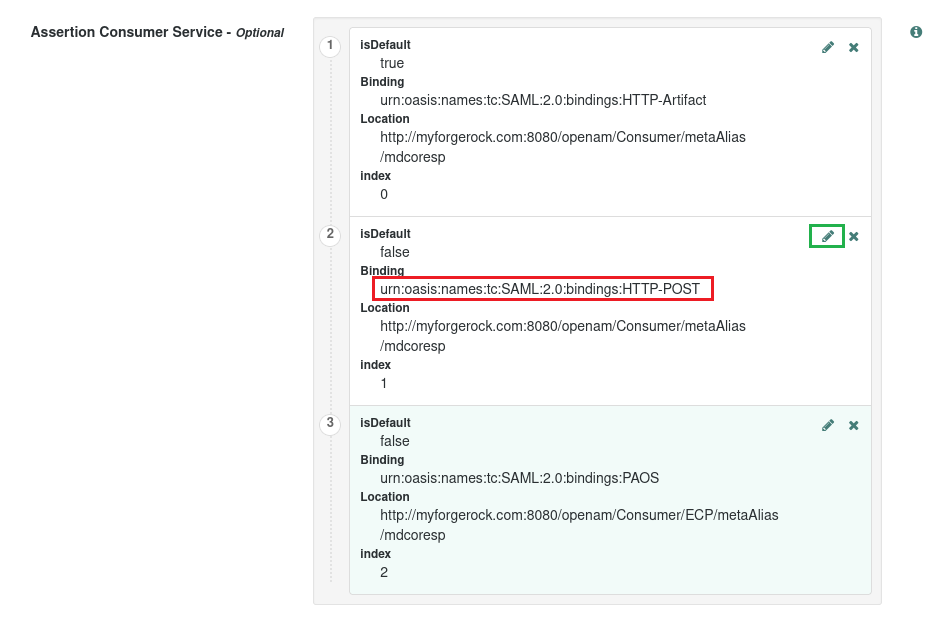
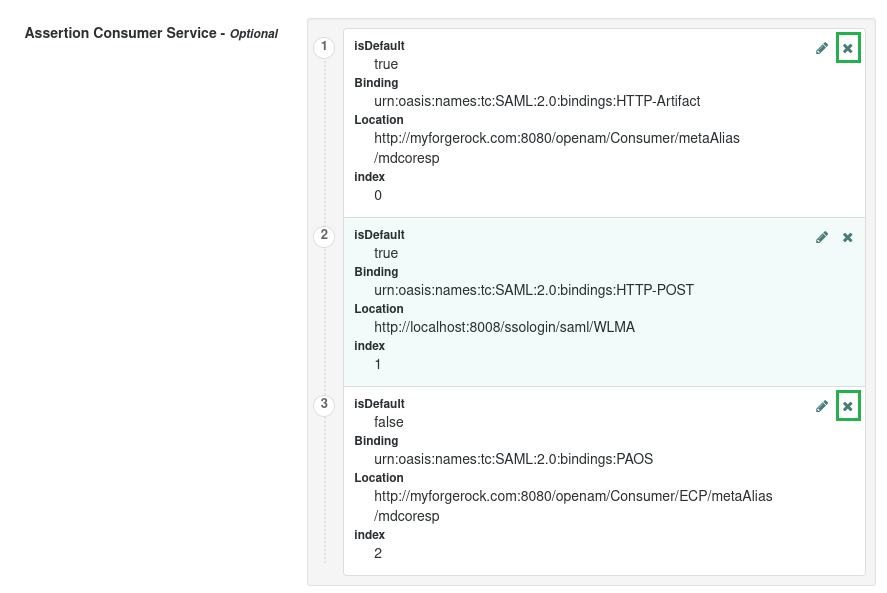
Go to
Assertion Consumer Servicearea, choose HTTP-POST binding entry, and tap the edit icon located in the top right.
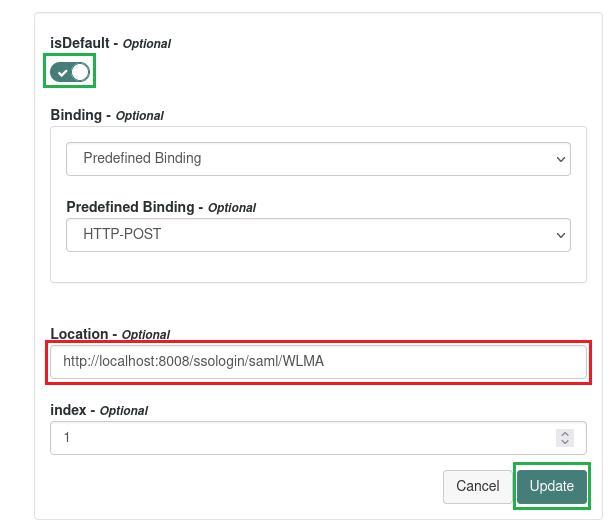
Input login URL from MetaDefender Core into
Location, toggleisDefaultswitch in the upper left, and pressUpdate.
Remove HTTP-Artifact and PAOS bindings, then press
Save Changes.
Select
Assertion Processingtab, navigate toAttribute Map, enter 'given_name' and 'givenName' asKeyandValue, accordingly.
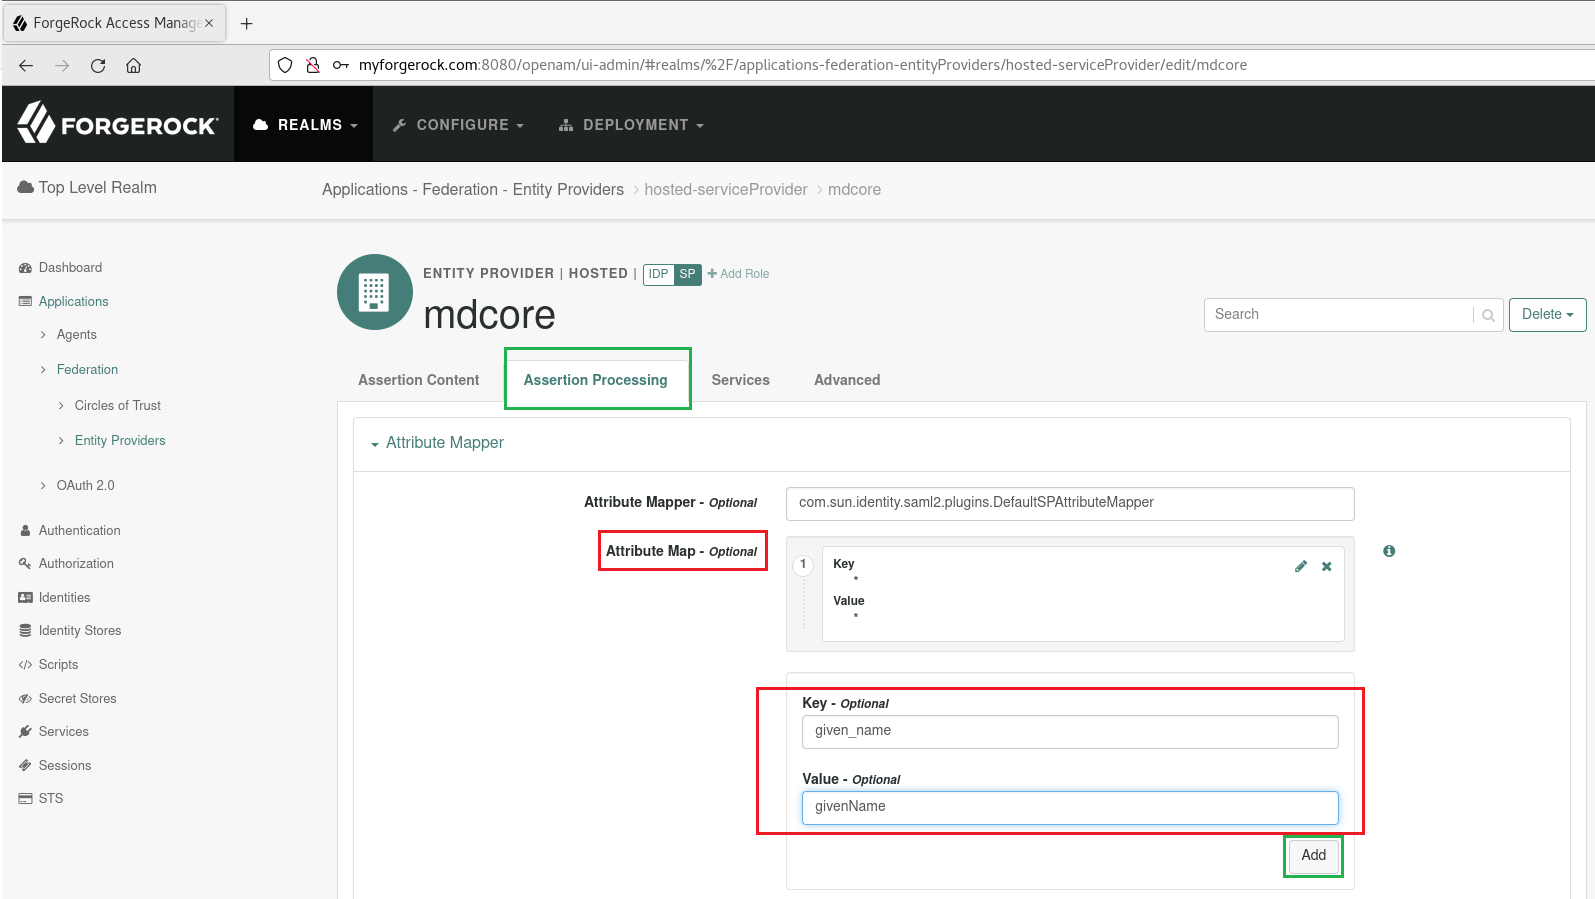
Press
AddandSave Changes.
Complete configuration in MetaDefender Core
Go back to MetaDfender Core, in
Add Directorypage, navigate toIdentity Providersection and click onFetch URL.Enter the SAML Metadata URL from ForgeRock into the field beneath
Fetch URL, clickOKand wait a moment for MetaDefender Core to assign ForgeRock as its IDP.
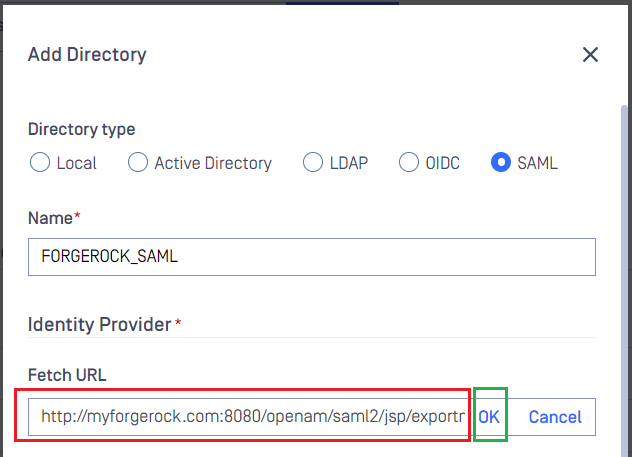
The structure of the metadata URL is as outlined below:
http://<forgerockserver>:<port>/openam/saml2/jsp/exportmetadata.jsp?entityid=<entityid>
In which, forgerock_server and port correspond to the host and port of the machine hosting ForgeRock server; entity_id refers to the value of Entity ID configured in ForgeRock. In this guide, ForgeRock is located at 'myforgerock.com:8080' and the Entity ID is 'mdcore'; thus, the metadata URL becomes
http://myforgerock.com:8080/openam/saml2/jsp/exportmetadata.jsp?entityid=mdcore
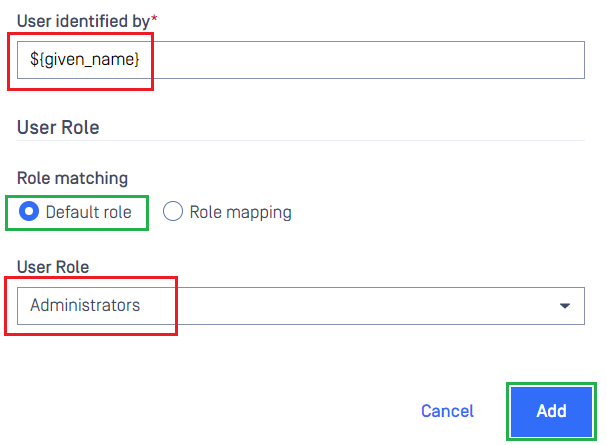
Populate
User identified byfield with '${given_name}', as set up in ForgeRock during the earlier step.Choose the appropriate role for the user in
User Roleand clickAddto finish the process.
On
User Managementscreen, switch on the new directory, 'FORGEROCK_SAML' in this case.
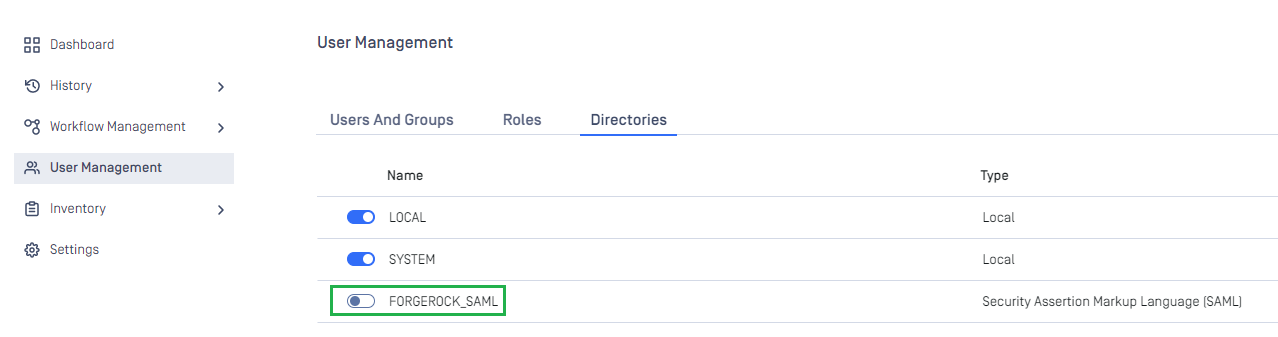
A confirmation dialog box will pop up to verify the action. Upon clicking
Enable, all sessions will be terminated instantly, and ForgeRock will be utilized for user authentication.
Test the integration
On the home screen of MetaDefender Core, click
Login; the user is redirected to ForgeRock Sign-in page.
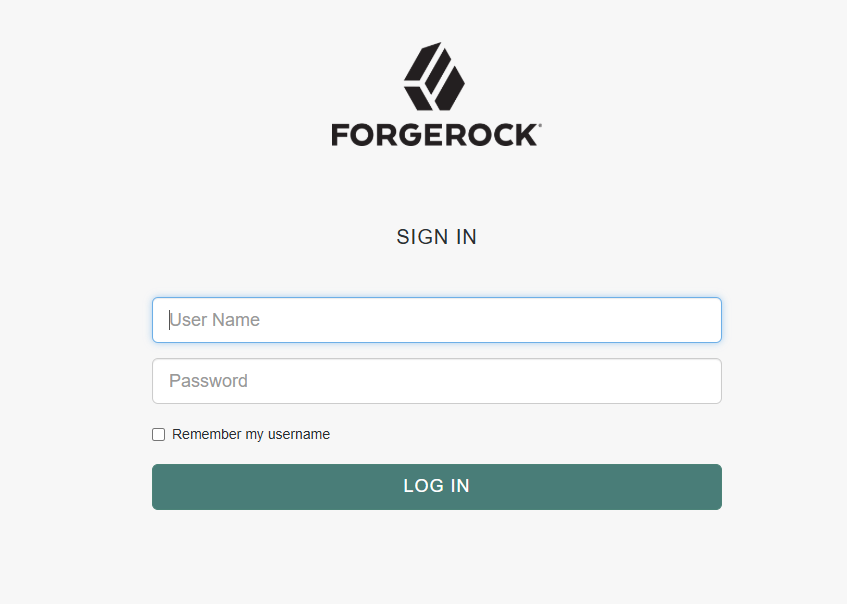
Sign in with your ForgeRock account.
If all proceeds smoothly, MetaDefender Core dashboard will appear with the user's identity in the upper right corner.

Otherwise, visit backup login page at
<mdcore-host>#/public/backuploginfor trouble shooting.