Configuration
Register a new application in Azure
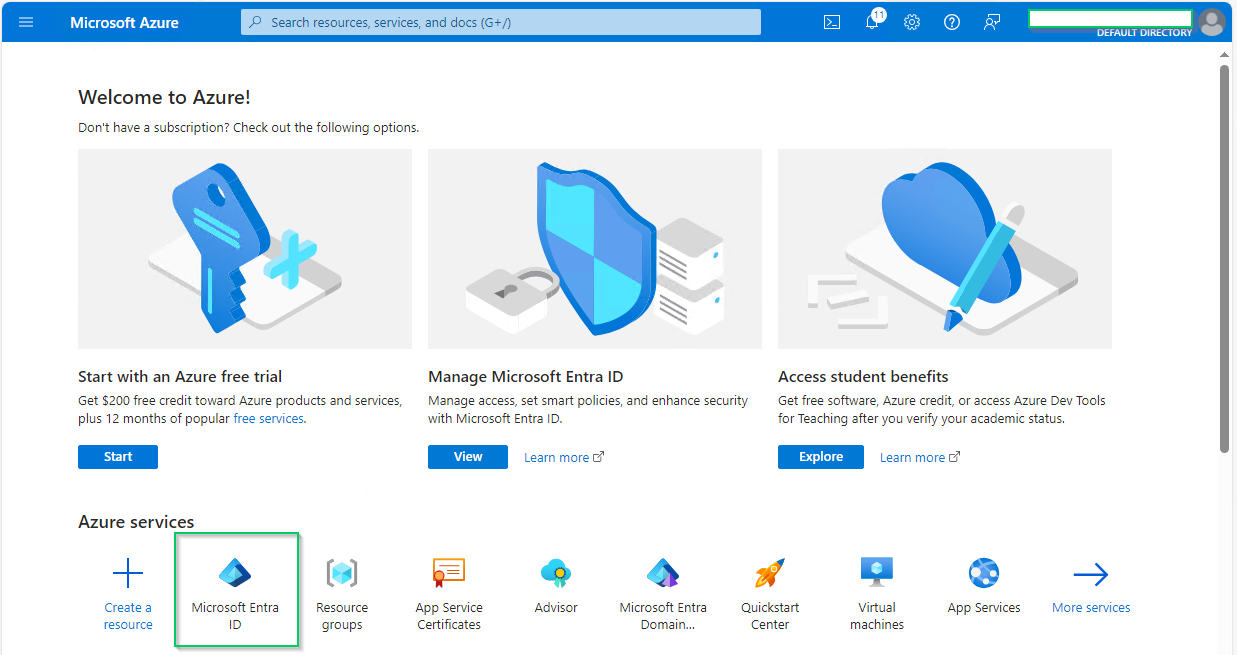
- Access Azure portal and sign in.
- On the home page, select
Microsoft Entra IDunderAzure services.
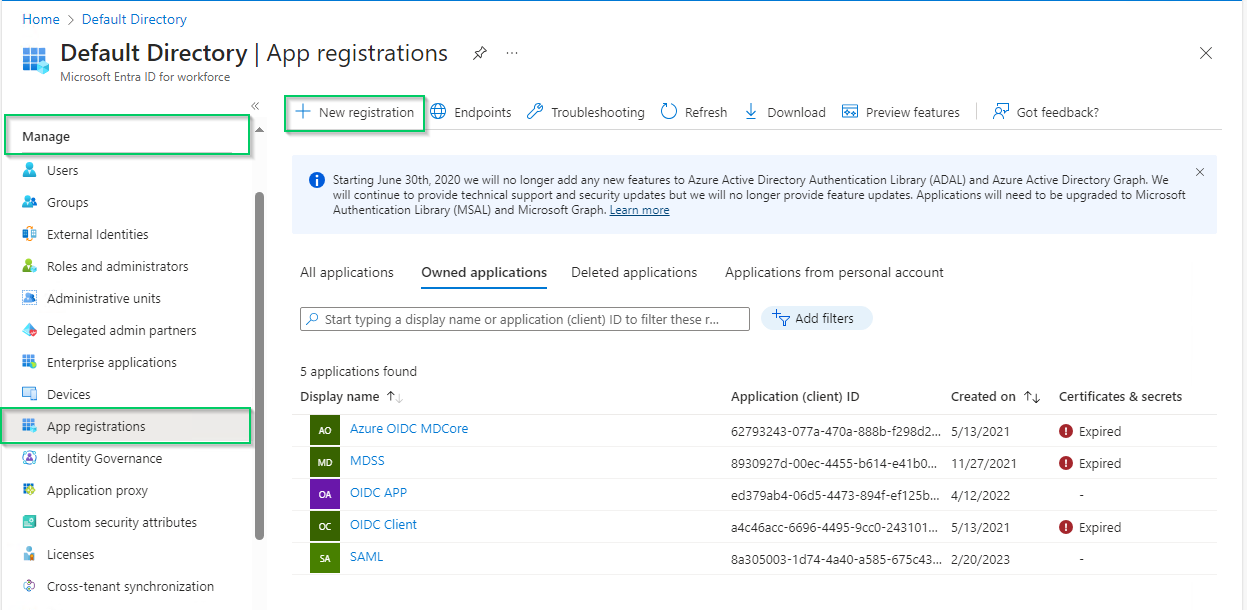
- Select
App registrationsunderManagesection on the left sidebar, then click onNew registrationon the top menu bar.
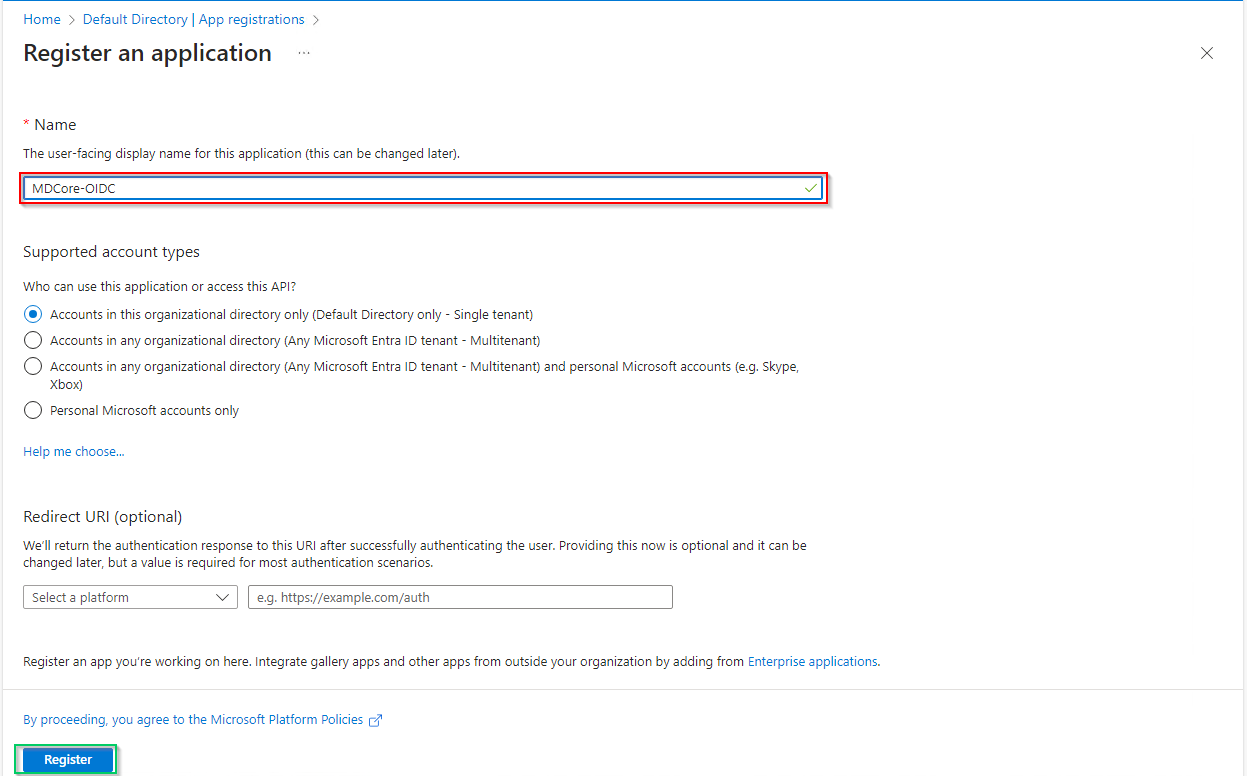
- In
Register an applicationpage, fill in the name for the new application, using MDCore-OIDC as an example, and clickRegisterto complete.
- Select
Token configurationin the left sidebar, hitAdd optional claim, chooseIDon the right sidebar, enable essential claims (given_name in this example) and clickAddat the bottom.
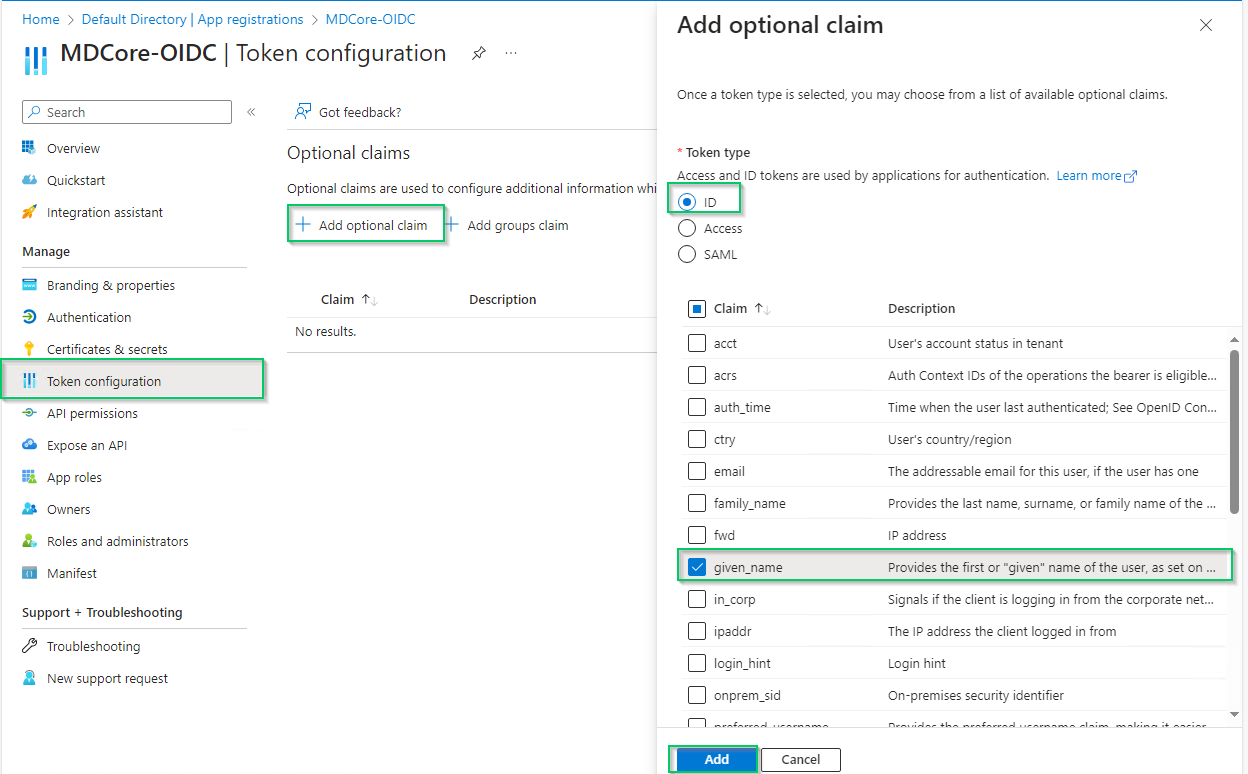
- Click
Addon the popup to finish.
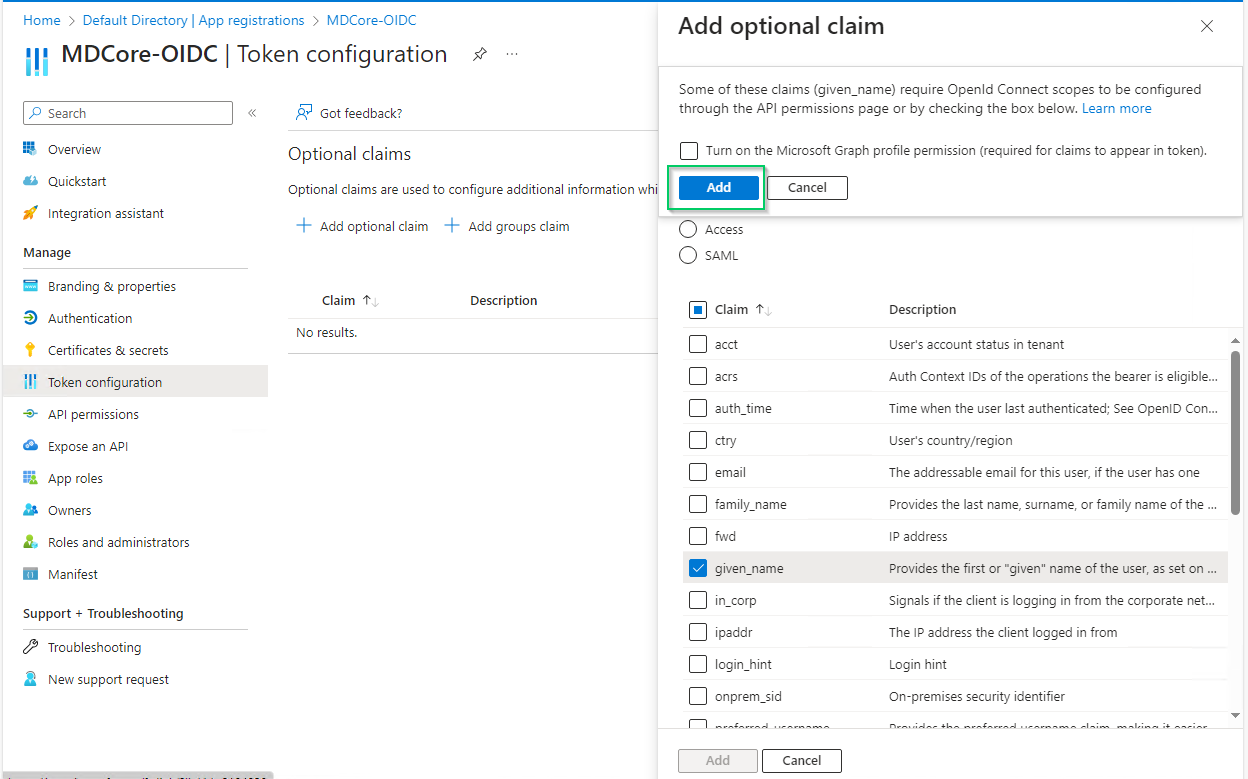
Enabled claims will be used later by MetaDefender Core to identify logged-in user.
Create OIDC directory in MetaDefender Core
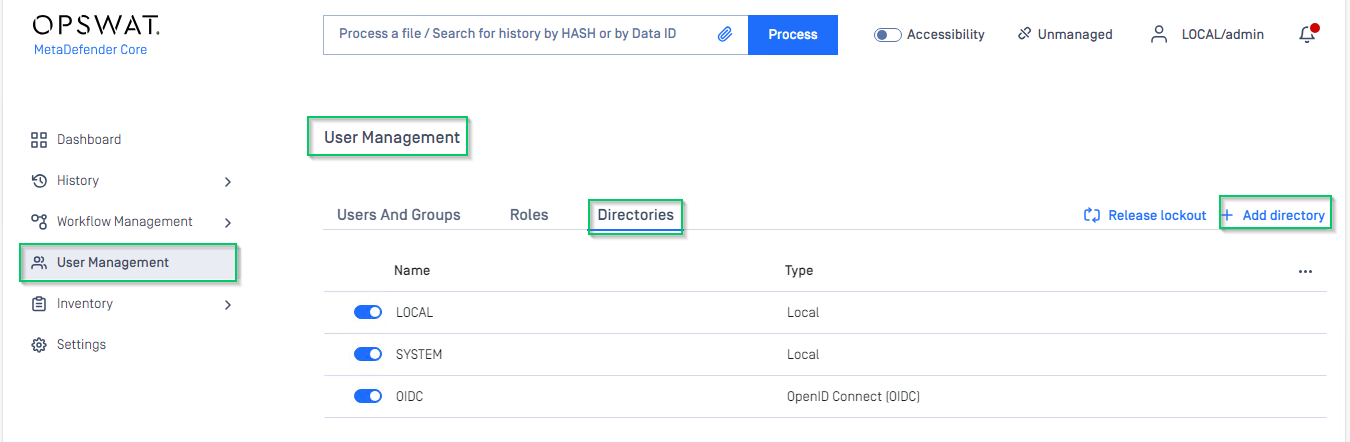
- Sign in to MetaDefender Core.
- At the dashboard, click
User Managementin the left sidebar. - In
User Managementpage, chooseDirectoriestab and clickAdd directoryon the top right corner.
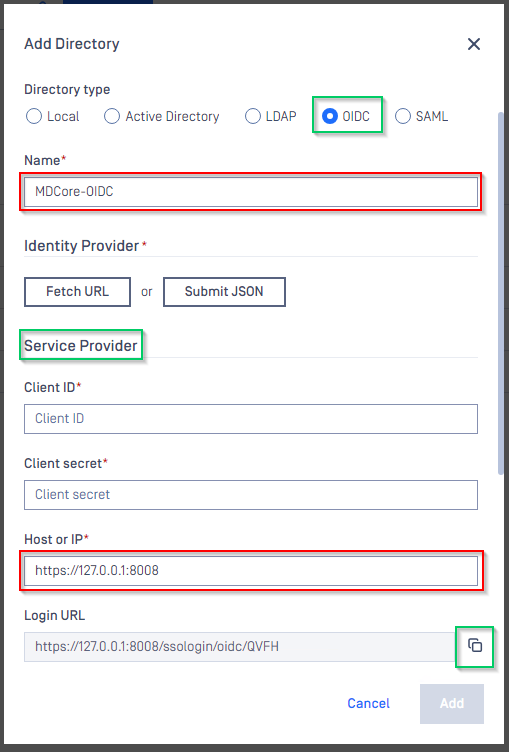
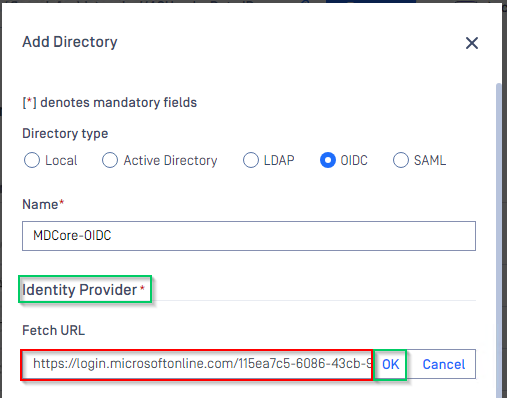
- In
Add Directorypage, choose OIDC inDirectory type. - Fill in the name the new directory, such as MDCore-OIDC.
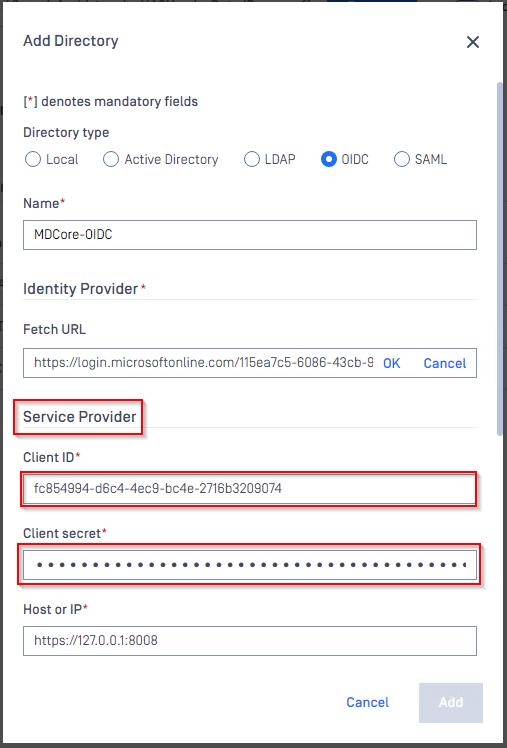
- In
Service Providersection, fill inHost or IPwith the host or IP address where MetaDefender Core is hosted; for this example, it is https://localhost:8008. - Copy the
Login URLand store it somewhere for later use.
Complete configuration in Entra ID
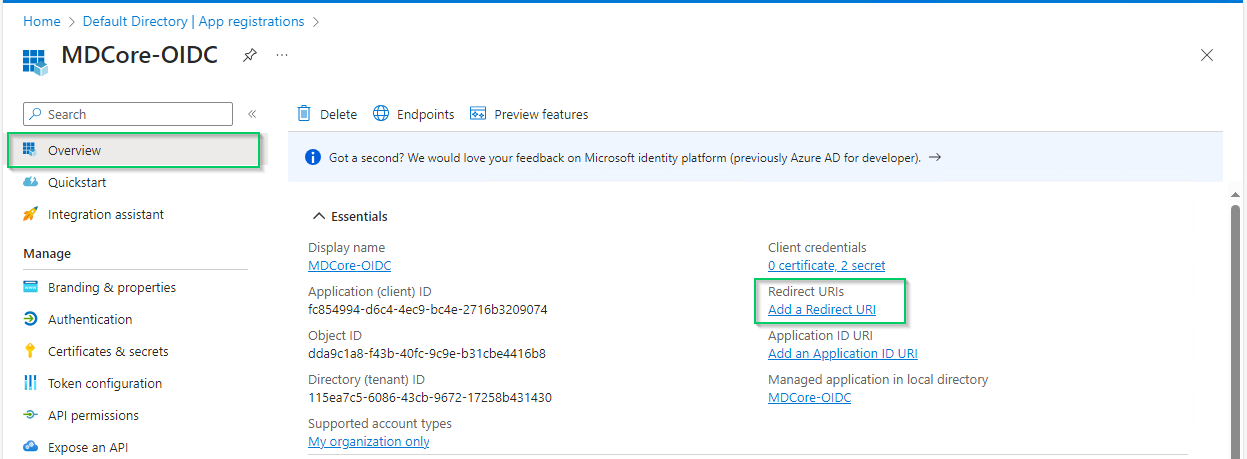
- Back to Microsoft Entra ID, on
MDCore-OIDCpage, selectOverviewsection in the left sidebar and click onAdd a Redirect URIlink to switch toAuthenticationpage.
- In
Authenticationpage, clickAdd a platformand chooseWeboption in the right sidebar.
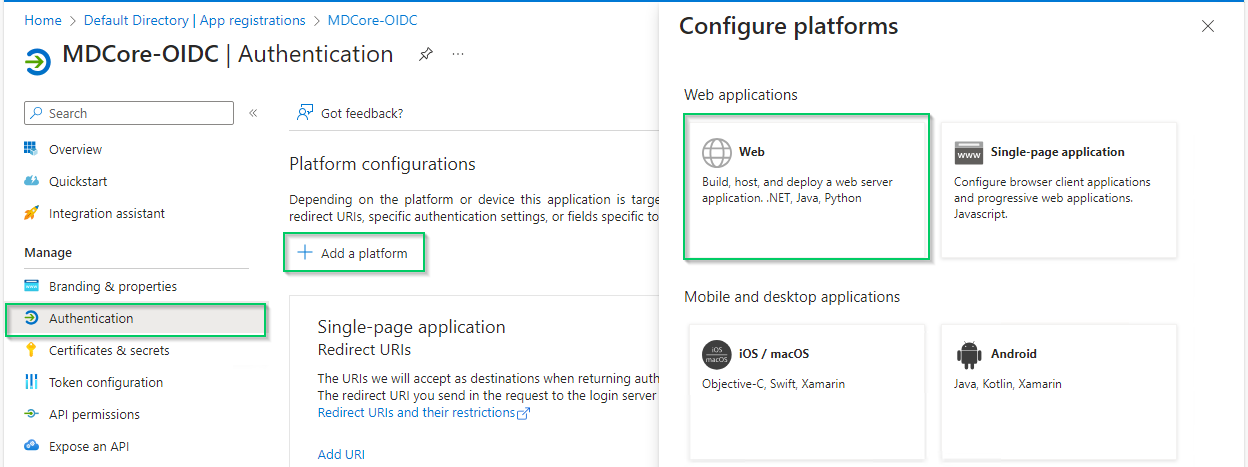
- Fill in
Redirect URIsfield with theLogin URLcopied from MDCore, enableAccess tokensoption and clickConfigure.

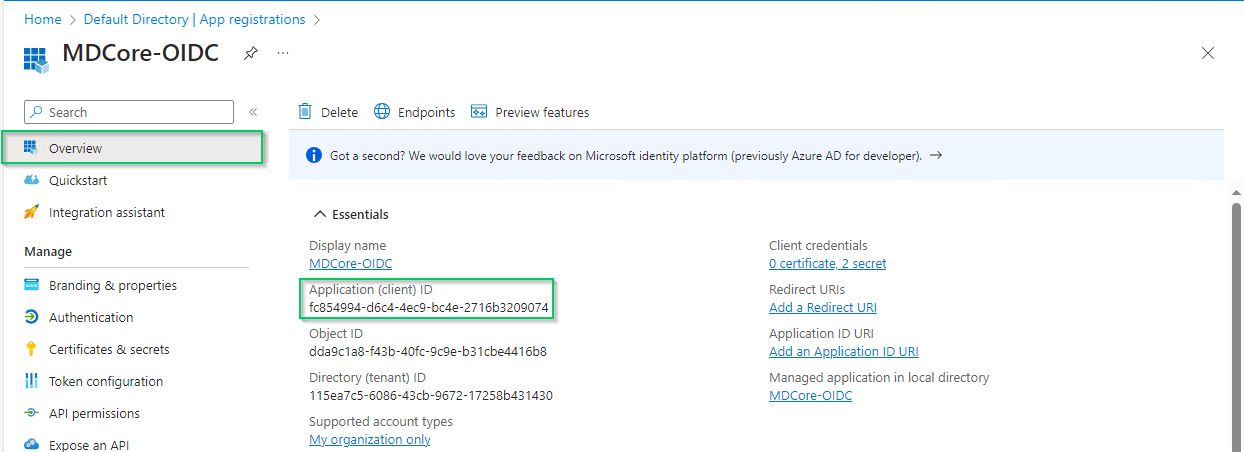
- Select
Overviewin the left sidebar again, copy the string next toApplication (client) IDand store as client_id.
- Click
Endpointsin the top bar, copy the URI underOpenID Connect metadata documentin the right sidebar and store it as metadata_uri.

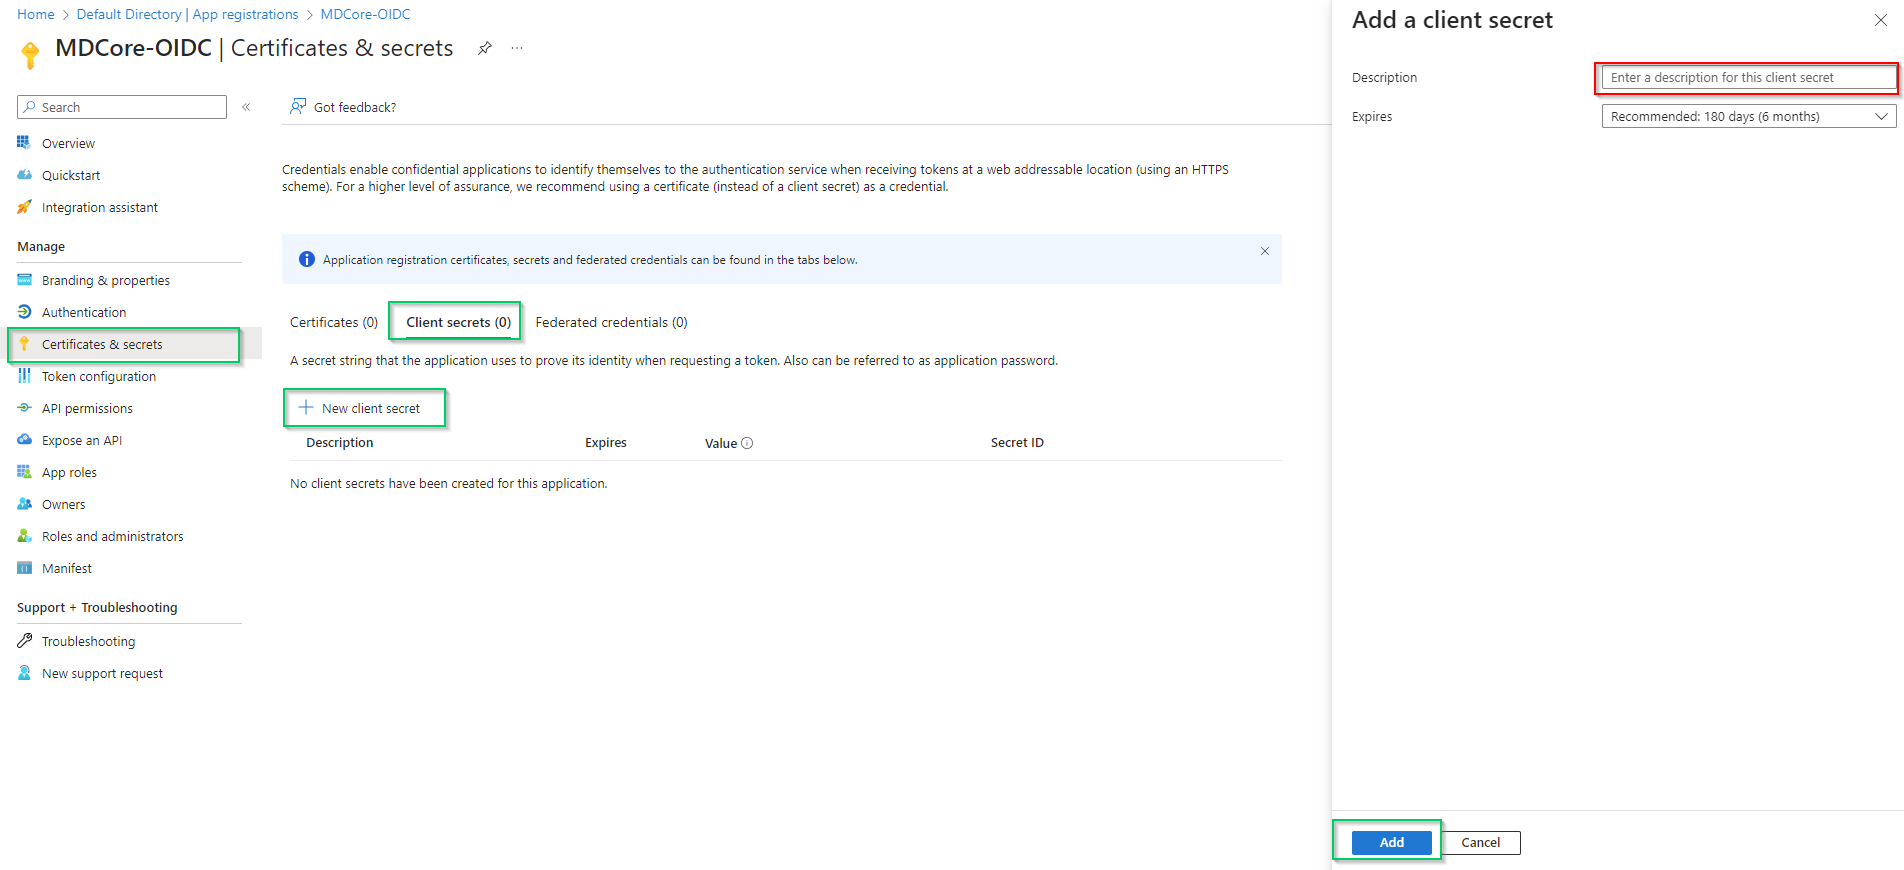
- Select
Certificates & secretsin the left sidebar, go toClient secrets (0)tab, clickNew client secret, fill in the secret description and set expiration and, then clickAddto complete.
- A new client secret is created under
Client secret (1)tab; copy the string underValuecolumn and store it as client_secret.
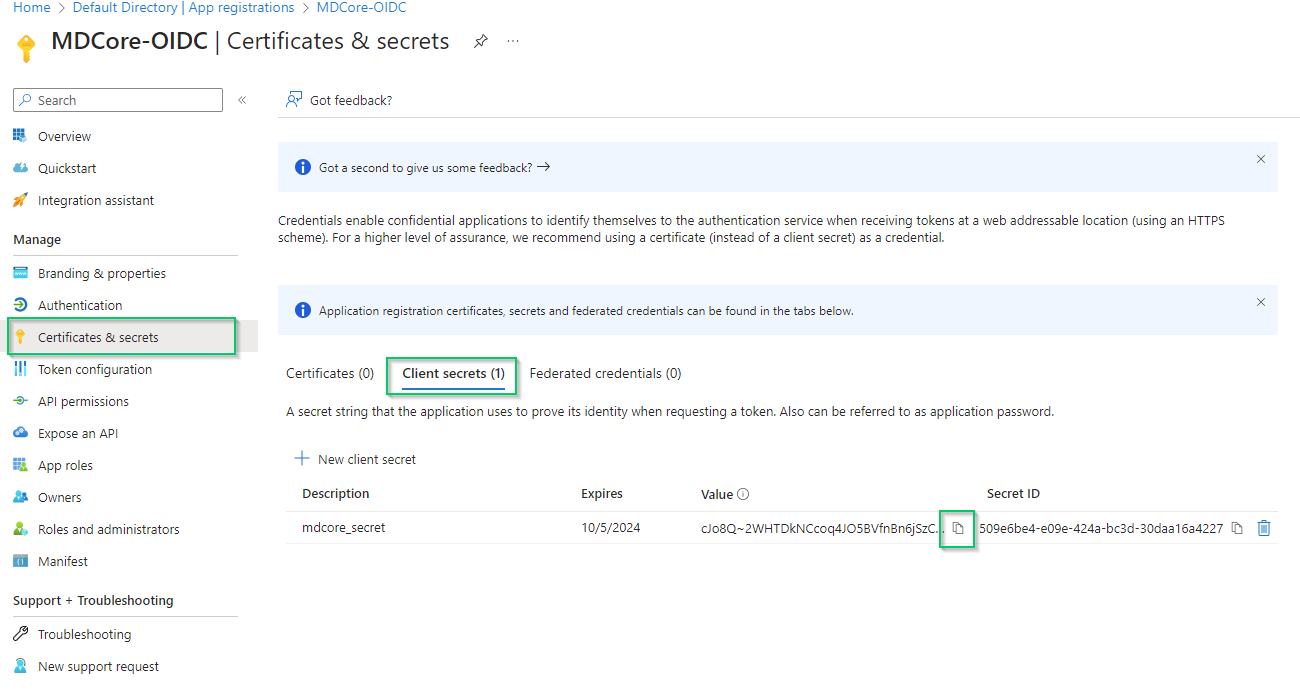
Entra ID will hide the client secret completely when page Certificate & secrets is left. Administrator is recommended to store the client secret in a safe place, otherwise they have to create a new one.
Complete configuration in MetaDefender Core
- Switch back to MetaDefender Core. Under
Identity Providersection, clickFetch URLand paste metadata_uri gathered in Configure Azure stage into the box underFetch URL. ClickOKand wait a moment for MetaDefender Core to set Microsoft Entra ID as its IDP.
- Under
Service Providersection, paste client_id and client_secret gathered in Configure Azure stage toClient IDandClient secretrespectively.
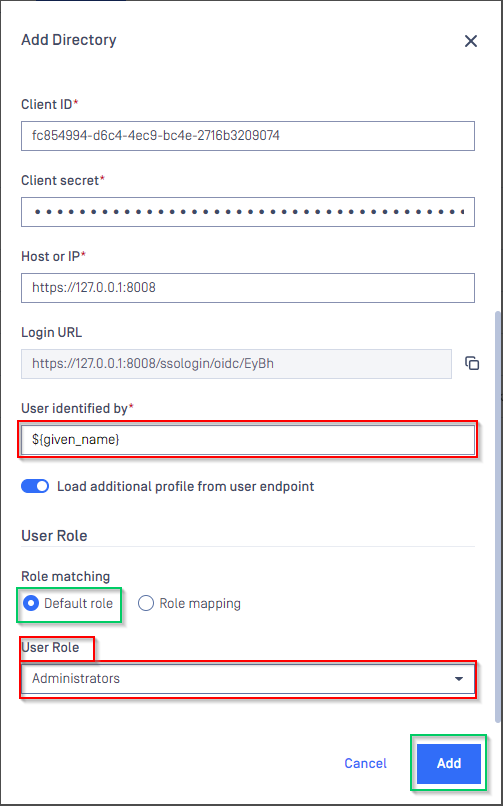
- Fill user identity under
User identified by, ${given_name} is used in this example. - Select
Default roleoption and select correct role for the user underUser Role - Click
Addto complete the settings.
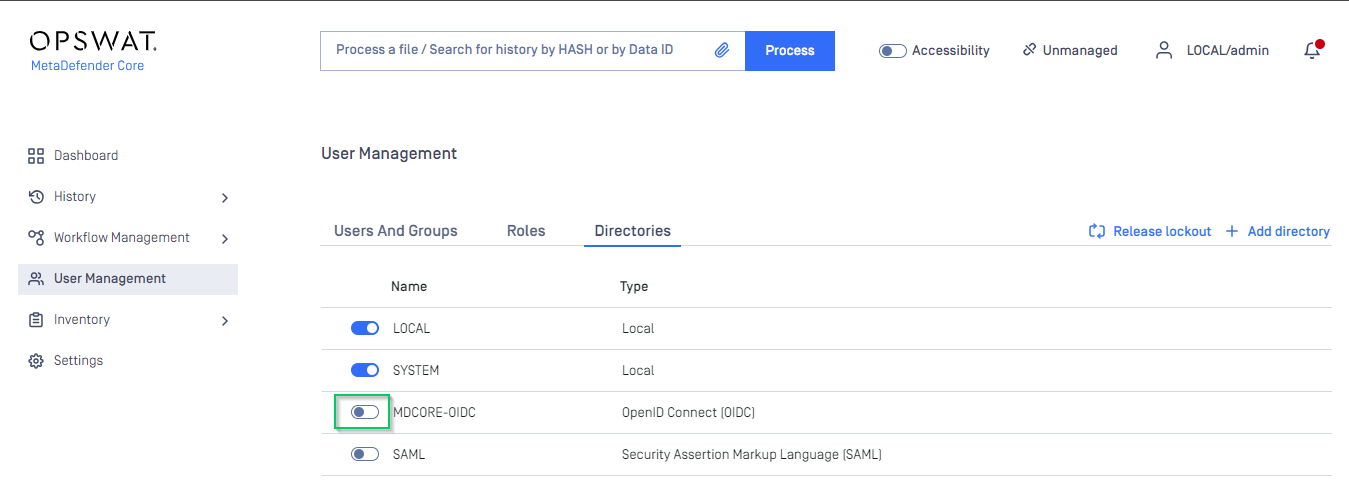
- In
User Managementscreen of MetaDefender Core, toggle MDCORE-OIDC directory. A dialog box appears to confirm the action. OnceEnableis clicked , all sessions expire immediately.
Test the integration
- At the home screen of MetaDefender Core, click
Login; the user is redirected to Microsoft Entra ID sign-in page.
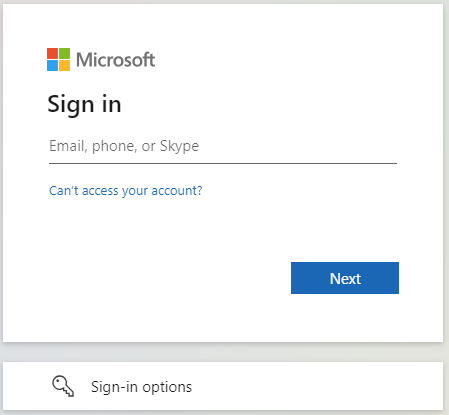
- Sign in using the account registered with Microsoft Entra ID.
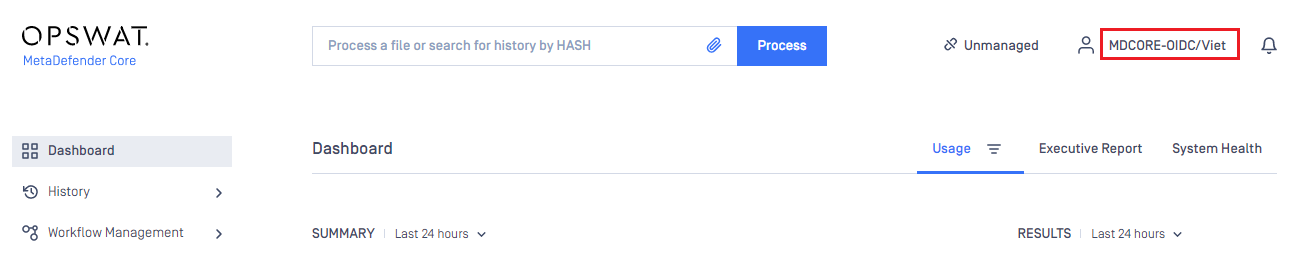
- If everything goes correctly, MetaDefender Core dashboard is displayed with user's identity shown in the top right corner.
- Otherwise, access backup login page at
<mdcore-host>#/public/backuploginfor trouble shooting.
Was this page helpful?