Set up PingFederate
Configurate PingFederate
Sign in to PingFederate console at
https://service-ip:service-port, whereservice-ipandservice-portrefer to the IP address and port of the machine hosting PingFederate server.In homepage, navigate to
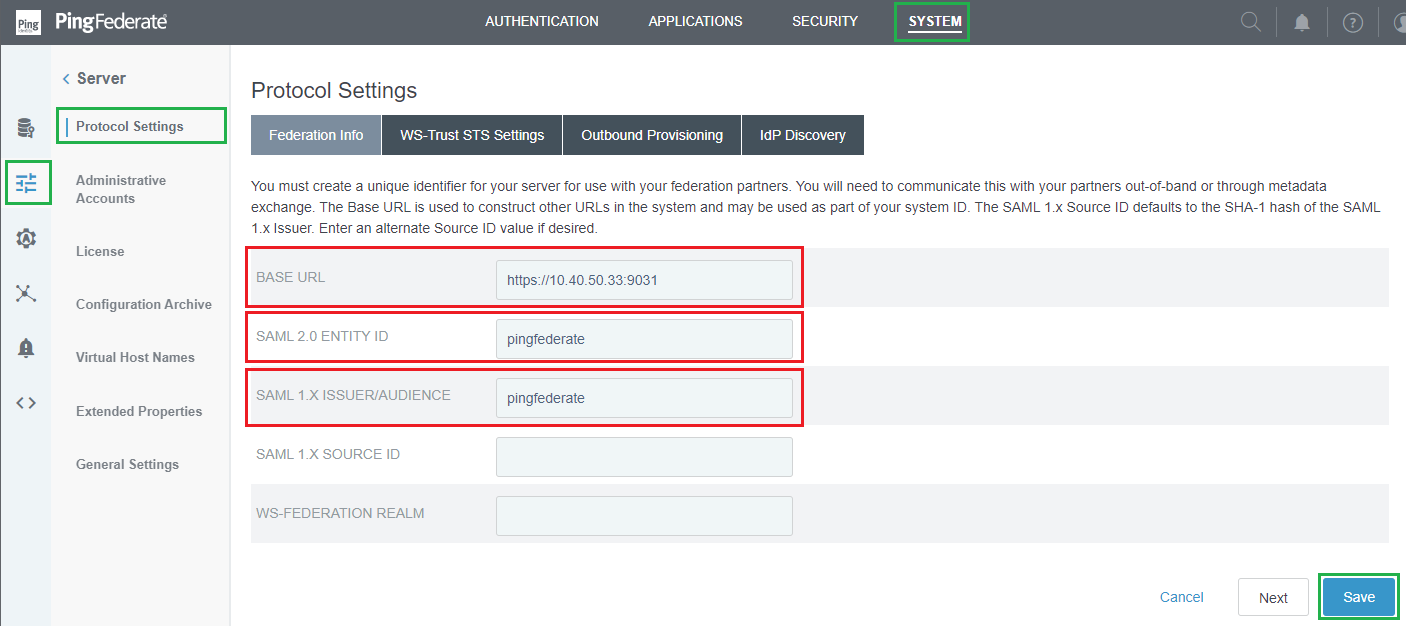
SYSTEMtab and selectServerfrom the left sidebar.Select
Protocol Settings, enterBase URL,SAML 2.0 ENTITY ID,andSAML 1.X ISSUER/AUDIENCE, then clickSaveto complete.
Set up simple Password Credential Validators
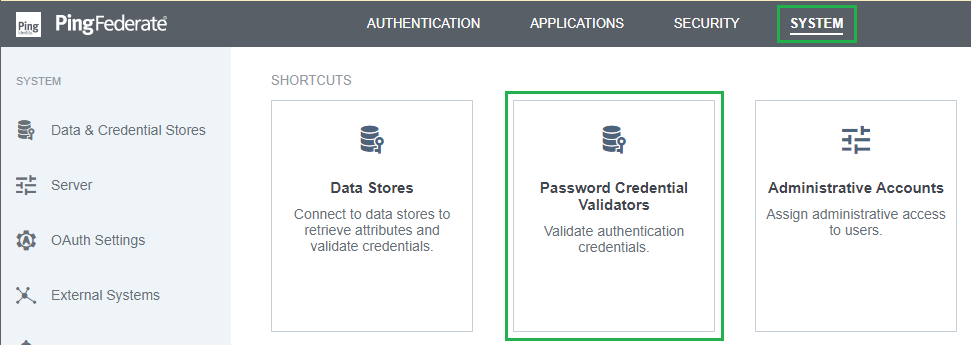
In homepage, navigate to
SYSTEMtab and click onPassword Credential Validators.
Click
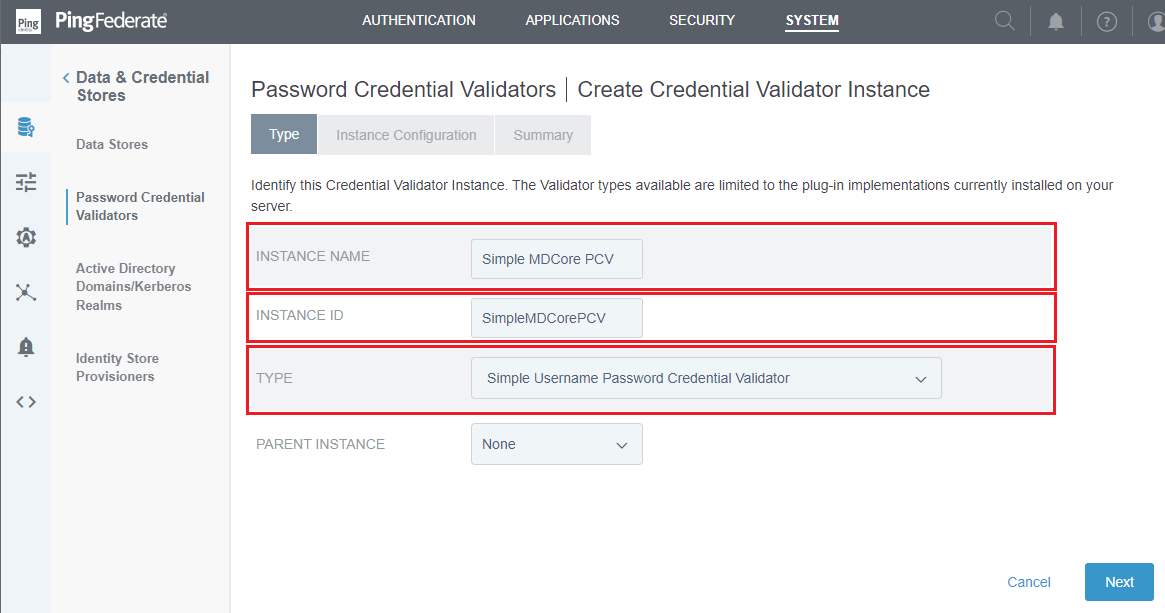
Create New Instance.Enter
INSTANCE NAMEandINSTANCE ID, selectSimple Username Password Credential ValidatorforTYPE, and clickNext.
In
Create Credential Validator Instancepage, clickAdd a new row to 'Users'.
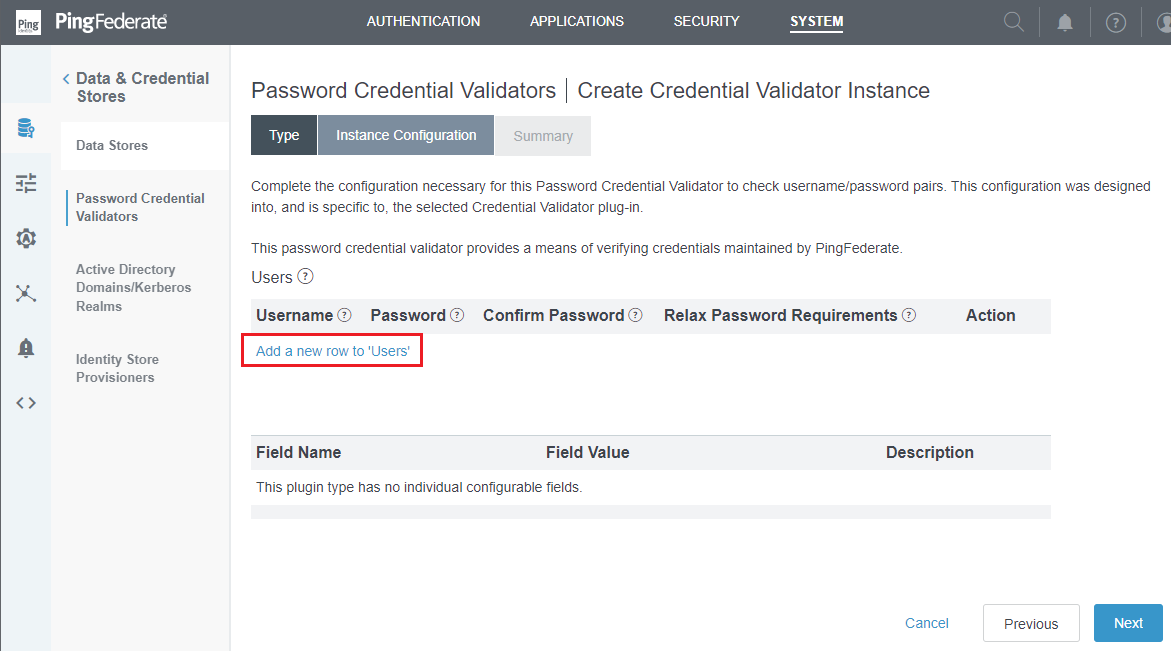
Enter
Username,Password, andConfirm Password, then clickUpdateandNext.
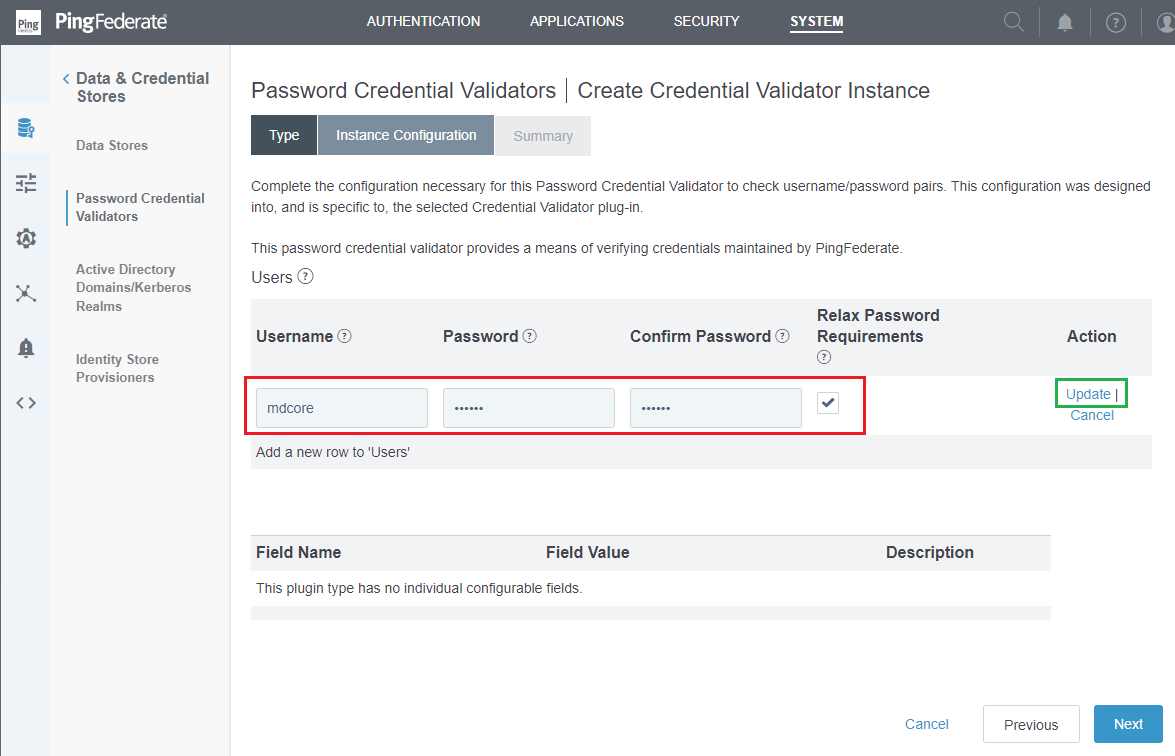
Review all selected options in
Summarytab, and clickSave.
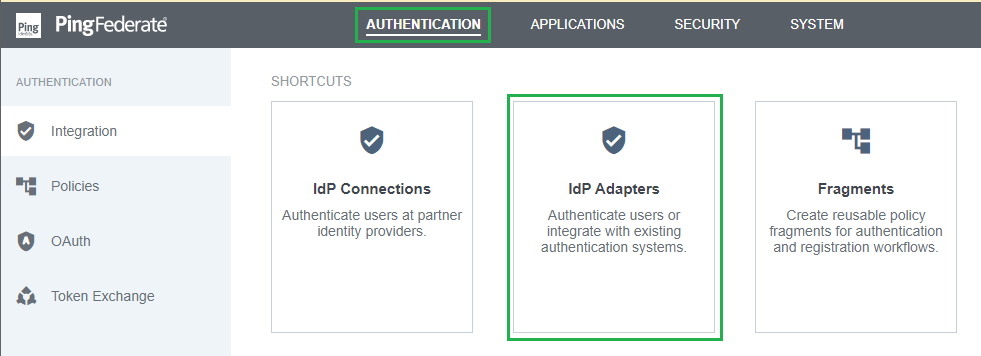
Set up a simple IdP Adapter
In homepage, navigate to
AUTHENTICATIONtab and click onIdP Adapters.
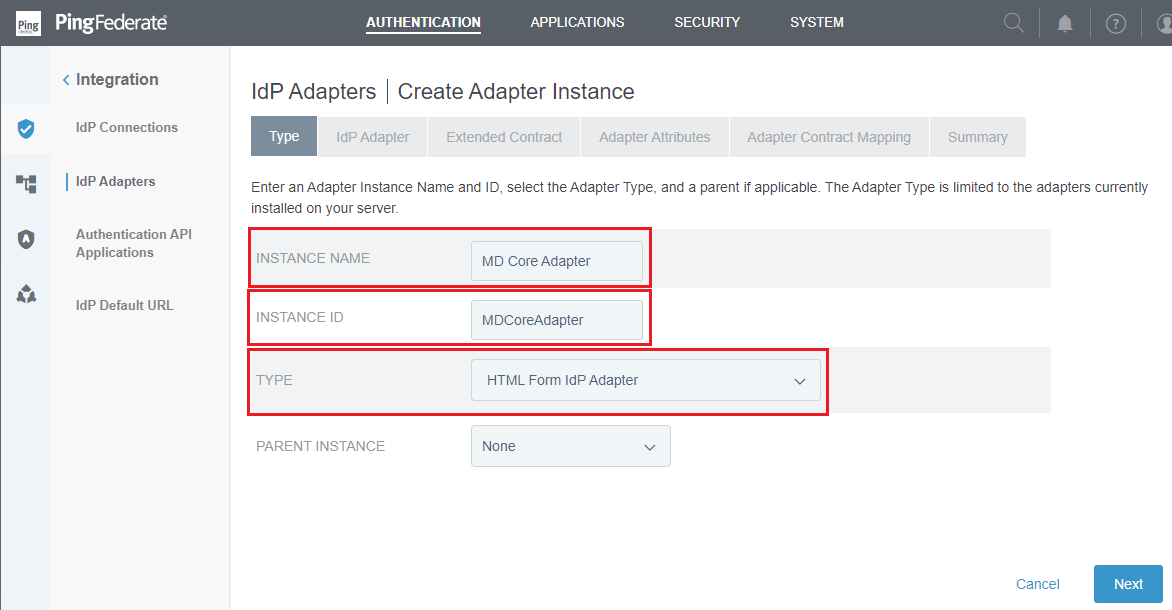
Click
Create New Instance.Enter
INSTANCE NAME,INSTANCE ID,and selectHTML Form IdP AdapterforTYPE. ClickNext.
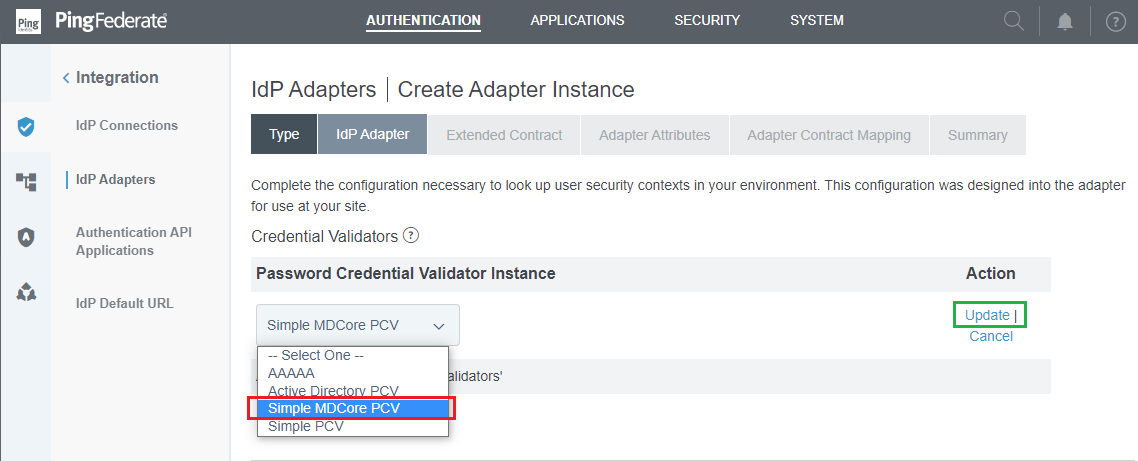
Click
Add a new row to 'Credential Validators'.

Select the Password Credential Validator created in the previous stage, that is "Simple MDCore PCV", then click
UpdateandNext.
Click
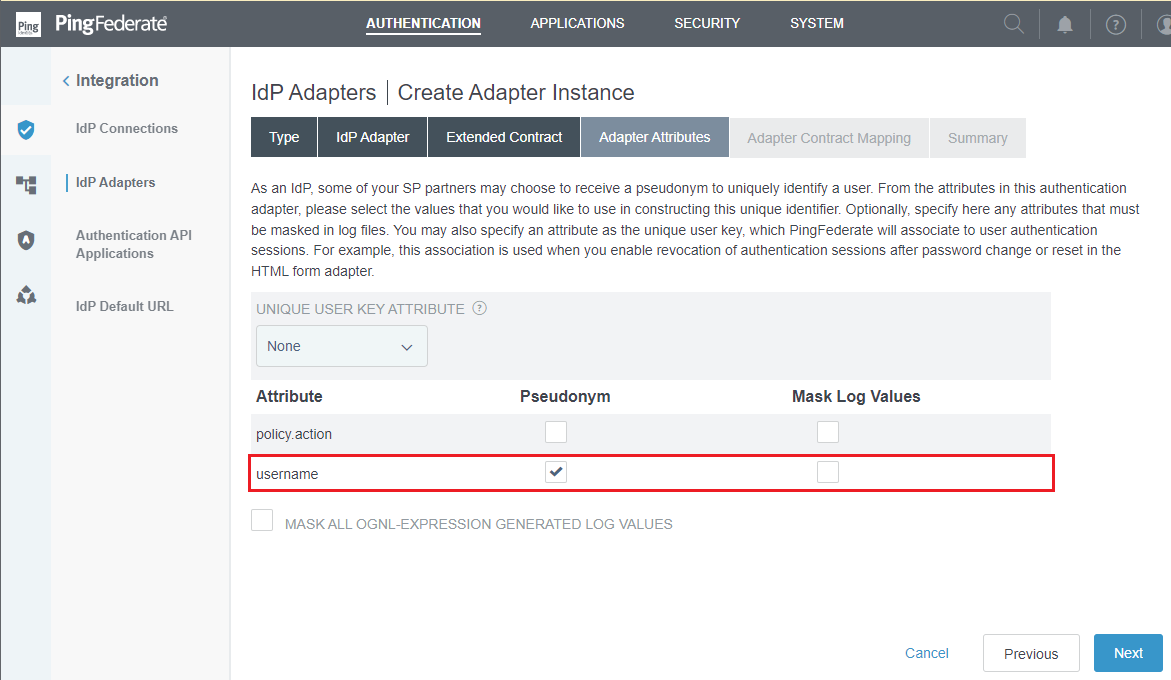
NextonExtended Contracttab.In
Adapter Attributestab, toggleusernameattribute underPseudonymcolumn, and clickNext.
Click
NextonAdapter Contract Mappingtab.Review all selected options in
Summarytab and clickSaveto complete.
Set up Signing, Decryption Keys and Certificates
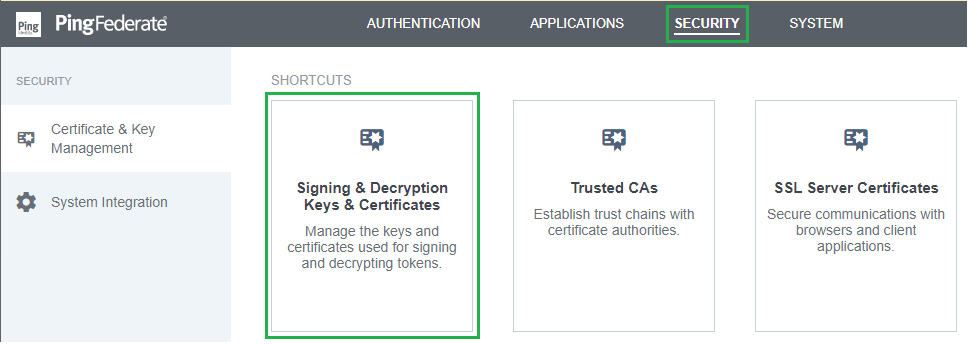
In homepage, navigate to
SECURITYtab and selectSigning & Decryption Keys & Certificates.
Click
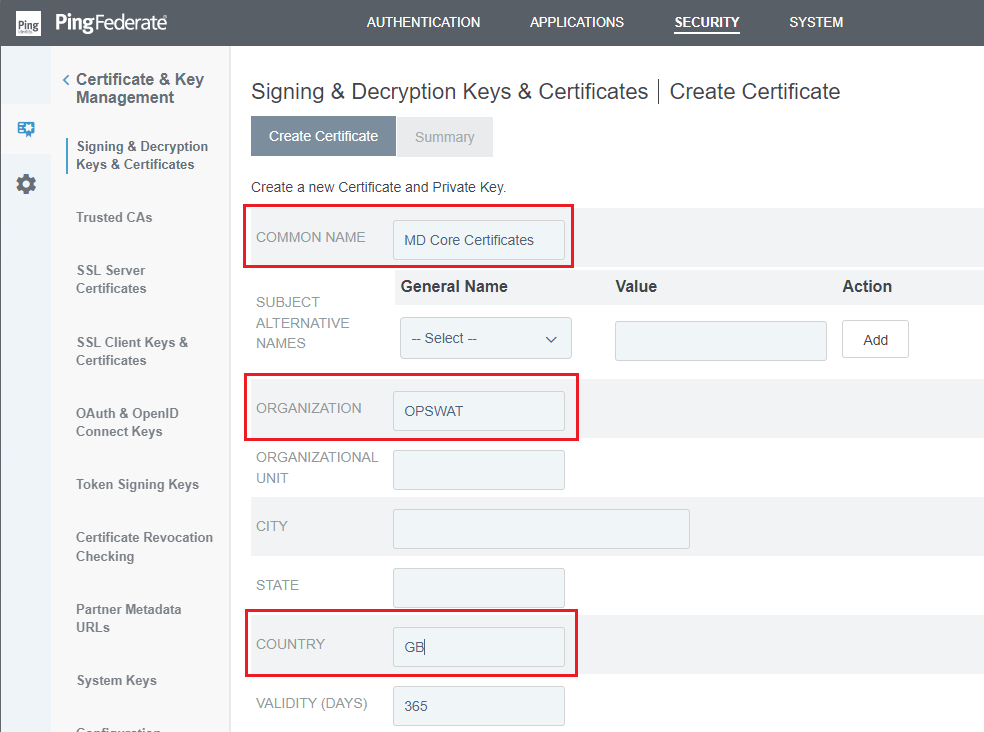
Create New.Enter
COMMON NAME,ORGANIZATION, andCOUNTRY, along with any other necessary information, then clickNext.
Review all selected options in
Summarytab and clickSaveto complete.
Set up Service Provider connections
In homepage, go to
APPLICATIONStab and chooseSP Connections.

Select
Create Connection.Select
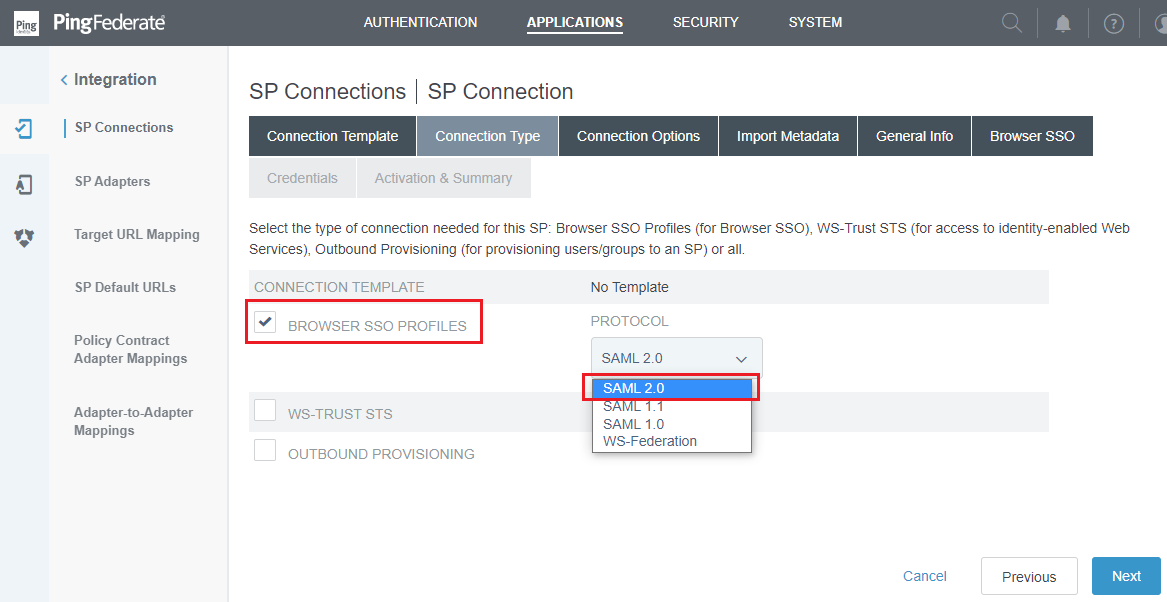
DO NOT USE A TEMPLATE FOR THIS CONNECTIONand then clickNext.In
Connection Typephase, toggleBROWSER SSO PROFILESand chooseSAML 2.0forPROTOCOL. PressNext.
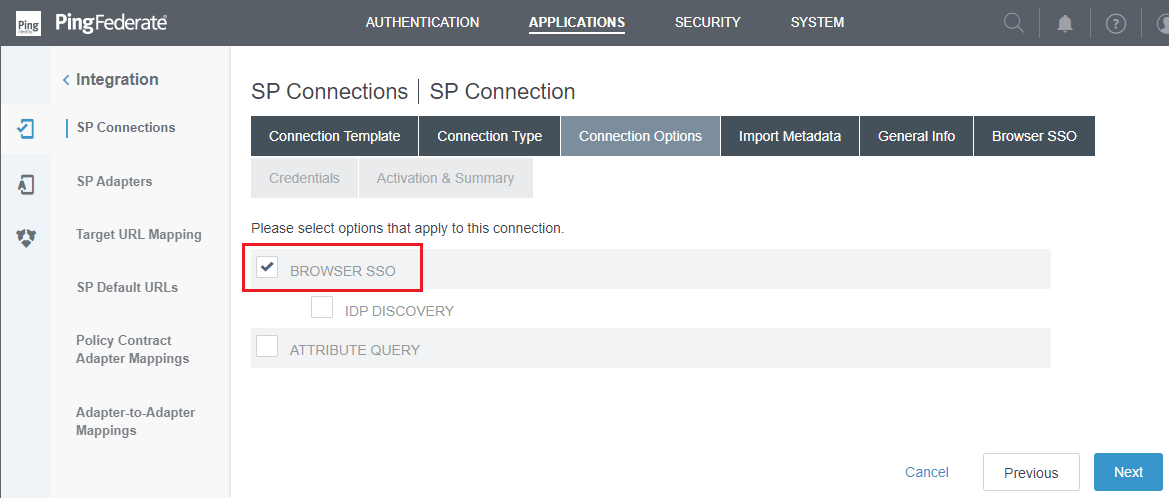
In
Connection Optionsphrase, selectBROWSER SSOand then clickNext.
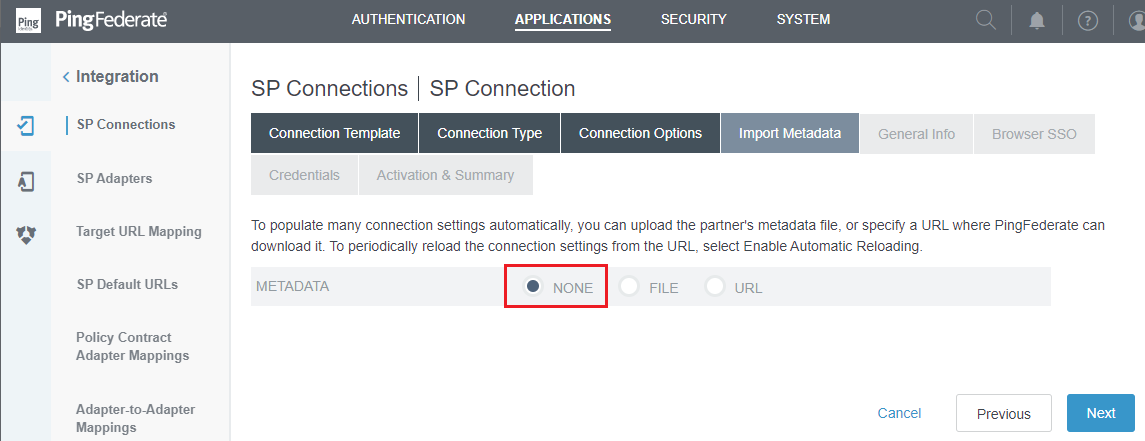
In
Import Metadataphase, selectNONEforMETADATAsubtab and pressNext.
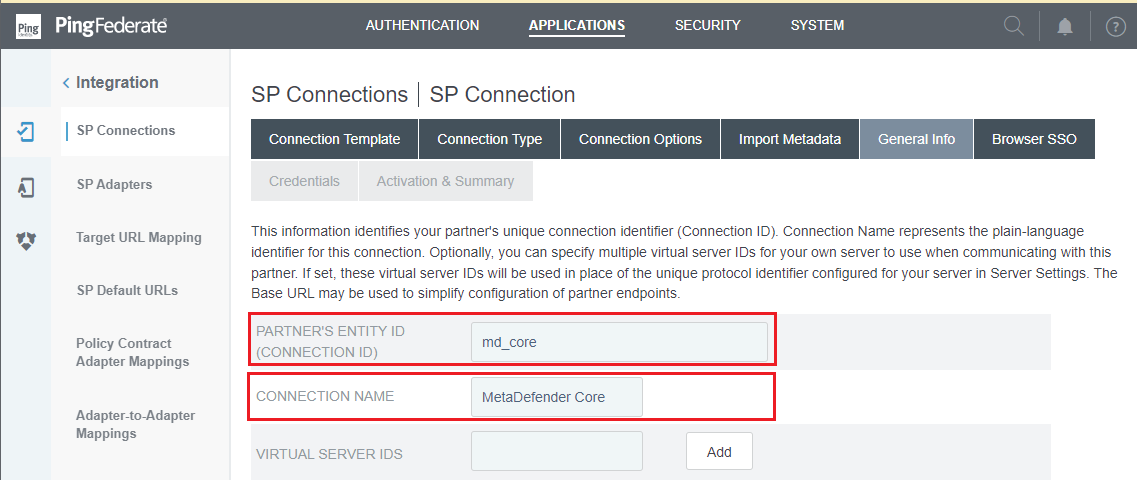
In
General Infosection, enterPARTNER'S ENTITY ID (CONNECTION ID)andCONNECTION NAME, then clickNext.
PARTNER'S ENTITY ID, 'md_core' in this case, will later be used to configure Custom entity ID in MetaDefender Core.
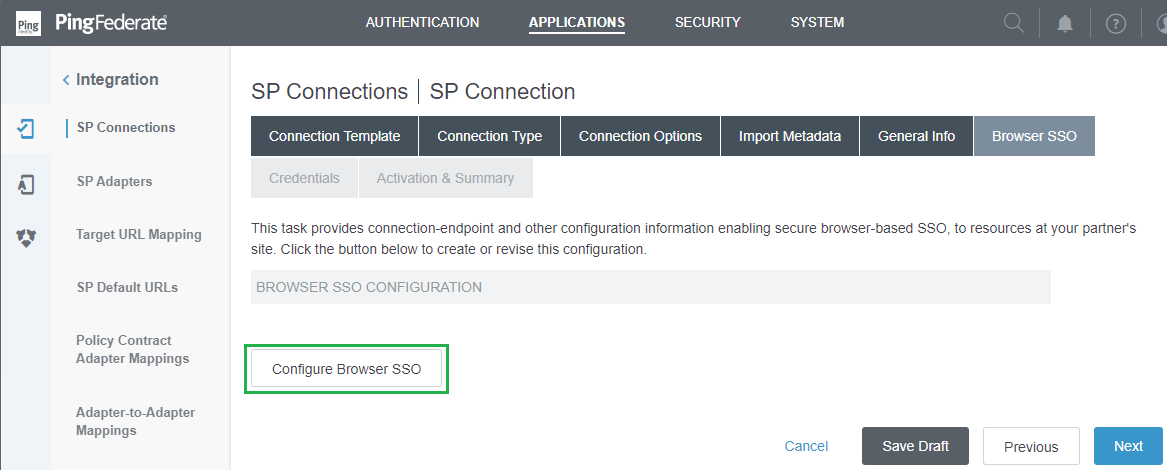
In
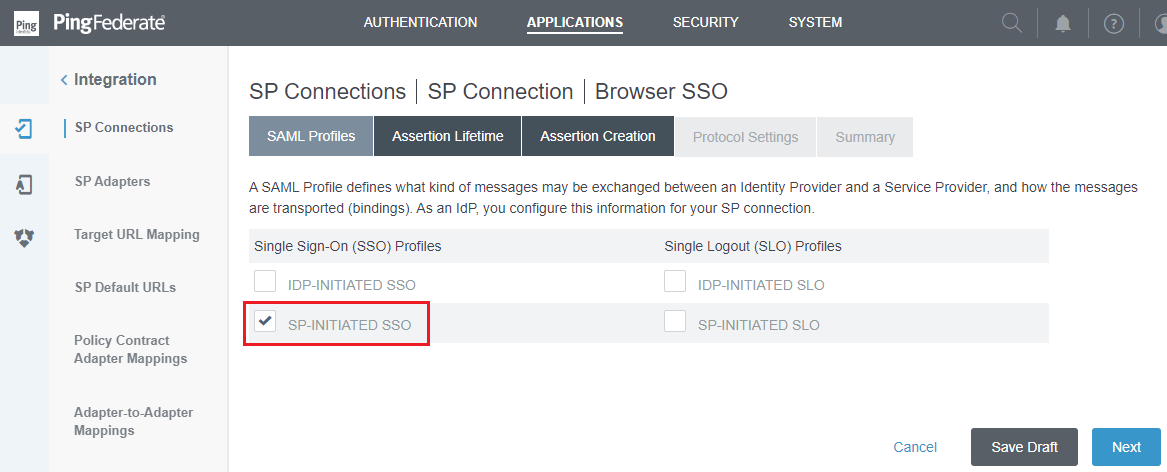
Browser SSOphrase, selectConfigure Browser SSO.
In
SAML Profilesphrase, checkSP-INITIATED SSOunderSingle Sign-On (SSO) Profilescolumn. PressNextonce you are finished.
Select
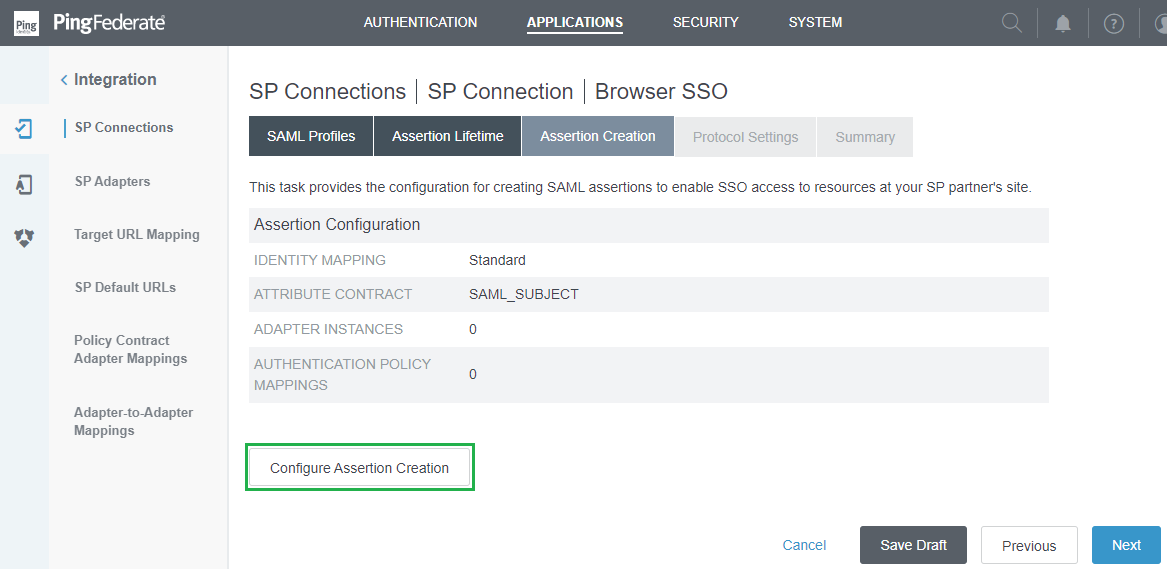
NextinAssertion Lifetimephase.In
Assertion Creationphase, selectConfigure Assertion Creation.
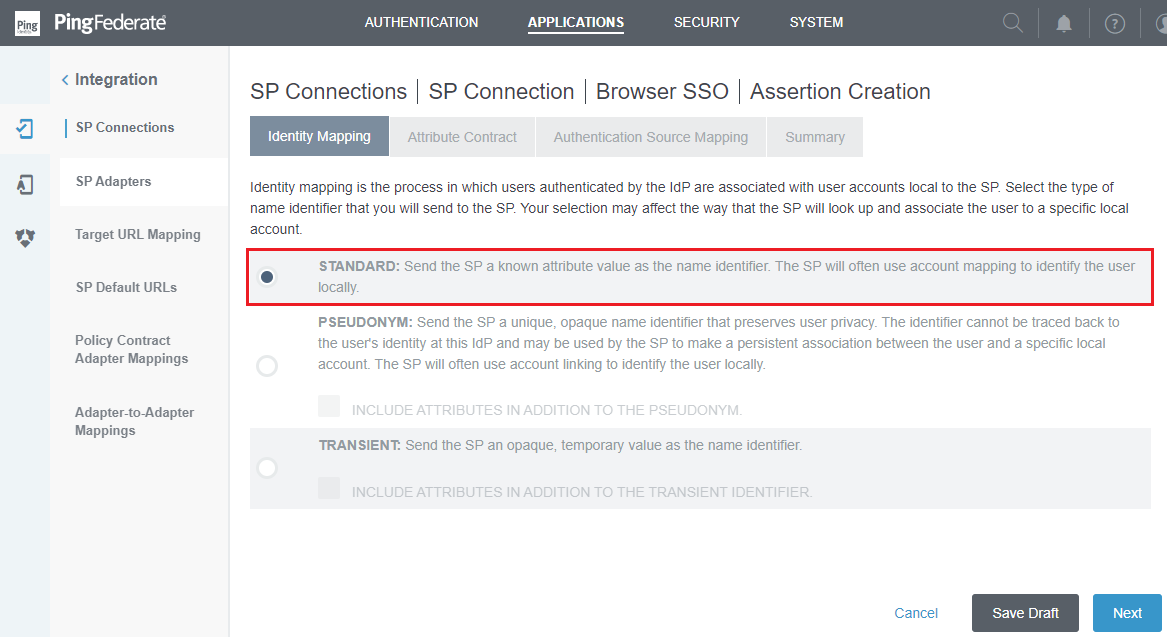
In
Identity Mappingphrase, chooseSTANDARDand pressNext.
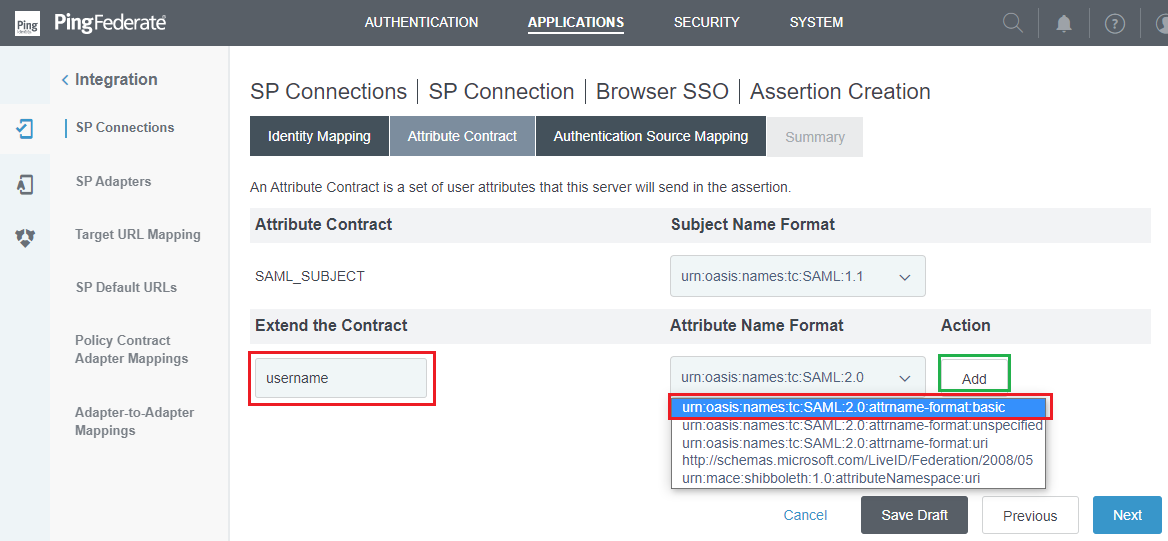
In
Attribute Contractphase, navigate toExtend the Contract, complete the contract needed by MetaDefender Core, using 'username' as a sample. Select the basic format forAttribute Name Format, then clickAddfollowed byNext.
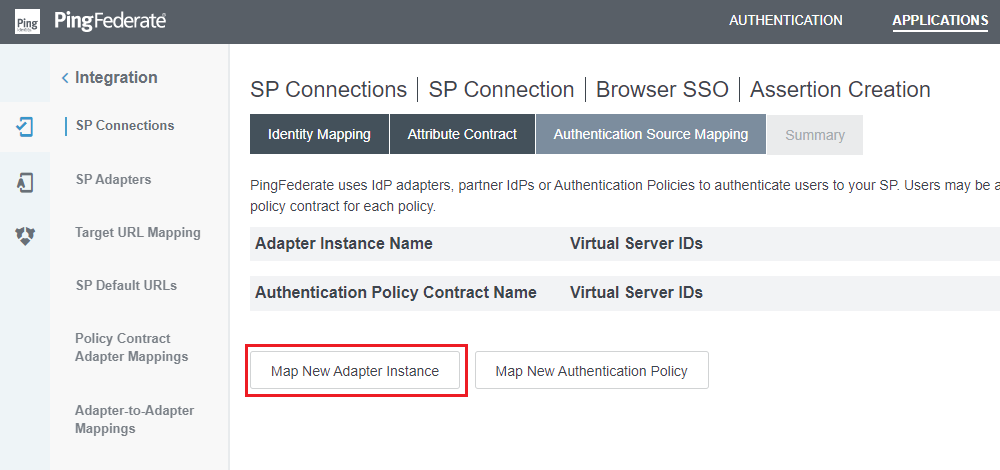
In
Authentication Source Mappingphase, selectMap New Adapter Instance.
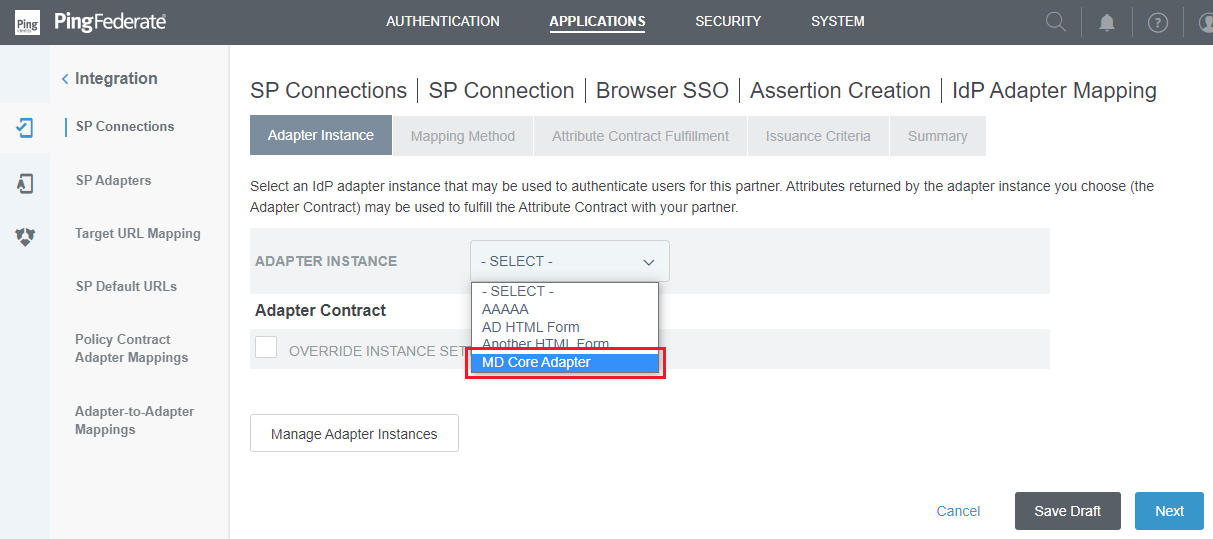
In
Adapter Instancephase, choose the appropriate IdP Adapter forADAPTER INSTANCEand then clickNext.
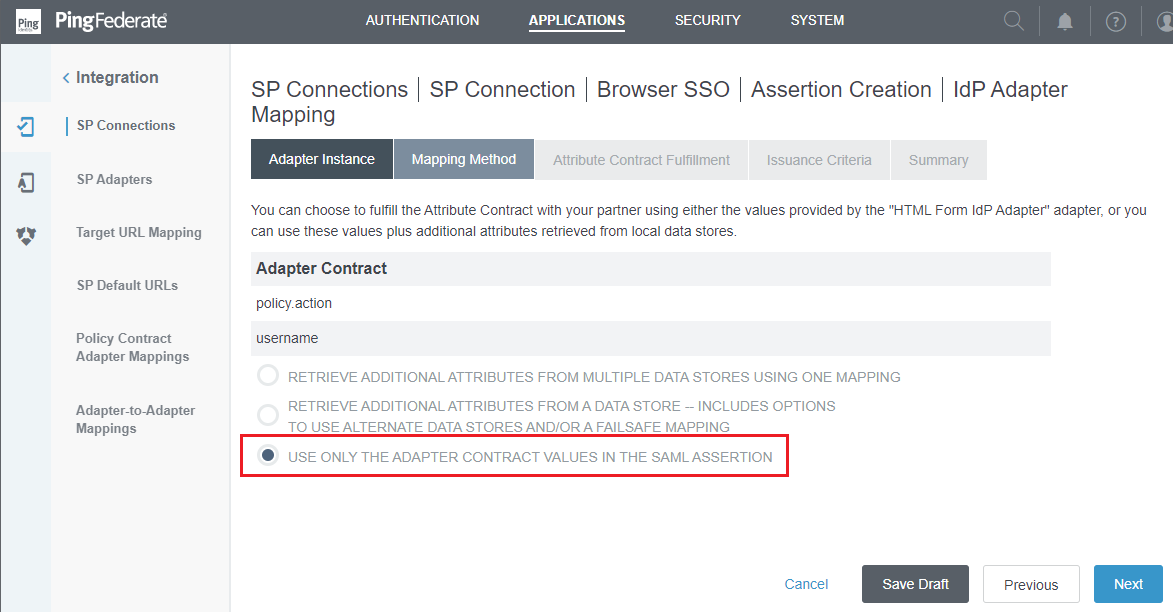
In
Mapping Methodphase, selectUSE ONLY THE ADAPTER CONTRACT VALUES IN THE SAML ASSERTION, then pressNext.
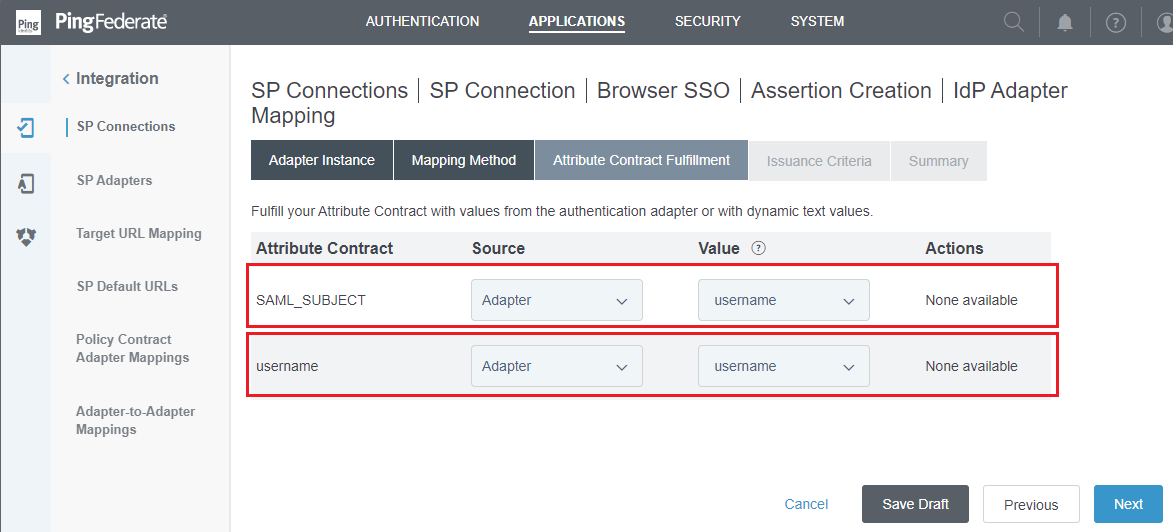
In
Attribute Contract Fulfillmentphase, choose 'Adapter' forSourcecolumn and 'username' forValuecolumn, then clickNext.
Press
NextonIssuance Criteriaphrase.Examine all chosen options in
Summary, then selectDoneandNext.Return to
Assertion Creationphrase, examine all chosen options inSummary, and then clickDoneandNext.In
Protocol Settingsphase, selectConfigure Protocol Settings.
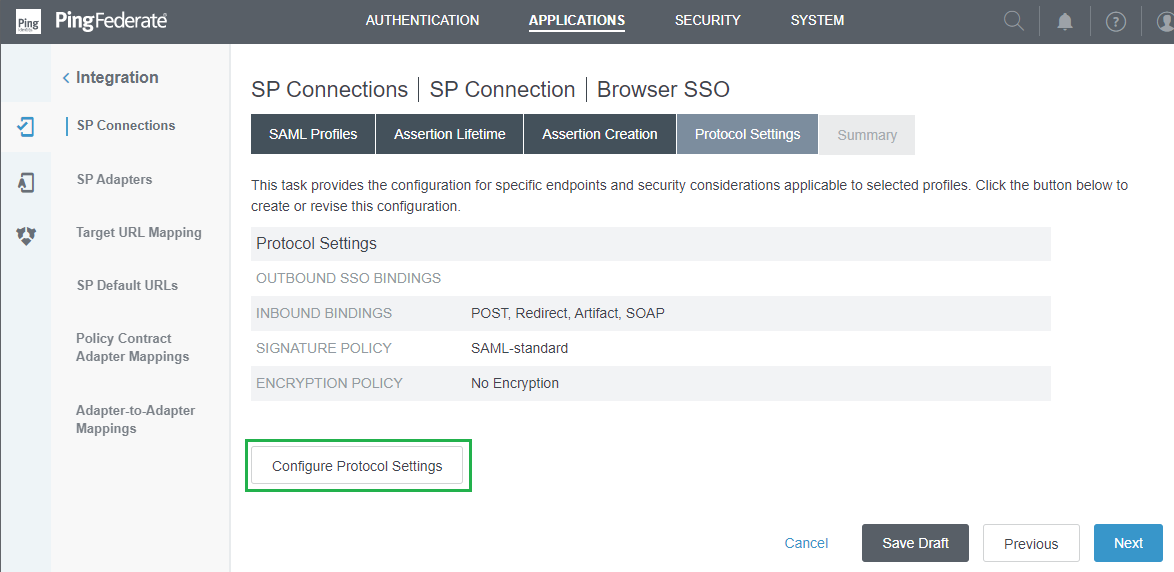
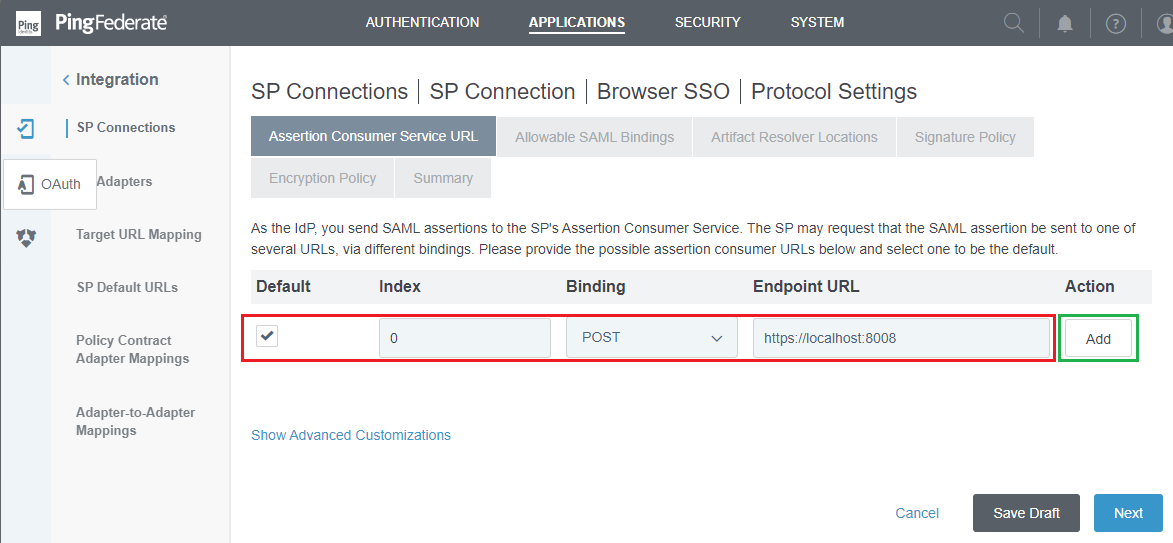
Check the box under
Defaultcolumn, enter 0 inIndexcolumn, select POST forBinding, and input the address of the machine hosting MetaDefender Core inEndpoint URLcolumn, then clickAddandNext.
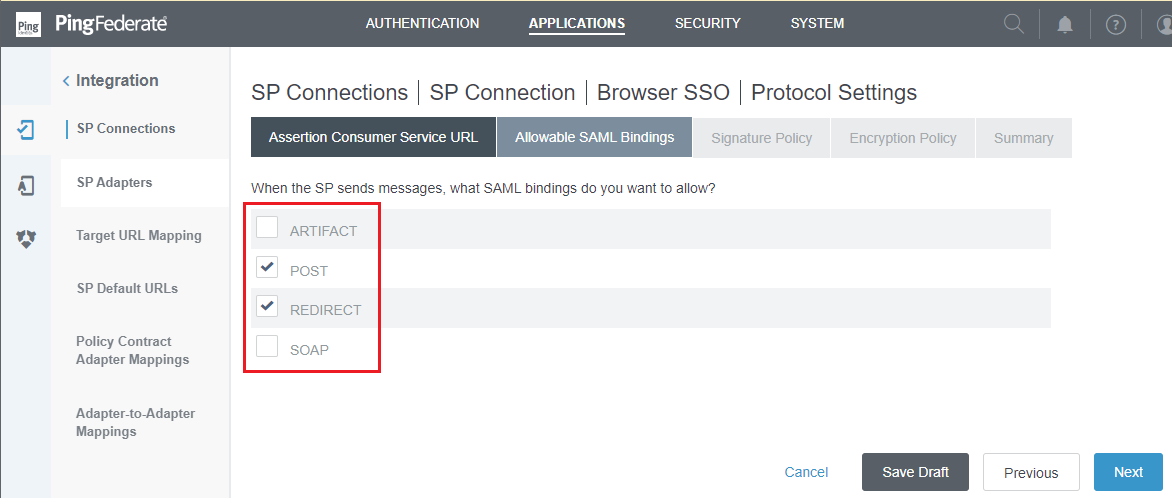
In
Acceptable SAML Bindingsphase, select only 'POST' and 'REDIRECT' choices, then clickNext.
Press
Nexton the phrases forSignature PolicyandEncryption Policy.Examine all chosen options in
Summaryand clickDone.Select
NextonBrowser SSO.Examine all chosen options in
Summary, then selectDoneandNext.In
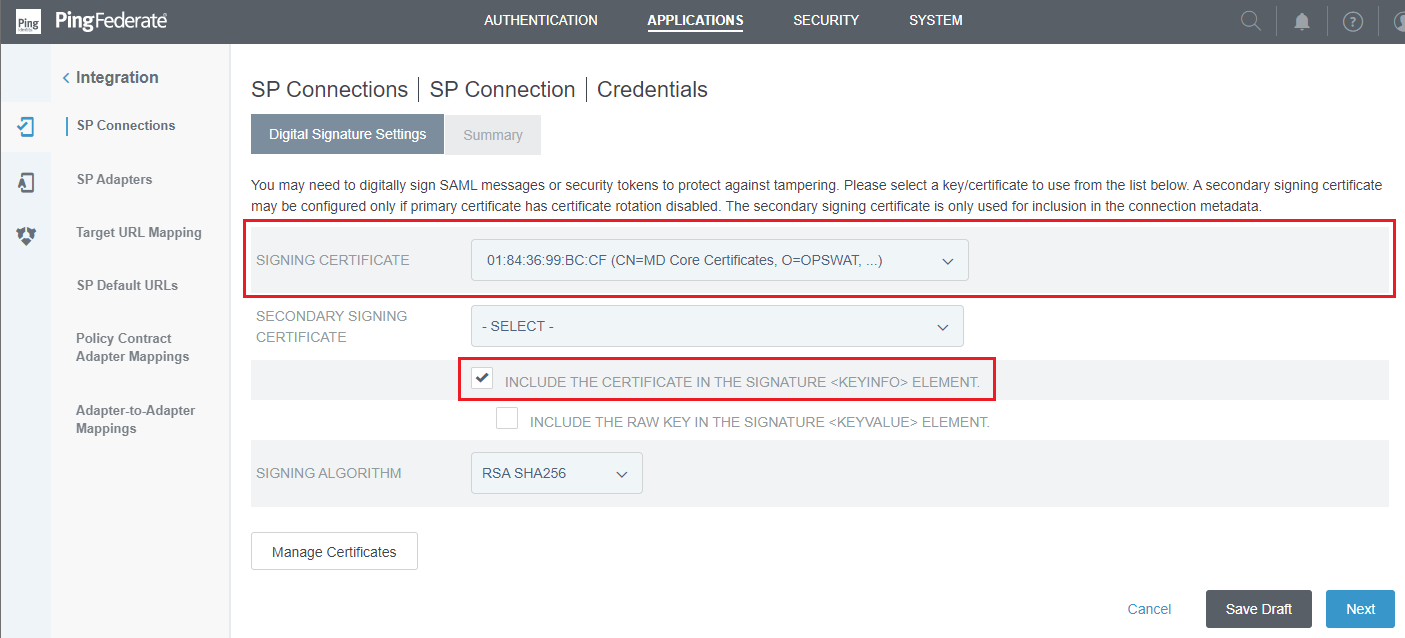
Credentialsphase, selectConfigure Credentials.

In
Digital Signature Settingsphase, go toSIGNING CERTIFICATE, choose the signing signature configured in the earlier step, activate the optionINCLUDE THE CERTIFICATE IN THE SIGNATURE <KEYINFO> ELEMENT, and then clickNext.
Examine all chosen options in
Summaryphrase, then pressDone.Return to
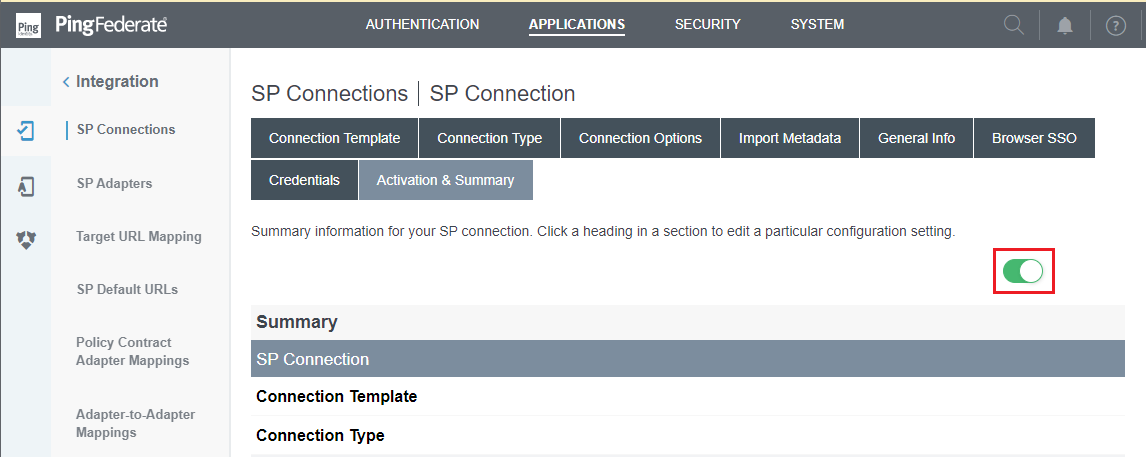
Credentialstab and selectNext.Examine all chosen options in
Activation & Summaryphrase, verify that the connection is active, and then clickSaveto finish.
Export Identity Provider metadata
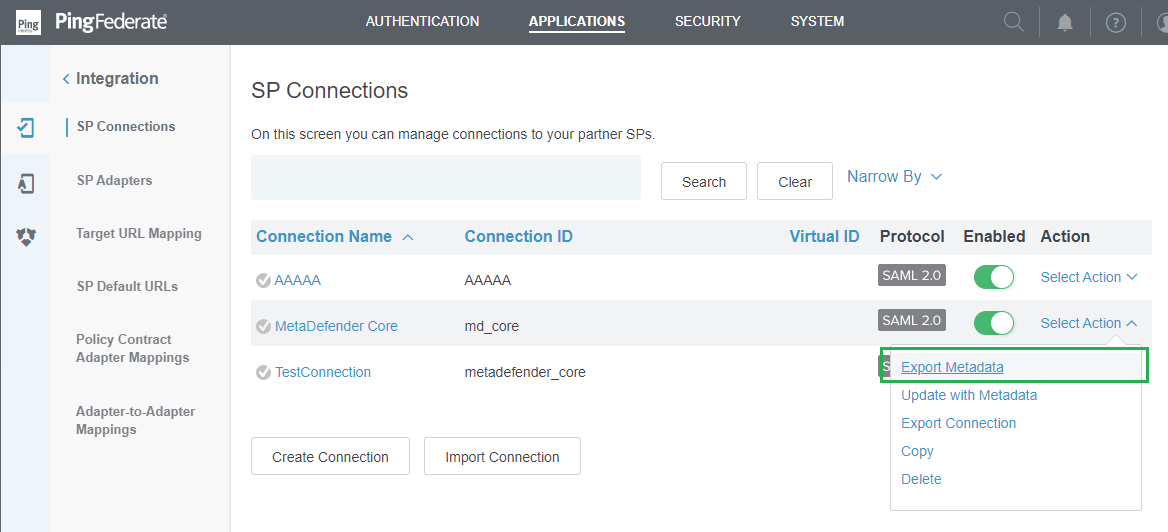
Go to
APPLICATIONSand click onSP Connectionson the left sidebar.Go to the connection established in the prior step, click
Select Actionlink located inActioncolumn, and chooseExport Metadata.
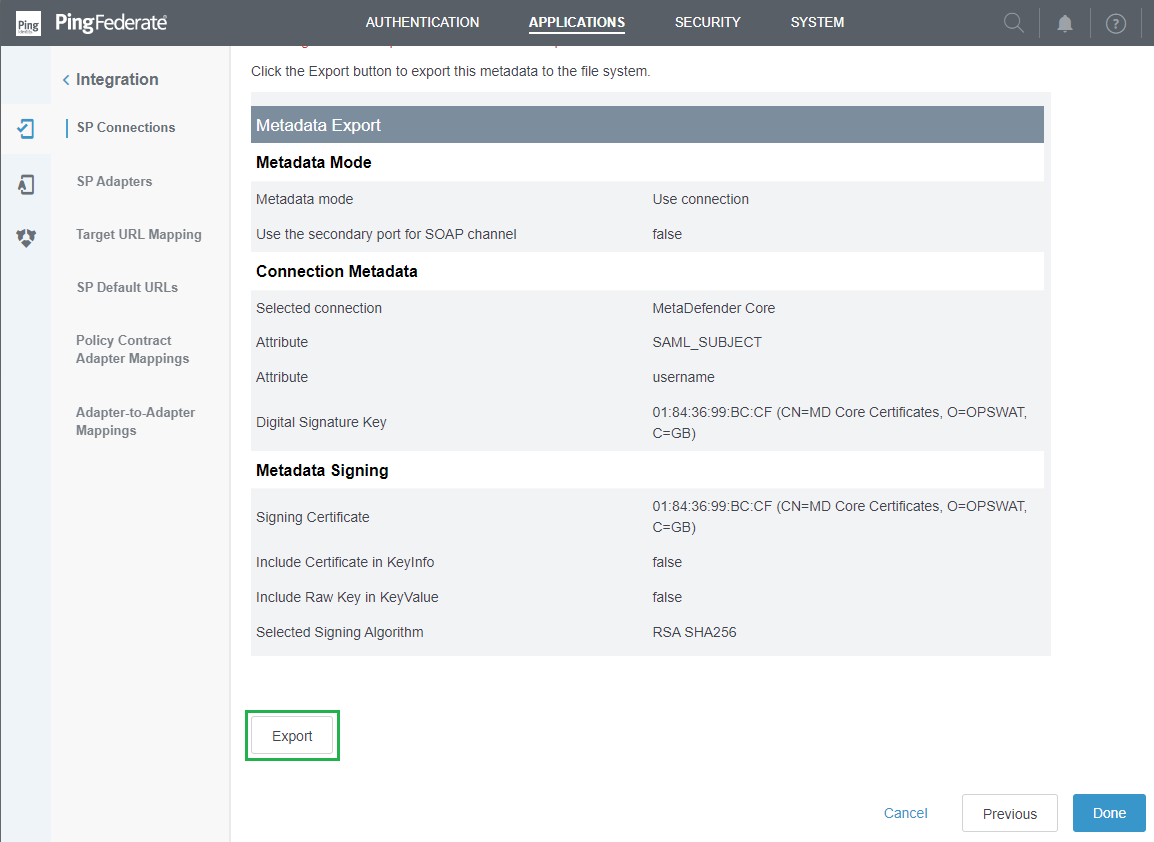
Choose the prior signing certificate, then press
Next.

Examine all chosen options in
Summaryand selectExport.
Save the exported file as 'metadata.xml', and then press
Done.
The 'metadata.xml' file will be used in the upcoming phase to set up Identity Provider in MetaDefender Core.
Configure SAML in MetaDefender Core
Sign in to MetaDefender Core.
In the dashboard, click on
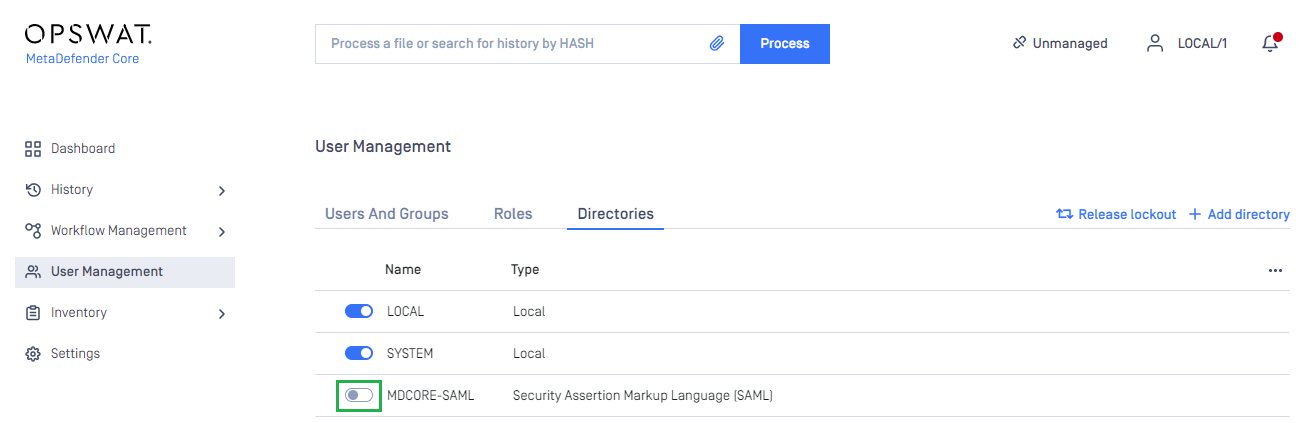
User Managementin the left sidebar.On
User Managementpage, selectDirectoriestab and clickAdd Directoryin the top right corner.

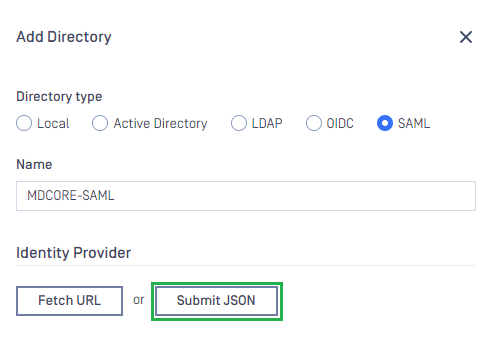
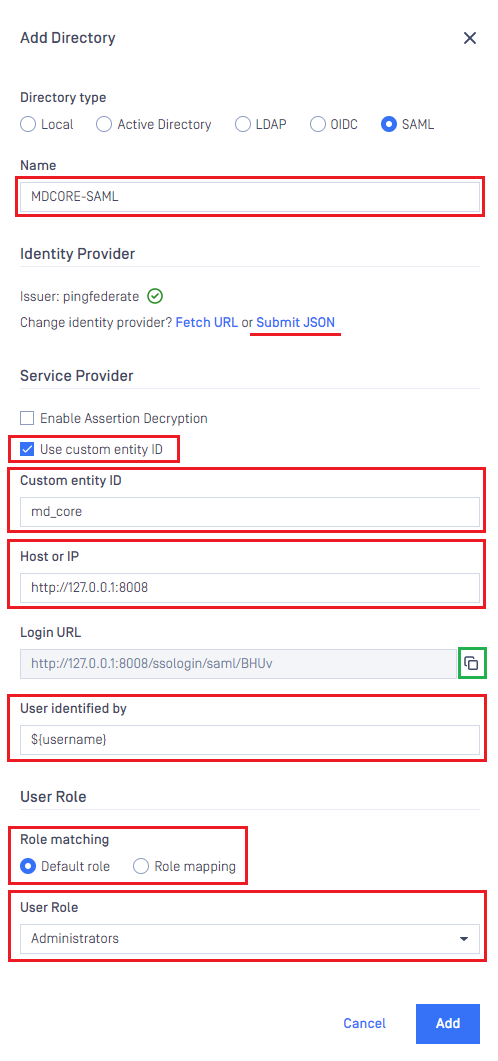
In
Add Directorypage, select OIDC asDirectory type, and enter a name for the new directory, such as MDCORE-SAML.Click
Submit JSONand upload the 'metadata.xml' file exported in the earlier stage.
Navigate to
Service Provider, toggleUse custom entity IDand fill inCustom entity IDwith the partner's entity ID configured in PingFederate. That is 'md_core' for this case.Enter value or
Host or IP, clickCopyand save it in redirect_url.
redirect_url will serve to establish the value for Endpoint URL in the final configuration phase in PingFederate.
Establish
User Identified byusing ${username}.Choose
Default roleand select the appropriate role for the logged-in user.Press
Addwhen finished.
In
User Managementpage, toggle the new directory, MDCORE-SAML, in this instance. A confirmation dialog box will pop up to verify the action. After clickingEnable, all sessions will end instantly.
Complete configuration in PingFederate
Access the PingFederate management console.
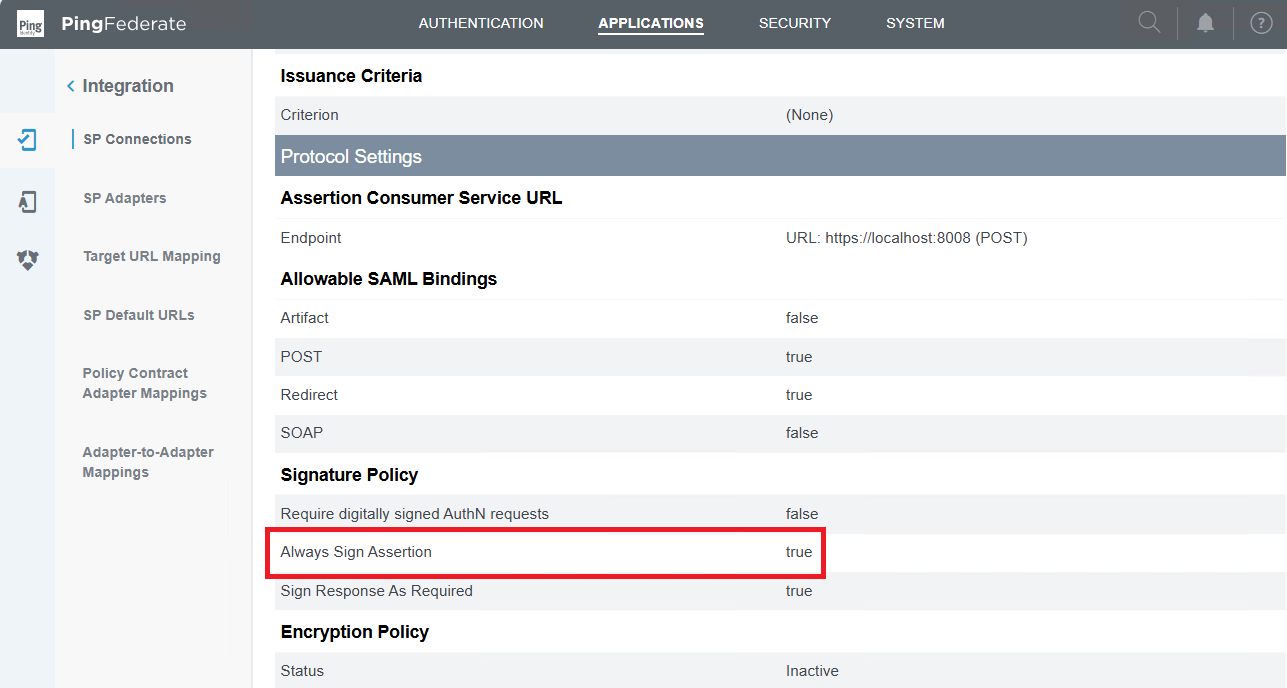
Go to
APPLICATIONand chooseSP Connectionsfrom the left sidebar.In
Signature Policy, setAlways Sign Assertionto 'true'.
Go to
Assertion Consumer Service URLand select the link next toEndpoint.
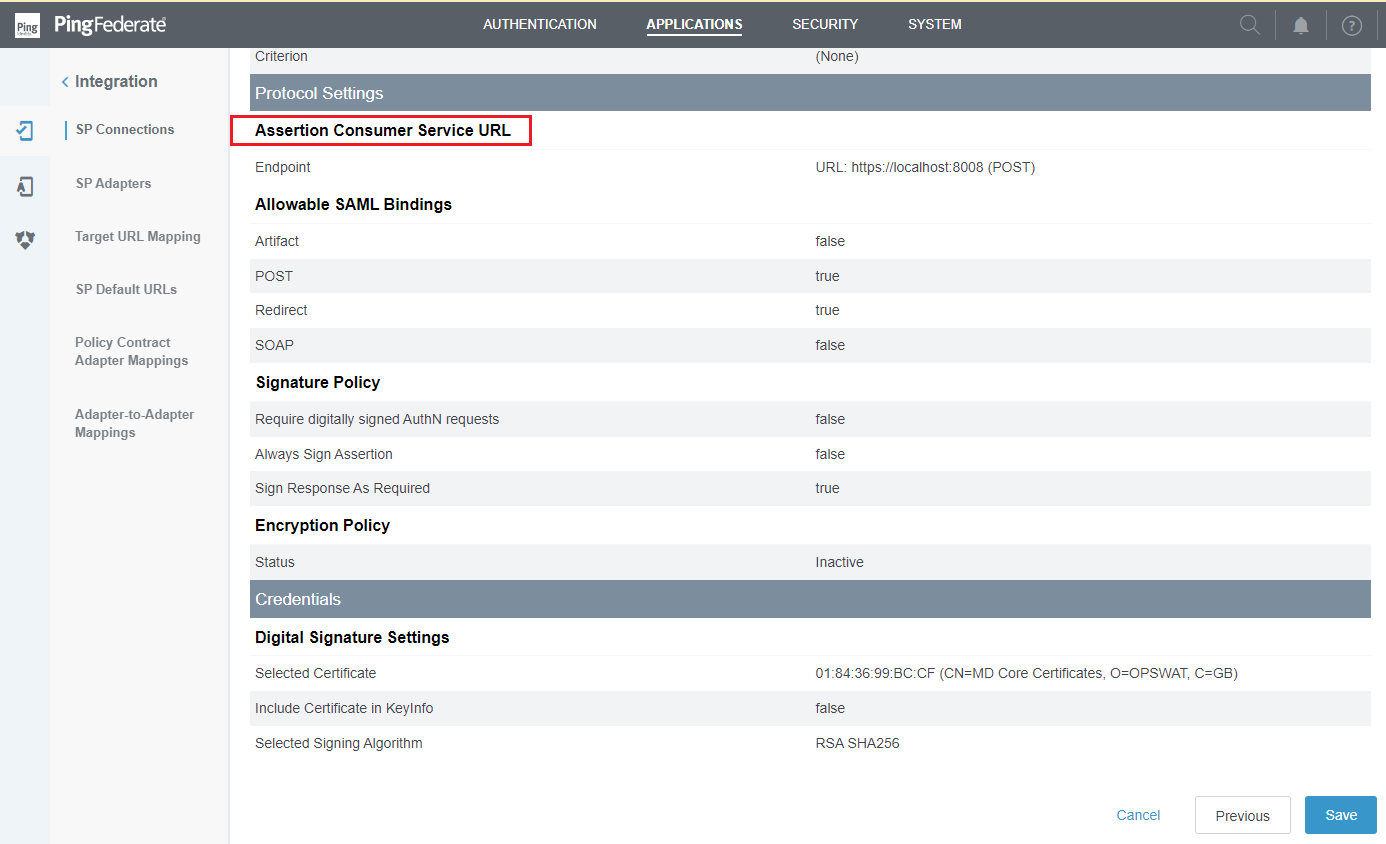
Click
Edit.
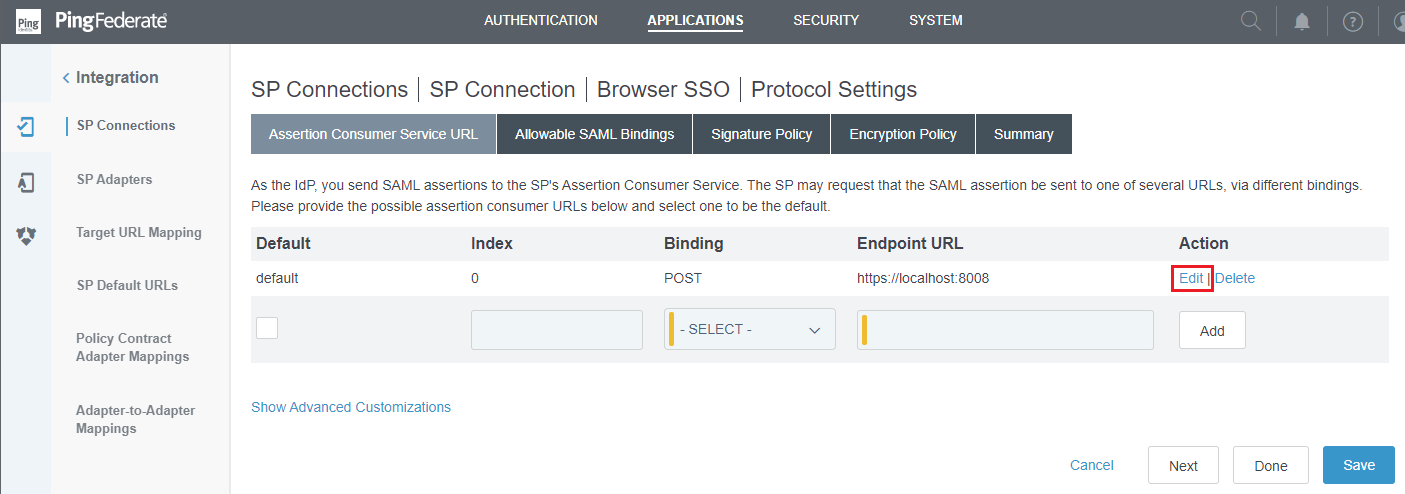
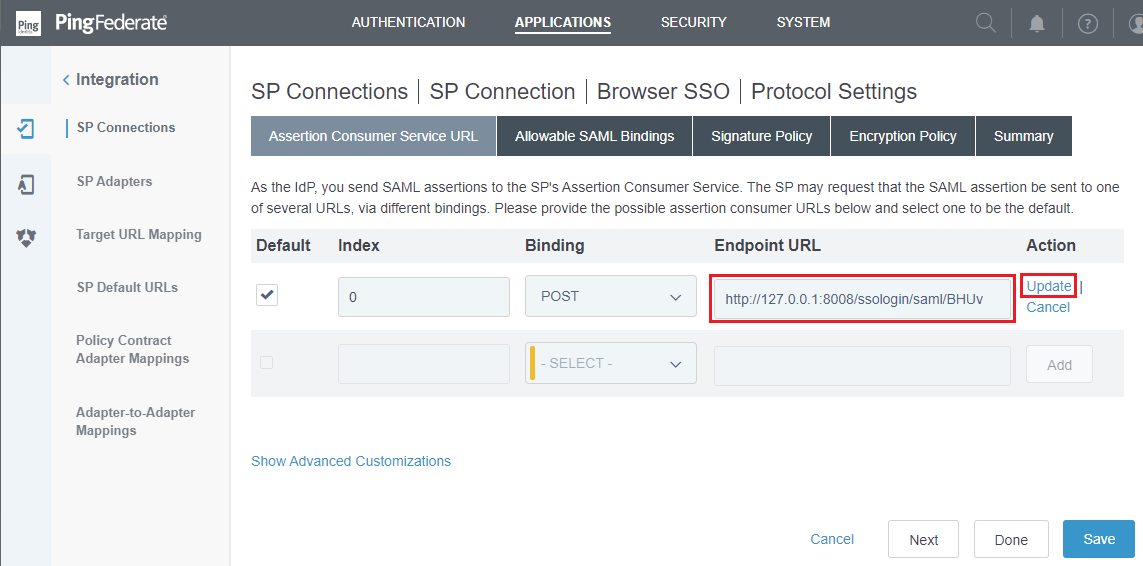
Modify the URL located below
Endpoint URLto the value found in redirect_url, then clickUpdateandSave.
Test the integration
On the home screen of MetaDefender Core, click
Login; the user is redirected to PingFederate Sign-on page.
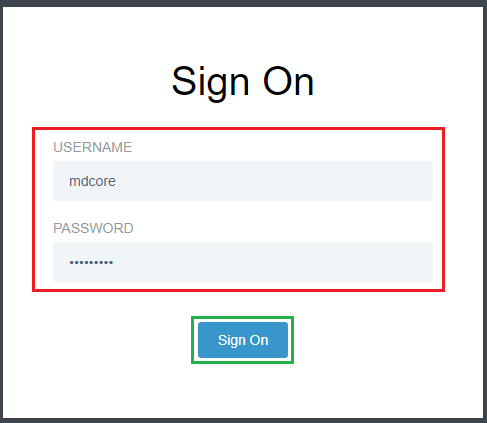
Sign in using the account registered with PingFederate.
If everything goes well, MetaDefender Core dashboard is displayed with the user identity in the top right corner.

Otherwise, access backup login page at
<mdcore-host>#/public/backuploginfor trouble shooting.