Create a realm on Keycloak
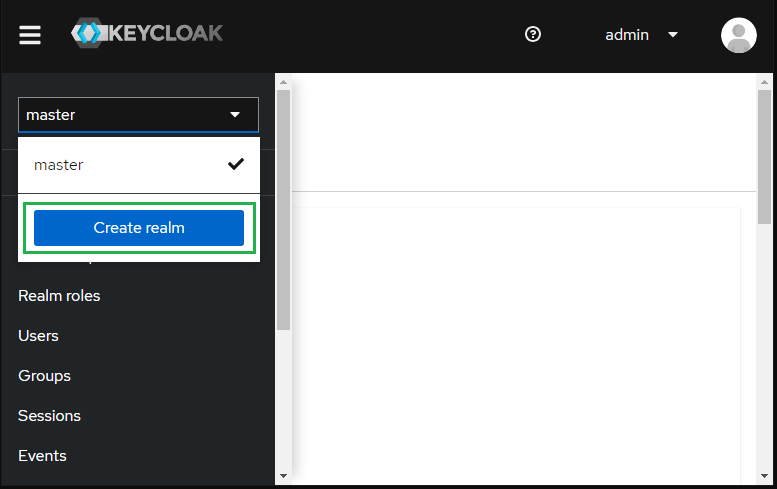
Sign in to Administrator Console, drop the list in the top left corner, and hit
Create realm.
Keycloak initially includes a single realm master which is used for managing Keycloak only and not for any applications.
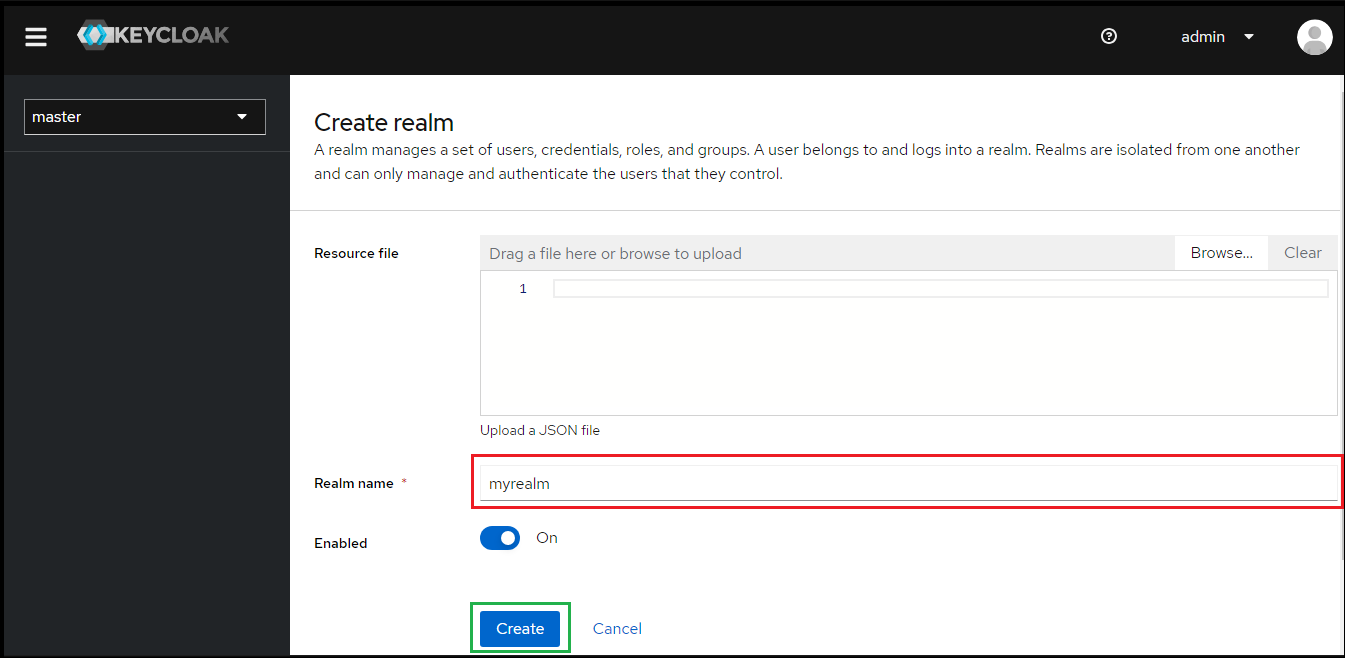
Enter
Realm namee.g. myrealm and clickCreate.
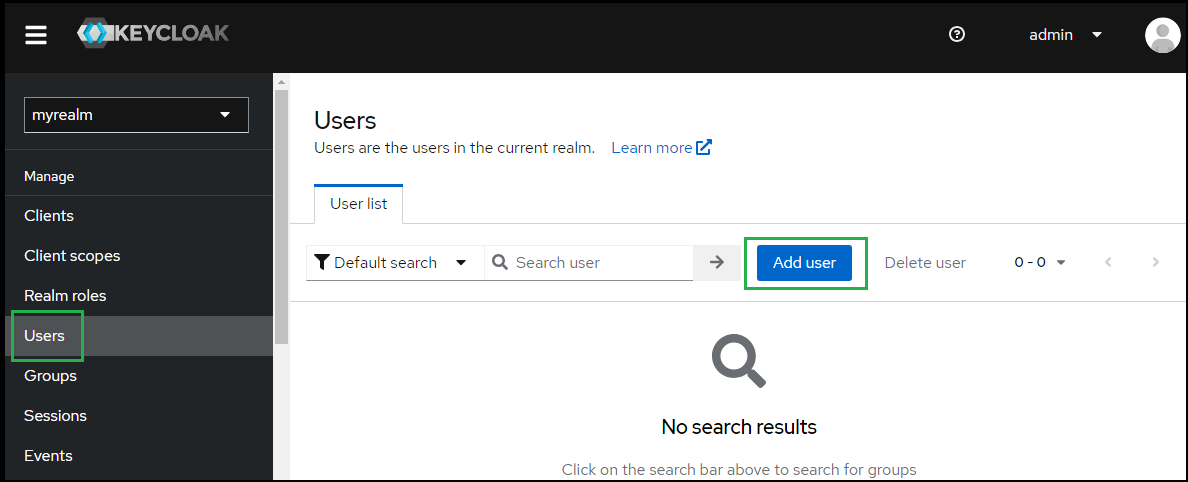
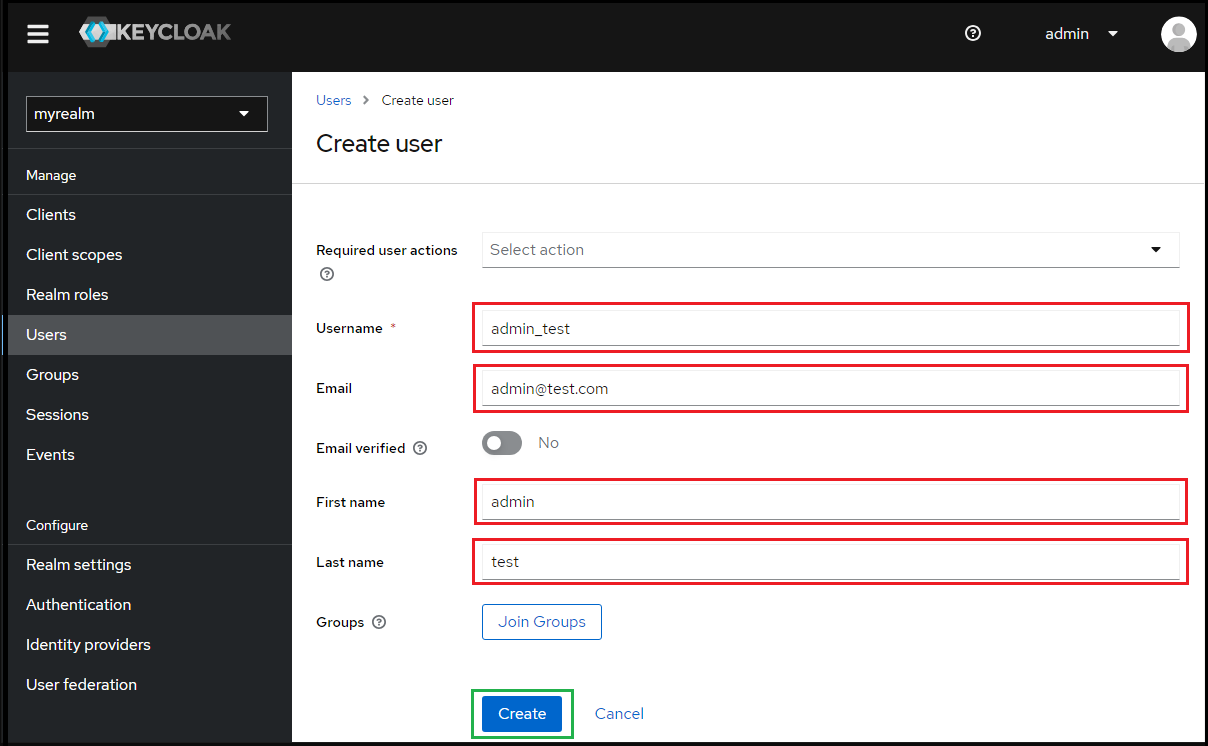
Select
Usersin the left sidebar and clickAdd user.
Enter values for
Username,Email,First nameandLast name; then clickCreate.
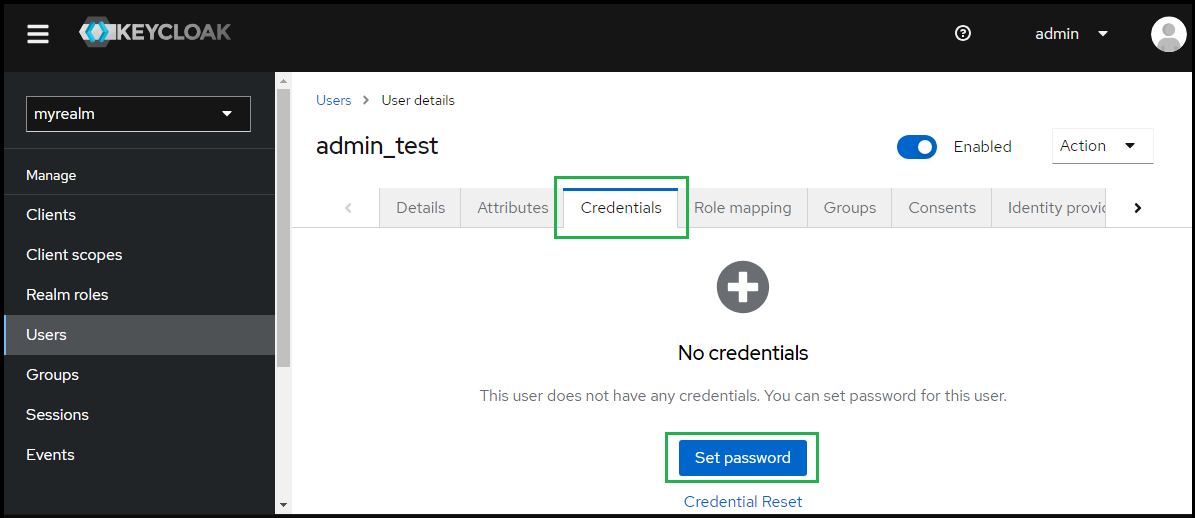
Under
User details, selectCredentialstab and clickSet passwordto create a password for the user created in the previous step.
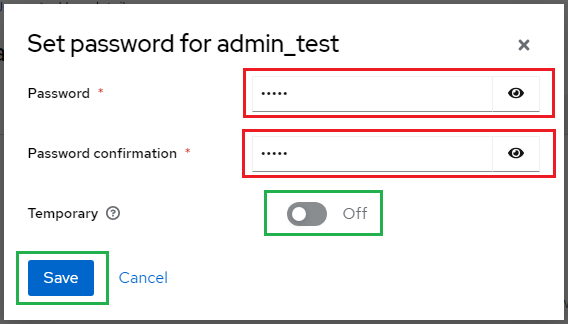
Enter the password and toggle
Temporaryto Off, then clickSave.
Create SAML directory on MetaDefender Core
Sign in to MetaDefender Core management console.
Under
Dashboard, clickUser Managementin the left sidebar.Under
User Management, selectDirectoriestab and hitAdd directoryin the top right.

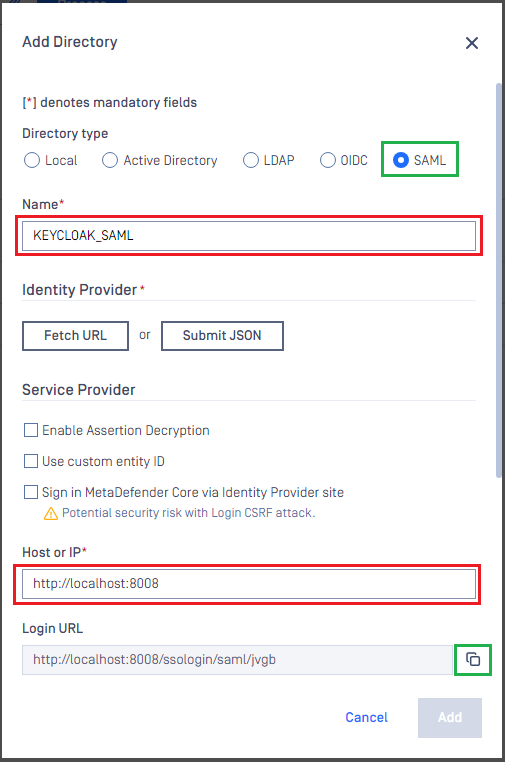
On
Add Directorypage, selectSAMLinDirectory Type.Fill
Nameof the new directory, such as KEYCLOAK_SAML_._Under
Service Provider, fill inHost or IPwhere MetaDefender Core is being hosted, using https://localhost:8008 as an example.Copy the value of
Login URL.
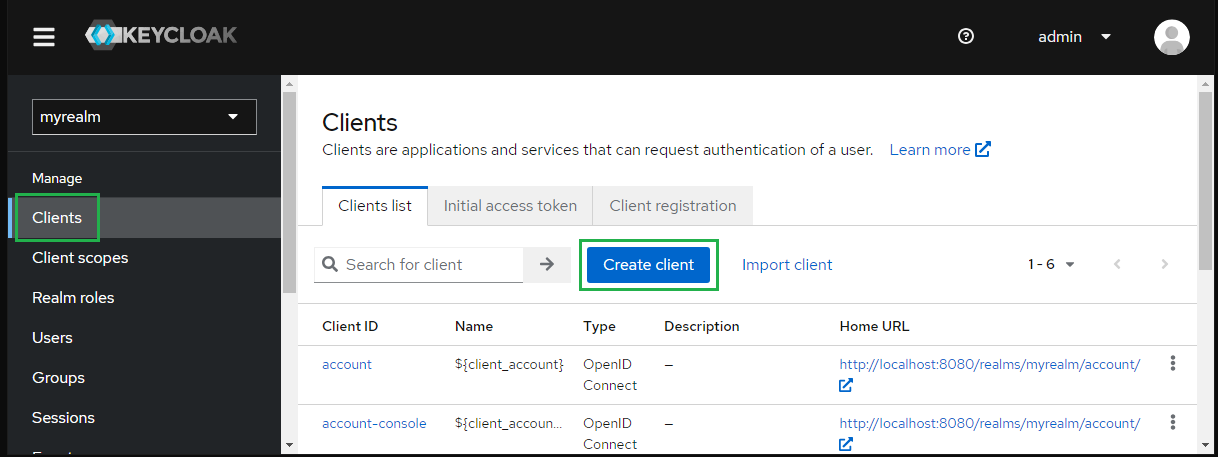
Create Keycloak application
On screen
myrealm, selectClientsin the sidebar and clickCreate client.
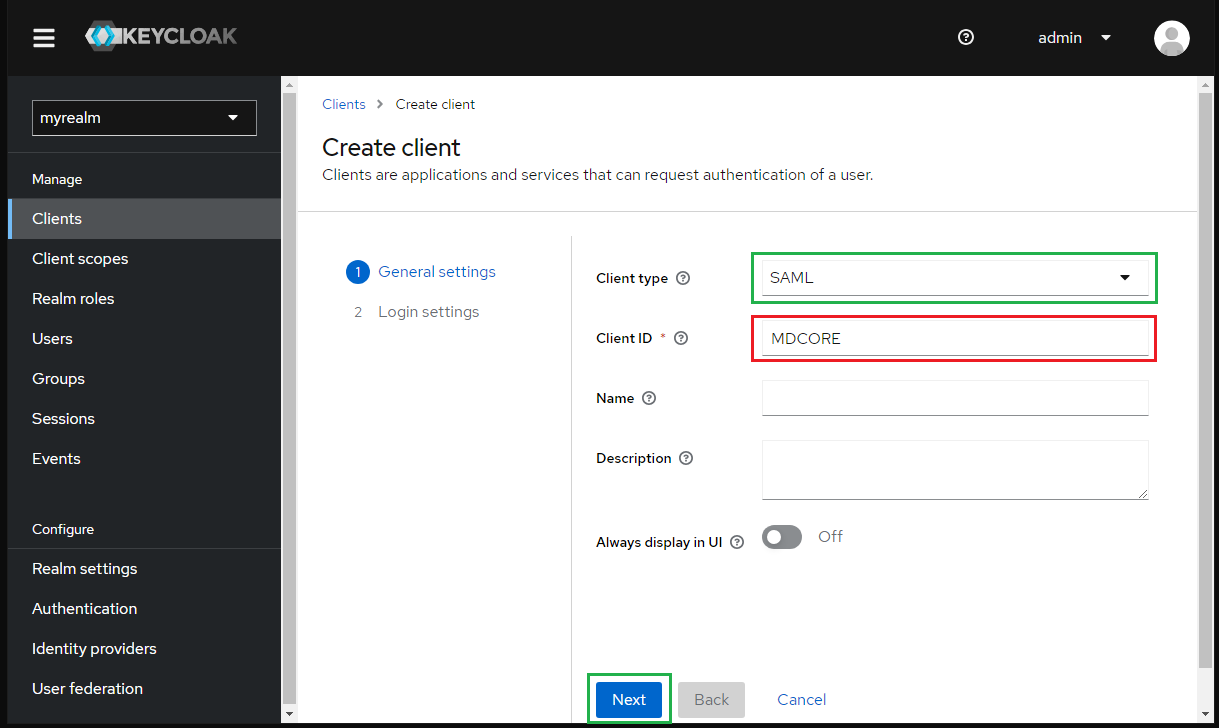
Choose SAML for
Client typeand enter MDCORE forClient IDthen clickNext.
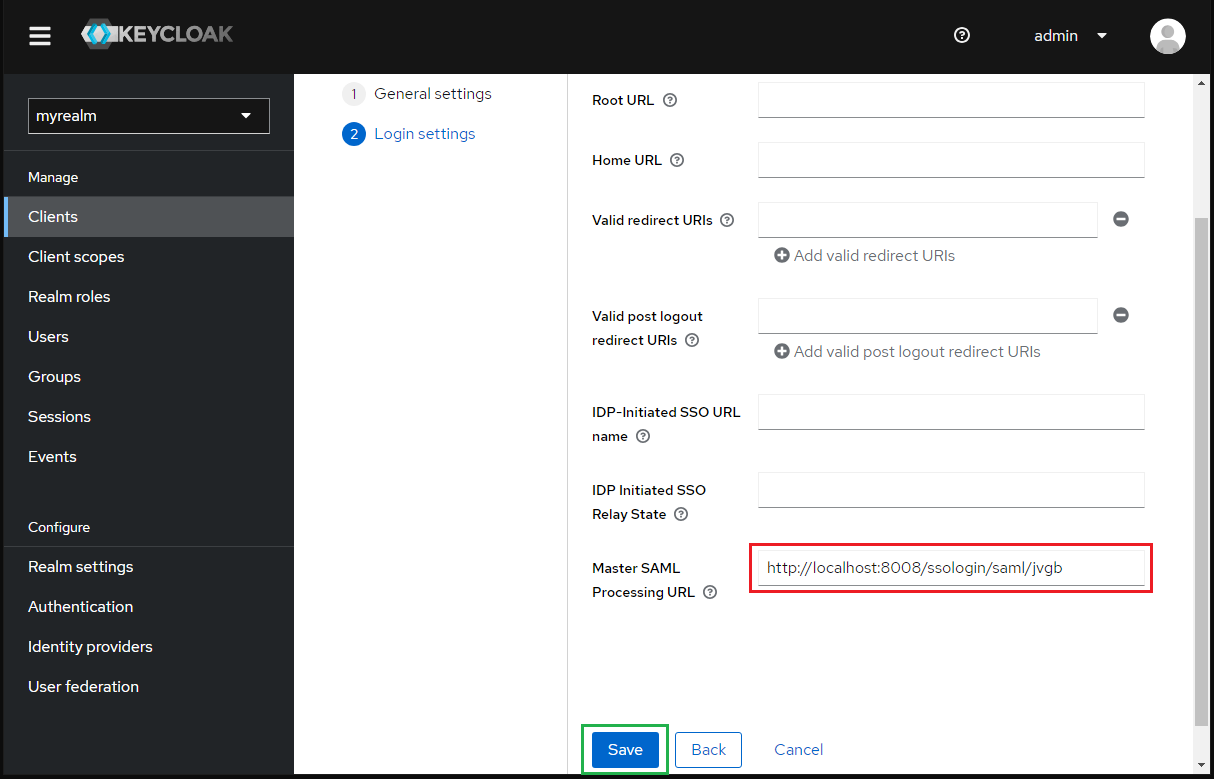
Paste the
Login URLfrom MetaDefender Core intoMaster SAML Processing URLand clickSave.
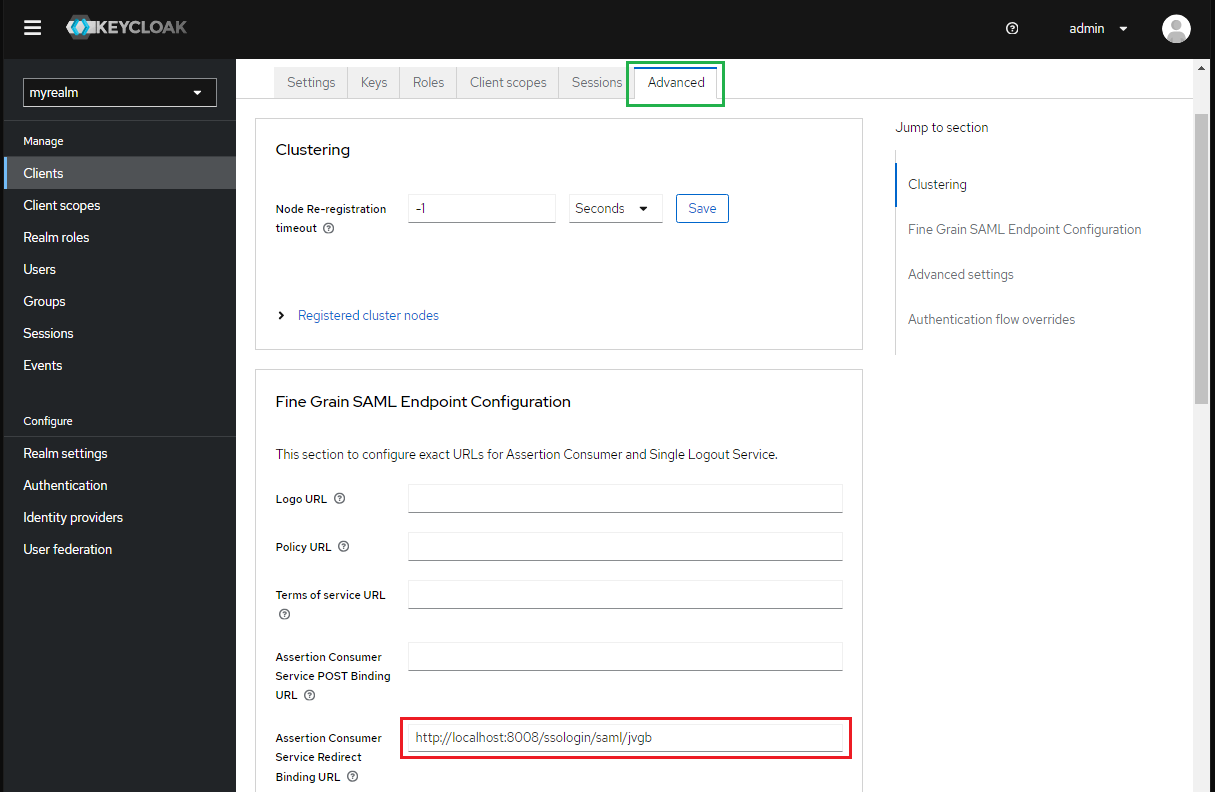
Go to
Advancetab and paste theLogin URLfrom MetaDefender Core toAssertion Consumer Service Redirect Binding URLand clickSave.
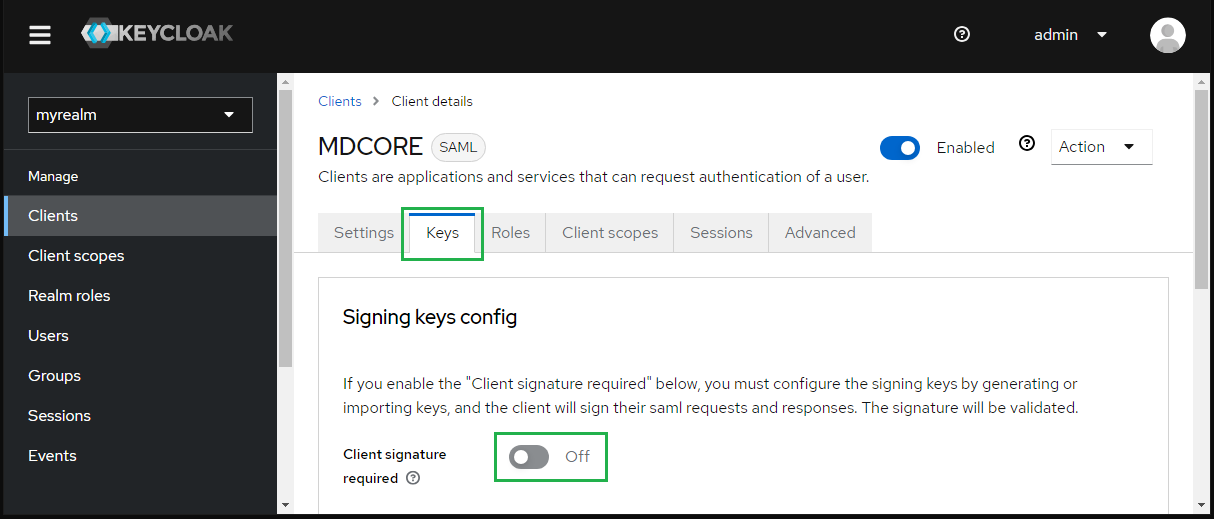
In
Keystab, toggleClient signature requiredto Off.
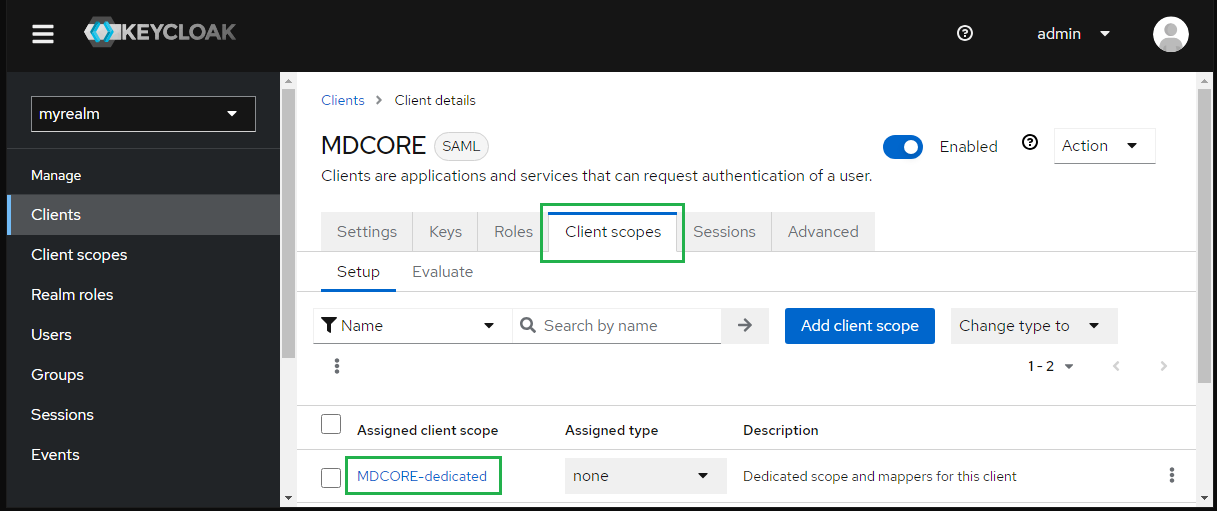
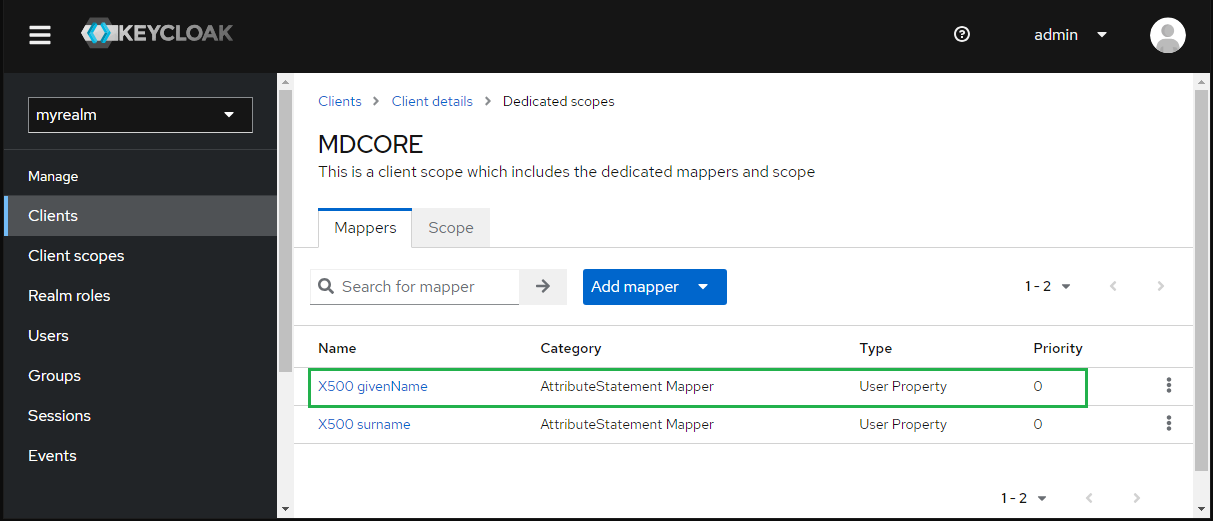
In
Client scopestab, selectMDCore-dedicated.
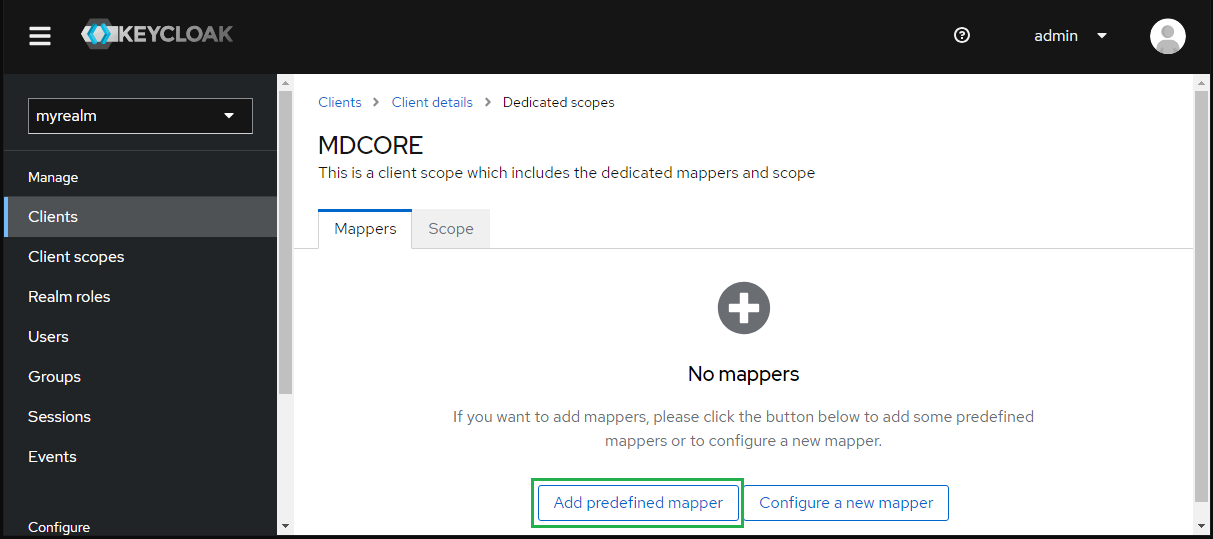
Under
Dedicated scopes, navigate toMapperstab and clickAdd predefines mapper.
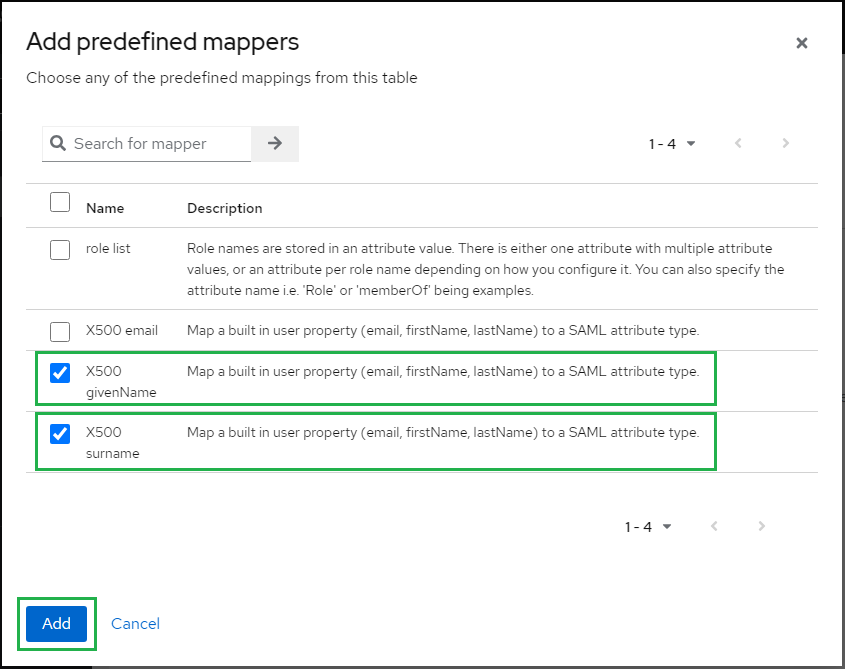
Check
X500 givenNameandX500 surname, then clickAdd.
Back to
Mapperstabs, click onX500 givenName.
Enter first_name to
SAML Attribute Nameand clickSave.

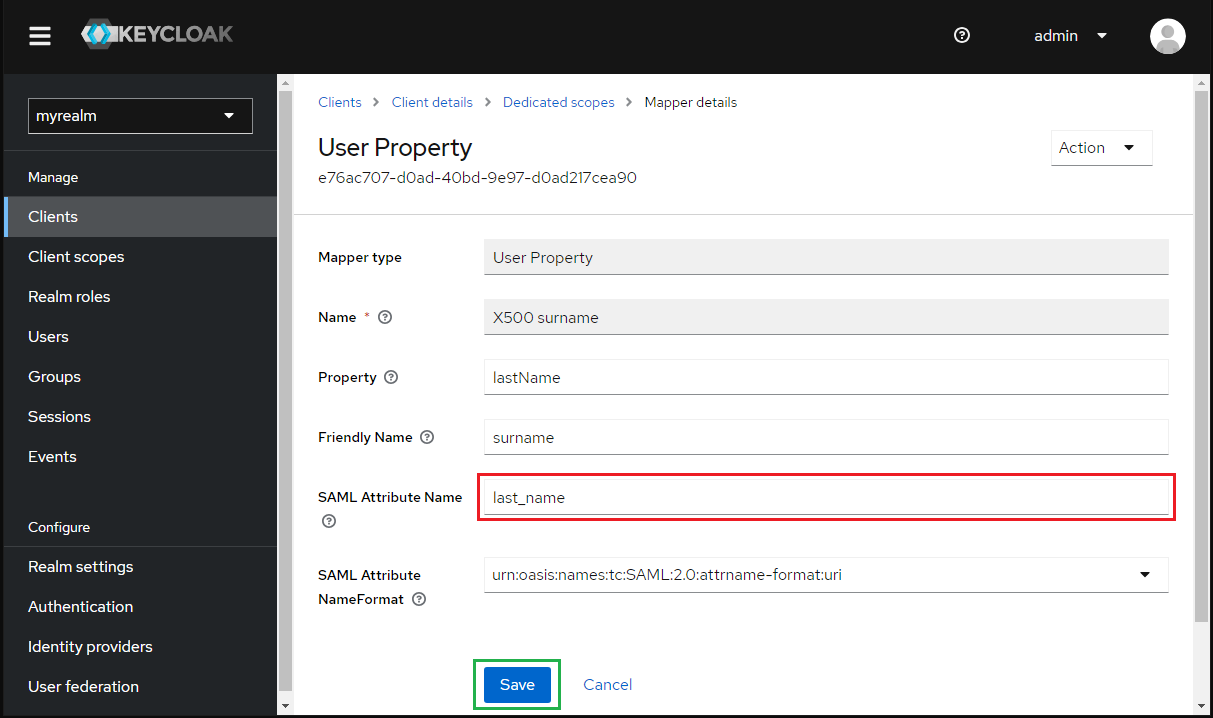
Click
X500 surnameinMapperstab.

Enter first_name for
SAML Attribute Nameand clickSave.
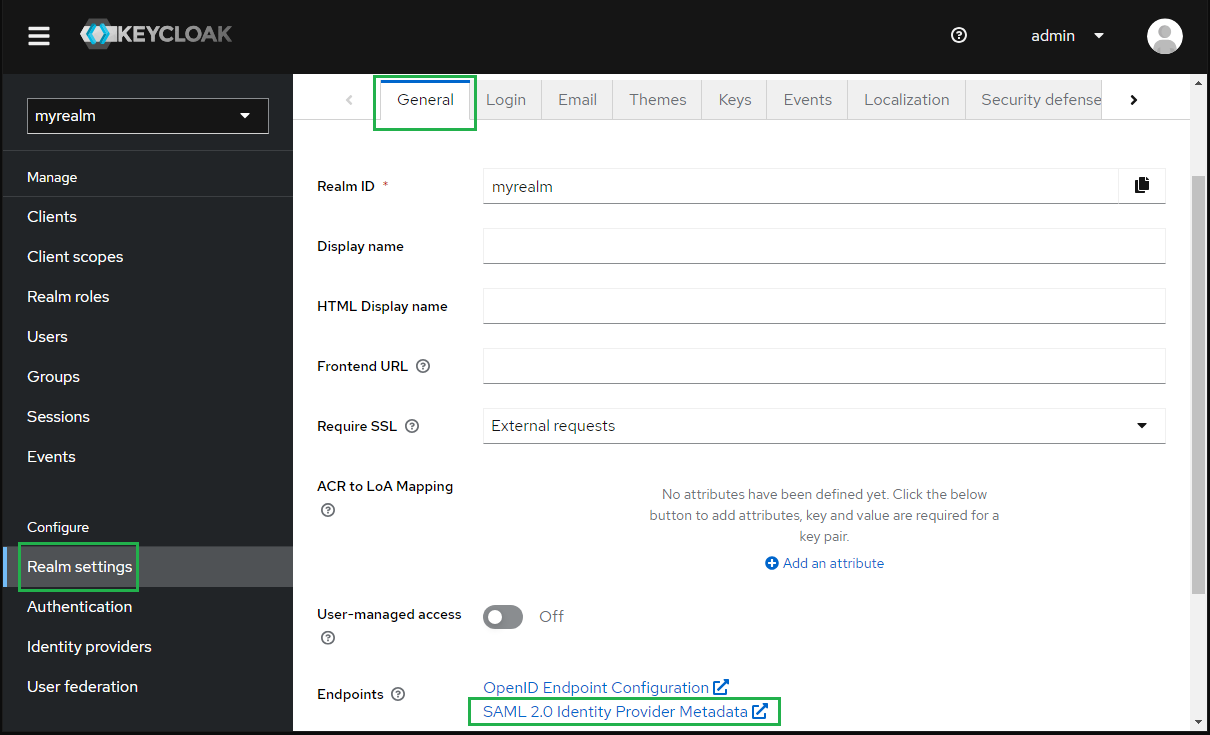
Select
Realm settingsin the sidebar, navigate toGeneraltab, clickSAML 2.0 Identity Provider Metadataand copy theSAML metadata link.
Complete configuration on MetaDefender Core
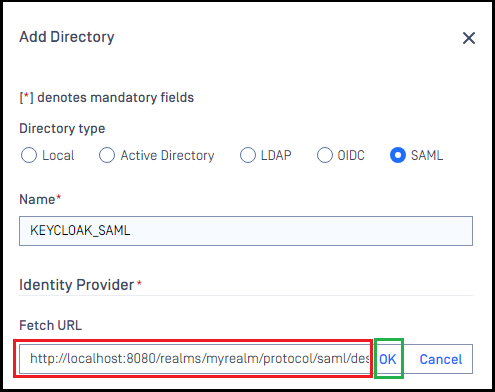
Switch to MetaDefender Core screen, under
Identity Provider, clickFetch URL.Paste
SAML Metadata linkfrom Keycloak to the box underFetch URLand clickOKto ensure MetaDefender Core can set Okta as its IdP.
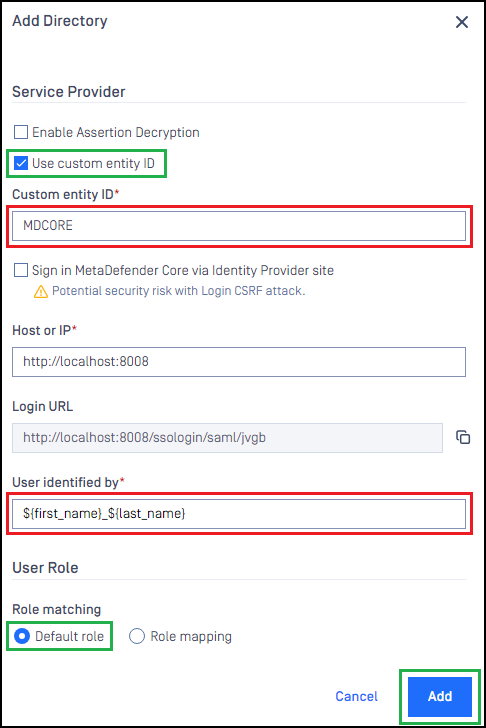
Under
Service Providersection, enableUse Custom Entity IDand enter MDCORE inCustom Entity IDfield.
The ID set for Use Custom Entity ID must match the Client ID created by Keycloak.
Fill in the user identity under
Use Identified bywith ${first_name}___${last_name} , for example.Select the appropriate role for the user under
User Role.Click
Addto complete the settings.
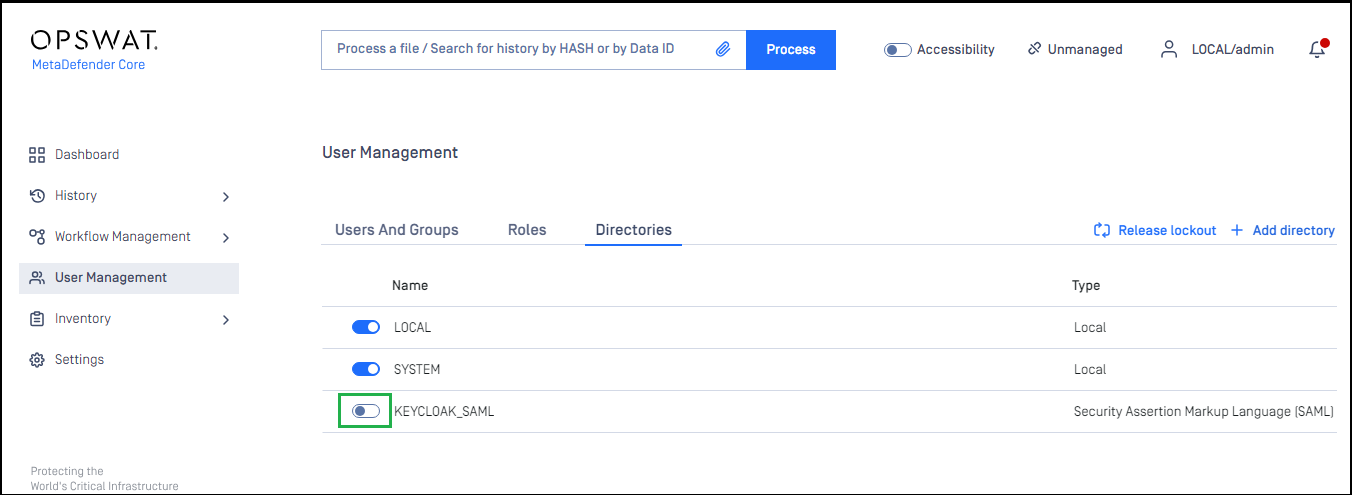
On
User Managementscreen, toggle the new directory, KEYCLOAK-SAML in this example. A dialog box will appear to confirm the action. OnceEnableis clicked, all existing sessions will expire immediately.
Test the integration
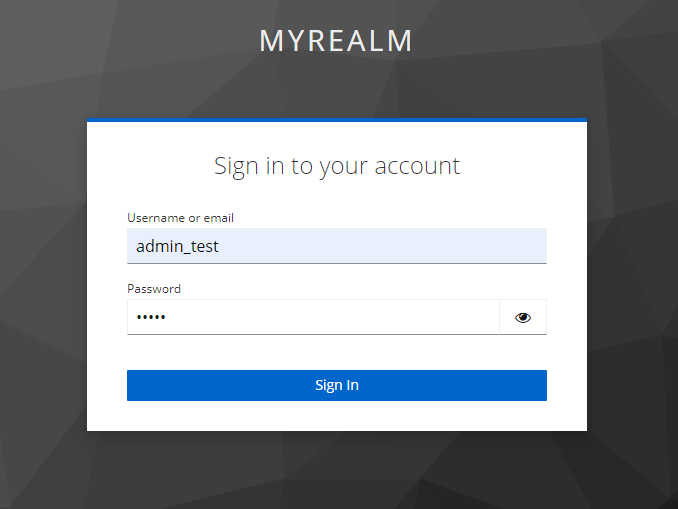
Click
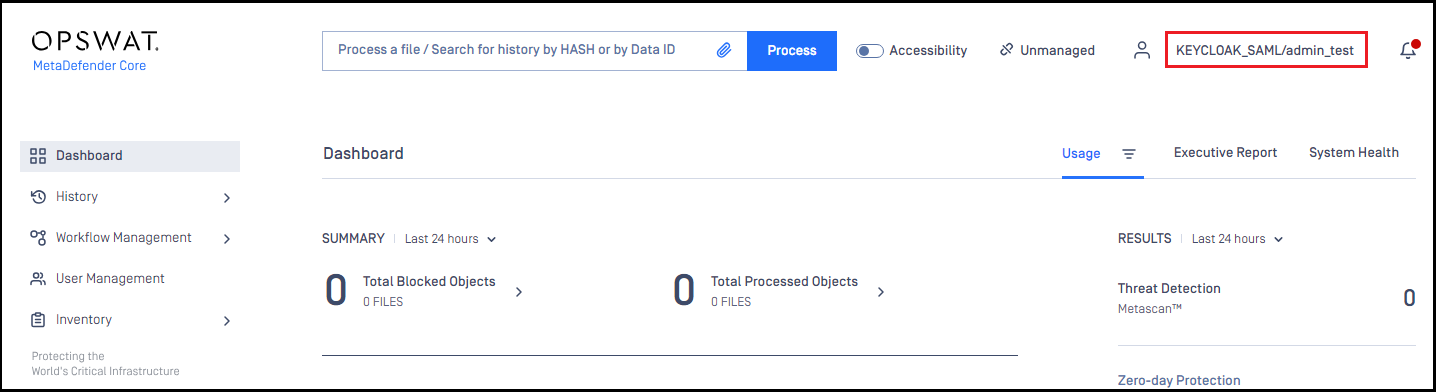
Loginfrom the home screen of MetaDefender Core; the user is redirected to Keycloak page.
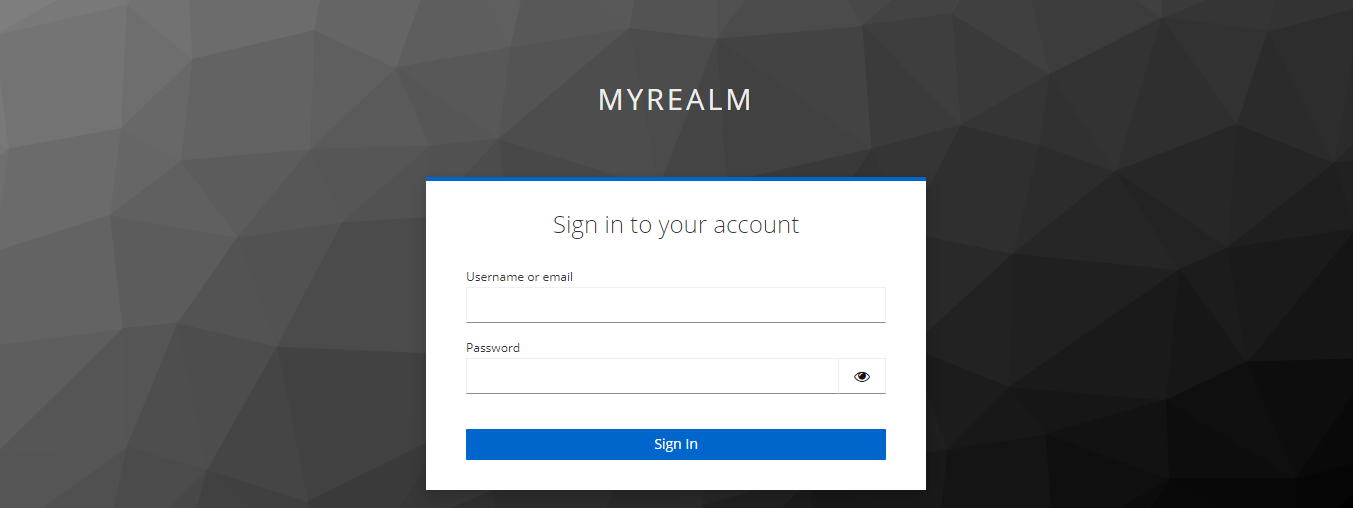
Sign in with the account registered in Keycloak (steps 4 and 6 under the section create-a-realm-on-keycloak).
If everything goes well, MetaDefender Core dashboard will be displayed with user identity set in the top right corner.