For a single deployment of MetaDefender in a public subnet. In this example, besides the MetaDefender EC2 instance, additional resources are being generated and set up.
Prerequisites and Requirements
AWS knowledge: This guide assumes familiarity with EC2, CloudWatch, Lambda and Cloudformation.
AWS account: needs permission to create EC2 instances
DNS: MetaDefender Core uses the internal routing of the host instance and does not require any special routing.
Tools installation: Terraform
System/OS requirements
For OS, database type, 3rd party dependencies and storage requirements on Windows installations, please refer to the Microsoft Windows Deployments section of the Recommended System Configuration page.
For OS, database type, 3rd party dependencies and storage requirements on Linux installations, please refer to the Linux Deployments section of the Recommended System Configuration page.
Deploy using Terraform
- Locally clone the metadefender-csp repository and go to AWS/single-ec2
git clone git@github.com:OPSWAT/metadefender-csp.gitcd AWS/single-ec2- Modify terraform.tfvars with the desired options
- LICENSE_KEY required if wanted to have the instance activated automatically
- APIKEY_GENERATION=true to have the apikey generated by terraform
- There is one general section and one section for each product that is supported using this Terraform project
# General variablesMD_ENV_NAME = "metadefender" # Prefix to add to all the resourcesMD_REGION = "eu-central-1" # Region for all the resourcesEC2_KEY_NAME = "" # Key pair to attach to EC2 instances (Optional)#ACCESS_KEY_ID = "<ACCESS_KEY_ID>"#SECRET_ACCESS_KEY = "<SECRET_ACCESS_KEY>" # To give access to terraform (Optional, can use other ways to authenticate)PUBLIC_ENVIRONMENT = trueAPIKEY_GENERATION = true# MetaDefender Core variablesDEPLOY_CORE = trueMD_VPC_CIDR = "192.168.0.0/16" # VPC CIDR where to create the MetaDefender productsCORE_PRODUCT_ID = "ani6v4vb5z4t87cymrfg3m451" #MetaDefender Core ID in AWS Marketplace || For Windows it is "9s8powksm1cj7fuafdnv0sfj9"CORE_INSTANCE_TYPE = "c5.2xlarge" # Instance type for MetaDefender CoreLICENSE_KEY_CORE = ""- In case of wanting to deploy MetaDefender ICAP Server or MetaDefender Storage Security, modify these sections
# MetaDefender ICAP variablesDEPLOY_ICAP = false # true to deploy ICAP together with CoreICAP_PRODUCT_ID = "b1w10ei2pw2vgpdsjw44pbffr" #MetaDefender ICAP LINUX ID in AWS Marketplace ICAP_INSTANCE_TYPE = "c5.2xlarge" # Instance type for MetaDefender Storage SecurityLICENSE_KEY_ICAP = ""# MetaDefender Storage Security variablesDEPLOY_MDSS = false # true to deploy MetaDefender Storage Security together with CoreMDSS_PRODUCT_ID = "3mup1qubt6hwmup405eljau0k" # MetaDefender Storage Security LINUX ID in AWS Marketplace MDSS_INSTANCE_TYPE = "c5.2xlarge" # Instance type for MetaDefender Storage SecurityDEPLOY_MDSS_DOCUMENTDB = false # true to deploy MetaDefender Storage Security with a managed instance of Amazon DocumentDBMDSS_DOCUMENTDB_INSTANCE_CLASS = "db.r5.large"DEPLOY_MDSS_ELASTICACHE = false # true to deploy MetaDefender Storage Security with a managed instance of Elasticache RedisMDSS_ELASTICACHE_NODE_TYPE = "cache.m5.large"- Run terraform init and apply. Check the resource to be created, after that enter "y"
terraform initterraform applyDeploy using AWS Console
Select MetaDefender Core AMI
- Go to the EC2 Management Console in AWS and select Launch Instance

- Select the desired MetaDefender, based on the OS support:
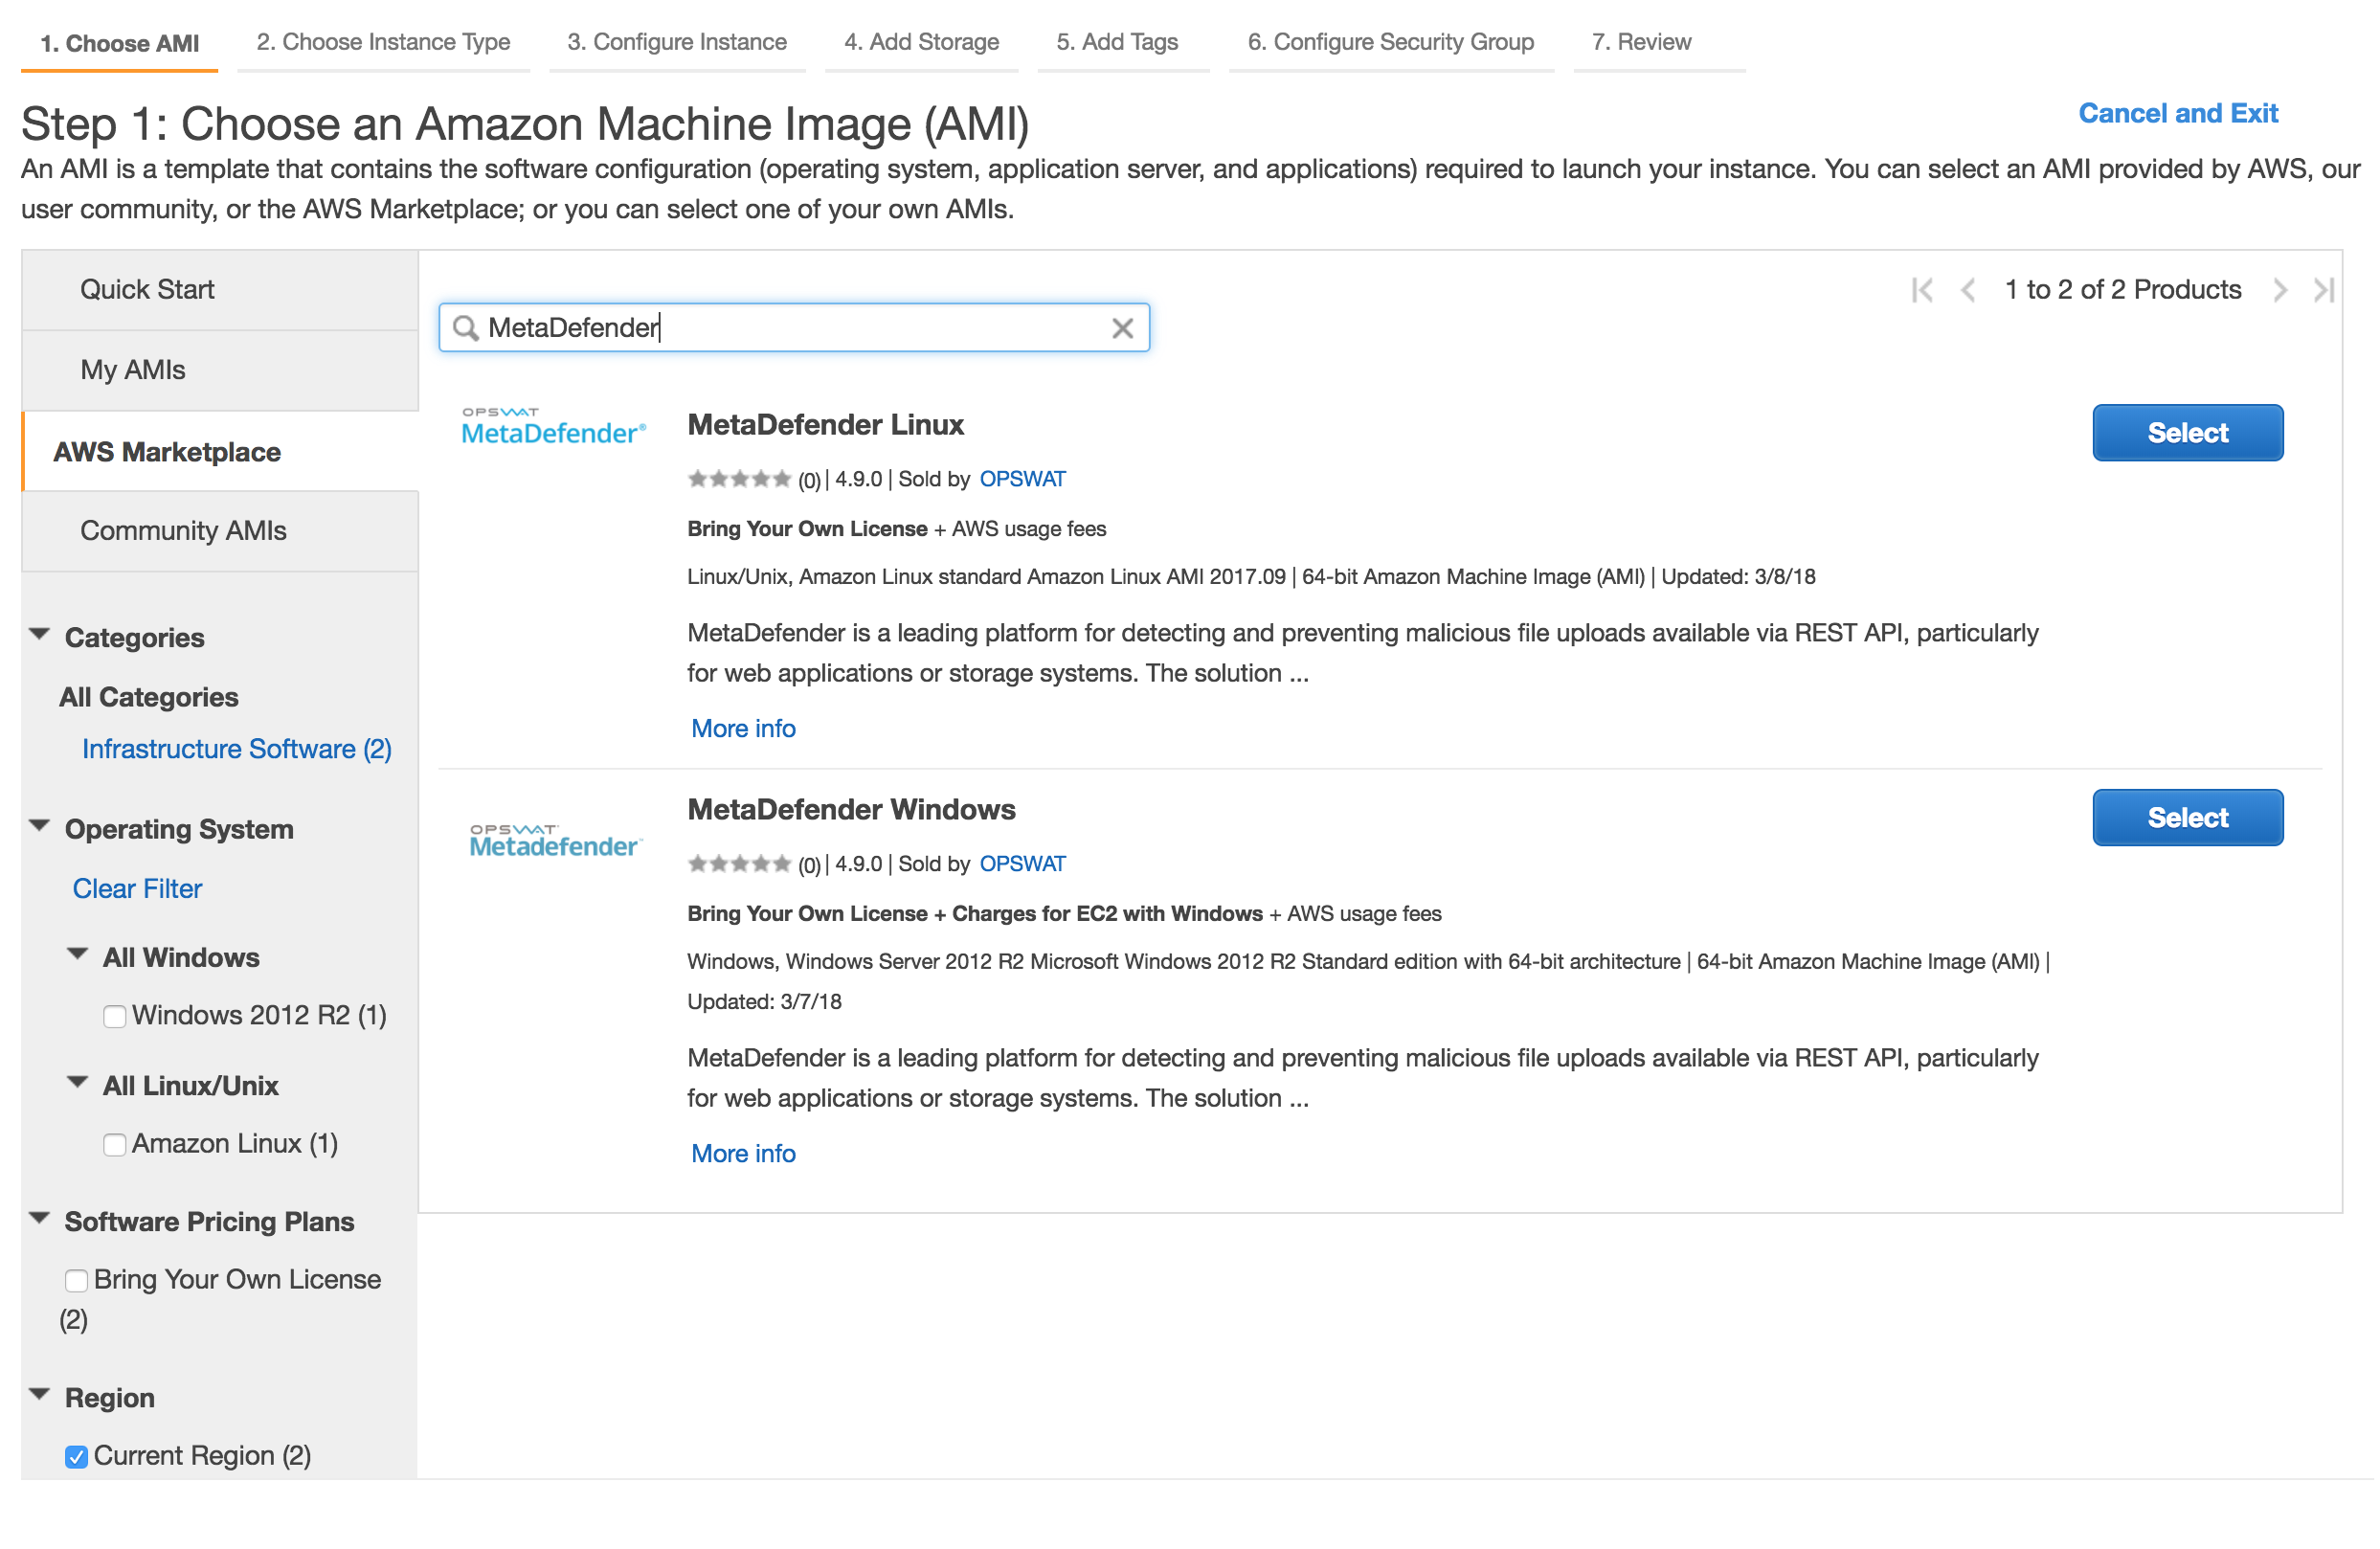
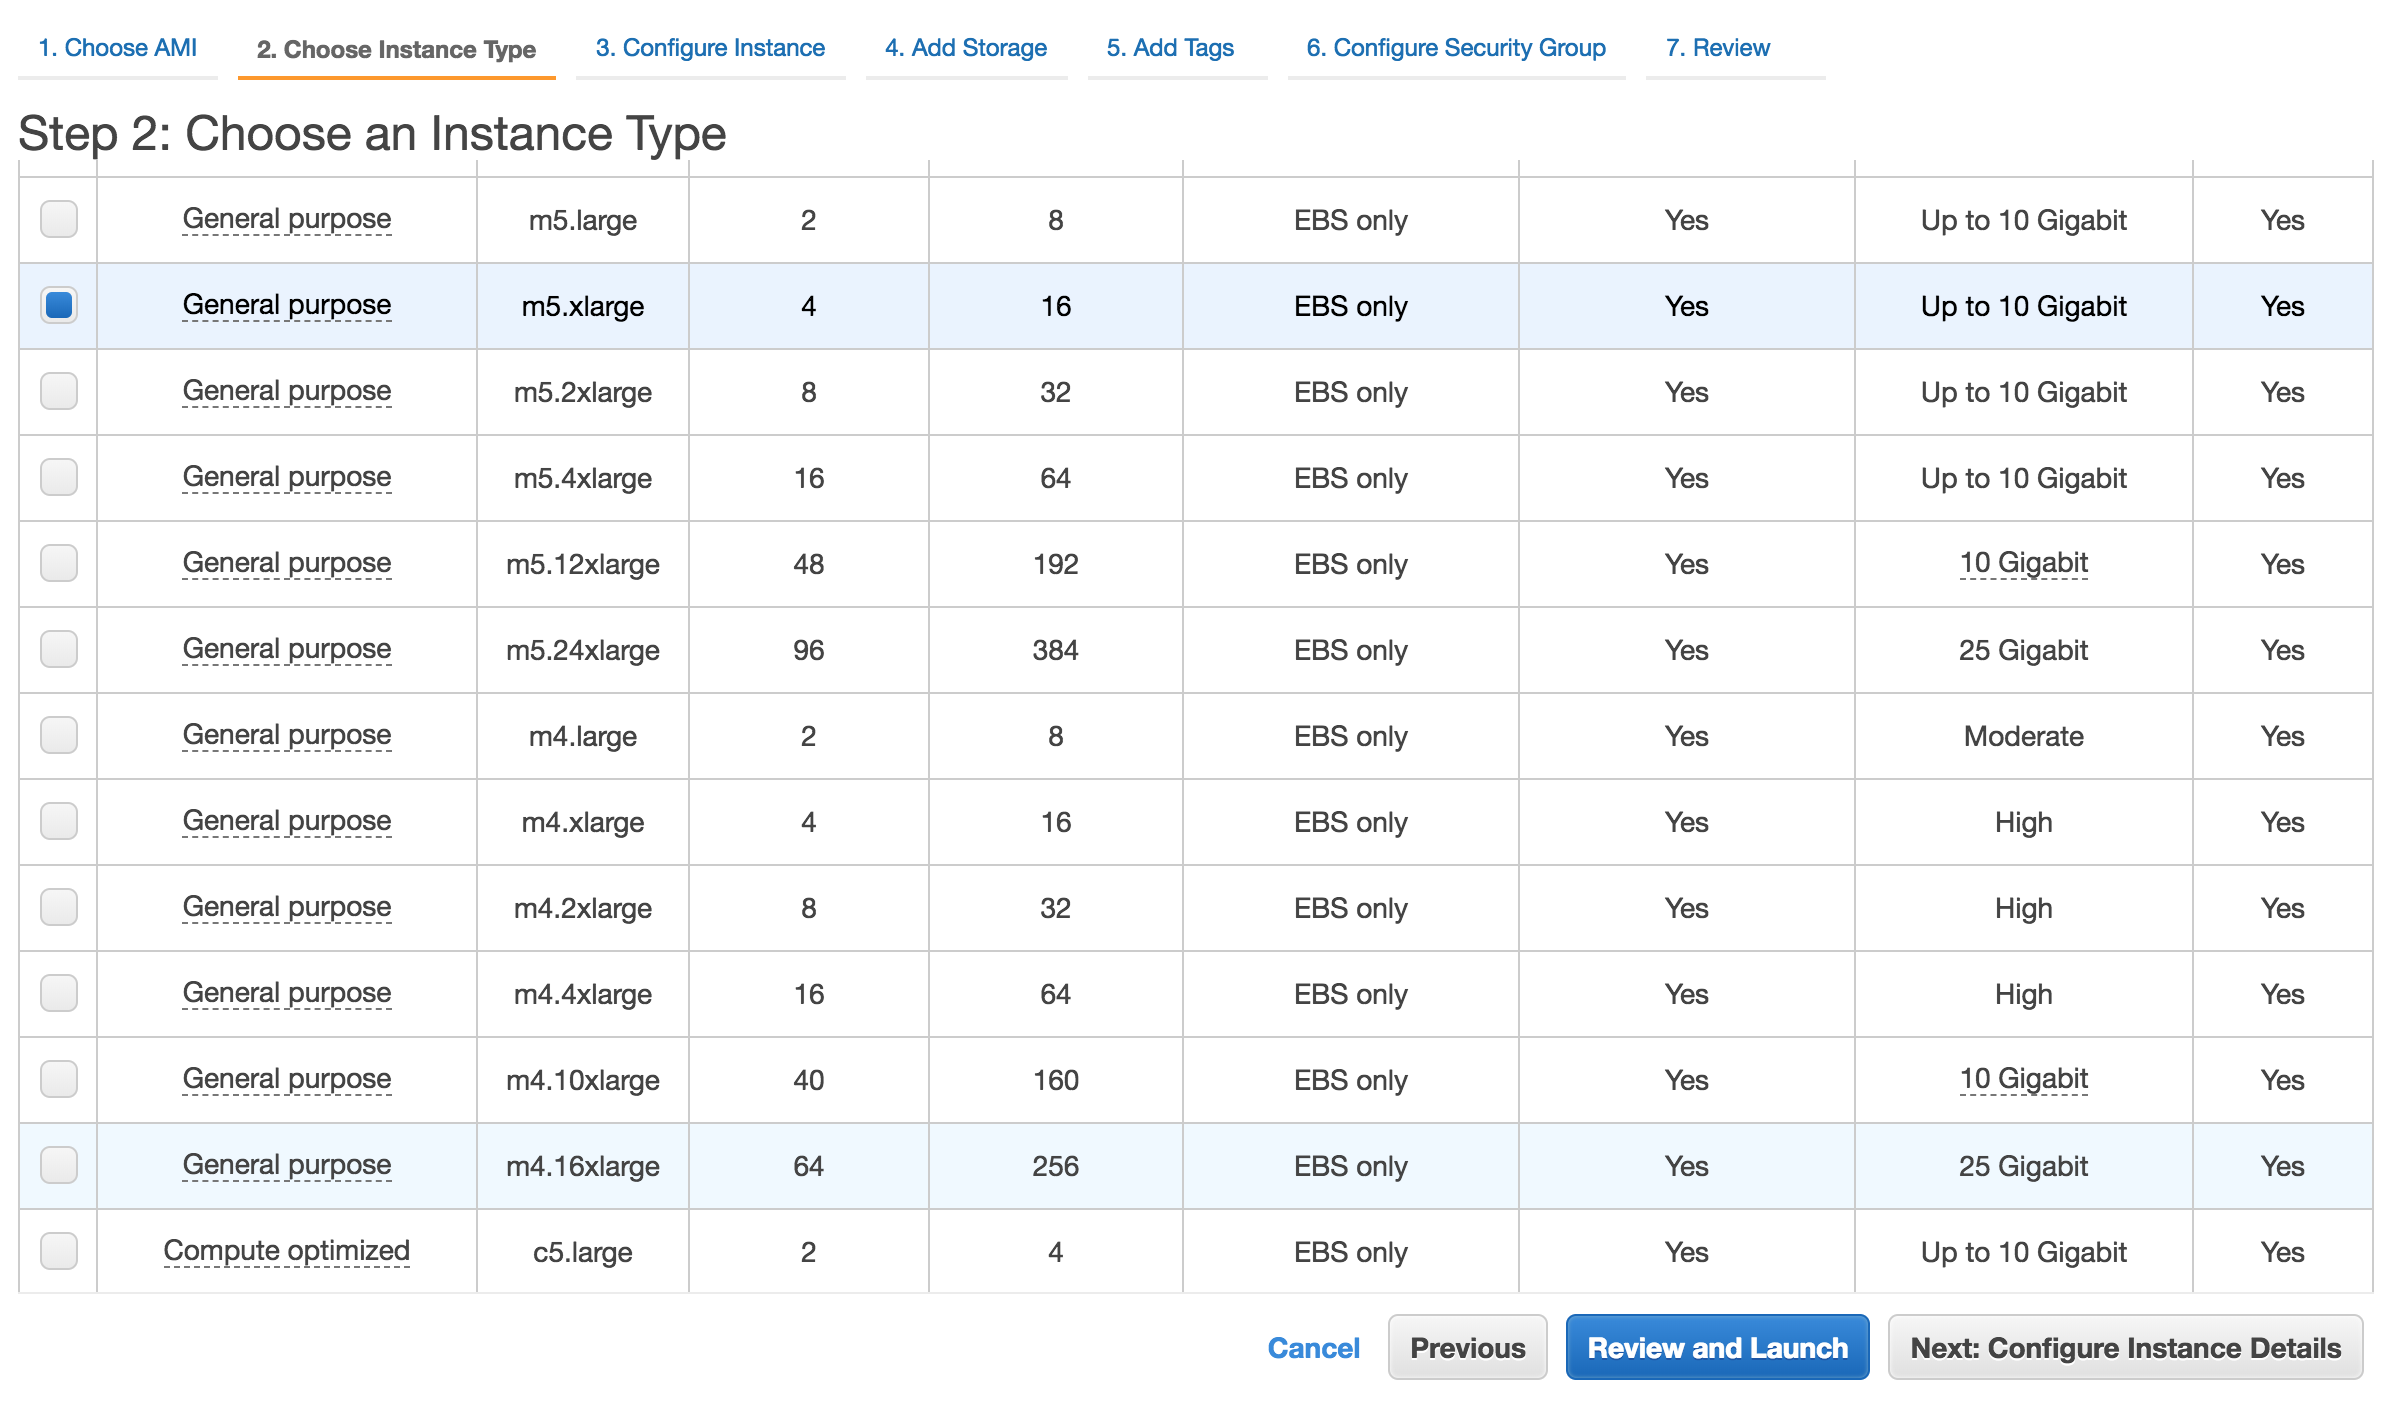
- Choose the Instance type
Please review MetaDefender's system requirements (OS and hardware requirements) before choosing the desired AMI and instance type.
Networking for EC2
- Select the desired VPC and subnet you would like to have MetaDefender deployed.
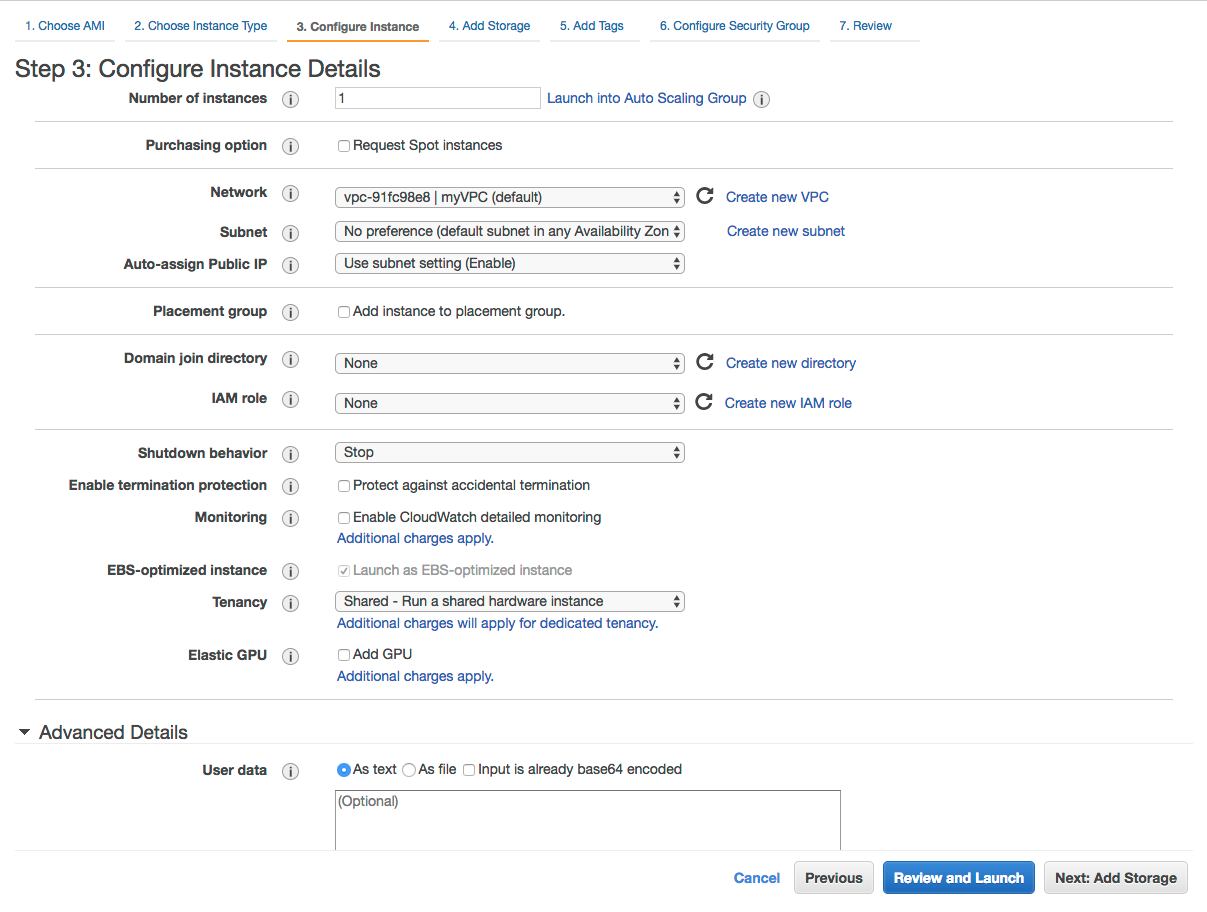
Depending on the deployment model, the recommendation would be to deploy MetaDefender in a private subnet, with no Internet Connection.
Storage configuration
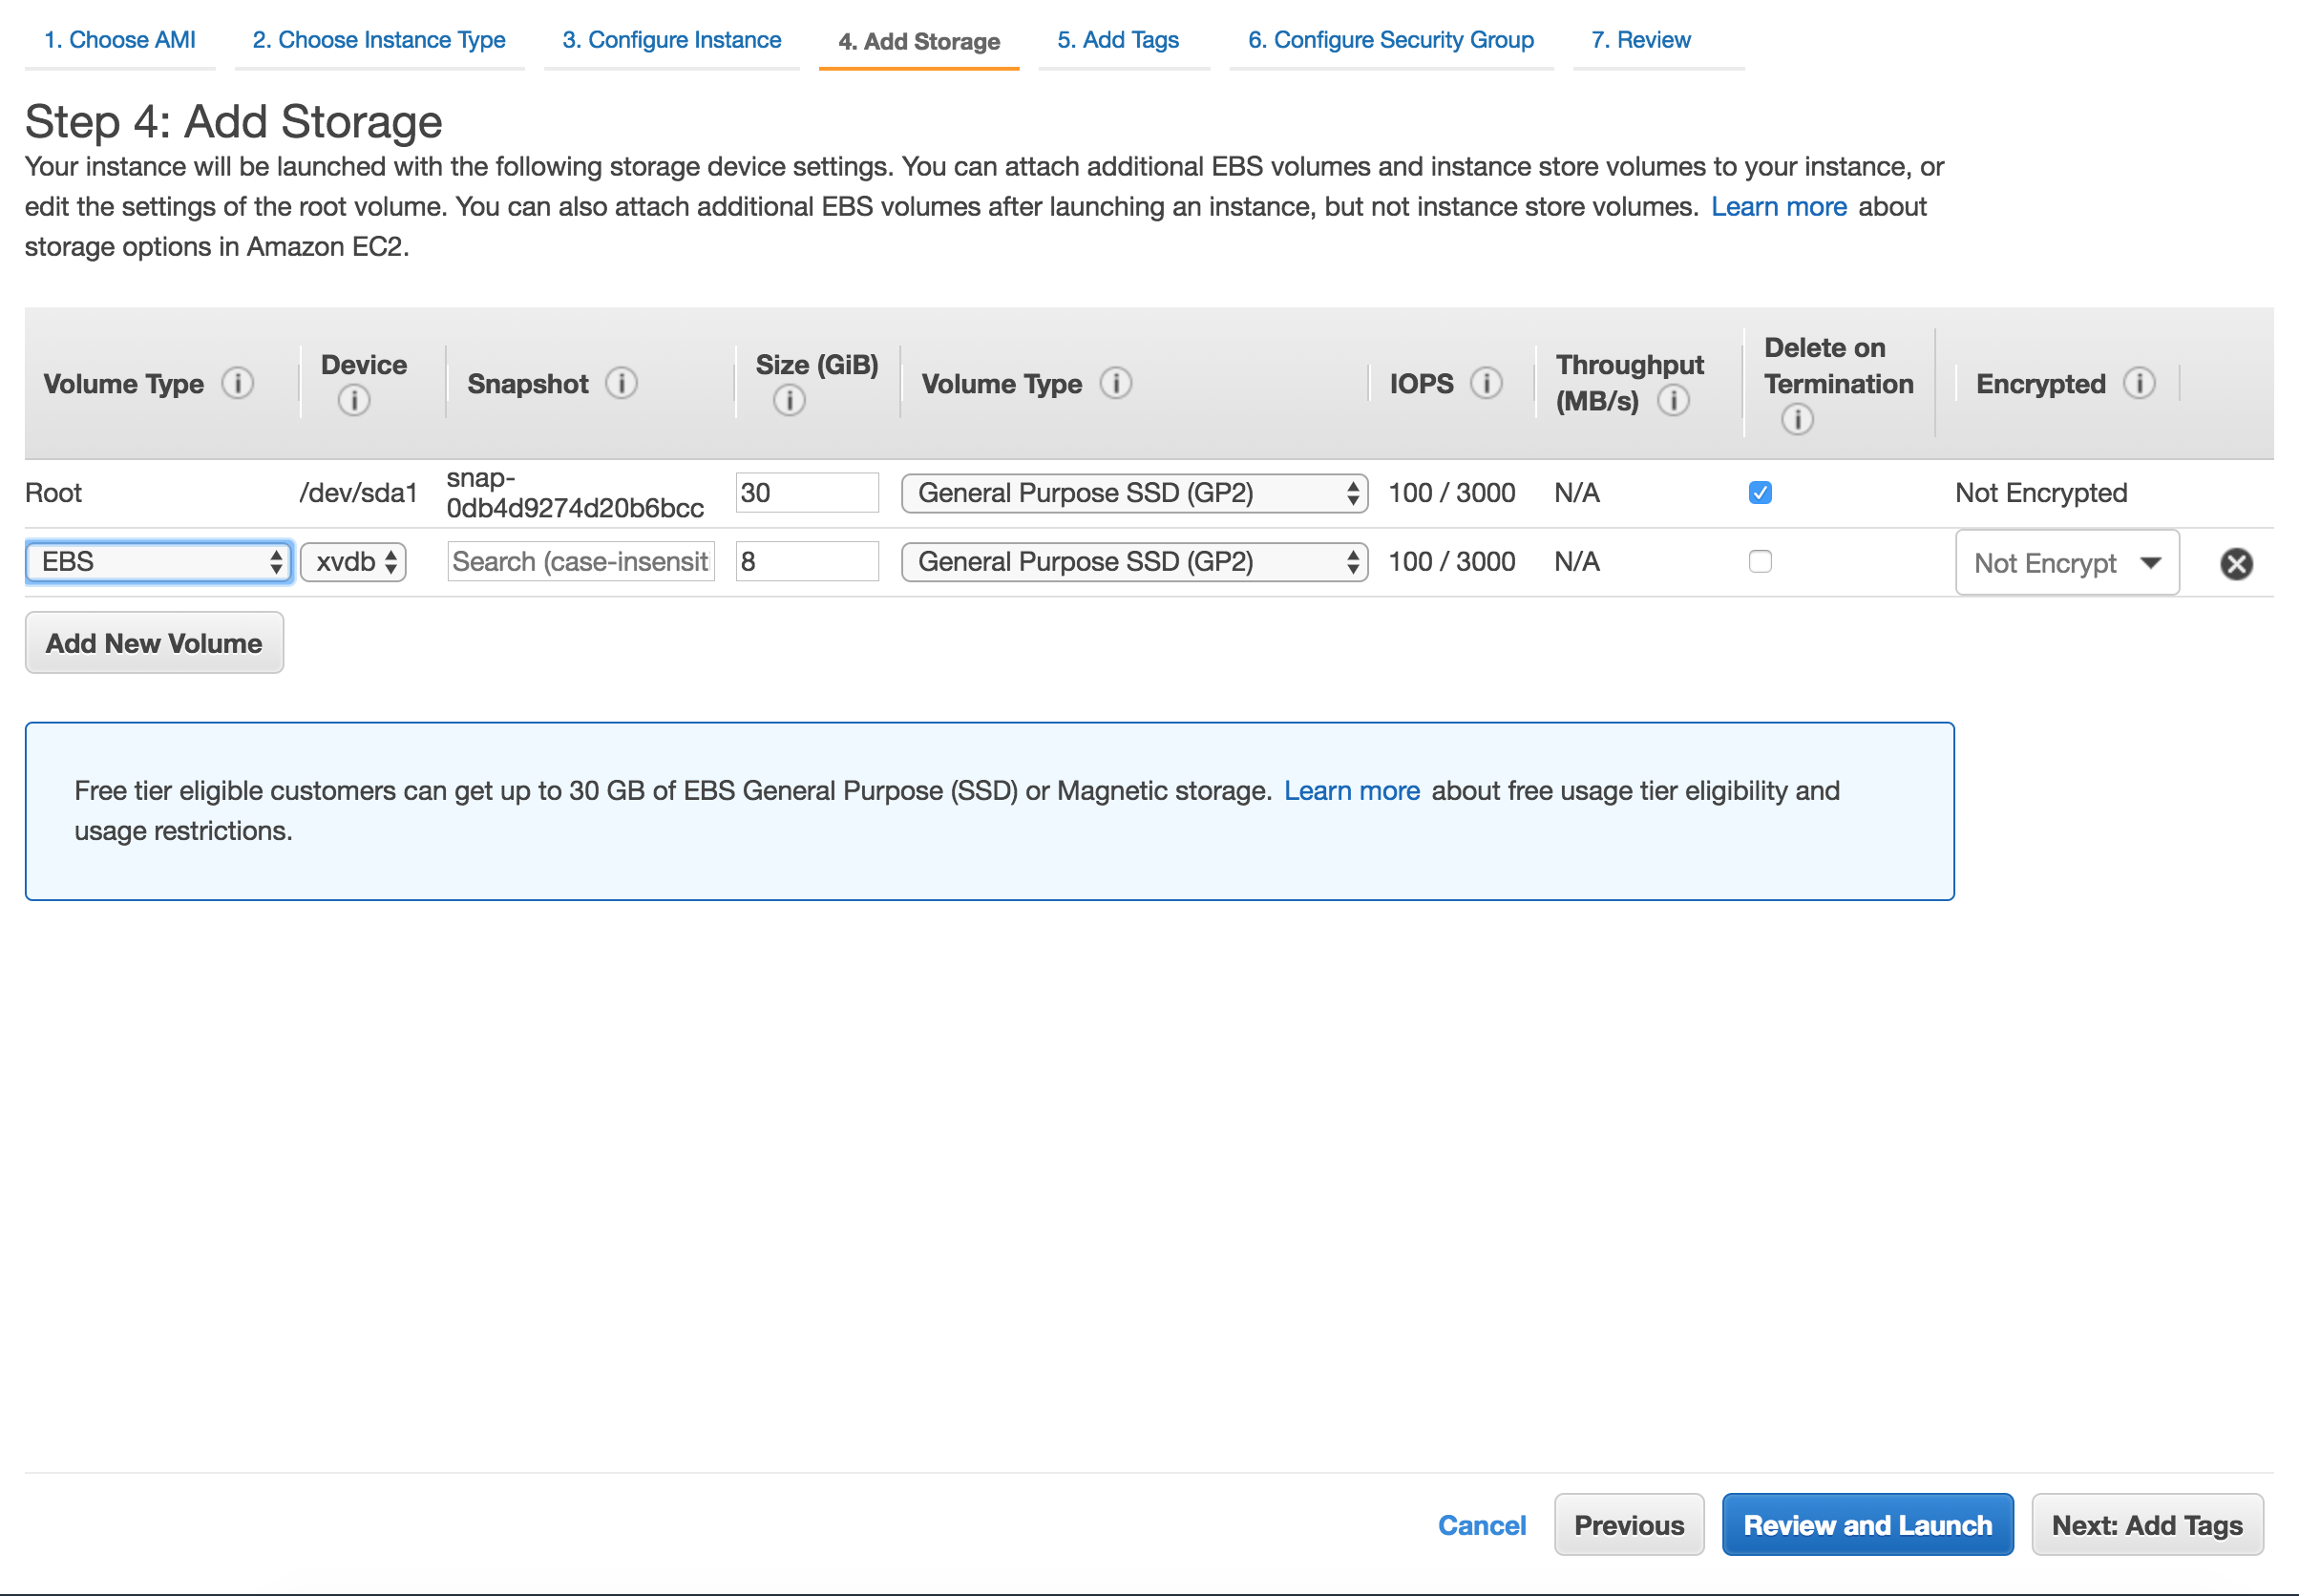
Storage step can be skipped
In general there's no need for additional storage by MetaDefender. However, there are 2 situations where additional local storage might be required:
- MetaDefender will process large files or a high volume of files which submitted in MetaDefender's queue will need over 10GB files storage
- MetaDefender is configured to store files in the Quarantine section which will eventually fill the entire root volume.
In case quarantining the files in the MetaDefender instance or analyzing high volumes of files is a requirement, please consider adding an EBS volume.
Security Groups configuration
There are 2 rules that are needed to be opened during the installation phase, after which only one rule should remain:
Custom TCP: 8008
- MetaDefender exposes it's REST API by default to port 8008. However this port can be changed during the installation phase or updated during it's lifetime.
RDP / SSH
- In order to install MetaDefender on Windows add access for RDP and for Linux add support for SSH
- Highly recommended would be not to allow traffic to RDP or SSH from anywhere, but to limit to your IP address
- In order to install MetaDefender on Windows add access for RDP and for Linux add support for SSH
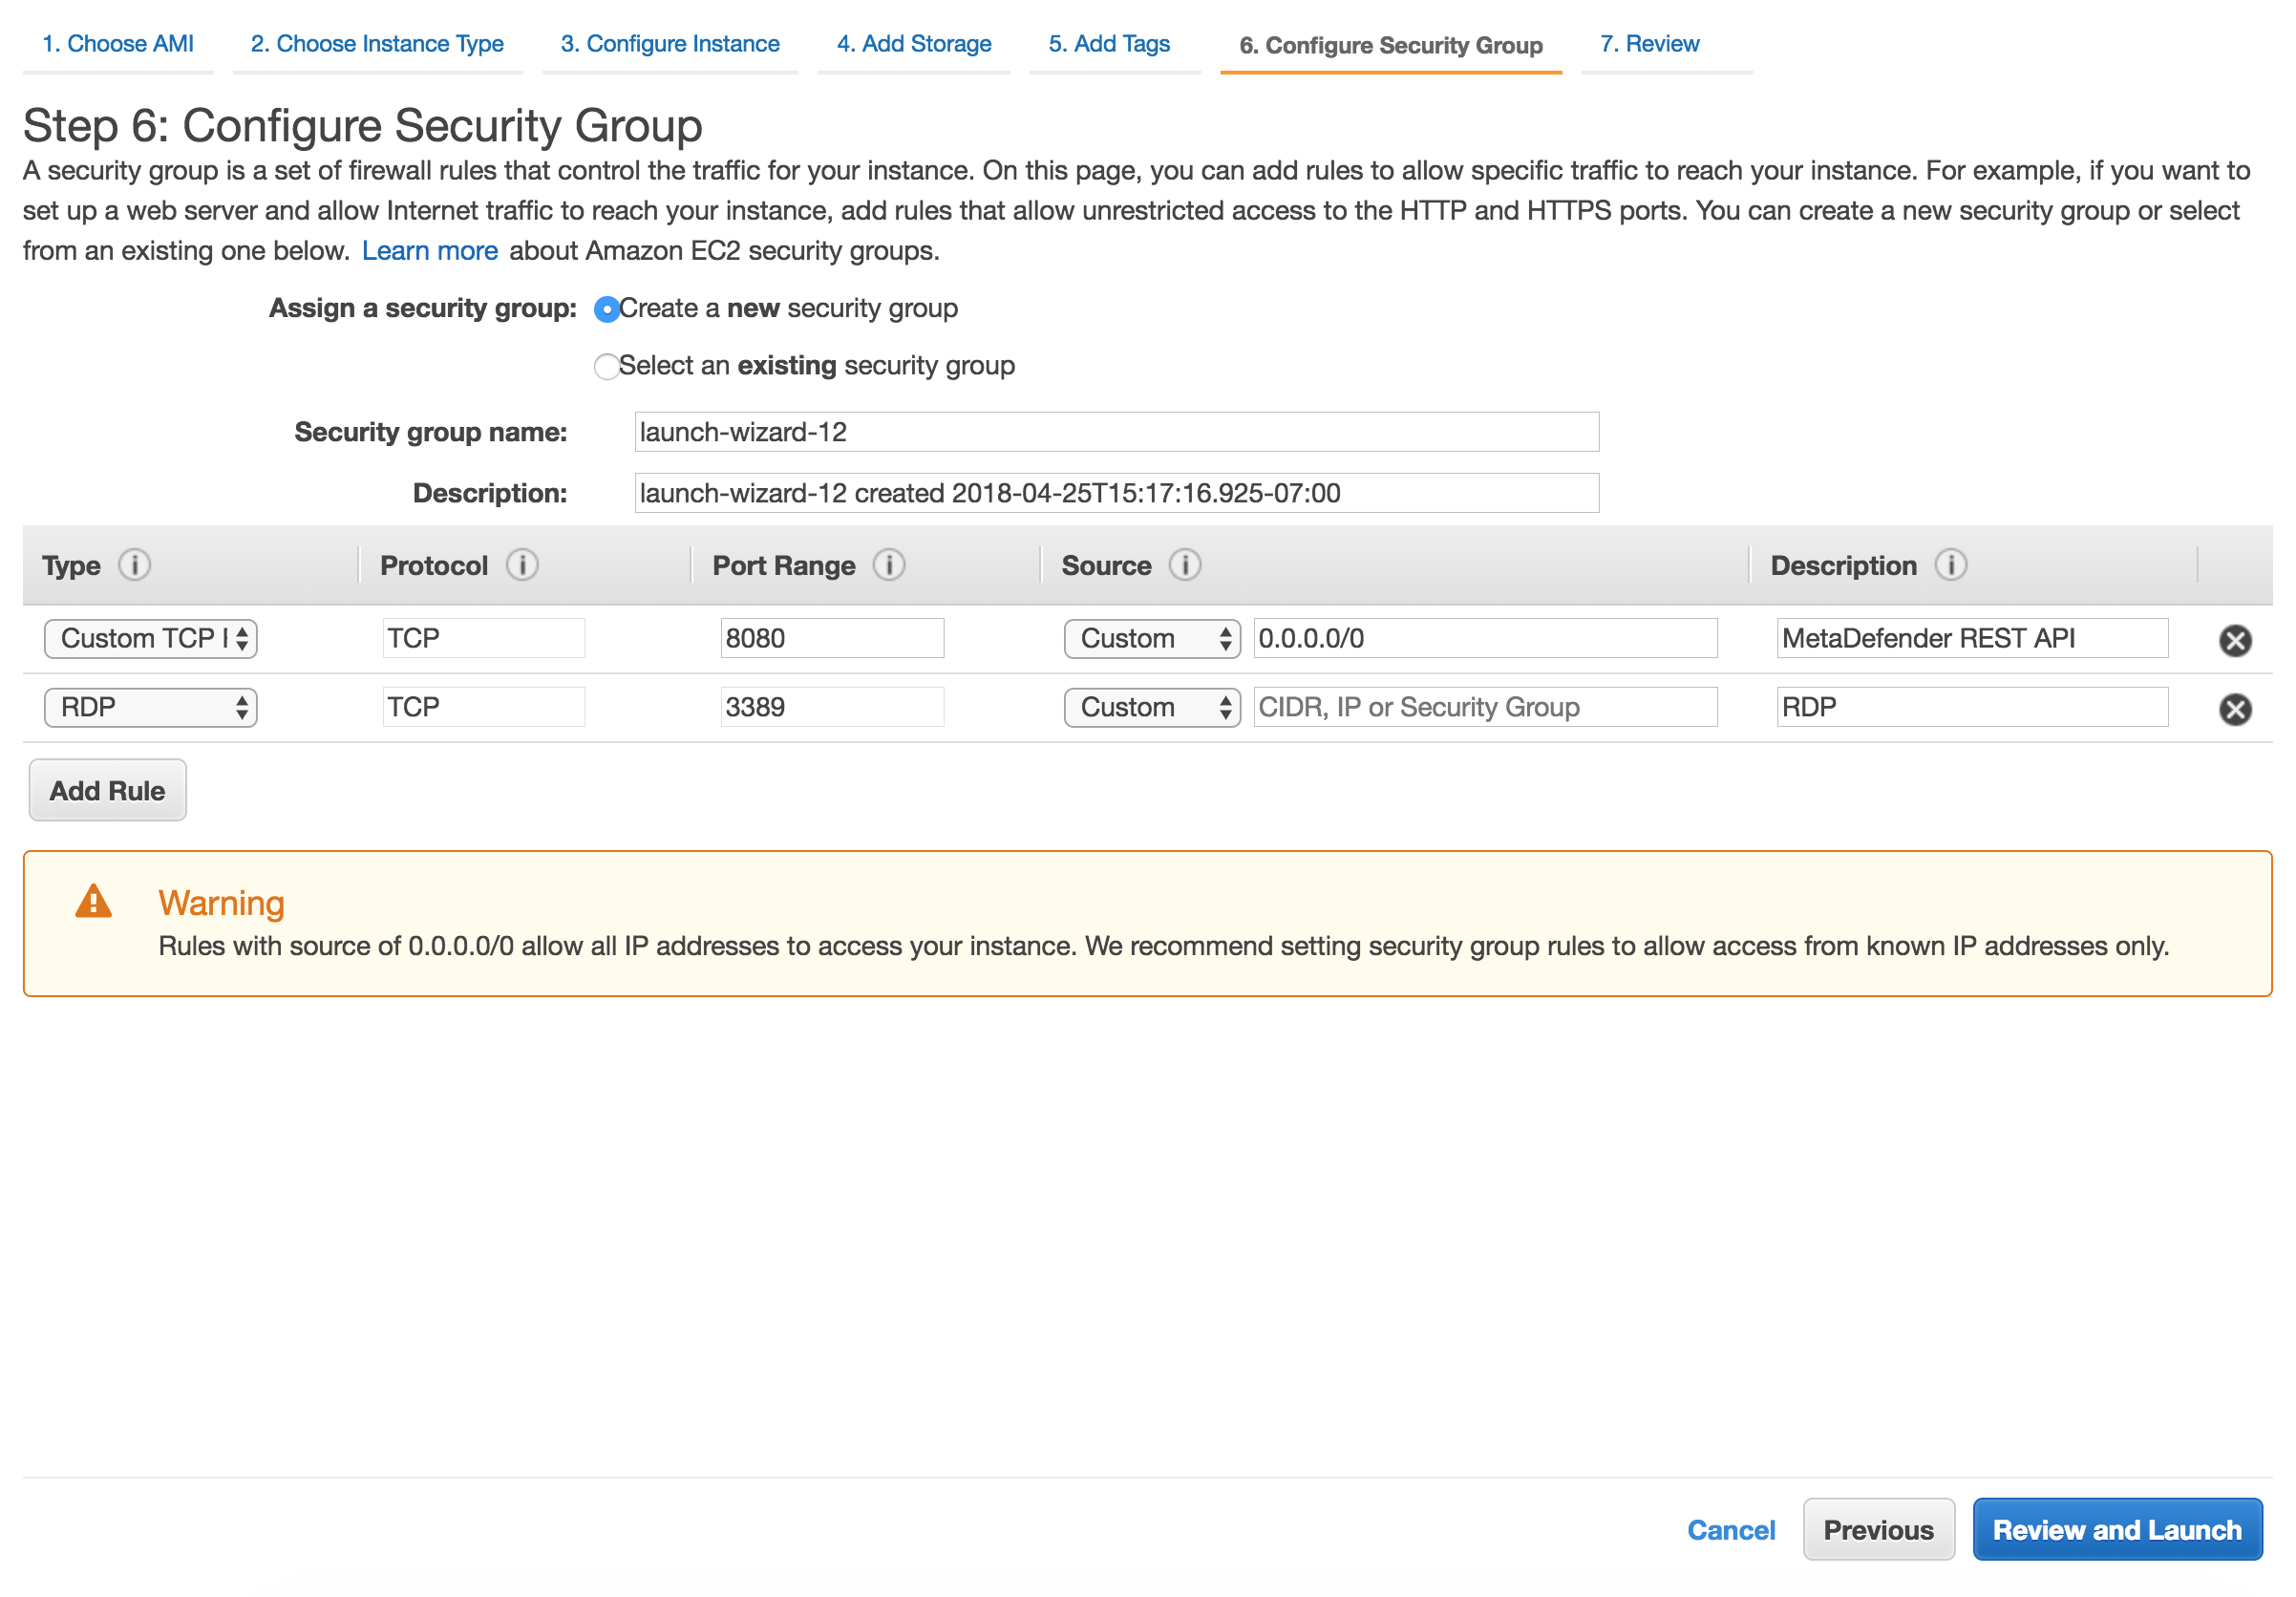
After the installation remove RDP or SSH from this Security Group!
Launch the instance
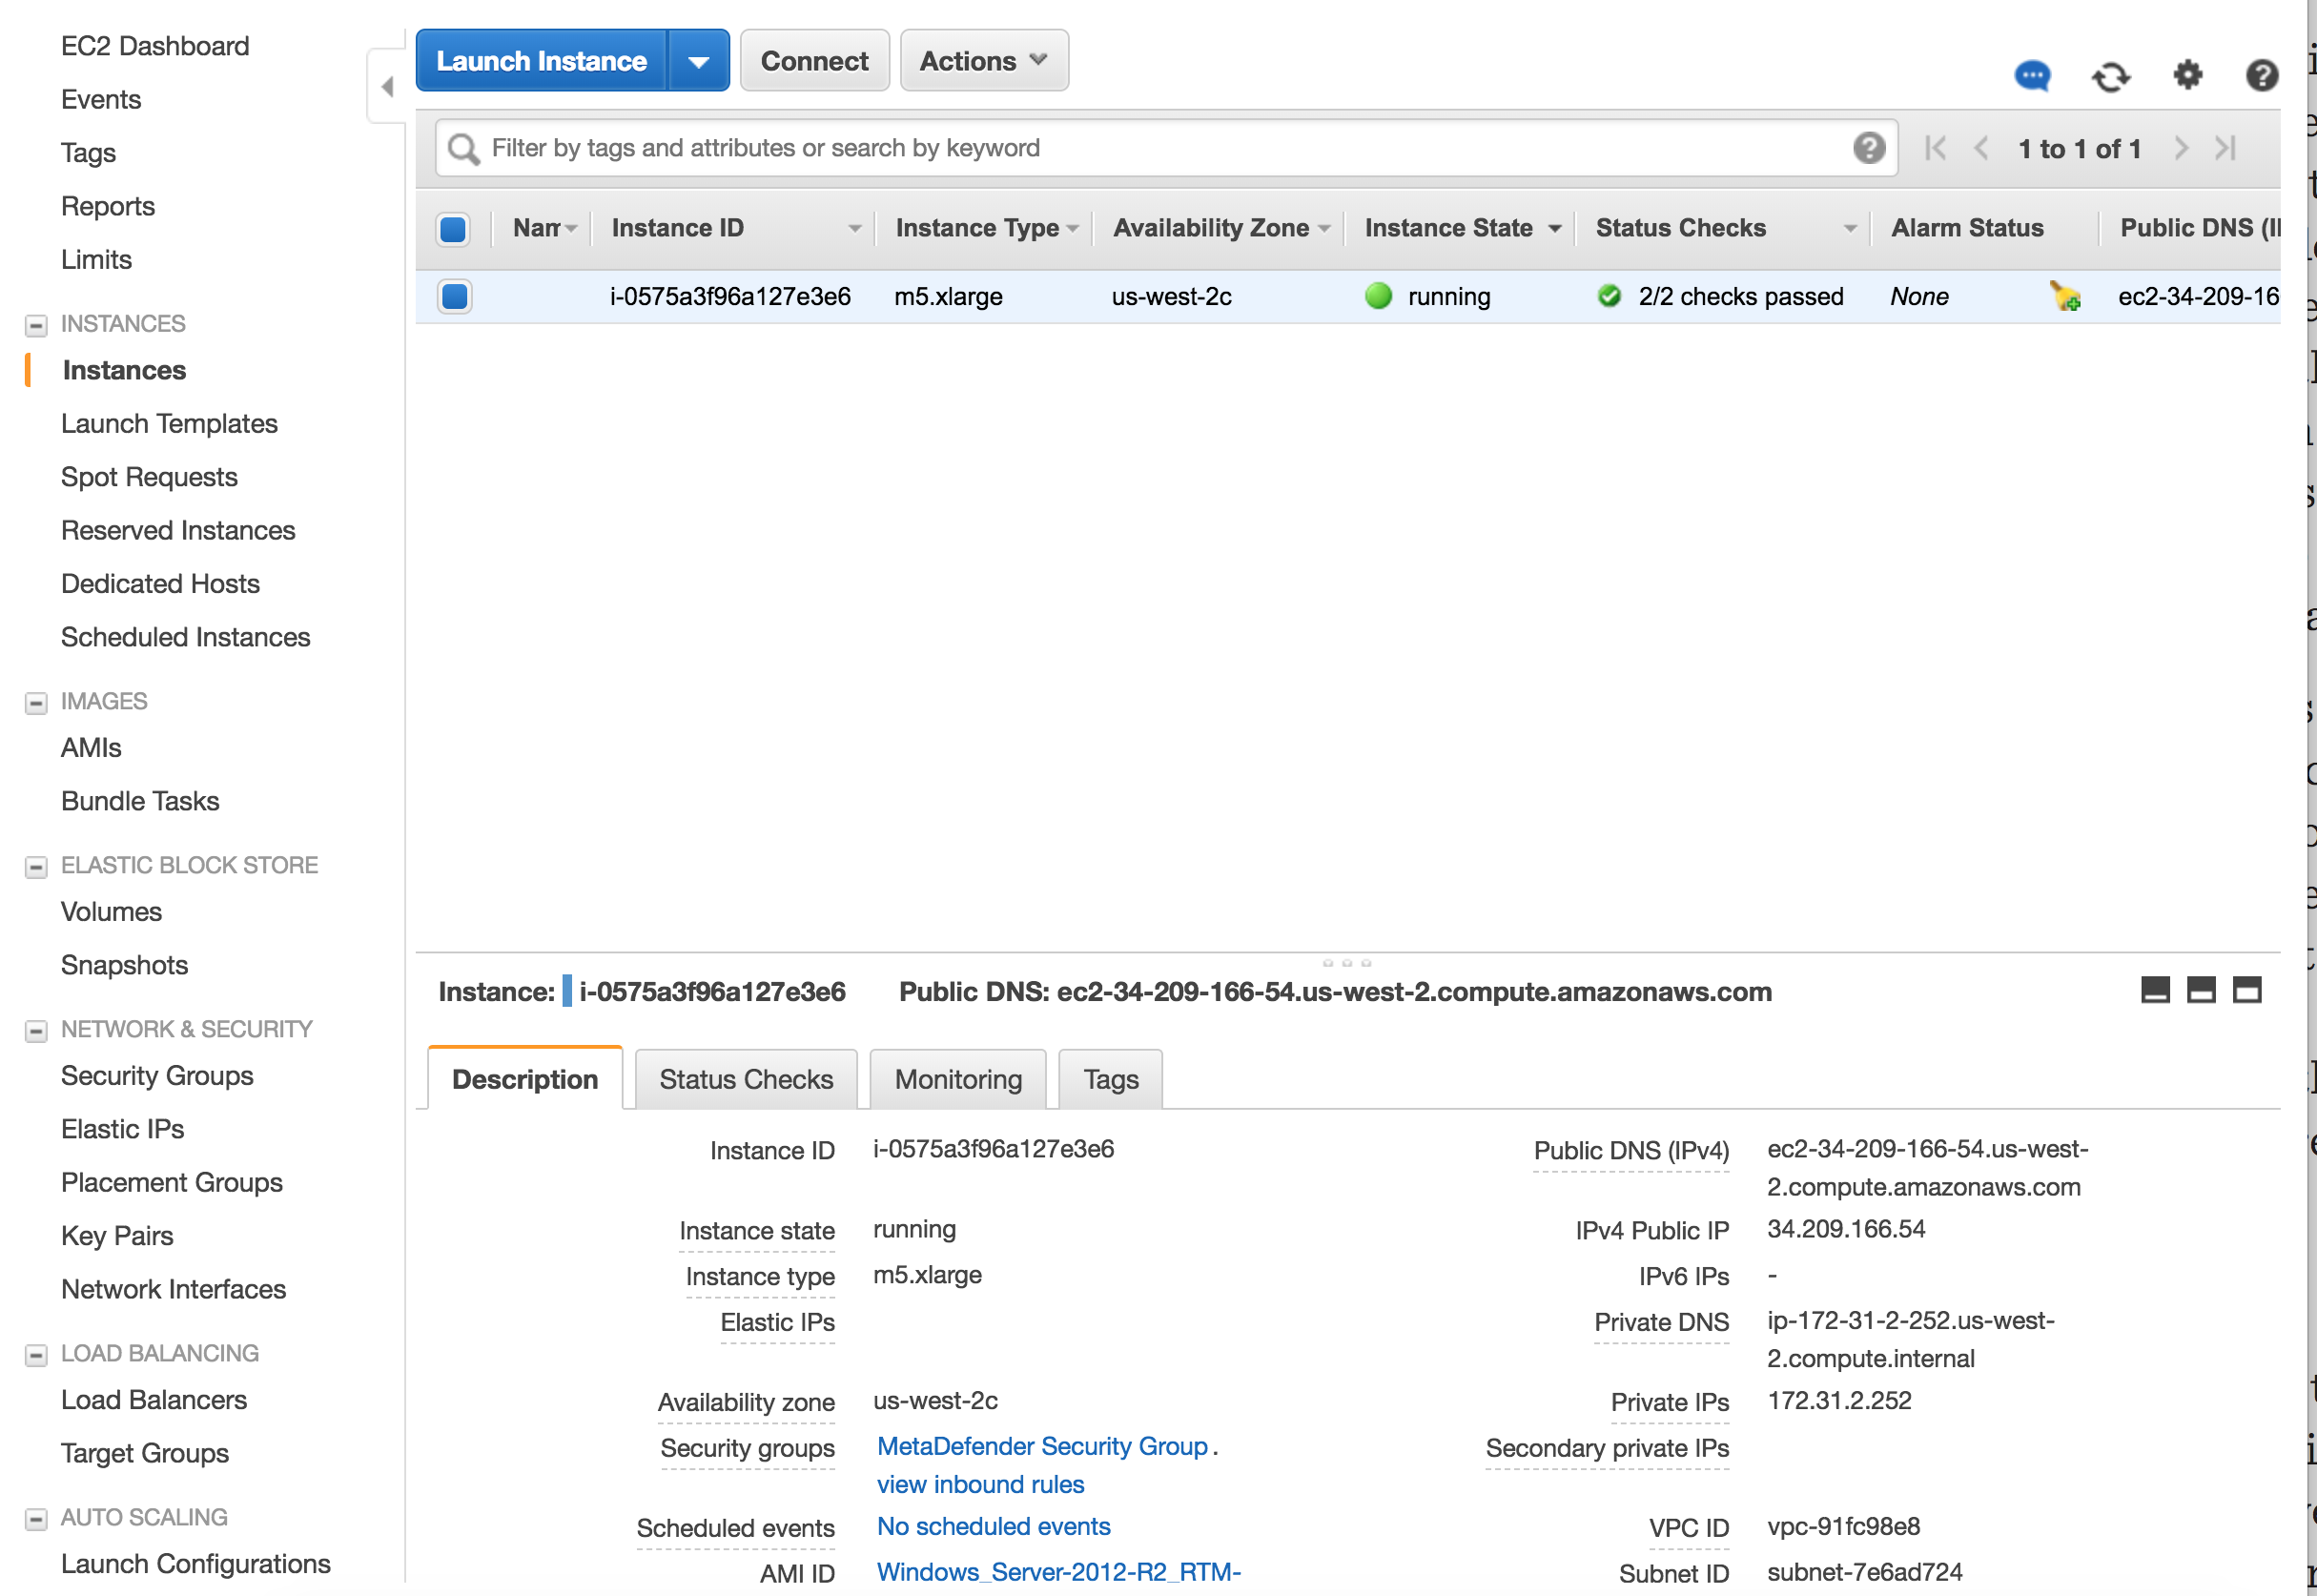
After you review the settings, hit Launch. In a few minutes the instance should become available
Licensing Automation
To automate the activation and deactivation of MetaDefender Core there are 2 options when launching Core in a EC2 instance.
Lambda functions:
- Are used for product activation/deactivation based on EC2 events
- Define an IAM role that grants access to those resources and attach it to the instance
User Data script to activate the product on start
Customize OPSWAT MetaDefender AMI from marketplace
Please follow these instructions before generating a custom AMI from the OPSWAT AMI published in the AWS marketplace.
Default username and password is
admin/<instance-ID>- “admin” is an unacceptable password. Whenever the end-user changes the password to “admin”, it will automatically change the password to
<instance-ID>after the Instance is rebooted.
- “admin” is an unacceptable password. Whenever the end-user changes the password to “admin”, it will automatically change the password to
To create custom AMI from OPSWAT AMI, some mandatory things need to be noted before converting:
- ( Required ) Deactivate the MetaDefender Core license in the EC2 instance from where the new AMI will be created.
- ( Optional ) Change MD Core password.
- If the end-user changes the password to “admin”, their default password after creating a custom AMI will be
<instance-ID> - If the end-user does NOT change the Core UI password, it will be the default password in the original instance (instance-id) for all the new instances that uses the custom AMI.
- If the end-user changes the password to “admin”, their default password after creating a custom AMI will be

