
Some deployments require inbound network access on specific TCP ports. If the operating system firewall blocks these ports, clients or services may be unable to connect.
This guide explains how to allow inbound TCP connections using several commonly used firewall solutions.
Windows Defender Firewall
Option 1: Using the Windows Defender Firewall Console
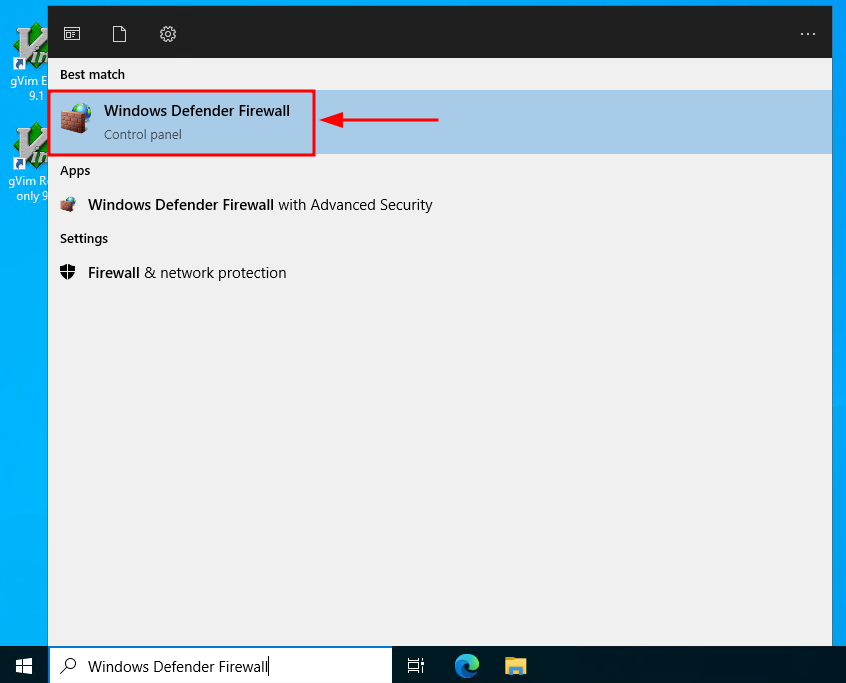
Open Windows Defender Firewall from the Windows Start menu or search bar.
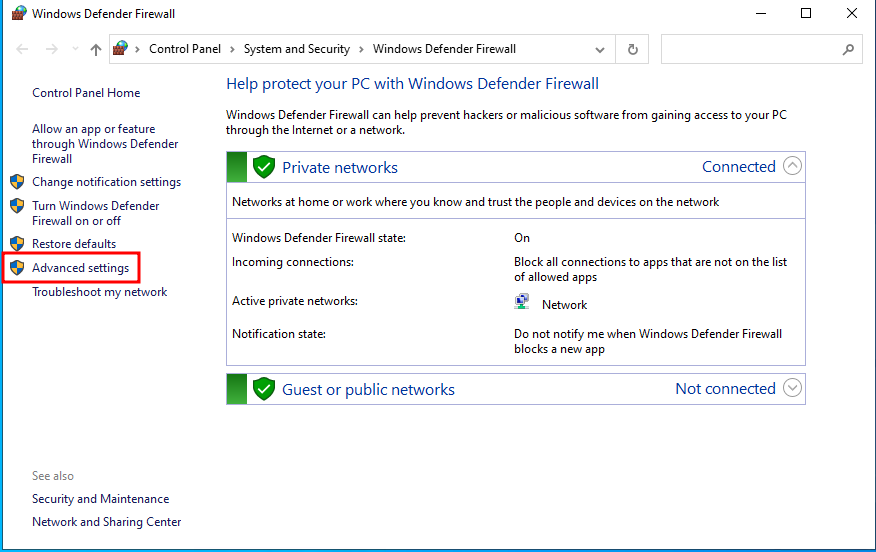
Select Advanced settings to open Windows Defender Firewall with Advanced Security.
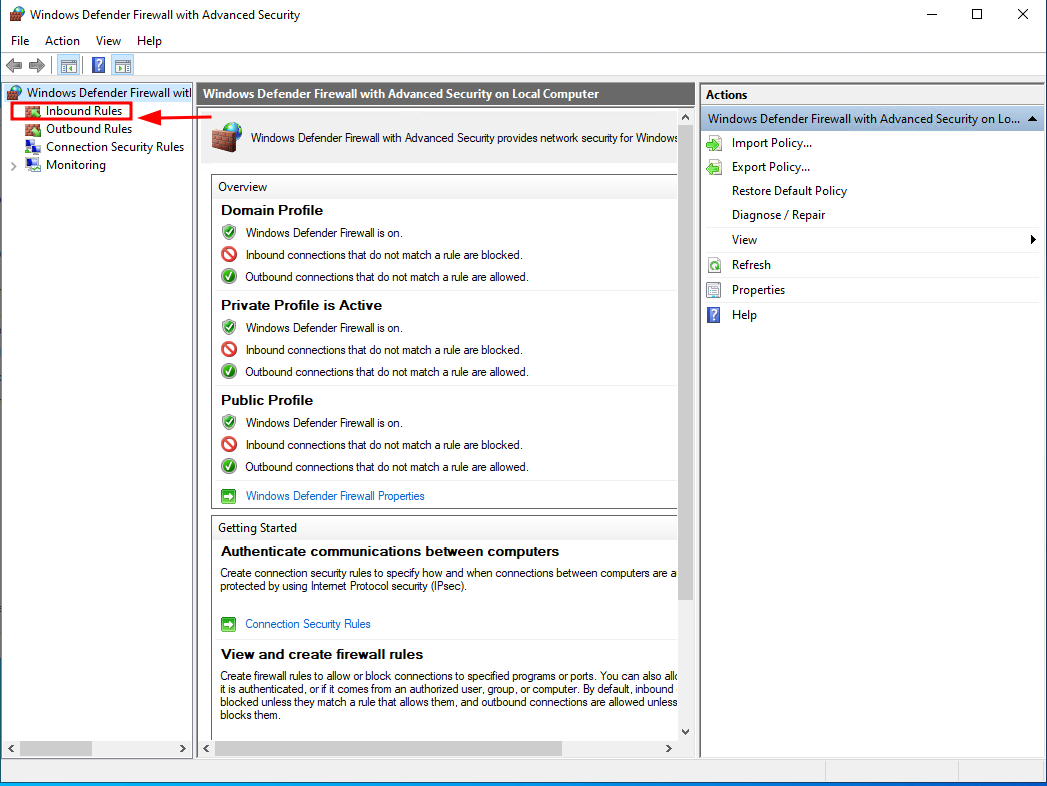
Select Inbound Rules.
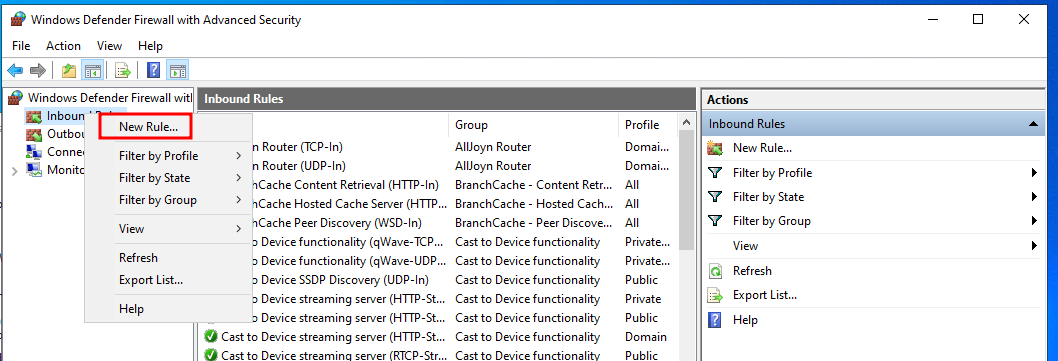
In the Actions at the right-hand pane, click New Rule....
Select Port and click Next.
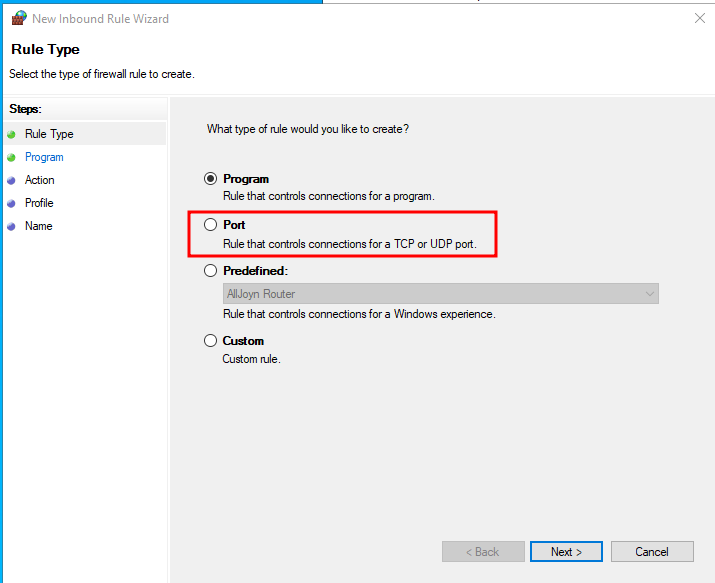
Select TCP, specify the required port number, and click Next.
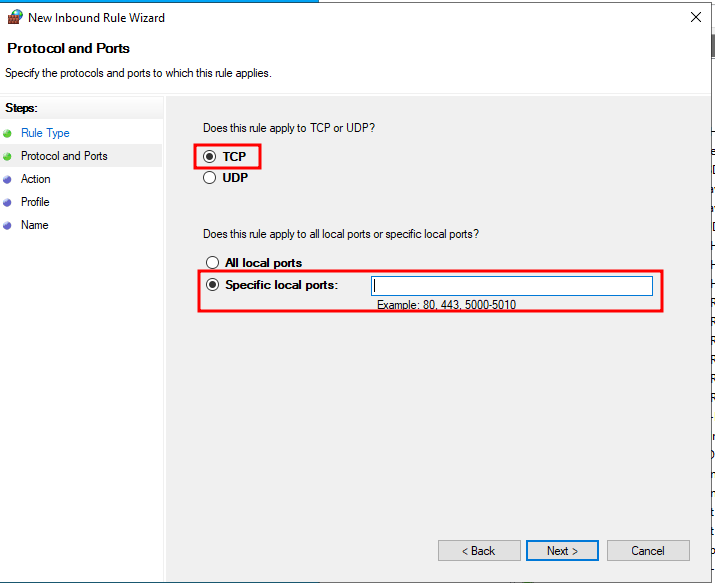
If you are unsure which protocol or port to use, refer to your application's documentation.
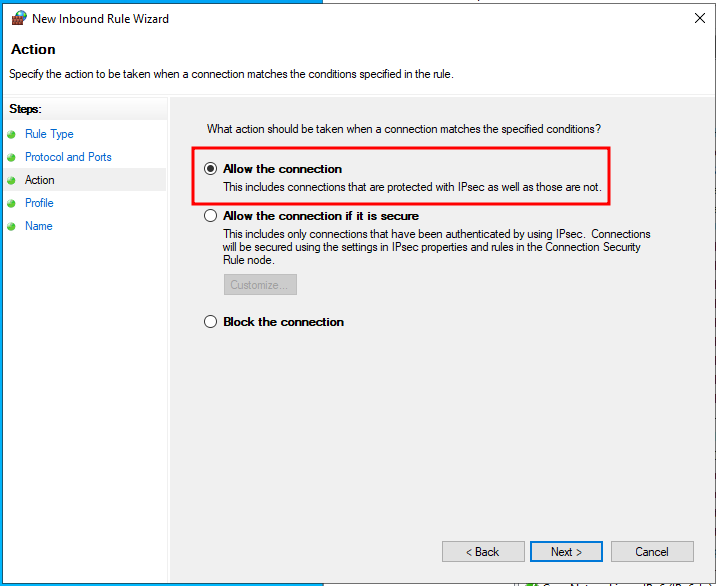
Select Allow the connection, then click Next.
Accept the default settings and click Next.
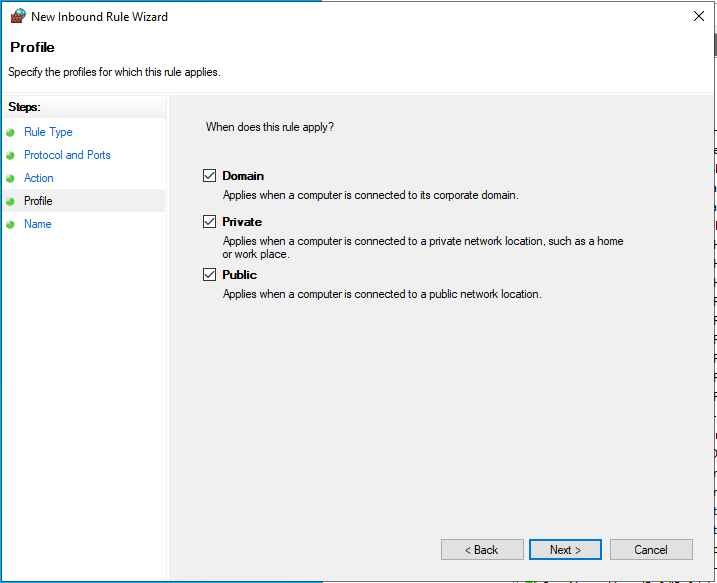
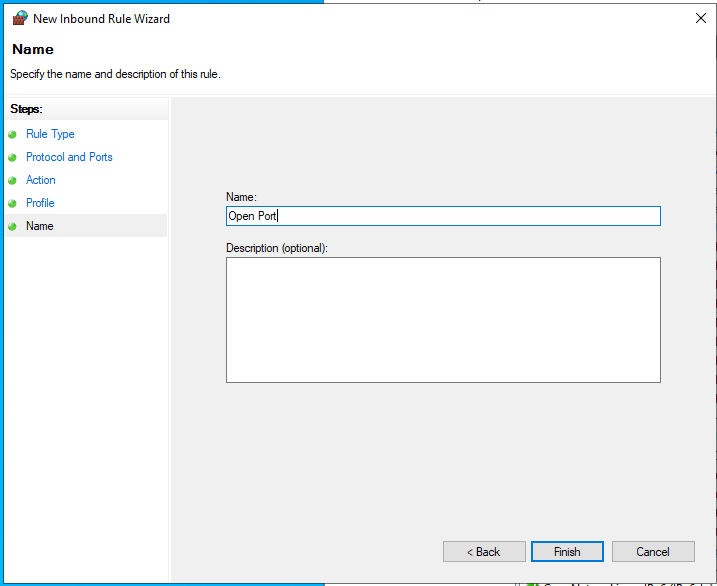
Enter a descriptive name for the rule (e.g., "Open Port”) and click Finish.
Option 2: Using PowerShell
Run PowerShell as Administrator.
Run the following command, replacing the placeholders with the appropriate values:
Uncomplicated Firewall (UFW)
Verify that UFW is running.
Expected output:
Allow a TCP port, replacing the placeholders with the appropriate value.
Example output:
Verify the firewall rule.
Confirm that the specified port appears in the list of allowed rules.
Firewalld
Verify that firewalld is running:
Expected output:
Allow a TCP port. Add a permanent firewall rule:
Reload the firewall configuration to apply the change:
Verify the firewall rule:
Confirm that the specified port is included in the list of allowed ports.