
The connection alerts are accessible under Connections → Connection Alerts.
The connection alerts contain all alerts on the whole devices in the system.
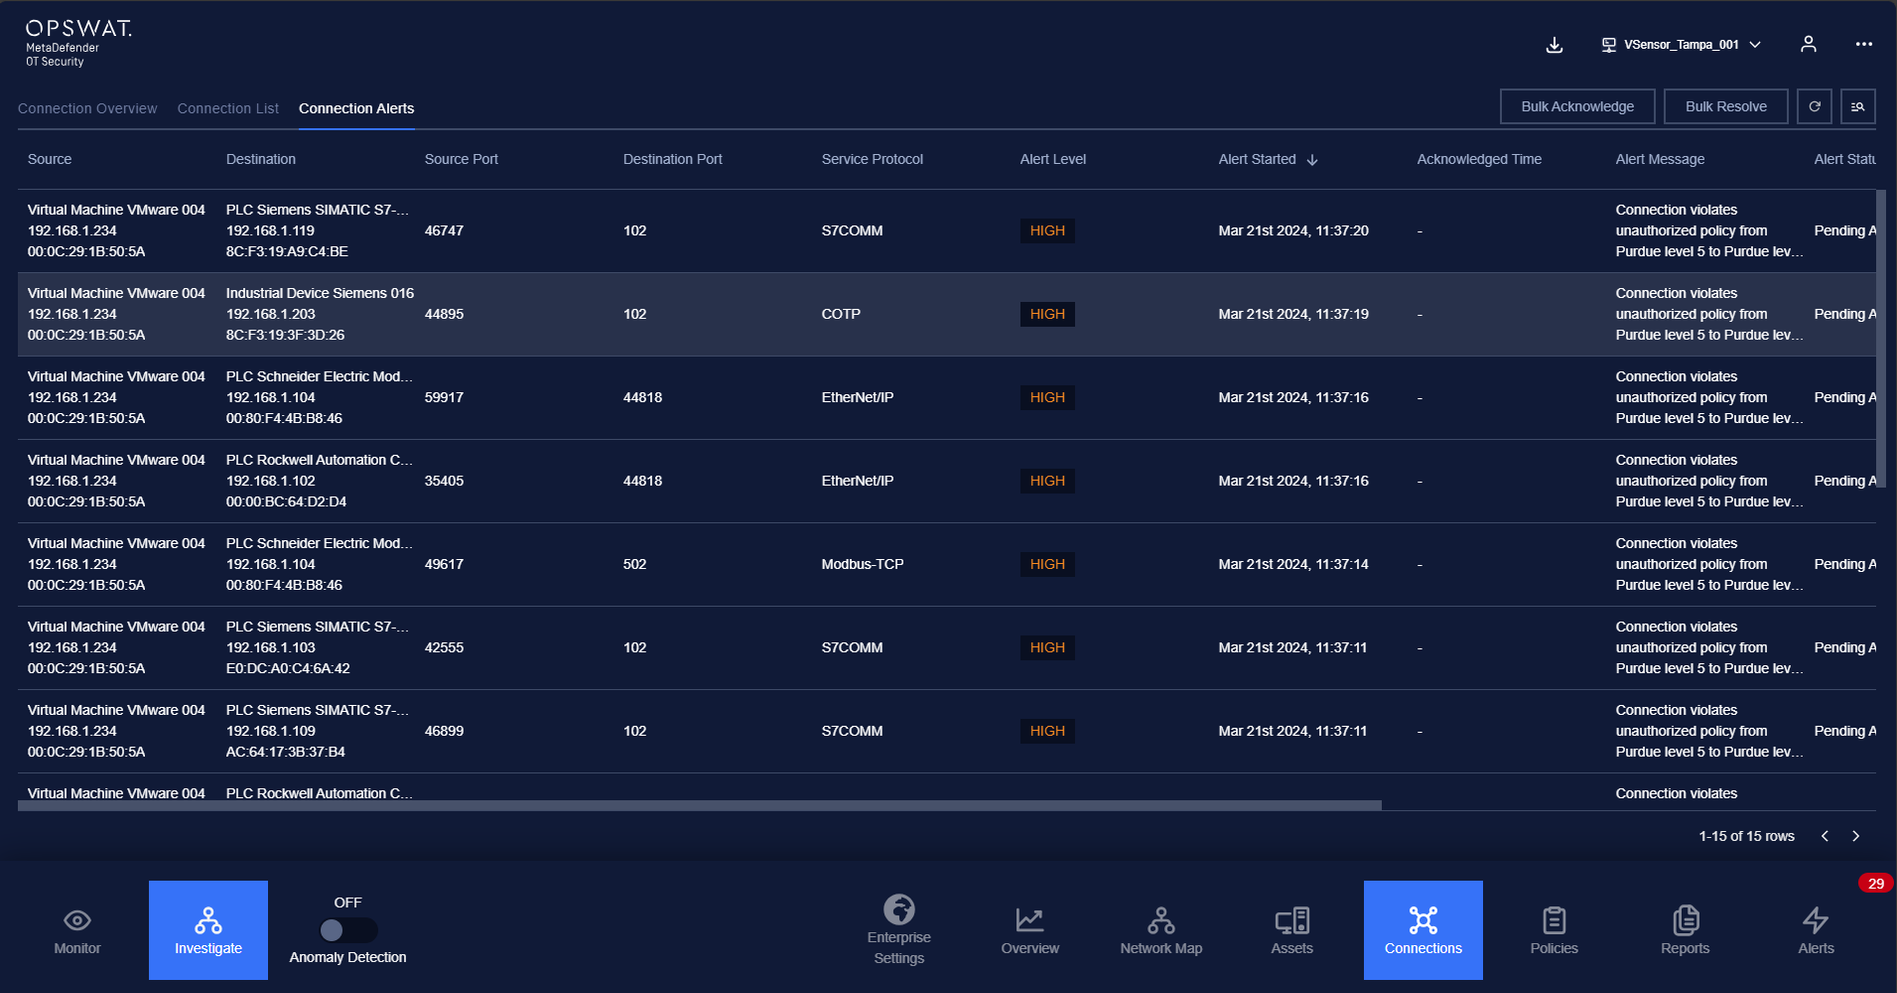
Each alert contains these following fields:
Source device (device from internal network), destination device (device from internal network)/ destination host (remote host), source port, destination port, protocol, connection started time, duration, data length.
Alert information: alert started/ended time, status, message for the detail, reason, comment and the action.
Note: you can sort a field in ascending or descending order by clicking on its label.
A new alert will appear on the list when a connection between two devices violates any policies in blocklist policy page or while Anomaly Detection is turned on.
If “On-screen alert” option is turned off
An acknowledge button will appear in the Action column on each alert record to indicate that the alert has not been acknowledged yet.
When the alert has been acknowledged, the resolve button will appear and you can completely resolve that alert.
Filter
We support searching and filtering on the connection alerts list:
You can enter value for 1 or more fields, and the result list and number of total records will be updated according to the value you entered.
Index | Field | Data type | Type of input | Support multi-input | Comment |
|---|---|---|---|---|---|
1 | Source | Text | Input text | No | |
2 | Destination | Text/Number | Input text or IP address | No | |
3 | Source Port | Number | Input Number | No | |
4 | Destination Port | Number | Input Number | No | |
5 | Protocol | Text | Input Text | No | |
6 | Connection Started | Date time | Select from pop-up calendar and clock (from-to) | No | |
7 | Duration | Decimal number | Input Number | No | |
8 | Connection Data Length | Decimal number | Input Number | No | |
9 | Alert Started | Date time | Select from pop-up calendar and clock (from-to) | No | |
10 | Acknowledged Time | Date time | Select from pop-up calendar and clock (from-to) | No | |
11 | Message | Text | Input text | No | |
12 | Status | Text | Select from drop-down list | No | |
13 | Reason | Text | Input text | No | |
14 | Comment | Text | Input text | No |
You can change the order of the fields displaying on the list by clicking "..." -> “Filter preference” then drag and drop the fields and arrange them in the desired order.
You can choose to show/hide the fields in the list by clicking "..." -> “Filter preference” and tick/untick the box on the left of field name
You can save a custom filter for your convenience when you need to reuse them in the future. Enter values into the fields to filter then select "..." -> "Create filter", give a name for your filter. Every time you come back, click on "..." → Your saved filter to apply it.
You can update your saved custom filters by editing/adding values to the fields and selecting "..." then "Save filter”
You can delete a saved custom filter by selecting “…” → “X” button on saved filter.