Overview
The smart profiling asset tab is accessible under Assets → Smart Profiling Asset.
This page lists all protocols available for smart profiling scanning and its history.
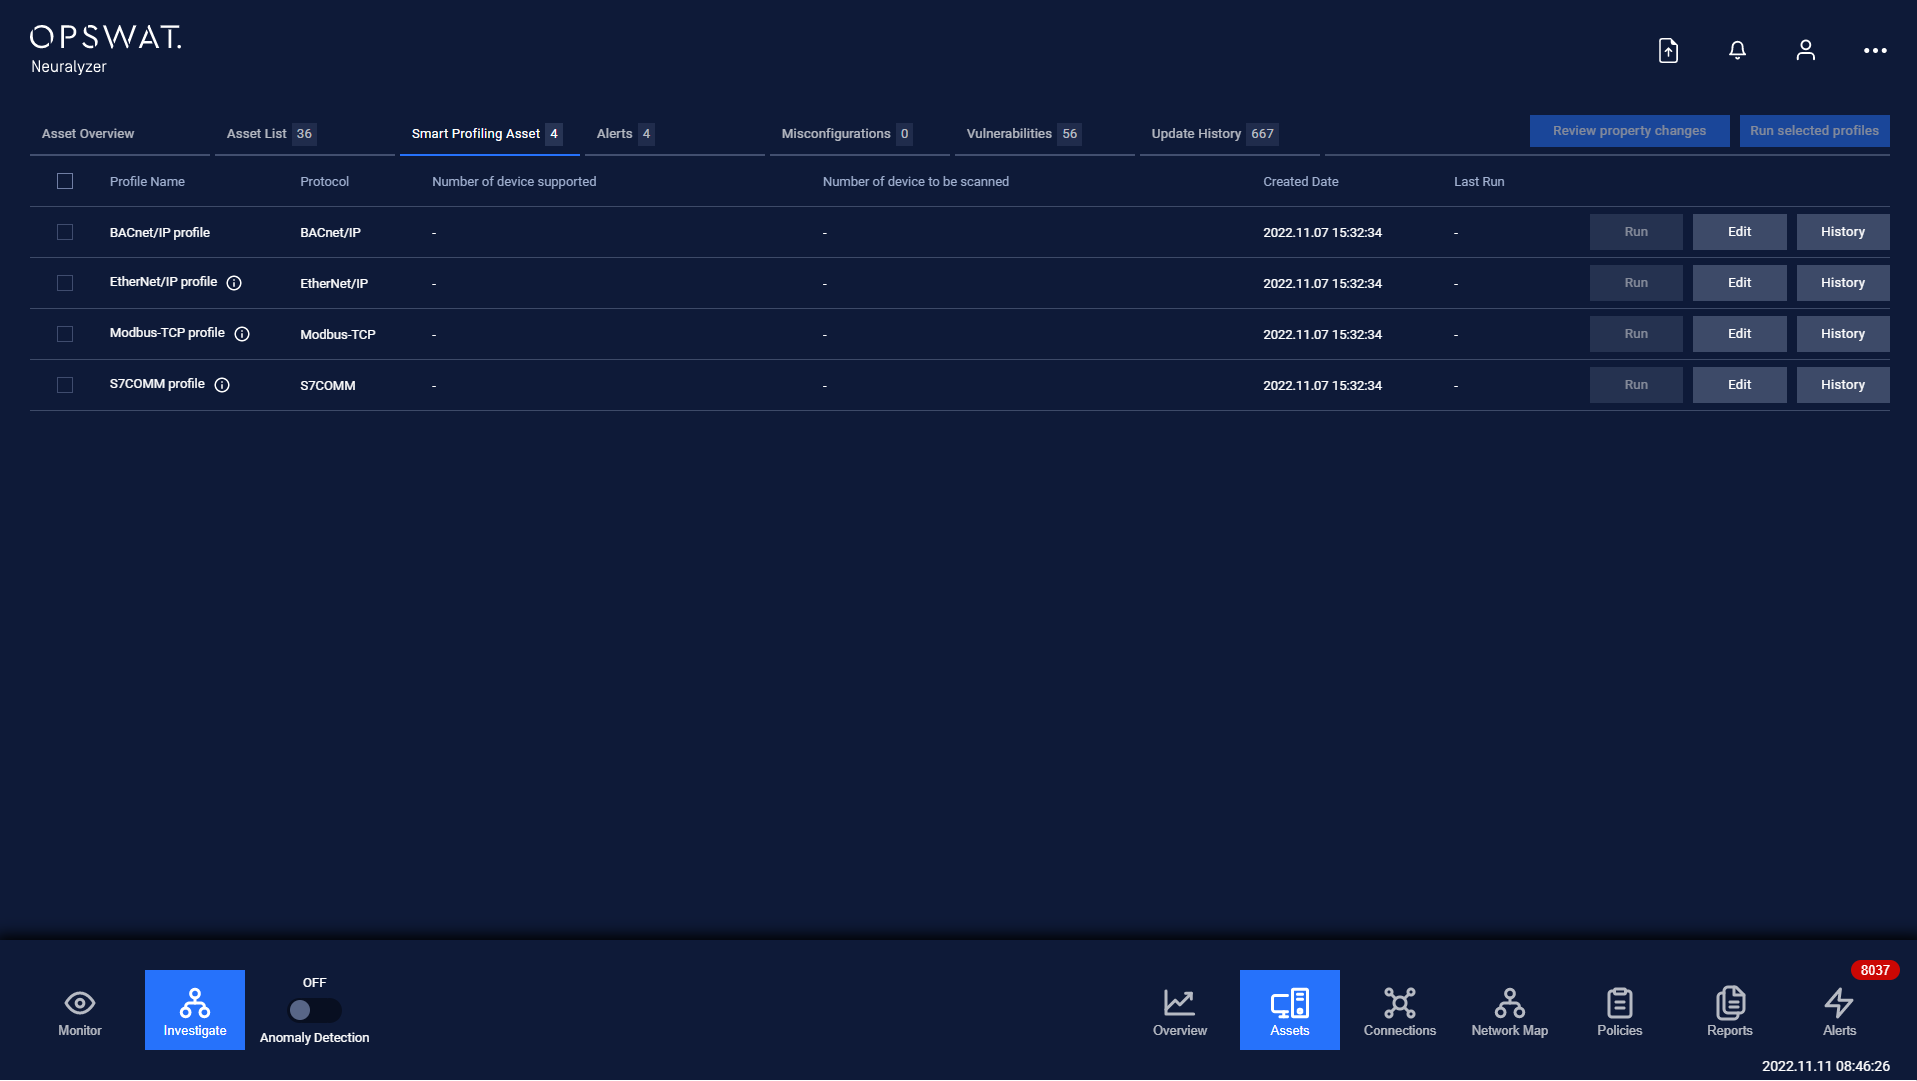
Table include:
- Information of profile: Profile name, More-information icon, Protocol, Number of devices supported, Number of devices supported, Number of devices to be scanned, Created date, Last run.
- Function buttons for each profile: Run, Edit and History.
- Checkbox for each profile and Select All checkbox.
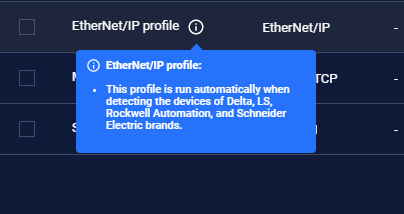
Except BACnet/IP, there are more-information section in the icon for others protocol to clarify that they can be run automatically by system for specific device brands.
Main features
Edit Profile
The popup Edit profile is accessible under Assets → Smart Profiling Asset → Edit.
The popup Edit profile lists all devices that are added to scan using the protocol.
User can add devices automatically (suggested by Neurlayzer) or manually (select from the list).
The Add device popup support user to filter, select one or many devices and add them to the profile.
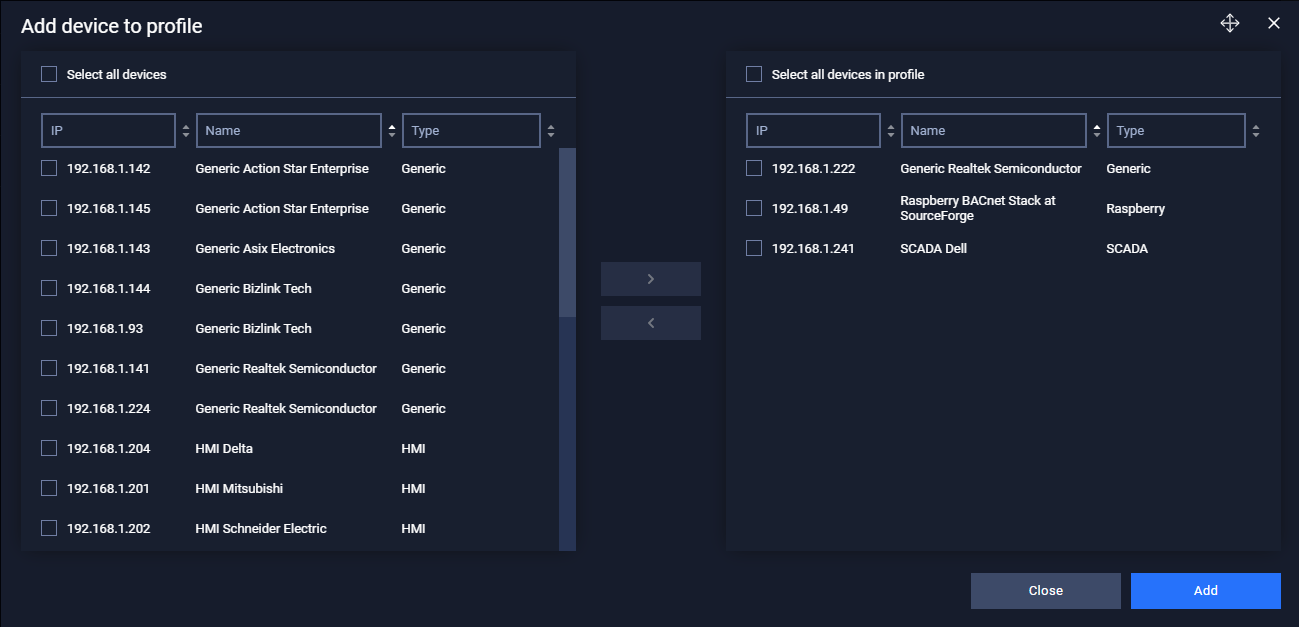
Back to the Edit profile popup, the device table include some device common information fields such as name, type and ip.
In addition, user can choose device to scan, remove a device from the table and decide the priority of the profile for a device, in case the device is scanned by two or more profiles.
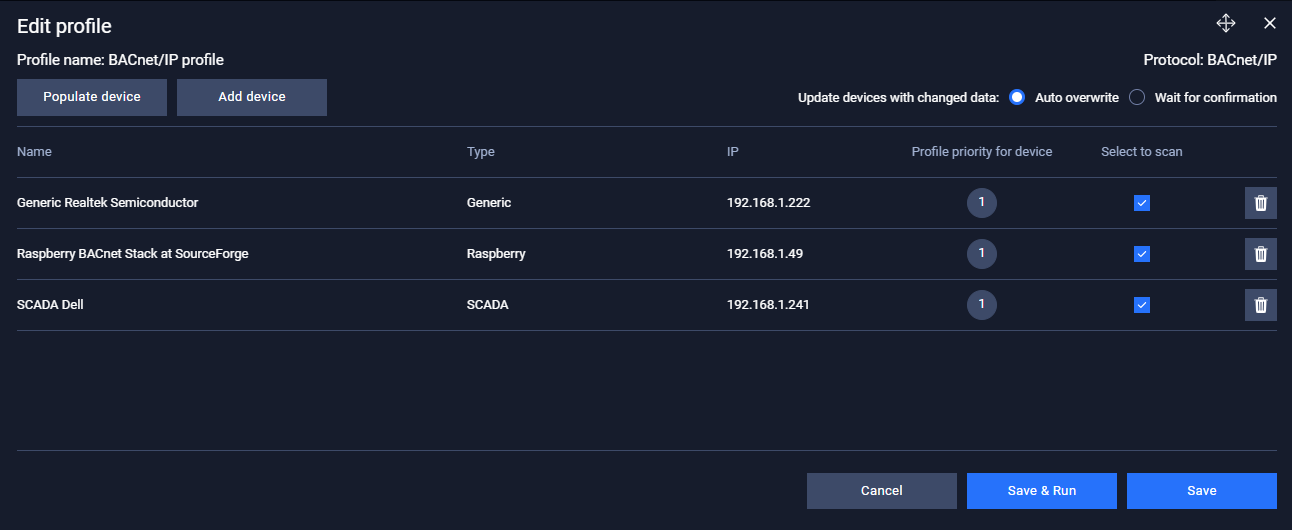
There are two options for the scan result for user to choose:
- Auto overwrite: Neuralyzer will automatically apply new information scanned by the profile to the device.
- Wait for confirmation: Neuralyzer will list new information scanned to the Review property changes popup and show it to user for confirmation.
Finally, user can choose to Save, Save & Run or cancel the change.
Run profile
User can choose to run smart profiling individually or simultaneously by clicking the "Run" button or checking checkboxes and use the "Run selected profiles" button.
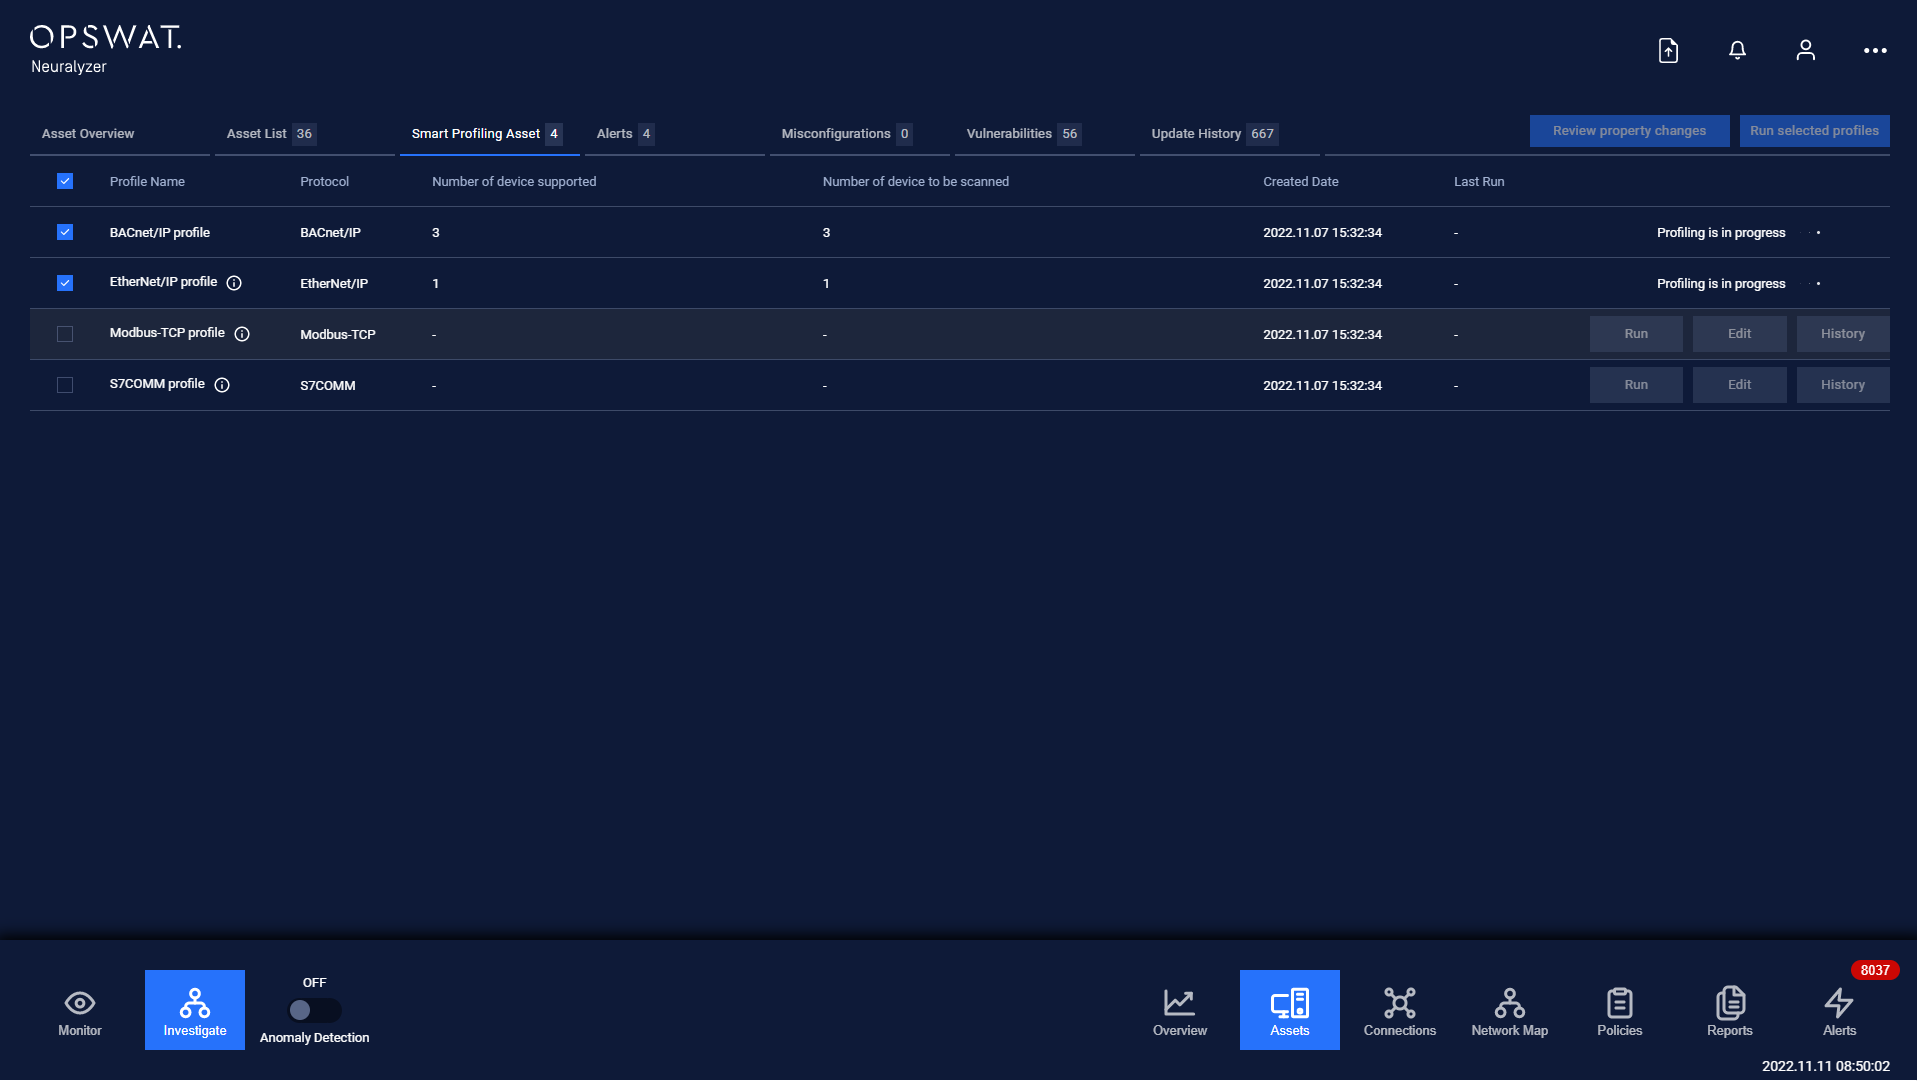
While the profiling process is running, users are unable to run other profile.
Review property changes
After profiling process finished, if there is any change detected, the review property changes popup will appear. Popup can still be opened through the button "Review property changes" at the main page.
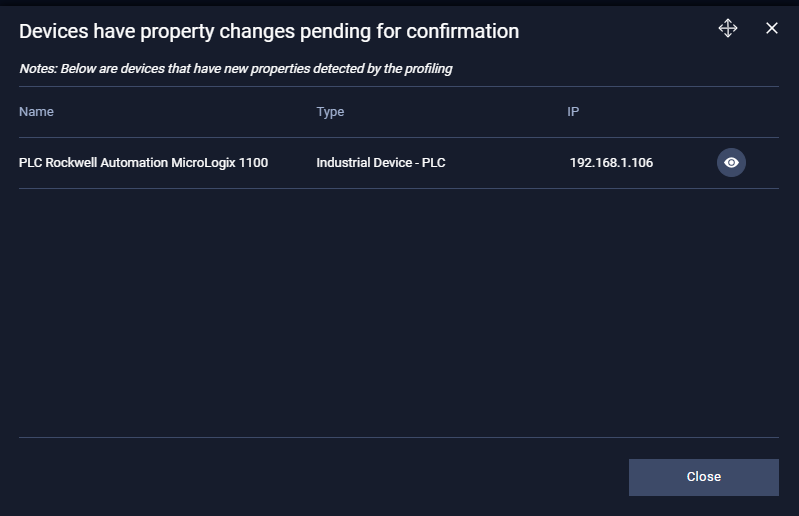
User can see the common information of device that is detected with property changes here as the image above.
Furthermore, user can view and decide what property to be change at New detected properties popup through the "Eye" button.
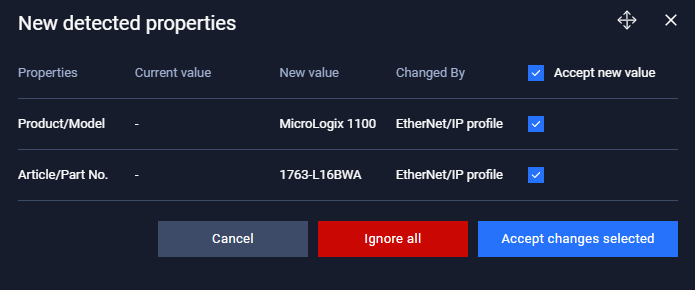
User can view all property changes detected here and can decide to accept or ignore each change individually.
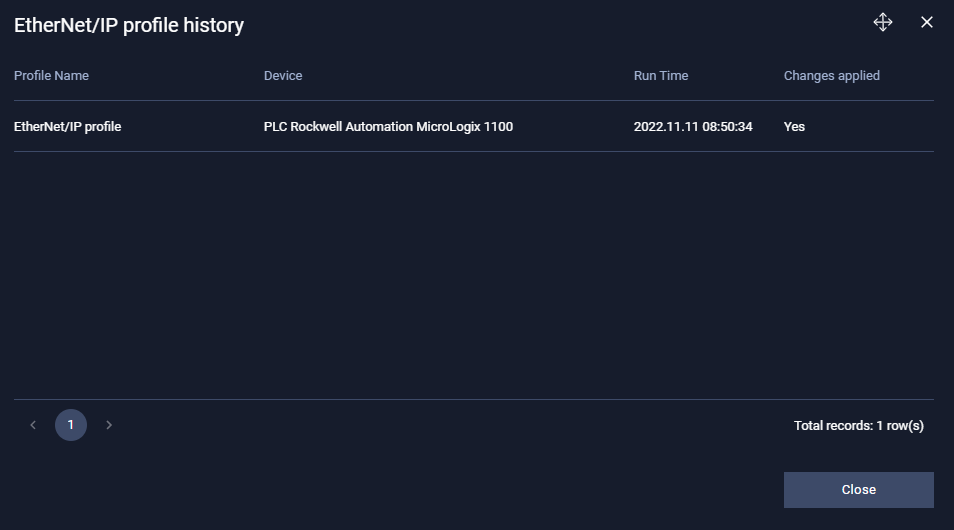
Profile history
Lastly, all change activities are recorded and can be view through the history button of each profile.