
Backup & Restore is a feature in My OPSWAT Central Management that lets you automatically back up the full system image of Windows endpoints across your organization. When a machine fails or needs to be rolled back, you can restore it to a known-good point in time from the same console.
You open the feature from the left-hand menu under Backup Restore.
This feature is available only through on-demand configuration. Please contact OPSWAT Support for assistance.
On This Page
Before You Begin
Keep the following in mind before creating a backup job:
Requirement | Backup | Restore |
|---|---|---|
License | MA-BKR | MA-BKR |
Operating System | Windows | Windows |
Supported Devices | Windows devices running MetaDefender Endpoint version 7.6.2607.xxx or later. Non-Windows devices and devices on older versions are automatically excluded from any target you select. | Windows devices running MetaDefender Endpoint version 7.6.2609 or later. Non-Windows and older version devices are excluded. |
Storage | You need at least one reachable storage destination (for example a shared folder path such as | At least one successful backup of the source device, taken on M OPSWAT Central Management 10.7.26092 or later. |
Devices that don't meet the OS or version requirement are excluded from the target list automatically.
Restore needs a newer device version than backup does. On the same fleet, the restore device picker can show fewer devices than the backup picker. If you can back up a device but can't restore it, check its MetaDefender Endpoint version first.
Every full backup stores a complete image, so make sure the destination has enough free space.
Main Screens and Navigation
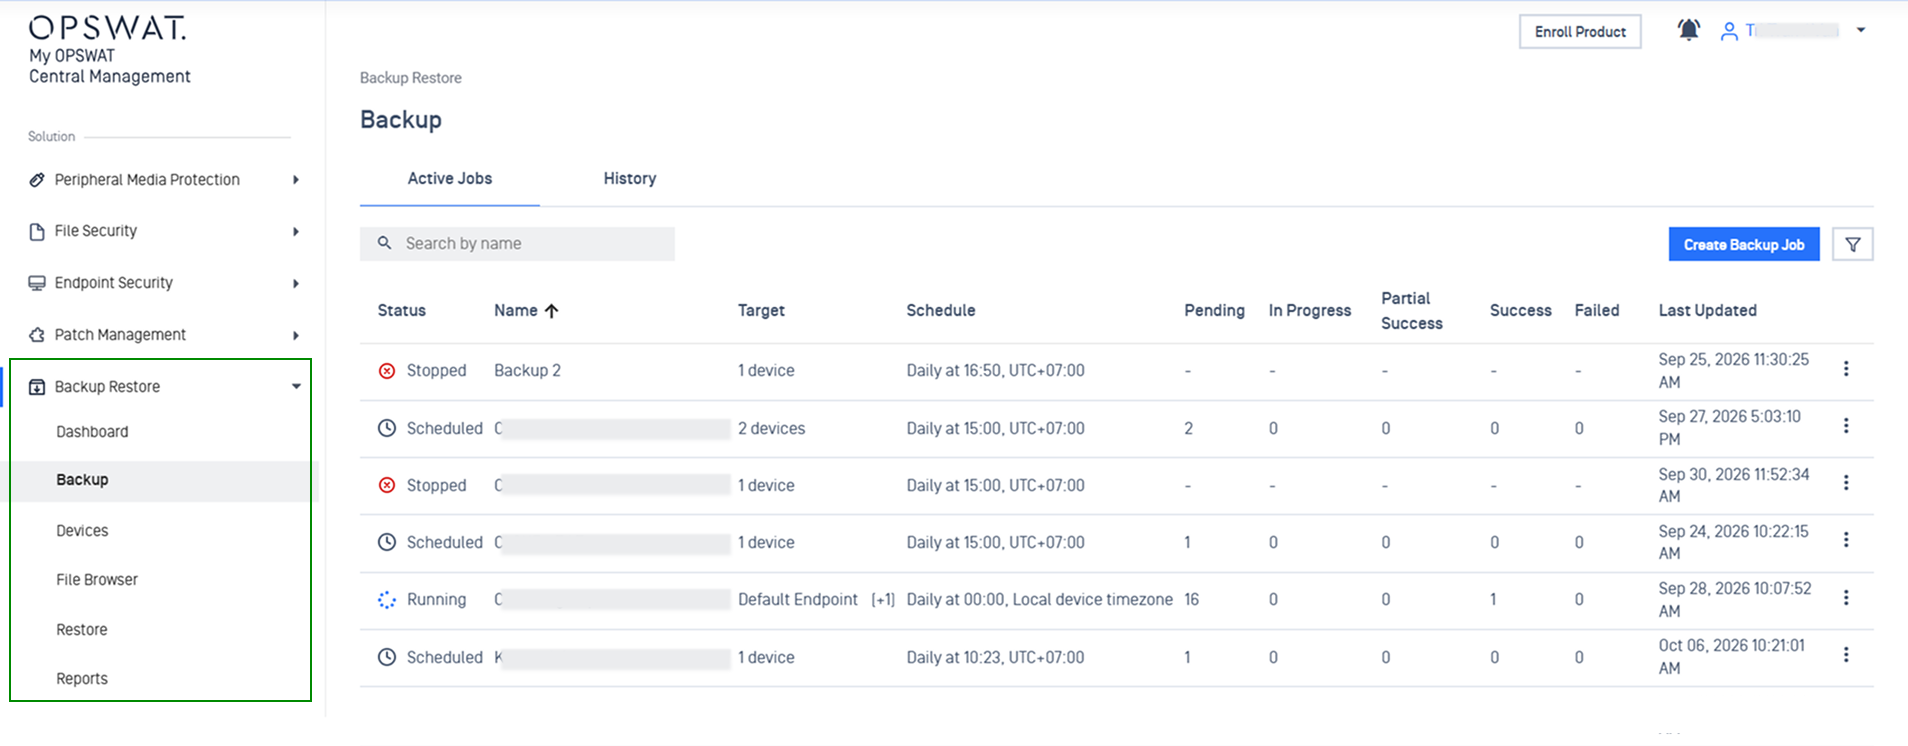
Backup & Restore has the following sub-pages:
Sub-pages | Details |
|---|---|
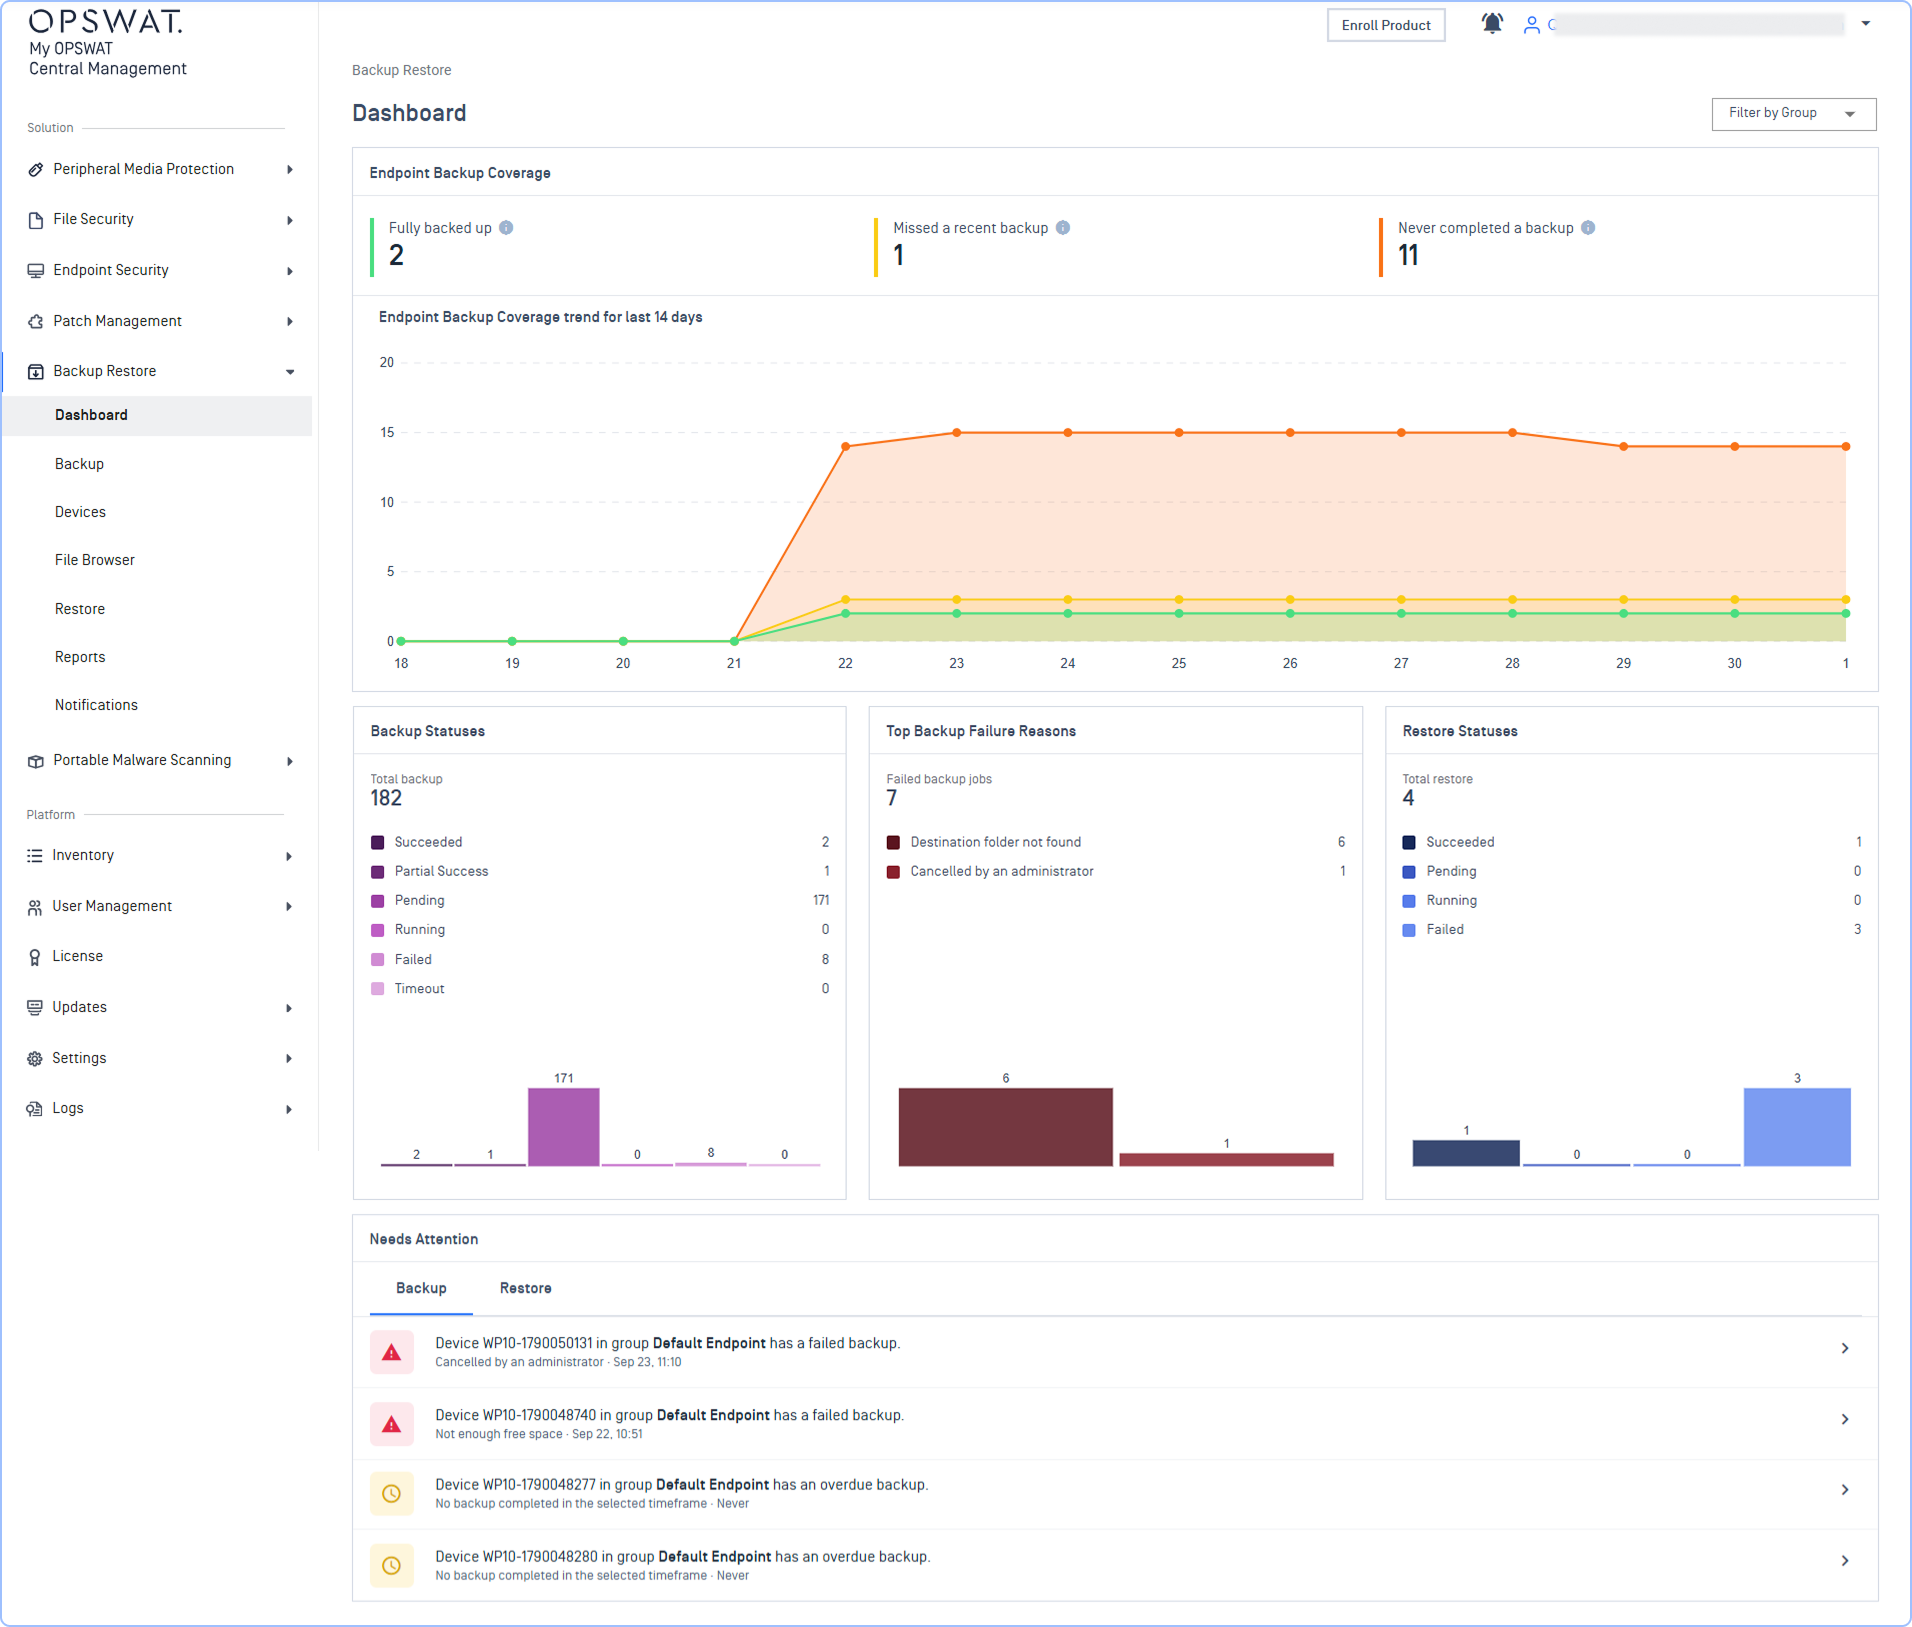
Dashboard | See fleet-wide backup coverage, run statuses, top failure reasons, and the devices that need attention 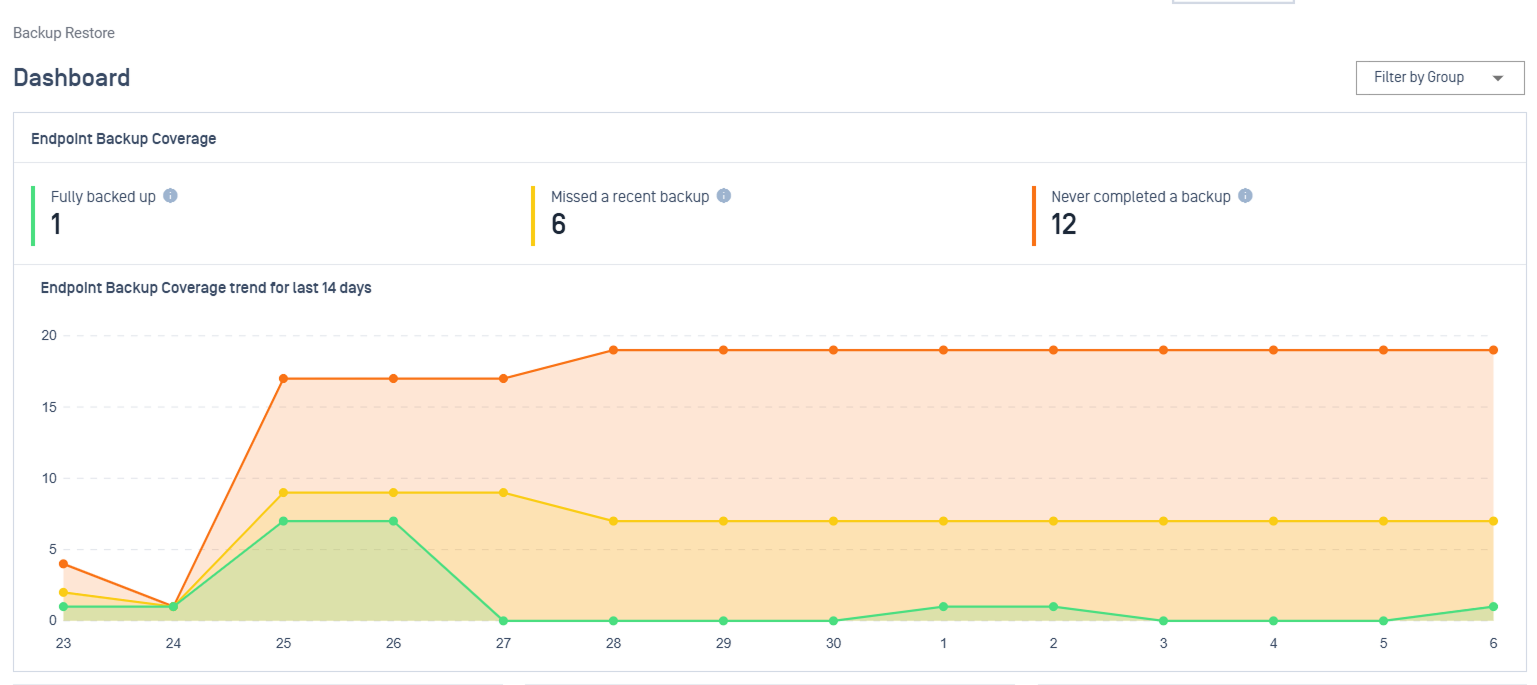 |
Backup | Create and manage backup jobs, including two tabs:
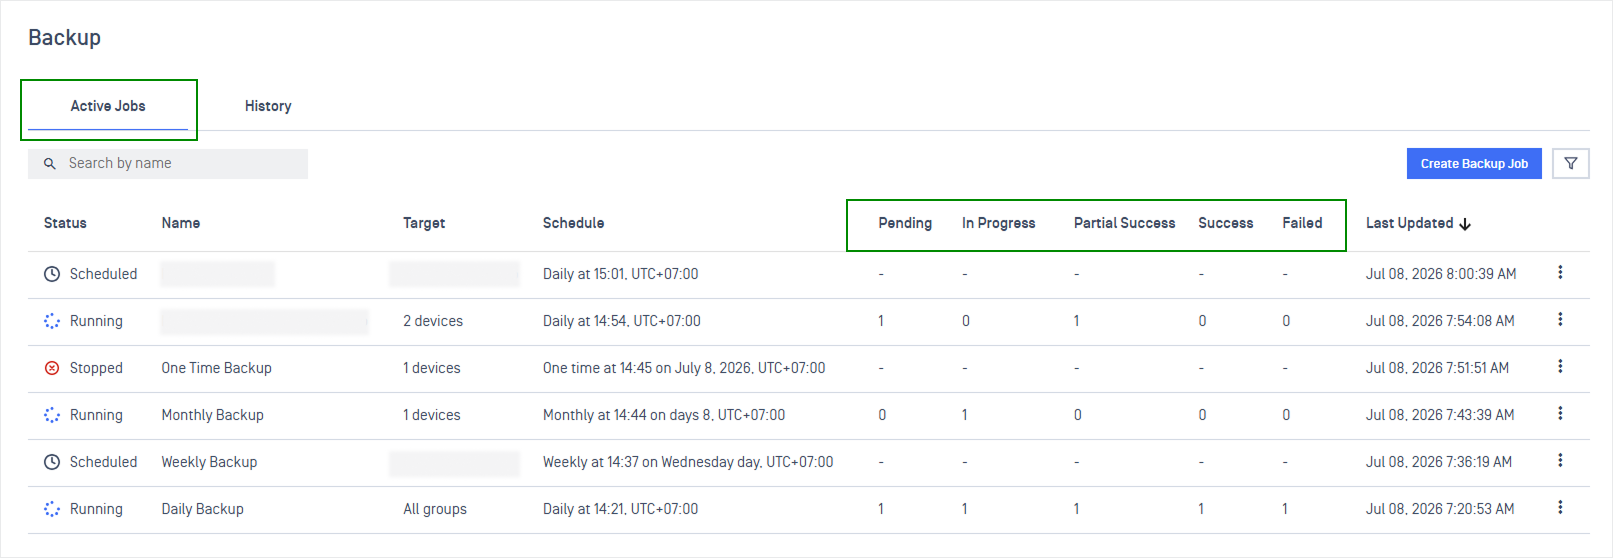 When a job finishes a run, it moves automatically to the History tab. If the job is recurring (Hourly, Daily, Weekly, or Monthly), a new active job is created automatically to handle the next scheduled run
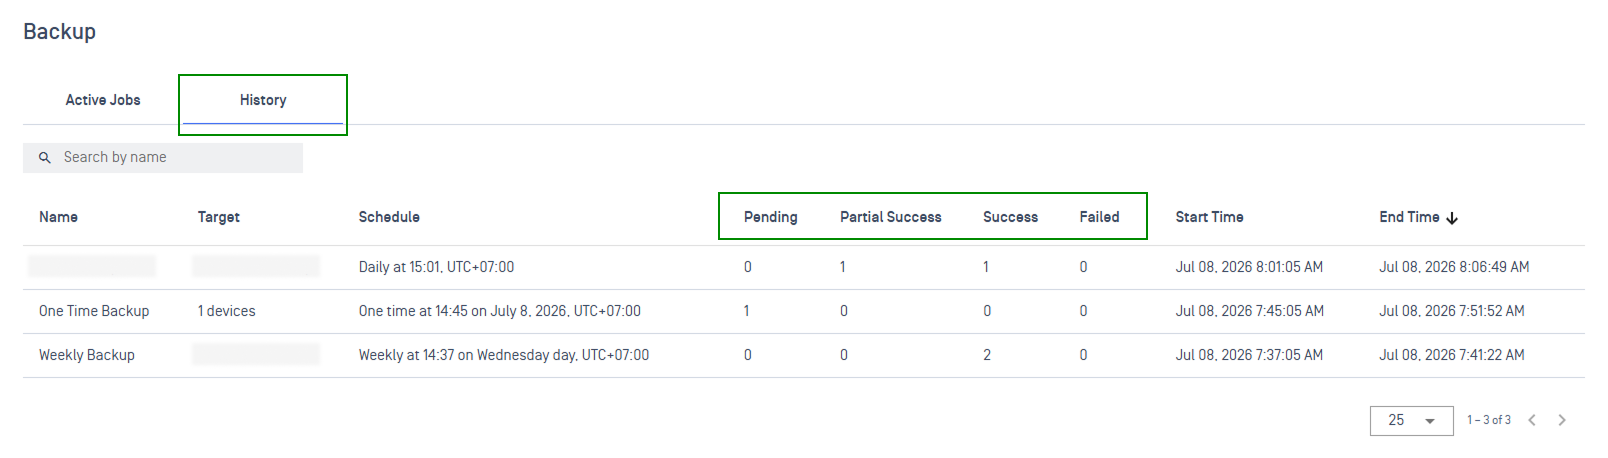 |
Devices | Lets you browse the backups that have been stored by device, as well as the backup scope, destination, size, and the time of the last backup for each device 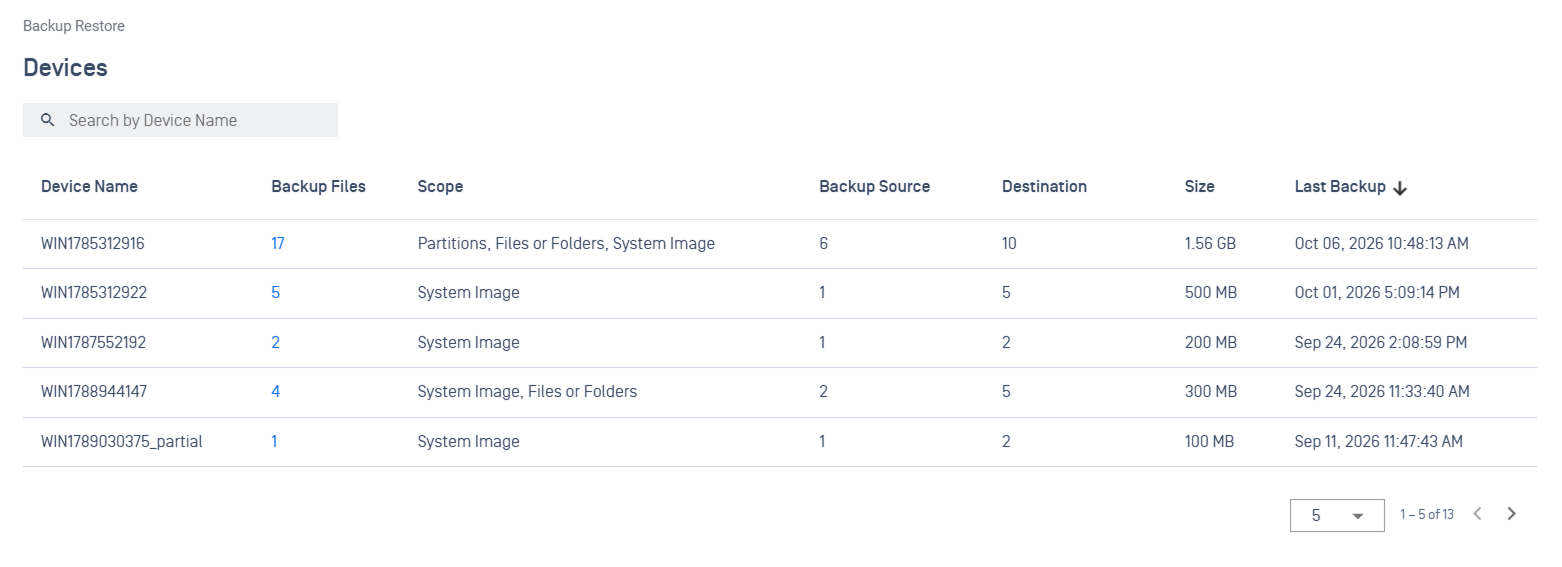 |
File Browser | Shows what has actually been stored by file, you can see the backup scope, destination, size, and the time of the last backup for each device 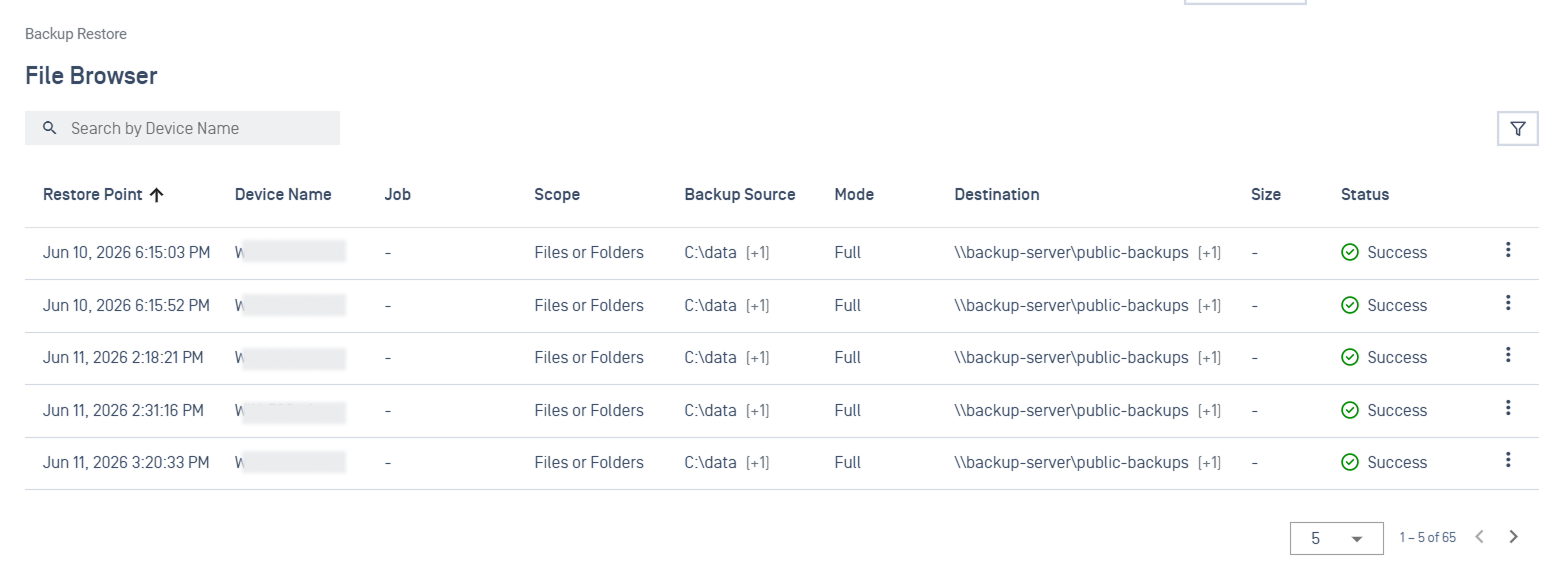 |
Restore | Create and manage restore jobs. The job list shows restores that are scheduled or in progress, and the History tab records finished restores. 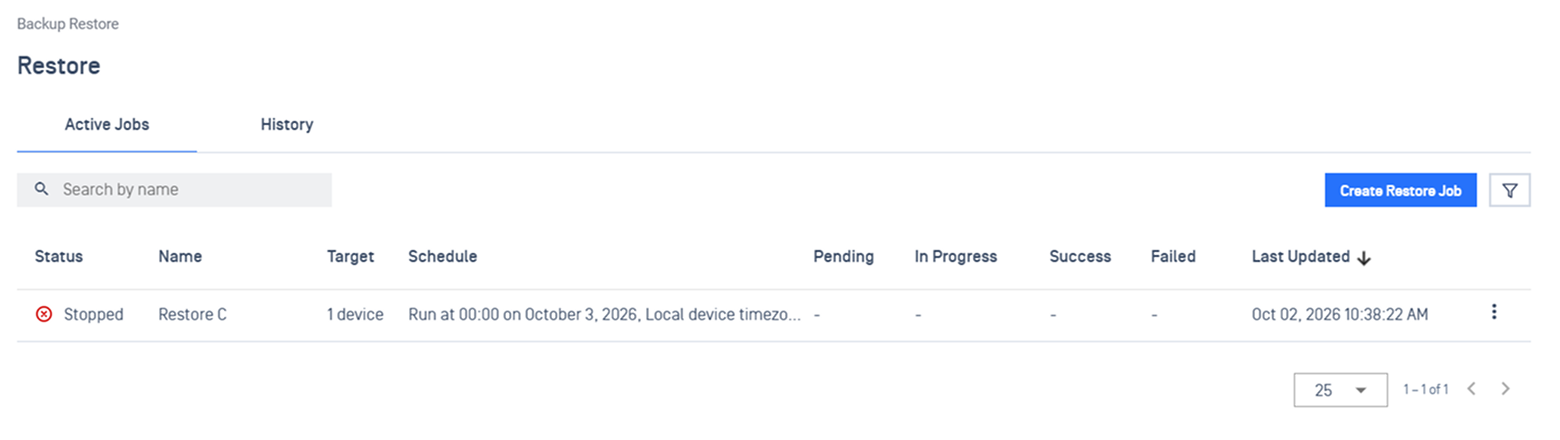 |
Reports | Automated and on-demand report definitions (PDF/CSV) with scheduled stakeholder email delivery 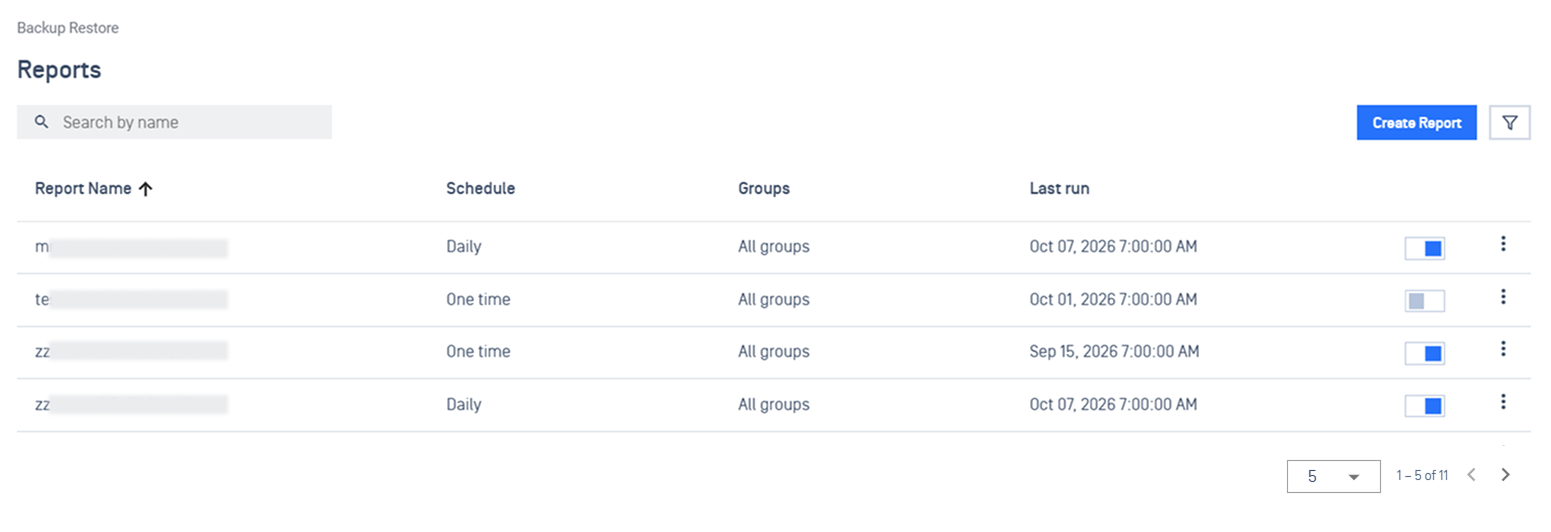 |
Notifications | 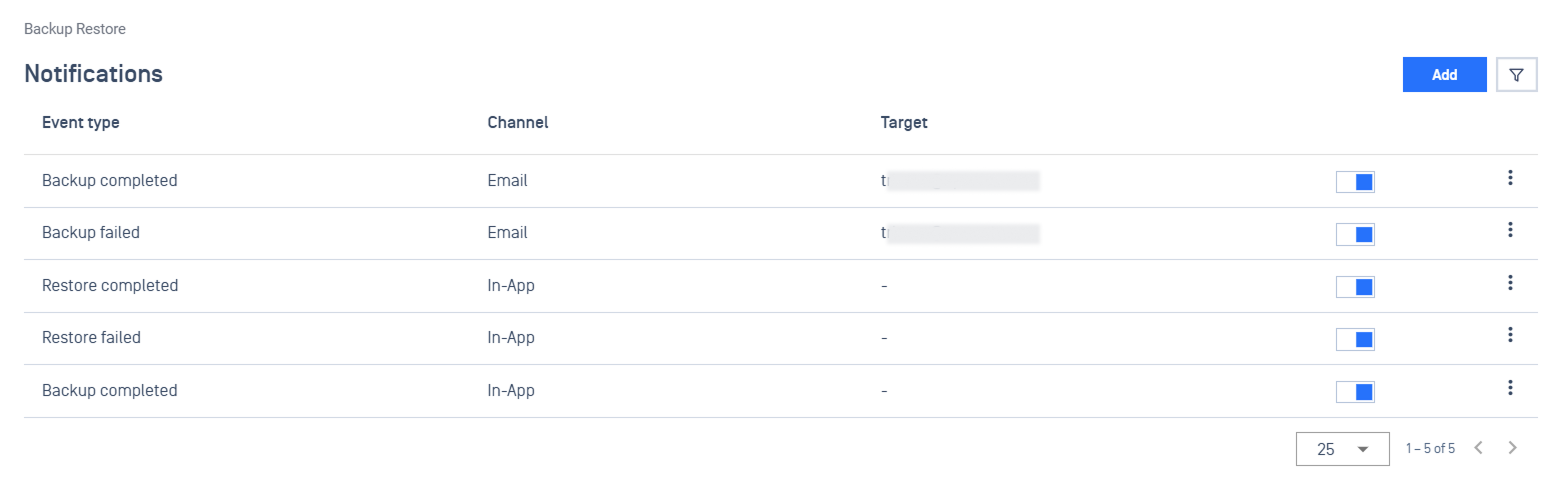 |
Backup & Restore Job Status
A job is in one of these states:
Status | Meaning |
|---|---|
Scheduled | The job is enabled and waiting for its next scheduled run |
In Progress | A run is underway and devices are backing up |
Stopped | The job has been stopped manually and will not run until you start it again |
A run is considered complete once every targeted device has reached a terminal result of Success, Failed, or Partial Success.
Note These are job-level states. The per-status counts on each job row (Pending, In Progress, Success, Failed, and so on) describe individual devices, not the job as a whole.
Backup Workflows
You create backup jobs, choose which devices to protect, decide where the backups are stored, and set a schedule for them to run automatically. The system sends the commands to each device, tracks progress, and reports results directly in the console.
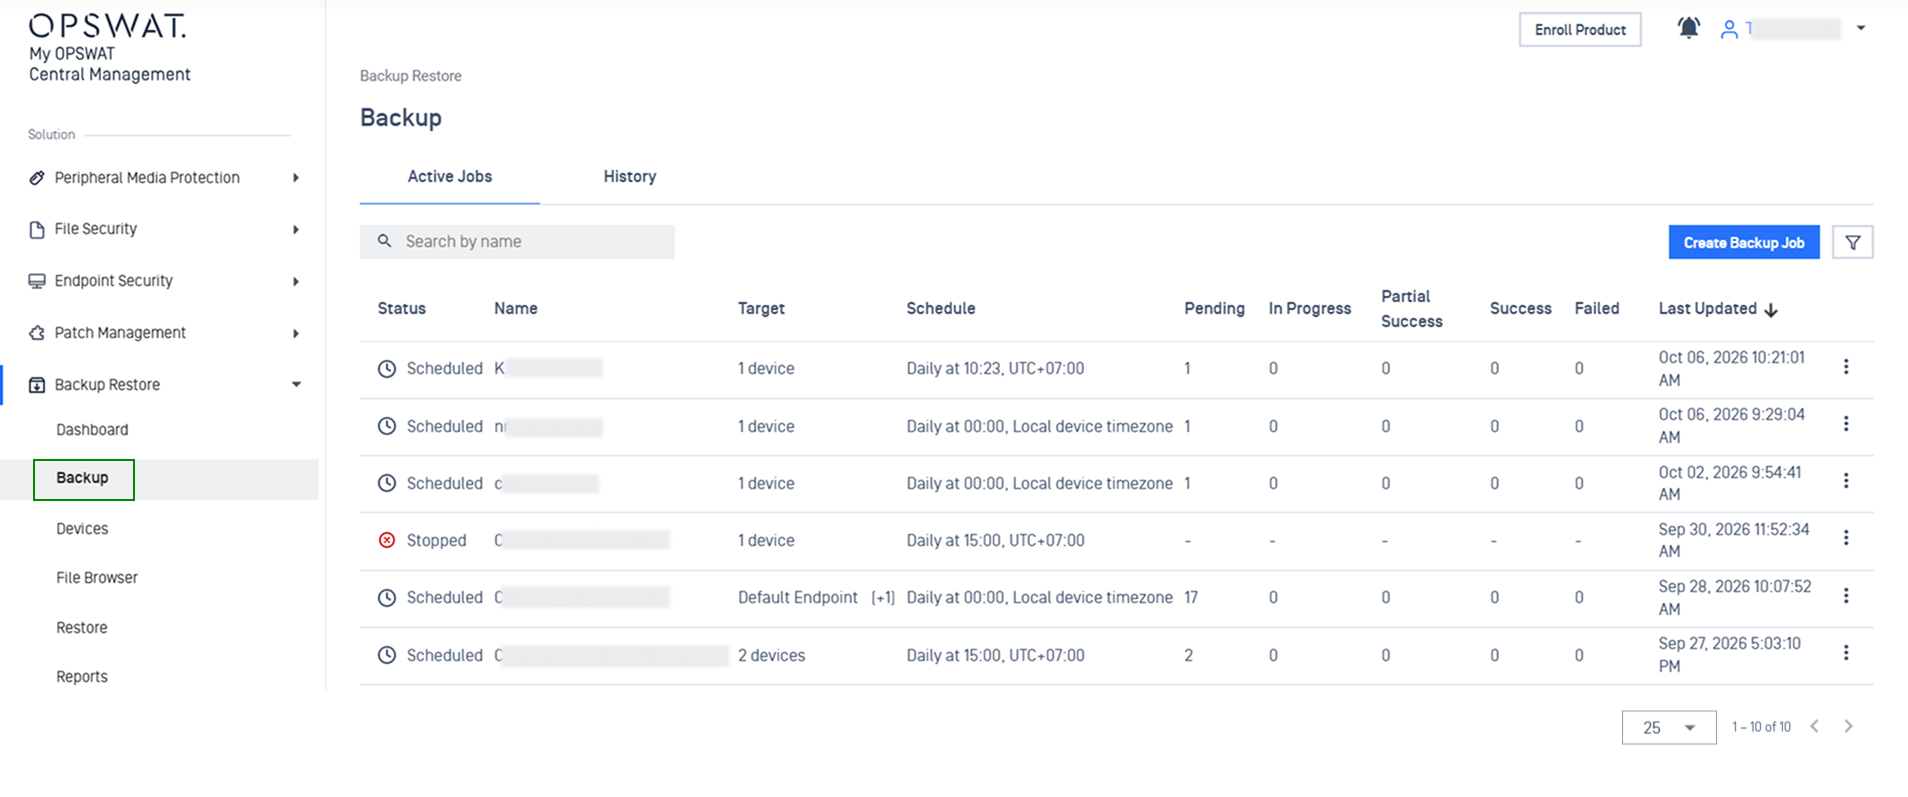
Create Backup Job
Navigate to Backup Restore → Backup → Create Backup Job
Step | Details |
|---|---|
Step 1: Enter a job name and description | The job name must be unique within your account; a duplicate name will be rejected 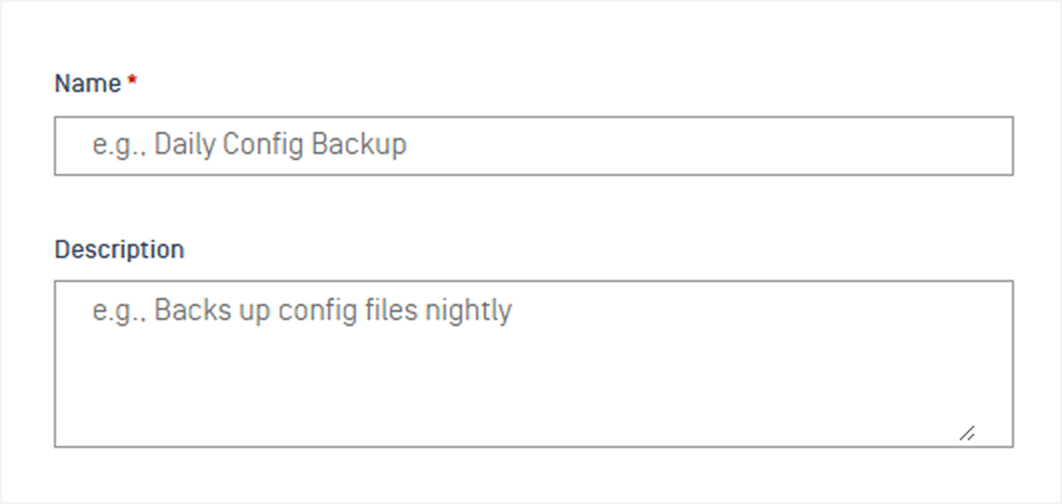 |
Step 2: Choose target devices to back up | Please note only Windows devices running MetaDefender Endpoint 7.6.2607.xxx or later can be backed up.
 |
Step 3: Configure Backup Scope and Backup Mode |

 |
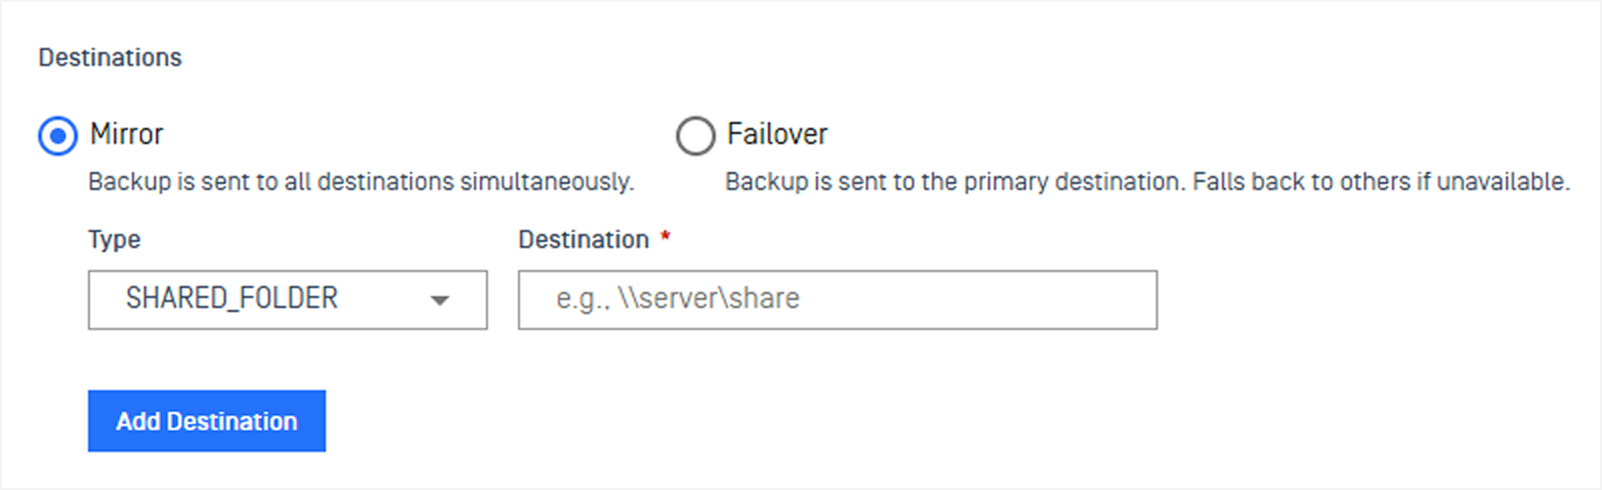
Step 4: Configure Backup Destination | Choose where backups are stored:
 |
Step 5: Set up a schedule when backups run on target devices |
|
Step 6: Complete | Click Create to save the job, or Discard to cancel |

Storage Vault Catalog
Backup destinations are now managed centrally through a Storage Vault Catalog, eliminating the need to type connection details into each backup job individually.
To access the Vault Catalog, go to Settings > Integrations > Vault Catalog tab.
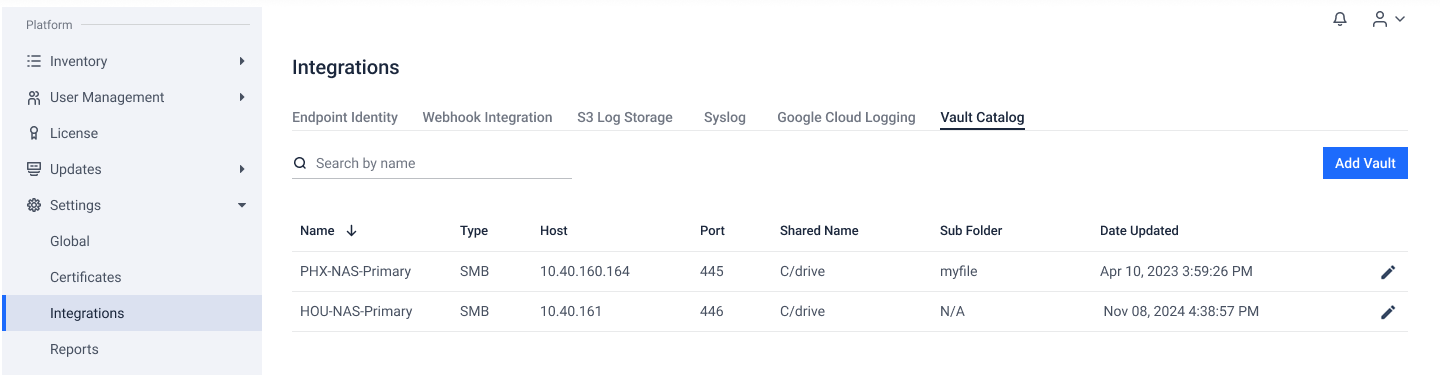
Add a new Vault
Click Add Vault
In the popup dialog, fill in the required fields
Click Add to save
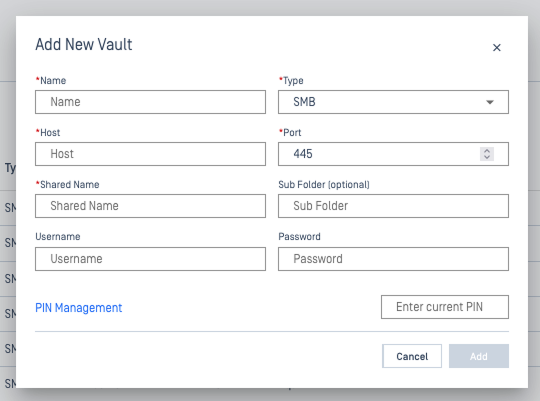
Note Deleting a Vault is not supported in current phase. Vaults referenced by active jobs cannot be removed. To change connection details, create a new vault and update your job(s) to point to it.
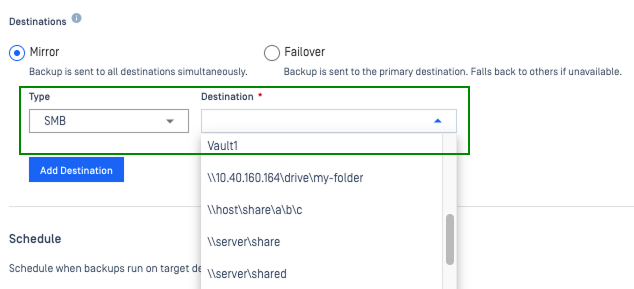
Use a Vault in a Backup Job
When you create or edit a backup job and add an SMB destination, select an existing vault from the dropdown instead of entering credentials manually.
Manage Backup Job
Click a job in the Active Jobs list to open its detail view, which shows its status, target, scope, mode, destination, schedule, and Max Backup Duration.
Use the Action menu at the top right to manage the job:
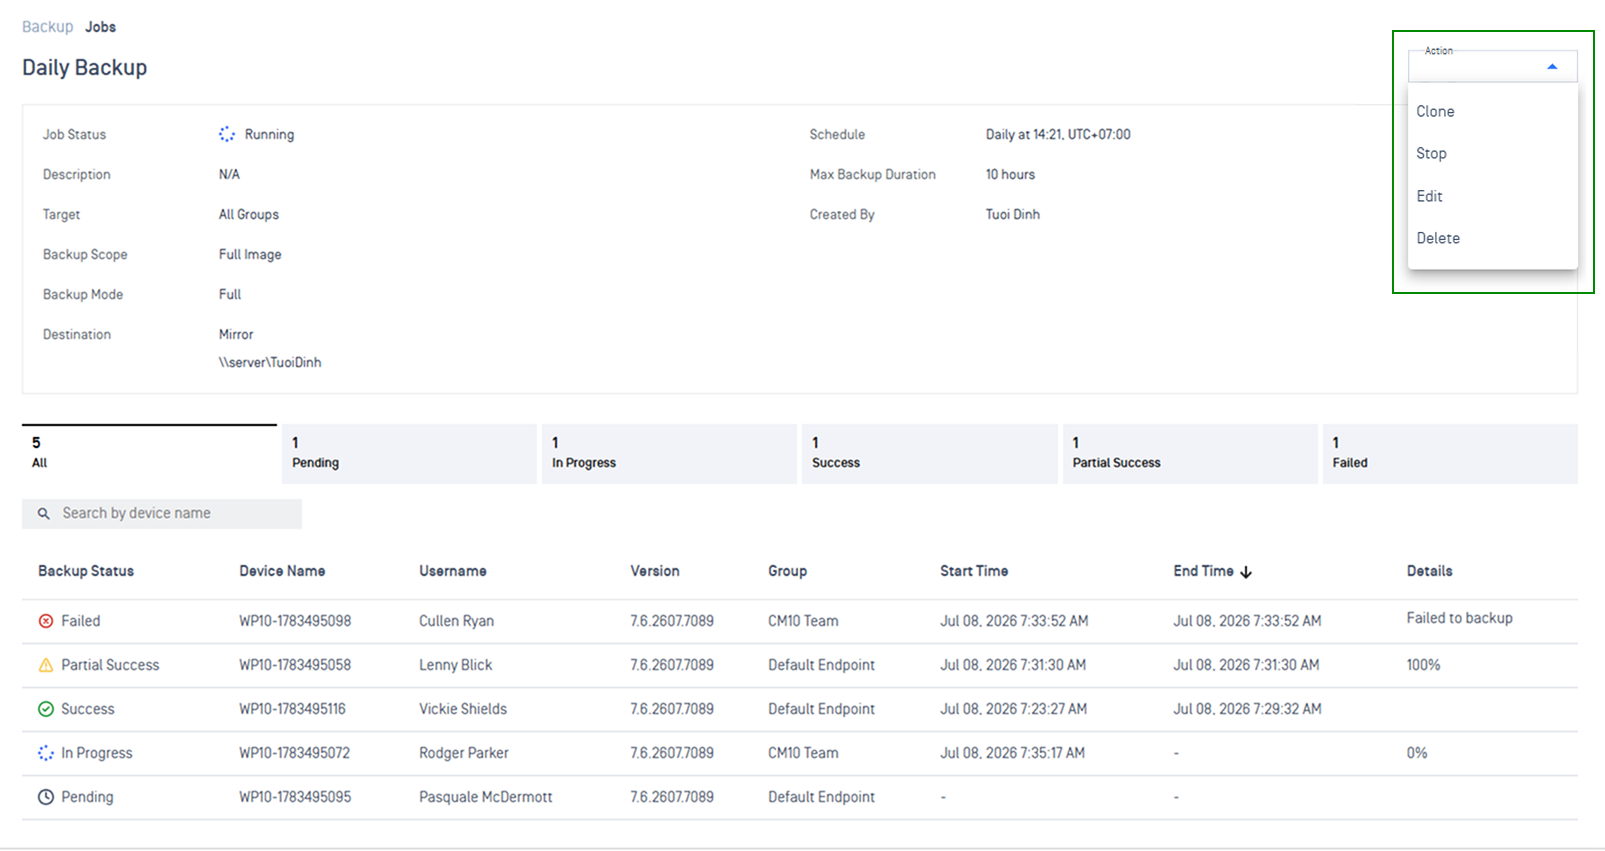
Action | What it does |
|---|---|
Clone | Duplicate the job's settings into a new job |
Stop | Stop a running or pending job. Devices that are backing up receive a stop command and are marked as failed by force stop, while devices that have not yet started are removed from the queue. A stopped job can be started again with Start, which recalculates the next run time from the schedule |
Edit | Change the job's settings, such as its schedule or targets |
Delete | Remove the job. You cannot delete a job while it is running, so stop it first |
Monitor Backup Progress and Results
While a backup runs, each device reports a completion percentage. When it finishes, each device ends in one of these results:
Success: the backup completed.
Partial Success: the backup finished but with some issues.
Failed: the backup didn't complete, ran past its Max Backup Duration, or was force-stopped.
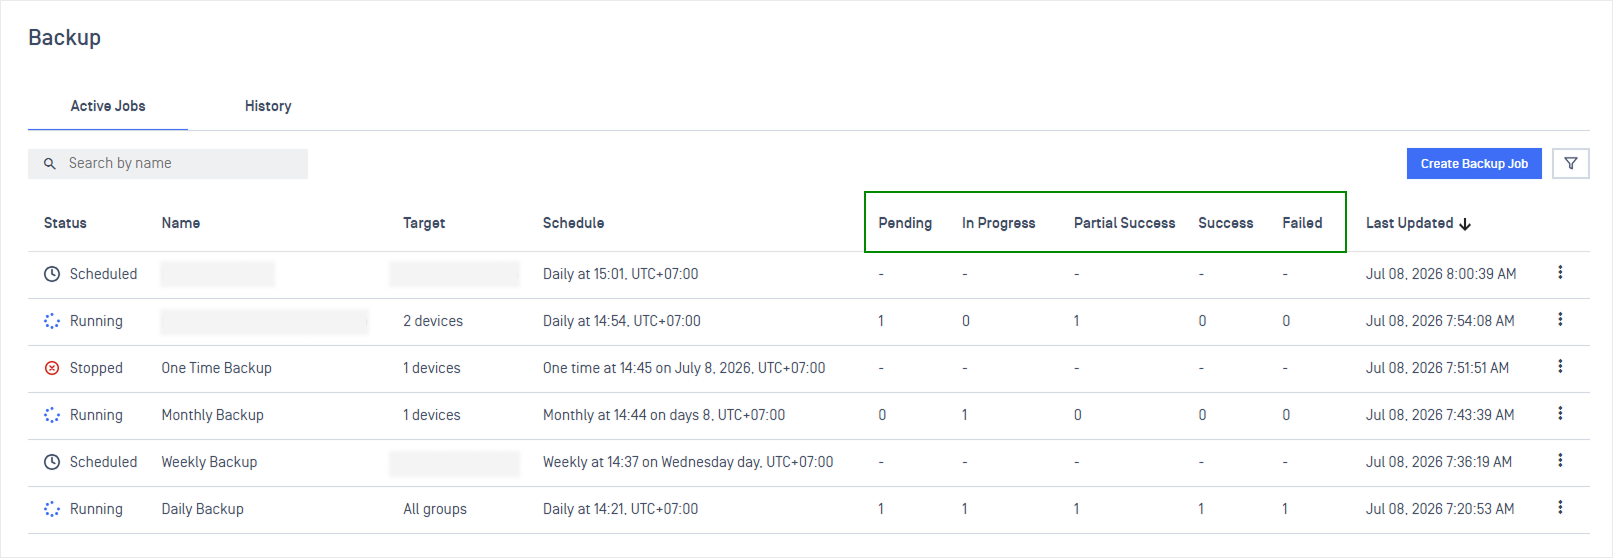
Results are summarized in Active Jobs and recorded in History. Every backup event is also written to the event log, so you can review each device's history: started, progress percentage, completed, failed, or completed with issues. Log entries expire according to your data retention policy.
Download Backup Files
You can download backed-up files directly from the console without navigating to the storage destination manually.
Step 1: Download the backup files
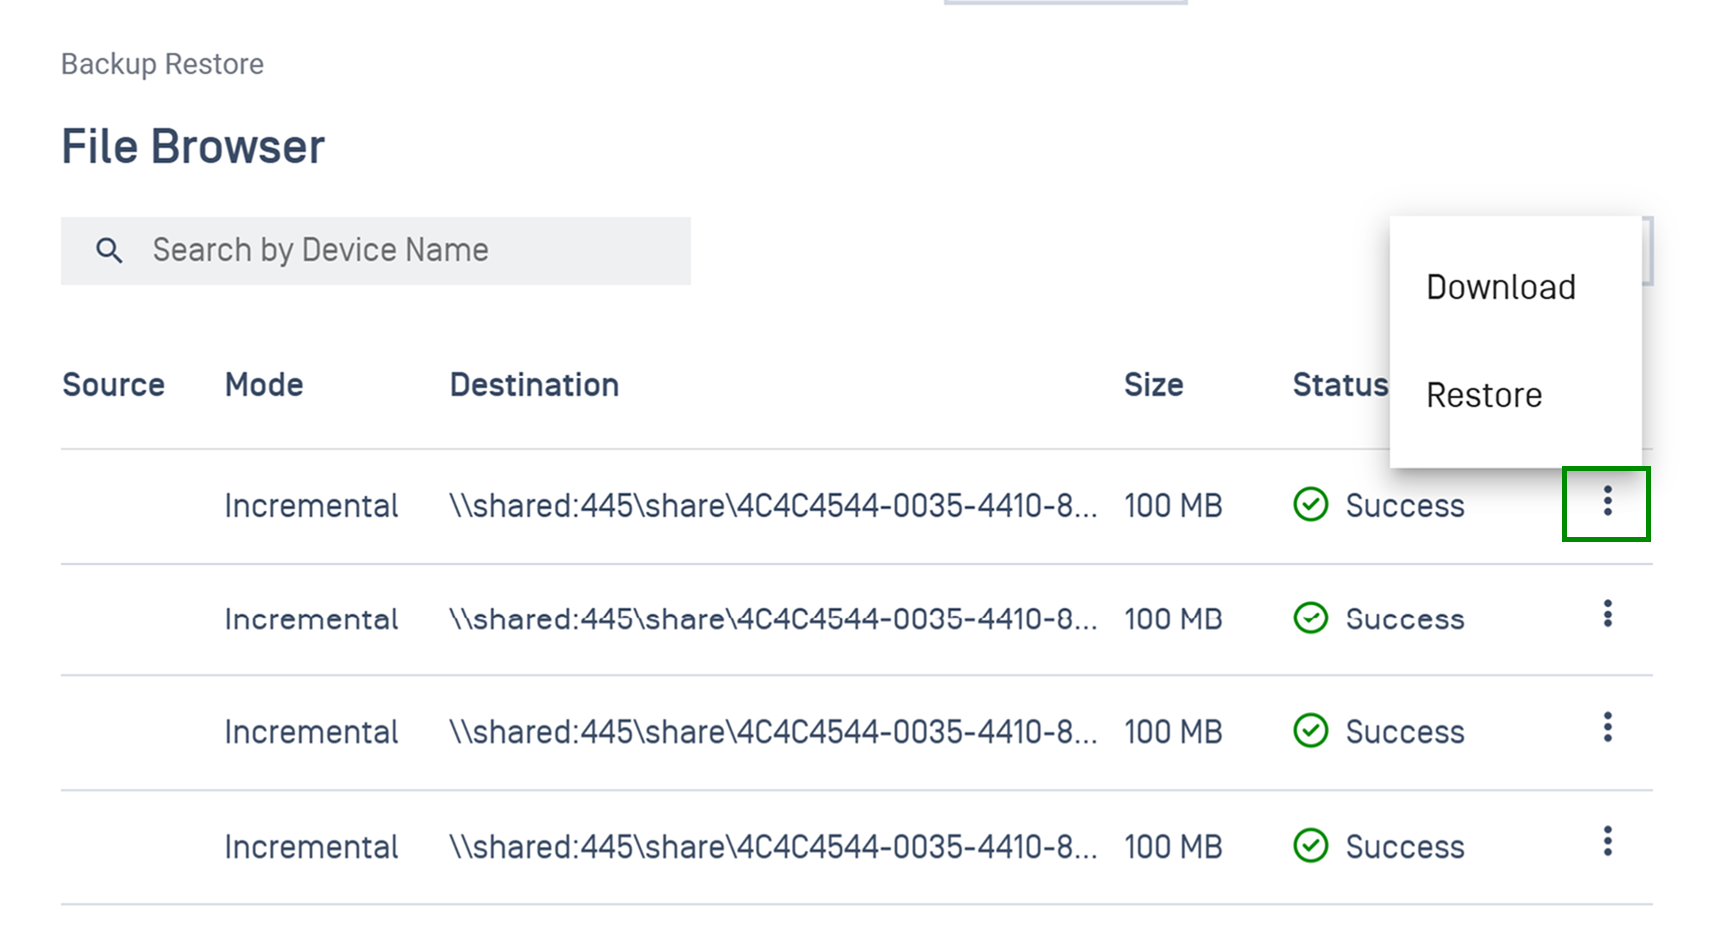
Open File Browser (or History)
Locate the completed backup entry
Open the action menu (⋮) and select Download
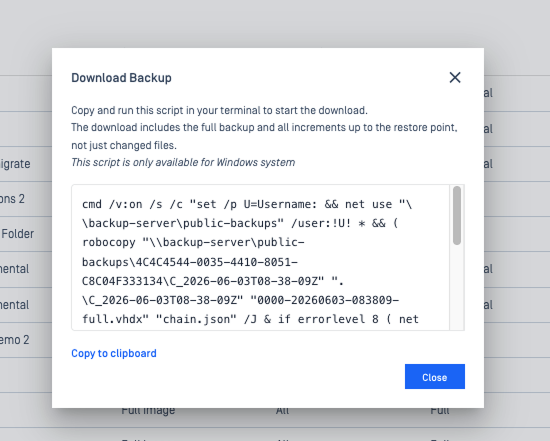
A dialog opens with a script you copy and run on the target Windows machine to pull the backup files down from the destination
Step 2: Run the script
Run in Windows Command Prompt (
cmd.exe), not PowerShellRun the script on any Windows machine that can reach the job's SMB destination(s) on your network
The script prompts you for a username and password when it starts. No credentials are embedded in the script text
What gets downloaded
Backup type you selected | Files downloaded |
|---|---|
Full | Only that backup's files |
Incremental | Downloads the full chain required to restore to that point, starting from the original full backup, through each increment, up to and including your selected one.
|
Please Note
Files are copied into a new folder next to where you run the script
If the job has multiple destinations (Mirror/Failover), the script tries them in order and automatically falls back to the next if one is unreachable
Temporary network connections are disconnected when the script finishes
Download is only available for backups that completed successfully
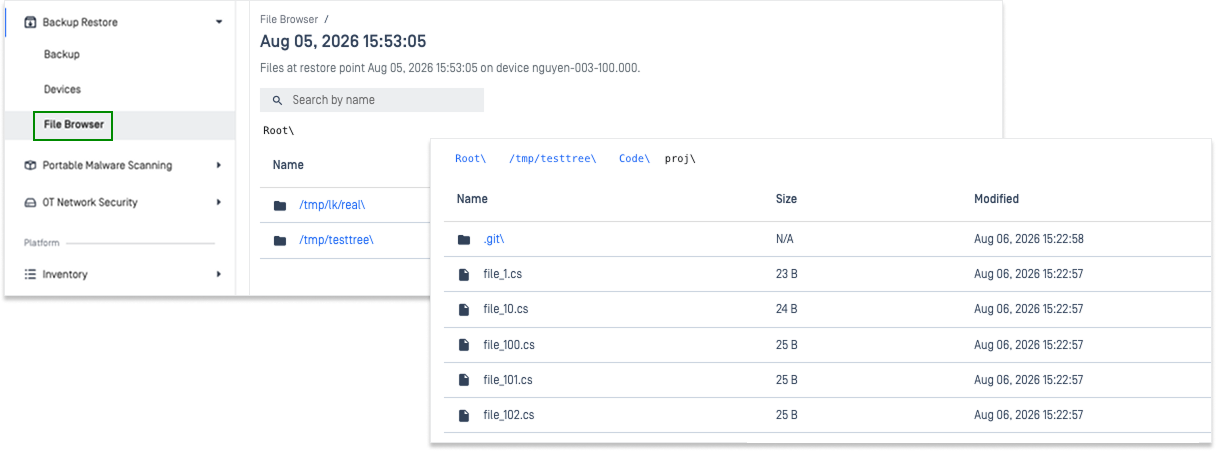
Browse Backup Contents
You can inspect the exact contents of a completed backup directly in My OPSWAT Central Management, no need to access the storage destination.
Open File Browser on a completed backup entry
The File Browse Tree starts at the top-level drives that were backed up (e.g., C:, D:, E:)
Click a drive to expand its folders and files
Continue drilling down the same way you would in a file explorer
Behavior | Detail |
|---|---|
Progressive loading | Only the current folder's contents load at a time |
Incremental backups | The tree shows the complete captured contents up to that point in time, not just the files that changed in that run |
Retention limit | Only the most recent backups per device retain a browsable tree. Older backups display a "tree not available" message |
Restore Workflows
Restore a device to an earlier, known-good state, for example after a failed update, a ransomware incident, or a corrupted OS. A restore takes one completed backup from one source device and writes it to one or more target devices.
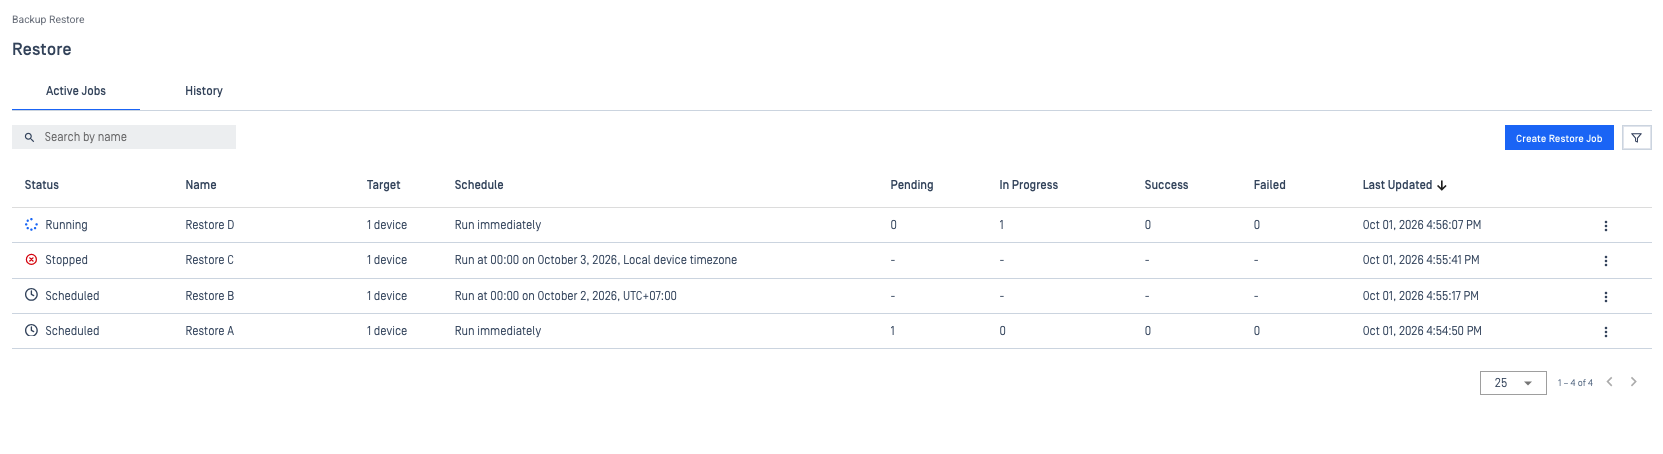
Two differences from backup affect most of the restore rules:
A restore runs once. It has no frequency or recurring schedule.
A full image restore takes the device offline. A machine can't overwrite the disk it's running from. The device reboots into a recovery environment, writes the disk, then reboots back into Windows. While this happens, the device can't be reached and doesn't report to the console.
Create Restore Job
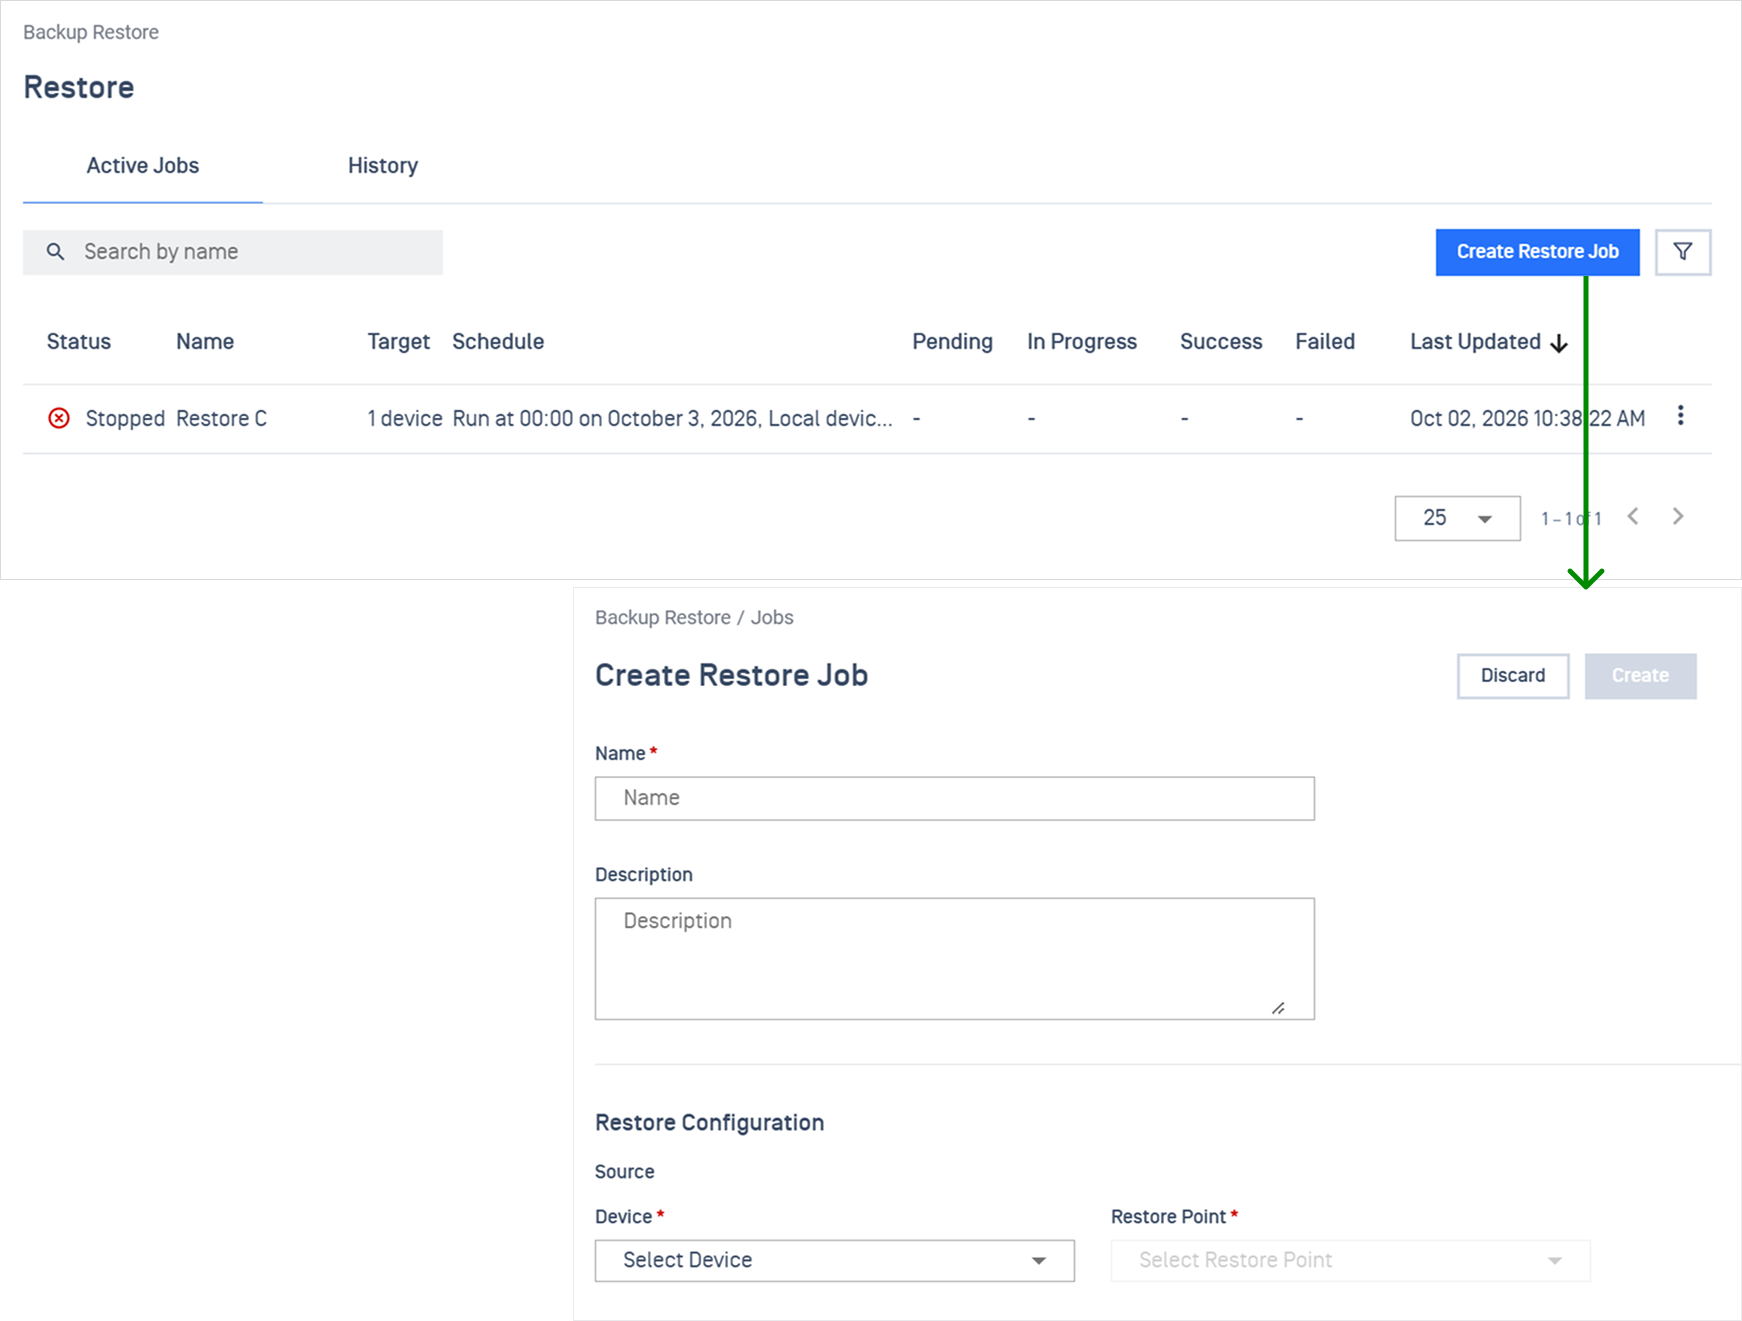
To restore an endpoint from a captured backup point, navigate to Backup Restore > Restore and click Create Restore Job.
Configuration | Details |
|---|---|
General | Enter a unique Job Name (duplicate names are rejected) and an optional Description 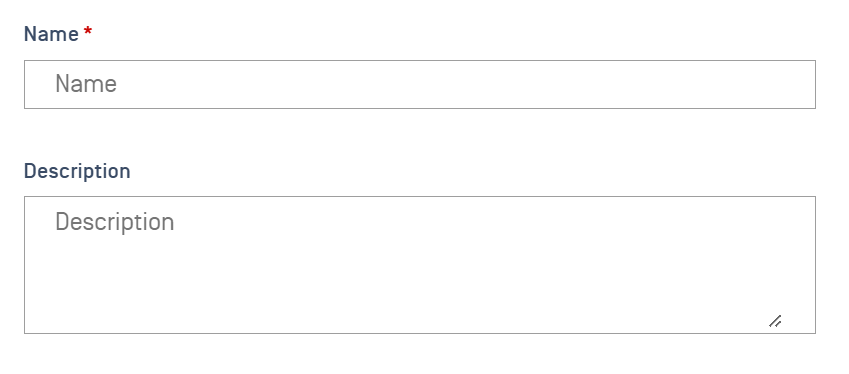 |
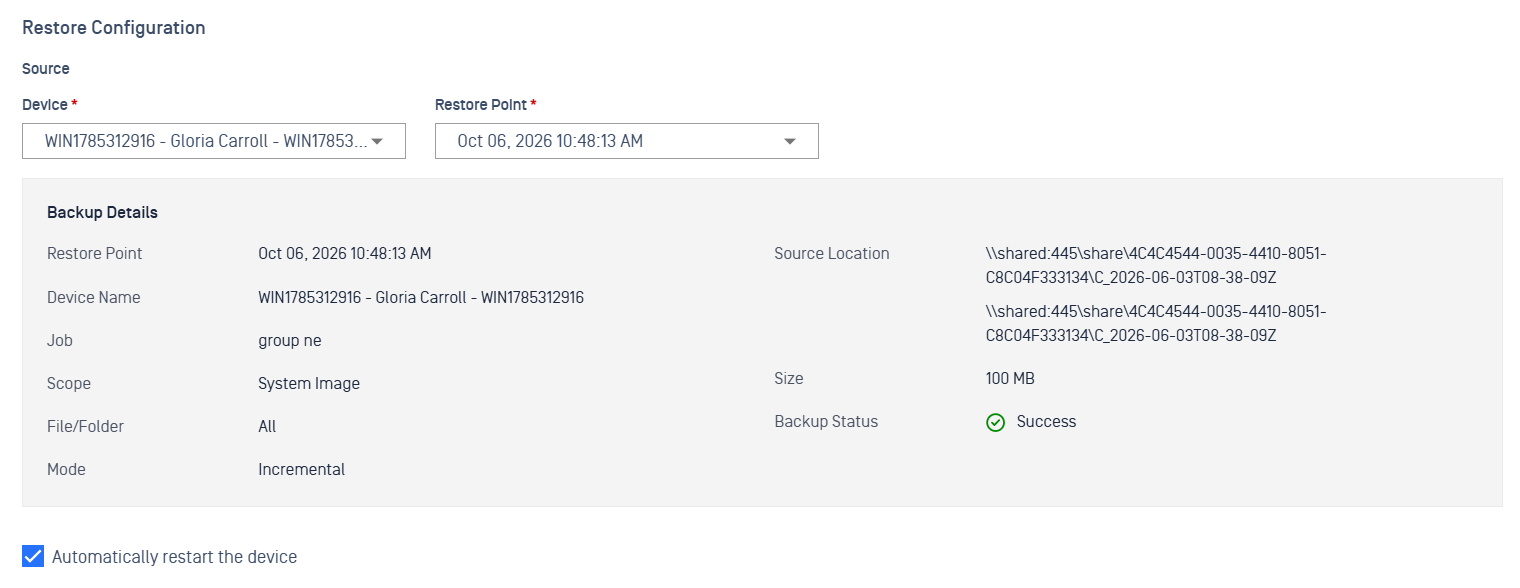
Source & Restore Point | Select the source device, then choose a restore point. Only devices with at least one successful backup are offered How much is restored depends on the backup's mode:
|
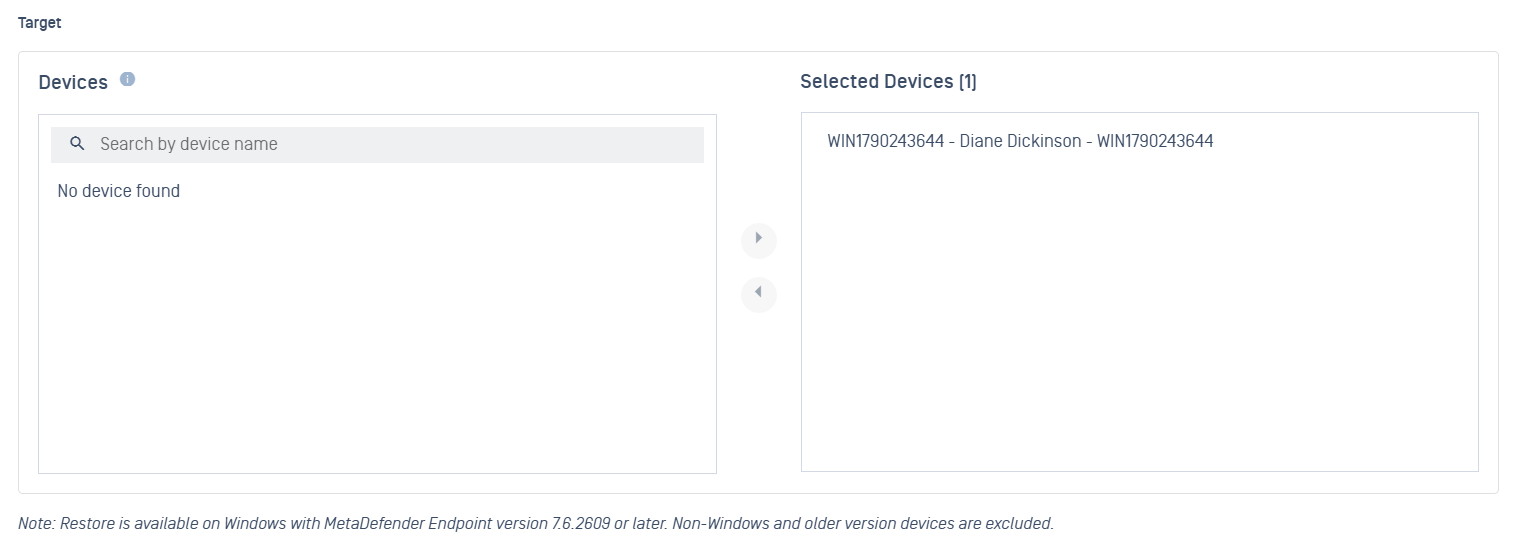
Target Devices |
 |
Schedule | Choose Run immediately or Run on schedule with designated date, time, and timezone 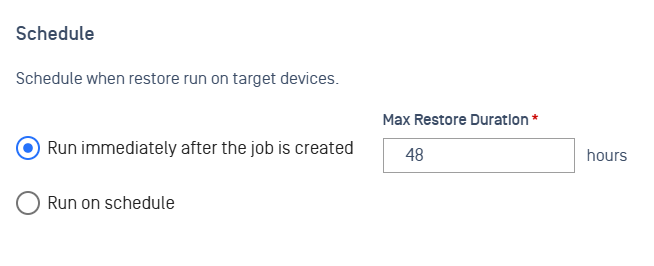
|
Note Backups taken before version 10.7.26092 release can't be restored by a job. A backup appears as a restore point only if it recorded its storage vault and its path inside that vault. Devices started recording both in this release. Older backups are still on your storage and aren't lost. Use Download Backup Files to retrieve them then restore them manually outside the console.
Current Limitations
Restoring to different hardware isn't supported. My OPSWAT Central Management doesn't check that an incremental chain is complete before you pick a restore point, and Max Restore Duration has no upper limit.
What Happens During a Restore
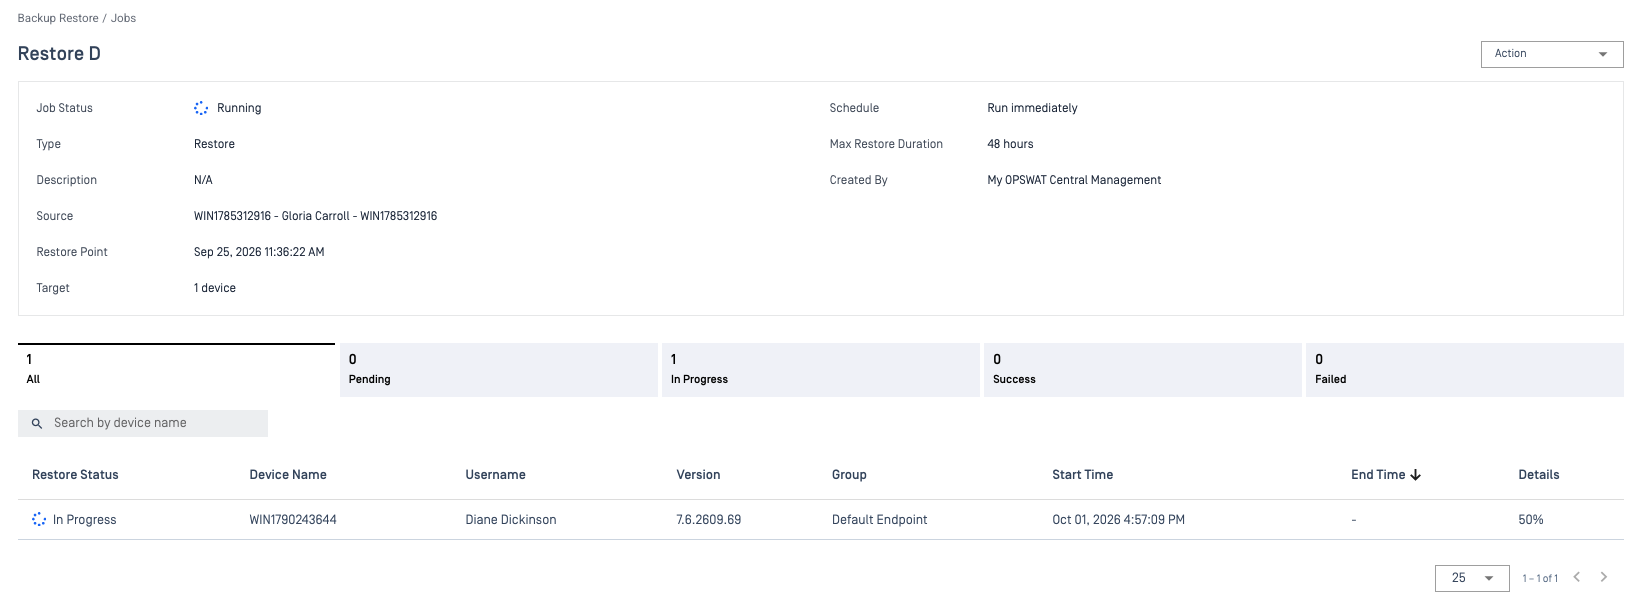
The job starts and checks its targets. Devices that have been removed, downgraded, or no longer have the agent since you created the job are skipped.
Each device gets the restore command at its next check-in and fetches the backup files it needs.
A full restore point needs only its own files.
An incremental restore point needs every backup in the chain, from the original full backup up to the point you selected. If any backup in that range can't be found (for example, its vault was removed from the catalog), the device rejects the whole restore before copying anything. This prevents an incomplete, unbootable disk.
The device copies the backup locally and reports progress.
For a full image restore, the device reboots into recovery and writes the disk. It's offline during this step.
The device restarts and reports its result.
When every device has finished, the run completes and the job moves to Restore → History.
Tip A device that goes quiet in the middle of a restore is usually still writing the disk offline. Wait until its Max Restore Duration runs out before you troubleshoot it.
Manage Restore Jobs
Open a restore job from the job list to manage it. Restore jobs support Clone, Start, Stop, Edit, and Delete.
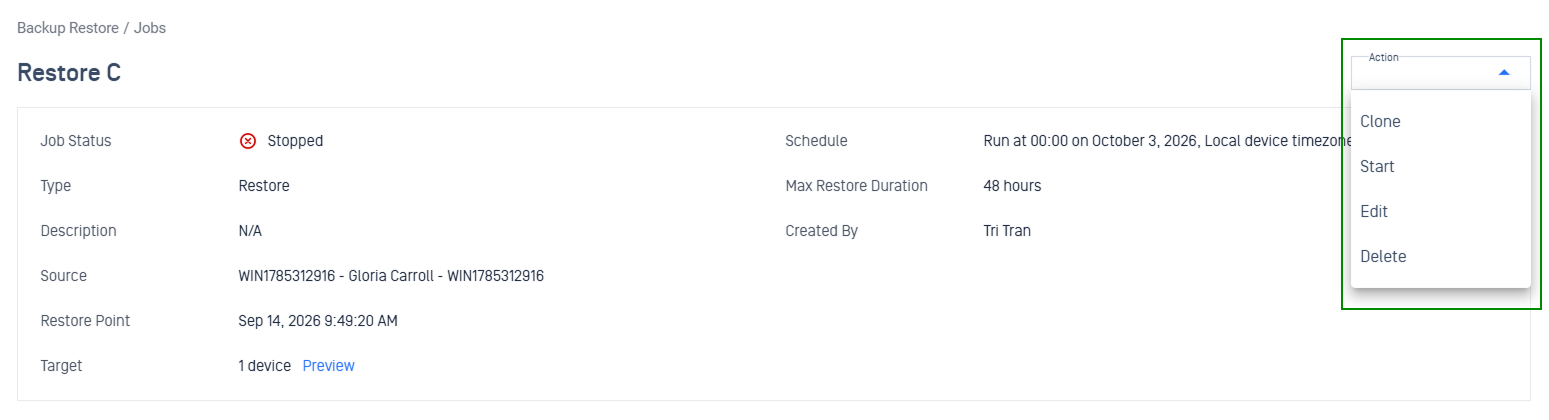
Action | What it does |
|---|---|
Stop | Stops only the devices that haven't started yet. Those devices are marked Failed, with the reason that an administrator cancelled them. Devices that are already restoring keep going, because their disk is partway through being rewritten. Before you confirm, the dialog lists the devices that will be stopped 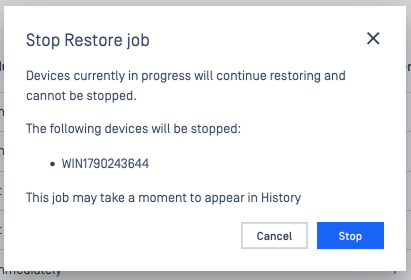 What happens after Stop depends on whether the job has run:
|
Start | Re-enables a job that has never run. A job that has already run can't be started again. Re-running it could send a second restore to devices that are still rewriting their disks |
Edit | Changes the job's settings. Available only when the job has no run in progress |
Delete | Removes the job. Unlike backup jobs, you can delete a restore job in any state, without stopping it first |
Clone | Duplicate the restore job's settings into a new job |
Monitor Restore Progress and History
Track a restore from the Ạctive Jobs list while it runs.
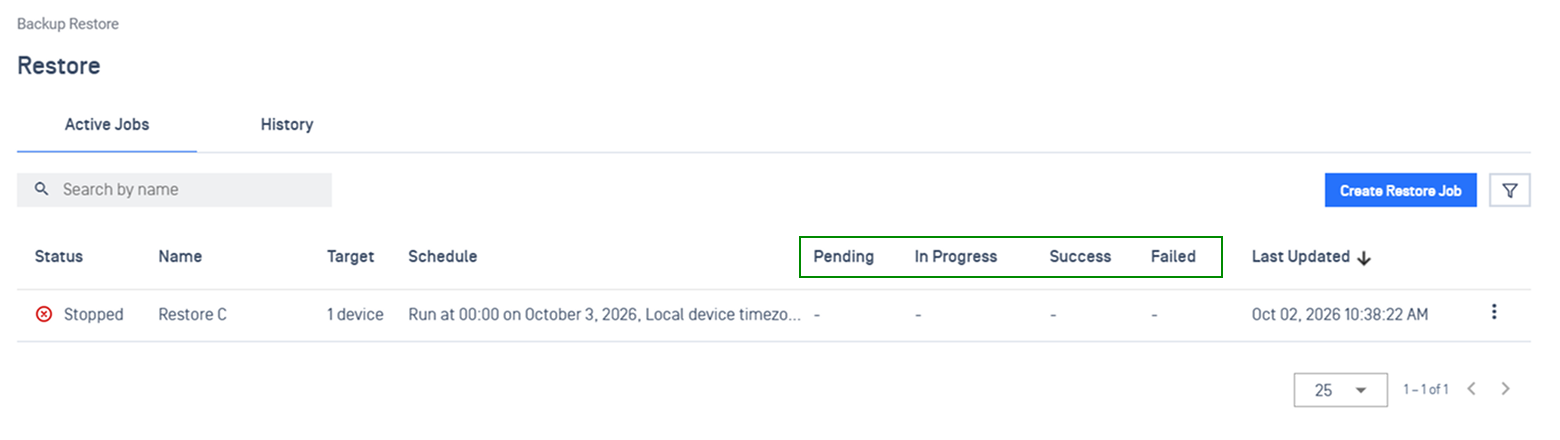
Statuses
Each device ends as Pending, In Progress Success, or Failed.
A restore has no Partial Success. Either the device was rebuilt or it wasn't.
Devices that were stopped by an administrator, ran out of time, or failed on their own are all marked Failed. The reason on the row tells you which one happened.
Restore History
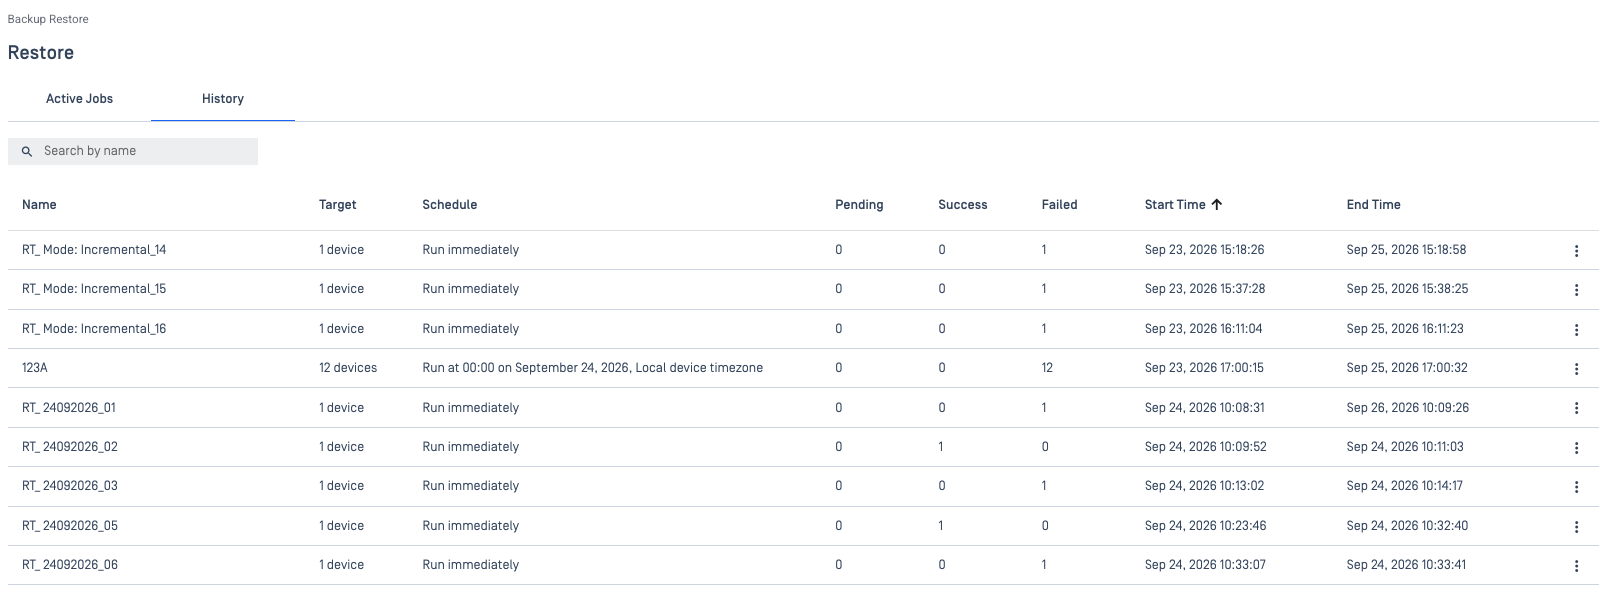
Go to Backup Restore → Restore → History. History lists every restore run in your account, newest first. You can filter by status and search by name. Each restore job runs once, so History shows one row per finished restore.
Job status is Pending, In Progress, or Completed.
A job stopped before any device started never produces a run. It stays in the job list as Stopped and doesn't appear in History.
History Details
Select a run to open its record. History works as an audit trail: the header shows the job as it was when the run started, and later edits or deletion don't change it.
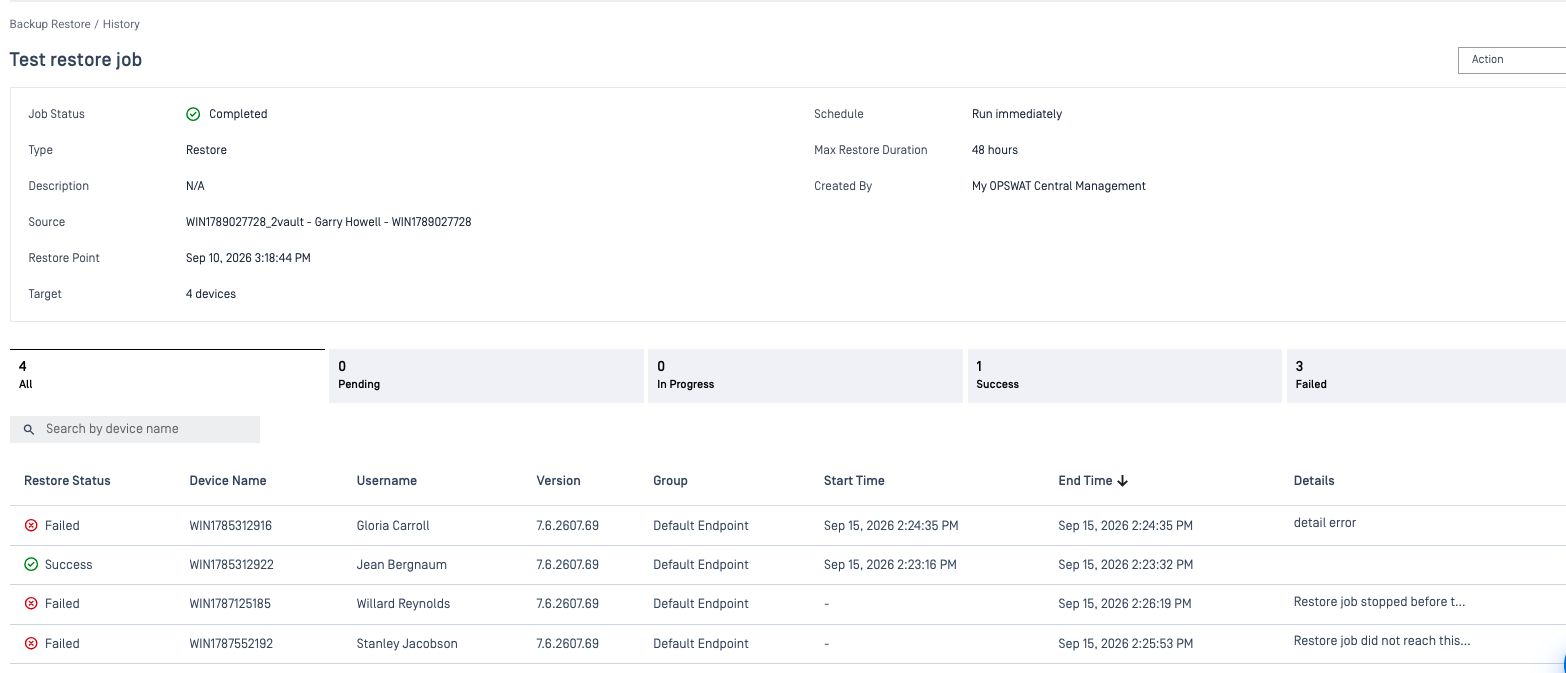
The header includes:
Name, description, and creator
Source device and the full restore point details: when the backup was taken, the backup job that created it, mode, scope, destination, size, and, for incremental backups, the chain and position in the chain
Target devices, schedule, Max Restore Duration, and whether automatic restart was on
Below the header, a table lists each device with its group, agent version, final status, restore duration, and failure reason (if any). Use the status tabs, filter, or device search to narrow down large runs.
Dashboard
Go to Backup Restore → Dashboard for real-time visibility into Endpoint backup and restore coverage across your fleet.
Filters: Filter by Endpoint Group (evaluates current device membership) and Timeframe (24h, 7d, 30d, or Custom).
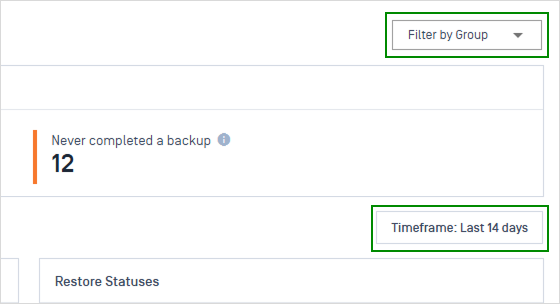
Panel | Details |
|---|---|
Endpoint Backup Coverage | Every eligible device falls into exactly one of three buckets:
Note Devices that aren't targeted by any active backup job are left out rather than counted as unprotected. If you stop the only job covering a group, that group's devices drop off the panel instead of turning red. To find devices with no backup job, use the Report.  |
Endpoint Backup Coverage Trend | The same three buckets over the last 14 days, one point per day. A flat line is normal for weekly backups. Days with no data appear as gaps, not zeros. 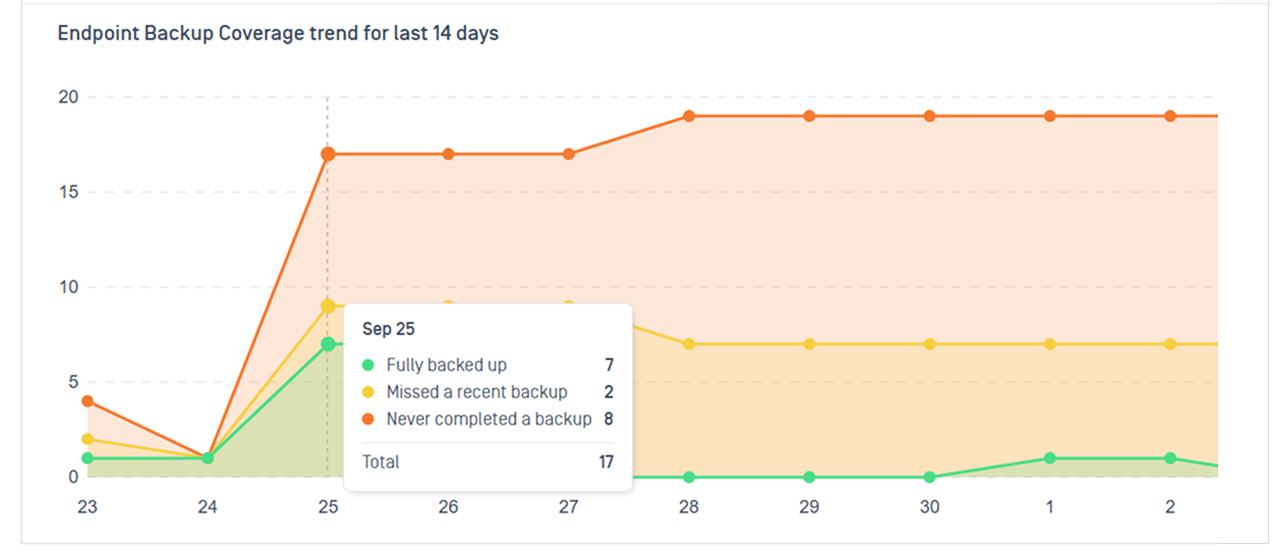 |
Backup Statuses | Backup runs in the timeframe: Succeeded, Partial Success, Pending, Running, Failed, and Timeout (the device never picked up the run before its window closed) 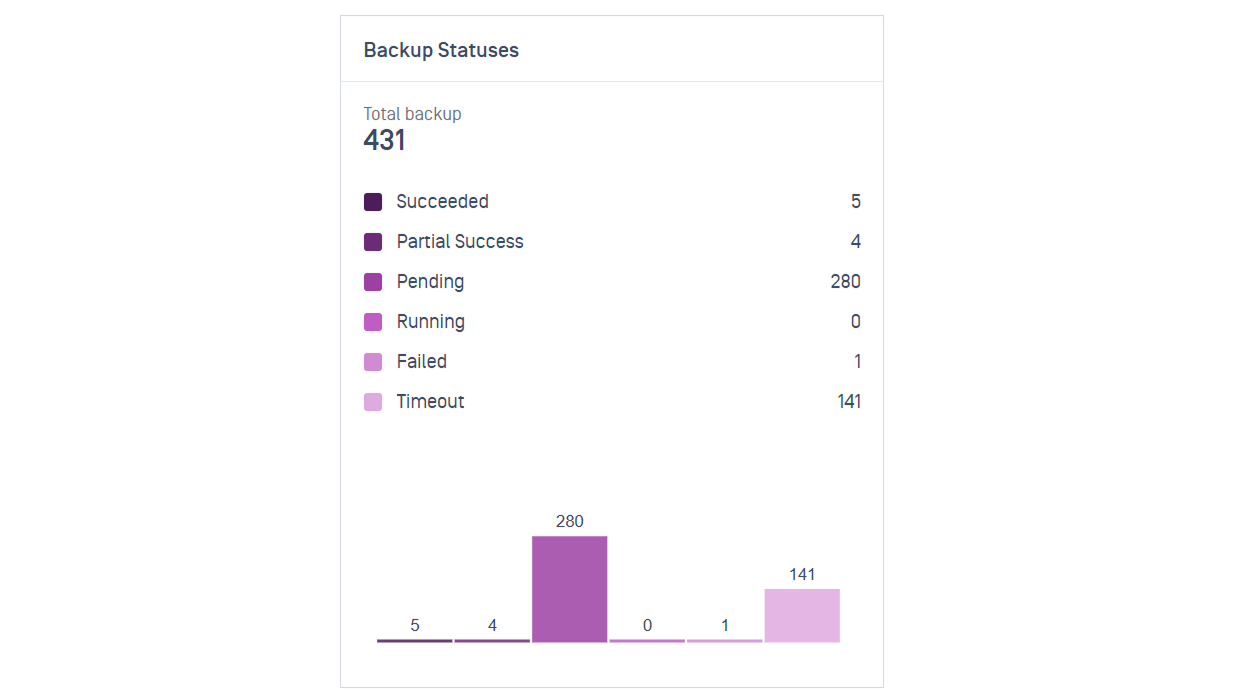 |
Restore Statuses | Restore runs in the timeframe: Succeeded, Pending, Running, and Failed. Timed-out and stopped restores count as Failed. 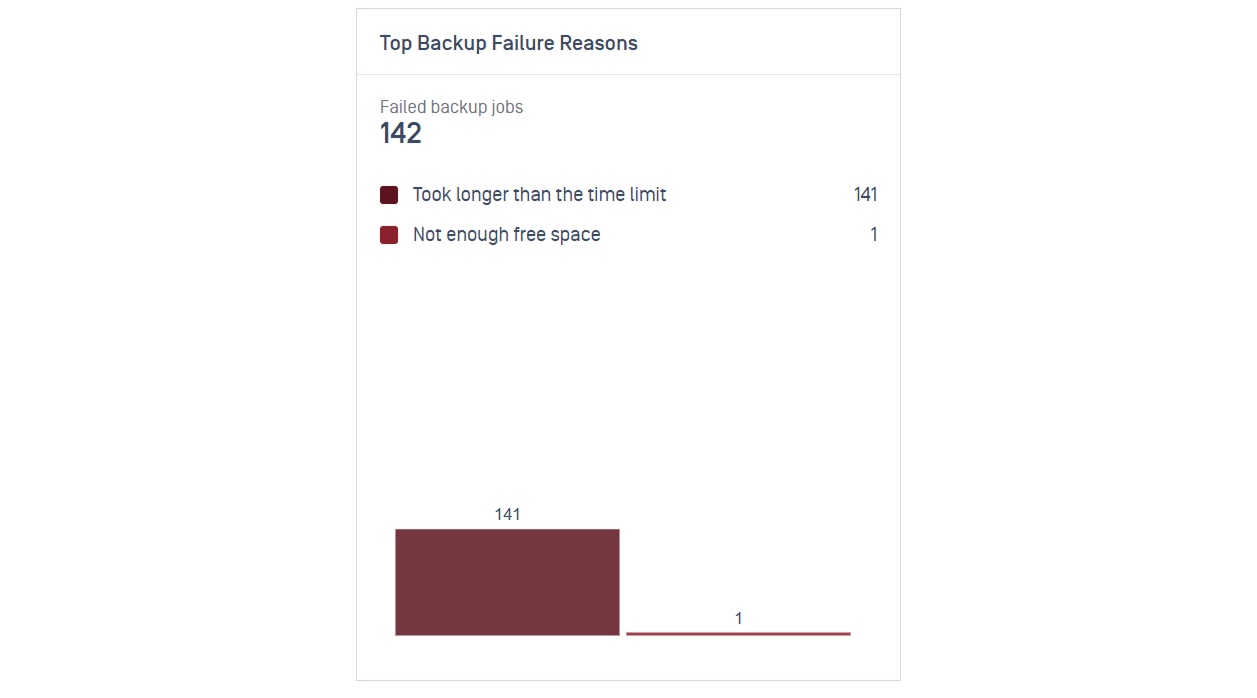 |
Top Backup Failure Reasons | The failure reasons devices reported, most common first. If every row shows zero, there were no classified failures in the timeframe 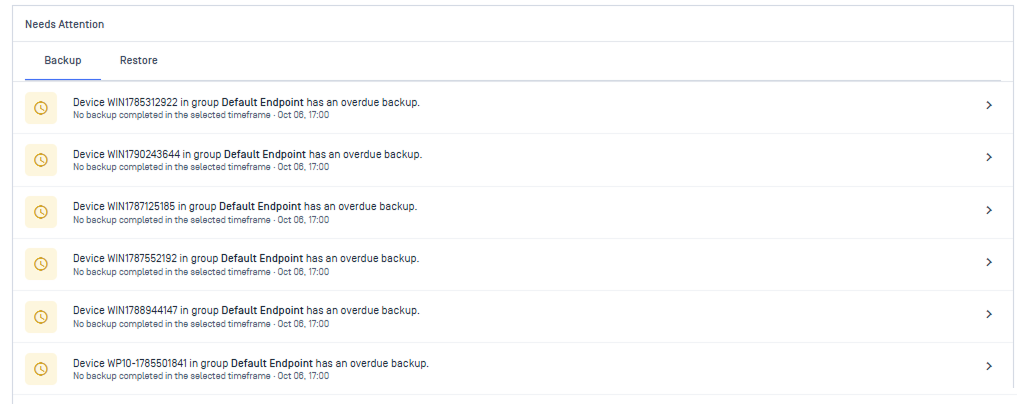 |
Needs Attention | The 10 most recent problems. The Backup tab lists failed and timed-out backup runs, and the Restore tab lists failed restore runs. There's one row per run, so a device that failed twice appears twice. |
Notifications
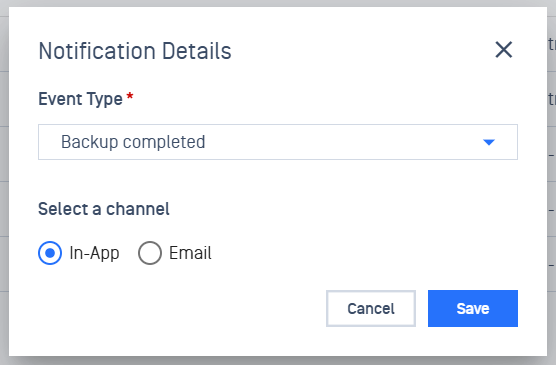
Configure automated notifications across In-app and Email channels under Backup & Restore > Notifications > Click Add button.
Setting | Options |
|---|---|
Event Types | Backup completed, Backup failed, Restore completed, Restore failed 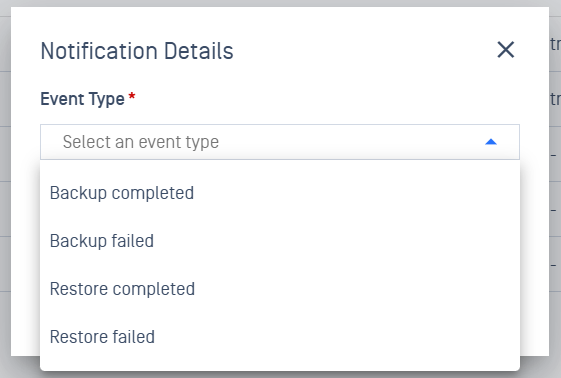 |
Channel |
 |
Execution Rules |
Tip Use In-app for success events and Email for failure events. An Email rule on Backup completed for a large fleet sends one email per device for every run. |
Note If hostname privacy is turned on for your account, device names show as <private> here and everywhere else in the console.
Reports
A report is a saved configuration: what to report on, the time period, which groups, how often, and who receives it. Each time it runs, it creates a report run that you can view in the console, export as PDF or CSV, and email as a download link.
There are two report types: Backup Summary Report and Failed and Overdue Agents.
Create a Report
Navigate to Backup & Restore > Reports > Select Create Report to start.
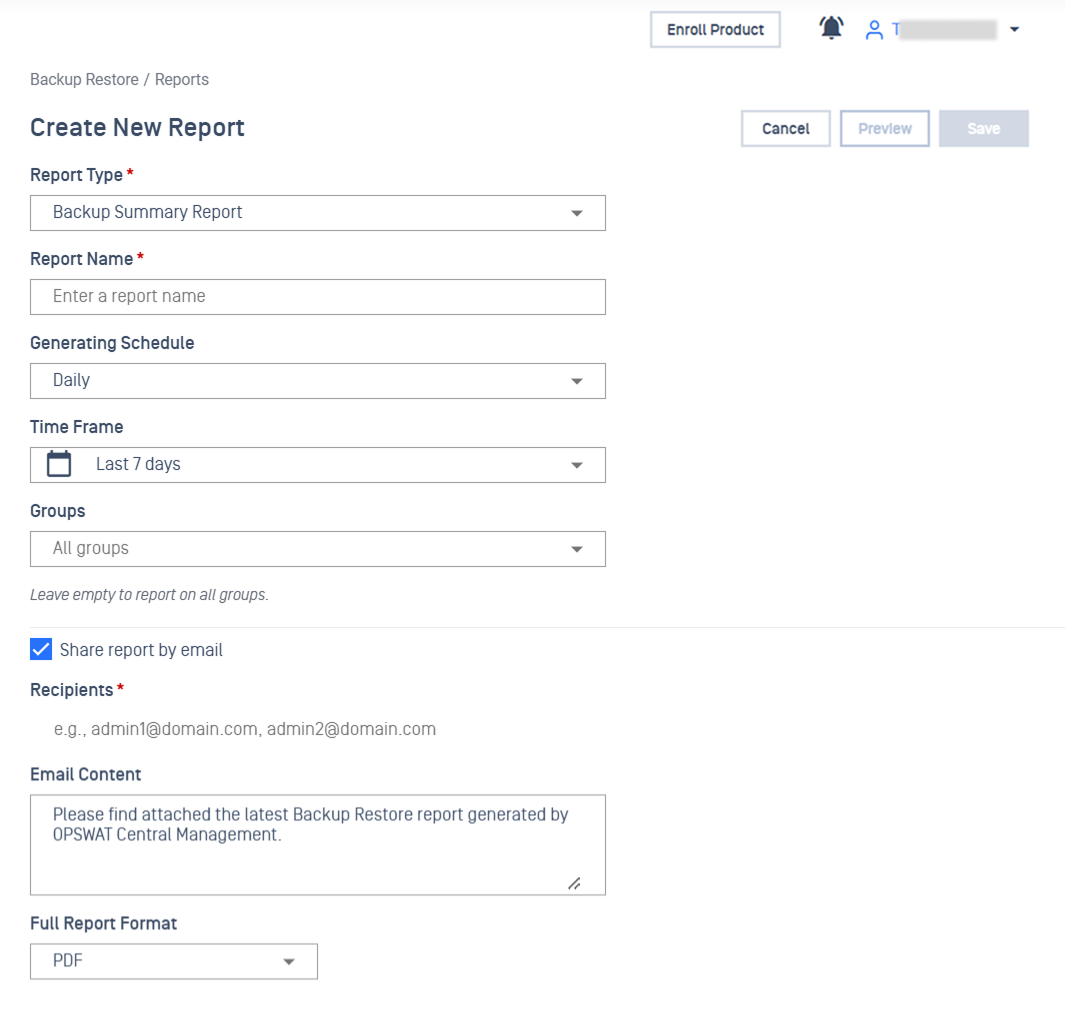
Configuration | |
|---|---|
| Up to 100 characters, unique within your account 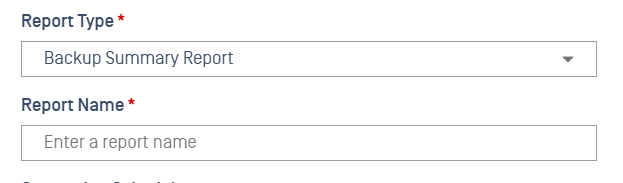 |
| Every schedule runs at a fixed time, with no day or time to set:
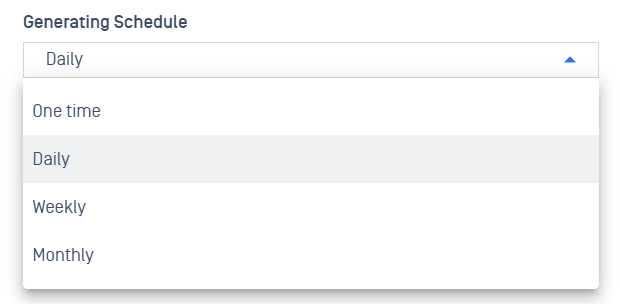 |
| Last 24 hours, Last 7 days, Last 30 days, or Custom Range 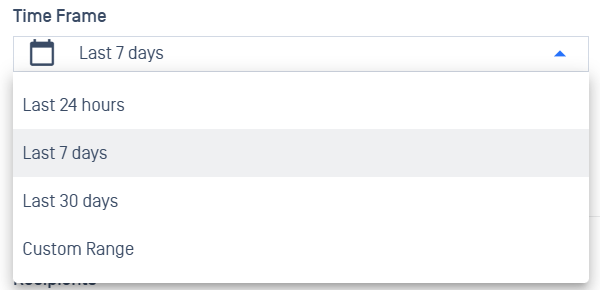 |
| Leave this empty to include all groups 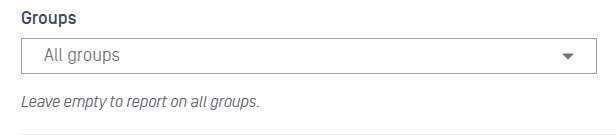 |
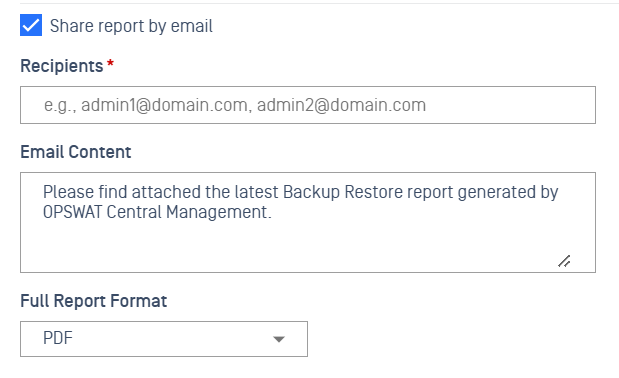
| Enter:
 |
| Preview shows the layout of the report before you save it; Back to Form returns you to the settings. 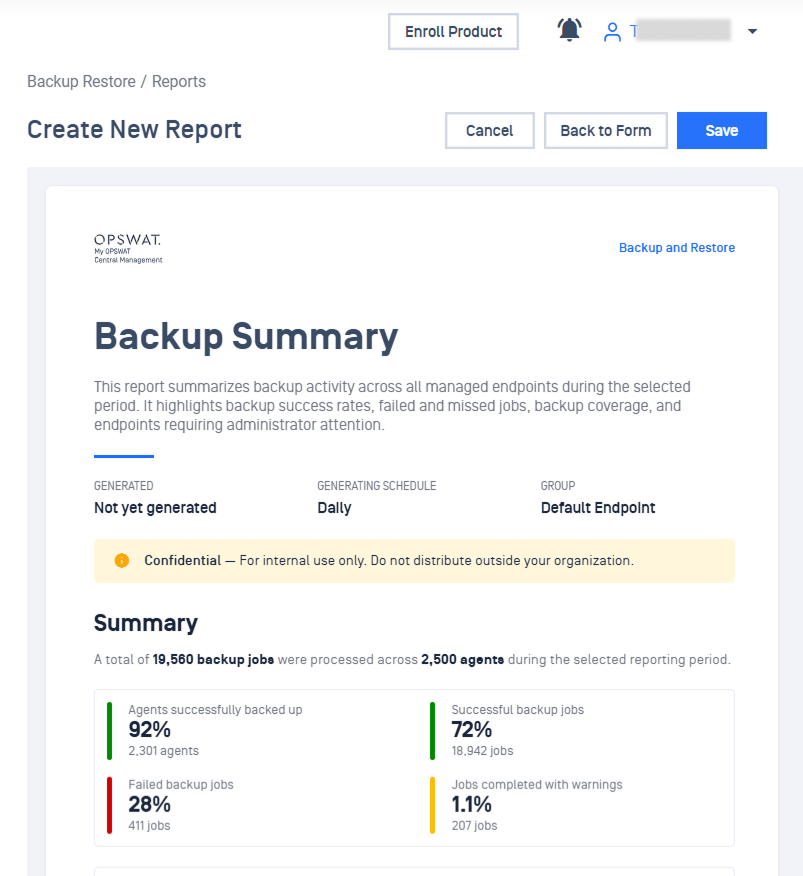 Note Preview uses sample data. Use it to judge layout, not your own numbers. |
What Recipients Receive?
Each recipient gets an email carrying your Email Content and a download link valid for seven days from the moment the run completed.
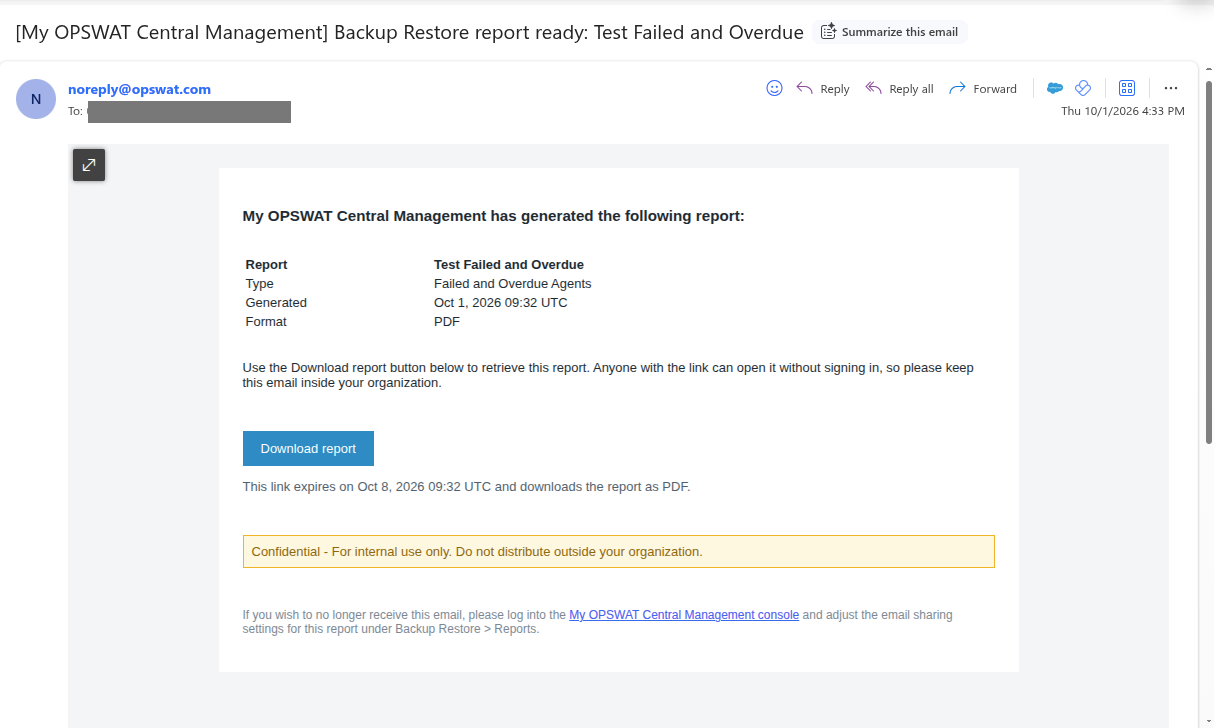
Report download links in emails are public. Anyone with the link can download the report without signing in. Send reports only to trusted recipients, and treat the email as confidential. Reports carry a "Confidential — for internal use only" banner.
Manage Reports and Runs
Report history
Click a report's name to open it:
Generated: When the run completed, in your local time
Status: Generating, Completed or Failed
Recipients: Who that run was addressed to
Type: Scheduled if the schedule produced it, Manual if someone clicked Generate Now
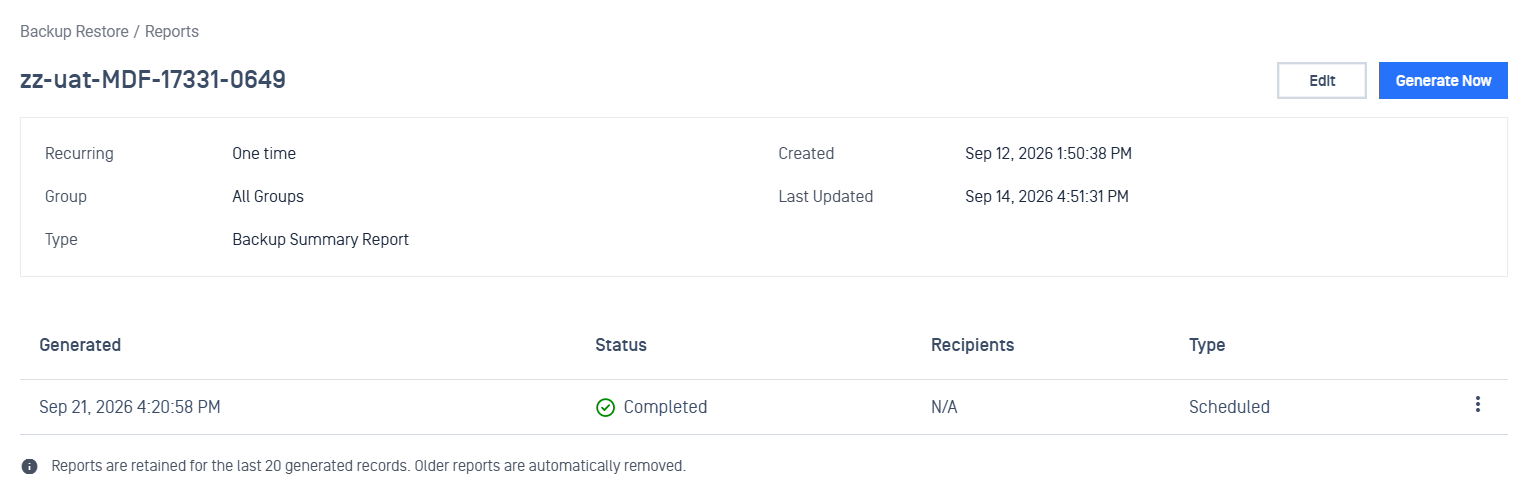
Function | Meaning |
|---|---|
The ⋮ menu |
View and Export are only available on a Completed run |
Generate Now | If Share report by email is turned on, clicking Generate Now will still email the full recipient list with a download link, even if the schedule is disabled. |
Edit | Changes the report settings |
Turn a schedule on or off | The schedule toggle only controls recurring automated generation; it does NOT suppress email sharing when manually triggering reports 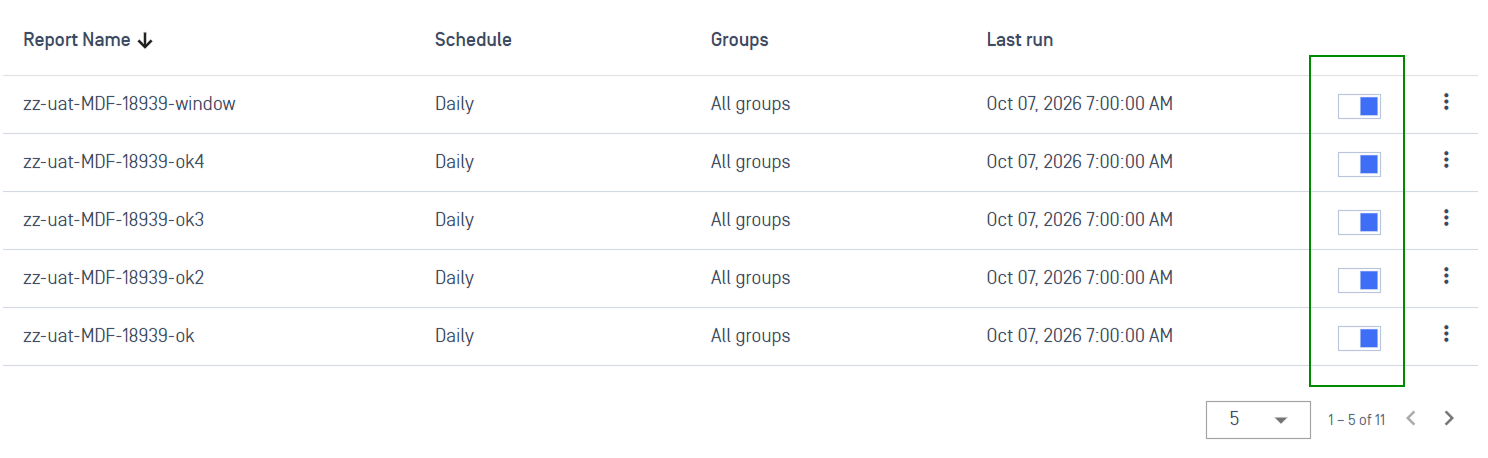 |
Report Limits and Retention
Tables are capped at 1,000 rows. Larger tables show "Showing the first 1000 rows. This table was truncated." Export as CSV to get the full data.
Only the 20 most recent runs of each report are kept. That's about three weeks of history for a daily report, or almost two years for a monthly one. Older runs are removed along with their files and links, so export anything you need to keep.
Important Notes
A few things to keep in mind:
The feature requires the MA-BKR license (SKU MA-BKR).
Any credentials used to reach a storage destination are always stored encrypted, so passwords are never exposed.
Each device has an execution time limit; if a backup runs too long (around 24 hours by default when no custom Max Backup Duration is set), it is marked as Failed.
The backup feature is available only on Windows devices running MetaDefender Endpoint version 7.6.2607.xxx or later. Restore requires 7.6.2609.xxx or later.